

Page 1
ASSEMBLY INSTRUCTIONS
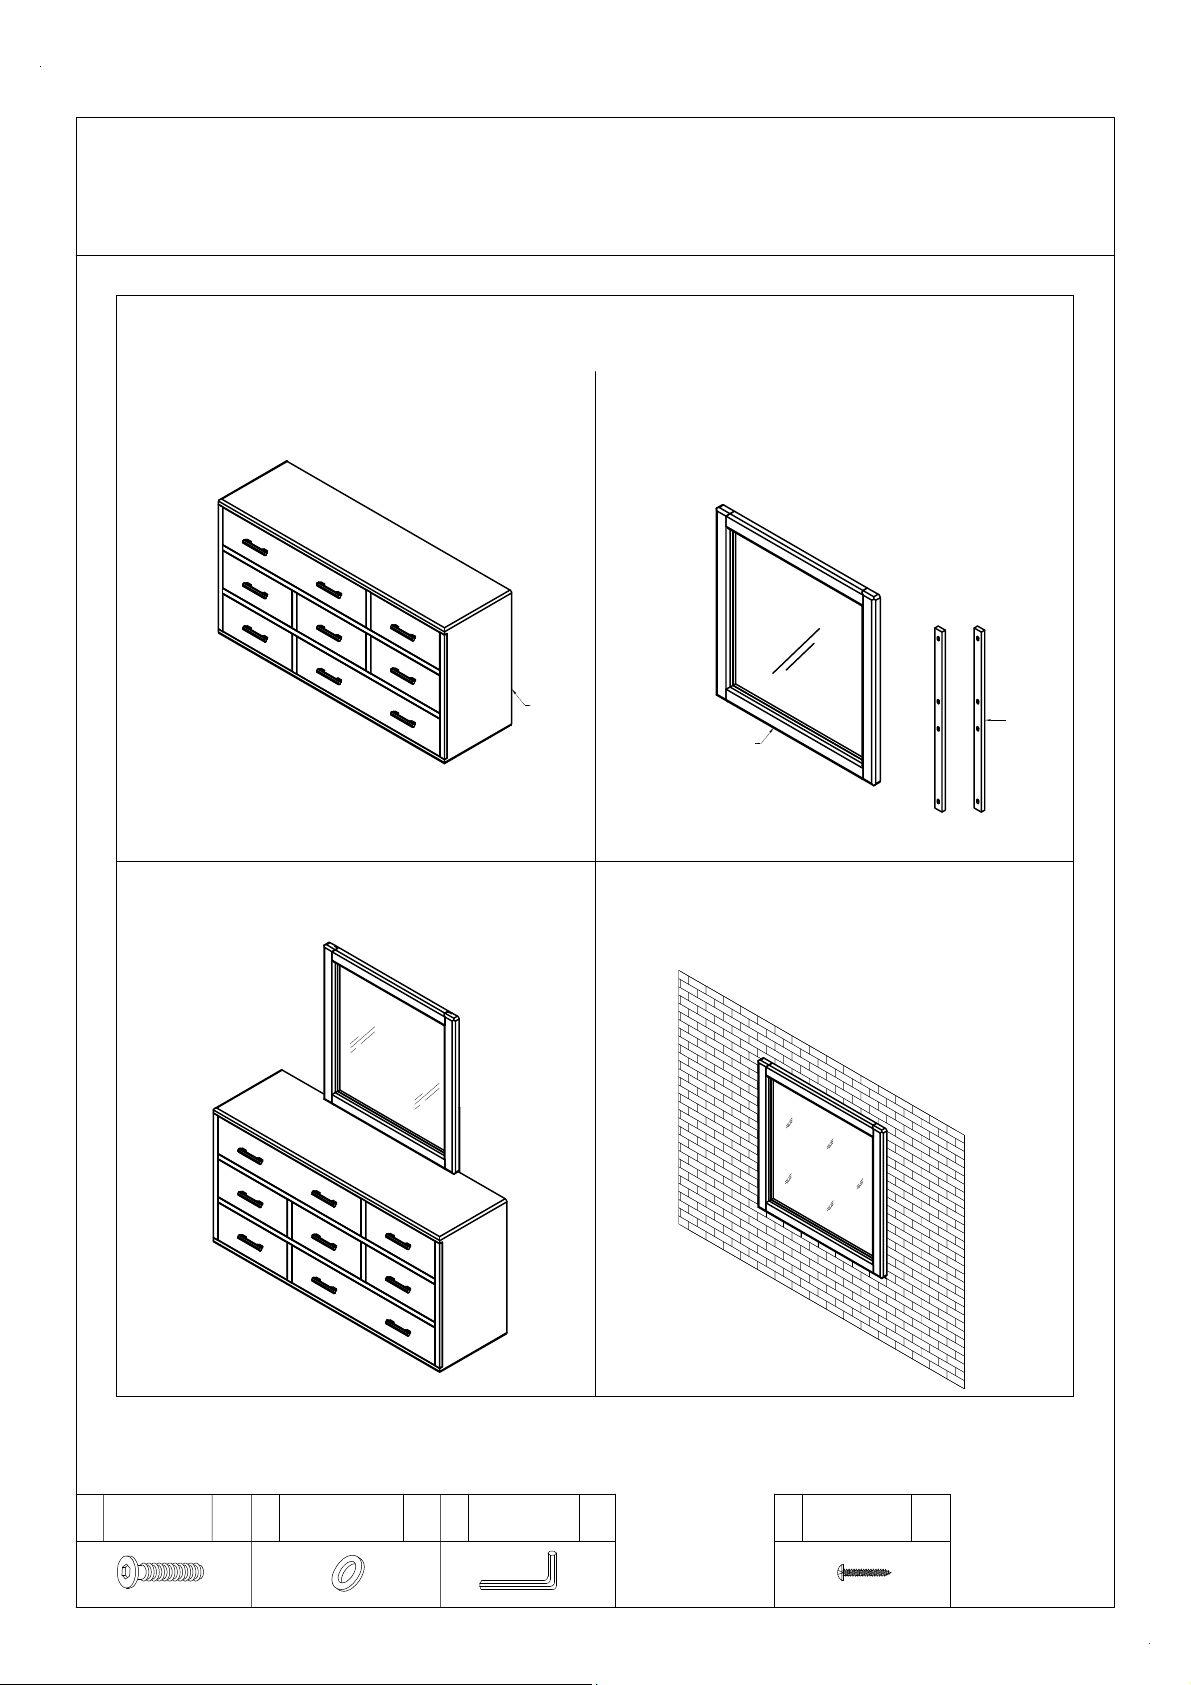
PARTS AND HARDWARE PACKING CONFIGURATIONS
BOX # 1
B. DRESSER: 1PC
OPTION 1:
MIRROR ATTACHED TO DRESSER
BOX # 2
A. MIRROR : 1PC
C. MIRROR SUPPORT: 2PCS
B
A
C
HARDWARE IN PLASTIC POUCH
OPTION 2:
MIRROR ATTACHED TO WALL
HARDWARE FOR OPTION 1
ALLEN BOLT
1
M6X40
08
PCS
FLAT WASHER
2
M6
HARDWARE PACKED IN BOX #2
08
PCS
3
ALLEN KEY
01
PC
HARDWARE FOR OPTION 2
WOOD SCREWS
1
M4X40
02
PCS
Page 2
ASSEMBLY INSTRUCTIONS
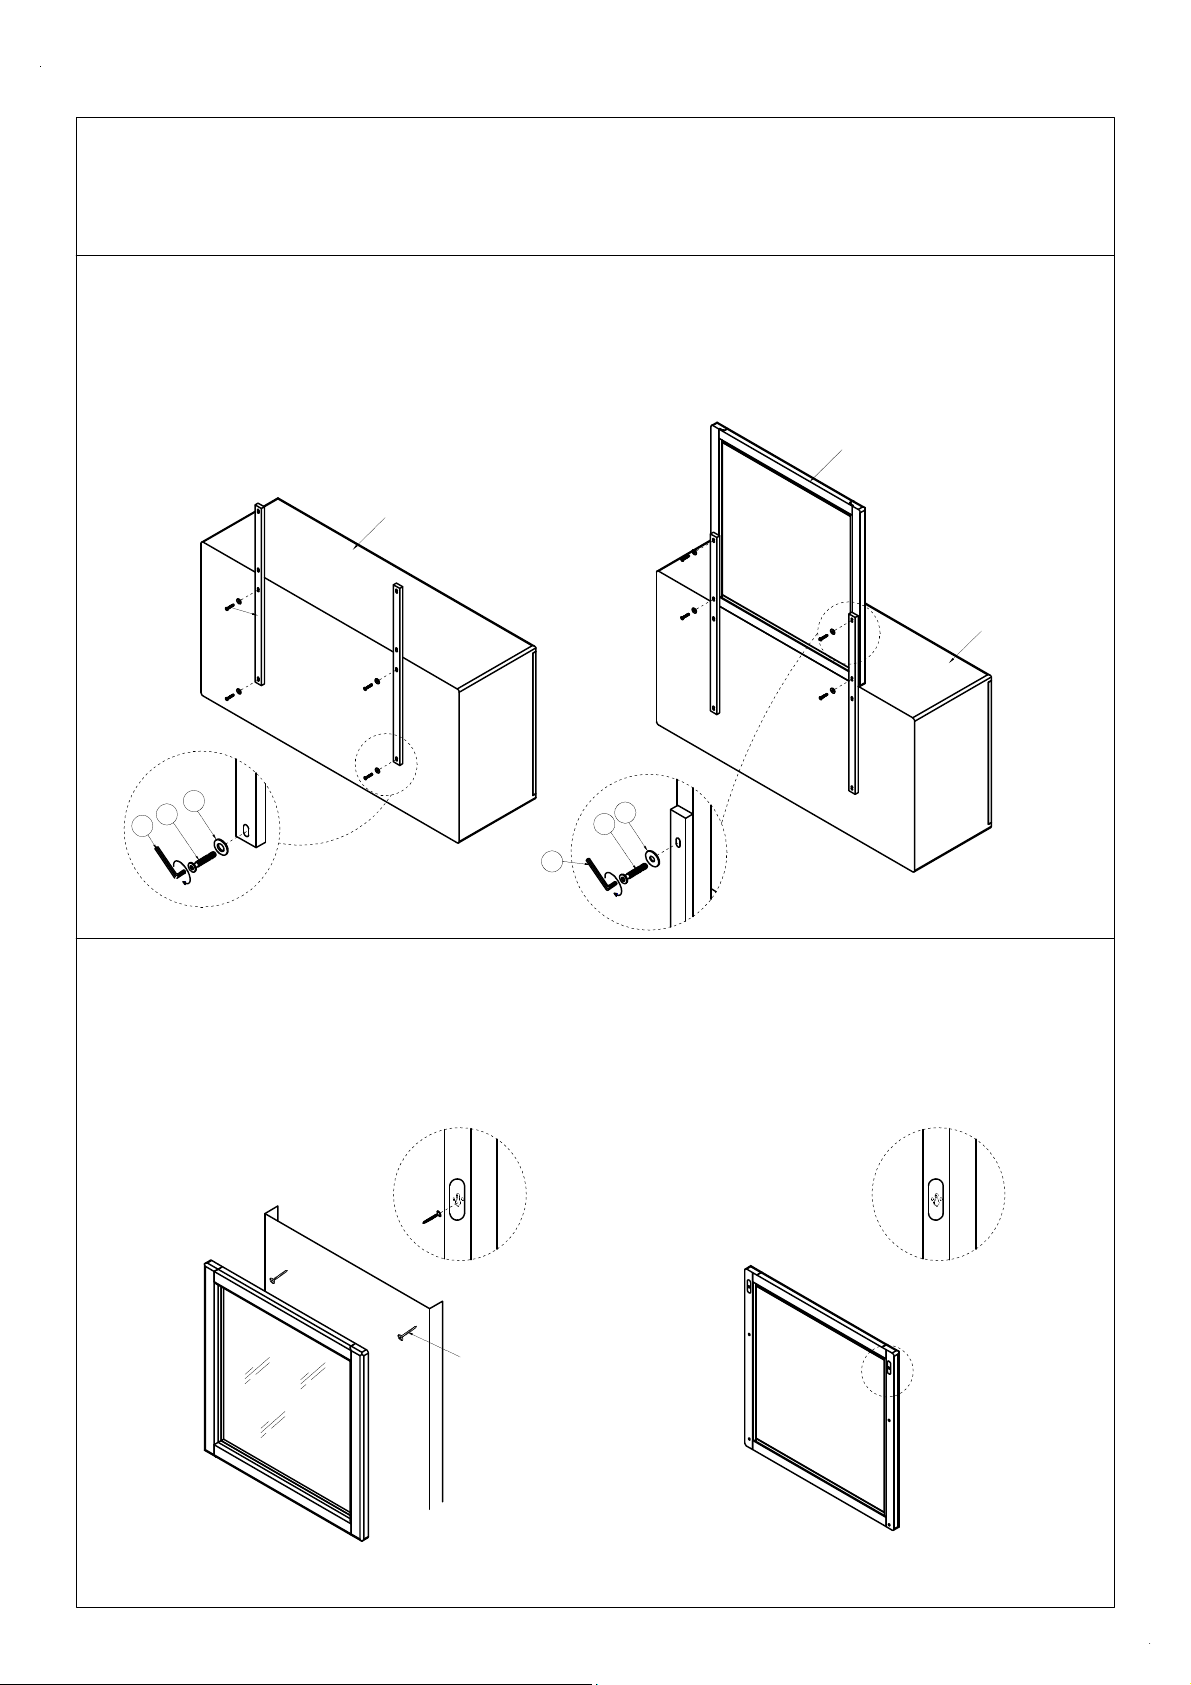
OPTION 1 : ATTACHING MIRROR TO DRESSER
STEP 1 STEP 2
ATTACH THE MIRROR SUPPORTS (C) TO THE BACK OF THE DRESSER
USING TWO ALLEN BOLTS (1) AND FLAT WASHERS (2) PER SUPPORT.
TIGHTEN, BUT DO NOT TIGHTEN COMPLETELY, WITH THE ALLEN
KEY (3)
B
ATTACH THE MIRROR (A) TO THE MIRROR SUPPORTS USING TWO
ALLEN BOLTS AND FLAT WASHERS PER SUPPORT. TIGHTEN ALL
THE BOLTS, INCLUDING THOSE FROM STEP 1, COMPLETELY WITH
THE ALLEN KEY.
A
C
2
1
3
3
2
1
B
OPTION 2 : ATTACHING MIRROR TO WAll
Pre-Installed mirror brackets are the teardrop shaped hardware on the back of the mirror. Test the connection of the bracket and the mounting hardware (screw (1))
before installing for a secure, safe fit.
Install mounting hardware (screw (1)) on the wall . Make sure the distance between the mounting hardware (screw (1)) matches the distance between the brackets
center of the mirror.
CAUTION!: We recommend installing the mounting hardware (screw (1)) in wall studs or a board that is secured to the studs. Consult a professional installer
before mounting to drywall.
Hang the mirror from the mounting hardware (screw (1)). Ensure that the teardrop brackets have caught the mounting hardware (screw (1)) securely.
FRONT VIEW OF MIRROR
1
BACK VIEW OF MIRROR
 Loading...