

Page 1
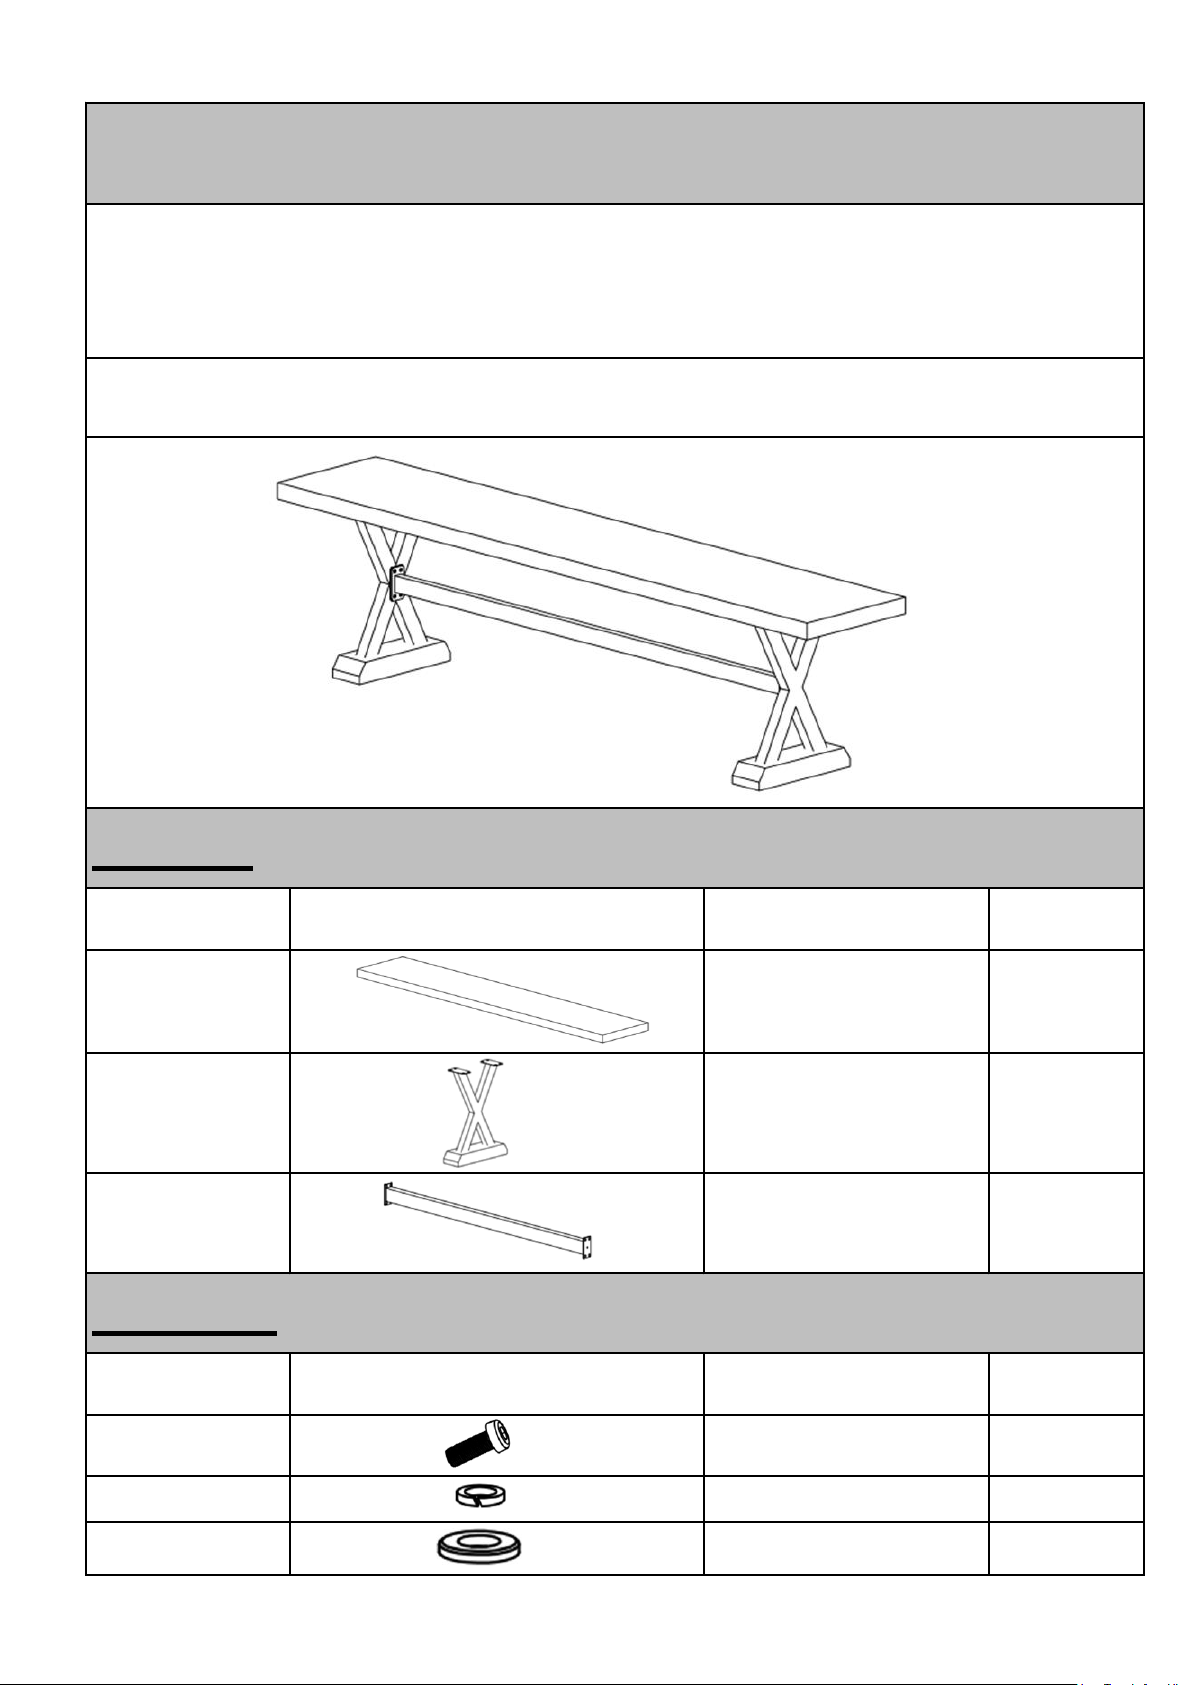
Label Description QTY
1 Bench Top 1
2 Leg 2
3 Connecting Bar 1
Label Description QTY
A Bolt (M6*16MM) 25
B Spring Washer 25
C Washer 25
Picture
Hardware
Picture
Assembly Instructions
Caution : You must read this before you proceed
The Bench and its Parts are Heavy.
At least two adults are required for lifting and moving them.
Bench
Part List
Page 1 OF 5
Page 2
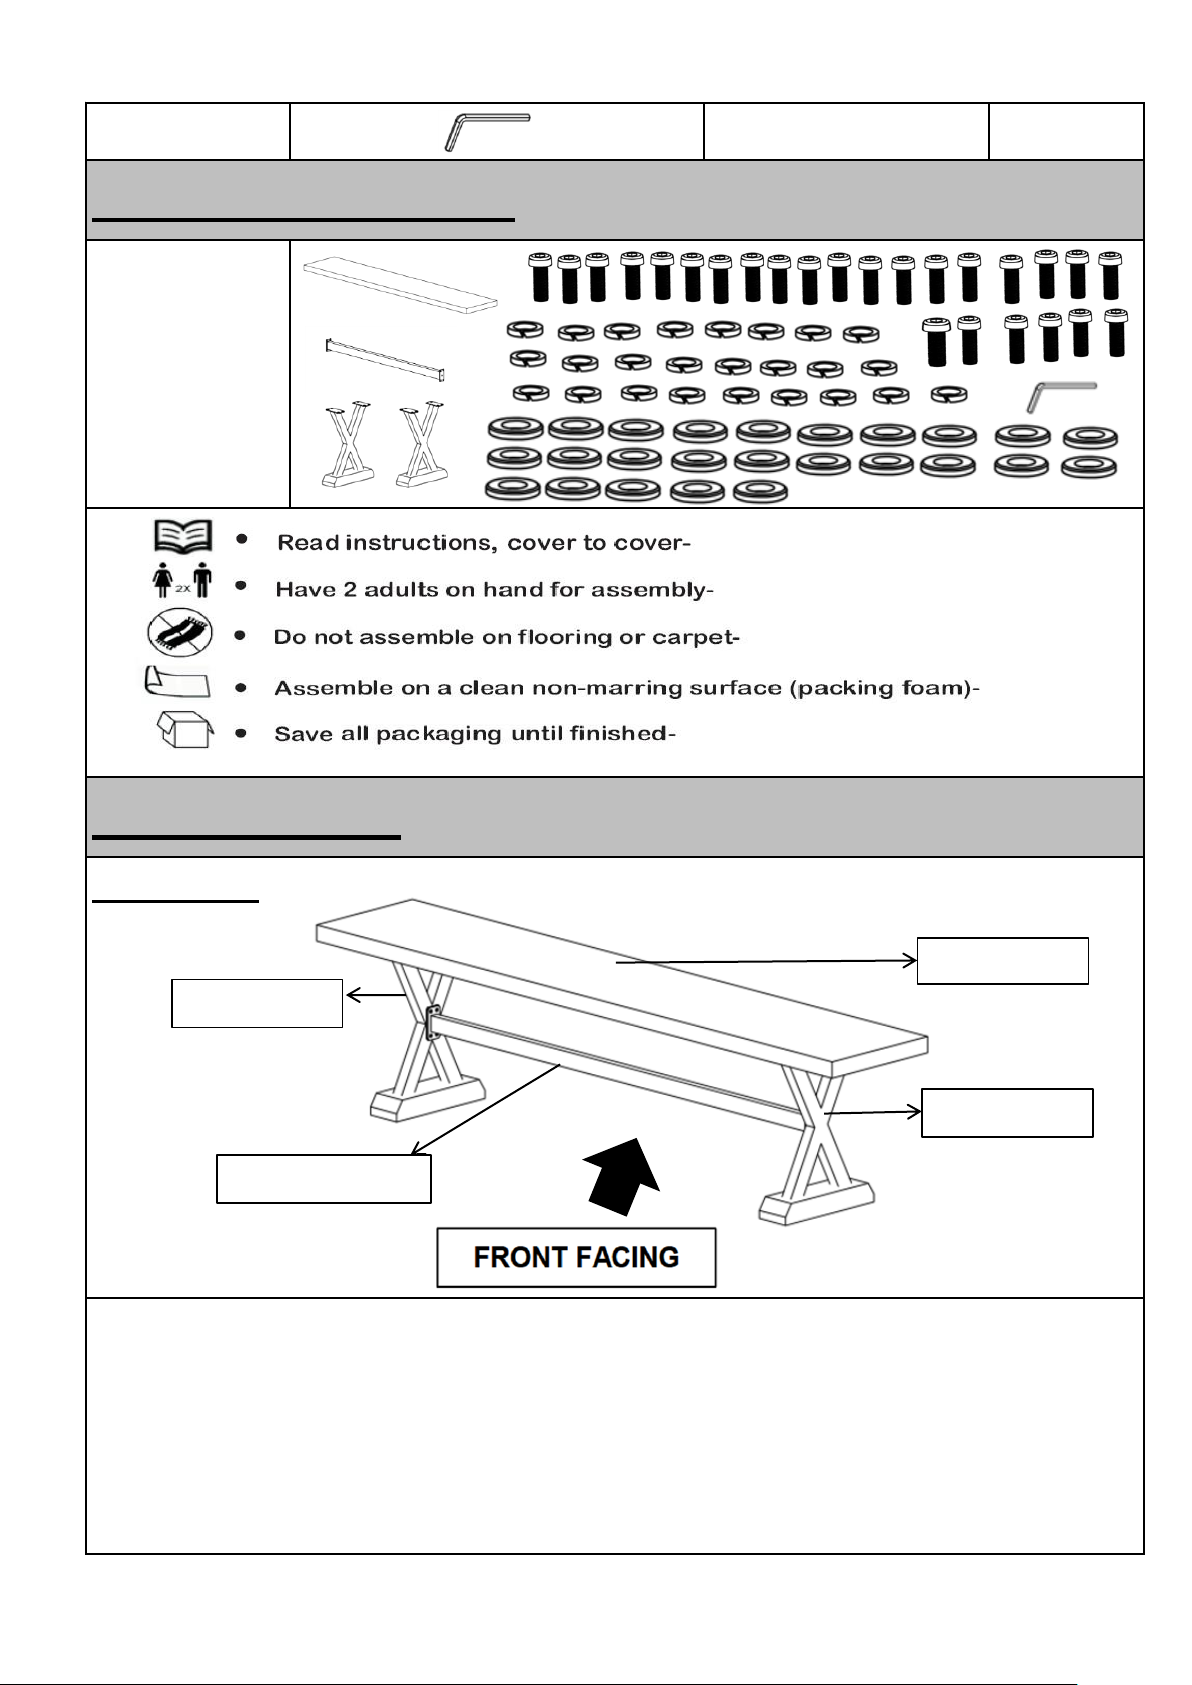
D Allen Key 1
Assembly Preparation
Assembly Steps
Before
Beginning
Assembly:
Overview
This Bench has multiple parts and may require up to some 30 minutes to assemble. To give you
an overview of the Bench parts, the above picture is to help you put the various parts into
perspective. Please read through the instructions herebelow to familiarise yourself with the parts
and steps before assembly.
Some parts are heavy, exercise safety and have 2 adult assistants to help whenever lifting
and moving them.
Bench Top(1)
Leg(2)
Leg(2)
Connecting Bar(3)
Page 2 OF 5
Page 3
Assembly Steps
Step 2
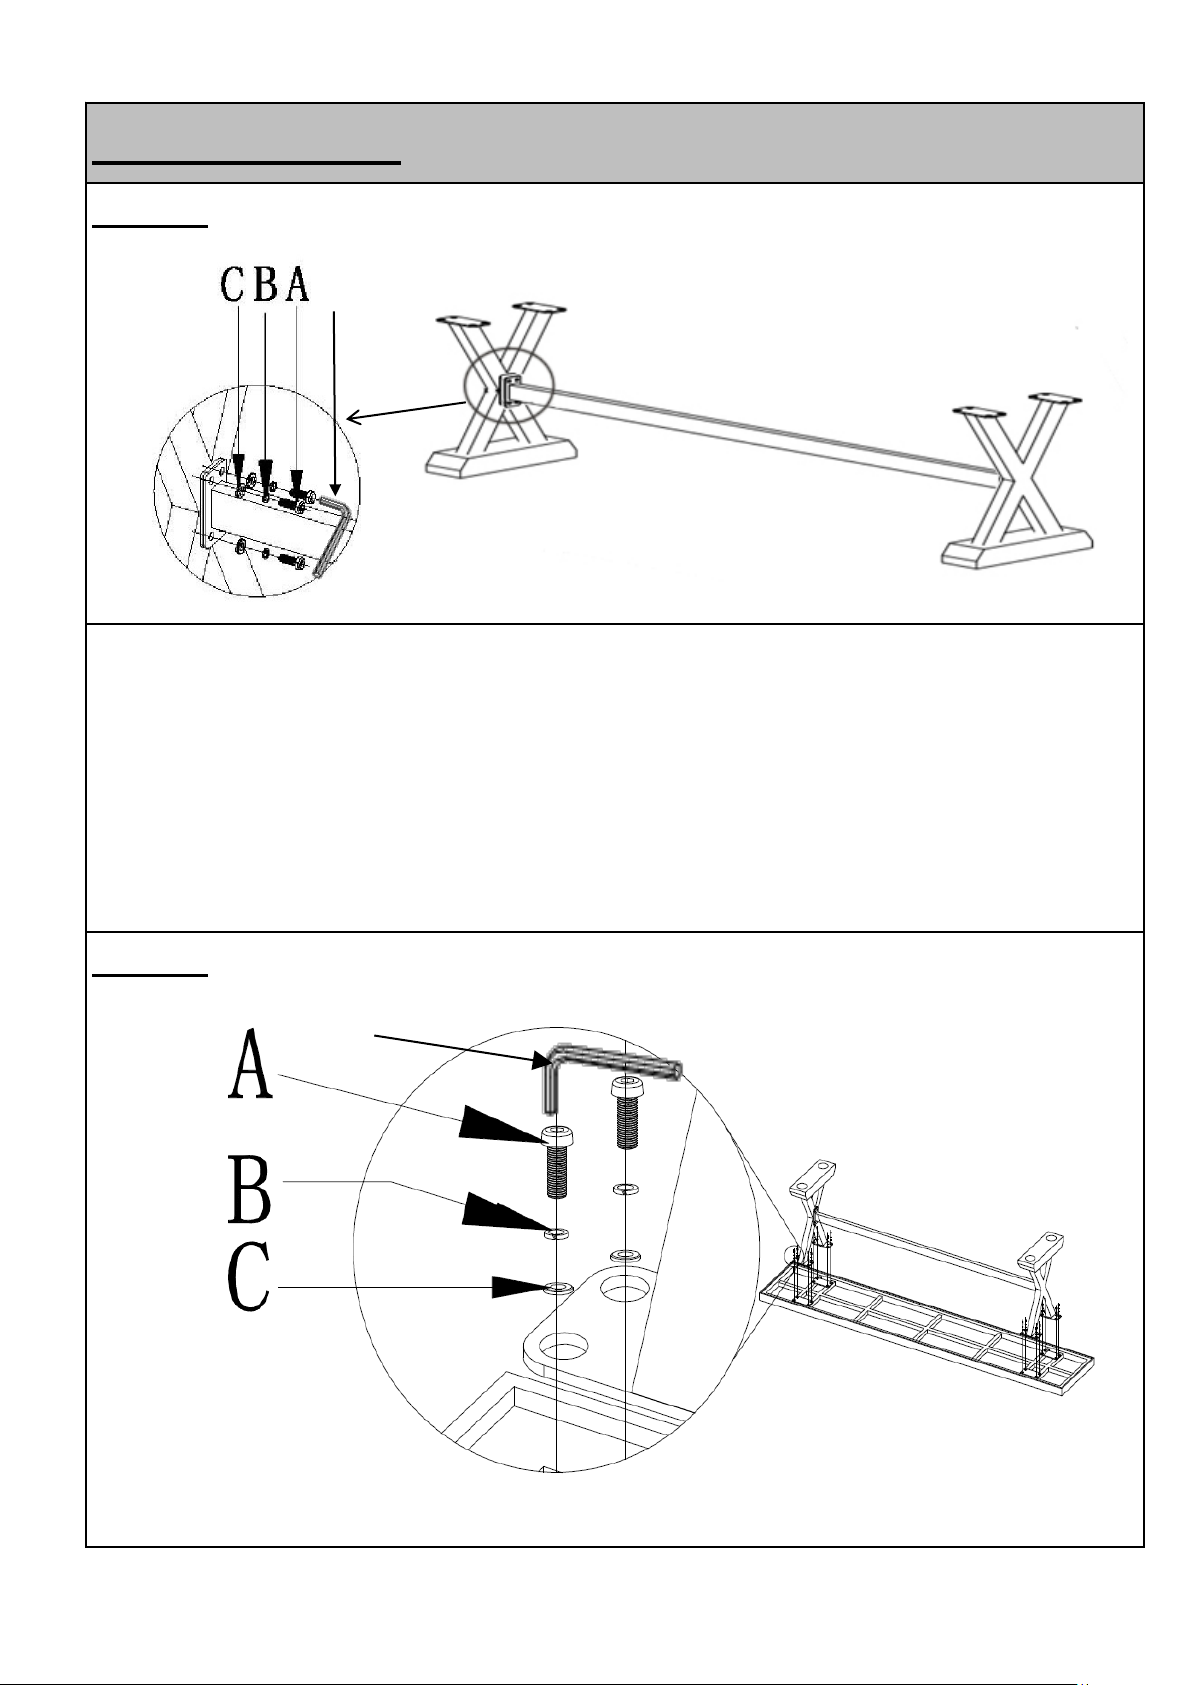
Unpack and place all parts on a clean, non-marring surface.
Stand the Leg(2) up as shown.
With the assistance of your adult partner, align the mountings of the Connection Bar(3) to the
mountings on the Leg(2).
Attach the Connection Bar(3) to Leg(2) using Bolts(A), Spring Washers(B) and Washers(C) with
Allen Key(D).
Only Loosely tighten at this stage.
Repeat the same process with the another Leg.
Step 1
2 3 2
D
1
D
Page 3 OF 5
Page 4
Step 3
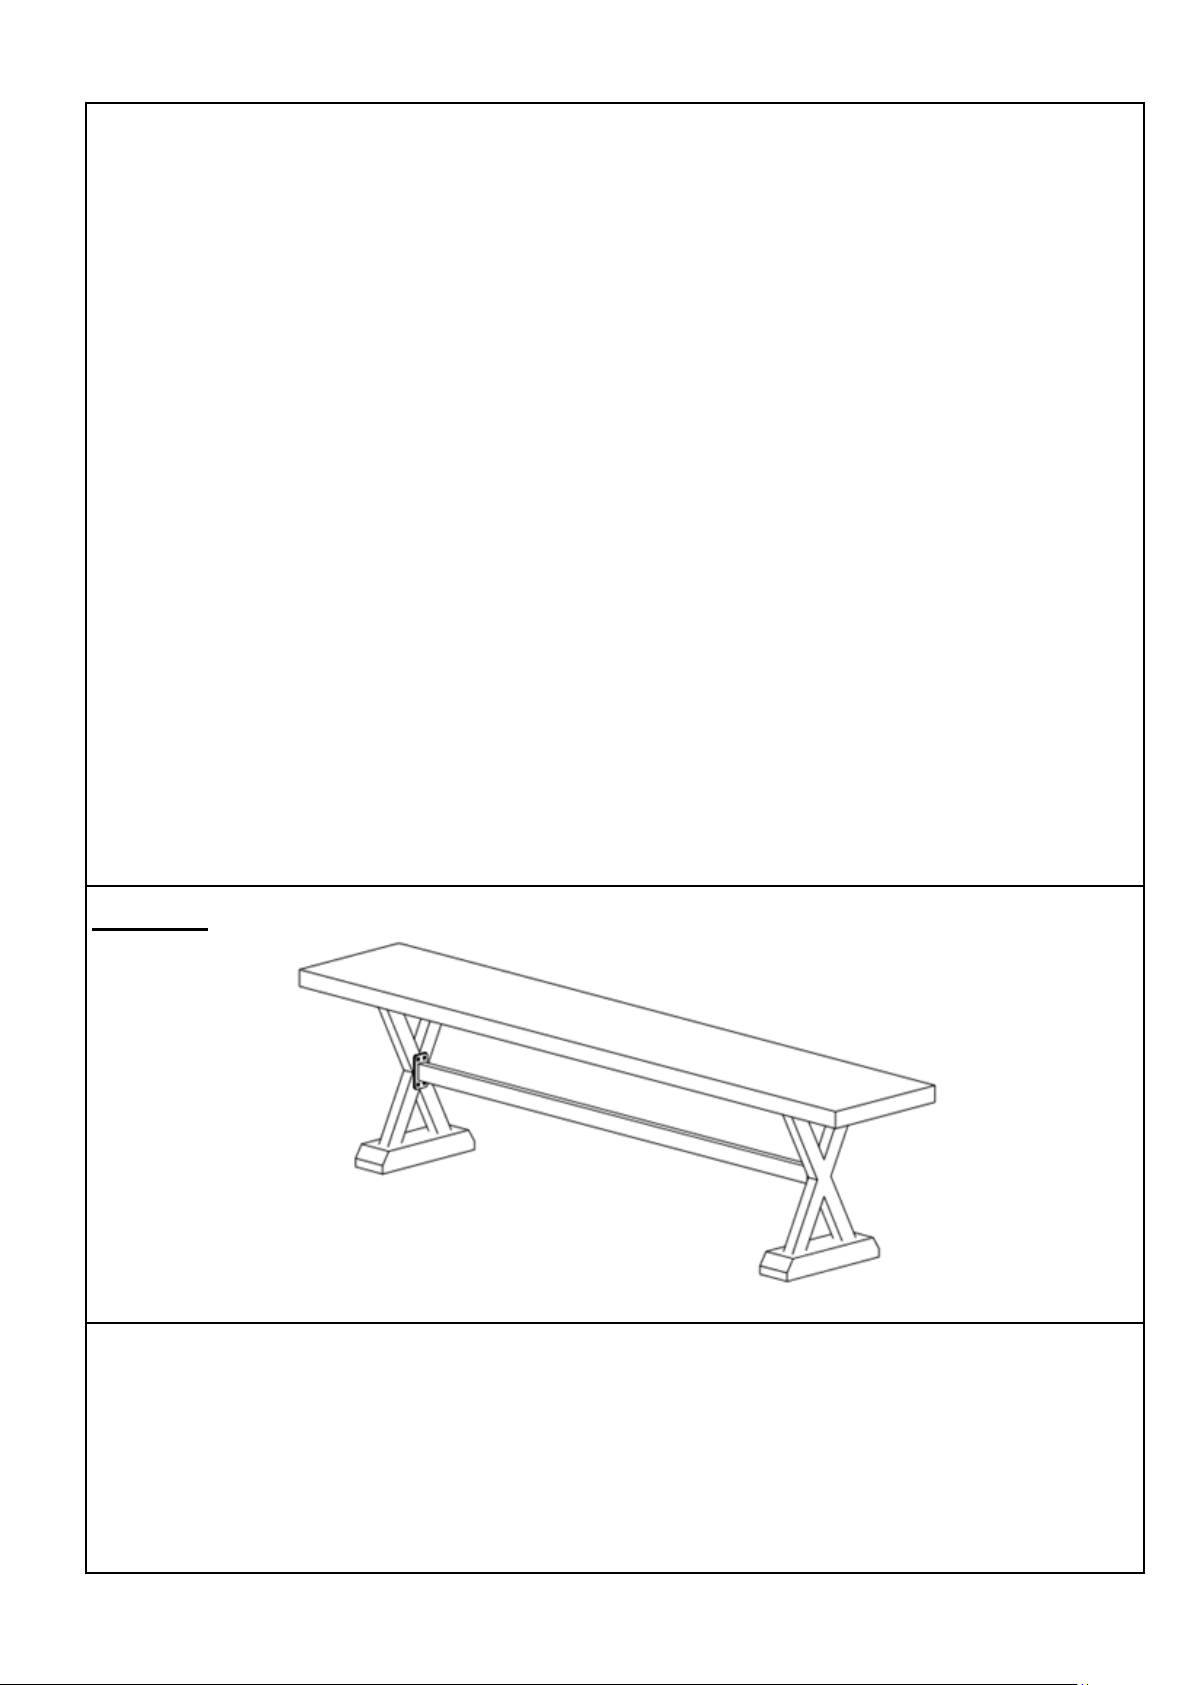
With assistance from your adult partner, stand the Bench right side up.
Inspect and make sure all parts are connected and fully secured into position.
Your Bench is now ready for use.
With assistance from your adult partner, carefully place the Bench Top(1) face down on a clean,
non-marring surface.
With assistance from your adult partner, pick up and turn the pre-assembled Leg Frame from Step 1,
180° degrees. Align the mounting points of the Legs to the mounting points on the underside of
Bench Top(1).
Attach the Legs to the Bench Top(1) using Bolts(A), Spring Washers(B) and Washers(C) with
Allen Key(D) as shown above. Tigthen Bolts in a sequential manner.
Turn Bench over to assess for evenness. If there is wobbles, you can achieve with either one of
the following steps :
1 ) release the bolts attaching the Legs to the Bench Top and re-tighten in a slower sequential
method OR
2 ) in mild wobbles, adjust the Adjustable Gliders to achieve eveness.
Where necessary, turn Bench right side up and in a sequential manner, proceed to tighten
all bolts at the underside of the Bench and at the 'X-point' of the legs.
DO NOT fully tighten a BOLT in one go and then move on to the next. Rather, In a
sequential manner, gradually tighten each Bolt until all bolts are evenly secured. This
methodology will ensure maximum evenness once all Bolts are fully tightened.
Page 4 OF 5
Page 5
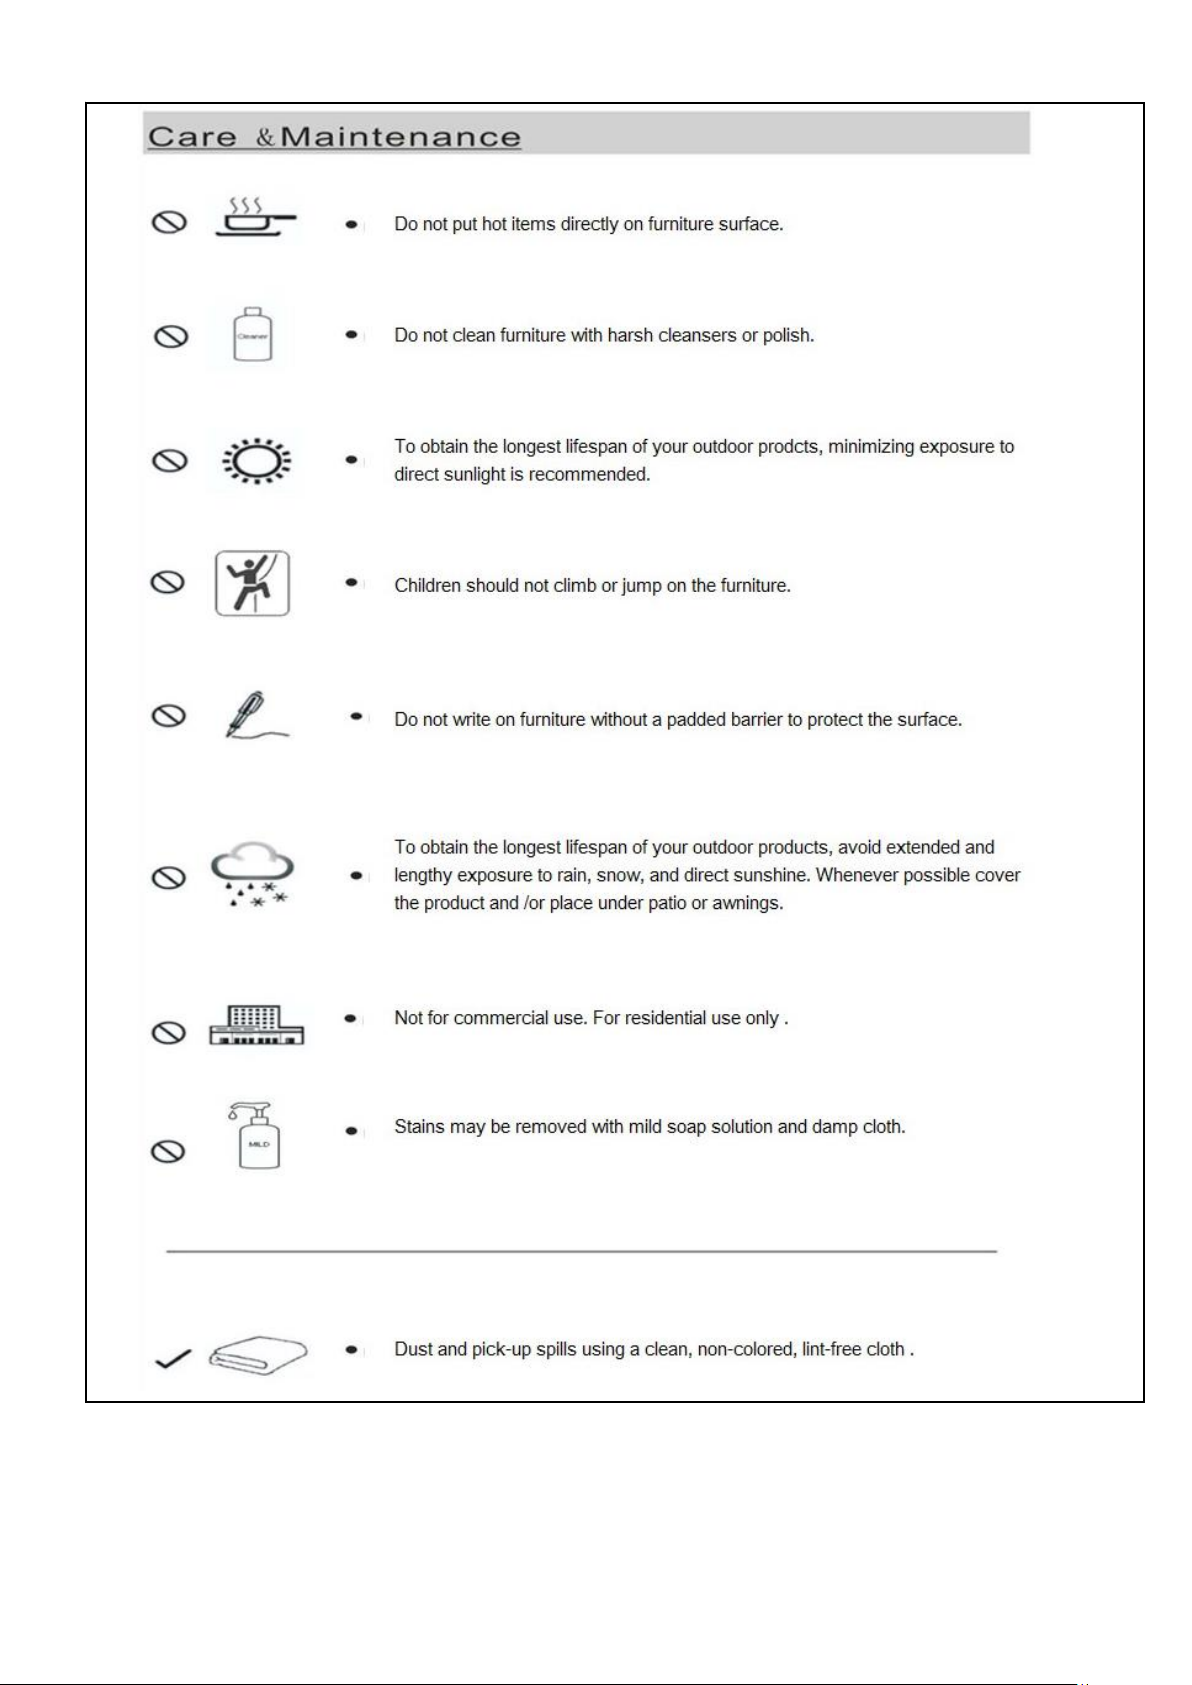
Page 5 OF 5
 Loading...