

Page 1
REFERENCE GUIDE
VERSION 2.0
V1
Page 2

Mari™ Reference Guide. Copyright © 2013 The Foundry Visionmongers Ltd. All Rights Reserved. Use of this Reference Guide and the Mari
software is subject to an End User License Agreement (the "EULA"), the terms of which are incorporated herein by reference. This Reference Guide
and the Mari software may be used or copied only in accordance with the terms of the EULA. This Reference Guide, the Mari software and all
intellectual property rights relating thereto are and shall remain the sole property of The Foundry Visionmongers Ltd. ("The Foundry") and/or The
Foundry's licensors.
The EULA can be read in the Mari User Guide Appendices.
The Foundry assumes no responsibility or liability for any errors or inaccuracies that may appear in this Reference Guide and this Reference Guide
is subject to change without notice. The content of this Reference Guide is furnished for informational use only.
Except as permitted by the EULA, no part of this Reference Guide may be reproduced, stored in a retrieval system or transmitted, in any form or by
any means, electronic, mechanical, recording or otherwise, without the prior written permission of The Foundry. To the extent that the EULA
authorizes the making of copies of this Reference Guide, such copies shall be reproduced with all copyright, trademark and other proprietary rights
notices included herein. The EULA expressly prohibits any action that could adversely affect the property rights of The Foundry and/or The
Foundry's licensors, including, but not limited to, the removal of the following (or any other copyright, trademark or other proprietary rights notice
included herein):
Mari™ software © 2013 The Foundry Visionmongers Ltd. All Rights Reserved.
Mari™ is a trademark of The Foundry Visionmongers Ltd.
Weta™ Digital is a trademark of Weta Digital Ltd.
In addition to those names set forth on this page, the names of other actual companies and products mentioned in this Reference Guide (including,
but not the to, those set forth below) may be the trademarks or service marks, or registered trademarks or service marks, of their respective
owners in the United States and/or other countries. No association with any company or product is intended or inferred by the mention of its
name in this Reference Guide.
Linux ® is a registered trademark of Linus Torvalds.
Windows ® is the registered trademark of Microsoft Corporation.
Adobe ® and Photoshop ® are either registered trademarks or trademarks of Adobe Systems Incorporated in the United States and/or other
countries.
Maya ® is a registered trademark of Autodesk, Inc., in the USA and other countries.
Mari software engineering: Jack Greasley, Kiyoyuki Nakagaki, Marcus Shoo, Kevin Atkinson, Tim Ebling, Jed Soane, Daniel Lond, Robert Fanner,
Duncan Hopkins, Mark Final, Chris Bevan, Carl Rand, Phil Hunter and Tim Smith
Product testing: Michael Zannetou, Mark Titchener, Robert Elphick, Antoni Kujawa and Chris Hiess
Writing and layout design: Jack Elder, Jon Hertzig, Eija Närvänen, Charles Quinn and Erica Cargle
Proof reading: Jack Elder and Eija Närvänen
Mari includes Disney technology licensed from Walt Disney Animation Studios.
The Foundry
6th Floor, Communications Building,
48 Leicester Square,
London
WC2H 7LT
Rev: March 8, 2013
Mari 2.0v1The Foundry
Page 3
Contents
PREFACE . . . . . . . . . . . . . . . . . . . . . . . . . . . . . . . . . . . . . . . . . . . . . . . . . . . . . . . . . . . . . . . . . . . . . . . . . . . . 7
TYPES OF CONTROLS . . . . . . . . . . . . . . . . . . . . . . . . . . . . . . . . . . . . . . . . . . . . . . . . . . . . . . . . . . . . . . . . . 8
PROJECT FUNCTIONS. . . . . . . . . . . . . . . . . . . . . . . . . . . . . . . . . . . . . . . . . . . . . . . . . . . . . . . . . . . . . . . . .11
PREFERENCE FUNCTIONS . . . . . . . . . . . . . . . . . . . . . . . . . . . . . . . . . . . . . . . . . . . . . . . . . . . . . . . . . . . . .12
SELECTION FUNCTIONS . . . . . . . . . . . . . . . . . . . . . . . . . . . . . . . . . . . . . . . . . . . . . . . . . . . . . . . . . . . . . . . 13
OBJECT FUNCTIONS. . . . . . . . . . . . . . . . . . . . . . . . . . . . . . . . . . . . . . . . . . . . . . . . . . . . . . . . . . . . . . . . . .19
CHANNEL FUNCTIONS . . . . . . . . . . . . . . . . . . . . . . . . . . . . . . . . . . . . . . . . . . . . . . . . . . . . . . . . . . . . . . . .20
LAYER FUNCTIONS. . . . . . . . . . . . . . . . . . . . . . . . . . . . . . . . . . . . . . . . . . . . . . . . . . . . . . . . . . . . . . . . . . . 25
PTEX FUNCTIONS. . . . . . . . . . . . . . . . . . . . . . . . . . . . . . . . . . . . . . . . . . . . . . . . . . . . . . . . . . . . . . . . . . . . 31
PATCH FUNCTIONS . . . . . . . . . . . . . . . . . . . . . . . . . . . . . . . . . . . . . . . . . . . . . . . . . . . . . . . . . . . . . . . . . . 32
SHADING FUNCTIONS . . . . . . . . . . . . . . . . . . . . . . . . . . . . . . . . . . . . . . . . . . . . . . . . . . . . . . . . . . . . . . . .36
PAINTING FUNCTIONS . . . . . . . . . . . . . . . . . . . . . . . . . . . . . . . . . . . . . . . . . . . . . . . . . . . . . . . . . . . . . . . . 38
FILTER FUNCTIONS . . . . . . . . . . . . . . . . . . . . . . . . . . . . . . . . . . . . . . . . . . . . . . . . . . . . . . . . . . . . . . . . . . 40
CAMERA FUNCTIONS . . . . . . . . . . . . . . . . . . . . . . . . . . . . . . . . . . . . . . . . . . . . . . . . . . . . . . . . . . . . . . . . .46
VIEW FUNCTIONS . . . . . . . . . . . . . . . . . . . . . . . . . . . . . . . . . . . . . . . . . . . . . . . . . . . . . . . . . . . . . . . . . . . 50
TOOL FUNCTIONS . . . . . . . . . . . . . . . . . . . . . . . . . . . . . . . . . . . . . . . . . . . . . . . . . . . . . . . . . . . . . . . . . . .51
PYTHON FUNCTIONS . . . . . . . . . . . . . . . . . . . . . . . . . . . . . . . . . . . . . . . . . . . . . . . . . . . . . . . . . . . . . . . . .52
Page 4

HELP FUNCTIONS. . . . . . . . . . . . . . . . . . . . . . . . . . . . . . . . . . . . . . . . . . . . . . . . . . . . . . . . . . . . . . . . . . . .53
TOOLBARS. . . . . . . . . . . . . . . . . . . . . . . . . . . . . . . . . . . . . . . . . . . . . . . . . . . . . . . . . . . . . . . . . . . . . . . . . . 54
STATUS BAR. . . . . . . . . . . . . . . . . . . . . . . . . . . . . . . . . . . . . . . . . . . . . . . . . . . . . . . . . . . . . . . . . . . . . . . . 77
CHANNELS PALETTE . . . . . . . . . . . . . . . . . . . . . . . . . . . . . . . . . . . . . . . . . . . . . . . . . . . . . . . . . . . . . . . . . 79
LAYERS PALETTE . . . . . . . . . . . . . . . . . . . . . . . . . . . . . . . . . . . . . . . . . . . . . . . . . . . . . . . . . . . . . . . . . . . . 82
PATCHES PALETTE . . . . . . . . . . . . . . . . . . . . . . . . . . . . . . . . . . . . . . . . . . . . . . . . . . . . . . . . . . . . . . . . . .100
OBJECTS PALETTE . . . . . . . . . . . . . . . . . . . . . . . . . . . . . . . . . . . . . . . . . . . . . . . . . . . . . . . . . . . . . . . . . .101
SHADERS PALETTE. . . . . . . . . . . . . . . . . . . . . . . . . . . . . . . . . . . . . . . . . . . . . . . . . . . . . . . . . . . . . . . . . . 103
4
LIGHTS PALETTE. . . . . . . . . . . . . . . . . . . . . . . . . . . . . . . . . . . . . . . . . . . . . . . . . . . . . . . . . . . . . . . . . . . .120
PROJECTORS PALETTE. . . . . . . . . . . . . . . . . . . . . . . . . . . . . . . . . . . . . . . . . . . . . . . . . . . . . . . . . . . . . . .122
SELECTION GROUPS PALETTE . . . . . . . . . . . . . . . . . . . . . . . . . . . . . . . . . . . . . . . . . . . . . . . . . . . . . . . .132
COLOR MANAGER PALETTE . . . . . . . . . . . . . . . . . . . . . . . . . . . . . . . . . . . . . . . . . . . . . . . . . . . . . . . . . .133
IMAGE MANAGER PALETTE. . . . . . . . . . . . . . . . . . . . . . . . . . . . . . . . . . . . . . . . . . . . . . . . . . . . . . . . . . .143
HISTORY VIEW PALETTE. . . . . . . . . . . . . . . . . . . . . . . . . . . . . . . . . . . . . . . . . . . . . . . . . . . . . . . . . . . . .145
BRUSH EDITOR PALETTE . . . . . . . . . . . . . . . . . . . . . . . . . . . . . . . . . . . . . . . . . . . . . . . . . . . . . . . . . . . .146
PLAY CONTROLS PALETTE . . . . . . . . . . . . . . . . . . . . . . . . . . . . . . . . . . . . . . . . . . . . . . . . . . . . . . . . . . . 151
PYTHON CONSOLE PALETTE. . . . . . . . . . . . . . . . . . . . . . . . . . . . . . . . . . . . . . . . . . . . . . . . . . . . . . . . . . 153
PIXEL ANALYZER PALETTE . . . . . . . . . . . . . . . . . . . . . . . . . . . . . . . . . . . . . . . . . . . . . . . . . . . . . . . . . . .155
The Foundry
Mari 2.0v1
Page 5

COLORS PALETTE. . . . . . . . . . . . . . . . . . . . . . . . . . . . . . . . . . . . . . . . . . . . . . . . . . . . . . . . . . . . . . . . . . .156
TOOL PROPERTIES PALETTE. . . . . . . . . . . . . . . . . . . . . . . . . . . . . . . . . . . . . . . . . . . . . . . . . . . . . . . . . . 158
PAINTING PALETTE . . . . . . . . . . . . . . . . . . . . . . . . . . . . . . . . . . . . . . . . . . . . . . . . . . . . . . . . . . . . . . . . .166
PROJECTION PALETTE . . . . . . . . . . . . . . . . . . . . . . . . . . . . . . . . . . . . . . . . . . . . . . . . . . . . . . . . . . . . . . .168
SHELF PALETTE . . . . . . . . . . . . . . . . . . . . . . . . . . . . . . . . . . . . . . . . . . . . . . . . . . . . . . . . . . . . . . . . . . . .174
HSV PALETTE . . . . . . . . . . . . . . . . . . . . . . . . . . . . . . . . . . . . . . . . . . . . . . . . . . . . . . . . . . . . . . . . . . . . . 175
SNAPSHOTS PALETTE . . . . . . . . . . . . . . . . . . . . . . . . . . . . . . . . . . . . . . . . . . . . . . . . . . . . . . . . . . . . . . . 176
NEW PROJECT DIALOG BOX . . . . . . . . . . . . . . . . . . . . . . . . . . . . . . . . . . . . . . . . . . . . . . . . . . . . . . . . . 178
5
SELECT COLOR DIALOG BOX . . . . . . . . . . . . . . . . . . . . . . . . . . . . . . . . . . . . . . . . . . . . . . . . . . . . . . . . .182
ADD CHANNEL DIALOG BOX . . . . . . . . . . . . . . . . . . . . . . . . . . . . . . . . . . . . . . . . . . . . . . . . . . . . . . . . . 184
ADD MULTIPLE CHANNELS DIALOG BOX . . . . . . . . . . . . . . . . . . . . . . . . . . . . . . . . . . . . . . . . . . . . . . .186
CHANNEL PRESETS DIALOG BOX. . . . . . . . . . . . . . . . . . . . . . . . . . . . . . . . . . . . . . . . . . . . . . . . . . . . . . 188
CONVERT TYPE DIALOG BOX . . . . . . . . . . . . . . . . . . . . . . . . . . . . . . . . . . . . . . . . . . . . . . . . . . . . . . . .190
COPY MULTIPLE TEXTURES DIALOG BOX . . . . . . . . . . . . . . . . . . . . . . . . . . . . . . . . . . . . . . . . . . . . . .191
EXPORT DIALOG BOX . . . . . . . . . . . . . . . . . . . . . . . . . . . . . . . . . . . . . . . . . . . . . . . . . . . . . . . . . . . . . . .192
IMPORT DIALOG BOX . . . . . . . . . . . . . . . . . . . . . . . . . . . . . . . . . . . . . . . . . . . . . . . . . . . . . . . . . . . . . . .196
MARI TO MAYA EXPORT DIALOG BOX . . . . . . . . . . . . . . . . . . . . . . . . . . . . . . . . . . . . . . . . . . . . . . . .200
CREATE SHADER DIALOG BOX. . . . . . . . . . . . . . . . . . . . . . . . . . . . . . . . . . . . . . . . . . . . . . . . . . . . . . . . 202
The Foundry
Mari 2.0v1
Page 6

CREATE SHADER DIALOG BOX. . . . . . . . . . . . . . . . . . . . . . . . . . . . . . . . . . . . . . . . . . . . . . . . . . . . . . . . 204
MASK CHANNEL TO ALPHA DIALOG BOX . . . . . . . . . . . . . . . . . . . . . . . . . . . . . . . . . . . . . . . . . . . . . .205
SELECT PATCHES BY RANGE DIALOG BOX. . . . . . . . . . . . . . . . . . . . . . . . . . . . . . . . . . . . . . . . . . . . . . 206
LOAD CAMERA DIALOG BOX . . . . . . . . . . . . . . . . . . . . . . . . . . . . . . . . . . . . . . . . . . . . . . . . . . . . . . . . .207
MANAGE TOOLBAR DIALOG BOX . . . . . . . . . . . . . . . . . . . . . . . . . . . . . . . . . . . . . . . . . . . . . . . . . . . . .209
MANAGE KEYBOARD SHORTCUTS DIALOG BOX . . . . . . . . . . . . . . . . . . . . . . . . . . . . . . . . . . . . . . . . . 211
HUD MANAGER DIALOG BOX . . . . . . . . . . . . . . . . . . . . . . . . . . . . . . . . . . . . . . . . . . . . . . . . . . . . . . . .213
MARI PREFERENCES DIALOG BOX. . . . . . . . . . . . . . . . . . . . . . . . . . . . . . . . . . . . . . . . . . . . . . . . . . . . .216
6
DISPLAY PROPERTIES DIALOG BOX . . . . . . . . . . . . . . . . . . . . . . . . . . . . . . . . . . . . . . . . . . . . . . . . . . .225
SCREENSHOT SETTINGS DIALOG BOX. . . . . . . . . . . . . . . . . . . . . . . . . . . . . . . . . . . . . . . . . . . . . . . . . . 228
RENDER TURNTABLE DIALOG BOX . . . . . . . . . . . . . . . . . . . . . . . . . . . . . . . . . . . . . . . . . . . . . . . . . . . .229
DIAGNOSTICS TURNTABLE DIALOG BOX. . . . . . . . . . . . . . . . . . . . . . . . . . . . . . . . . . . . . . . . . . . . . . . . 231
QUICK PROJECTION DIALOG BOX . . . . . . . . . . . . . . . . . . . . . . . . . . . . . . . . . . . . . . . . . . . . . . . . . . . . .233
The Foundry
Mari 2.0v1
Page 7

1 PREFACE
Mari is a creative texture-painting tool that can handle extremely complex
or texture heavy projects. It was developed at Weta Digital and has been
used on films such as The Adventures of Tintin: The Secret of the Unicorn,
District 9, The Day the Earth Stood Still, The Lovely Bones and Avatar.
The name Mari comes from the Swahili 'Maridadi', meaning 'beautiful' and
carrying connotations of 'usefulness'.
About this guide
Contact
customer
support
This guide provides a complete reference for all the functions and fields
within Mari. It does not give you any instructions on using Mari. For details
on installing Mari, read the
using Mari, read the
The first part of this document describes all the functions within Mari,
broken up by functional area.
Should questions arise that this manual fails to address, you can contact
Customer Support directly via e-mail at support@thefoundry.co.uk or via
telephone to our London office on +44 (0)20 7968 6828 or to our Los
Angeles office on (310) 399 4555 during office hours.
User Guide
Getting Started Guide
.
. For full instructions on
Page 8
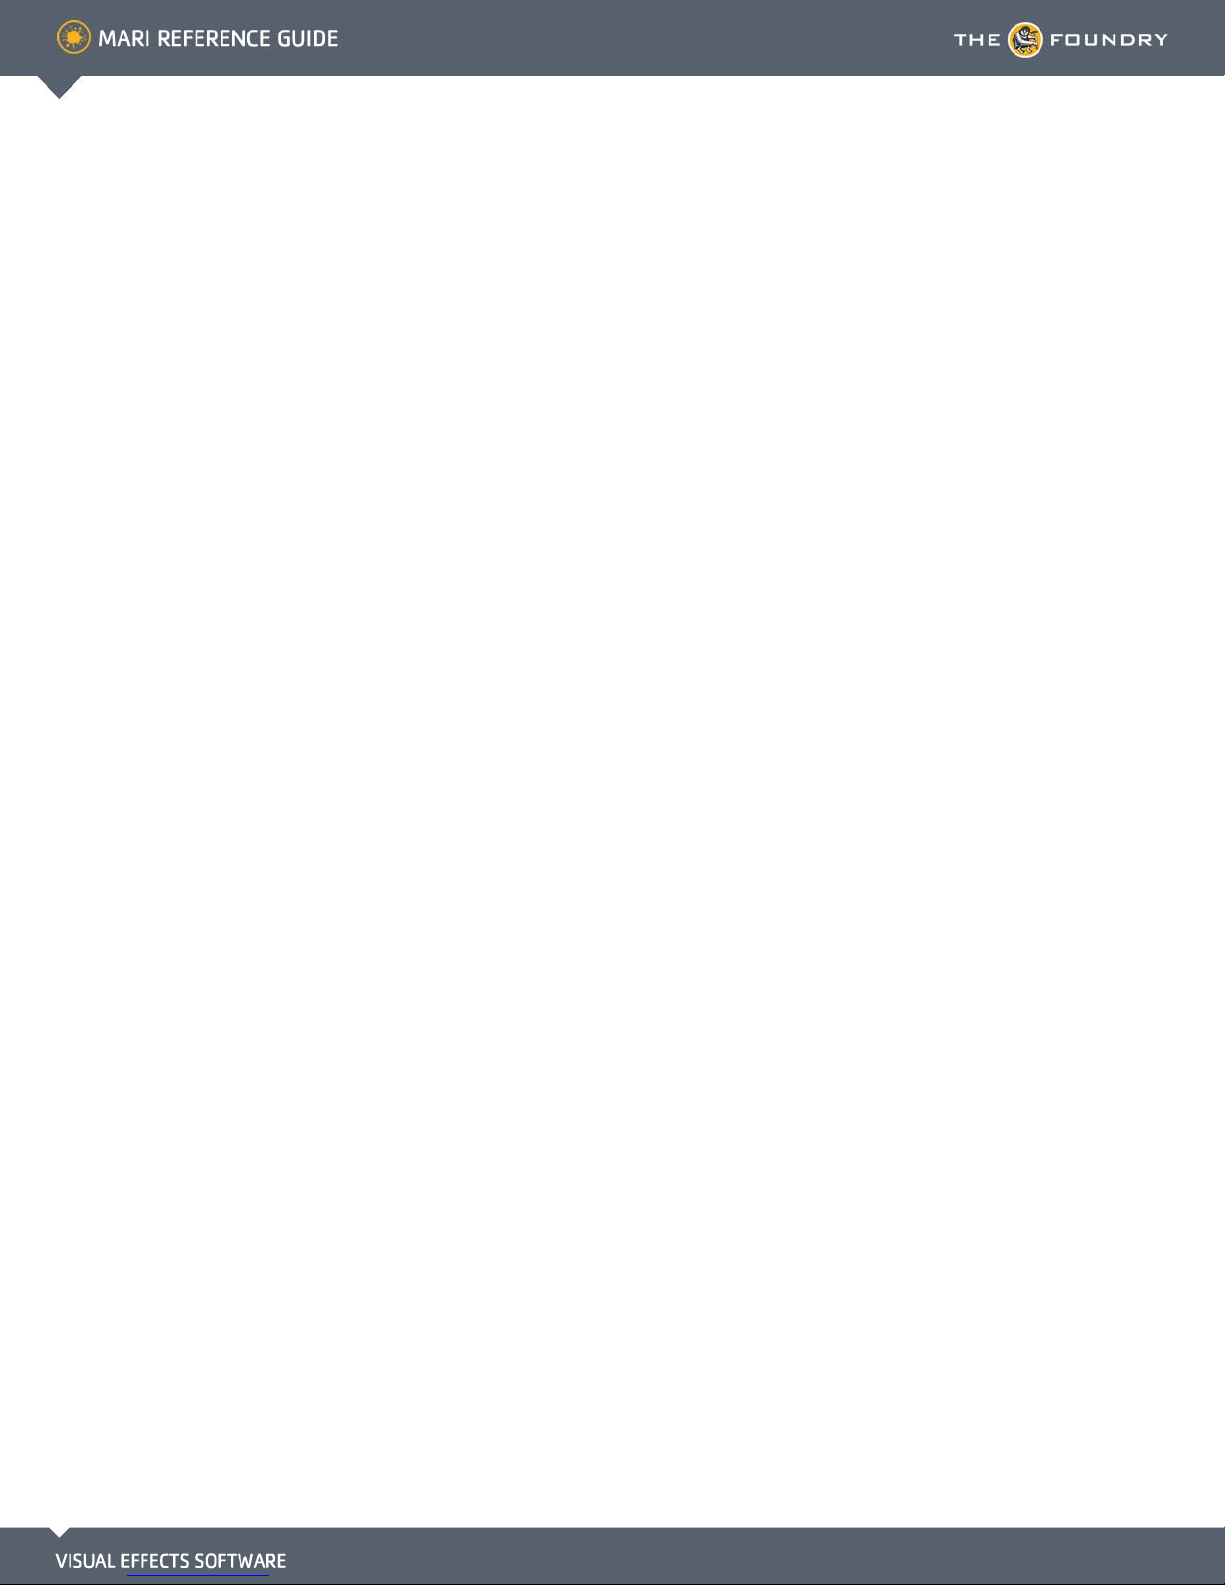
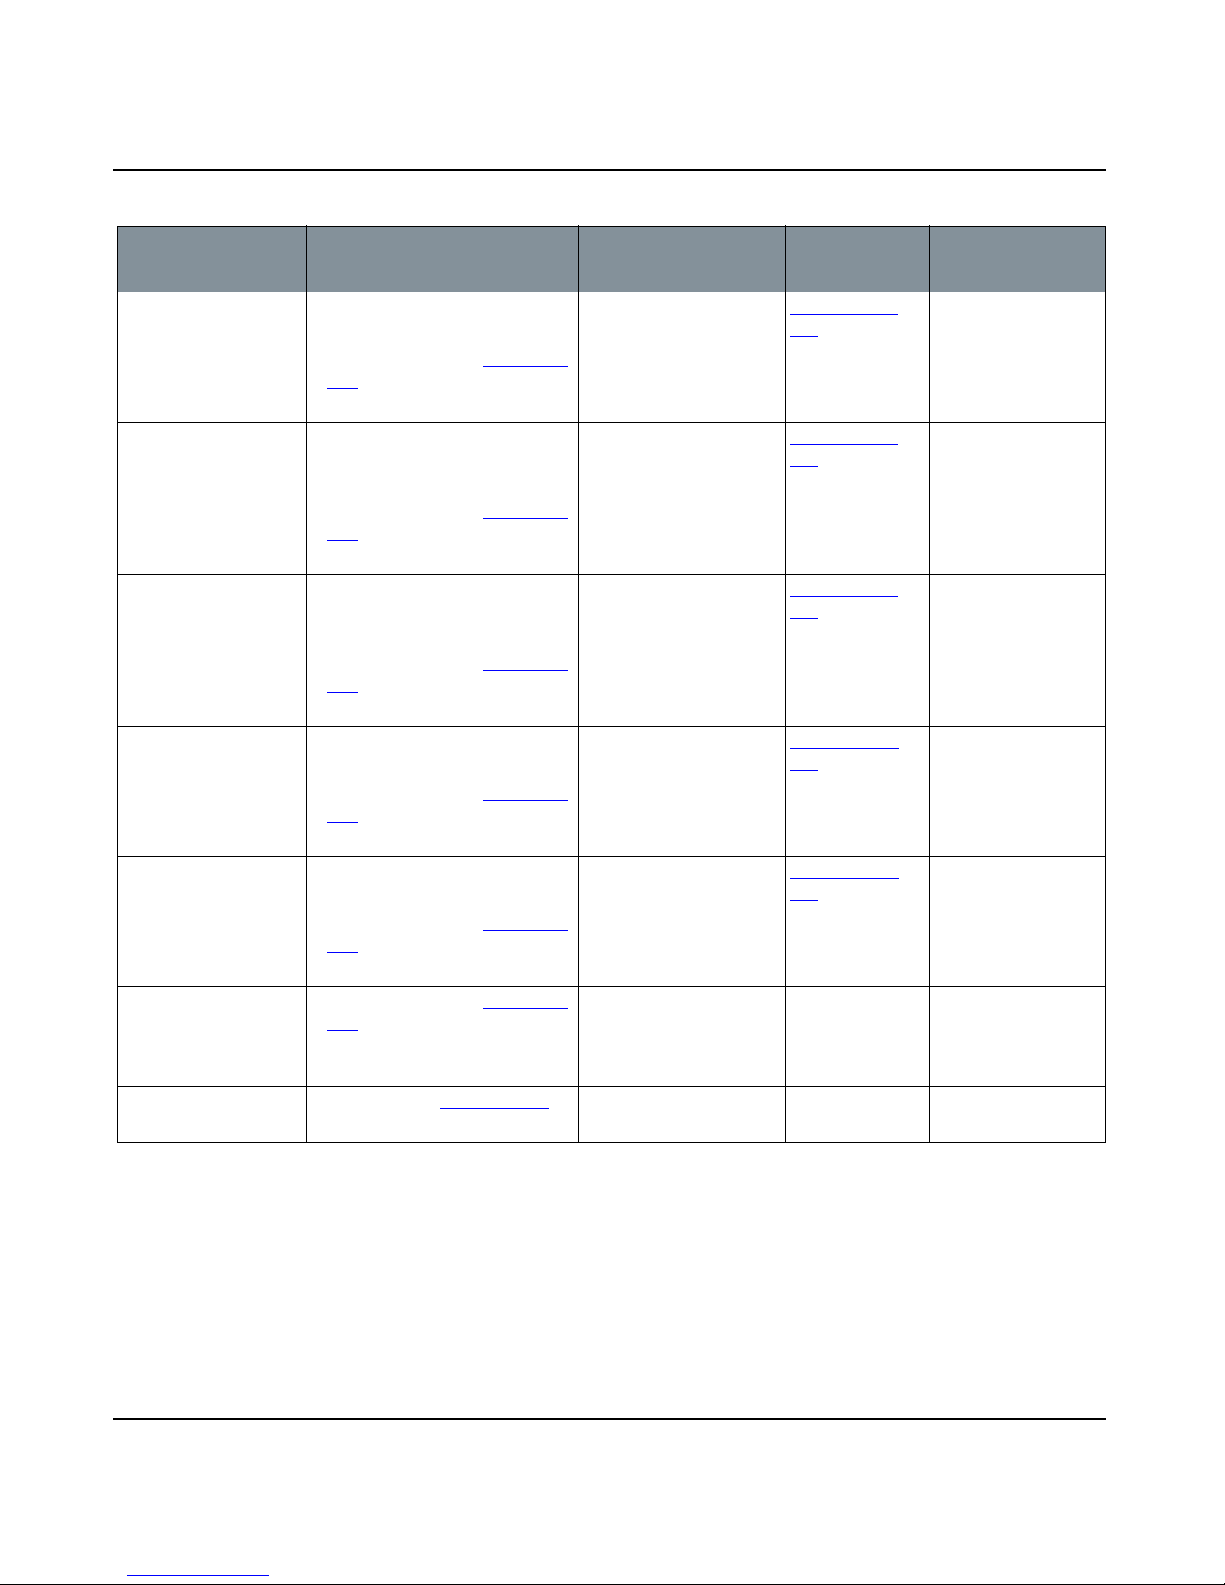
2 TYPES OF CONTROLS
Control What it looks like What it does How to use it Notes
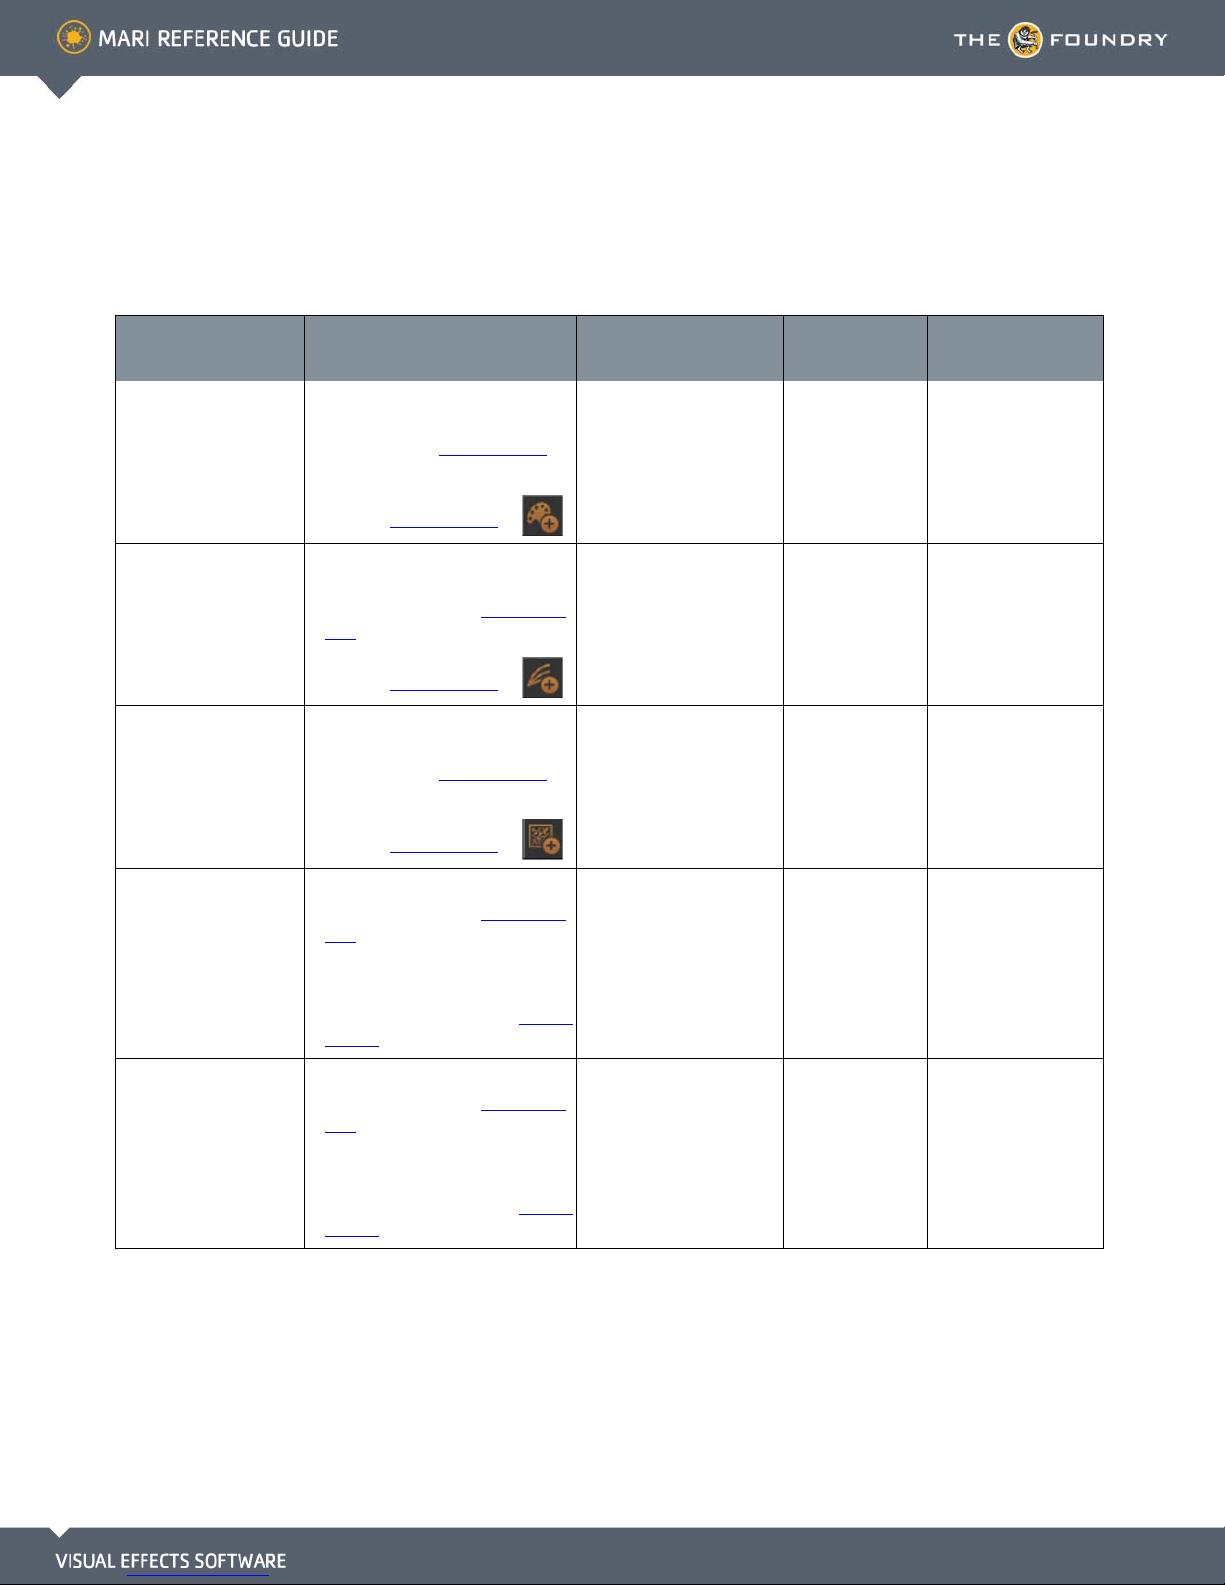
Add attribute Lets you add an
attribute to a property.
Buttons
Checkbox
Control
sphere
Curve editor Maps between input
Dropdown
list
,
unselected, selected
Lets you select a
function.
Lets you select an
option.
Lets you move a light
around the scene.
and output values
(45° = the same). Bar
along the bottom
displays the effect at
each point.
Lets you select from
a list of valid values.
Click the icon, and fill
in the Add User
Attribute dialog box.
Click it. May show an icon or a word.
Click to select. An “x” displays when selected.
Click and drag to pull
the light around.
Drag to move points
on the graph. Add
points by clicking on
the curve or bar. Edit
a point by right-clicking it.
You can also remove a
point by clicking on it
while holding Ctrl.
Click the down arrow
on the right, then click
to select an option.
For more information, see the
Extending Mari chapter in the
Mari User Guide.
Entry box Lets you type an
Horizontal
slider
Incrementers Lets you increment a
entry.
Slides along a range
of valid values.
value up or down.
Click inside the box
and type a valid entry.
Click and drag left
(more) or right (less).
Click up or down
arrows to increment
up or down.
Often combined with a slider and
reset button.
Often combined with an entry box
(that shows the value) and reset
button.
Page 9
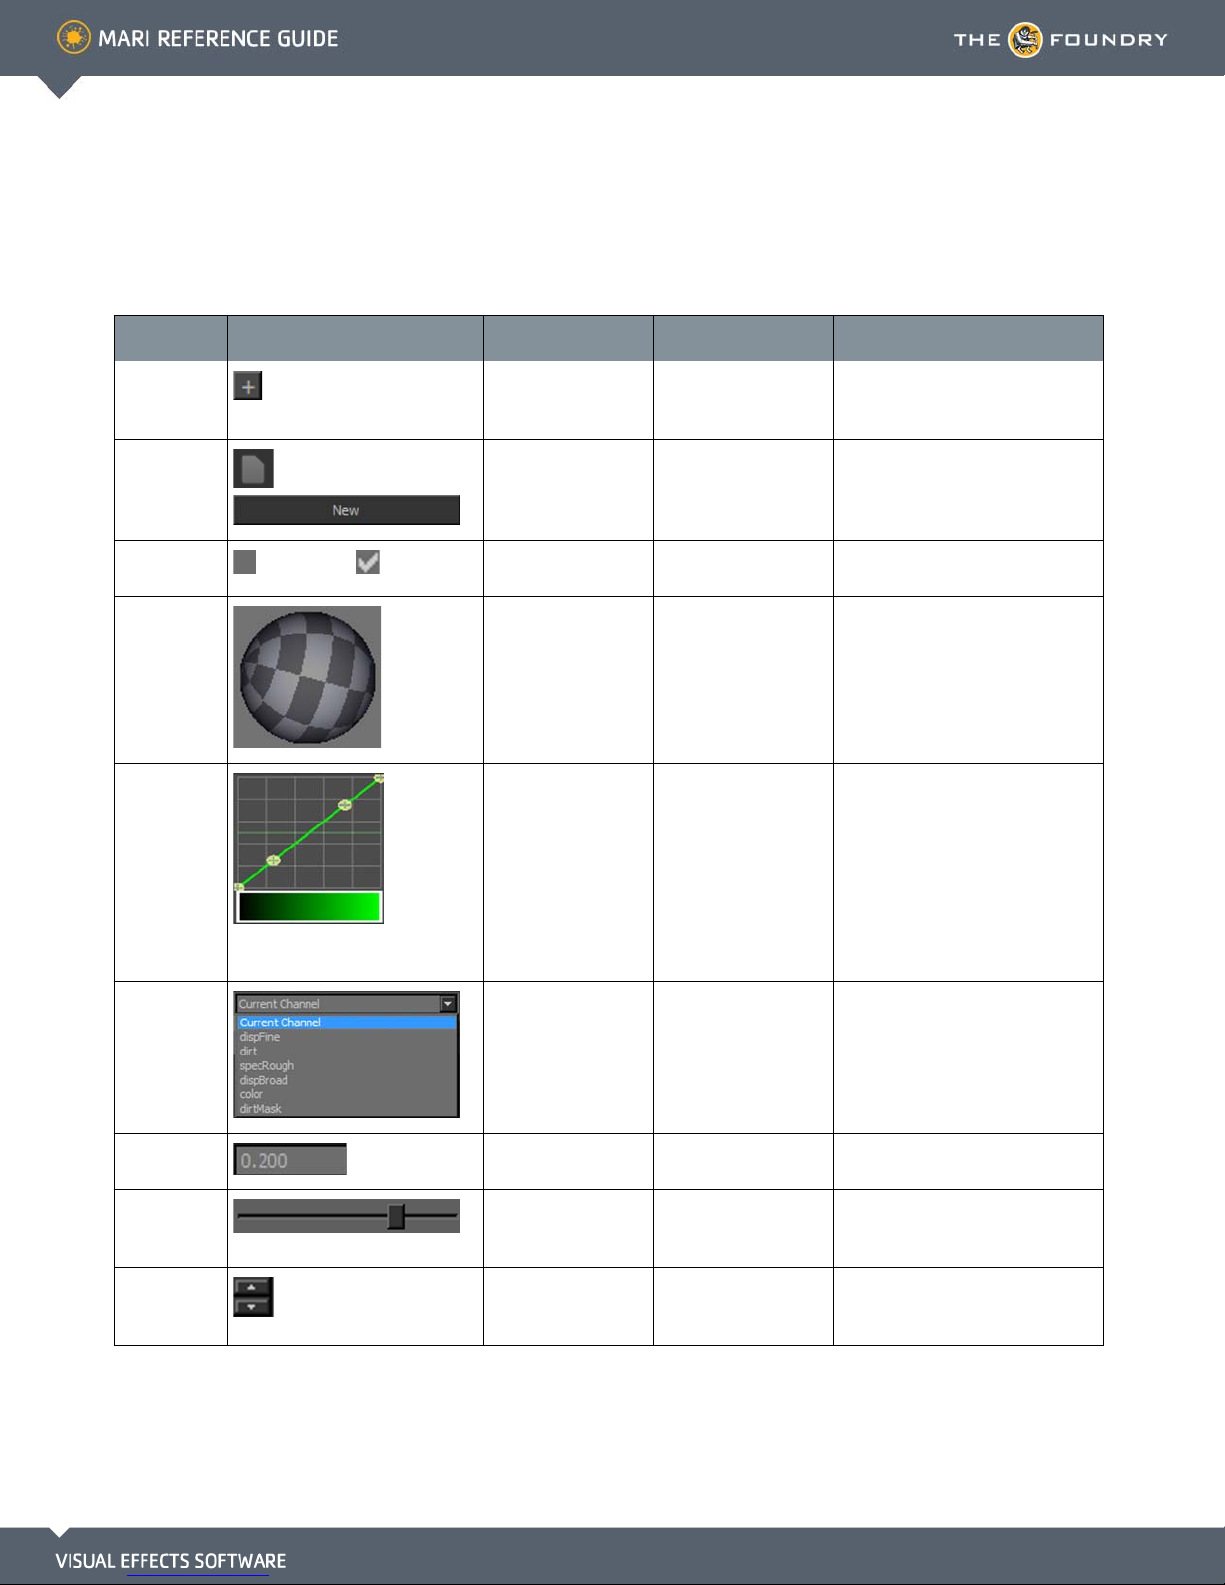
Control What it looks like What it does How to use it Notes
TYPES OF CONTROLS
9
List Lets you select from
a list of valid values.
On/Off Indicator
Option
buttons
Remove
attribute
Reset button Reset to the default. Click the icon. Often combined with an entry box
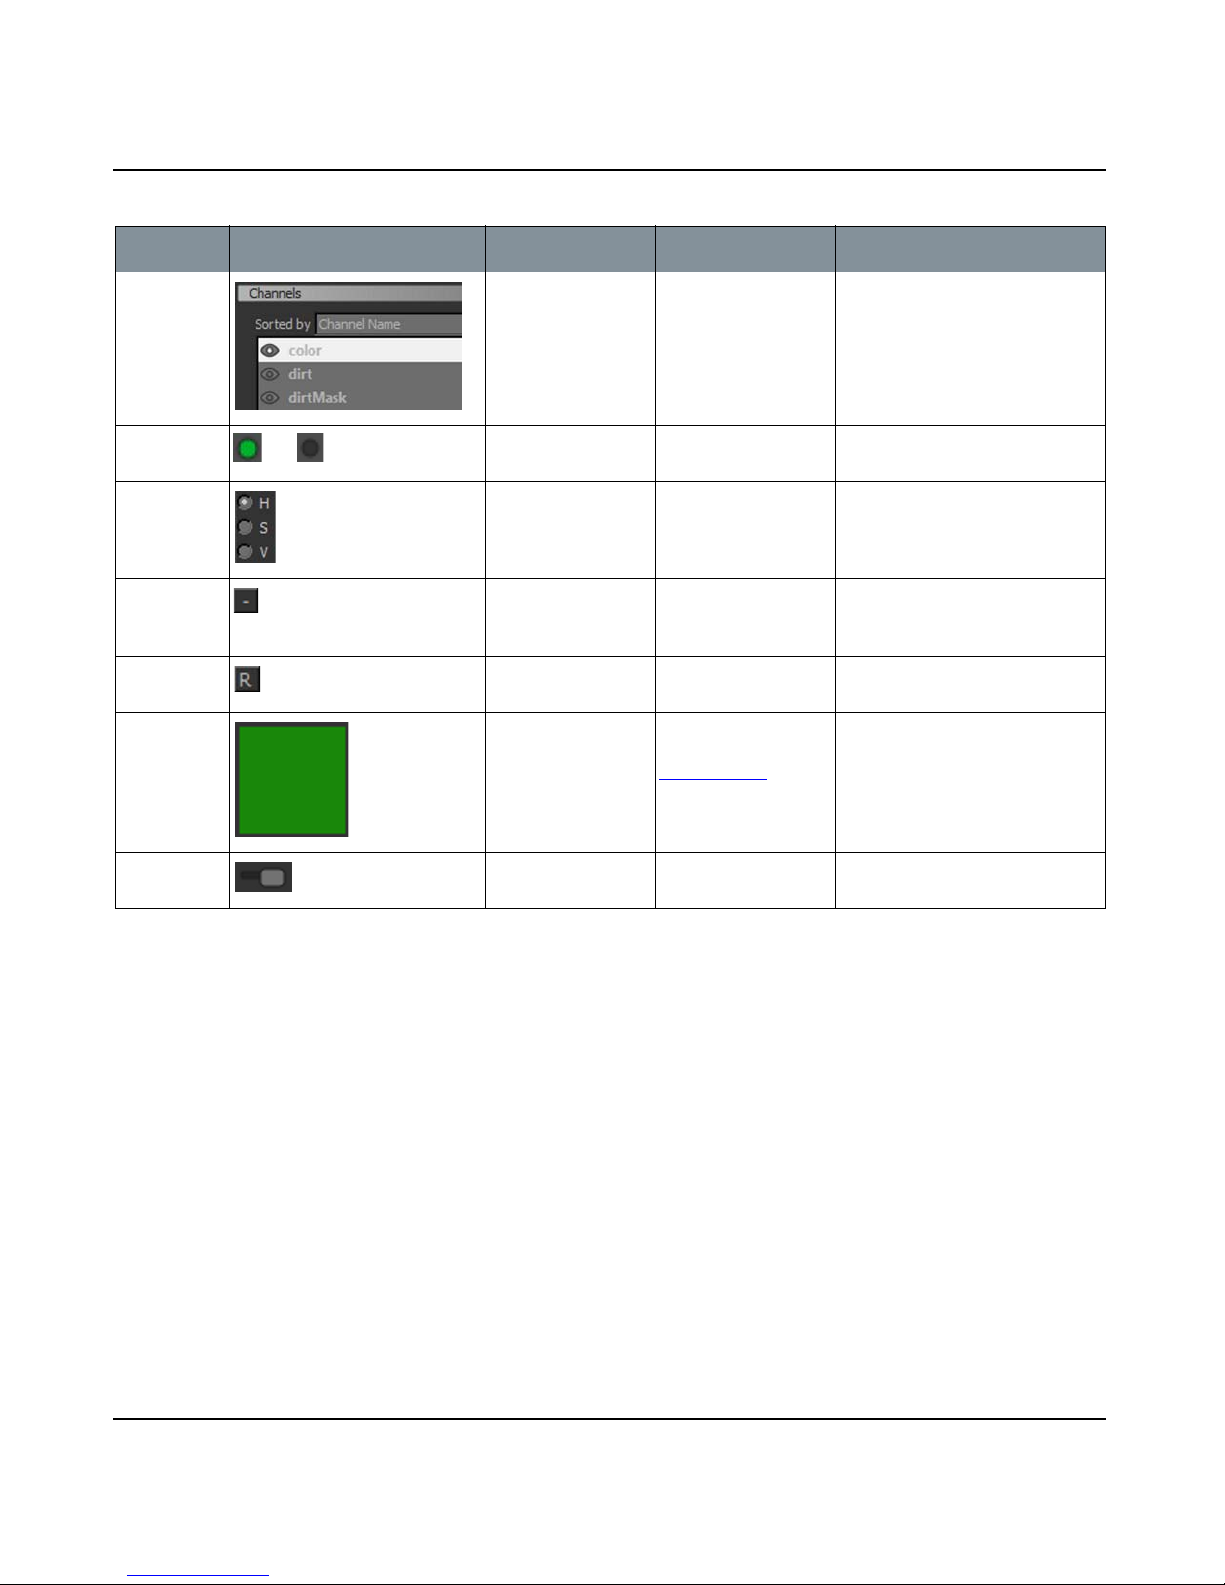
Swatch
Switch Turns an option on
on, off
Shows whether an
option is on or off
Lets you select
mutually exclusive
options.
Lets you remove an
attribute from a
property.
Displays the
currently selected
color, and lets you
select a different
color.
or off.
Click to select an
option.
Look at it. Often combined with a switch.
Click to select which
option you want.
Click the icon, then
click Remove to confirm.
Click to select a color
from the
Colors Palette
Click and drag right
(on) or left (off).
.
Circle is filled when selected.
Sometimes called “radio buttons”.
and slider.
Often combined with an On/Off
indicator.
The Foundry
Mari 2.0v1
Page 10
Control What it looks like What it does How to use it Notes
TYPES OF CONTROLS
10
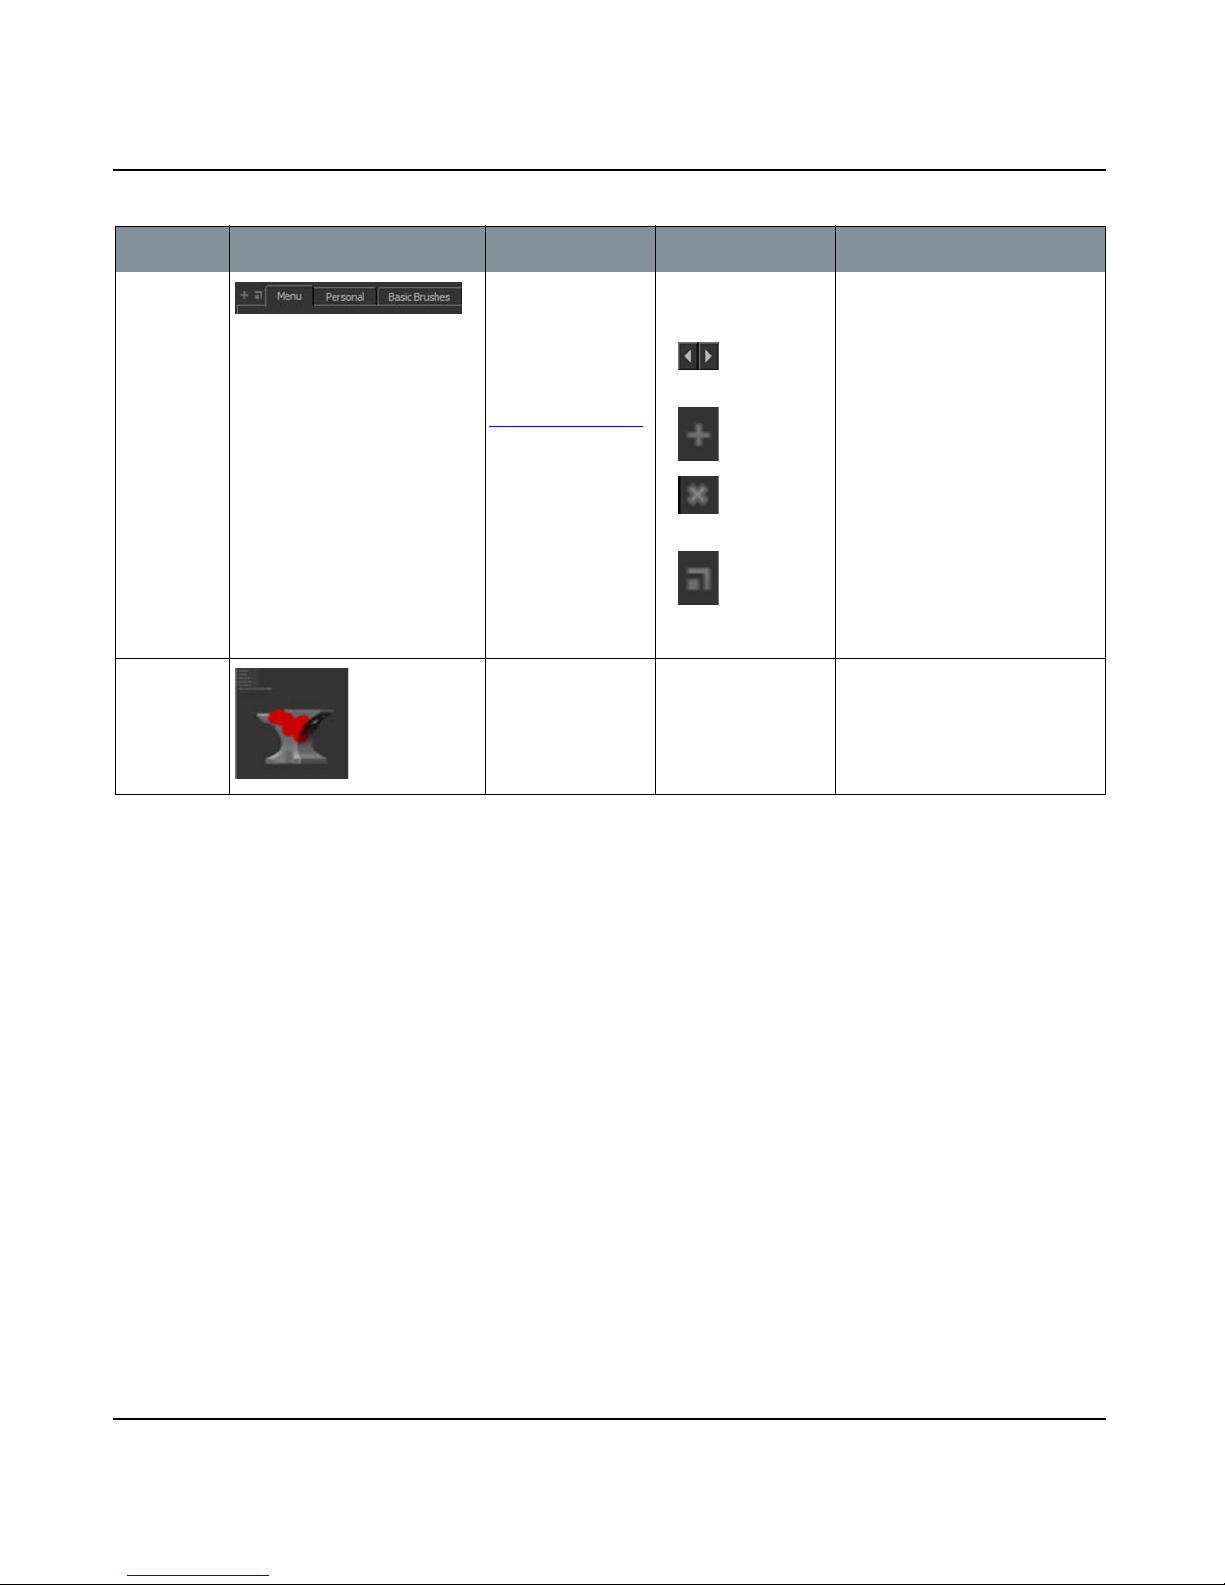
Tabs Displays several
groups of the same
kind of information,
such as different
categories of brush
tips in the
Brush Editor Palette
Thumbnail Displays a thumbnail
preview of a selected
feature or function.
Click:
• a tab to view it
• to view the
previous or next tab
.
• to add a tab
• to delete a
tab
• to open the
current tab in a
separate window
Look at it.
The Foundry
Mari 2.0v1
Page 11
3 PROJECT FUNCTIONS
Function How to access it What it does
New project •
Menubar
Keyboard
•
Projects tab
•
Projects tab
•
New
Toolbar
•
| File > New
| Ctrl+N
| New button
|
Right-click
|
Creates a new project. New Project Dialog
>
Opens this dialog
box
Box
Notes
Name the project, select
options, and add geometry.
Open a project •
Open recent
project
Save project •
Close project •
Delete project •
Open Archive •
Archive Project •
Copy (Duplicate)
Project
Projects tab
Open
Projects tab
•
•
Menubar
<project name>
Menubar
Keyboard
•
Toolbar
•
Menubar
Keyboard
•
Toolbar
•
| File > Open >
| File > Save
| Ctrl+S
|
| File > Close
| Ctrl+W
|
Projects tab
Projects tab
•
Delete
Projects tab
button
Projects tab
•
Open Archive
Projects tab
button
Projects tab
•
Archive
Projects tab
•
Projects tab
•
Copy
|
Right-click
|
Double-click
| Delete button
|
Right-click
| Open Archive
|
Right-click
| Archive
|
Right-click
| Copy button
|
Right-click
>
>
>
>
>
Opens the selected project
(the project you rightclicked on).
Opens a project, from a list
of the last 10 projects
opened.
Saves the current project.
Closes the current project. Save Changes
Before Closing? (if
unsaved changes)
Deletes the selected project
from disk.
Opens a project from an
archive file.
Saves the selected project to
disk as a Mari archive (.mra)
file.
Creates a copy of the
selected project.
The new copy appears in the
Projects tab.
Import Archive
The archive includes all the
supporting files required for
the project.
Page 12
4 PREFERENCE FUNCTIONS
Function How to access it What it does
Set preferences
Menubar
| Edit > Preferences Lets you set general prefer-
ences for Mari — cache size,
plug-ins, autosave frequency, and so on.
Opens this dialog
box
Mari Preferences
Dialog Box
Notes
Edit toolbars
Edit shortcuts
Configure
Heads-Up
Display
Menubar
Menubar
Menubar
| Edit > Toolbars Lets you create and edit cus-
tom toolbars.
| Edit > Shortcuts Lets you add or edit keyboard
shortcuts.
| Edit > HUD Manager Lets you set what information
Mari shows in the Heads-Up
Display (HUD) behind the
model on the canvas.
Manage Toolbar
Dialog Box
Manage Keyboard
Shortcuts Dialog Box
HUD Manager Dialog
Box
Page 13
5 SELECTION FUNCTIONS
Function How to access it What it does
Object selection
mode
• Selection toolbar |
Menubar
•
Object Mode
•Right-click
Object Mode
| Selection >
| canvas >
Sets Mari to select whole
objects.
Opens this
dialog box
Notes
Patch selection
mode
Faces selection
mode
Hide unselected
areas
• Selection toolbar |
Menubar
•
Patch Mode
Right-click
•
Patch Mode
• Selection toolbar |
Menubar
•
Face Mode
Right-click
•
Face Mode
Menubar
•
Hide Unselected
Right-click
•
Visibility > Hide
Unselected
Right-click
•
ette > Hide Unselected
Keyboard
•
•
Mouse
| Selection >
| canvas >
| Selection >
| canvas >
| Selection >
| canvas >
| Patches Pal-
| Shift+H
|
Sets Mari to select patches
on objects.
Sets Mari to select areas on
the objects.
Hides the unselected areas
on the canvas.
For the mouse gesture: press and
hold \, click and drag in the direction indicated. (A thin red line
traces gestures onscreen. Mari
1.2v1
Page 14
Function How to access it What it does
Hide selected
areas
Menubar
•
Hide Selected
Right-click
•
Visibility > Hide Selected
Right-click
•
ette > Hide Selected
Patches
Keyboard
•
•
Mouse
| Selection >
| canvas >
| Patches Pal-
| H
|
Hides the selected areas on
the canvas.
Opens this
dialog box
SELECTION FUNCTIONS
Notes
For the mouse gesture: press and
hold \, click and drag in the direction indicated. (A thin red line
traces gestures onscreen.
14
Show selected
areas
Show all areas •
Show whole
object
Menubar
•
Show Selected
Right-click
•
Visibility > Show
Selected
Right-click
•
ette > Show Selected
Patches
Menubar
Show All
Right-click
•
Visibility > Show All
Right-click
•
ette > Show All Patches
Keyboard
•
Mouse
•
•
Menubar
Show Entire Object
Right-click
•
Visibility > Show Entire
Object
| Selection >
| canvas >
| Patches Pal-
| Selection >
| canvas >
| Patches Pal-
| Ctrl+Shift+H
|
| Selection >
| canvas >
Shows the selected areas on
the canvas.
Displays all areas, selected
or not, on the canvas.
Shows all area, selected or
not, on only the selected
object.
For the mouse gesture: press and
hold \, click and drag in the direction indicated. (A thin red line
traces gestures onscreen.
The Foundry
Mari 2.0v1
Page 15
Function How to access it What it does
Select all areas •
Menubar
Select All
Right-click
•
Selection > Select All
Right-click
•
ette > Select All Patches
Button
•
>
| Selection >
| canvas >
| Patches Pal-
| Patches Palette
Selects all areas in the
model, depending on your
current selection mode
(objects, patches, or faces)
Opens this
dialog box
Notes
SELECTION FUNCTIONS
15
De-select all
areas
Invert selection
of areas
Select visible
areas
Lock unselected
areas
Keyboard
•
Menubar
•
Select None
Right-click
•
Selection > Select None
Right-click
•
ette > Select None
Keyboard
•
•
Menubar
Select Invert
Right-click
•
Selection > Select Invert
Right-click
•
ette > Select Invert
Patches
Keyboard
•
Menubar
•
Select Visible
Right-click
•
Selection > Select Visible
Right-click
•
ette > Select Visible
Patches
•Menubar
Lock Unselected
•Right-click
Locking > Lock
Unselected
•Right-click
ette > Lock Unselected
Patches
| Ctrl+A
| Selection >
| canvas >
| Patches Pal-
| Ctrl+E
| Selection >
| canvas >
| Patches Pal-
| Ctrl+I
| Selection >
| canvas >
| Patches Pal-
| Selection >
| canvas >
| Patches Pal-
De-selects all areas on the
model.
De-selects the current
selection and selects everything currently unselected.
Selects only areas that
aren't hidden.
Locks unselected patches so
they cannot be edited.
Depends on your current selection
mode (either objects, patches, or
faces) for the scope of inversion.
For example, in face mode, the
unselected faces become selected
and vice versa.
The Foundry
Mari 2.0v1
Page 16
Function How to access it What it does
Lock selected
areas
Menubar
•
Lock Selected
Right-click
•
Locking > Lock Selected
Right-click
•
ette > Lock Selected
Patches
Button
•
>
| Selection >
| canvas >
| Patches Pal-
| Patches Palette
Locks selected areas, so
they cannot be painted.
Opens this
dialog box
Notes
SELECTION FUNCTIONS
16
Unlock selected
areas
Lock all areas •
Unlock all areas •
Unlock everything •
Menubar
•
Unlock Selected
Right-click
•
Locking > Unlock
Selected
Right-click
•
ette > Unlock Selected
Patches
Button
•
>
Menubar
Lock All
Right-click
•
Locking > Lock All
Right-click
•
ette > Lock All Patches
Menubar
Unlock All
Right-click
•
Locking > Unlock All
Right-click
•
ette > Unlock All Patches
Menubar
Unlock Entire Object
Right-click
•
Locking > Unlock Entire
Object
| Selection >
| canvas >
| Patches Pal-
| Patches Palette
| Selection >
| canvas >
| Patches Pal-
| Selection >
| canvas >
| Patches Pal-
| Selection >
| canvas >
Unlocks selected locked
areas, so they are again
paintable.
Locks all areas, so they cannot be painted.
Unlocks all locked areas, so
they are again paintable.
Unlocks everything on the
current object, regardless of
whether it’s a face, patch, or
channel.
Create selection
group for patches
The Foundry
Right-click
•
Create Patch Selection
Set
| canvas >
Creates a new selection set
consisting of whichever
patches you currently have
selected.
Creates a new selection set in the
Patches Palette
Mari 2.0v1
Page 17
Function How to access it What it does
Create selection
group
Right-click
•
Create Selection Group
Button
•
Palette >
| canvas >
| Selection Groups
Creates a new selection
group to save your selection modes.
Opens this
dialog box
SELECTION FUNCTIONS
Notes
You can create selection groups in
any selection mode (objects,
patches, or faces).
17
Reselect
selection group
Lock the selection
group
Unlock the
selection group
Hide the selection
group
Right-click
•
group in Selection
Groups Palette > Select
Selection Group
Button
•
Palette >
Right-click
•
group in Selection
Groups Palette > Lock
Selection Group
Button
•
Palette >
Right-click
•
group in Selection
Groups Palette > Unlock
Selection Group
Button
•
Palette >
Right-click
•
group in Selection
Groups Palette > Hide
Selection Group
Button
•
| selection
| Selection Groups
| selection
| Selection Groups
| selection
| Selection Groups
| selection
| Selection Groups
Reselects the current selection group.
Locks the selection group.
Unlocks the selection group.
Hides the contents of the
selection group.
Palette >
The Foundry
Mari 2.0v1
Page 18
Function How to access it What it does
Show the
selection group
Right-click
•
group in Selection
Groups Palette > Show
Selection Group
Button
•
Palette >
| selection
| Selection Groups
Shows the contents of the
selection group.
Opens this
dialog box
Notes
SELECTION FUNCTIONS
18
Remove the
selection group
•Right-click
group in Selection
Groups Palette > Remove
Selection Group
• Button
Palette >
| selection
| Selection Groups
The Foundry
Mari 2.0v1
Page 19
6 OBJECT FUNCTIONS
Function How to access it What it does
Add object •
Menubar
Object
Right-click
•
Add Object
Button
•
| Objects > Add
| Objects Palette >
| Objects Palette >
Adds a new object to the
project.
Opens this
dialog box
Add Objects
Notes
Remove object •
Add object
version
Rename object
version
Remove object
version
Calculate
ambient occlusion
Reset Move
Object - single
object
Reset Move
Object - all
objects
Menubar
Object
Right-click
•
Remove Object
Button
•
•
Right-click
Add Object Version
•
Right-click
Rename Object Version
Right-click
•
Remove Object Version
•
Menubar
Occlusion
Right-click
•
Ambient Occlusion
Mouse | Shift-click
•
object
Keyboard
•
| Objects > Remove
| Objects Palette >
| Objects Palette >
| Objects Palette >
| Objects Palette >
| Objects Palette >
| Objects > Ambient
| Objects Palette >
| ’ Pressing the apostrophe key
on the
Removes the selected object
from the project.
Lets you select a file containing the new object version data.
Renames the current object
version.
Deletes the current object
version.
Calculates the ambient
occlusion for the object. This
is required for any operations that use the ambient
occlusion data (such as
using ambient occlusion
masking).
Shift-click on the object
resets that object to its
original position.
resets all objects back to
their original positions.
Projects must always have at
least one object.
Add Version
Objects must always have at
least one version.
This can take a long time,
depending on the complexity
of the model.
Page 20
7 CHANNEL FUNCTIONS
Function How to access it What it does
Add channel •
Menubar
Right-click
•
Add Channel
Button
•
| Channels > Add Channel
| in Channels Palette >
| Channels Palette >
Adds a new channel to the
current project.
Opens this
dialog box
Add Channel
Dialog Box
Notes
Create channel
presets
Remove channel •
Convert channel •
Flatten channel
Cut channel
•
Menubar
sets
Right-click
•
Channel Presets
Menubar
Channel
Right-click
•
Remove Channel
Button
•
Menubar
Channel
Right-click
•
Convert Channel
•
Button
•Menubar
Right-click
•
Flatten
•Menubar
Right-click
•
Cut
Keyboard
•
| Channels > Channel Pre-
| Channels > Remove
| Channels Palette >
| Channels > Convert
| Channels Palette >
| Channels > Flatten
| Channels > Cut
| Ctrl+X
| in Channels Palette >
| in Channels Palette >
| in Channels Palette >
| in Channels Palette >
| in Channels Palette >
Allows you to create a new
channel preset to use as a
template for new channels.
Removes the selected channel,
and any layers associated with
it, from the channels list.
Changes the color depth of
the channel to either 8bit
(Byte), 16bit (Half), or 32bit
(Float).
Cuts the channel and all associated layers from the channels list and places it in the
clipboard.
Channel Presets Dialog
Box
Convert Type
Dialog Box
Click the checkbox for
channels you want to
add, and click OK. You
can customize available categories of
channel presets using
an XML file in a folder
specified in your preferences.
Determines number of
pixels per RGB channel.
Copy channel
•Menubar
| Channels > Copy
•Right-click
Copy
•Keyboard
| Ctrl+C
| in Channels Palette >
Copies the channel, and all
associated layers from the
channels list and places it in
the clipboard.
Page 21
CHANNEL FUNCTIONS
21
Paste channel
Export current
channel
Export all channels
Export everything •
Flatten and
export the current channel
•Menubar
•Right-click
Paste
•Keyboard
•
Menubar
rent Channel
Right-click
•
Export Current Channel
Right-click
•
Export Current Channel
•
Menubar
Export All Channels
Right-click
•
Export All Channels
Right-click
•
Export > Export All Channels
Menubar
Export Everything
Right-click
•
Export Everything
Right-click
•
Export > Export Everything
•
Menubar
tened > Export Current Channel
Flattened
Right-click
•
tened > Export Current Channel
Flattened
•
Right-click
Export Flattened > Export Current
Channel Flattened
| Channels > Paste
| in Channels Palette >
| Ctrl+V
| Channels > Export Cur-
| canvas > Export >
| in Channels Palette >
| Channels > Export >
| canvas > Export >
| in Channels Palette >
| Channels > Export >
| canvas > Export >
| in Channels Palette >
| Channels > Export Flat-
| canvas > Export Flat-
| in Channels Palette >
Pastes any cut or copied
channel and associated layers
from the clipboard to the
channels list.
Exports the current channel to
a series of files.
Exports all the channels in the
channels palette to a series of
files.
Exports the channels for all
the objects in your project to
a series of files.
Flattens the current channel
and exports it to a series of
files.
Export Dialog
Box
Export Dialog
Box
Export Dialog
Box
Export Dialog
Box
Flatten and
export all channels
The Foundry
•
Menubar
tened > Export All Channels Flattened
Right-click
•
tened > Export All Channels Flattened
Right-click
•
Export Flattened > Export All Channels Flattened
| Channels > Export Flat-
| canvas > Export Flat-
| Channels Palette >
Flattens all the channels in the
channels palette and exports
it to a series of files.
Export Dialog
Box
Mari 2.0v1
Page 22
CHANNEL FUNCTIONS
22
Flatten and
export everything
Import into a
layer stack
Import into a new
channel
Resize channel
Lock channel
•
Menubar
tened > Export Everything Flattened
Right-click
•
tened > Export Everything Flattened
Right-click
•
Export Flattened > Export Everything Flattened
•
Menubar
Import into Layer Stack
•Right-click
Import into Layer Stack
Right-click
•
Import > Import into Layer Stack
•
Menubar
Import into New Channel
Right-click
•
Import into New Channel
Right-click
•
Import > Import into New Channel
•Menubar
Right-click
•
Resize
•Menubar
•Right-click
Palette > Lock Channel
• Button
| Channels > Export Flat-
| canvas > Export Flat-
| Channels Palette >
| Channels > Import >
| canvas > Import >
| in Channels Palette >
| Channels > Import >
| canvas > Import >
| in Channels Palette >
| Channels
| in Channels Palette >
| Channels > Lock Channel
| channel in Channels
| Channels Palette >
>
Resize
Flattens the channels for all
objects in your project and
exports them to a series of
files.
Imports the file as layers into
the layer stack of your current, selected channel.
Import the file as a new channel in the Channels palette.
Resize options are:
• 256x256
• 512x512
• 1024x1024
• 2048x2048
• 4096x4096
• 8192x8192
• 16384x16384
• 32768x32768
•Half Size
•Double Size
Lock the selected channel so
that the channel nor any of
the layers in the associated
layer stack can be edited or
deleted.
Export Dialog
Box
Import Dialog
Box
Import Dialog
Box
Lock icons in the Chan-
nels Palette show the
current state of the
channel.
The Foundry
Mari 2.0v1
Page 23
CHANNEL FUNCTIONS
23
Unlock channel
Lock all channels
Unlock all channels
View the Next
Channel
•Menubar
nel
•Right-click
Palette > Unlock Channel
• Button
•Menubar
Channels
•Right-click
Lock All Channels
•
Menubar
Channels
Right-click
•
Unlock All Channels
•
Menubar
Right-click
•
Next Channel
Keyboard
•
•
Mouse
| Channels > Unlock Chan-
| channel in Channels
| Channels Palette >
| Channels > Lock All
| Channels Palette >
| Channels > Unlock All
| Channels Palette >
| Channels > Next Channel
| in Channels Palette >
| Page Down
|
Unlocks the selected channel
so that the channel or the layers within the layer stack can
be edited.
Locks all the channels in the
Channels palette, regardless
of what is selected.
Unlock all the channels in the
Channels palette, regardless
of what is selected.
Selects the next channel in the
list.
Lock icons in the Chan-
nels Palette show the
current state of the
channel.
In addition to the
unlock options listed
here, you can also
unlock channels by
selecting Unlock Entire
Object.
View the Previous
Channel
Snapshot all
channels
Snapshot the current channel
•Menubar
Channel
•Right-click
Previous Channel
•Keyboard
•Mouse
•
Menubar
Snapshot All Channels
Right-click
•
Snapshots > Snapshot All Channels
•
Menubar
Snapshot Current Channel
Right-click
•
Snapshots > Snapshot Current
Channel
| Channels > Previous
| in Channels Palette >
| Page Up
|
| Channels > Snapshots >
| in Channels Palette >
| Channels > Snapshots >
| in Channels Palette >
Selects the previous channel
in the list.
Takes snapshots of all the
channels in the channels palette.
Takes snapshots of only the
current selected channel.
The Foundry
Mari 2.0v1
Page 24
CHANNEL FUNCTIONS
24
Manage snapshots
Delete all snapshots
•
Menubar
Manage Snapshots
Right-click
•
Snapshots > Manage Snapshots
•Menubar
Delete All Snapshots
•Right-click
Snapshots > Delete All Snapshots
| Channels > Snapshots >
| in Channels Palette >
| Channels > Snapshots >
| in Channels Palette >
Opens the Snapshots Palette.
Deletes all the snapshots
taken for the current project.
The Foundry
Mari 2.0v1
Page 25
8 LAYER FUNCTIONS
Function How to access it What it does
Add new layer
•Menubar
Layer
Right-click
•
Add New Layer
•
Button
| Layers > Add New
| in Layers Palette >
| Layers Palette >
Adds a new layer to the
layers list.
Opens this dialog
box
Notes
Add adjustment layer
Add procedural layer
Cut layer or layer mask
Copy layer or layer
mask
•Menubar
ment Layer
•Right-click
ette > Add Layer Adjustment
•Button
•Menubar
dural Layer
Right-click
•
Add Procedural Layer
Button
•
•Menubar
•Right-click
ette > Cut
•Menubar
> Cut
•Right-click
Palette > Layer Mask > Cut
•Menubar
•Right-click
ette > Copy
•Menubar
> Copy
•Right-click
Palette > Layer Mask > Copy
| Layers > Add Adjust-
| layer in Layers Pal-
| Layers Palette >
| Layers > Add Proce-
| in Layers Palette >
| Layers Palette >
| Layers > Cut
| layer in Layers Pal-
| Layers > Layer Mask
| layer mask in Layers
| Layers > Copy
| layer in Layers Pal-
| Layers > Layer Mask
| layer mask in Layers
Adds the selected filter as
an Adjustment layer to
the layers list.
Adds the selected Basic,
Environment, Geometry,
or Procedural layer to the
layers list.
Cuts the layer from the
layers list to allow you to
paste it elsewhere in the
project or temporarily
remove it.
Copies the layer from the
layers list to allow you to
paste it elsewhere in the
project.
Following the arrows
in the Add Adjustment Layer menu
leads to a choice of
25 adjustment layers.
Following the arrows
in the Add Procedural Layer menu
leads to a choice of
27 procedurals.
Page 26
Function How to access it What it does
Paste layer or layer
mask
• Menubar
•Right-click
ette > Paste
• Menubar
> Paste
•Right-click
Palette > Layer Mask > Paste
| Layers > Paste
| layer in Layers Pal-
| Layers > Layer Mask
| layer mask in Layers
Pastes a cut or copied
layer into the selected
location in the project’s
Layers Palette. Layers can
be paste as a copy in the
layer list, or as a new
layer in a mask group or
adjustment stack.
Opens this dialog
box
LAYER FUNCTIONS
Notes
26
Duplicate layer
Remove layers •
Merge layers •
Add empty layer group
Group layers •
Flatten layer group
Button
•
•
•Right-click
•Button
•Right-click
| Layers Palette >
Right-click
ette > Remove Layers
Button
Right-click
ette > Merge Layers
Add Layer Group
Right-click
ette > Group Layers
ette > Flatten Layer Group
| layer in Layers Pal-
| Layers Palette >
| layer in Layers Pal-
| in Layers Palette >
| Layers Palette >
| layer in Layers Pal-
| layer in Layers Pal-
Creates an exact copy of
the selected layer.
Removes the selected
layer from the current
project.
Merges two or more layers together into a single
new layer.
Adds an empty layer
group, which allows you
to add layers, masks,
adjustments or procedurals within a single layer
group.
Gathers multiple selected
layers together under a
single group.
Reduces multiple layers
into a single layer, where
all the textures are still
present.
’Copy’ is added to the
layer name to denote
which layer is the
duplicate.
Any masks or layer
groups contained in
the selection will also
be merged into the
layer and are no longer displayed as
masks or groups.
These layer groups
can be flattened to
create a single layer.
Selected layers are
located under a parent layer, which is
given a ‘group’ name.
The Foundry
Mari 2.0v1
Page 27
Function How to access it What it does
Add mask
• Menubar
> Add Mask
•Right-click
ette > Layer Mask > Add Layer
Mask
| Layers > Layer Mask
| layer in Layers Pal-
Adds a layer mask to the
selected layer. Choose to
Reveal All, Hide All, or to
create From Alpha.
Opens this dialog
box
LAYER FUNCTIONS
Notes
27
Bake mask •
Remove mask •
Make mask group
Flatten mask group
Enable mask
•Button
•
•
• Menubar
•Right-click
• Menubar
•Right-click
• Menubar
•Right-click
| Layers Palette >
Menubar
> Bake Mask
Right-click
ette > Layer Mask > Bake Mask
Menubar
> Remove Mask
Right-click
ette > Layer Mask > Bake Mask
> Make Mask Group
ette > Layer Mask > Make Mask
Group
> Make Mask Group
ette > Flatten Mask Group
> Enable Mask
Layer Mask > Enable Mask
| Layers > Layer Mask
| layer in Layers Pal-
| Layers > Layer Mask
| layer in Layers Pal-
| Layers > Layer Mask
| layer in Layers Pal-
| Layers > Layer Mask
| layer in Layers Pal-
| Layers > Layer Mask
| in Layers Palette >
Bakes the mask into the
layer, essentially flattening it.
Remove the mask from
the layer.
Creates a mask layer
group from a single mask
on a layer. Requires the
selected layer to have a
mask.
Reduces the masks in a
mask group back into a
single mask on the layer.
Enables the mask to be
viewed on the model.
Clicking the mask
group icon
opens an undocked
mask group palette.
Disable mask
Add secondary adjustment
The Foundry
• Menubar
> Disable Mask
•Right-click
Layers Mask > Disable Mask
• Menubar
Adjustment > Add Secondary
Adjustment
•Right-click
Layers Palette
Adjustment
| Layers > Layer Mask
| in Layers Palette >
| Layers > Secondary
| adjustment layer in
> Secondary
Disables the mask from
being viewed on the
model. Disabling the mask
only temporarily removes
it from view.
Allows you to add another
type of adjustment to the
selected adjustment layer.
To remove the mask
entirely, simply
Remove Mask in the
same menu.
This only applies to
adjustment layers.
The option appears
grayed out if the
selected layer isn’t an
adjustment.
Mari 2.0v1
Page 28
Function How to access it What it does
Remove secondary
adjustment
Add adjustment stack
Bake adjustment stack
• menubar
Adjustment > Remove Secondary Adjustment
•Right-click
Layers Palette > Remove Sec-
ondary Adjustment
• Menubar
Stack > Add Adjustment Stack
•Right-click
ette > Adjustment Stack > Add
Adjustment Stack
• Menubar
Stack > Bake Adjustment Stack
•Right-click
ette > Adjustment Stack > Bake
Adjustment Stack
| Layers > Secondary
| adjustment layer in
| Layers > Adjustment
| layer in Layers Pal-
| Layers > Adjustment
| layer in Layers Pal-
Removes any secondary
adjustment that has been
applied to the selected
adjustment layer
Adds an adjustment stack
to the selected layer. Add
adjustment layer from the
menu of 21 Filter adjustment layers.
Bakes an adjustment
stack down, essentially
flattening the stack into a
single adjustment layer.
Opens this dialog
box
LAYER FUNCTIONS
Notes
This only applies to
adjustment layers.
The option appears
grayed out if the
selected layer isn’t an
adjustment.
This only applies to
layers other than
adjustment layers.
28
Remove adjustment
stack
Enable adjustment
stack
Disable adjustment
stack
Convert to paintable
• Menubar
Stack > Remove Adjustment
Stack
•Right-click
ette > Adjustment Stack >
Remove Adjustment Stack
• Menubar
Stack > Enable Adjustment
Stack
•Right-click
ette > Adjustment Stack >
Enable Adjustment Stack
• Menubar
Stack > Disable Adjustment
Stack
•Right-click
ette > Adjustment Stack > Dis-
able Adjustment Stack
• Menubar
Paintable
•Right-click
ette > Convert to Paintable
| Layers > Adjustment
| layer in Layers Pal-
| Layers > Adjustment
| layer in Layers Pal-
| Layers > Adjustment
| layer in Layers Pal-
| Layers > Convert to
| layer in Layers Pal-
Removes any adjustment
stack that has been
applied to the selected
layer.
If an adjustment stack
has been disabled, this
option re-enables the
adjustment stack.
Disables an adjustment
stack to show the paint
layer result as it is without the stack. Useful for
comparing the model with
and without the adjustment stack.
This only applies to
layers other than
adjustment layers.
This only applies to
adjustment stacks
that have been disabled. If a layer does
not have an adjustment stack, or if the
stack is already
enabled, the option
appears grayed out.
This only applies to
adjustment stacks
that have been added
to a layer. If a layer
does not have an
adjustment stack, the
option appears
grayed out.
The Foundry
Mari 2.0v1
Page 29
Function How to access it What it does
Share As channel
• Menubar
Share As Channel
•Right-click
ette > Sharing > Share As Chan-
nel
| Layers > Sharing >
| layer in Layers Pal-
Copies the selected layer
into the Channels Palette
as a new Channel. Clicking
on the channel icon opens
a new palette with the
shared layer already
listed.
Opens this dialog
box
LAYER FUNCTIONS
Notes
29
Unshare layer
Make shared channel
current
Cache layer
Cache up to here
Uncache layer
Uncache layer up to
here
• Menubar
Unshare Layer
•Right-click
ette > Sharing > Unshare Layer
• Menubar
Make Shared Channel Current
•Right-click
ette > Sharing > Make Shared
Channel Current
• Menubar
•Right-click
ette > Cache Layer
• Menubar
Here
•Right-click
ette > Cache Up To Here
• Menubar
Layer
•Right-click
ette > Uncache Layer
• Menubar
To Here
•Right-click
ette > Uncache Up To Here
| Layers > Sharing >
| layer in Layers Pal-
| Layers > Sharing >
| layer in Layers Pal-
| Layers > Cache Layer
| layer in Layers Pal-
| Layers > Cache Up To
| layer in Layers Pal-
| Layers > Uncache
| layer in Layers Pal-
| Layers > Uncache Up
| layer in Layers Pal-
If you have shared a layer
as a channel, you can
undo the shared state by
selecting this option.
Bakes the layer to speed
up layer performance.
Caching a layer caches it
to the hard-disk.
Caches up to the current
selected layer in the layer
stack.
Release the cached files
and unlocks the layer
stack, allowing it to be
edited again.
Releases the cached files
and unlocks the layer
stack up to the selected
layer, allowing those layers to be edited again.
Unsharing the layer
to remove the shared
state doesn’t remove
the channel from the
Channels Palette. This
need to be done manually.
Export selected layers
• Menubar
Export Selected Layers
•Right-click
ette > Export > Export Selected
Layers
The Foundry
| Layers > Export >
| layer in Layers Pal-
Exports the selected layer
to an external source.
Export Dialog
Box
Mari 2.0v1
Page 30
Function How to access it What it does
Export all layers
• Menubar
Export All Layers
•Right-click
ette > Export > Export All Lay-
ers
| Layers > Export >
| layer in Layers Pal-
Exports all the layers in
the layer stack to an
external source.
Opens this dialog
box
Export Dialog
Box
LAYER FUNCTIONS
Notes
30
Export selected layers
flattened
Export all layers flattened
Import into layer
Import into layer stack
Inspect layer properties •
Refresh layer view
• Menubar
tened > Export Selected layers
Flattened
•Right-click
ette > Export > Export Selected
Layers Flattened
• Menubar
tened > Export All Layers Flattened
•Right-click
ette > Export > Export All Lay-
ers Flattened
• Menubar
Import into Layer
•Right-click
ette > Import > Import into
Layer
• Menubar
Layer Stack
•Right-click
ette > Import > Import into
Layer Stack
Right-click
ette > Layer Properties
•Right-click
Refresh Layer View
| Layers > Export Flat-
| layer in Layers Pal-
| Layers > Export Flat-
| layer in Layers Pal-
| Layers > Import >
| layer in Layers Pal-
| Layers > Import into
| layer in Layers Pal-
| layer in Layers Pal-
| in Layers Palette >
Exports the selected layer
or layers flattened into a
single file to an external
source.
Exports all the layers in
the layer stack flattened
into a single file to an
external source.
Selects a file with paint or
mask data to be imported
into the selected layer.
Selects a file with paint or
mask data to be imported
into the current layer
stack.
Opens a separate window to display the properties of the selected
layer.
Refreshes the entire layer
stack.
Export Dialog
Box
Export Dialog
Box
Import Dialog
Box
Import Dialog
Box
The Foundry
Mari 2.0v1
Page 31

9 PTEX FUNCTIONS
Function How to access it What it does Notes
Double face resolution
Halve face resolution •
Set the world space
face resolution for
the selected face
Set the face resolution for the selected
face
Fill selected faces
with foreground
color
Fill selected faces
with background
color
•
Menubar
Button
•
Menubar
•
Button
Menubar
•
lution
Button
•
Menubar
•
Button
•
•
Menubar
•
Button
Menubar
•
•
Button
| Ptex > Double Face Resolution
| Ptex Toolbar >
| Ptex > Halve Face Resolution
| Ptex Toolbar >
| Ptex > World Space Face Reso-
| Ptex Toolbar >
| Ptex > Set Face Resolution
| Ptex Toolbar >
| Ptex > Fill Faces Foreground
| Ptex Toolbar >
| Ptex > Fill Faces Background
| Ptex Toolbar >
Double the selected face resolution.
Halve the selected face resolution.
Set the world space face resolution for the selected face.
Set the face resolution for the
selected face.
Fill the selected faces with the
foreground color.
Fill the selected faces with the
background color.
Page 32

10 PATCH FUNCTIONS
Function How to access it What it does
Extract patch •
Select patches by
number
Copy selected
patches to system clipboard
Paste selected
patch
Copy selected
patch
Menubar
Selected
Right-click
•
Extract Selected
•
Menubar
Right-click
•
Select Range
Menubar
•
to Clipboard
Right-click
•
Copy Indexes to Clipboard
Right-click
•
Copy Indexes to Clipboard
Menubar
•
Right-click
•
Quick Paste
Keyboard
•
Menubar
•
Right-click
•
Quick Copy
Keyboard
•
| Patches > Extract
| canvas > Patches >
| Patches > Select Range
| canvas > Patches >
| Patches > Copy Indexes
| canvas > Patches >
| Patches Palette >
| Patches > Quick Paste
| canvas > Patches >
| Ctrl+V
| Patches > Quick Copy
| canvas > Patches >
| Ctrl+C
Extracts the selected
patches as images, and displays them in the Image
Manager Palette.
Lets you enter a series of
patch numbers in order to
select those patches.
Copies selected patch IDs to
the system clipboard.
Pastes a copied patch (from
the clipboard).
Copies the selected patch. Only copies the paint
Opens this
dialog box
Select Patches
Notes
You can only extract
images up to 8K in resolution.
Copies the UDIM of the
selected patch(es) to
the system clipboard,
for use in other applications.
baked onto the patch
(does not copy unbaked
paint).
Copy textures •
Fill patches with
black
Fill patches with
gray
Fill patches with
white
Menubar
Right-click
•
Copy Textures
•
Menubar
Right-click
•
> Black
Menubar
•
Right-click
•
> Gray
•Menubar
| Patches > Copy Textures
| Patches > Fill > Black
| Patches > Fill > Gray
| Patches > Fill > White
•Right-click
> White
| canvas > Patches >
| canvas > Patches > Fill
| canvas > Patches > Fill
| canvas > Patches > Fill
Copies multiple textures
from selected patches.
Fills the patch with black
paint.
Fills the patch with gray
paint.
Fills the patch with white
paint.
Copy Multiple
Textures Dialog Box
Page 33

Function How to access it What it does
Fill patches with
foreground color
Fill patches with
background color
Fill with patches
with transparency
Copy the patch
mask
Menubar
•
ground
Right-click
•
> Foreground
Menubar
•
ground
Right-click
•
> Background
Menubar
•
parent
Right-click
•
> Transparent
Menubar
•
Image Manager
Right-click
•
Mask to Image Manager
Right-click
•
ette > UV Mask to Image Manager
| Patches > Fill > Fore-
| canvas > Patches > Fill
| Patches > Fill > Back-
| canvas > Patches > Fill
| Patches > Fill > Trans-
| canvas > Patches > Fill
| Patches > UV Mask to
| canvas > Patches > UV
| patch in Patches Pal-
Paints the selected patch(es)
with the current foreground
color.
Paints the selected patch(es)
with the current background
color.
Makes the selected patch(es)
transparent.
Copies the outline (mask) of
the UVs on the patch to the
Image Manager.
Opens this
dialog box
PATCH FUNCTIONS
Notes
33
Copy the patches
wireframe
Extend the patch
bleed area
Flip patch vertically
Flip patch horizontally
Rotate patch 90
degrees counterclockwise
Menubar
•
to Image Manager
Right-click
•
Wireframe to Image Manager
•
Menubar
Edges
Right-click
•
Bleed Patch Edges
Right-click
•
Bleed Patch Edges
•
Menubar
Flip Vertical
Right-click
•
Transform > Flip Vertical
Menubar
•
Flip Horizontal
Right-click
•
Transform > Flip Horizontal
Menubar
•
Rotate 90 CCW
Right-click
•
Transform > Rotate 90 CCW
| Patches > UV Wireframe
| canvas > Patches > UV
| Patches > Bleed Patch
| canvas > Patches >
| in Patches Palette >
| Patches > Transform >
| canvas > Patches >
| Patches > Transform >
| canvas > Patches >
| Patches > Transform >
| canvas > Patches >
Copies the wireframe of the
UVs on the patch to the
Image Manager.
Extends the bleed area at
the edges of the UV patches
out to the edge of the entire
patch.
Flips the paint on the
selected patch(es) vertically.
Flips the paint on the
selected patch(es) horizontally.
Rotates the paint on the
selected patch(es) 90
degrees counterclockwise.
The Foundry
Mari 2.0v1
Page 34

Function How to access it What it does
Rotate patch 90
degrees clockwise
Rotate patch 180
degrees
Mirror patch from
left to right
Mirror patch from
right to left
Mirror patch from
top to bottom
Mirror patch from
bottom to top
Link selected
patches
Unlink selected
patches
Menubar
•
Rotate 90 CW
Right-click
•
Transform > Rotate 90 CW
Menubar
•
Rotate 180
Right-click
•
Transform > Rotate 180
Menubar
•
ror Left to Right
Right-click
•
Mirror > Mirror Left to Right
Menubar
•
ror Right to Left
Right-click
•
Mirror > Mirror Right to Left
Menubar
•
ror Top to Bottom
Right-click
•
Mirror > Mirror Top to Bottom
Menubar
•
ror Bottom to Top
Right-click
•
Mirror > Mirror Bottom to Top
Menubar
•
Selected Patch Images
Right-click
•
Selected Patch Images
Right-click
•
Selected Patch Images
Menubar
•
Selected Patch Images
Right-click
•
Selected Patch Images
Right-click
•
Unlink Selected Patch Images
| Patches > Transform >
| canvas > Patches >
| Patches > Transform >
| canvas > Patches >
| Patches > Mirror > Mir-
| canvas > Patches >
| Patches > Mirror > Mir-
| canvas > Patches >
| Patches > Mirror > Mir-
| canvas > Patches >
| Patches > Mirror > Mir-
| canvas > Patches >
| Patches > Link > Link
| canvas > Link > Link
| Patches Palette > Link
| Patches > Link > Unlink
| canvas > Link > Unlink
| Patches Palette >
Rotates the paint on the
selected patch(es) 90
degrees clockwise.
Rotates the paint on the
selected patch(es) 180
degrees.
Mirrors the paint on the
selected patch(es) from left
to right.
Mirrors the paint on the
selected patch(es) from right
to left.
Mirrors the paint on the
selected patch(es) from top
to bottom.
Mirrors the paint on the
selected patch(es) from bottom to top.
Links patches that have been
selected in the Patches palette. This allows you to
quickly replicate changes
from one patch across multiple patches.
Unlinks any linked patches
that have been selected in
the Patches palette.
Opens this
dialog box
PATCH FUNCTIONS
Notes
A colored box highlights
linked patches in the UV
view.
Removes the colored
box from the unlinked
patches in the UV view.
34
The Foundry
Mari 2.0v1
Page 35

Function How to access it What it does
Selects all
patches linked to
a specific patch
Menubar
•
Linked Patch Images
Right-click
•
Linked Patch Images
Right-click
•
Select Linked Patch Images
| Patches > Link > Select
| canvas > Link > Select
| Patches Palette >
Selects all of the patches
that have been linked to the
specified patch selection,
and highlights them in the
Patches palette.
Opens this
dialog box
PATCH FUNCTIONS
Notes
35
Unlinks all linked
patches
Resize patches •
Menubar
•
All Linked Patch Images
Right-click
•
All Linked Patch Images
Right-click
•
Unlink All Linked Patch Images
Menubar
Selected > Size
Right-click
•
Selected > Size
Right-click
•
Resize Selected > Size
| Patches > Link > Unlink
| canvas > Link > Unlink
| Patches Palette >
| Patches > Resize
| canvas > Resize
| Patches Palette >
Unlinks all linked patches for
the entire project.
Resizes the selected patches
to the chosen size, including
options to double or halve
the size.
The Foundry
Mari 2.0v1
Page 36

11 SHADING FUNCTIONS
Function How to access it What it does
Add new shader •
Duplicate shader •
Menubar
Add New Shader
Right-click
•
Add New Shader
•
Button
Menubar
Shader
Right-click
•
Duplicate Shader
Button
•
| Shading >
| in Shaders Palette >
| Shaders Palette >
| Shading > Duplicate
| in Shaders Palette >
| Shaders Palette >
Adds a new shader from
the choices:
•Phong
• Cook Torrance
•Beckman
•Blinn
•Flat
• Standard Lighting, and
• Choose Diffuse and
Specular.
Makes a copy of the
selected shader.
Opens this dialog
box
Create Shader
Dialog Box when
selecting Choose
Diffuse and
Specular.
Notes
The Choose Diffuse and
Specular option allows
you to create a custom
shader. Refer to the
Create Shader Dialog
Box for more informa-
tion.
Delete shader
Cut shader •
Copy shader •
Paste shader •
Set lighting on
main mesh to flat
•Menubar
Shader
Right-click
•
Remove Shader
Button
•
| Shading > Remove
| Shaders Palette >
Right-click
Palette > Cut
• Ctrl+X
Right-click
Palette > Copy
• Ctrl+C
Right-click
Palette > Paste
• Ctrl+V
Menubar
•
•
Toolbar
| Shading > Flat
|
| in Shaders Palette>
| on shader in Shaders
| on shader in Shaders
| on shader in Shaders
Deletes the selected
shader from the project.
Cuts the shader from the
Shaders palette list and
places it in the clipboard.
Copies the shader from
the Shaders palette list
and places it in the clipboard.
Pastes the cut or copied
shader from the clipboard
into the Shaders palette
list.
Shades all pixels with the
same value.
Default shaders cannot
be cut or pasted.
Default shaders cannot
be copied or pasted.
Page 37

Function How to access it What it does
Set lighting on
main mesh to
basic
Menubar
•
•
Toolbar
| Shading > Basic
|
Applies a basic lighting
model.
Opens this dialog
box
SHADING FUNCTIONS
Notes
37
Set lighting on
main mesh to full
Toggle shadows
in the display
Toggle wireframe
view
Toggle UV image
rendering
Menubar
•
•
Toolbar
Menubar
•
Toolbar
•
•
Menubar
Wireframe
Keyboard
•
•
Toolbar
Menubar
•
UvImage
•
Toolbar
| Shading > Full
|
| Shading > Shadows
|
| Shading > Toggle
| Shift+W
|
| Shading > Toggle
|
Applies a full, configurable lighting model.
Toggles whether to show
the shadows in the display.
Toggles whether to show
the wireframes on the
model.
Shows the patches in the
UV view as they appear
after export, including
the overspill areas.
From within the Lighting
palette, you can also
adjust the four basic
lights.
Mari saves these lighting values with the project.
This does not enable or
disable shadow processing. To enable
shadow processing,
enable Depth Projections in the Preferences.
By default this preference is disabled.
Toggle whole
patch project
The Foundry
•
Menubar
Patch Project
Toolbar
•
| Shading > Toggle Whole
|
Enables painting outside
geometry shell boundaries in UV patches.
This is only available in
UV views.
Mari 2.0v1
Page 38

12 PAINTING FUNCTIONS
Function How to access it What it does
Undo all unbaked
painting
Menubar
•
Painting
• Toolbar |
Mouse
•
| Painting > Clear
|
Undo all painting not yet
baked into the model (still in
the paint buffer).
Opens this
dialog box
Notes
For the mouse gesture: press and
hold \, click and drag in the direction indicated. (A thin red line
traces gestures onscreen.)
Undo •
Redo •
Bake painting into
the model
Show or hide
painting
Show or hide
paintable areas
(not currently
masked out)
Menubar
Keyboard
•
Toolbar
•
Mouse
•
Menubar
Keyboard
•
Toolbar
•
Mouse
•
Keyboard
•
Menubar
•
Mouse
•
Statusbar
•
Keyboard
•
Menubar
•
Toggle Mask Preview
Keyboard
•
• Projection Palette
Preview | MaskPreview
Enabled
| Edit > Undo
| Ctrl+Z
|
|
| Edit > Redo
| Ctrl+Y
|
|
| B
| Painting > Bake
|
|
| . Shows or hides the contents
| Painting >
| ,
| Mask
Undo the last action. For the mouse gesture: press and
hold \, click and drag in the direction indicated. (A thin red line
traces gestures onscreen.)
See also the History View Palette
Redo the last (undone)
action.
Saves the painting as part of
the project.
of the paint buffer (that is,
the unbaked paint).
Shows or hides the current
masking (including all masking currently turned on – the
edge mask, channel mask,
ambient occlusion mask,
depth mask, and backface
mask). When this is on, this
shows paintable areas normally, and unpaintable areas
are colored.
For the mouse gesture: press and
hold \, click and drag in the direction indicated. (A thin red line
traces gestures onscreen.)
See also the History View Palette
For the mouse gesture: press and
hold \, click and drag in the direction indicated. (A thin red line
traces gestures onscreen.)
.
.
Page 39

Function How to access it What it does
Save current
painting as a file
Load previously
saved painting
files
Draw straight line
between two
points
Draw straight line
horizontally or
vertically
Toggle Last Brush
Tip
Menubar
•
Painting
Menubar
•
Painting
Mouse
•
click
Mouse
•
drag
Mouse
•
•
Keyboard
| Painting > Save
| Painting > Load
| Click, then Shift-
| Shift-click and
|
| N
Saves the current unbaked
paint (the contents of the
paint buffer) as an .exr file.
Loads an .exr file and projects it onto the model as the
current painting.
Draws a line with the current
brush between the two
selected points.
Constrains painting to
straight horizontal or vertical lines.
Switches to the last brush
tip used.
Opens this
dialog box
Save Window
Painting
Load Window
Painting
PAINTING FUNCTIONS
Notes
Saves the paint buffer as an .exr
file, and puts it in the Image Man-
ager Palette.
39
The Foundry
Mari 2.0v1
Page 40

13 FILTER FUNCTIONS
Function How to access it What it does
Apply Invert filter •
Apply Luminosity
filter
Apply In Blur
filter
Apply Soften Blur
filter
Menubar
Invert
Menubar
•
Luminosity
Menubar
•
Blur > Blur
Menubar
•
Blur > Soften
| Filters >
| Filters >
| Filters >
| Filters >
Inverts the colors in the
selection’s alpha channel.
Replaces colors with their
“opposite” in the color chart.
For example, replaces a
color with a float value of
0.3 with a color with float
value 0.7.
Outputs just the luminosity
value of each pixel in the
selection. That is, it outputs
a grayscale image based on
the brightness of every pixel
in the original image.
Applies a standard blur to
the selection.
Applies a subtle softening
blur. This is a quick, predefined blur filter. If you
need more control over the
degree or type of blurring,
use either the standard Blur
or Gaussian Blur filters.
Opens this
dialog box
Apply Invert
Apply
Luminosity
Apply Blur You can select the blur radius — the
Apply Soften This filter is not supported with Ptex
Notes
number of pixels Mari uses when calculating the blur value for each pixel.
The higher the radius, the more
blurred the results. If you use a larger
blur radius, you may get slight lines
on the boundaries between patches.
This is an artifact of the way that
Mari handles patch edges.
This filter is not supported with Ptex
channels.
channels.
Apply Gaussian
Blur filter
Menubar
•
Blur > Gaussian
| Filters >
Applies a Gaussian blur.
Compared to the standard
Blur filter, this gives you
much finer control over the
degree of blurring, and the
option of using much higher
blur values.
Apply
Gaussian
You can select the blur radius. The
higher the radius, the more blurred
the results. If you use a higher blur
radius, you may see artifacts along
the boundaries of geometry shells and
UV patches.
This filter is not supported with Ptex
channels.
Page 41

Function How to access it What it does
Apply Gamma
filter
Menubar
•
Gamma
| Filters >
Changes the gamma levels in
the selection.
FILTER FUNCTIONS
Opens this
dialog box
Apply Gamma Do Inverse reverses the gamma con-
Notes
version. That is, a higher setting for
Gamma results in a more washed-out
looking image.
41
Apply sRGB To
Linear Filter
Apply Hue filter •
•
Menubar
sRGB To Linear
Menubar
Hue
| Filters >
| Filters >
Applies an sRGB to linear
colorspace conversion.
Changes the hue, saturation,
and value of the colors on
the model.
Apply sRGB To
Linear
Apply Hue To change the hue of the colors, set
Checking Invert applies a linear to
sRGB colorspace conversion.
the value for Hue. This moves the colors around the color wheel. The rotation value is the degree around the
color wheel that each color shifts,
between 0 and 360 (which both correspond to the original colors). The
options to change the Saturation are:
• Saturation — how much saturation
is applied. Select a multiplier from 0
to 2, where 1.00 is the original saturation value.
• Offset — an offset value to add to
the initial saturation value, before
applying the scale.
You can also edit the Saturation
curve. This controls how the filter
translates current saturation values
to new values. For each input value
along the bottom of the graph, the
output value is set from the position
of the line above that point. Edit the
curve by:
• pulling the anchor points
• clicking between anchor points to
add a new point
• right-clicking to select from a set of
preset values.
You can edit the Scale, Offset and
Value curve for the value of the colors
in the same way.
Apply Brightness
filter
The Foundry
Menubar
•
Brightness
| Filters >
Changes the brightness of
the paint, either overall or
for specific color channels.
You can also change the
contrast.
Apply Brightness
You can either change the brightness
of all color channels at once, or oneby-one. Changing the main Brightness
control changes (overwrites) any
changes you make to brightness values for individual color channels.
Mari 2.0v1
Page 42

Function How to access it What it does
Apply Contrast
filter
Apply Clamp filter •
Apply Levels filter •
Menubar
•
Contrast
Menubar
Clamp
Menubar
Levels
| Filters >
| Filters >
| Filters >
Changes the contrast of the
paint.
Clamps color values to lie
within the specified upper
and lower values.
Changes the color levels in
the paint, by setting the
white point, midtone, and
black point.
FILTER FUNCTIONS
Opens this
dialog box
Apply Contrast You can select the amount of contrast
Apply Clamp Set the Upper Value and Lower Value
Apply Levels You can change the levels of all color
Notes
using the slider.
by adjusting the sliders or entering
values in the entry boxes.
Select the individual Color Component
to clamp in the dropdown menu.
components or each color component
separately. You can set the:
• Color Component - whether this
affects all color components, or a
specific one (Red, Green, or Blue).
• White Point - the upper limit of displayed color intensity. Areas with a
value higher than this are mapped
to 1 (white).
• Midtone - the middle point between
white and black. Mari remaps the
values so that this is the middle of
the range between the white point
and black point. Moving this pushes
the values towards that end of the
spectrum.
• Black Point - the lower limit of displayed color intensity. Areas with a
value lower than this are mapped to
0 (black).
• White Output Level - how strongly
to output the white in the filtered
image. Higher values show the
entire white output, lower values
show decreasing amounts.
• Black Output Level - how strongly
to output the black in the filtered
image. Higher values show the
entire black output, lower values
show decreasing amounts.
42
The Foundry
Mari 2.0v1
Page 43

Function How to access it What it does
Apply Color
Curves filter
Apply Color
Switches filter
Menubar
•
Color Curves
Menubar
•
Color Switches
| Filters >
| Filters >
Changes the color curve for
each color component (RGB)
in the painting.
Turns individual color components on or off.
Opens this
dialog box
Apply Color
Curves
Apply Color
Switches
FILTER FUNCTIONS
Notes
You can also edit each color curve,
controlling how each color component
appears on-screen. This controls how
the filter translates current color values to new values. For each input
value along the bottom of the graph,
the output value is set from the position of the line above that point. Edit
the curve by:
• pulling the anchor points
• clicking between anchor points to
add a new anchor point
• right-clicking to select from a set of
preset values.
Use the checkboxes to select which
color components are displayed.
When Mari applies the filter, it
removes any unchecked color components from the painting.
43
Apply Tone
Mapping filter
Apply Copy
Channel filter
•
Menubar
Tone Mapping
Menubar
•
Copy Channel
| Filters >
| Filters >
Varies the “exposure” of the
painting.
Copies the value from one
RGB color component to the
other two. The result is a
grayscale image with the
intensity values from the
selected component.
Apply Tone
Mapping
Apply Copy
Channel
You can set the:
• White Point — the upper limit of
color intensity displayed; any colors
of greater intensity map to white.
• Exposure — lower exposures give
darker images; higher exposures
give lighter ones.
Select the source component from the
list. When you apply the filter, Mari
copies the selected component over
the other two components.
The Foundry
Mari 2.0v1
Page 44

Function How to access it What it does
Apply Premultiply
Alpha filter
Apply Edge
Detect filter
Apply Emboss
filter
Apply Sharpen
filter
Apply High Pass
Filter
Menubar
•
Premultiply Alpha
Menubar
•
Edge Detect
Menubar
•
Emboss
Menubar
•
Sharpen
Menubar
•
High Pass
| Filters >
| Filters >
| Filters >
| Filters >
| Filters >
Either pre- or post- multiplies the alpha in the
selected image. If you are
painting using an image
without pre-multiplied alpha
onto one with it, use this filter to perform the pre- multiplication, so the images
match and you avoid lines
around the outside of the
patch. Post-multiply works
the same, but in reverse
[removes pre- multiplication
to match images that do not
have pre-multiplied alpha].
Finds “edges” (transitions
between colors) in the image
and heightens them.
Applies an “emboss” effect,
so that textures look
“raised” on the surface.
Removes 'fuzziness' and
clarifies detail in the image.
Removes low frequency
information from the image
while maintaining higher frequency detail.
This can be useful for
quickly creating specular
maps where only the higher
frequency image highlights
are maintained.
FILTER FUNCTIONS
Opens this
dialog box
Apply Premultiply Alpha
Apply Edge
Detect
Apply Emboss This filter is not supported with Ptex
Apply Sharpen You can set the amount of sharpen-
Apply High
Pass
Notes
If the Postmultiply box is checked, the
pre-multiplied alpha is removed.
This filter is not supported with Ptex
channels.
channels.
ing. Higher values mean more sharpening, while a value of 0.00 is the
picture without the filter applied.
This filter is not supported with Ptex
channels.
You can set the kernel size (the
amount of filtering) by adjusting the
Radius.
If you use a large radius, you may get
slight lines on the boundaries
between patches. This is an artifact of
the way that Mari handles patch
edges.
This filter is not supported with Ptex
channels.
44
The Foundry
Mari 2.0v1
Page 45

Function How to access it What it does
Apply Color Correction filter
Menubar
•
Color Correction
| Filters >
Applies a colorspace correction to the current channel
or painting.
Opens this
dialog box
Apply Color
Correction
FILTER FUNCTIONS
Notes
You have the option to use Mari’s
default Configuration File or a custom
one.
Set the colorspace of the current
channel or painting in the Input ColorSpace dropdown.
Set the colorspace correction to apply
to the current channel or painting in
the Output ColorSpace dropdown.
45
Apply Add Noise
filter
Menubar
•
Add Noise
| Filters >
Applies noise to the current
channel or painting.
Apply Add
Noise
Use the Amount slider to adjust how
much noise is applied and select the
component you want to affect from
the Color Component dropdown.
For additive grayscale noise that
modifies the intensity while retaining
the original color, check the Grayscale
checkbox.
You can regenerate the noise using
different random samples by dragging
on the Seed slider.
Adjust the size of the noise applied by
dragging on the Size slider.
The Foundry
Mari 2.0v1
Page 46

14 CAMERA FUNCTIONS
Function How to access it What it does
View all selected
areas
Menubar
•
Keyboard
•
•
Mouse
| Camera > View All
| A
|
Fills the canvas with all
selected areas (or all objects
in the project if nothing is
selected).
Opens this
dialog box
Notes
For the mouse gesture:
press and hold \, click and
drag in the direction indicated. (A thin red line traces
gestures onscreen.)
Load FBX Camera •
Project onto the
front patches from
the current view
Project onto all
images from the
current view
Unproject from the
current view
Set up quick
projection
Menubar
Camera
Menubar
•
Project Front
Menubar
•
Project Through
Menubar
•
Unproject
Menubar
•
Projection Settings
| Camera > Load
| Camera > Quick
| Camera > Quick
| Camera > Quick
| Camera > Quick
Loads a 3rd party .fbx camera view point of the current
model.
(The view point may seem
arbitrary, depending on the
model)
Loads the data from the file
set in the Quick Projection
dialog. The result is projected onto the patches of
the model visible from the
current view, and baked on.
Loads the data from the file
set in the Quick Projection
dialog. The result is projected onto all patches of
the model (whether visible in
the current view or not) and
baked on.
Saves the current baked
painting, as visible in the
current view, to an image
file (as set in the Quick
Projection properties dialog
box).
Lets you set the image Resolution, Path and Lighting
setup for the projected file.
Load Camera File format is .fbx
Quick Projection
(if details have
not already been
set)
Quick Projection
(if details have
not already been
set)
Quick Projection
(if details have
not already been
set)
Quick Projection
View left side of
model
View right side of
model
•
Menubar
Left
Keyboard
•
•
Menubar
Right
Keyboard
•
| Camera > Camera
| 1
| Camera > Camera
| 2
Changes the view to show
the “left” side of the model.
Changes the view to show
the “right” side of the model.
Model's “left” (may seem
arbitrary, depending on the
model).
Model's “right” (may seem
arbitrary, depending on the
model).
Page 47

Function How to access it What it does
View top of model •
View bottom of
model
Menubar
Top
Keyboard
•
Menubar
•
Bottom
Keyboard
•
| Camera > Camera
| 3
| Camera > Camera
| 4
Changes the view to show
the “top” of the model.
Changes the view to show
the “bottom” of the model.
Opens this
dialog box
CAMERA FUNCTIONS
Notes
Model's “top” (may seem
arbitrary, depending on the
model).
Model's “bottom” (may seem
arbitrary, depending on the
model).
47
View front of
model
View back of
model
Create a projector •
Use the view saved
in a particular
projector
Save the current
camera view
Save all projectors
defined in the
project
•
Menubar
Front
Keyboard
•
•
Menubar
Rear
Keyboard
•
Right-click
Projectors Palette > Create
Projector
Button
•
>
Right-click
•
Projectors Palette > Make
Projector Current
Right-click
•
Projectors Palette > Save
Projector
Button
•
>
Right-click
•
Projectors Palette
Projectors
| Camera > Camera
| 5
| Camera > Camera
| 6
| in
| Projectors Palette
| Projector in
| Projector in
| Projectors Palette
| in
> Save All
Changes the view to show
the “front” the model.
Changes the view to show
the “rear” the model.
Sets the current camera and
paintable region, to frame a
particular view on the model.
Changes the current view to
the view set in the selected
projector.
Saves the current projector
(including all details of the
view) to disk.
Saves all the projectors currently defined in the project.
Mari saves all the projectors
as a single file.
Model's “front” (may seem
arbitrary, depending on the
model).
Model's “back” (may seem
arbitrary, depending on the
model).
Save
File format is .mpc (Mari
Projector Collection).
Load projectors
from disk
Save a snapshot
from a projector to
a file
The Foundry
•
Right-click
Palette > Load Projector
Button
•
>
Right-click
•
Projectors Palette
Unproject
| in Projectors
| Projectors Palette
| Projector in
>
Loads one or more projectors from a file, and changes
the current view to the first
projector in the file.
Saves the current baked
painting from the selected
projector to an image file.
Load
Save Unprojected Image (if
Output Path has
not been set yet)
Mari 2.0v1
Page 48

Function How to access it What it does
Load image data
from the current
projector
Right-click
•
Projectors Palette
| Projector in
> Project
Loads the data from the file
specified for that projector,
projects it onto the model,
and bakes it on.
Opens this
dialog box
Pick Path (if
Input Path has
not been set yet)
CAMERA FUNCTIONS
Notes
48
Load image data
into the paint buffer from the current projector
Load a projector •
Remove a projector
Generate a render
turntable from a
projector
Generate a diagnostic turntable
from a projector
Rotate •
Zoom •
•
Right-click
Projectors Palette > Import
Image
Right-click
Projectors Palette > Make
Projector Current
Right-click
•
Projectors Palette > Remove
Projector
Button
•
>
•
Right-click
Projectors Palette > Render
Turntable
•
Right-click
Projectors Palette > Diag-
nostic Turntable
Mouse
Mouse
left or right
| Projector in
| Projector in
| Projector in
| Projectors Palette
| Projector in
| Projector in
| Alt and drag Drag to rotate the model in
| Alt+Ctrl and drag
Loads the data from the file
specified for that projector,
and puts it into the paint
buffer.
Displays the current project
with that projector (camera
and paintable region).
Deletes that projector.
Takes the scene as viewed
through the selected projector, and creates a series of
images showing the scene
rotating through an axis.
You can include custom text
or thumbnails of reference
images in the turntable.
Takes the scene as viewed
through the selected projector, and creates a turntable
for a set of channels. The
turntable has flat lighting
and uses the default shader.
different directions.
Drag left to zoom out, right
to zoom in.
Pick Path (if
Input Path has
not been set yet)
Render Turntable Dialog Box
Diagnostics
Turntable Dialog
Box
Keys plus mouse movement;
uses last mouse click as
pivot point.
Keys plus mouse movement.
Pan •
Spin •
The Foundry
Mouse
| Alt+Shift and drag Drag the model to a differ-
Mouse
| Ctrl+R and drag Drag up to spin the model
Keys plus mouse movement
ent place on the canvas.
Keys plus mouse movement.
clockwise, left to spin counterclockwise
Mari 2.0v1
Page 49

Function How to access it What it does
Focus •
Switch to Ortho
Camera
Switch to
Perspective
Camera
Switch to UV
Camera
Reset the model
position
Keyboard
Keyboard
•
Keyboard
•
Keyboard
•
Keyboard
•
| F Re-centers view on selected
patch(es).
| F10 Switches the canvas view to
Orthographic mode.
| F11 Switches the canvas view to
Perspective mode.
| F12 Switches the canvas view to
UV mode.
| 1 In the UV view, resets the
model to its default position.
Opens this
dialog box
CAMERA FUNCTIONS
Notes
If no patches are selected,
focuses on the center of the
model.
Enables the Near, Far, and
FoV fields. See Projectors
palette fields for more
information.
49
Rotate the model
90 degrees counter-clockwise
Rotate the model
180 degrees counter-clockwise
Rotate the model
270 degrees counter-clockwise
•
Keyboard
Keyboard
•
Keyboard
•
| 2 In the UV view, rotates the
model 90 degrees counterclockwise from the default
position.
| 3 In the UV view, rotates the
model 180 degrees counterclockwise.
| 4 In the UV view, rotates the
model 270 degrees counterclockwise.
The Foundry
Mari 2.0v1
Page 50

15 VIEW FUNCTIONS
Function How to access it What it does
Set the display properties
Save the current layout
Open a saved
layout
Revert to the
default layout
Right-click
•
> Display Properties
Menubar
•
Properties
•
Menubar
Layout
Menubar
•
Layout
Menubar
•
Layout
| main canvas
| View > Display
| View > Save
| View > Load
| View > Default
Opens a dialog box allowing
you to control how the main
canvas displays.
Saves the current layout of
your Mari workspace as a
*.mws file.
Opens a saved layout (*.mws
file).
Resets the layout back to
the Mari default.
Opens this dialog
box
Display Properties
Dialog Box
Save Window
Layout
Load Window
Layout
Notes
Saves the position of palettes
and other elements of the GUI.
By default, Mari starts with the
last-used layout.
Save image of
current canvas
Adjust the
screenshot
settings
Hide docked
palettes
Hide GUI
components on
canvas
View a
particular
palette
Enter full
screen mode
•
Menubar
Screenshot
Menubar
•
shot Settings
Menubar
•
Palettes
Keyboard
•
Keyboard
•
Menubar
•
><palette name>
Right-click
•
Toolbar >
<palette name>
Menubar
•
Screen
| View > Take
| View > Screen-
| View > Hide
| Home
| / Hides displayed information
| View > Palettes
| Menubar or
| View > Full
Saves the current view of
the canvas as an image file.
Opens a dialog box that
allows you to set how
screenshots are saved.
Hides all docked palettes, so
the canvas takes up the
entire workspace.
(such as the histogram,
heads-up display, etc) from
the canvas.
Displays the selected palette.
Enters full screen mode Click View > Full Screen to exit
Screenshot Settings
Various image formats available.
The Home key cycles between
showing all palettes, hiding
undocked palettes, and hiding all
palettes.
The palette re- displays in its last
position.
full screen mode.
Page 51

16 TOOL FUNCTIONS
Function How to access it What it does
View installed
plug-ins
Imports Custom
Brushes
Menubar
•
ins
Menubar
•
Brushes
| Tools > Plug-
| Tools > Import
Displays a list of installed
plug-ins.
Allows you to select the custom Photoshop brush file
that you want to import into
Mari
Opens this
dialog box
Plug-ins Drag the edge of the dialog box, and
Import
Brushes
Notes
column headings within, to display
full content.
Photoshop custom brush files must
be in the .abr file format.
Set the Mari
cache location
Make changes to
your license
•
Menubar
Location Setup
Menubar
•
| Tools > Cache
| Tools > License Lets you:
Lets you set the area to hold
the Mari cache.
• purchase, activate, and
install licenses,
• tell Mari where to find a
license server,
• obtain 15-day trial
licenses,
• see how many days remain
before your license
expires (if you are using a
temporary license),
• see your System ID (if you
are using a node locked
license), and
• see your server name (if
you are using a floating
license).
Cache
Location
Mari Licensing
You can only add or remove additional cache locations when there
are no projects. Once projects have
been created for a given set of
cache locations, that set must not
be changed or project corruption
will occur.
You can only obtain a trial license
for a major Mari release once on
each machine. For example, if you
had a trial license for Mari 1.1v1,
you can’t get another one for Mari
1.1v2 on the same machine.
Page 52

17 PYTHON FUNCTIONS
Function How to access it What it does Notes
Execute example scripts •
View Python API documentation
View Software API Overview documentation
Display Python Console •
Menubar
•
Menubar
tion
Menubar
•
Menubar
| Python > Examples Executes example scripts and displays
results in the output pane of the Python
Console.
| Python > Documenta-
| Python > Readme Displays the Software API Overview doc-
| Python > Show Console Displays the Python Console
Displays the Python API documentation in
a web browser.
umentation.
An introduction to
Python in Mari and
GLSL shaders
Page 53

18 HELP FUNCTIONS
Function How to access it What it does Notes
View information about
Mari
View the Mari Getting
Started Guide
View the Mari User Guide •
View the Mari Reference
Guide
View the Mari Release
Notes
View the Mari Training
Resources web page.
View Software API Overview documentation
View the Python API documentation and examples.
View the C API documentation and examples.
•
Menubar
Menubar
•
Menubar
•
Menubar
Menubar
•
Menubar
•
Tutorials
•
Menubar
Overview
•
Menubar
Menubar
•
| Help > About Displays the Mari info screen. About this release,
credits, and so on.
| Help > Getting Started Displays the basic guide to working with
Mari.
| Help > User Guide Displays the comprehensive, step-by-
step guide to all Mari's functions.
| Help > Reference Guide Displays the overall Mari reference guide.
| Help > Release Notes Displays a web page that links to the
release notes
| Help > Training and
| Help > SDK > API
| Help > SDK > Python Displays the Python API documentation
| Help > SDK > C API Displays the C API documentation and a
Displays a web page with links to user
guide assets and video tutorials.
Displays the Software API Overview documentation.
and a list of examples.
list of examples.
An introduction to
Python in Mari and
GLSL shaders.
Page 54
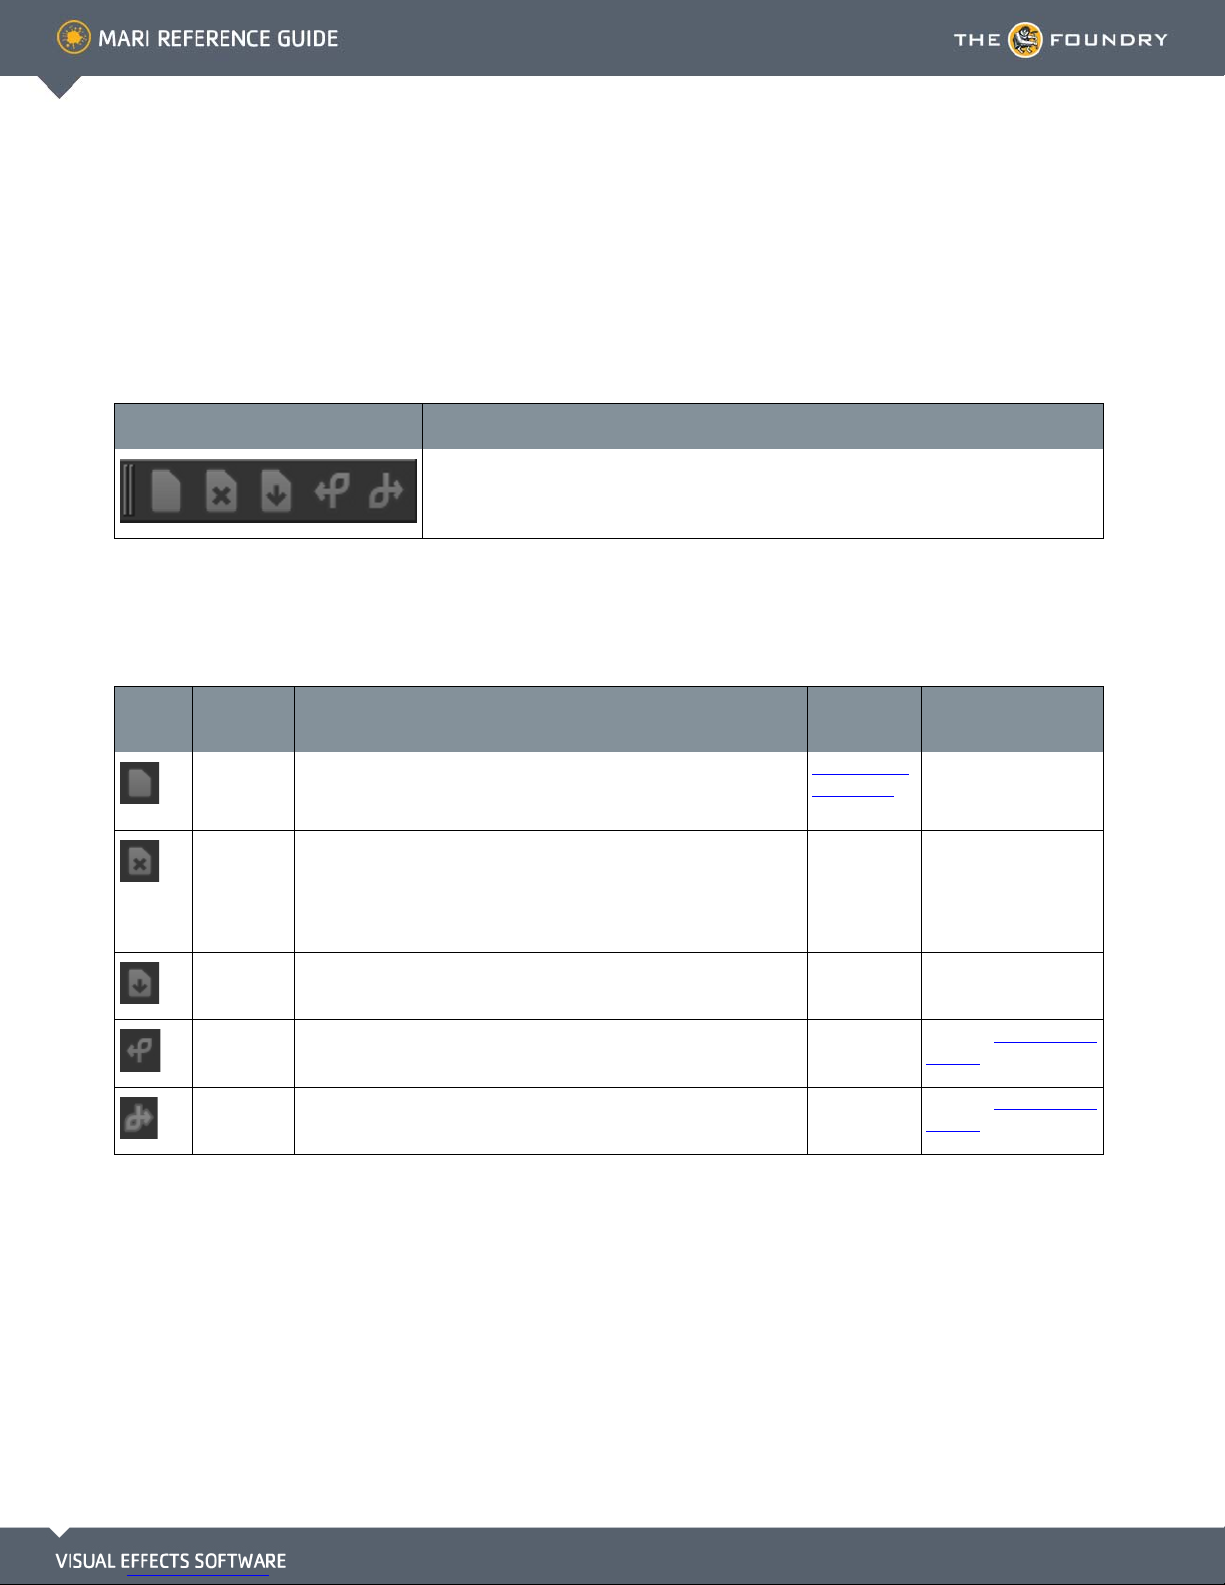
19 TOOLBARS
Project Toolbar
What it looks like What it does
Lets you perform common project functions, such as creating, closing and saving projects.
Project Toolbar
Controls
Control Type What it does
button Create a new project. New Project
button Close the current project. Save Changes
Opens this
dialog box
Dialog Box
Before Closing? (if
unsaved
changes)
Notes
Name the project,
select options, and
add geometry.
button Save the current project.
button Undo the last action. See also History View
Palette.
button Redo the last action. See also History View
Palette.
Page 55

Lighting Toolbar
What it looks like What it does
Lets you change the lighting on the object. You can choose from three lighting presets: flat, basic, or
full, and toggle the use of shadows in the display.
By default, lighting is relative to the scene, not the view. You can set individual lights to move with
the view.
Mari saves custom lighting with the project. If you need the same lights in another project, you need
to set them up separately.
Lighting Toolbar
Controls
Control Type What it does Notes
button Set the lighting on the object to "flat". In this mode, the position of the lights has no
effect.
TOOLBARS
Lighting Toolbar
55
button Set the lighting on the object to "basic". In this mode, you can move lights around on the
button Set the lighting on the object to "full". In this mode, you can move lights around on the
button Toggles shadows on or off. This does not enable or disable shadow processing.
Painting Toolbar
What it looks like What it does
Clears all painting not yet baked into the model (still in the paint buffer).
canvas or make fine adjustments to lighting using
Lights Palette.
the
canvas or make fine adjustments to lighting using
Lights Palette.
the
It simply controls whether the shadows are dis
played or not. To enable shadow processing,
enable Depth Projections in the Preferences. By
default, this preference is disabled.
-
The Foundry
Mari 2.0v1
Page 56

Tools Toolbar
What it looks like What it does
Lets you select a tool for
painting.
Tools Toolbar
Controls
Opens this
Control Type What it does
button Activate the Select tool. This tool lets you select
areas on the model(s) in your project.
button Activate the Marquee Select tool. This tool lets you
select areas on the screen, to control where you
can apply paint.
button Activate the Transform Paint Buffer tool. This tool
lets you resize, rotate, and move the paint buffer
(and any unbaked paint in the buffer). It works on
the entire paint buffer at once.
dialog box
Notes
You can select whole objects,
patches, or areas on the surface of
the objects. Once you have made a
selection, you can choose to show or
hide the selected areas, or to lock
them for editing.
When you've made a selection, paint
only bakes down within the selected
areas.
You can also make these transformations by manually editing the values under Transform in the Paint
Buffer section of the Painting Pal-
ette.
TOOLBARS
Tools Toolbar
56
The Foundry
button Activate the Zoom Paint Buffer tool. This tool lets
you zoom in and out of the scene with the paint
buffer locked to the object and without baking the
paint.
button Activate the Pan Object tool. This tool lets you
move objects and lights around on the canvas.
button Activate the Vector Inspector tool. This tool lets
you control the appearance of the directional
markers for painted vectors.
You can also enable this tool by
pressing Z. Zooming is reset when
paint is baked.
You can opt to enable or disable the
visibility of the directional markers
in the Vector Inspector toolbar. If
the markers don’t appear when you
select the tool, ensure that this
option is set to enabled.
Mari 2.0v1
Page 57

Control Type What it does
button Activate the Blur tool. This tool lets you blur paint
already baked on a model.
button Activate the Warp tool. This tool lets you warp a
selected area within your paint buffer. You create a
warp box — a rectangle with between 4 and 64
control points.
button Activate the Slerp tool. This tool works like the
Liquify tool in Adobe® Photoshop®. It lets you
“pull” the contents of the paint buffer around.
Opens this
dialog box
TOOLBARS
Tools Toolbar
Notes
If you want to blur large areas of the
surface, you may want to use the
Filter Functions instead. These
blur
apply a controlled blur to entire
patches or objects. Mari includes
several blur filters, including a con
trollable Gaussian blur.
As well as pulling, Slerp lets you
grow, shrink, and rotate the paint.
You can also use it to selectively
erase distortions you've already
applied.
-
57
button Activate the Pinup tool. This tool lets you works
like the Warp tool, but lets you set your own control points (pins) wherever you want.
button Activate the Paint tool. This tool lets you draw
paint strokes in the paint buffer.
button Activate the Vector Paint tool. This tool lets you
draw vector paint strokes in the paint buffer.
button Activate the Eraser tool. This tool lets you erase
paint from the paint buffer. It does not affect any
underlying paint baked onto the model.
button Activate the Paint Through tool. This tool lets you
position an image over an object, and then as you
paint, paints the image "through" onto your model.
button Activate the Paint Gradient tool. This lets you cre-
ate a color gradient floating over your model,
which you can paint through to stamp onto your
model (like the Paint Through tool).
button Activate the Clone Stamp tool. This tool lets you
clone from an existing image, shown in a separate
window. You set a source point on the image. As
you paint, Mari copies the texture around that
source point onto your model.
Shift-click to create a pin.
To clear the entire paint buffer, click
the button in the Painting
Toolbar.
You can also clone stamp from
painting already on an object, in the
paint buffer, or in another channel.
The Foundry
Mari 2.0v1
Page 58

Control Type What it does
button Activate the Towbrush tool. This tool lets you lets
you select areas of paint and drag them around the
surface of your model. As you tow the paint
around, it blends the edges of your selection with
the surrounding paint. It works like the Clone
Stamp tool, but blends in the edges of the cloned
selection.
button Activate the Color Picker / Pixel Analyzer tool. This
tool lets you pick a color from the paint on the
model.
Opens this
dialog box
Notes
TOOLBARS
Selection Toolbar
58
Color
swatch
Color
swatch
button Select a foreground color. Select Color
button Swap the foreground and background colors.
button Select a background color. Select Color
button Set the foreground color to white and the back-
ground color to black.
Selection
Toolbar
What it looks like What it does
Lets you switch between three selection modes (objects, patches, and faces) when using the Select tool.
The Foundry
Mari 2.0v1
Page 59

Selection Toolbar
Controls
Control Type What it does Notes
button Set Mari to select whole objects.
button Set Mari to select patches on objects. You can hold down Shift to add to the
selection, Ctrl to remove from the selection,
and Meta (Windows) to intersect the selec
tion.
button Set Mari to select areas on objects. You can hold down Shift to add to the
selection, Ctrl to remove from the selection,
and Meta (Windows) to intersect the selec
tion.
TOOLBARS
Selection Toolbar
-
-
59
The Foundry
Mari 2.0v1
Page 60
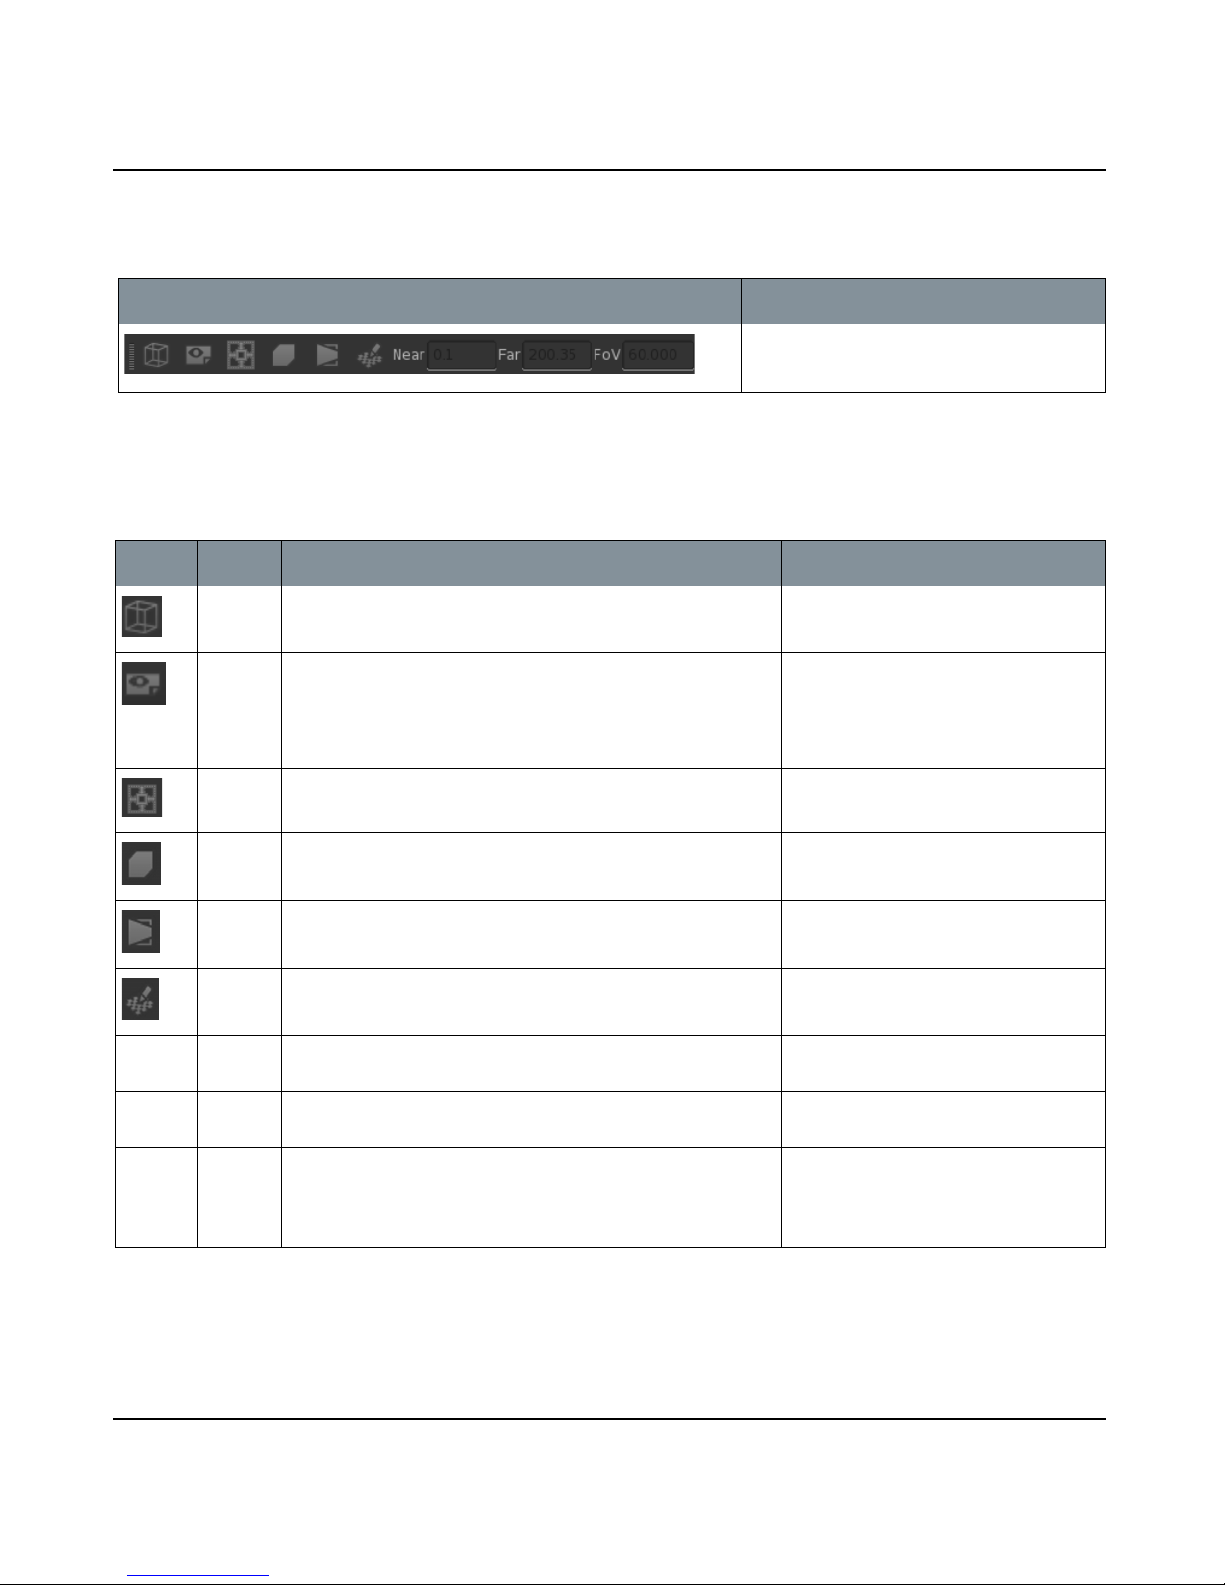
Canvas Toolbar
What it looks like What it does
Lets you set the view options for the UV and
3D views.
Canvas Toolbar
Controls
Control Type What it does Notes
button Toggle whether to show the wireframes on the model. You can also press Shift+W to do this.
button Toggle between showing the patches in the UV view:
• as they appear as part of the model, and
• as they appear when exported (that is, as square images, with
overpaint areas around the corners of the patches).
button Toggle whether paint can be projected onto UV patches located
outside the shells of the original geometry.
This control is only available in UV view.
TOOLBARS
Canvas Toolbar
60
button Switch to the orthographic camera view.
button Switch to the perspective camera view. In this view, you can set the near and far
button Switch to the UV camera view (the UV tab). This gives you a
“flat” view of the patches in the model.
Near entry box Set the value for the near clipping plane. Mari doesn’t display
parts of the scene that are closer than the Near plane.
Far entry box Set the value for the far clipping plane. Mari doesn’t display
parts of the scene that are further than the Far plane.
FoV entry
box,
slider
Set the value for the field of vision. This controls how much Mari
distorts the view when applying perspective. At 0, the perspective camera gives exactly the same view as the ortho camera. As
the value increases, the distortion increases.
clipping planes and the field of view.
This control is only available in the perspective camera view.
This control is only available in the perspective camera view.
This control is only available in the perspective camera view.
The Foundry
Mari 2.0v1
Page 61

Tool Properties
Toolbar
What it looks like What it does
Displays information about the selected
tool.
Tool Properties
Toolbar Controls
Opens this
Tool Control Type What it does
Facing dropdown Set whether the selection only applies to the
Front of the model as you can see it, or if the
selection goes Through the model and includes
the other side.
button Activate Rectangle Selection mode. This lets you
draw a rectangular selection.
button Activate Lasso Selection mode. This lets you
draw the outline of your selected area. You can
draw any shape you want.
button Activate Smart Selection mode. This lets you cre-
ate selections based on the surface of the model.
dialog box
TOOLBARS
Tool Properties Toolbar
Notes
This control only
works in Face selec
tion mode.
This control only
works in Face selec
tion mode.
Smart selection only
works in Face selec
tion mode.
-
-
-
61
Smart SelType dropdown Choose whether to base your smart selection on:
The Foundry
• Connectedness — selects the areas on the
model connected to the selected face. When
you look at the area in the UV view, this
selects the whole connected area within the
current UV patch. If the UV patch holds several
different areas, only those areas you click on
are selected.
• Edge Angle — selects based on the degree of
change between neighboring faces. The selection goes until it hits an angle higher than the
Smart Sel Angle.
• Orientation — selects the area that faces in
the same direction as your initial selection.
This control only
works in Smart Selection mode.
Mari 2.0v1
Page 62

Tool Properties Toolbar
Opens this
Tool Control Type What it does
Smart Sel Angle entry box,
slider
All button Select all items.
None button Unselect all items.
Invert button Invert the current selection. Unselected areas
Grow button Grow the current selection. This control only
Shrink button Shrink the current selection. This control only
Grow/Shrink by dropdown Choose whether to grow or shrink the current
button Activate Rectangle Selection mode. This lets you
Set the maximum angle for the smart selection.
• For Edge Angles, this sets the maximum angle
between areas on the model surface. For exam
ple, if the angle is set to 30, this selects areas up
to a 30 degree change of facing.
• For Orientation, this sets how far from the fac-
ing of your original selection the selection goes
to. For example, if the angle is set to 30, this
selects areas up to 30 degrees away from the
facing of your original selection.
become selected, and vice versa.
selection by Vertex or Edge.
draw a rectangular selection.
dialog box
-
Notes
This control only
works in Smart Selec
tion mode.
works in Face selec
tion mode.
works in Face selec
tion mode.
This control only
works in Face selec
tion mode.
TOOLBARS
-
-
-
-
62
The Foundry
button Activate Lasso Selection mode. This lets you
draw the outline of your selected area. You can
draw any shape you want.
button Activate Ellipse Selection mode. This lets you
draw an elliptical selection.
button Activate MagicWand Selection mode. This lets
you select by color. When you click, Mari creates
a selection around the point you clicked. The
selection is based on color – areas with a similar
color to the original point are selected. You can
change the color threshold for the selection.
Mari 2.0v1
Page 63

Tool Control Type What it does
Mode button How drawing a new selection affects the current
marquee selection:
• Replace — the new selection replaces the
existing selection.
• Transform — this lets you move your selection
area around (move, rotate, or scale the selection).
Invert button Invert the current selection. Unselected areas
become selected, and vice versa.
Clear button Clear the current selection.
Opens this
dialog box
TOOLBARS
Tool Properties Toolbar
Notes
In Replace mode (the
default), you can:
• hold down Shift,
click and drag to
add to the current
selection, or
• hold down Ctrl, click
and drag to remove
from the current
selection.
In Transform mode,
you can:
• hold down Shift,
click and drag to
move the current
selection,
• hold down Ctrl, click
and drag to rotate
the current selection, or
• hold down
Shift+Ctrl, click and
drag to scale the
current selection.
63
Feathering entry box Soften the edges of the selection. Higher values
Reset Buffer button Reset any transformations (moves, rotations,
Reset button Reset the zoom level of the paint buffer.
Zoom In button Zoom in on the paint buffer.
Zoom Out button Zoom out of the paint buffer.
No properties.
The Foundry
give the selection a softer, fuzzier edge. At 0, the
selection has a hard edge.
scales) applied to the paint buffer (and any
unbaked paint in the buffer).
Mari 2.0v1
Page 64

Tool Properties Toolbar
Opens this
Tool Control Type What it does
Reset button Reset the settings of the vector inspector. Can also be done by
Enabled checkbox Enable (or disable) the visible directional markers
for the vector paint tool.
Line spacing entry box,
slider
Adjust the spacing between the directional markers.
dialog box
Notes
using the ’ (apostro
phe) shortcut when
the vector inspector
is active.
Can also be done by
using the Shift+I
shortcut.
Can also be done by
Shift+dragging the
mouse when the vec
tor inspector is
active.
TOOLBARS
-
-
64
Line length entry box,
slider
Line width entry box,
slider
Start Color button Change the color at the base of the directional
End Color button Change the color at the tip of the directional
Vector Space dropdown Set whether the vector inspector operates in
Same as Paint,
plus the following:
Blur entry box,
slider
Clear button Remove the current warp.
+ button Increase the number of control points (up to 64)
- button Decrease the number of control points in the
Toggle Grid button Toggle between hiding and displaying the grid
Adjust the length of the directional markers.
Adjust the width (thickness) of the directional
markers.
markers.
markers.
ScreenSpace, TangentSpace, or WorldSpace.
Set the blur strength. The higher the value, the
more blur is produced.
in the warp grid.
warp grid.
lines connecting the control points.
The Foundry
Mari 2.0v1
Page 65

Tool Control Type What it does
Mode dropdown Select how to use the Slerp tool:
• Pull — pulls paint around.
• Grow — makes the paint in a specific area
larger.
• Shrink — makes the paint in a specific area
smaller.
• Rotate — rotates paint around.
• Erase — lets you undo the distortion in a specific area of the painting.
Opens this
dialog box
TOOLBARS
Tool Properties Toolbar
Notes
You can also:
•press ’ (apostrophe)
to undo all the distortions you've
applied, or
•press ; (semicolon)
to apply your
changes to the
paint buffer (that
is, make them so
you can't erase the
distortions).
65
Radius entry box,
slider
Opacity entry box,
slider
Reset Pins button Undo all the distortions you've applied, moving
Clear Pins button Remove all the current pins. You can also press
+ button Increase the strength of the currently selected
- button Decrease the strength of the currently selected
Apply button Apply your changes to the paint buffer and
Set the slerp radius (that is, how big the brush
tip is).
Set the strength of the Slerp effect.
the pins back to their original positions.
pin. Stronger pins pull more of the surrounding
texture towards them.
pin.
remove all current pins.
You can also press ’
(apostrophe) to do
this.
Ctrl+’ (apostrophe) to
do this.
You can also press
the Up arrow key to
do this.
You can also press
the Down arrow key
to do this.
You can also press ;
(semicolon) to do this.
The Foundry
Mari 2.0v1
Page 66

Tool Properties Toolbar
Opens this
-
dialog box
Notes
the opacity by pressing R and clicking and
dragging.
You can also adjust
the opacity by pressing O and clicking and
dragging.
Tool Control Type What it does
Painting Mode dropdown The blending mode used when the paint bakes
down onto the channel surface. The default is
Normal (paint in the buffer overwrites the sur
face), but Mari supports a number of other
blending modes.
Colors checkbox Whether more pressure causes the color to vary
(from slightly darker to the target color).
Alpha checkbox Whether more pressure increases the opacity.
Radius checkbox Whether more pressure increases the radius.
Flow checkbox Whether more pressure increases the flow.
Radius entry box Set how big the brush tip is (in pixels). You can also adjust
Opacity entry box How opaque the paint is. This is a multiplier on
the paint buffer contents. At 1.0, the paint bakes
down to the surface with the same opacity as it
is in the buffer. At 0.5, the paint applied to the
surface is half as transparent as when it's in the
buffer.
Flow entry box Mimics how quickly paint is applied, by setting
the maximum opacity in a splat.
TOOLBARS
66
Same as Paint
Same as Paint.
The Foundry
Mari 2.0v1
Page 67

Tool Properties Toolbar
Opens this
Tool Control Type What it does
Same as Paint,
plus the following:
Mode dropdown Select from two modes:
• Paint through — you hover the image preview
over the model and stamp it down onto the
surface.
• Image clone — you hover the image next to the
model, set a source point, and clone from that
point.
Stamp button Stamp the image straight onto the model. You can also press ’
dialog box
Notes
The Image clone mode
is like the normal
Clone Stamp tool, but
you have more control
over the source image
(you can resize,
stretch, and rotate it).
(apostrophe) to do
this.
TOOLBARS
67
Toggle Repeat button Toggle source image tiling on and off. If this is
on, when you paint off the edge of the image,
Mari repeats the image (so you always have
source data).
You can also press ;
(semicolon) to toggle
this.
The Foundry
Mari 2.0v1
Page 68

Tool Control Type What it does
Tint button Tint combines the foreground color with the
paint through texture.
Stencil dropdown Stencil uses the Paint Through texture’s alpha
channel as a mask and paints the foreground
color. There are three options available:
• No Stencil - if this is selected, Mari ignores the
stencil color and follows the alpha value.
• Stencil - if this is selected, paint is applied to
the foreground color.
• Inverted Stencil - if this is selected, paint is
applied in everything that is transparent.
Luminance dropdown Luminance uses the Paint Through texture’s lumi-
nance instead of the alpha, but works similarly to
Stencil. The following options exist within the
same dropdown menu as the Stencil options:
• Luminance - Works well for dirt, noise, and
other similar images by using the luminance
value of an image instead of the alpha.
• Inverted Luminance - Similar to the luminance
option, but the calculated luminance value is
inverted before use.
Opens this
dialog box
TOOLBARS
Tool Properties Toolbar
Notes
By default the option
is set to No Stencil.
By default, the option
in the dropdown menu
is set to No Stencil.
68
Reset Image button Reset any transformations (such as moving,
resizing, or rotating) you have made to the
source image that you're cloning.
Pan Lock checkbox Lock the image position relative to the model. If
you pan the model, the image that you're painting
through pans too.
Scale Lock checkbox Lock the image size relative to the model. If you
zoom the model in or out, the image that you're
painting through zooms in or out too.
The Foundry
Mari 2.0v1
Page 69

Tool Control Type What it does
Same as Paint,
plus the following:
Color swatch Select the start color for the gradient. Select Color
Color swatch Select the end color for the gradient. Select Color
In Point entry box How far through the gradient the start color
lasts (before it starts graduating into the end
color).
Out Point entry box How far through the gradient the end color
reaches.
Type dropdown Select between Linear or Radial gradient. A linear
gradient has a color at one end grading into the
other color. A radial gradient has a color in the
middle, radiating out in a circle to the other color
on the outside.
Same as Paint,
plus the following:
Opens this
dialog box
TOOLBARS
Tool Properties Toolbar
Notes
69
Source dropdown Clone from:
• Current Paint Target - the model's surface
(baked paint) in the active channel.
• Painting - the current (unbaked) paint in the
paint buffer.
• Image - an external image (selected from the
Image Manager, optionally zoomed in or out).
• Any of the other channels in the project.
button Clone from the selected region to another part of
the surface.
button Overwrite the selected region with another part
of the surface.
button Swap the contents of the selected region with
another area on the surface.
Sample Size entry box,
slider
Radius in pixels that the eyedropper uses when
sampling colors off the surface. The eyedropper
takes the average value of all the pixels in this
area, and sets this as the foreground color.
The Foundry
Mari 2.0v1
Page 70

Ptex Toolbar
What it looks like What it does
Displays a number of options for managing Ptex faces within your project.
This toolbar is only available for Ptex
channels.
Ptex Toolbar
Controls
Control Type What it does Notes
button Double the selected face resolution.
TOOLBARS
Ptex Toolbar
70
button Halve the selected face resolution.
button,
entry box
button,
dropdown
dropdown Fill the selected faces with the foreground color.
button Fill the selected faces with the background color.
Set the world space face resolution for the selected face. Enter the Texel Density and then click
Set the face resolution for the selected face.
.
Select the Size and then click .
The Foundry
Mari 2.0v1
Page 71

ColorSpace
Toolbar
What it looks like What it does
Displays a number of options for
managing colorspaces in Mari.
ColorSpace Controls
Control Type What it does Notes
button Enable color management. Click to toggle.
TOOLBARS
ColorSpace Toolbar
71
button Select a custom colorspace configuration file.
button Select a custom LUT to apply to the scene.
button Clear the current LUT applied to the scene.
Extrapolate checkbox Sets whether the GPU extrapolates the grid values or
clamps to the maximum value of the LUT.
InputColor
Space
Display
Device
View Transform
Component dropdown View the individual color channels for the scene.
Gain incre-
Gamma entry box,
dropdown Set the colorspace of the scene.
dropdown Set the colorspace of the display device used to view the
scene.
dropdown Select a colorspace transform to apply to the scene.
Set the amount of exposure adjustment applied before the
menter,
entry box,
slider
slider
display transform.
Set the amount of gamma correction applied after the dis-
play transform.
You can boost or reduce Gain by entering
a multiplier (exposure value), dragging on
the slider, or adjusting the F-Stop value.
You can boost or reduce Gamma by
entering a gamma level or dragging on
the slider.
The Foundry
Mari 2.0v1
Page 72

Navigation
Toolbar
What it looks like What it does
Displays a number of options for managing navigation in Mari.
Navigation Toolbar
Controls
Control Type What it does Notes
button Resets all the options in the Navigation toolbar to the
default settings.
TOOLBARS
Navigation Toolbar
72
button,
dropdown
button,
dropdown
button,
dropdown
Provides the following options for panning:
•Pan All - allows panning in any direction.
•Pan X - allows panning on the x axis only.
•Pan Y - allows panning on the y axis only.
• Pan Disabled - disables all panning.
Provides the options to either enable or disable zooming. The button changes to reflect the
Provides the options to either enable or disable rolling. The button changes to reflect the
The button changes to reflect the
selected option.
selected option.
selected option.
The Foundry
Mari 2.0v1
Page 73

Control Type What it does Notes
TOOLBARS
Paint Buffer Symmetry Toolbar
73
button,
dropdown
button,
dropdown
Paint Buffer
Symmetry
Toolbar
Provides the following options for orbiting:
• Orbit All - allows orbiting around the model in any direction.
• Orbit X - allows orbiting around the model on the x axis
only.
• Orbit Y - allows orbiting around the model on the y axis
only.
• Orbit Disabled - disables all orbiting.
Provides the following options:
• Snap 45 degrees - when rotating the model it snaps at
45 degree angles.
• Snap 90 degrees - when rotating the model it snaps at
90 degree angles.
• Snap angle disabled - when rotating the model it does
not snap to any angle.
The button changes to reflect the
selected option.
The button changes to reflect the
selected option.
What it looks like What it does
Displays the four options for the Paint Buffer Symmetry functionality.
The Foundry
Mari 2.0v1
Page 74

Paint Buffer
Symmetry Toolbar
Controls
Control Type What it does Notes
button This is the default setting. When mirroring is disabled, the
paint buffer acts as normal and the paint strokes are not
mirrored.
button Mirroring left and right splits the paint buffer down the
center vertically. Any paint strokes made on either the left
or right side of the divider are mirrored on the opposite
side.
This applies to paint strokes only.
TOOLBARS
Paint Buffer Symmetry Toolbar
74
button Mirroring top and bottom splits the paint buffer down the
center horizontally. Any paint strokes made on either the
top or bottom of the divider are mirrored on the opposite
side.
button Mirroring four ways splits the paint buffer into quarters
around the center of the canvas. Any paint strokes made in
one of the quadrants are mirrored in the other three.
This applies to paint strokes only.
This applies to paint strokes only.
The Foundry
Mari 2.0v1
Page 75

Vector Painting
Toolbar
What it looks like What it does
Displays the option to toggle the vector inspector on or off and to
create default vector shaders. When the tool is active, the vector
inspector markers are shown, regardless of whether you toggle the
option on or off.
Vector Painting
Toolbar Controls
Control Type What it does Notes
button Quickly enables the vector inspector so that the directional
markers are visible. To quickly turn off the directional markers, click the button again.
button Sets up two default vector shaders with default channels and
layers for painting flow or normal maps. Also changes the
tool to Vector Paint and switches the Painting Mode to Paint
Flow Vectors.
Can also be done by using the Shift+I
shortcut.
Can also be done by navigating to
Python | Examples > Setup Vector
Brush
TOOLBARS
Vector Painting Toolbar
75
Default Shaders
Toolbar
What it looks like What it does
Displays one of the four default shader in the Shaders palette: Current
Channel, Current Layer and Below, Current Layer, and Current Paint
Target. Selecting a custom created shader in the Shaders palette won’t
highlight any of the shaders in the toolbar, but selecting a default
shader from either the palette or the toolbar activates the shader and
highlights the icon in the toolbar.
The Foundry
Mari 2.0v1
Page 76

Default Shaders
Toolbar Controls
Control Type What it does Notes
button Selects the default Current Channel shader from the Shaders
palette and displays only the paint in the current channel.
button Selects the default Current Layer and Below shader from the
Shaders palette and displays only the paint in the current
layer stack.
button Selects the default Current Layer shader from the Shaders
palette and displays only the paint in the current layer.
button Selects the default Current Paint Target shader from the
Shaders palette and displays only the paint of the currently
selected target.
TOOLBARS
Default Shaders Toolbar
76
The Foundry
Mari 2.0v1
Page 77

20 STATUS BAR
What it looks like What it does
Displays status icons that indicate which features are active, whether an error has
been encountered, and information about the current project. This includes progress
bars on running processes.
Status Bar Icons
Icon What it does Notes
Displays the UDIM number of the patch you have selected. If nothing is
selected, then there is nothing listed after Udim.
Notifies you that there is paint to bake. Click on the icon to bake.
Notifies you that background jobs are currently running. Clicking on this icon displays a dialog
for the progress bar.
Notifies you that the project has changed and allows you to save. Click on the icon to save changes.
Notifies you that your painting is hidden.
Notifies you that color management is active.
Notifies you that you are currently projecting on the front of objects. Clicking on this icon toggles between
projecting through objects and project
ing on the front of objects. The icon
takes the default icon’s place when
switching to project through.
Notifies you that you currently have edge masking enabled. Clicking on this icon disables edge
masking.
Notifies you that you currently have channel masking enabled. Clicking on this icon disables channel
masking.
Notifies you that you currently have ambient occlusion masking enabled. Clicking on this icon disables ambient
occlusion masking.
Notifies you that you currently have depth masking enabled. Clicking on this icon disables depth
masking.
-
Page 78

Icon What it does Notes
Notifies you that you currently have backface masking enabled. Clicking on this icon disables backface
masking.
Notifies you that you currently have fractal noise masking enabled. Clicking on this icon disables fractal
noise masking.
Notifies you that you currently have the global mask preview enabled. Clicking on this icon disables the global
mask preview.
STATUS BAR
78
Warns you that a low memory status has been detected. Low memory
affects Mari’s performance and may make it unstable.
Notifies you that there are warning messages present. Clicking on this icon displays these
Warns you that the cache disk is critically full. If you don’t free disk space, data loss
Warns you that there is no disk space left for the operation you are trying to run.
Warns you that channels are a higher bit-depth than what the virtual
texture is configured for.
Notifies you that Mari is currently loading data from the disk.
Notifies you that Mari is currently loading data from the RAM to GPU
memory.
Notifies you that Mari is listening for commands on [COMPUTER NAME]
port [PORT NUMBER].
Notifies you that there was an error while Mari was listening for commands.
Try freeing memory or closing and
restarting Mari to clear this issue.
warnings.
may occur. A simple way to free disk
space is to close the project and reopen it. Mari saves your session history,
but closing your project clears this used
disk space up for use.
Hovering over this icon displays the
computer name and port number on
which Mari is listening for commands.
Notifies you that Nuke is connected to send commands to Mari on [COMPUTER NAME] port [PORT NUMBER].
The Foundry
Hovering over this icon displays the
computer name and port number from
which Nuke is connected.
Mari 2.0v1
Page 79

21 CHANNELS PALETTE
What It Does
The Channels palette displays:
• a list of channels in the project,
• buttons to add, duplicate, convert, or remove channels,
• options for creating quick channels, and
• channel attribute information.
Channels provide a foundation that layers are built on. These channels can be diffuse, bump, or spec
channels, to name only a few. Channels are assigned to lighting shaders, and sliders in that palette give
you fine control over aspects of each channel.
Below are the controls you can expect to find on the Channels palette.
Channels Palette
Fields
Control Type What it does Dialog Notes
button Adds a new channel to the channels list. Add Channel
Dialog Box
button Duplicate the selected channel.
Quick Channel
button Converts the channel into either 8bit (Byte), 16bit
(Half), 32bit (Float).
button Removes the channel.
| swatch Creates a channel filled in black. The created channel is
Convert Type
Dialog Box
named Quick Channel. If
there are multiple Quick
Channels, then the name is
followed with a number.
Page 80
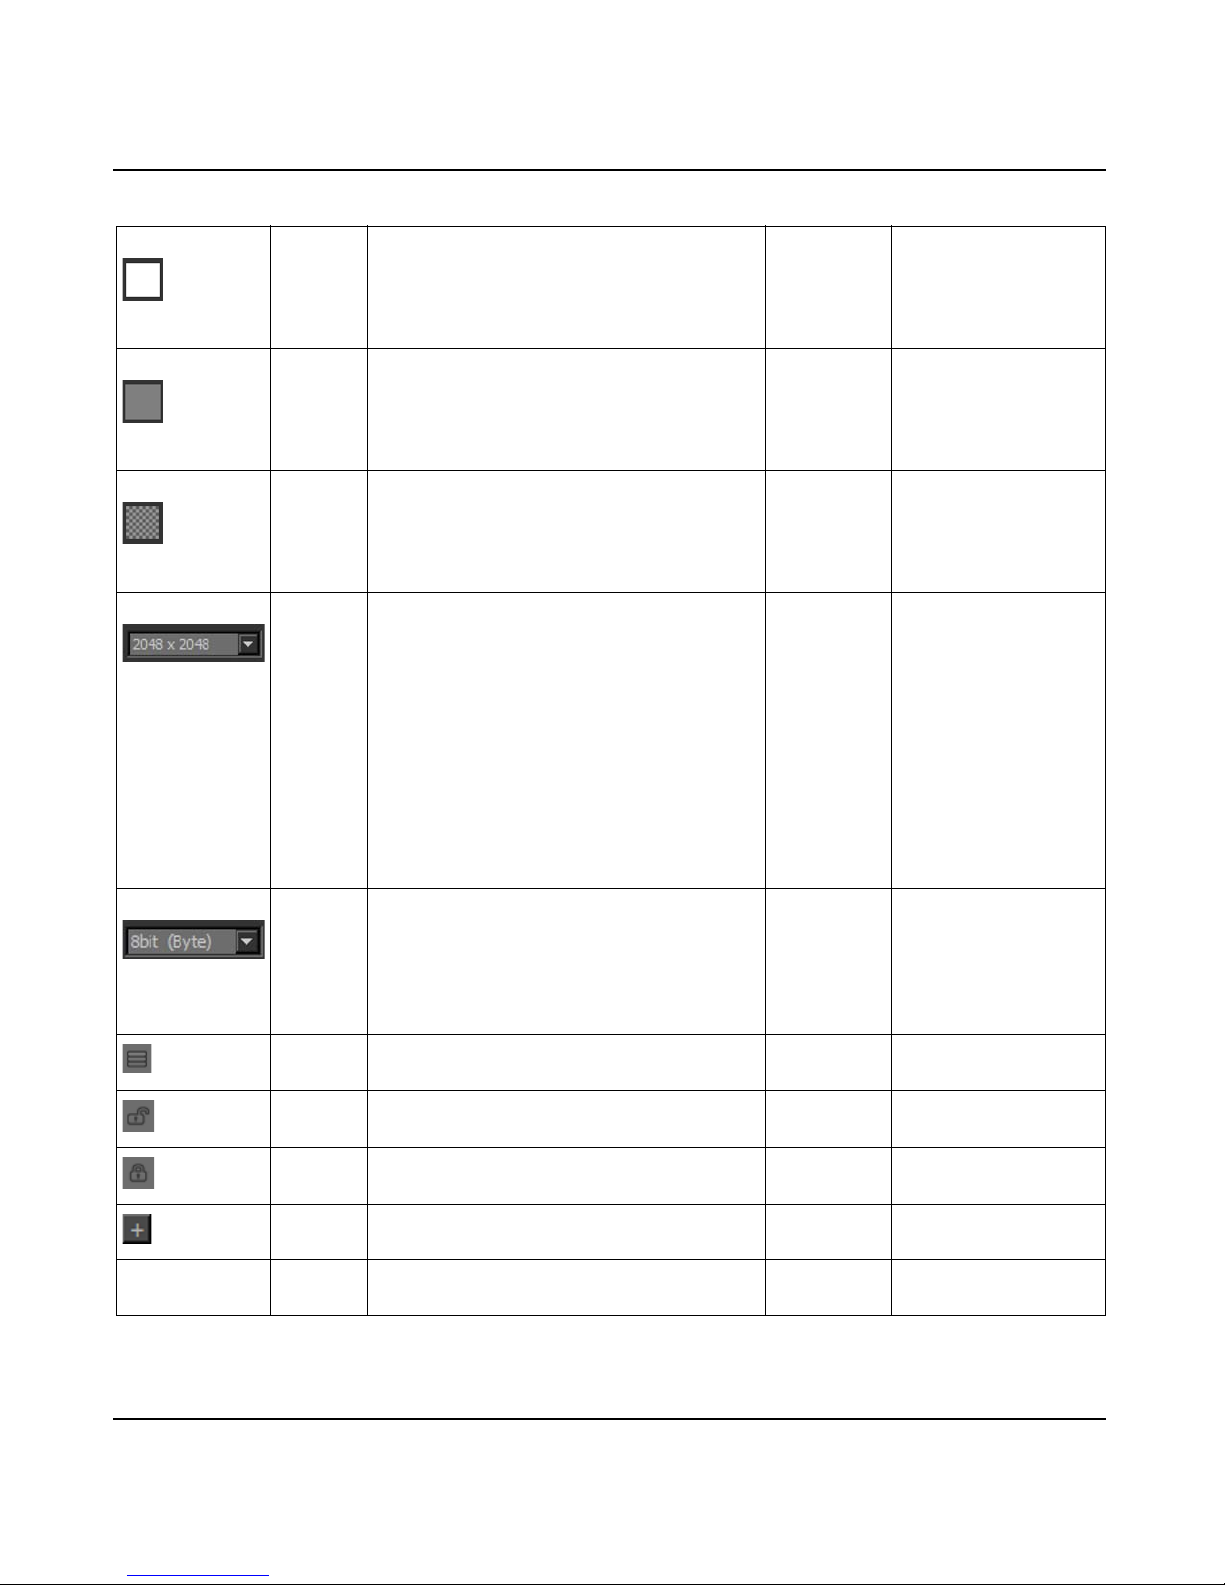
CHANNELS PALETTE
Channels Palette Fields
80
Quick Channel
Quick Channel
Quick Channel
Quick Channel
Quick Channel
| swatch Creates a channel filled in white. The created channel is
named Quick Channel. If
there are multiple Quick
Channels, then the name is
followed with a number.
| swatch Creates a channel filled in mid-grey. The created channel is
named Quick Channel. If
there are multiple Quick
Channels, then the name is
followed with a number.
| swatch Creates a channel filled in transparent. The created channel is
named Quick Channel. If
there are multiple Quick
Channels, then the name is
followed with a number.
| dropdown Sets the channel size used when creating a Quick
Channel, from the options:
• 256x256
• 512x512
• 1024x1024
• 2048x2048
• 4096x4096
• 8192x8192
• 16384x16384
• 32768x32768
| dropdown Sets the channel depth used when creating a Quick
Channel, from the options:
•8bit (Byte)
• 32bit (Float)
• 16bit (Half)
button Opens an individual palette that displays the layers
of that channel only.
Ensure this is set to the
size you want before cre
ating Quick Channels.
Ensure this is set to the
depth you want before
creating Quick Channels.
-
button Indicates an unlocked state. Clicking the icon
changes the channel state to locked.
button Indicates a locked state. Clicking the icon changes
‘
button Adds user attributes for the channel.
<channel name> >
General
| File Space
The Foundry
information Sets whether the channel is Normal, Vector, Vector
the channel state to unlocked.
(flipped Y)
Mari 2.0v1
Page 81

CHANNELS PALETTE
Channels Palette Fields
81
<channel name> >
General
| Color
Space
<channel name> >
General
| Size
<channel name> >
General
| Depth
information Sets whether the channel is Color or Scalar.
information Lists the size of the patches in the channel.
information Lists the color depth of the channel.
The Foundry
Mari 2.0v1
Page 82

22 LAYERS PALETTE
What It Does
The Layers palette lets you view, create and alter layers. You can also add
the following to individual layers, or layer groups:
•masks
• adjustments
•procedurals
Layers Palette
Fields
Control Type What it does Notes
dropdown,
switch
Filter bar function that gives the choices: Name,
Type, Attribute, and Color Tag. Depending on
which filter option you choose, the filter bar shows
one of the following:
• - filter for the type of layers by
clicking on the associated icons.
• - filter for the
attributes of layers by clicking on the associated
icons.
Both Type and Attribute provide
icons that allow you to set the
parameters for your filter.
Quickly clear the entry box by press-
ing the icon.
dropdown Click to select from the blend mode options avail-
button Opens the Advanced Blending menu, which gives
icon Click to toggle the selected layers’ visibility on the
• - filter for the color
tags of the selected color icon.
able for individual layers. To adjust the blend
amount, enter the value into the entry box, or
adjust the slider located to the right of the blend
mode menu.
• - adjusts
the blend mode amount.
options for blend modes and components, blend
amount, and whether the blend applies to only the
selected layer.
canvas.
This list does not include the
advanced blend mode options.
Page 83

Control Type What it does Notes
icon Denotes whether the layer is a paint layer and,
when lit, whether it is selected as the current paint
target.
LAYERS PALETTE
Layers Palette Fields
83
icon Denotes whether the layer is a mask layer and,
when lit, whether the mask is selected as the current paint target.
icon Denotes whether the layer has a mask group and,
when lit, whether the mask group is selected as
the current layer.
icon Denotes whether the layer is an adjustment layer,
or has an adjustment as part of the layer and,
when lit, whether the adjustment is selected as the
current layer.
icon Denotes whether the layer is a procedural layer
and, when lit, whether the procedural is selected
as the current layer.
You can Shift+click on the mask to
disable it, or right-click on the layer
and select Layer Mask > Disable
Mask. The disabled mask icon
indicates the disabled state.
To enable it, either Shift+click on the
mask again or select Layer Mask >
Enable Mask from the right-click
menu.
Clicking on the icon brings up the
mask group palette.
To distinguish whether the layer is an
adjustment layer or simply has an
adjustment on it, look for the posi
-
tion of the icon. If the icon is in the
left-most column, where the
icon is normally located on paint lay-
ers, then the layer is an adjustment
layer.
The Foundry
icon Denotes whether the layer is the parent layer of a
group.
icon Locks or unlocks the selected layer. If the layer is
the parent of a group of layers, all the layers in the
group are also locked or unlocked. Clicking the
padlock icon when a layer is cached also unlocks it.
button Adds a new paint layer to the layer stack.
button Adds a mask to the selected layer or, if none is
selected, the top layer in the layer stack.
If a mask has already been added to
a layer, you cannot add a second
mask using this method. You must
create a mask group using the rightclick menu.
button Adds an adjustment layer to the layer stack. Choose adjustments from the drop-
down menu when you click the icon.
Mari 2.0v1
Page 84

Control Type What it does Notes
button Adds a procedural layer to the layer stack. Choose procedurals from the drop-
down menu when you click the icon.
button Adds a parent layer for a group to the layer stack.
Additional layers can be added after the parent
layer is created.
button Duplicates the selected layer in the layer stack. The duplicate has "copy" included in
the name so that it can be differenti
ated from the original.
button Removes the selected layer from the layer stack.
button Assigns a color to the selected layers. To clear an
already assigned color, click the icon and select
the gray color in the center of the palette. This
effectively removes the color and returns it to the
default color state.
Adjustment/Brightness
Brightness entry box,
slider
Controls the brightness of the paint on the model.
LAYERS PALETTE
Layers Palette Fields
-
84
Adjustment/Brightness Lookup
Map curve editor Adjusts the brightness to a specific lookup value
using a curve map.
Adjustment/Clamp
Min entry box,
slider
Max entry box,
slider
Components
Components
Components
Components
Adjustment/Color Balance
Preserve Luminosity checkbox Ensures that the luminosity value is maintained
| R checkbox If enabled, specifies that the red channel should be
| G checkbox If enabled, specifies that the green channel should
| B checkbox If enabled, specifies that the blue channel should
| A checkbox If enabled, specifies that the alpha channel should
Clamps the minimum RGB value for the selected
checkboxes below.
Clamps the maximum RGB value for the selected
checkboxes below.
affected by the Min and Max sliders.
be affected by the Min and Max sliders.
be affected by the Min and Max sliders.
be affected by the Min and Max sliders.
when other values are adjusted.
The Foundry
Mari 2.0v1
Page 85

Control Type What it does Notes
LAYERS PALETTE
Layers Palette Fields
85
Highlights
Highlights
Green
Highlights
Shadows
Shadows
Green
Shadows
Midtones
| Cyan/Red entry box,
slider
| Magenta/
| Yellow/Blue entry box,
| Cyan/Red entry box,
| Magenta/
| Yellow/Blue entry box,
| Cyan/Red entry box,
entry box,
slider
slider
slider
entry box,
slider
slider
slider
Adjusts the scale of the Red color component.
Dragging the slider to the left pulls the scale
towards cyan, whereas dragging the slider to the
right pulls it towards red. The modification applies
to the texture’s highlights.
Adjusts the Green color component. Dragging the
slider to the left pulls the scale towards magenta,
whereas dragging the slider to the right pulls it
towards green. The modification applies to the
texture’s highlights.
Adjusts the Blue color component. Dragging the
slider to the left pulls the scale towards yellow,
whereas dragging the slider to the right pulls it
towards blue. The modification applies to the tex
ture’s highlights.
Adjusts the scale of the Red color component.
Dragging the slider to the left pulls the scale
towards cyan, whereas dragging the slider to the
right pulls it towards red. The modification applies
to the texture’s shadows.
Adjusts the Green color component. Dragging the
slider to the left pulls the scale towards magenta,
whereas dragging the slider to the right pulls it
towards green. The modification applies to the
texture’s shadows.
Adjusts the Blue color component. Dragging the
slider to the left pulls the scale towards yellow,
whereas dragging the slider to the right pulls it
towards blue. The modification applies to the tex
ture’s shadows.
Adjusts the scale of the Red color component.
Dragging the slider to the left pulls the scale
towards cyan, whereas dragging the slider to the
right pulls it towards red. The modification applies
to the texture’s midtones
-
-
Midtones
Green
Midtones
The Foundry
| Magenta/
| Yellow/Blue entry box,
entry box,
slider
slider
Adjusts the Green color component. Dragging the
slider to the left pulls the scale towards magenta,
whereas dragging the slider to the right pulls it
towards green. The modification applies to the
texture’s midtones
Adjusts the Blue color component. Dragging the
slider to the left pulls the scale towards yellow,
whereas dragging the slider to the right pulls it
towards blue. The modification applies to the tex
ture’s midtones.
-
Mari 2.0v1
Page 86

Control Type What it does Notes
Adjustment/Color Lookup
Red curve editor Adjusts the value of the red channel for the overall
layer stack, using the curve editor.
Green curve editor Adjusts the value of the green channel for the
overall layer stack, using the curve editor.
Blue curve editor Adjusts the value of the blue channel for the over-
all layer stack, using the curve editor.
Adjustment/Color Switch
Red checkbox Turns the red channel on or off. Disabling the red
channel removes it from the painting.
Green checkbox Turns the green channel on or off. Disabling the
green channel removes it from the painting.
Blue checkbox Turns the blue channel on or off. Disabling the blue
channel removes it from the painting.
Alpha checkbox Turns the alpha channel on or off. Disabling the
alpha channel removes it from the painting.
Adjustment/Contrast
Contrast entry box,
Adjusts the contrast for the layer stack.
slider
Contrast Pivot entry box,
Sets the point around which Contrast is adjusted.
slider
LAYERS PALETTE
Layers Palette Fields
86
Adjustment/Copy Channel
Channel dropdown Copies the value from one RGB color channel to
the other two. The result is a grayscale image with
the intensity values from the selected channel.
Adjustment/Gamma
Gamma entry box,
Adjusts the gamma levels in the layer stack.
slider
Invert entry box,
slider
Reverses the gamma conversion. That is, a higher
setting for Gamma results in a more washed-out
looking image.
Adjustment/Grade
Blackpoint entry box,
Sets the blackpoint of the RGB values. Blackpoint is the color value at which
slider
Whitepoint entry box,
Sets the whitepoint of the RGB values. Whitepoint is the color value at
slider
The Foundry
the input is considered to be 100%
black.
which the input is considered to be
100% white.
Mari 2.0v1
Page 87

Control Type What it does Notes
LAYERS PALETTE
Layers Palette Fields
87
Lift entry box,
slider
Gain entry box,
slider
Multiply entry box,
slider
Offset entry box,
slider
Gamma entry box,
slider
Adjustment/HSL
Hue Shift entry box,
slider
Saturation Scale entry box,
slider
Lightness Scale entry box,
slider
Adjustment/HSV
Hue Shift entry box,
slider
Saturation Scale entry box,
slider
Value Scale entry box,
slider
Lifts the blackpoint, while keeping the whitepoint
the same.
Adjusts the whitepoint, while keeping the blackpoint the same
Multiplies the value to lighten the texture while
preserving the blackpoint.
Specifies a fixed value to add in order to lighten
the texture.
Adjusts the midtones, while keeping the whitepoint
and blackpoint the same.
Adjusts the hue, as tied to the HSL, for the layer
stack.
Adjusts the saturation level, as tied to the HSL, for
the layer stack.
Adjusts the lightness level, as tied to the HSL, for
the layer stack.
Adjusts the hue level, as tied to the HSV, for the
layer stack.
Adjusts the saturation level, as tied to the HSV, for
the layer stack.
Adjusts the value level, as tied to the HSV, for the
layer stack.
Adding negative values essentially
darkens the texture.
Adjustment/Height As Normal
Bump Weight entry box,
slider
Adjusts the sensitivity of the bump weight when
calculating height as a normal value.
Adjustment/Hue Shift
Hue entry box,
slider
Changes the RGB hue value of the paint in the
layer stack.
Adjustment/Invert
Red checkbox Inverts the contents of the red color component
when checked. Uncheck the parameter to leave the
component unchanged. If there is a significant
amount of red paint in your layer stack the inverse
is a significant absence of red.
The Foundry
It is uncommon that only one component would be selected, however if
the need arises, you can choose to
invert only one, or a subset, of the
four components.
Mari 2.0v1
Page 88

Control Type What it does Notes
LAYERS PALETTE
Layers Palette Fields
88
Green checkbox Inverts the contents of the green color component
when checked. Uncheck the parameter to leave the
component unchanged. If there is a significant
amount of green paint in your layer stack the
inverse is a significant absence of green.
Blue checkbox Inverts the contents of the blue color component
when checked. Uncheck the parameter to leave the
component unchanged. If there is a significant
amount of blue paint in your layer stack the
inverse is a significant absence of blue.
Alpha checkbox Inverts the contents of the alpha color component
when checked. Uncheck the parameter to leave the
component unchanged.
Adjustment/Levels
Red checkbox Determines whether to apply the adjustment to the
red component.
Green checkbox Determines whether to apply the adjustment to the
green component.
Blue checkbox Determines whether to apply the adjustment to the
blue component.
Output Level
| WhiteOut entry box,
slider
Adjusts the white level of the output in the paint
for the selected color components.
It is uncommon that only one component would be selected, however if
the need arises, you can choose to
invert only one, or a subset, of the
four components.
It is uncommon that only one component would be selected, however if
the need arises, you can choose to
invert only one, or a subset, of the
four components.
It is uncommon that only one component would be selected, however if
the need arises, you can choose to
invert only one, or a subset, of the
four components.
Output Level
Input Level
Input Level
Input Level
Adjustment/Luminosity
The Foundry
| BlackOut entry box,
| White entry box,
| Mid entry box,
| Black entry box,
slider
slider
slider
slider
Adjusts the black level of the output in the paint
for the selected color component.
Adjusts the white level of the input for the
selected color component.
Adjusts the midtone level of the input for the
selected color components.
Adjusts the black level of the input for the selected
color component.
Mari 2.0v1
Page 89

Control Type What it does Notes
Adjustment/Premultiply Alpha
Unpremultiply checkbox Either pre- or post-multiplies the alpha in the
selected image. If you are painting using an image
without pre-multiplied alpha onto one with it, use
this filter to perform the pre-multiplication, so the
images match and you avoid lines around the out
side of the patch. Post-multiply works the same,
but in reverse: it removes pre-multiplication to
match images that do not have pre-multiplied
alpha.
Adjustment/Saturation
Saturation entry box,
slider
Adjusts the color saturation of the paint in the
layer stack.
Adjustment/Scale
R entry box,
slider
Adjusts the scale of the Red color component.
Dragging the slider to the left pulls the scale
towards cyan, whereas dragging the slider to the
right pulls it towards red.
LAYERS PALETTE
Layers Palette Fields
89
G entry box,
slider
Adjusts the Green color component. Dragging the
slider to the left pulls the scale towards magenta,
whereas dragging the slider to the right pulls it
towards green.
B entry box,
slider
Adjusts the Blue color component. Dragging the
slider to the left pulls the scale towards yellow,
whereas dragging the slider to the right pulls it
towards blue.
A entry box,
Adjusts the Alpha component.
slider
Adjustment/Set Value
Channel dropdown The options available in the dropdown menu are
Red, Green, Blue, Alpha.
Value entry box,
slider
Adjusting the slider modifies the value of the component chosen in the dropdown menu above.
Adjustment/Shuffle
R dropdown Select a color component from the options r, g, b,
and a in the dropdown menu to replace the Red
component with another color. Setting r in the
dropdown menu keeps the red color in the Red
component.
The Foundry
Mari 2.0v1
Page 90

Control Type What it does Notes
G dropdown Select a color component from the options r, g, b,
and a in the dropdown menu to replace the Green
component with another color. Setting g in the
dropdown menu keeps the green color in the Green
component.
B dropdown Select a color component from the options r, g, b,
and a in the dropdown menu to replace the Blue
component with another color. Setting b in the
dropdown menu keeps the blue color in the Blue
component.
A dropdown Select a color component from the options r, g, b,
and a in the dropdown menu to replace the Alpha
component with another color. Setting a in the
dropdown menu keeps the alpha color in the Alpha
component.
Adjustment/Tangent To Screen
Suppress Blue checkbox Suppresses the blue value from the color-encoded
vectors in screen space.
LAYERS PALETTE
Layers Palette Fields
90
Adjustment/Tangent To World
Suppress Blue checkbox Suppresses the blue value from the color-encoded
vectors in world space.
Adjustment/sRGB2Linear
Invert checkbox Applies an sRGB to linear colorspace conversion.
Checking Invert applies a linear to sRGB colorspace
conversion.
Procedural/Basic/Color
Color swatch Applies the specified color from the color swatch
to the entire model.
Procedural/Basic/Constant
Constant entry box,
slider
Generates a constant level of grayscale color to be
applied to the model.
Procedural/Basic/Vector
X entry box,
slider
Adjusts the values of the X axis, which correspond
to the Red color component, to modify the colorencoded vectors.
Y entry box,
slider
Adjusts the values of the Y axis, which correspond
to the Green color component, to modify the colorencoded vectors.
Z entry box,
slider
Adjusts the values of the Z axis, which correspond
to the Blue color component, to modify the colorencoded vectors.
The Foundry
Mari 2.0v1
Page 91

Control Type What it does Notes
LAYERS PALETTE
Layers Palette Fields
91
W entry box,
slider
Procedural/ Environment/Cubemap
Cubic Image entry box,
file browser
Falloff Start entry box,
slider
Falloff End entry box,
slider
Procedural/ Environment/Cubemap Projector
Cubic Image entry box,
file browser
Cull Backfaces checkbox When the checkbox is ticked, this setting ensures
Offset
| X entry box,
slider
Offset
| Y entry box,
slider
Adjusts the values of the W axis, which correspond
to the Alpha component, to modify the colorencoded vectors.
The environment image you want to be reflected. This procedural cannot be cached or
Specifies where the cubic image starts.
Specifies where the cubic image ends.
Select or input the filepath to the .dds cubic image
to project as a texture.
that projection does not affect areas facing away
from the camera when factoring edge falloff.
The offset of the projected image along the X axis.
This affects the position of where the camera sits
in the scene.
The offset of the projected image along the Y axis.
This affects the position of where the camera sits
in the scene.
baked and is for display purposes
only.
This procedural cannot be cached or
baked and is for display purposes
only.
Offset
| Z entry box,
Rotation
Rotation
Rotation
Edge Falloff
Edge Falloff
Edge Falloff
The Foundry
| X entry box,
| Y entry box,
| Z entry box,
| Start entry box,
| End entry box,
| Curve curve editor Modifies the otherwise linear shape of the edge
slider
slider
slider
slider
slider
slider
The offset of the projected image along the Z axis.
This affects the position of where the camera sits
in the scene.
The rotation of the projected image along the X
axis.
The rotation of the projected image along the Y
axis.
The rotation of the projected image along the Z
axis.
Modifies how far away the projection falloff starts
on the model.
Modifies how far away the projection falloff ends
on the model.
falloff to your desired shape.
This rotates the camera for the
entire scene, not just one part.
This rotates the camera for the
entire scene, not just one part.
This rotates the camera for the
entire scene, not just one part.
Mari 2.0v1
Page 92

Control Type What it does Notes
LAYERS PALETTE
Layers Palette Fields
92
Distance Falloff
Distance Falloff
Distance Falloff
Procedural/Environment/Sphere Map
SphereMap file browser The environment image you want to be reflected. This procedural cannot be cached or
FalloffStart entry box,
FalloffEnd entry box,
Procedural/Environment/Sphere Map Projector
Spherical Image filebrowser Uses a spherical image of any file type as a texture
Cull Backfaces checkbox When the checkbox is ticked, this setting ensures
| Start entry box Modifies the falloff start distance. From 0-100;
100 represents straight-on projection.
| End entry box Modifies the falloff end distance. From 0-100;
100 represents straight-on projection.
| Curve entry box,
slider
slider
file browser
Modifies the otherwise linear shape of the distance falloff to your desired shape.
Specifies where the spherical image starts.
Specifies where the spherical image ends.
to project onto the model. Select the filepath to
the spherical image to project as a texture.
that projection does not affect areas facing away
from the camera when factoring edge falloff.
baked and is for display purposes
only.
This procedural cannot be cached or
baked and is for display purposes
only.
Offset
| X entry box The offset of the projected image along the X axis.
This affects the position of where the camera sits
in the scene.
Offset
| Y entry box The offset of the projected image along the Y axis.
This affects the position of where the camera sits
in the scene.
Offset
| Z entry box The offset of the projected image along the Z axis.
This affects the position of where the camera sits
in the scene.
Rotation
Rotation
Rotation
Edge Falloff
Edge Falloff
The Foundry
| X entry box,
slider
| Y entry box,
slider
| Z entry box,
slider
| Start entry box,
slider
| End entry box,
slider
The rotation of the projected image along the X
axis.
The rotation of the projected image along the Y
axis.
The rotation of the projected image along the Z
axis.
Modifies how far away the projection falloff starts
on the model.
Modifies how far away the projection falloff ends
on the model.
This rotates the camera for the
entire scene, not just one part.
This rotates the camera for the
entire scene, not just one part.
This rotates the camera for the
entire scene, not just one part.
Mari 2.0v1
Page 93

Control Type What it does Notes
LAYERS PALETTE
Layers Palette Fields
93
Edge Falloff
Distance Falloff
Distance Falloff
Distance Falloff
Procedural/Environment/Triplanar Projection
World Scale entry box Gives overall scale control for the image projec-
Top
| Top Image file browser Specifies the location of the image you want to
Top
| Top Repeat entry box,
Top
| Top Angle entry box,
Top
| Top U Offset entry box,
Top
| Top V Offset entry box,
| Curve curve editor Modifies the otherwise linear shape of the edge
falloff to your desired shape.
| Start entry box Modifies the falloff start distance. From 0-100;
100 represents straight-on projection.
| End entry box Modifies the falloff end distance. From 0-100;
100 represents straight-on projection.
| Curve curve editor Modifies the otherwise linear shape of the dis-
tance falloff to your desired shape.
tion.
project onto the top of your model.
Specifies the frequency at which the image is
slider
slider
slider
slider
repeated across the top of your model.
Specifies the rotation angle of the image on the
top of your model.
Specifies how much the image on the top of your
model is offset by on the U axis.
Specifies how much the image on the top of your
model is offset by on the V axis.
Top
| Top U Scale entry box,
slider
Top
| Top V Scale entry box,
slider
Top
| Top Falloff Start entry box,
slider
Top
| Top Falloff End entry box,
slider
Top
| Top Falloff curve editor Controls the falloff of the image projection
Front
| Front Image file browser Specifies the location of the image you want to
Front
| Front Repeat entry box,
slider
Front
| Front Angle entry box,
slider
The Foundry
Specifies how much the image on the top of your
model is stretched or contracted on the U axis.
Specifies how much the image on the top of your
model is stretched or contracted on the V axis.
Controls where the image projection starts on the
top of the model.
Controls where the image projection ends on the
top of the model.
between the start and end values on the top of the
model.
project onto the front of your model.
Specifies the frequency at which the image is
repeated across the front of your model.
Specifies the rotation angle of the image on the
front of your model.
Mari 2.0v1
Page 94

Control Type What it does Notes
Front
| Front U Offset entry box,
slider
Front
| Front V Offset entry box,
slider
Front
| Front U Scale entry box,
slider
Front
| Front V Scale entry box,
slider
Front
| Front Falloff
Start
Front
| Front FalloffEnd entry box,
Front
| Front Falloff curve editor Controls the falloff of the image projection
entry box,
slider
slider
Specifies how much the image on the front of your
model is offset by on the U axis.
Specifies how much the image on the front of your
model is offset by on the V axis.
Specifies how much the image on the front of your
model is stretched or contracted on the U axis.
Specifies how much the image on the front of your
model is stretched or contracted on the V axis.
Controls where the image projection starts on the
front of the model.
Controls where the image projection ends on the
front of the model.
between the start and end values on the front of
the model.
LAYERS PALETTE
Layers Palette Fields
94
Right
| Right Image file browser Specifies the location of the image you want to
project onto the side of your model.
Right
| Right Repeat entry box,
slider
Right
| Right Angle entry box,
slider
Right
| Right U Offset entry box,
slider
Right
| Right V Offset entry box,
slider
Right
| Right U Scale entry box,
slider
Right
| Right V Scale entry box,
slider
Right
| Right Falloff
Start
Right
| Right Falloff End entry box,
Right
| Right Falloff curve editor Controls the falloff of the image projection
Procedural/Geometry/Ambient Occlusion
Procedural/Geometry/Position
entry box,
slider
slider
Specifies the frequency at which the image is
repeated across the side of your model.
Specifies the rotation angle of the image on the
side of your model.
Specifies how much the image on the side of your
model is offset by on the U axis.
Specifies how much the image on the side of your
model is offset by on the V axis.
Specifies how much the image on the side of your
model is stretched or contracted on the U axis.
Specifies how much the image on the side of your
model is stretched or contracted on the V axis.
Controls where the image projection starts on the
side of the model.
Controls where the image projection ends on the
side of the model.
between the start and end values on the side of
the model.
Procedural/Geometry/Surface Normal
The Foundry
Mari 2.0v1
Page 95

Control Type What it does Notes
Procedural/Geometry/UDIM Mask
UDIM entry box Enter the UDIM number of the UDIM you want to
unmask.
Procedural/Geometry/UV
Procedural/Procedural/Fractal/ Cloud
Size entry box,
slider
Roughness entry box,
slider
Offsets
| X Offset entry box,
slider
Offsets
| Y Offset entry box,
slider
Offsets
| Z Offset entry box,
slider
Color
| Color A swatch Sets the color to be used for the pattern’s A input.
Color
| Color B swatch Sets the color to be used for the pattern’s B input.
Adjusts the size of the cloud pattern.
Adjusts the roughness of the cloud pattern. Dragging the slider to lower values smooths out the
transition from color A to color B.
Moves the pattern across the model on the x axis.
Moves the pattern across the model on the y axis.
Moves the pattern across the model on the z axis.
LAYERS PALETTE
Layers Palette Fields
95
Procedural/Procedural/Fractal/Turbulence
Size entry box,
slider
Roughness entry box,
slider
Color
| Color A swatch Sets the color to be used for the pattern’s A input.
Color
| Color B swatch Sets the color to be used for the pattern’s B input.
Procedural/Procedural/Misc/Flow
Animation
Animation
Animation
Image
Image
| Animated checkbox Enables or disables the animation.
| Time Offset entry box,
slider
| Speed entry box,
slider
| Tile Image file browser Selects the image to use on the model for flow.
| Repeat entry box,
slider
Adjusts the size of the turbulence pattern.
Adjusts the roughness of the turbulence pattern.
Dragging the slider to lower values smooths out
the transition from color A to color B.
Adjusts the flow over time to view the effect of
vector paint.
Adjusts the sensitivity of Time Offset to affect the
speed of flow.
Sets the repetition value of the tiled image.
The Foundry
Mari 2.0v1
Page 96

Control Type What it does Notes
Procedural/Procedural/Misc/Oil
Size entry box,
slider
Adjusts the size of the oil pattern.
LAYERS PALETTE
Layers Palette Fields
96
Organicness entry box,
slider
Roughness entry box,
slider
Color
| Color A swatch Sets the color to be used for the pattern’s A input.
Color
| Color B swatch Sets the color to be used for the pattern’s B input.
Procedural/Procedural/Noise/Cellular
Size entry box,
slider
Type dropdown Sets how color A and color B are used in the pat-
Distance Method dropdown Changes the shape of the cells to affect the dis-
Color
| Color A swatch Sets the color to be used to the pattern’s color A
Color
| Color B swatch Sets the color to be used for the pattern’s color B
Procedural/Procedural/Noise/Perlin
Size entry box,
slider
Sets the overall organic quality of the oil pattern.
Adjusts the roughness of the oil pattern. Dragging
the slider to lower values smooths out the transi
tion from color A to color B.
Adjusts the size of the cellular pattern.
tern.
tance the cells are from each other.
input.
input.
Adjusts the size of the noise pattern.
-
Color
| Color A swatch Sets the color to be used for the pattern’s color A
input.
Color
| Color B swatch Sets the color to be used for the pattern’s color B
input.
Procedural/Procedural/Noise/Squiggle
Size entry box,
slider
Color
| Color A swatch Sets the color to be used for the pattern’s color A
Color
| Color B swatch Sets the color to be used for the pattern’s color B
Procedural/Procedural/ Pattern/Cube
Repeat entry box,
slider
The Foundry
Adjusts the size of the squiggle pattern.
input.
input.
Specifies the repetition frequency of the cube pattern.
Mari 2.0v1
Page 97

Control Type What it does Notes
LAYERS PALETTE
Layers Palette Fields
97
Gap entry box,
slider
Fall Off entry box,
slider
Roundness entry box,
slider
Color
| Color A swatch Sets the color to be used for the pattern’s color A
Color
| Color B swatch Sets the color to be used for the pattern’s color B
Procedural/Procedural/Pattern/Object Space Linear Gradient
Start entry box,
slider
End entry box,
slider
Map curve editor Set the color A and color B transitions for the gra-
Rotation
Rotation
| X entry box,
slider
| Y entry box,
slider
Sets the spacing between the cubes in the pattern.
Adjusts the falloff amount between the cubes.
Adjusts how much the cubes are rounded off.
input.
input.
Sets the start point on the object for Color B of
the gradient.
Sets the end point of Color B, where Color A
begins, on the object of the gradient.
dient using points on a curve.
Adjusts how the gradient appears on the model by
rotating the gradient on the X axis.
Adjusts how the gradient appears on the model by
rotating the gradient on the Y axis.
Rotation
Color
Color
Procedural/Procedural/Pattern/Sphere
Size entry box,
Falloff curve editor Adjusts the falloff amount between the spheres.
Color
Color
Procedural/Procedural/Pattern/Tiled
Tile Image file browser The image you want to have tiled across the model.
The Foundry
| Z entry box,
slider
| Color A swatch Sets the color to be used for the gradient’s A
| Color B swatch Sets the color to be used for the gradient’s B
slider
| Color A swatch Sets the color to be used for the pattern’s color A
| Color B swatch Sets the color to be used for the pattern’s color B
Adjusts how the gradient appears on the model by
rotating the gradient on the Z axis.
input.
input.
Adjusts the size of the spherical pattern.
input.
input.
Mari 2.0v1
Page 98

Control Type What it does Notes
LAYERS PALETTE
Layers Palette Fields
98
Rotation Angle
(Degrees)
Offset
| U Offset entry box,
Offset
| V Offset entry box,
Repeat
| U Repeat entry box,
Repeat
| V Repeat entry box,
Mirror
| Mirror U entry box,
Mirror
| Mirror V entry box,
Procedural/Procedural/Pattern/UV Grid
Color swatch Sets the color to be used for the grid lines.
Repeat entry box,
Thickness entry box,
Procedural/Procedural/Pattern/UV Linear Gradient
entry box,
slider
slider
slider
slider
slider
slider
slider
slider
slider
Changes the angle of rotation for the tiled image.
Specifies how much the image is offset by on the U
axis.
Specifies how much the image is offset by on the V
axis.
Specifies how much the image is repeated on the U
axis.
Specifies how much the image is repeated on the V
axis.
Sets whether the tiled image is mirrored on the U
axis.
Sets whether the tiled image is mirrored on the V
axis.
Specifies the repeat rate for the grid on the
model’s surface.
Sets the thickness of the grid lines.
Start entry box,
slider
End entry box,
slider
Map curve editor Set the color A and color B transitions for the gra-
Angle entry box,
slider
Repeat entry box,
slider
Color
| Color A swatch Sets the color to be used for the gradient’s A
Color
| Color B swatch Sets the color to be used for the gradient’s B
Procedural/Procedural/Plant/Wood
Size entry box,
slider
The Foundry
Sets the start point on the UV patches for Color B
of the gradient.
Sets the end point of Color B, where Color A
begins, on the UV patches of the gradient.
dient in UV space using points on a curve.
Specifies the angle of the linear gradient on the UV
patches.
Sets how much the linear gradient is repeated
across the UV patches.
input.
input.
Adjusts the size of the wood pattern across the
entire model.
Mari 2.0v1
Page 99

Control Type What it does Notes
LAYERS PALETTE
Layers Palette Fields
99
Bands entry box,
slider
Noise
| Size entry box,
slider
Noise
| Roughness entry box,
slider
Stretch
| X entry box,
slider
Stretch
| Y entry box,
slider
Stretch
| Z entry box,
slider
Color
| Color A swatch Sets the color to be used for the pattern’s color A
Color
| Color B swatch Sets the color to be used for the pattern’s color B
Adjusts the size of the individual bands in the
wood pattern.
Adjusts the amount of the noise in the bands of
the wood pattern.
Adjusts the roughness of the wood pattern. Dragging the slider to lower values makes the transition from color A to color B more distinct.
Stretches the wood pattern across the model on
the x axis.
Stretches the wood pattern across the model on
the y axis.
Stretches the wood pattern across the model on
the z axis.
input.
input.
The Foundry
Mari 2.0v1
Page 100

23 PATCHES PALETTE
What It Does
The Patches palette displays a selectable list of patches in the project, with icons and buttons to toggle
whether they are visible, or whether they are locked. You can group patches into sets.
Patches palette
fields
Opens this
Control Type What it does
Sorted by dropdown Lets you specify whether to list patches by:
UDIM, or a custom sort (by dragging patches up
and down the list).
icon Click to toggle whether a patch is visible or not.
dialog box
Notes
icon Click to toggle whether a patch is locked or not.
button Hide selected patches.
button Show selected patches.
button Select all patches.
button Lock selected patches.
button Unlock selected patches.
button Link selected patches.
This allows you to replicate changes made to one
patch onto all linked patches quickly and easily.
button Unlink selected patches.
 Loading...