

Page 1
Video Coming Soon!
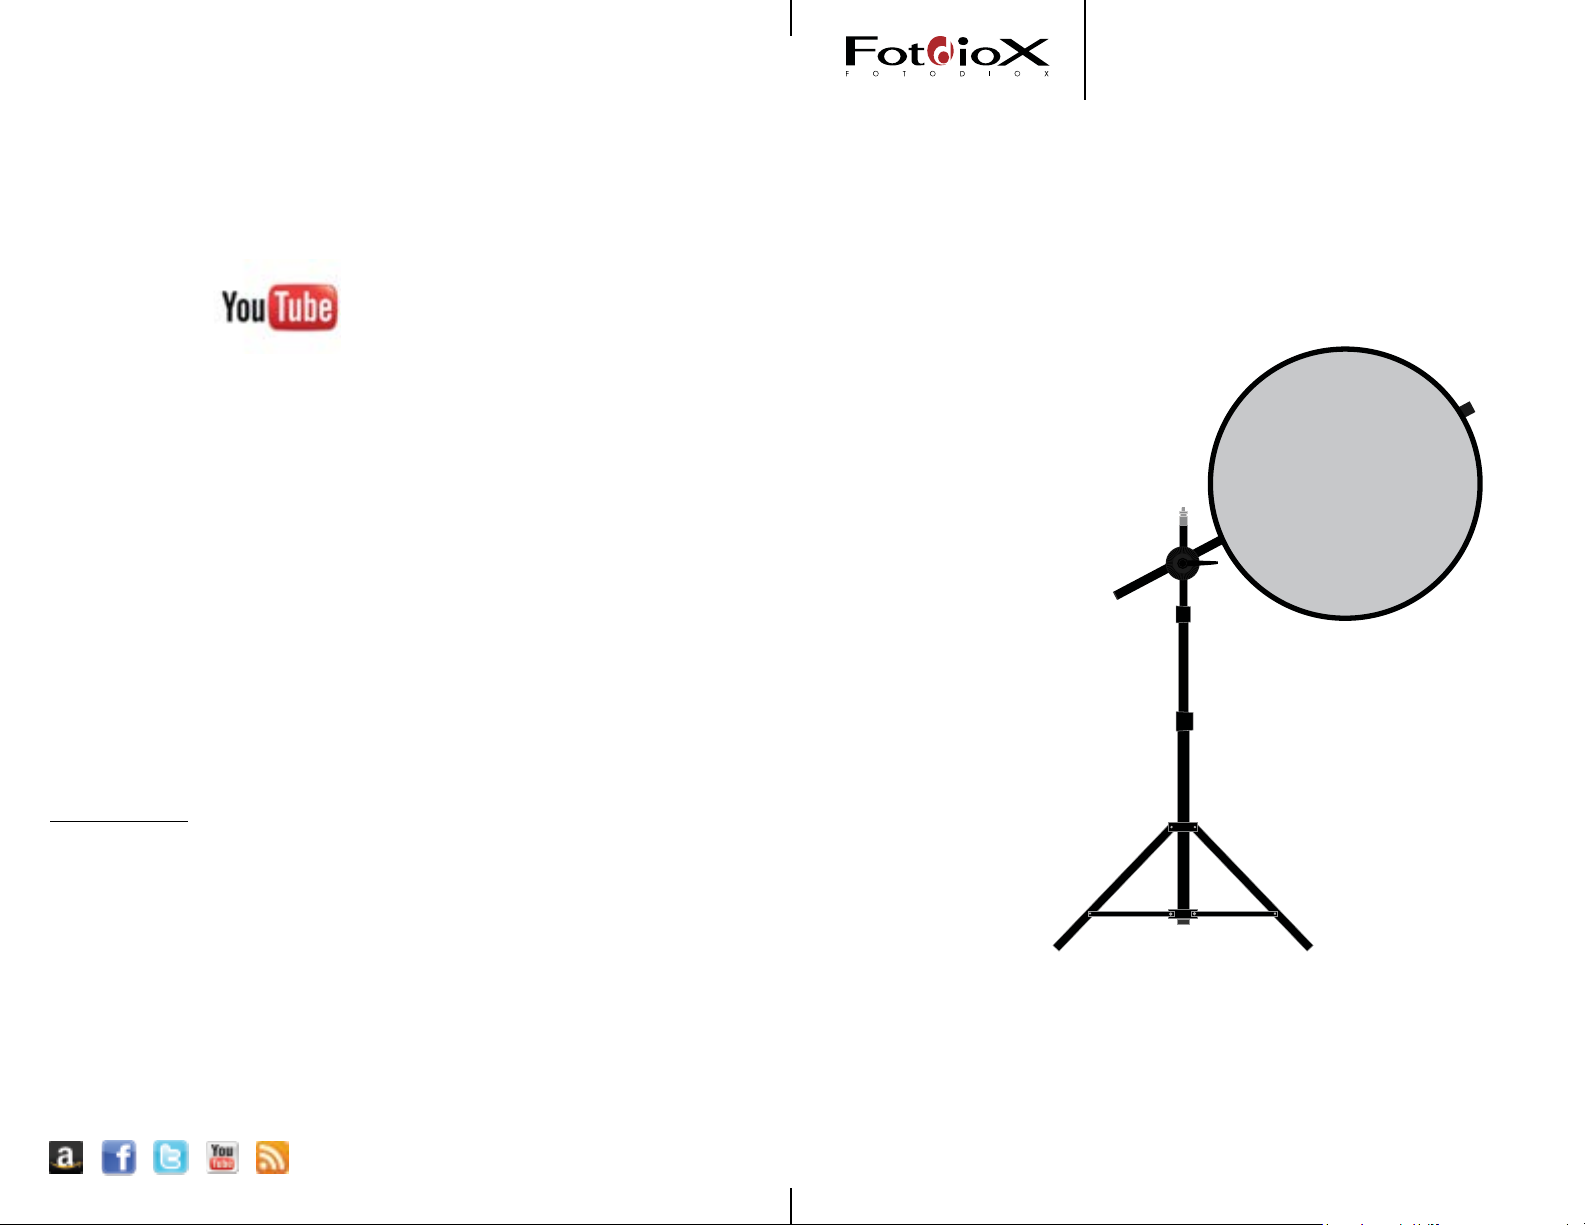
5in1 Reflector
/fotodioxinc
Con taC t Us:
For Information Regarding this
and more of our products,
please contact us:
Instruction Manual
E-mail: [email protected]
Phone: 847.201.4623
www.fotodiox.com
3805 Hawthorne Ct.
Waukegan IL, 60087
We’re also on:
www.fotodiox.com
Page 2
5in1 RefleCtoR
Specs and Features
Product Overview
assemblinG the RefleCtoR
The Stand
fotodiox PRemiUm GRade 5in1 RefleCtoR provides the ultimate in photo
solutions. Use as a ll reector with a soft cold silver, neutral white or
warm tone gold. Can be used as a plain diffuser or use the black to
block unwanted light. The Fotodiox Premium Grade 5in1 reector disc
is made of premium grade, quality reective and diffusive materials
guaranteed to atten out when opened. A slip-cover with four colors
are enclosed with the diffusive disc: soft gold, black, soft silver, and
soft white. Disc collapses down to about 1/3 of its original size for easy
storage and transportation. This kit includes the Fotodiox 6ft or 8ft Stand
and Fotodiox Telescoping Reector Holding Arm.
Product Features
• Pro-grade material, heavy duty construction
• Kit with 6ft or 8ft stand and telescoping boom holder
• Collapsible for portability
• 5 applications in one for all photo occasions
• 24 Month manufacture warranty
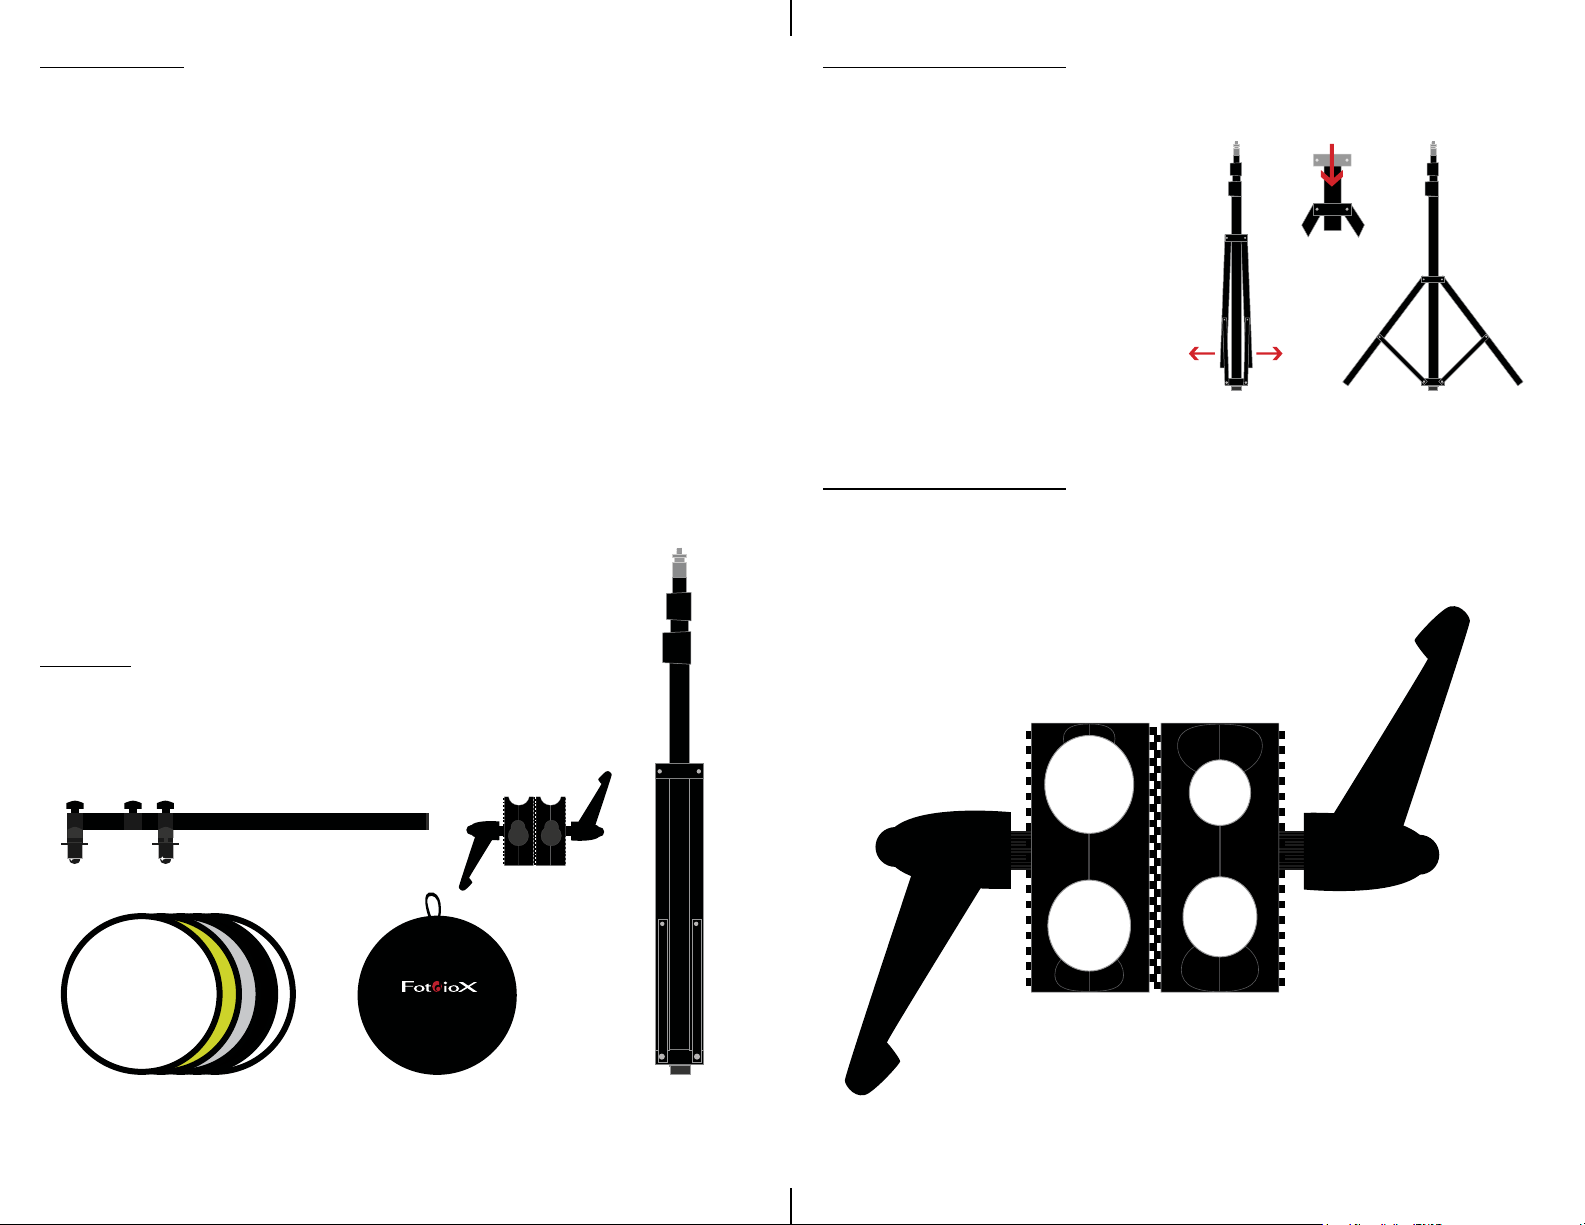
Contents
5 in 1 Reector Kit Includes
1x Holding Arm
1x Rotating Heads
Unfold the stand by loosening
1
the locking nob and slightly
pulling the legs out
Continue by pushing the leg
lock piece down until legs are
unfolded and steady
NOTE: tighten nob to lock legs
assemblinG the RefleCtoR
Understanding the Rotating Heads
The Rotating Heads have four different size holes to t all
of our holding arms and stands including our boomstands
Each of the heads split an extra inch appart to clamp on
to thicker stands
1/8”
1
29 mm
3/4“
19 mm
1x 5in1 Reector Set
1
1x Case
1x 6’ or 8’ Stand
1”
25 mm
NOTE: The rotating heads both have all 4 of the different size holes
7/8“
22 mm
2
Page 3
assemblinG the RefleCtoR assemblinG the RefleCtoR
The Rotating Heads The Rotating Heads
3/4”
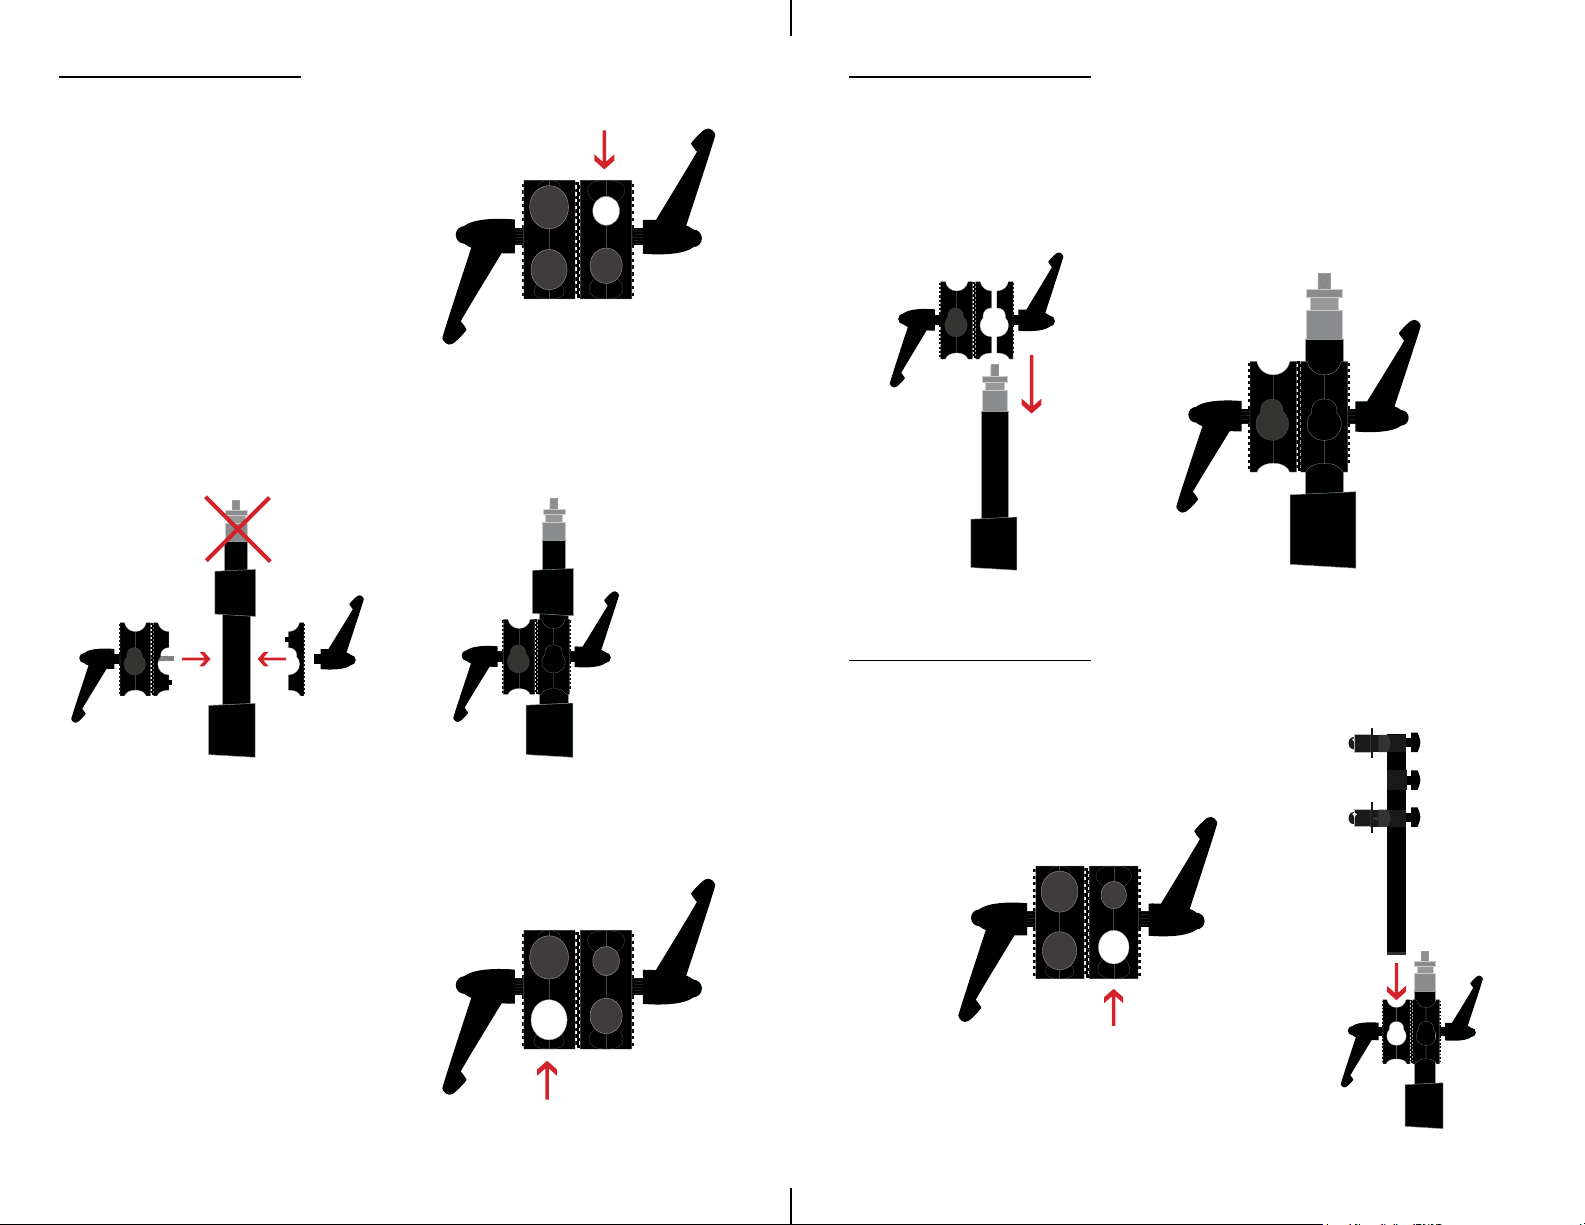
Instructions for the 6ft stand
2
3
To mount the rotating heads to
the 6ft stand, locate the 3/4”
hole on one of the heads
Without loosing sight of the 3/4” hole, detach half of
the head by unscrewing the handle and clamping it
to the second extension pole
NOTE: Careful not to loose the spring or washers
3
Loosen the head by giving the handle a few of turns;
Slide and clamp the 1” hole to the rst extension pole
Screw back
together tightly
Line up studs
and holes together
NOTE: The 6ft stand’s rst extension pole is too thin to hold the rotating head
Instructions for the 8ft stand
2
To mount the rotating heads
to the 8ft stand, locate the 1”
hole on one of the heads
Screw back
together tightly
1”
assemblinG the RefleCtoR
The Arm
To attach the arm to the second head
1
2
locate the 7/8” hole and loosen the head
by giving the handle a few turns
7/8”
Slide arm in and tighten
the head to lock arm in position
43
Page 4
assemblinG the RefleCtoR
The Reector
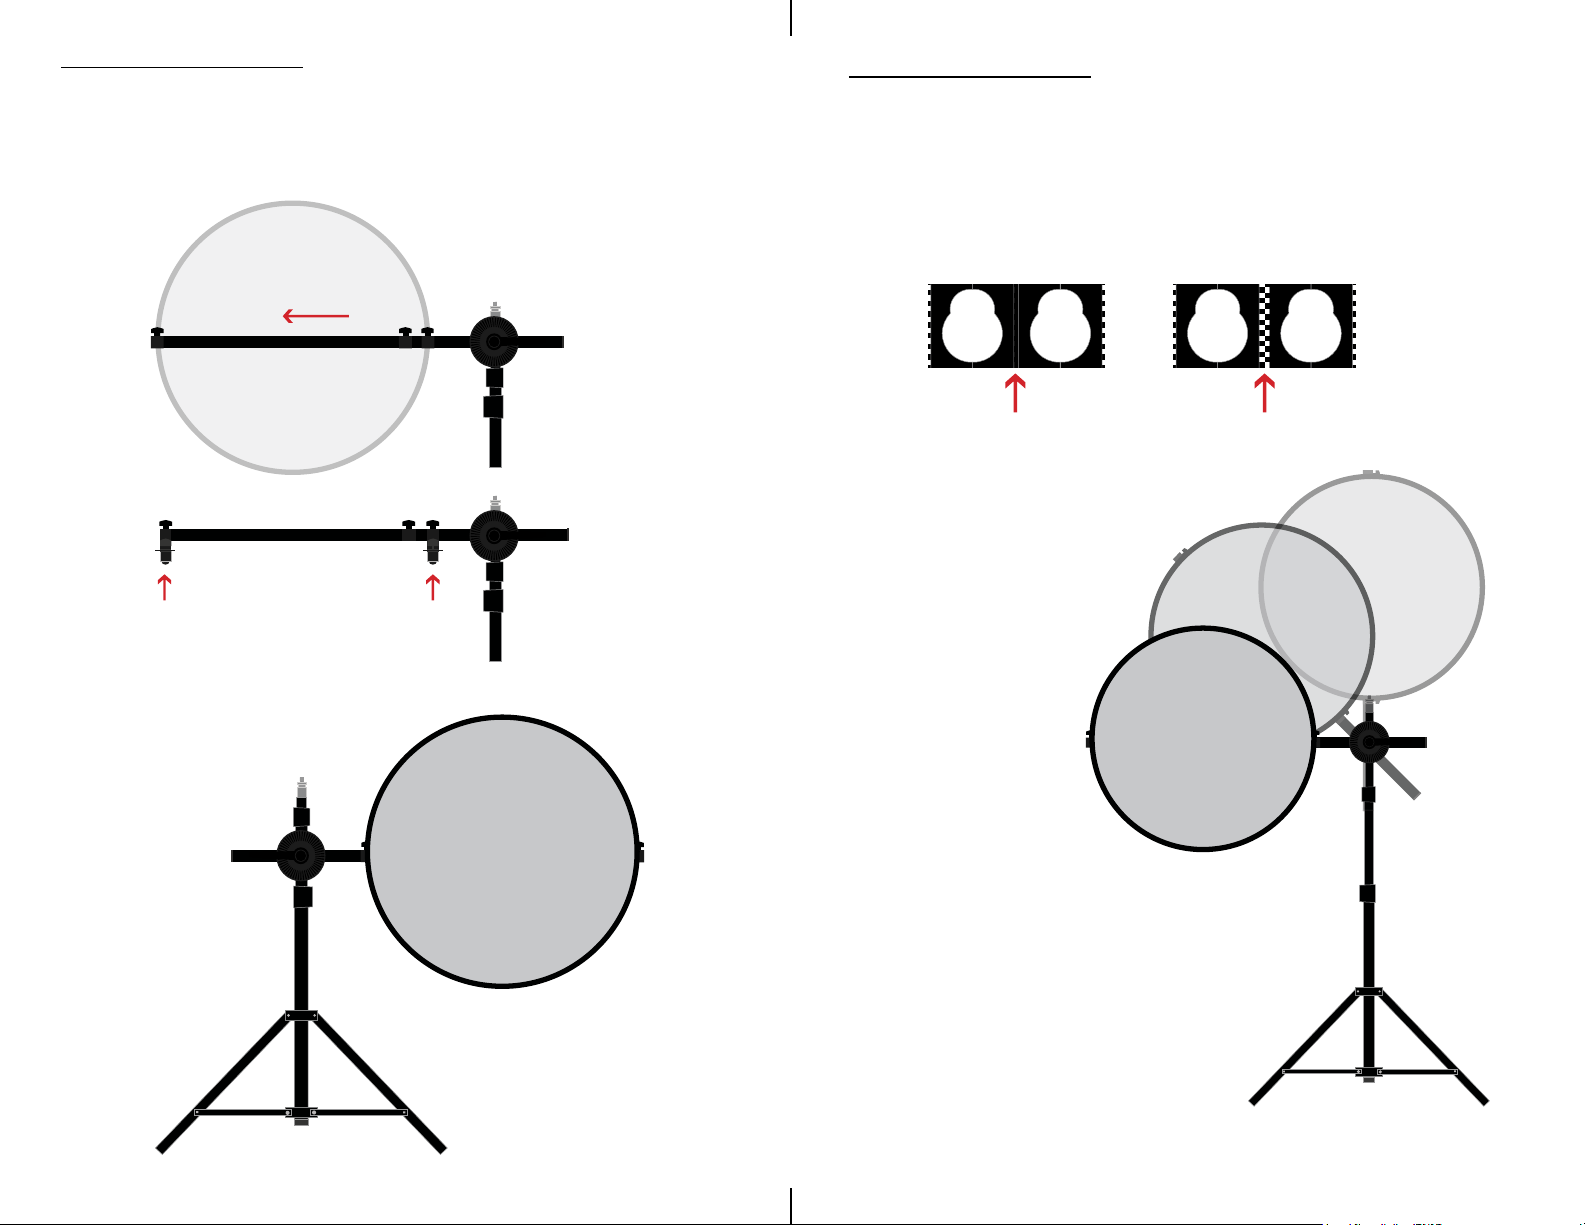
Extend the arm to the width of the
1
2
reector disk by loosening the handles
Using the clips from the holding
arm, clip the disc’s metal frame
onto the arm
assemblinG the RefleCtoR
The Rotating Heads
To adjust the angle of the reector holding
1
arm, loosen the rotating heads enough to
unlock the teeth
Teeth Locked Teeth Unlocked
Adjust the angle by rotating
2
5
the heads and locking them
in position
6
 Loading...