

Page 1
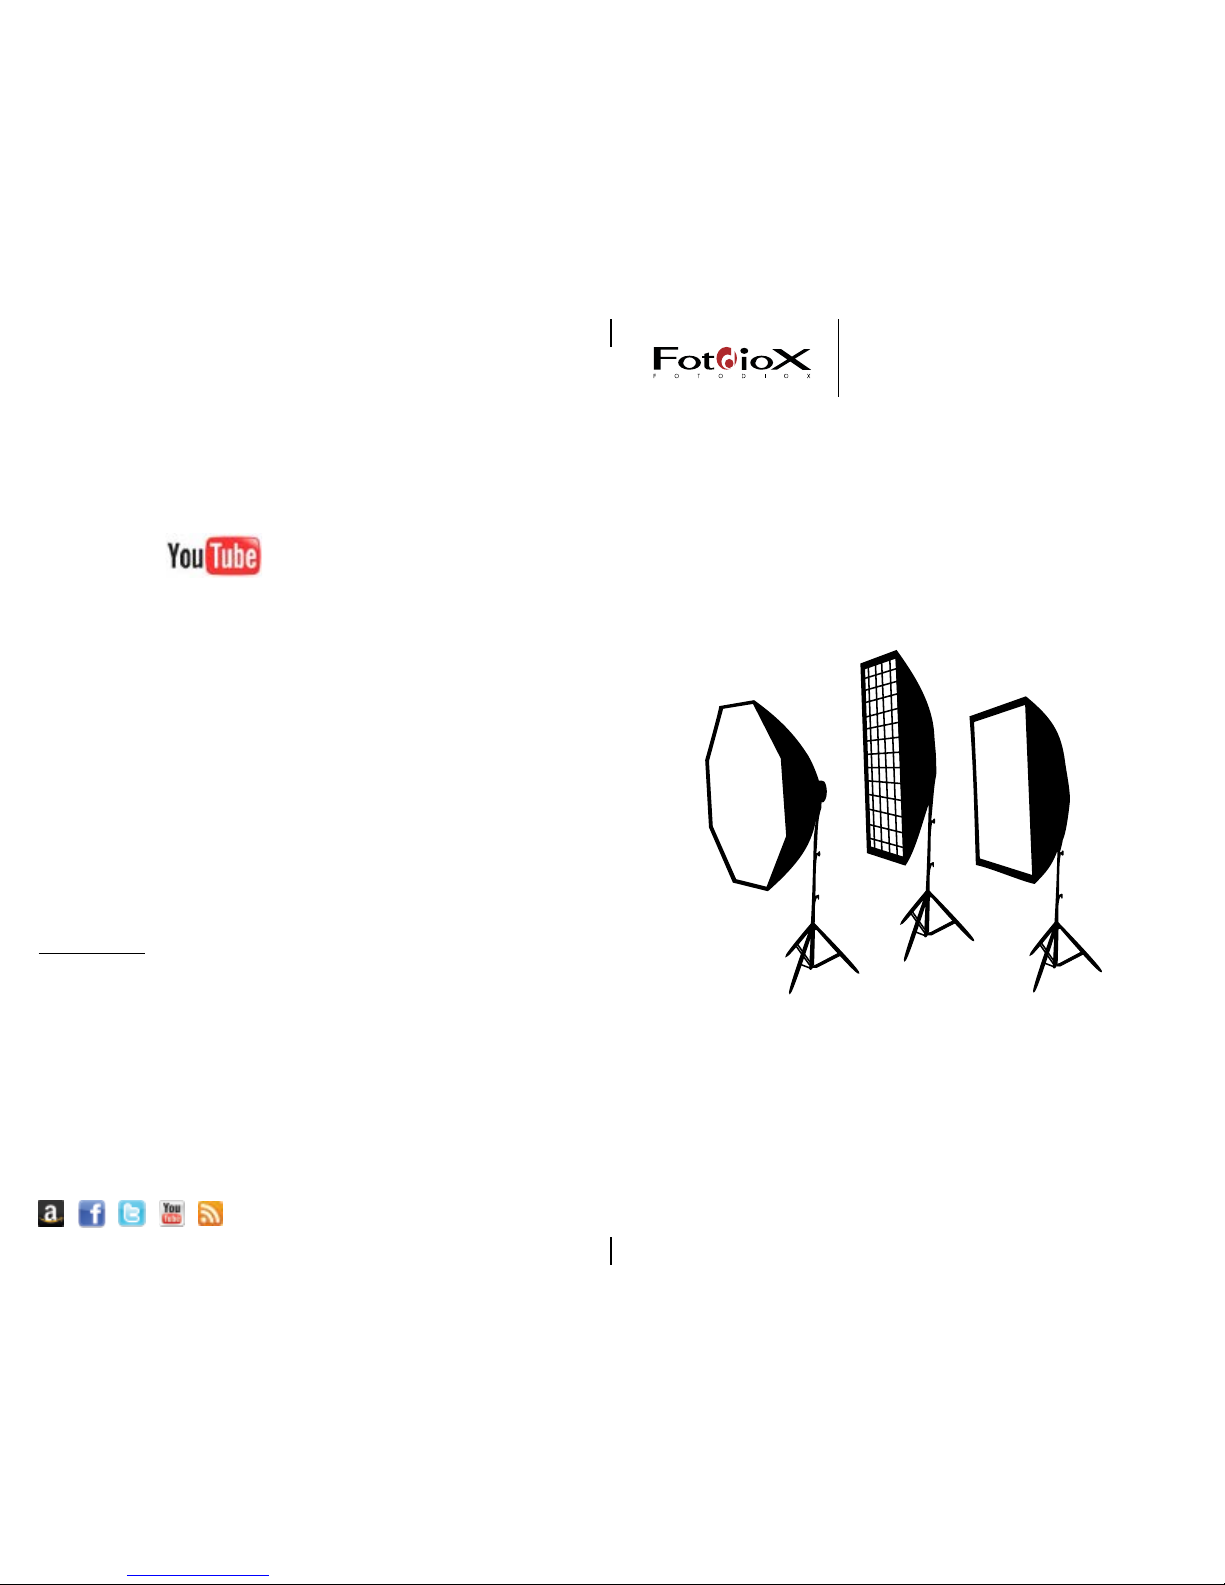
Pro Softbox
Instruction Manual
www.fotodioxpro.com
Con taC t Us:
For Information Regarding this
and more of our products,
please contact us:
E-mail: [email protected]
Phone: 847.201.4623
www.fotodioxpro.com
3805 Hawthorne Ct.
Waukegan IL, 60087
We’re also on:
Video Coming Soon!
/fotodioxinc
Page 2
6
1
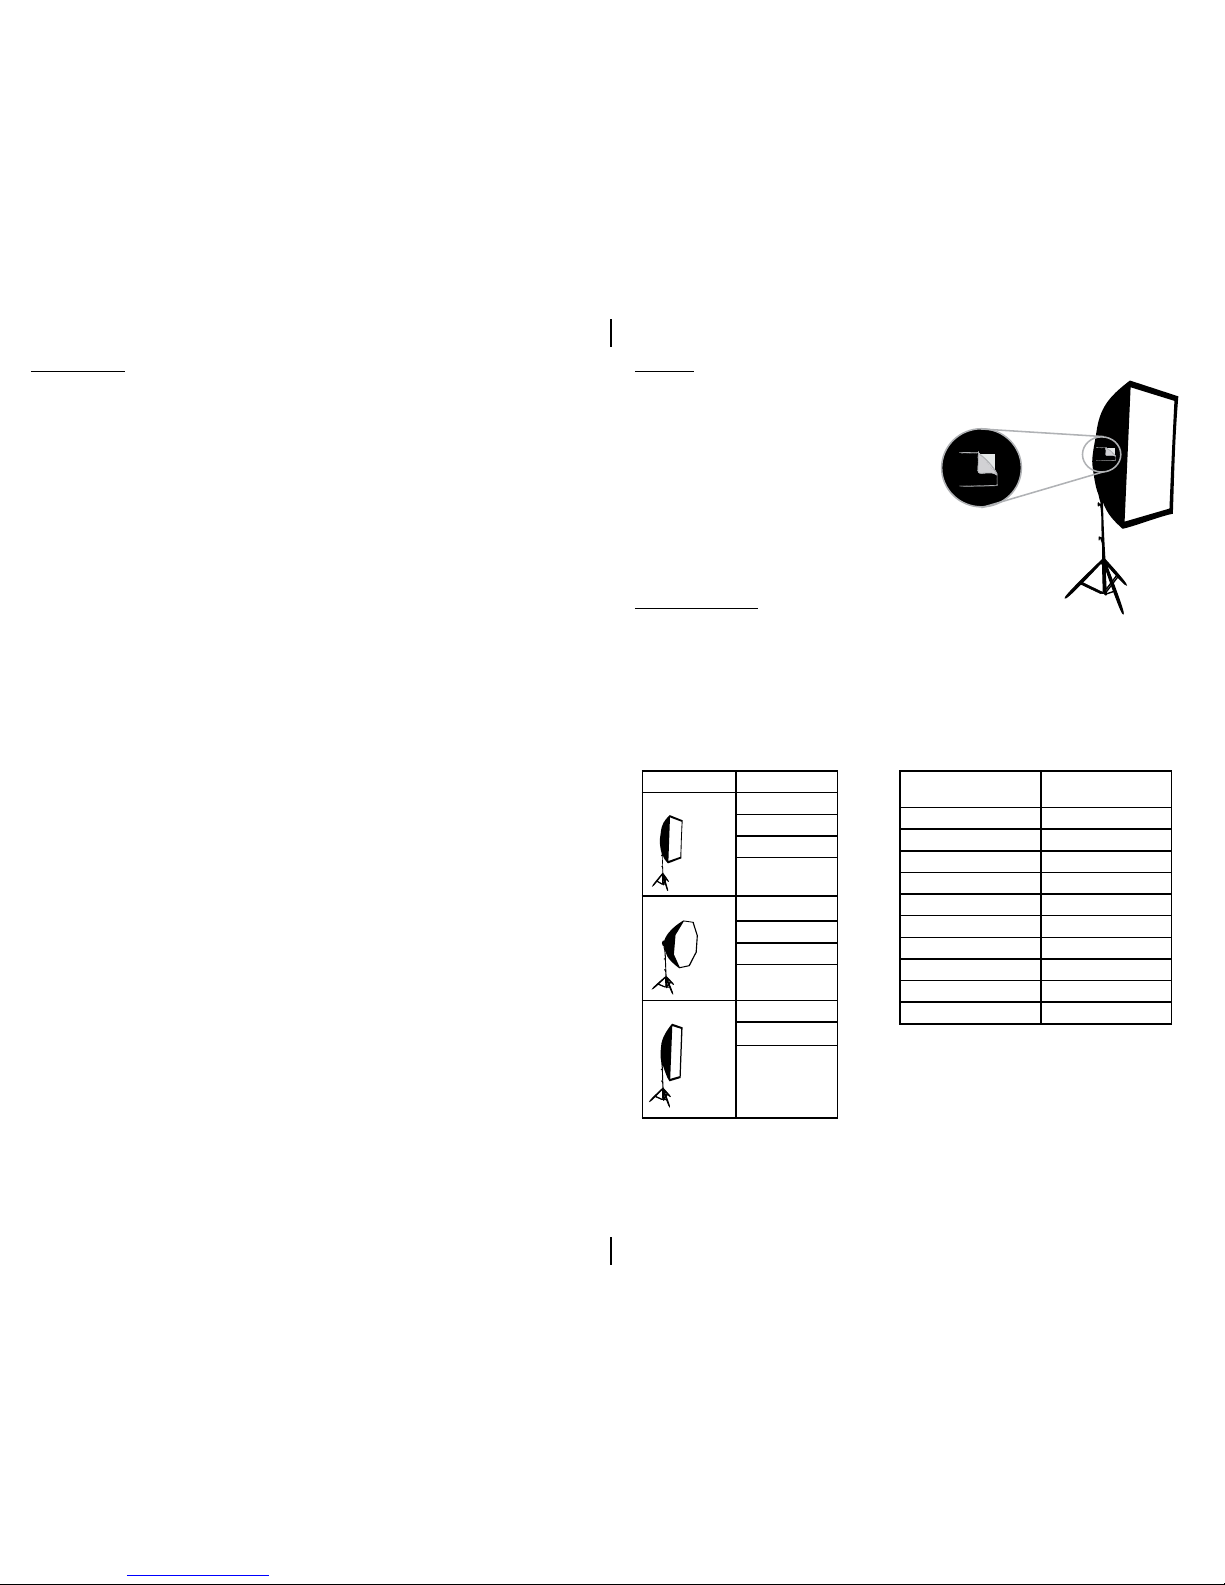
Softboxes and
Eggcrate Grids
Softbox Type Sizes
Rectangular 24x24
24x36
32x48
48x72
Octagon 36
48
60
70
Stripbox 12x56
12x80
12x80
Pro softbox softbox
other softboxes
Specs and Features Details
And Accessories
Product Overview
the fotodiox Pro softbox is a sturdy and economical version of the
standard softbox designs available today and is perfect for studio and
multi-day shooting. It is made with Fotodiox high quality reective and
diffusive materials. The dome of the softbox is made of durable Pro-
grade omni-bounce silver reective fabric with black backing. It also
features a neutral diffusive bafe inside the dome to provide softer
lighting, if needed. An outer diffusive cover closes the front of the
softbox and is attached by Velcro making varied lighting options quick
and easy.
The dedicated speedring is specically designed for your strobe light to
t standard softboxes, rectangular octagon and strip boxes. The speed
ring allows rotation of softbox while on light xture.
Product Features
• Pro Grade, Heat Resistant Reective Fabric
• Heavy Duty Construction with Premium Grade Materials
• Features Inner Bafe and Outer Diffusive Cover for Even Light Throw
• Sealable Venting for use with Modeling Lamp or Continuous Lighting
• Rotating Speedring with Thumb Screw Lock
• 24 Month Manufacturer Warranty
Tips
Softbox size is usually chosen by the size of the subject and the strength
of light supply being used. Used with any tungsten (500 watts or less)
or ash light source, the softbox will direct, amplify, and soften the light
output to subject.
Some rectangular/square softbox
models have vents on two of the
sides for easy access.
These vents, when kept open, help
the Softbox cool off.
Fotodiox, carries a variety of complementary products for
your new Softbox.
Speedring Inserts
Allien Bees Flash Hotshoe
Speedring
Balcar Hensel
Bowens Multiblitz
Broncolor Impact Multiblitz P-Type
Broncolor Pulso Norman Allure
Calumet Genesis Norman Monolight
Calumet Travelite Norman 900 Series
Comet Novatron
Einstein ProPhoto
Elinchrome Speedotron
Excalibur Universal
Page 3
4
3
4x Elastic Bands
Inner Diffuser
Rectangle/
Square Softbox
Stripbox Octagon Box
Small
Large
2
4
3
1
Small Tip
2
6
3
7
4
8
1
5
4
5
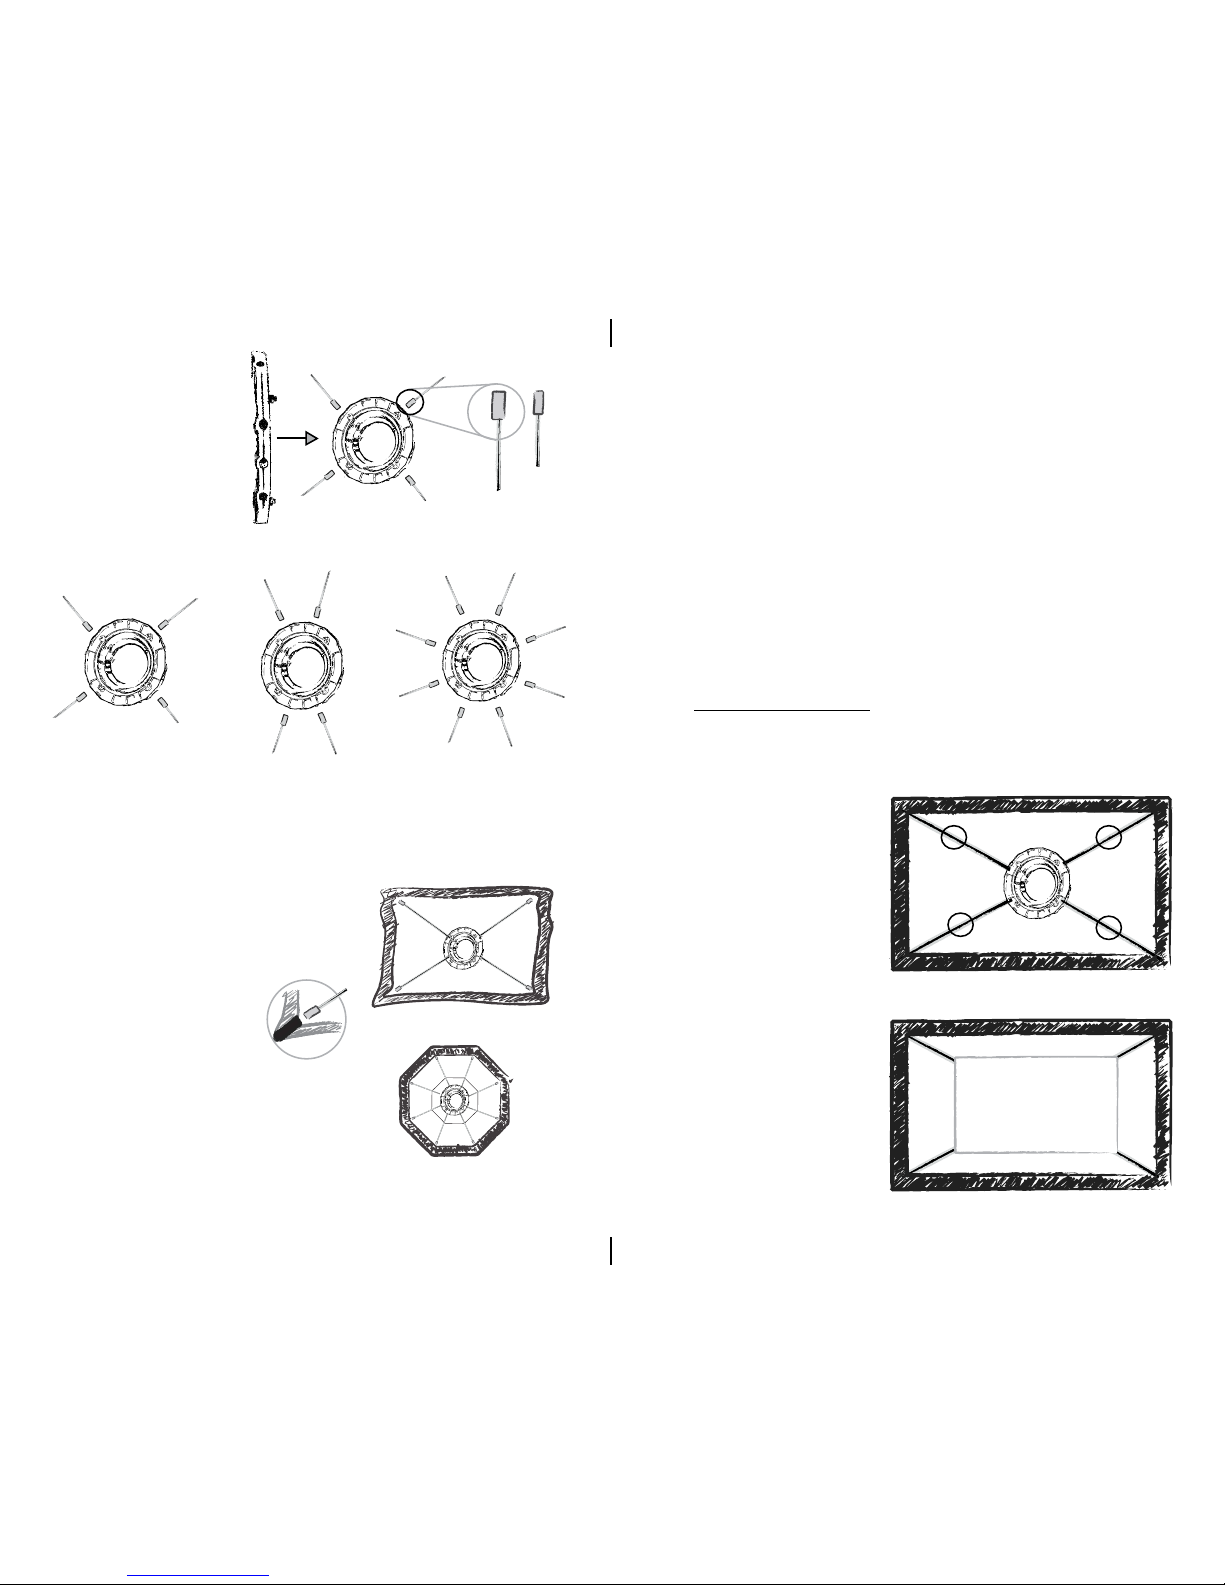
Insert rod into
closed pocket.
Using both hands,
grab the Rod
with one and
push toward the
speedring.
Rectangular Softboxes: You may insert the
rods in any order.
Octagon Softboxes: Insert rods into holes
2 and 3 (see diagram in step 3) into the
closed pockets rst. Then insert rods into
holes 6 and 7 (see diagram in step 3) on
the speedring. Then insert remaining 4
rods in any order desired. This procedure
allows for easy installation. Otherwise, the
rods will be difcult to insert.
Locate the 4 elastic
bands inside the
Softbox at midperimeter on each
corner.
Locate 8 elastic
bands if your model is
an Octagon Softbox.
assembling the softbox
Attaching the inner diffusers
6
Connect all 4 corners
of the Inner Diffuser to
the 4 elastic bands.
Connect 8 corners of
the Inner Diffuser to
the 8 elastic bands
if your model is an
Octagon Softbox.
3
Place Speedring in the
center of the Softbox
Shell as illustrated here.
Insert the large tip
of the Rods in four
opposite holes on
the speedring to
form a perfect “X”
Insert the large tip
of the Rods in four
opposite holes on
the speedring to
form a “Tall X”
Insert the large tip
of the Rods in eight
of the holes on the
speedring that form
an Octagon
2
Study the different
holes of the
Speedring. Insert the
large tip of the Rods
in the holes that
correspond to your
softbox model.
(Examples Below)
Start inserting the small
tip of the rods into the
corresponding closed
pockets in the sequence
that corresponds to your
Softbox model.
WARNING: DO NOT insert the rods underneath the pockets,
Be sure to insert them inside the pockets, NOT under.
Page 4
2
5
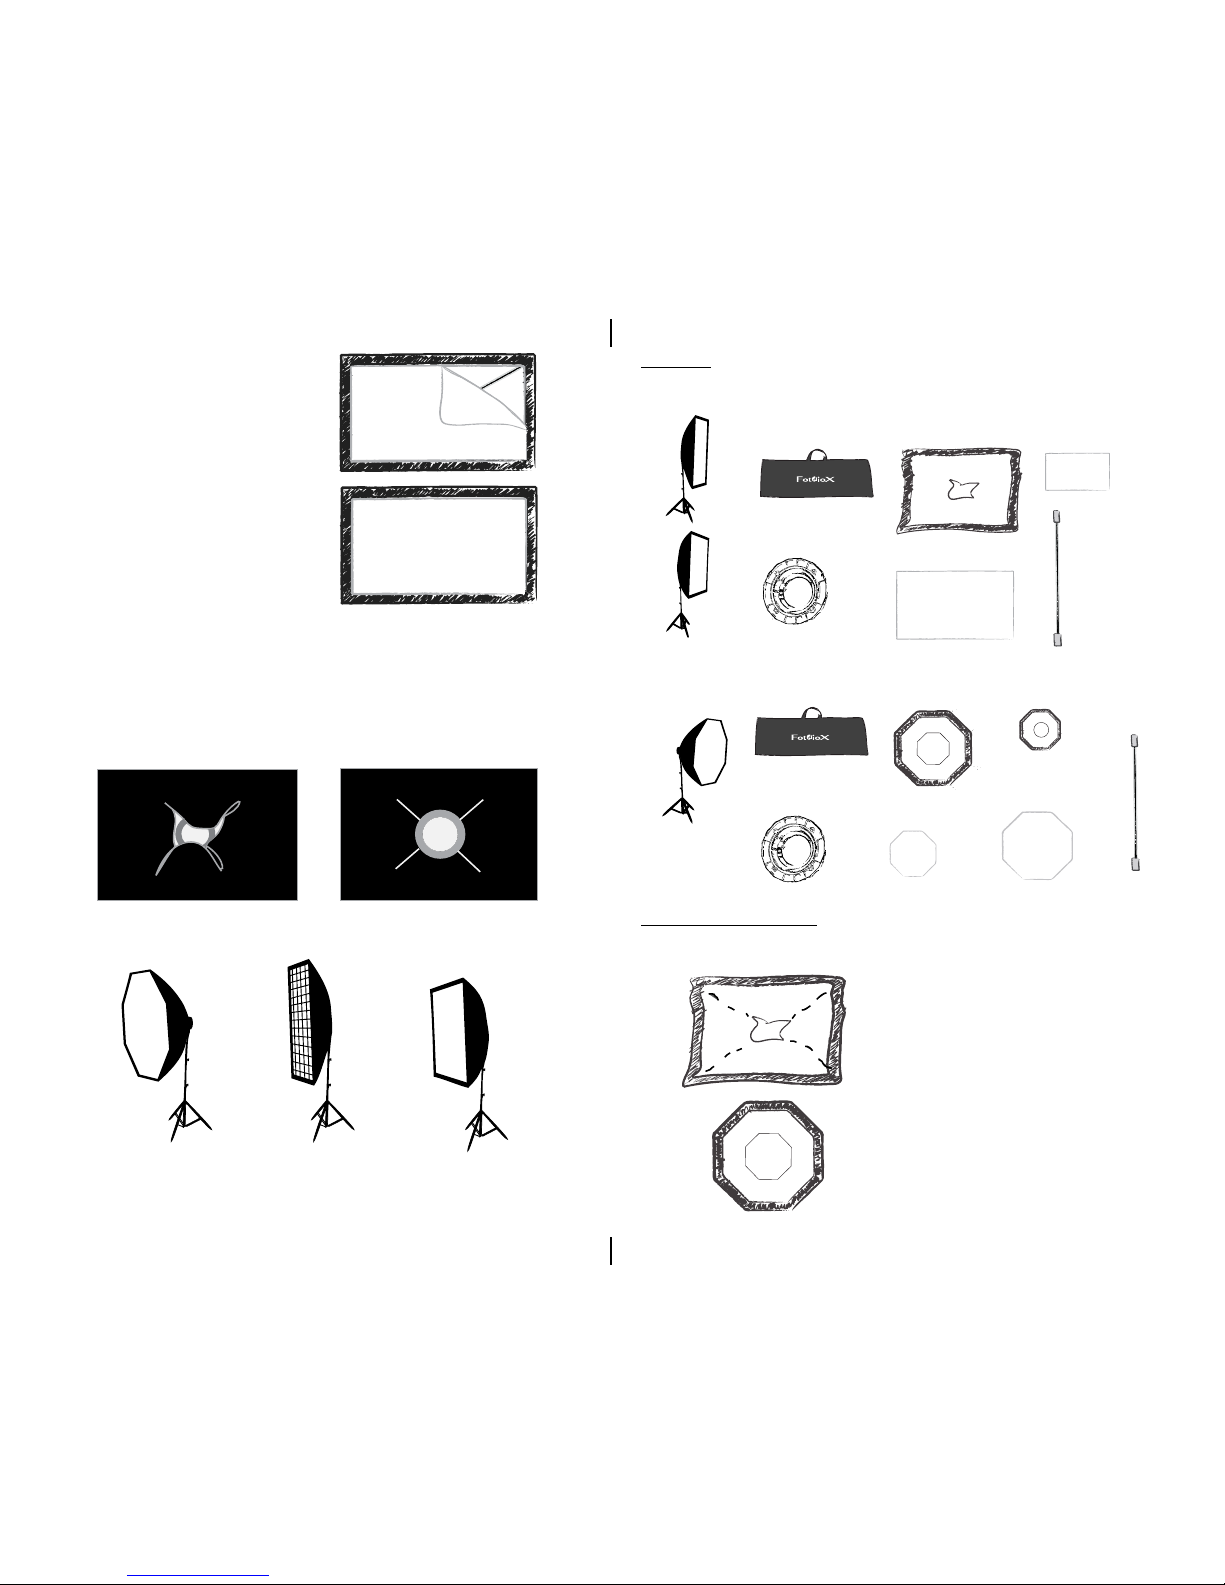
Octagon Softboxes Include
1x Carrying Case
1x Carrying Case
1x Softbox Shell
1x Softbox Shell
1x Back Cover
1x Inner Diffuser
1x Outer Diffuser
1x Outer Diffuser
1x Inner Diffuser
1x Dedicated
Speedring
1x Dedicated
Speedring
4x Softbox
Rods
8x Softbox
Rods
1
Contents
assembling the softbox
Inserting the Softbox Rods
Stripbox and Rectangular/Square Softboxes include
Find a large open area
and spread the Softbox
Shell on the oor, silver
side up.
Study the pockets at
the corners and locate
the closed velcro
pockets.
7
8
9
Grab the Outer Diffuser
and attach the Velcro
to the entire perimeter of
the Softbox. Press rmly
around the perimeter to
close any gaps between
the Shell and the Diffuser.
Be sure to attach the
Diffuser on the inner side
of the Softbox, leaving a
good amount of Velcro to
attach a Grid if desired.
Flip the softbox over and secure the Velcro aps together
around the Speedring Insert.
Mount the Softbox on a stand (Not Included) and You’re done!
Fotodiox carries a variety of products to complement
your new Softbox. See page 6 for a list of complementary
products such as the Grid illustrated above. (Not included)
For Octagon Softboxes, secure the back cover to velcro
around the softbox shell. Make sure it covers the Speedring
Insert.
 Loading...