

Page 1
V1.1
EE200853
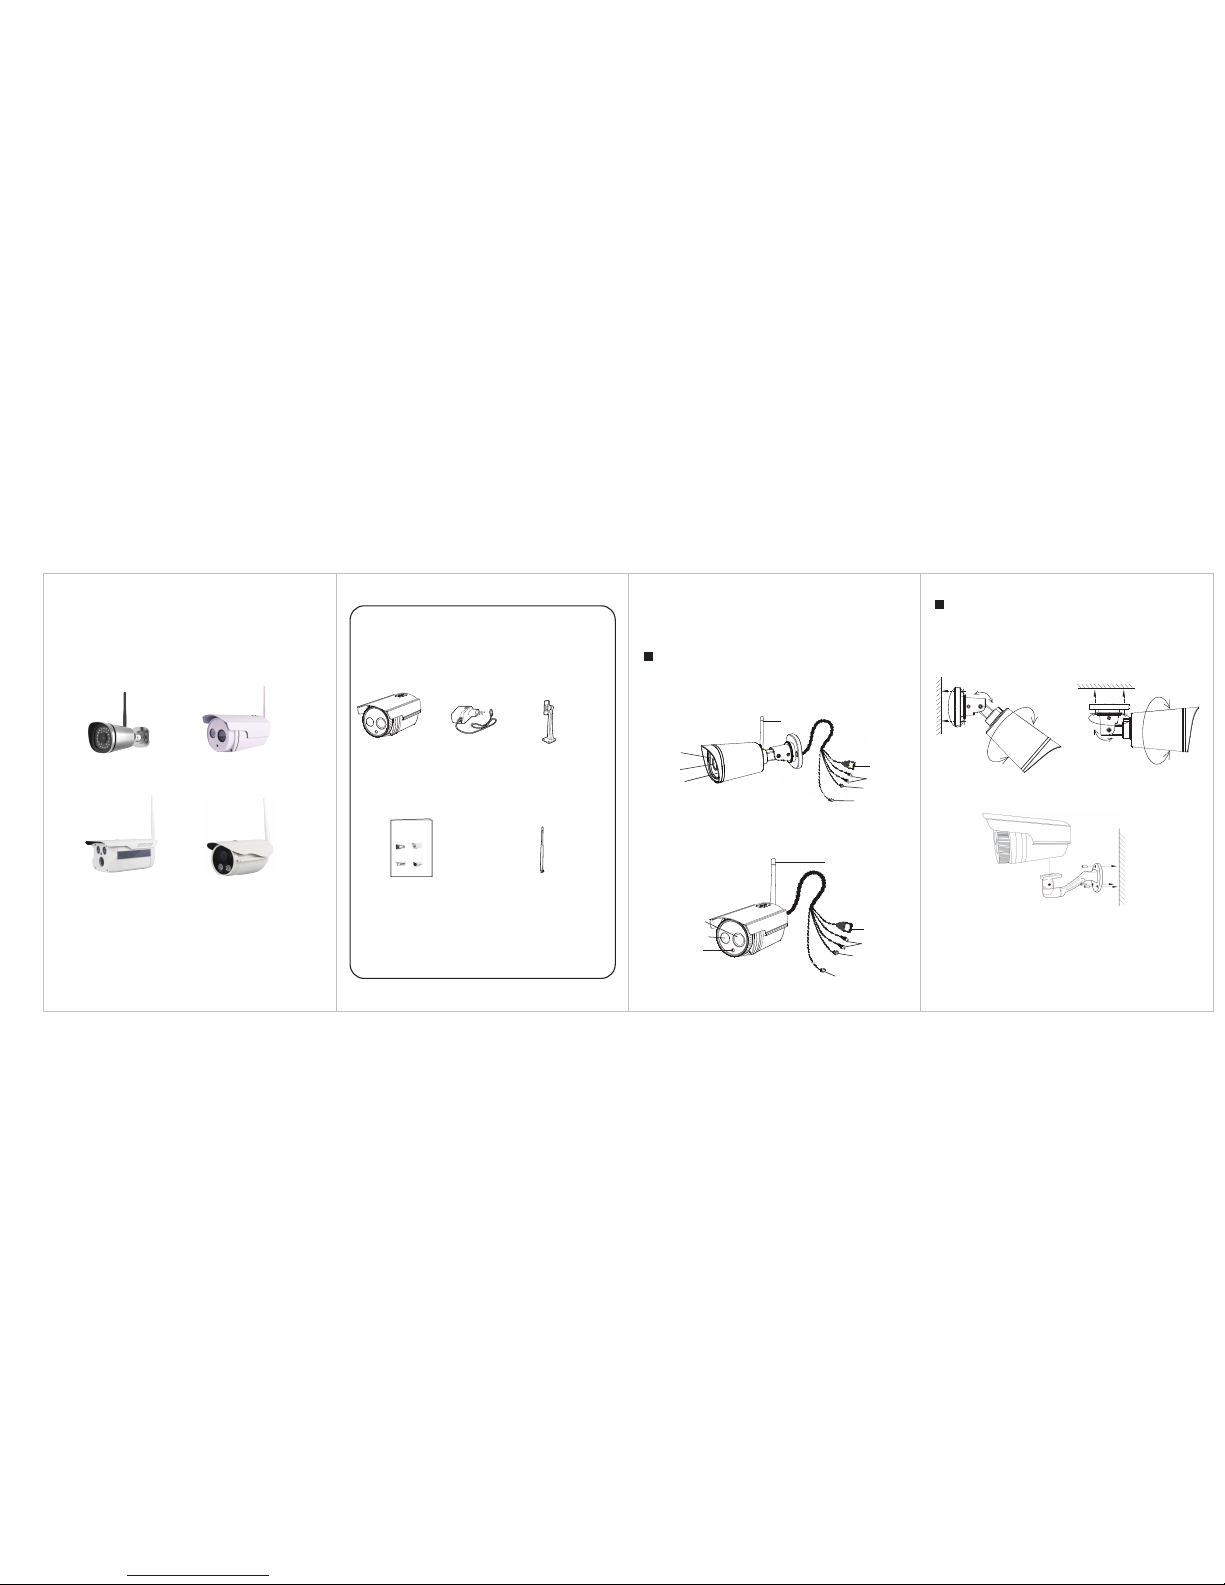
Package Contents
Quick Installation Guide
Power Adapter
IP Camera
1 Hardware Introduction
Physical Description
Hardware Installation
Wi-Fi Antenna
Mounting Bracket
(Except FC5618P/FC5415P)
LAN
Audio in/out
Power
Reset Button
Antenna
Induction IC
LENS
Infrared Lamp Array
1. Screw the mount on the wall with the 3 screws
provided.
2. Install the camera on the mounting bracket with 1
screw to complete installation.
Quick Installation Guide
Outdoor HD Wireless IP Camera
Model: FC5410P
Model: FC5618P/FC5415P
FC5618P/FC5415P
FC5618P/FC5415P
FC5410P / FC5412P / FC5413P
FC5410P / FC5412P / FC5413P
LAN
Audio in/out
Power
Reset Button
Antenna
Induction IC
LENS
Infrared LED
Screw the mount on the wall with the 2 screws provided.
Model: FC5412P Model: FC5413P
Quick Installation Guide
Outdoor HD Wireless IP Camera
Model: FC5410P
Model: FC5618P/FC5415P
Model: FC5412P Model: FC5413P
0~90°
0~90°
0~360°
0~360°
0~360°
0~360°
Page 2
4 FAQ
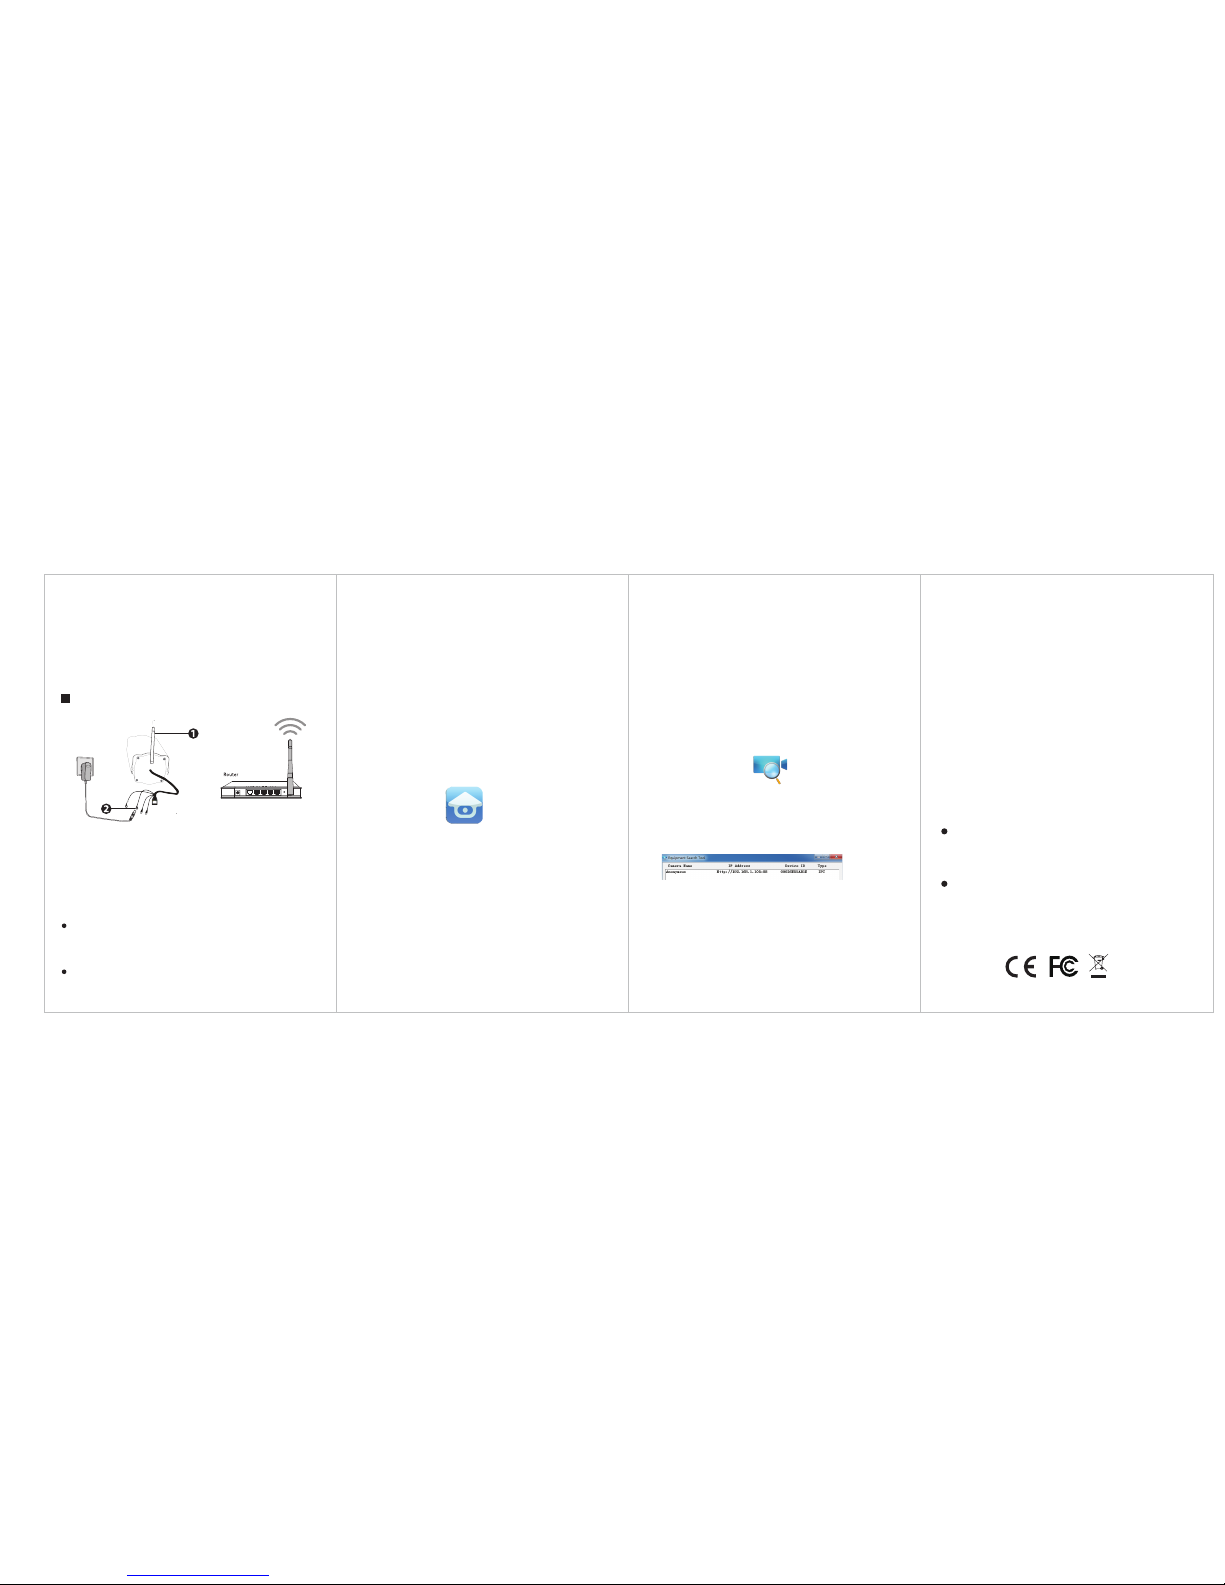
2 Add the IP Camera
3 Access the IP Camera
You can add the IP Camera by smart phone.
1. Download the App
You can go to the App Store or Google Play store and
search for “My IPC Viewer”. please download and
install it.
2. Add the IP Camera
Run the APP, then you can tap the "+" button on the
App and follow the wizard to add your camera.
The App icon will be displayed after successful
installation:
My IPC Viewer
Forget Username / Password
Please Note:
After restore to factory default settings, you need to
config the Wi-Fi connection again, you can follow
the Setup Wizard of the app to add again.
In case your device failed to add by Wi-Fi, you can
use wired connection. please refer to the User
Manual on the CD.
Restore camera back to factory settings:
1. Press "Reset" button for about 10 seconds with camera
powered on.
2. Release the button and wait about 30 seconds, the
camera will automatically restart, and restore factory
settings with its username / password recovery to
admin / (blank) .
Please Note:
The tail line’s wall hole must be lower than socket,
ensure that the rain will not allow the device to get wet
due to the tail line.
Hardware Connection
WPS
1. Install Wi-Fi antenna and position upright.
2. Connect the power adapter to the camera.
3. Connect the wireless router to the Internet.
Before you continue, please note:
Make sure your smart phone has connected to the
wireless router, and your smart phone and camera
in the same in LAN(Local Area Network).
Do not use an Ethernet cable to connect the camera
if you want to use a wireless connection.
If you want to use your camera via the browser, you can
search and access its local website in LAN.
1. Please copy the “IP Camera Search Tool” file from the
CD to your computer.
Please Note:
Make sure the camera and PC are both in the same Local
Area Network (LAN).
2. Open "Equipment Search Tool".
3. Double click the camera list here, and your default
browser will open up to the login page.
4. When logging in for the first time, you will need to
download and install the add-on.
5. After logging in, you can manage camera through the
browser.
After your camera has been successfully added, you can
access the IP Camera via the app or browser.
 Loading...