

Foscam FI8620 User Manual
U
U
s
s
e
err
M
M
a
a
n
n
u
u
a
all
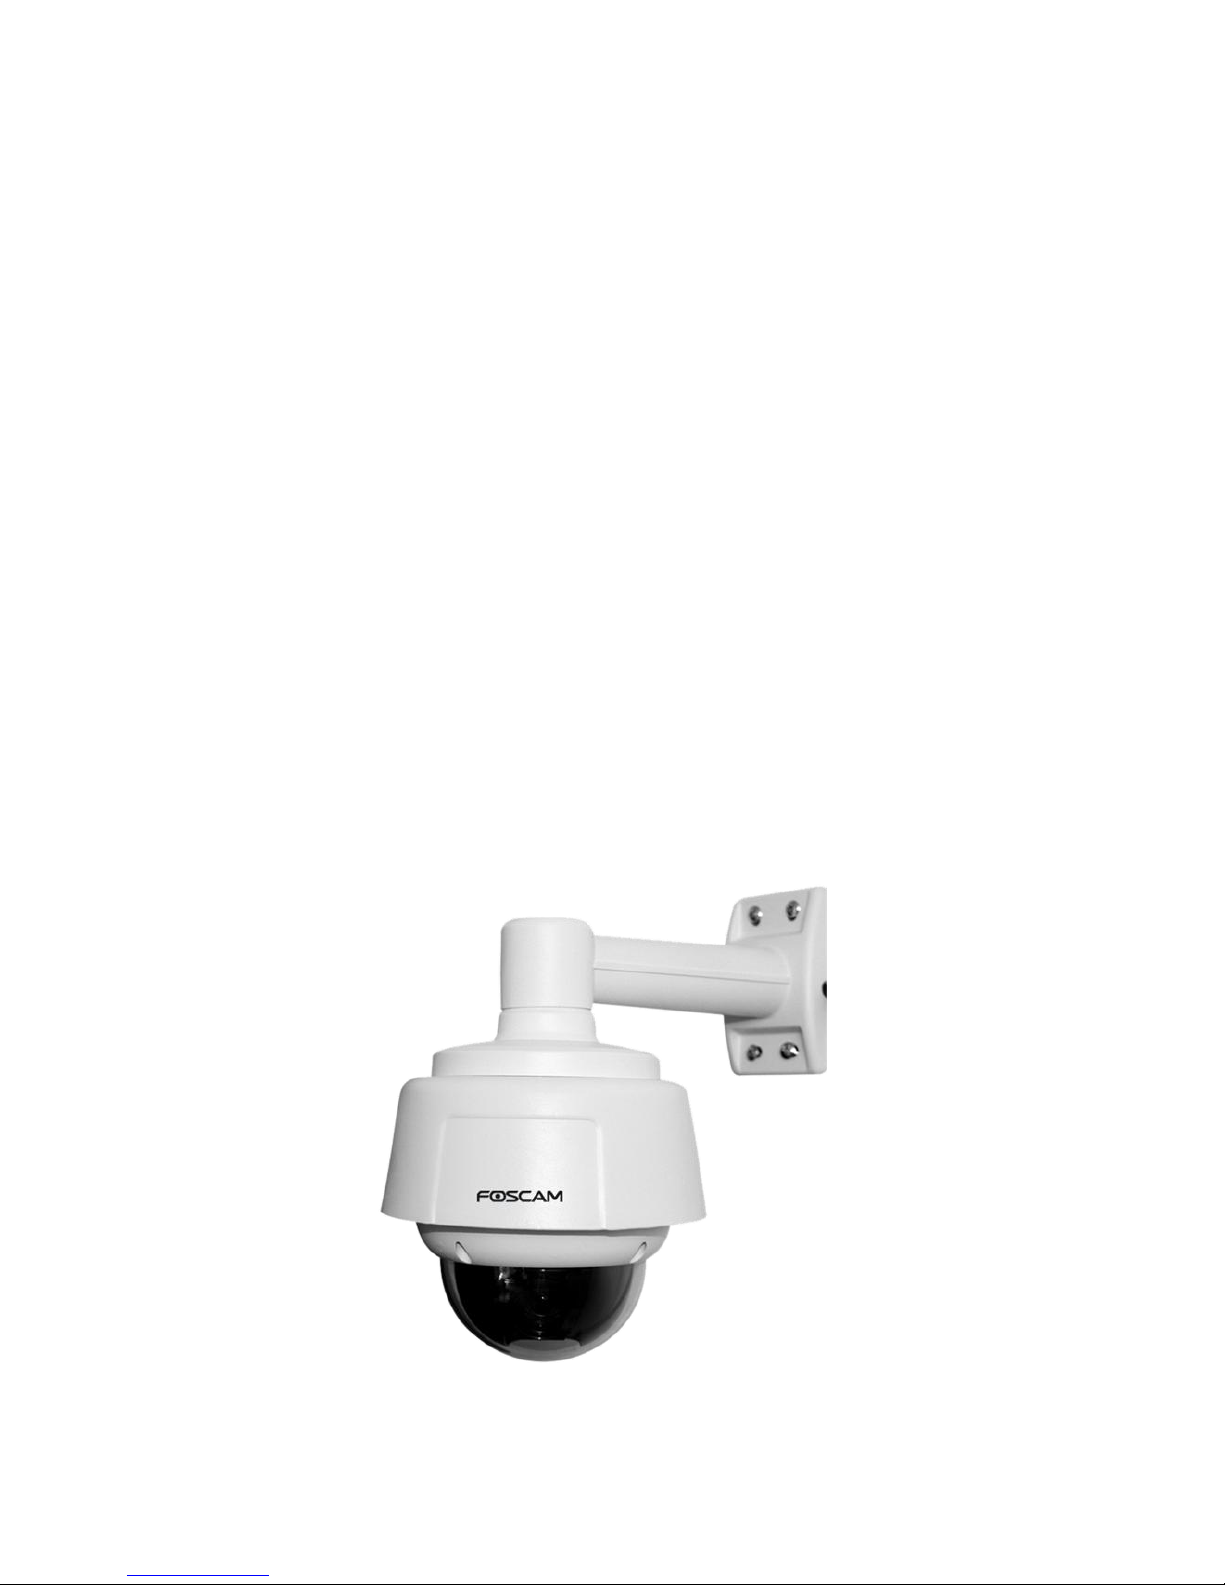
Model: FI8620
Outdoor Dome Network Camera
10X OPTICAL ZOOM & REMOTE
PAN / TILT ROTATE

1
w
w
wwwwww..ffoossccaamm..ccoomm
SShheennzzhheenn FFoossccaamm IInntteelllliiggeenntt TTeecchhnnoollooggyy CCoo..,, LLiimmiitteedd
TTeell:: 8866 775555 22667744 55666688 FFaaxx:: 8866 775555 22667744 55116688
1
Table of Contents
1 Overviews .......................................................................................................................................................... 2
1.1 Key Features .............................................................................................................................................. 3
1.2 Read Before Use ........................................................................................................................................ 3
1.3 Packing Contents ....................................................................................................................................... 3
1.4 Physical Description ................................................................................................................................... 4
2 Surveillance Software GUI ................................................................................................................................ 6
2.1 Login Window ............................................................................................................................................. 6
2.2 Surveillance Window .................................................................................................................................. 9
3 Advanced Camera Settings ............................................................................................................................ 16
3.1 Device Information .................................................................................................................................... 16
3.2 Date & Time Settings ................................................................................................................................ 17
3.3 User Settings ............................................................................................................................................ 19
3.4 Basic Network Settings ............................................................................................................................ 20
3.5 Remote Access ......................................................................................................................................... 25
3.6 Email Settings ........................................................................................................................................... 31
3.7 FTP Settings ............................................................................................................................................. 32
3.8 Auto Capture ............................................................................................................................................. 33
3.9 Terminal .................................................................................................................................................... 34
3.10 Motion Detection ..................................................................................................................................... 34
3.11 Alarm ....................................................................................................................................................... 39
3.12 Schedule ................................................................................................................................................. 40
3.13 Video ....................................................................................................................................................... 41
3.14 Image Settings ........................................................................................................................................ 43
3.15 Initialize ................................................................................................................................................... 44
3.16 Back ........................................................................................................................................................ 44
4 Other Settings ................................................................................................................................................. 45
Use Mobile to login ......................................................................................................................................... 45
5 APPENDIX ...................................................................................................................................................... 46
5.1 Frequently Asked Questions .................................................................................................................... 46
5.2 Default Parameters ................................................................................................................................... 53

2
w
w
wwwwww..ffoossccaamm..ccoomm
SShheennzzhheenn FFoossccaamm IInntteelllliiggeenntt TTeecchhnnoollooggyy CCoo..,, LLiimmiitteedd
TTeell:: 8866 775555 22667744 55666688 FFaaxx:: 8866 775555 22667744 55116688
2
5.3 Specifications ............................................................................................................................................ 54
6 OBTAINING TECHNICAL SUPPORT ............................................................................................................ 55
11 OOvveerrvviieewwss
IPCAM is an integrated wired IP Camera solution. It combines a high quality digital video camera
with network connectivity and a powerful web server on your desktop from anywhere on your
local network or over the internet.
FI8620 supports the industry-standard H.264 compression technology, drastically reducing file
sizes and conserving valuable network bandwidth. With flexible 360-degree pan,90-degree tilt
and 10X optical zoom, IPCAM gives users more comprehensive control over a monitored site.
The IPCAM is based on the TCP/IP standard. There is a WEB server inside which could support
Internet Explore. Therefore the management and maintenance of your device is simplified by
using the network to achieve the remote configuration, start-up and to upgrade the firmware.
The camera is designed for outdoor surveillance applications such as supermarket, bank and
school. Controlling the IPCAM and managing images are simplified by using the provided web
interface across the network connectivity.

3
w
w
wwwwww..ffoossccaamm..ccoomm
SShheennzzhheenn FFoossccaamm IInntteelllliiggeenntt TTeecchhnnoollooggyy CCoo..,, LLiimmiitteedd
TTeell:: 8866 775555 22667744 55666688 FFaaxx:: 8866 775555 22667744 55116688
3
11..11 KKeeyy FFeeaattuurreess
Standard H.264 video compression algorithm to satisfy the transmission of high definition
video in narrow bandwidth network
Network self-adapting function: adjust stream and encoding frame rate automatically
according to network bandwidth
Supports IE/Firefox/Google/Safari browser or any other standard browsers
Supports 10X optical zoom
Pan 360 degree, tilt 90 degree
Supports mobile watch
Supports dual-stream
Supports RTSP port
Embedded FOSCAM DDNS(dynamic domain name service) Service
Supports remote viewing & record from anywhere anytime
Supporting Third Party Domain name
Multi-level users management with password protection
Embedded Web Server for users to visit by IE
Motion detection alert via email or upload image to FTP
Supports multiple network protocols: HTTP /TCP /IP /UDP /FTP /DHCP /DDNS /UPNP /
RTSP
Providing CMS software to manage or monitor multiple cameras
11..22 RReeaadd BBeeffoorree UUssee
Please first verify that all contents received are complete according to the Package Contents
listed below. Before the Network Camera is installed, please carefully read and follow the
instructions in the Quick Installation Guide to avoid damage due to faulty assembly and
installation. This also ensures the product is used properly as intended.
11..33 PPaacckkiinngg CCoonntteenntts
s
● IPCAM×1
● CD×1
● DC Power Supply×1
● Quick Installation Guide×1
● Mounting bracket×1(option)
● Warranty Card×1
● Network Cable×1
4
w
w
wwwwww..ffoossccaamm..ccoomm
SShheennzzhheenn FFoossccaamm IInntteelllliiggeenntt TTeecchhnnoollooggyy CCoo..,, LLiimmiitteedd
TTeell:: 8866 775555 22667744 55666688 FFaaxx:: 8866 775555 22667744 55116688
4
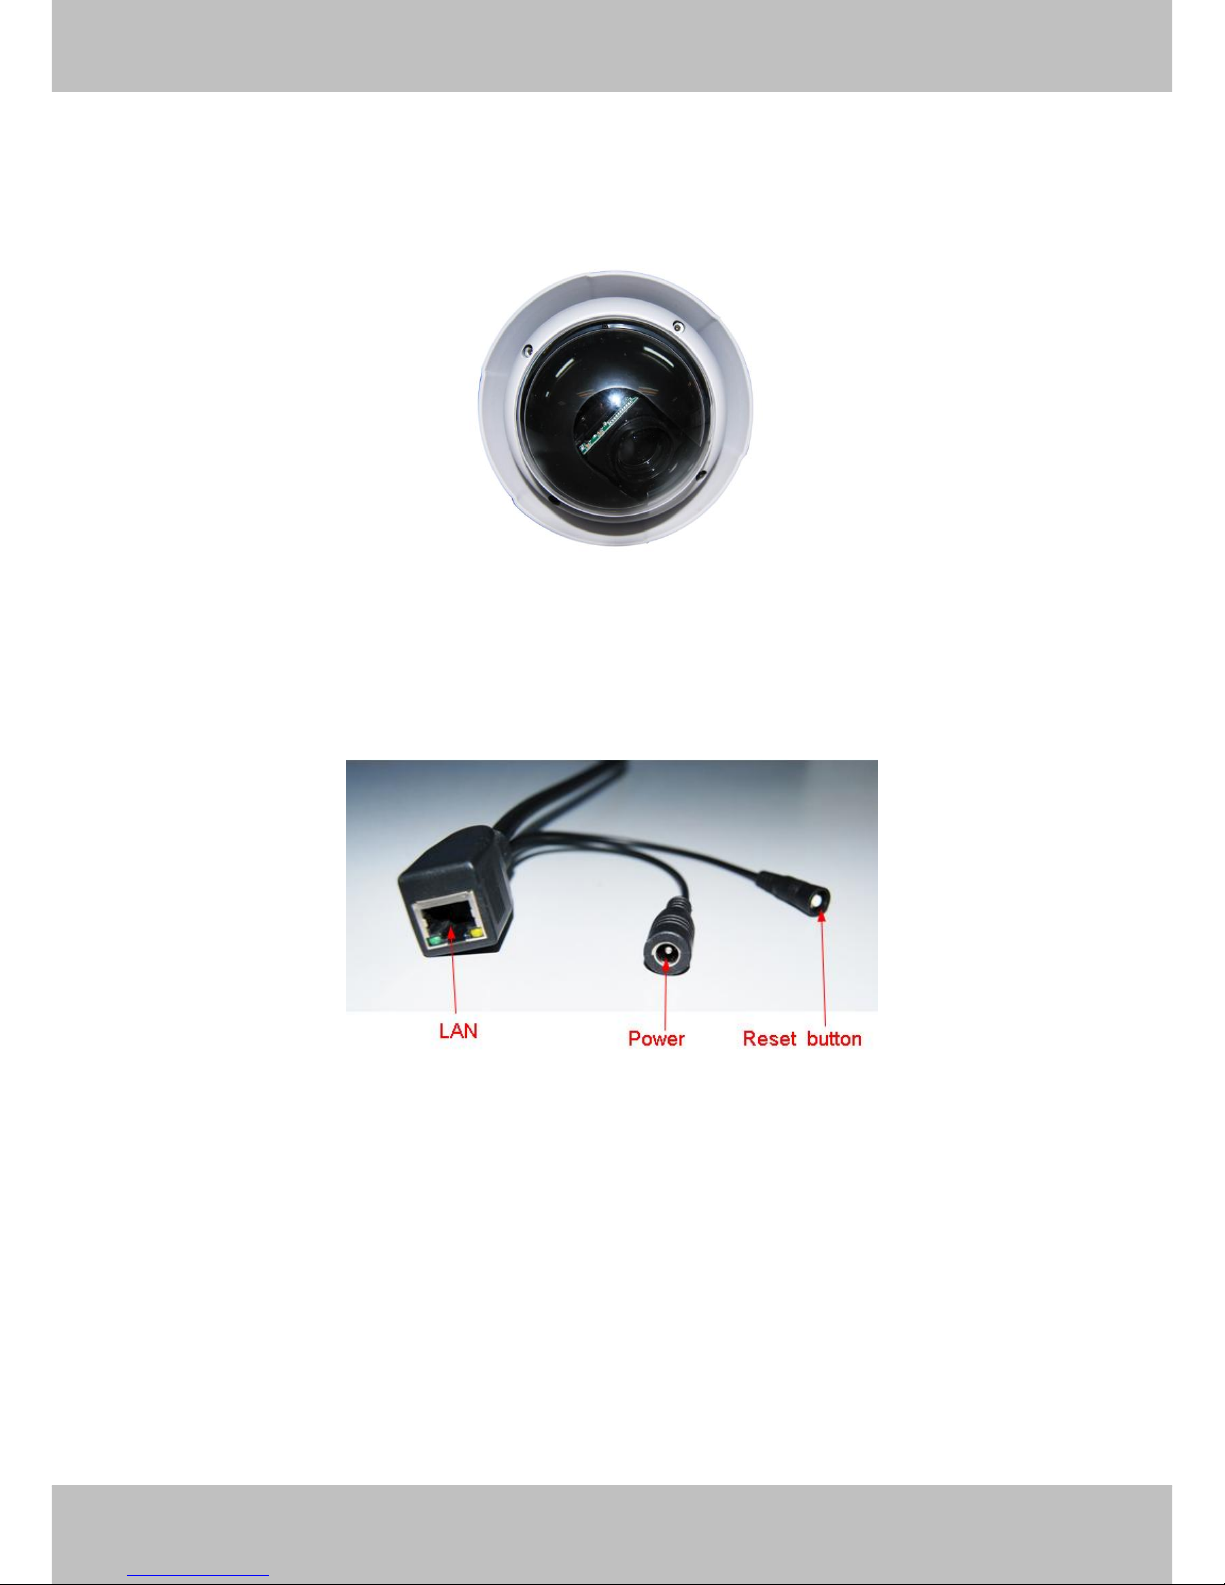
11..44 PPhhyyssiiccaall DDeessccrriippttiioonn
Front Panel
Figure 1.1
The camera lens has variable optical zoom. The biggest optical zoom time is 10 times. With this
function you can see farther and clearer.
Interface
Figure 1.2
1) Power Interface: Connect the external power adapter, request for 12V/2A power.
2) Reset button : Press and hold on the reset button for 10 seconds. Releasing the reset
button, the password will back to the factory default administrator password. The default
administrator username and password are all admin. You must power on the camera before
reset.
3) LAN: 10/100M adaptive Ethernet interface. Through this interface, IPCAM can be connected
with various network devices, such as hub, router, etc.
5
w
w
wwwwww..ffoossccaamm..ccoomm
SShheennzzhheenn FFoossccaamm IInntteelllliiggeenntt TTeecchhnnoollooggyy CCoo..,, LLiimmiitteedd
TTeell:: 8866 775555 22667744 55666688 FFaaxx:: 8866 775555 22667744 55116688
5
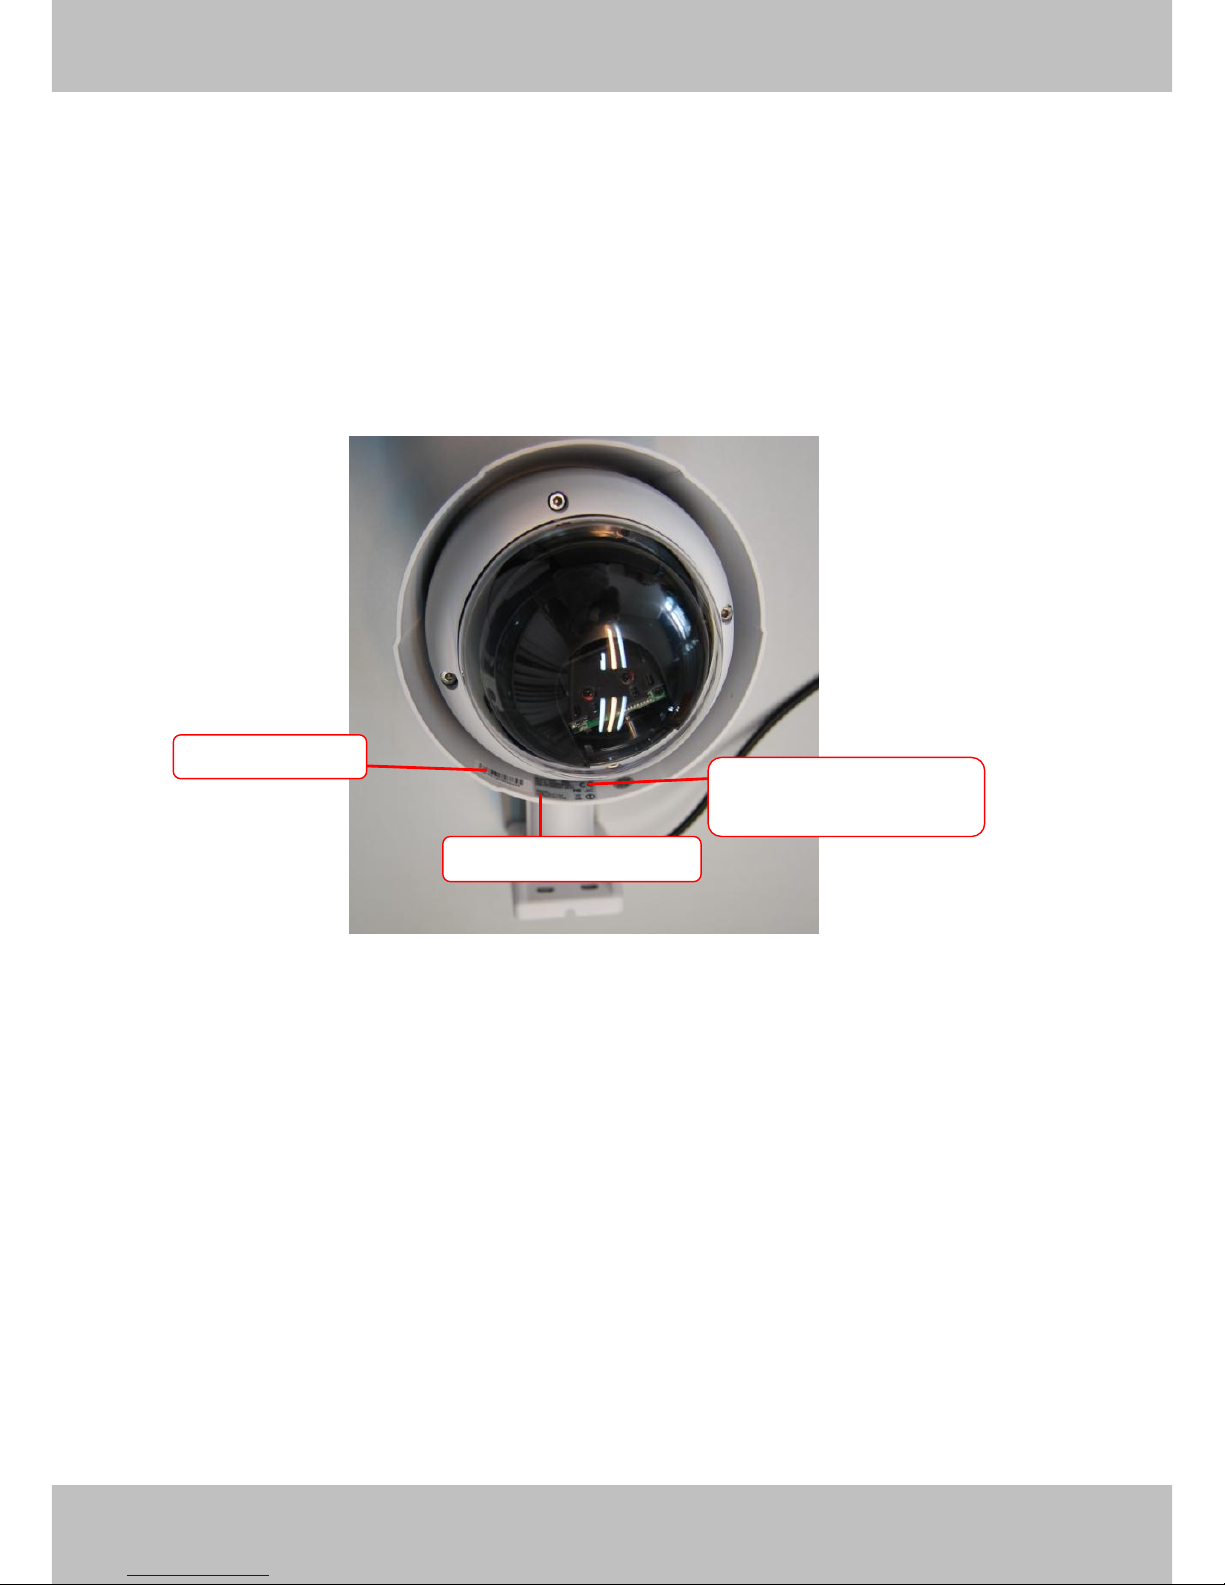
Bottom View
There are up to two labels located on the body of the camera; this is an important feature of
original Foscam cameras. If your camera does not have labels as shown in Figure 1.3 ,it may be
a clone one. Cloned Foscam cameras can not use original firmware and are not eligible for
warranty or technical services.
Figure 1.3
S/N of FOSCAM
MAC address of wired
connection
FOSCAM DDNS Service
6
w
w
wwwwww..ffoossccaamm..ccoomm
SShheennzzhheenn FFoossccaamm IInntteelllliiggeenntt TTeecchhnnoollooggyy CCoo..,, LLiimmiitteedd
TTeell:: 8866 775555 22667744 55666688 FFaaxx:: 8866 775555 22667744 55116688
6
22 SSuurrvveeiillllaannccee SSooffttwwaarree GGUUII
Please refer to the Quick Installation Guide if you install the camera at first time. After finishing
quick installation, you can take time to learn the operation of the software.
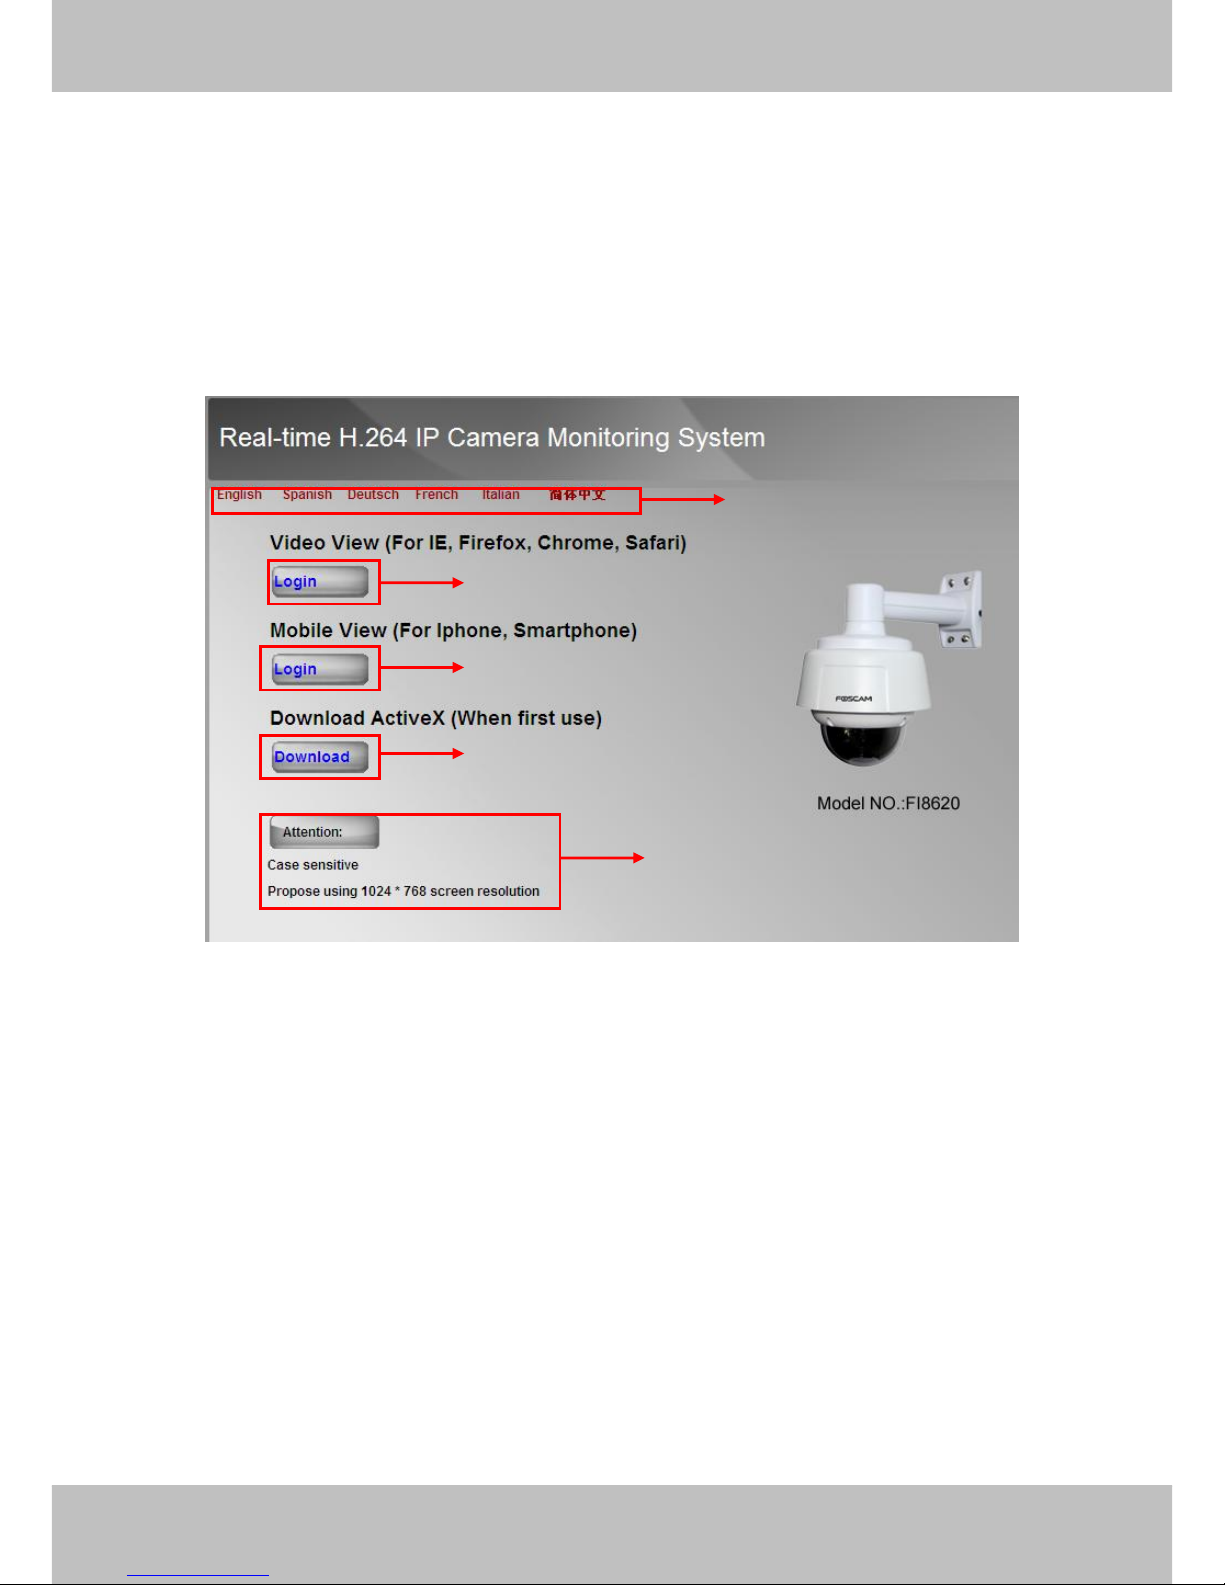
22..11 LLooggiinn WWiinnddooww
Figure 2.1
Please check the login window above, it was divided to 5 sections from no. 1 to 5.
Section1 Select Language
FOSCAM camera supports up to multi-languages, such as English, Spanish, Deutsch and so on.
You can select the language you need via click on the select language bar to switch.
Section2 Video View Login Button
For PC, please select the login button under Video View.
Section3 Mobile View Login Button
If you are using the Mobile to access the camera, here you need to select Mobile View login
button.
1
2 3 4 5
7
w
w
wwwwww..ffoossccaamm..ccoomm
SShheennzzhheenn FFoossccaamm IInntteelllliiggeenntt TTeecchhnnoollooggyy CCoo..,, LLiimmiitteedd
TTeell:: 8866 775555 22667744 55666688 FFaaxx:: 8866 775555 22667744 55116688
7
Section4 Download ActiveX
For IE users, the ActiveX have been embedded in the IP Camera Tool, so if you have installed
the IP Camera Tool, you need not download again. If you use Firefox, Google Chrome, Safari or
others, you should download and install QuickTime Player as the ActiveX from other website.
For remote IE users, first time you use the IPCAM, you may need download and install the
ActiveX. (Please read chapter 5.1 in Appendix about how to download and install the ActiveX).
Section5 Attention
For better viewing, here we suggest using 1024*768 screen resolution.
Click the PC login button under Video View, you will see the video window:
For Internet Explorer
Figure 2.2
8
w
w
wwwwww..ffoossccaamm..ccoomm
SShheennzzhheenn FFoossccaamm IInntteelllliiggeenntt TTeecchhnnoollooggyy CCoo..,, LLiimmiitteedd
TTeell:: 8866 775555 22667744 55666688 FFaaxx:: 8866 775555 22667744 55116688
8
If you could not view living video after running the ActiveX, only a red cross in the center
of the video or just a black screen. Please change another port number to try.
Make sure all firewall or antivirus software on your computer does not block the active download
and installation. If you are unable to run the ActiveX control, try shutting down the firewall or
antivirus program.
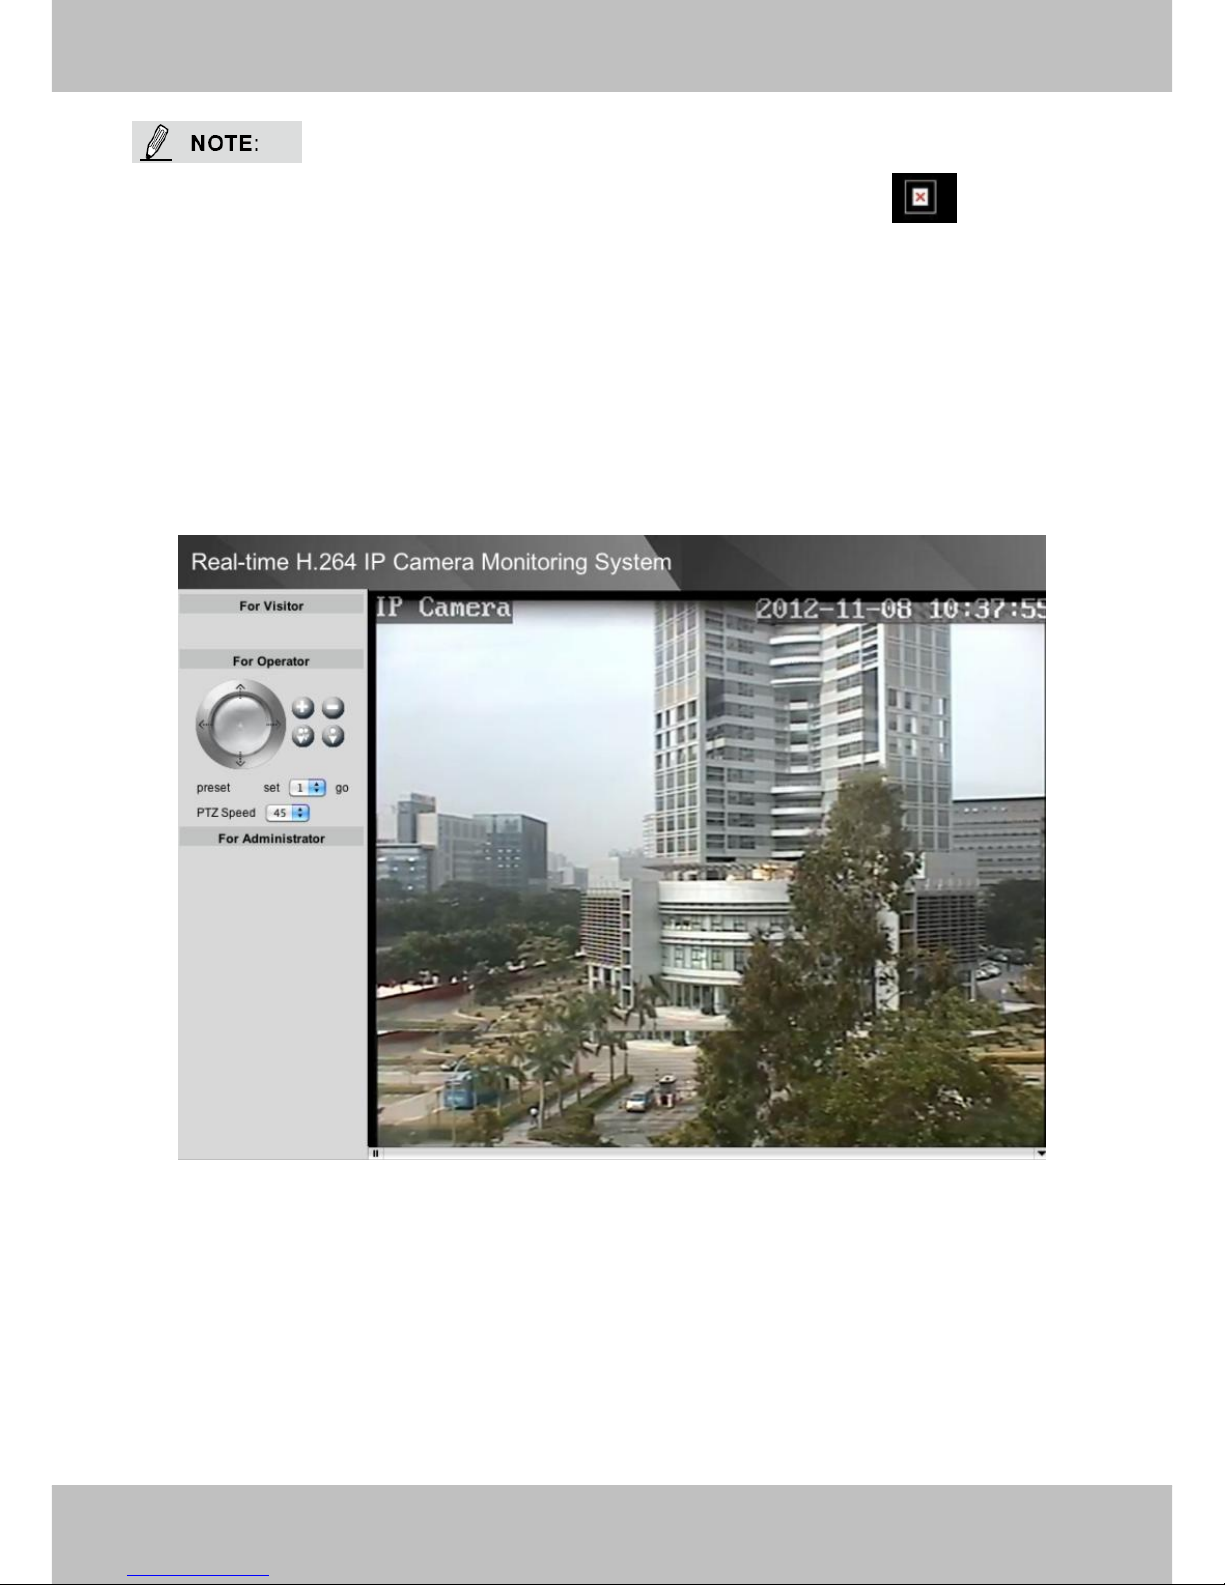
For Firefox, Google Chrome and Safari
Install the Quick Time Player and fill in user name and password then login, you will see the
living video.
Figure 2.3
9
w
w
wwwwww..ffoossccaamm..ccoomm
SShheennzzhheenn FFoossccaamm IInntteelllliiggeenntt TTeecchhnnoollooggyy CCoo..,, LLiimmiitteedd
TTeell:: 8866 775555 22667744 55666688 FFaaxx:: 8866 775555 22667744 55116688
9
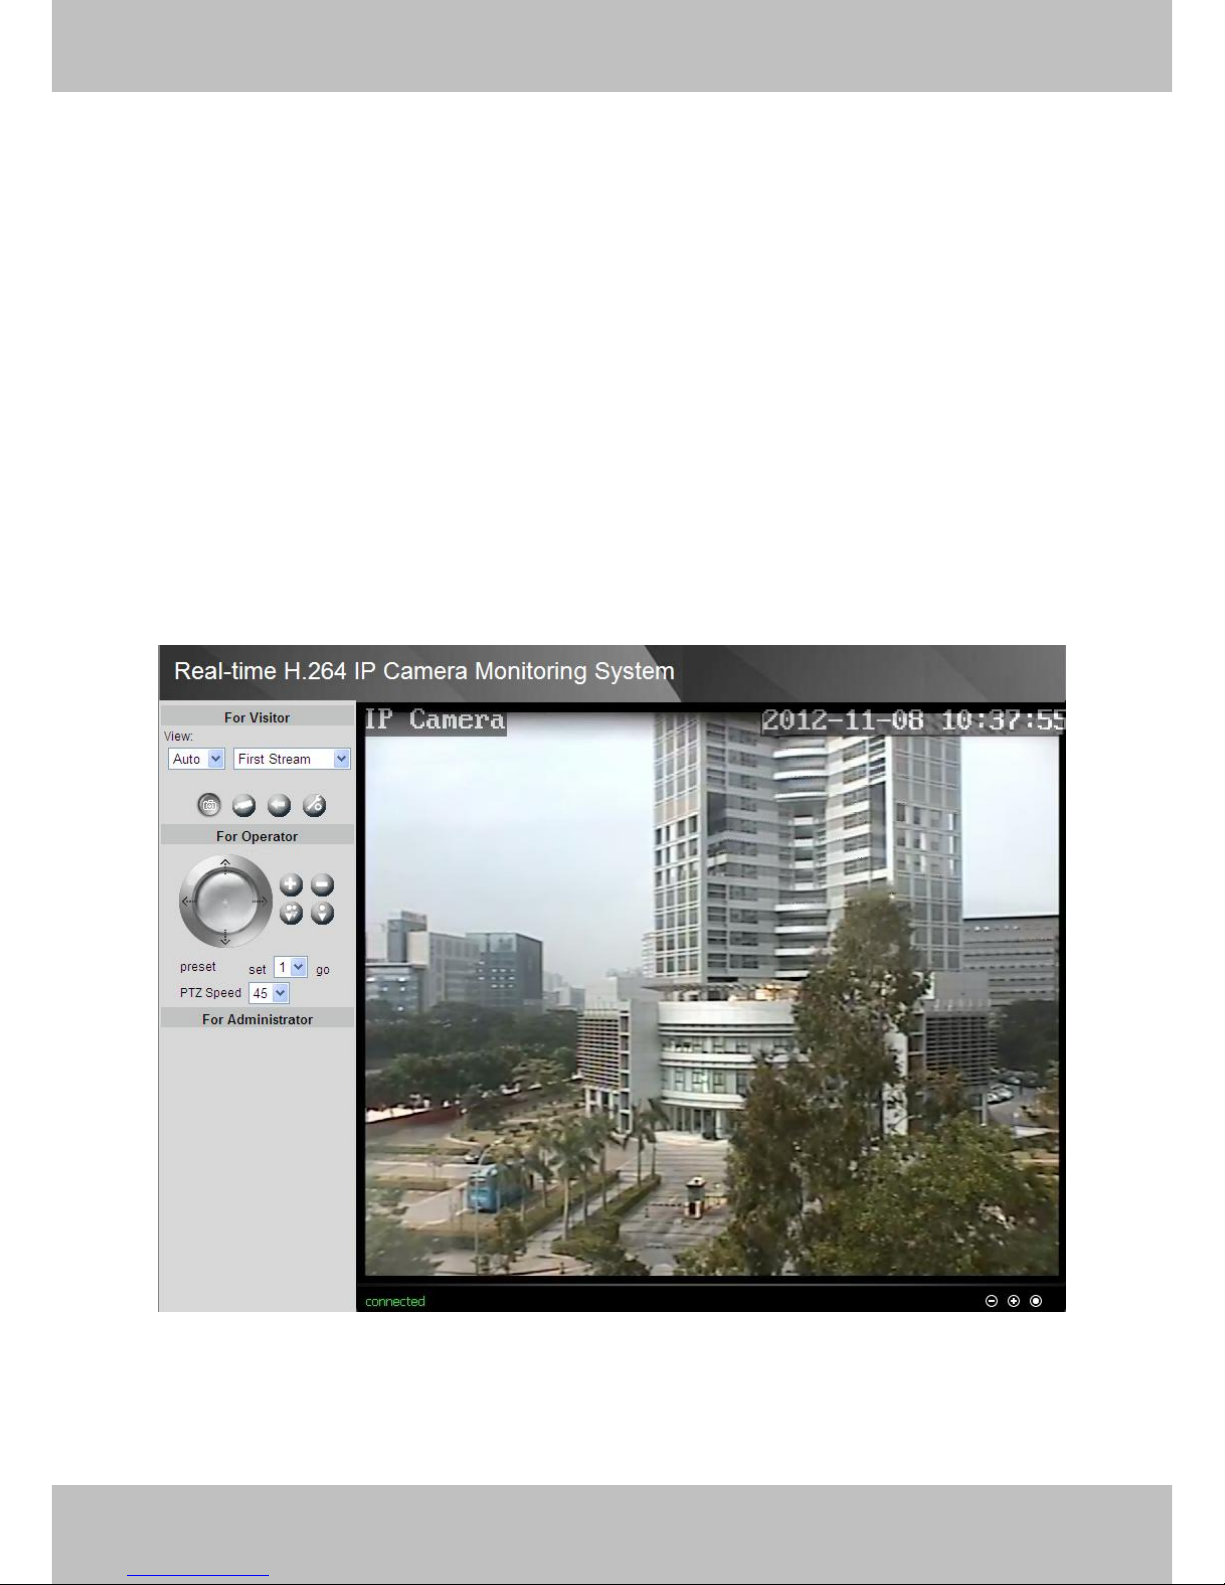
2.2 Surveillance Window
Select the PC login mode and you will enter the surveillance window.
Figure 2.4
For Visitor / For Operator / For Administrator
Camera supports three-level users management: admin, user and guest.
The default “admin” username and password are all “admin”, the default “user” username and
password are all “user”, and the default “guest” username and password are all “guest”. For first
using, please go to For Administrator-> User Settings panel to change the password and
against illegal access.
Different users have different permissions. Admin user has the highest authority. He can do any
settings. User account can do settings below For Visitor and For Operator. Guest account can
do settings below For Visitor.
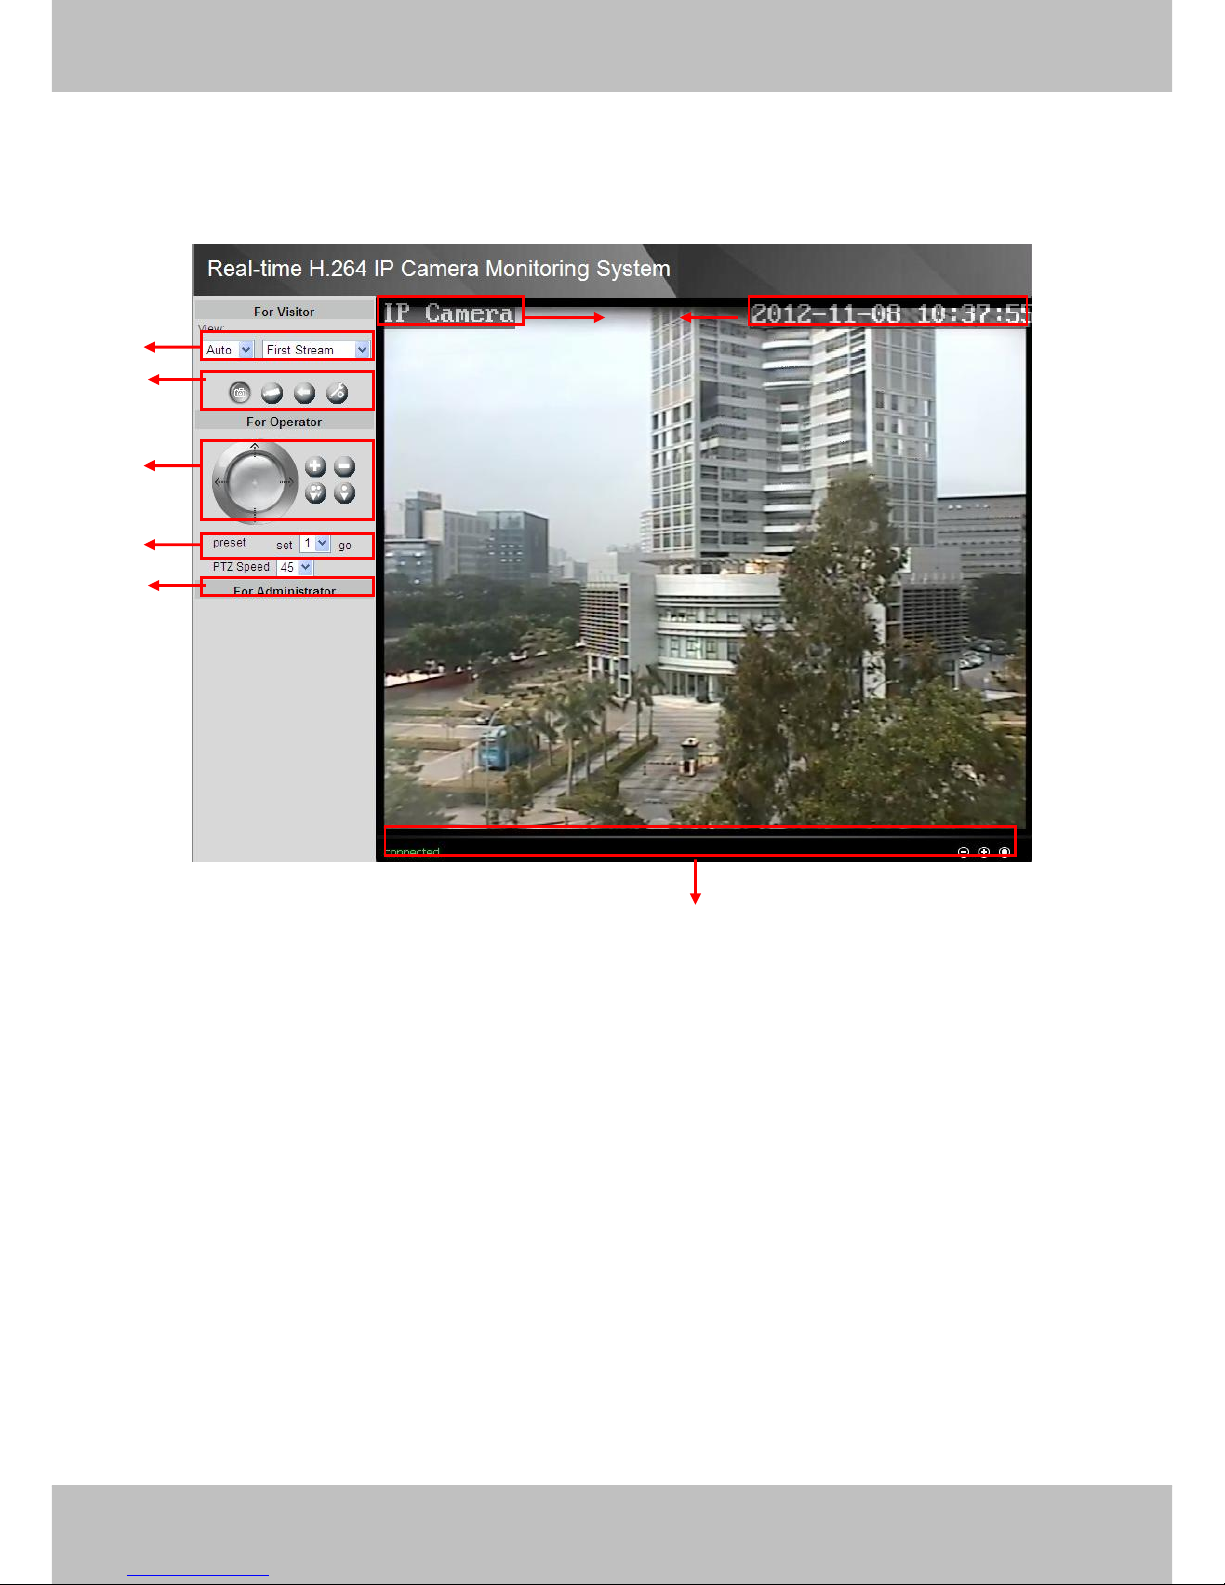
1 2 3 5 6
7
4

10
w
w
wwwwww..ffoossccaamm..ccoomm
SShheennzzhheenn FFoossccaamm IInntteelllliiggeenntt TTeecchhnnoollooggyy CCoo..,, LLiimmiitteedd
TTeell:: 8866 775555 22667744 55666688 FFaaxx:: 8866 775555 22667744 55116688
10
Section1 View
The resolution contains D1(720*576), CIF(352*288), QCIF(176*144) and Auto. You can choose
First Stream or Second Stream to adjust the view window.
Note: When the network bandwidth is bad, you’d better select Second Stream and the video will
be more fluency.
Section2 Capture/Record/Playback/Set Path Buttons
Capture: Click this icon, the current living picture will be stored to a predetermined path.
The default storage path is D disk. You can click this button to change the storage path.
Record: Click the icon. The camera will begin recording and store the recorded file to the
folder you set. And the status column will display REC when recording. Click again it will stop
recording. The default storage path is D disk. You can click this button to change the
storage path.
Figure 2.5
11
w
w
wwwwww..ffoossccaamm..ccoomm
SShheennzzhheenn FFoossccaamm IInntteelllliiggeenntt TTeecchhnnoollooggyy CCoo..,, LLiimmiitteedd
TTeell:: 8866 775555 22667744 55666688 FFaaxx:: 8866 775555 22667744 55116688
11
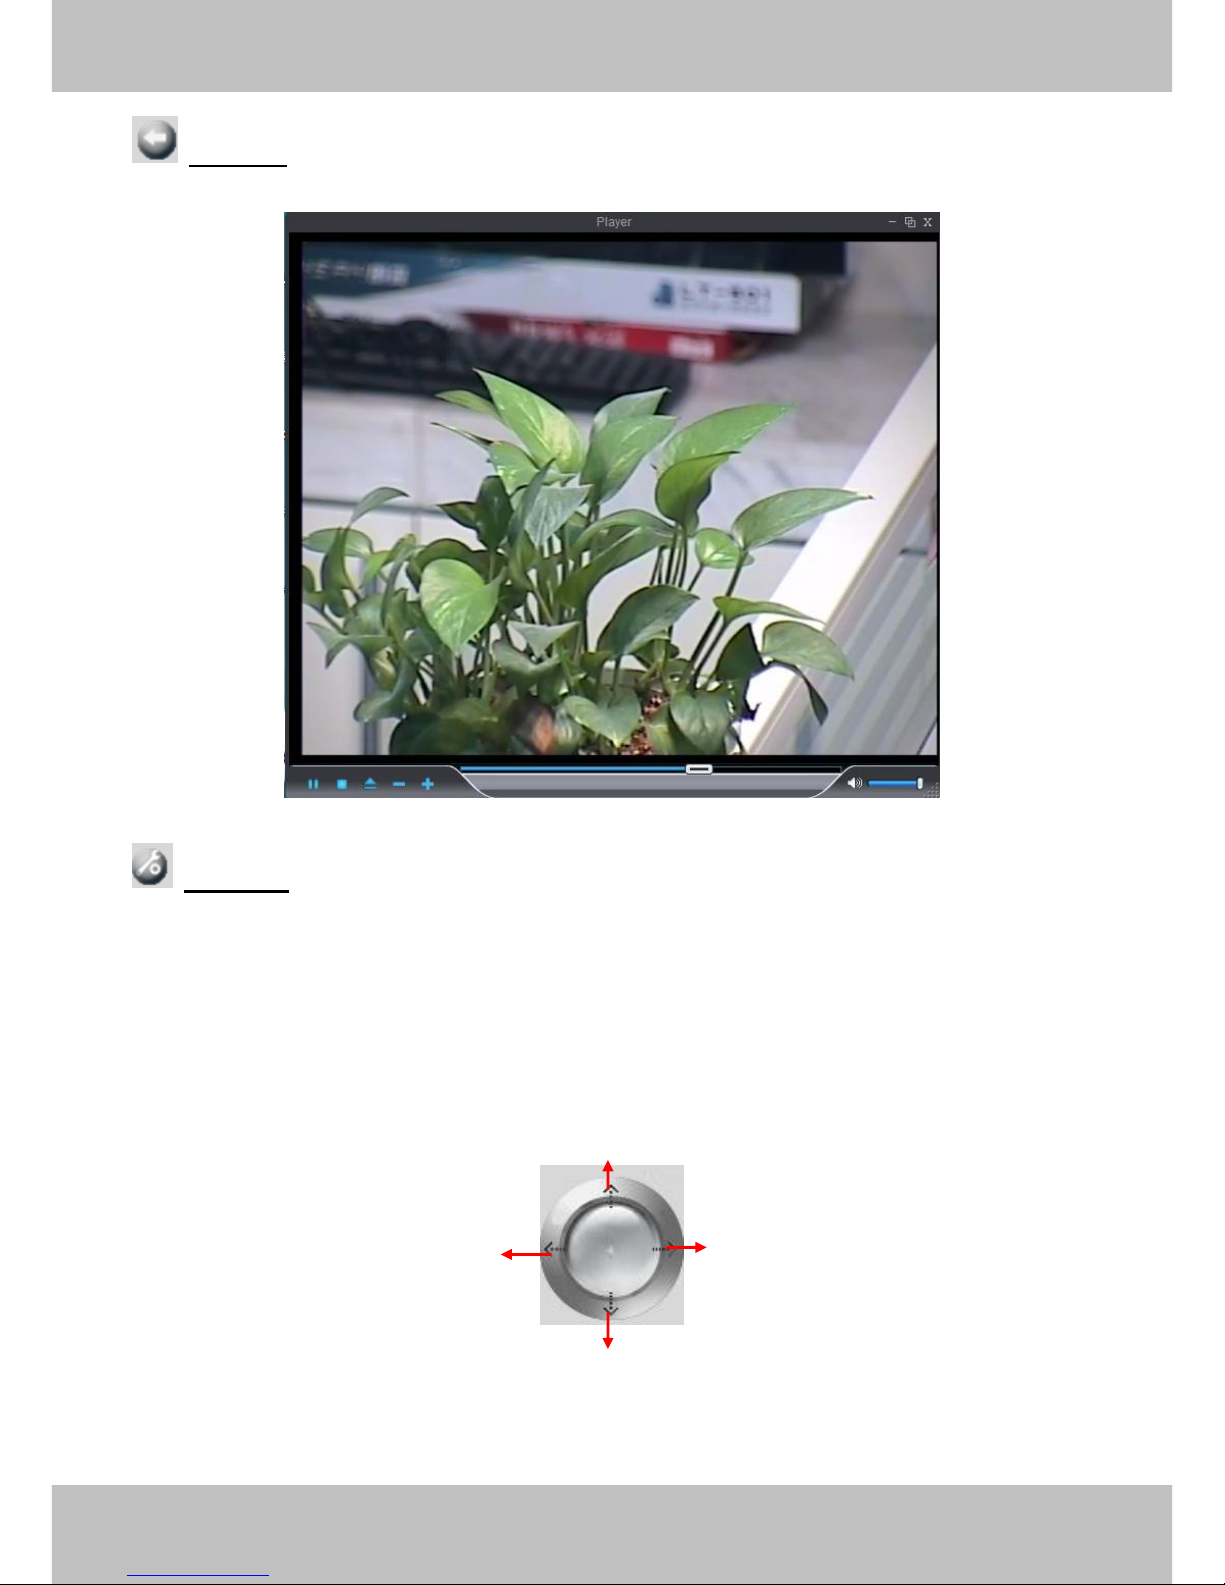
Playback: Click the button, it will pop up a player. And you can see the videos you have
stored in your computer.
Figure 2.6
Set Path: Set the storage path of photos and videos. The default storage path is D disk.
Note: These buttons are controlled by the ActiveX controller, therefore Firefox, Google Chrome
and Safari cannot allow to these functions.
Section3 Pan/Tilt /Zoom/Focus Control
1------Up control button, 2------Down control button,
3------Left control button, 4------Right control button,
1
2 3 4
12
w
w
wwwwww..ffoossccaamm..ccoomm
SShheennzzhheenn FFoossccaamm IInntteelllliiggeenntt TTeecchhnnoollooggyy CCoo..,, LLiimmiitteedd
TTeell:: 8866 775555 22667744 55666688 FFaaxx:: 8866 775555 22667744 55116688
12
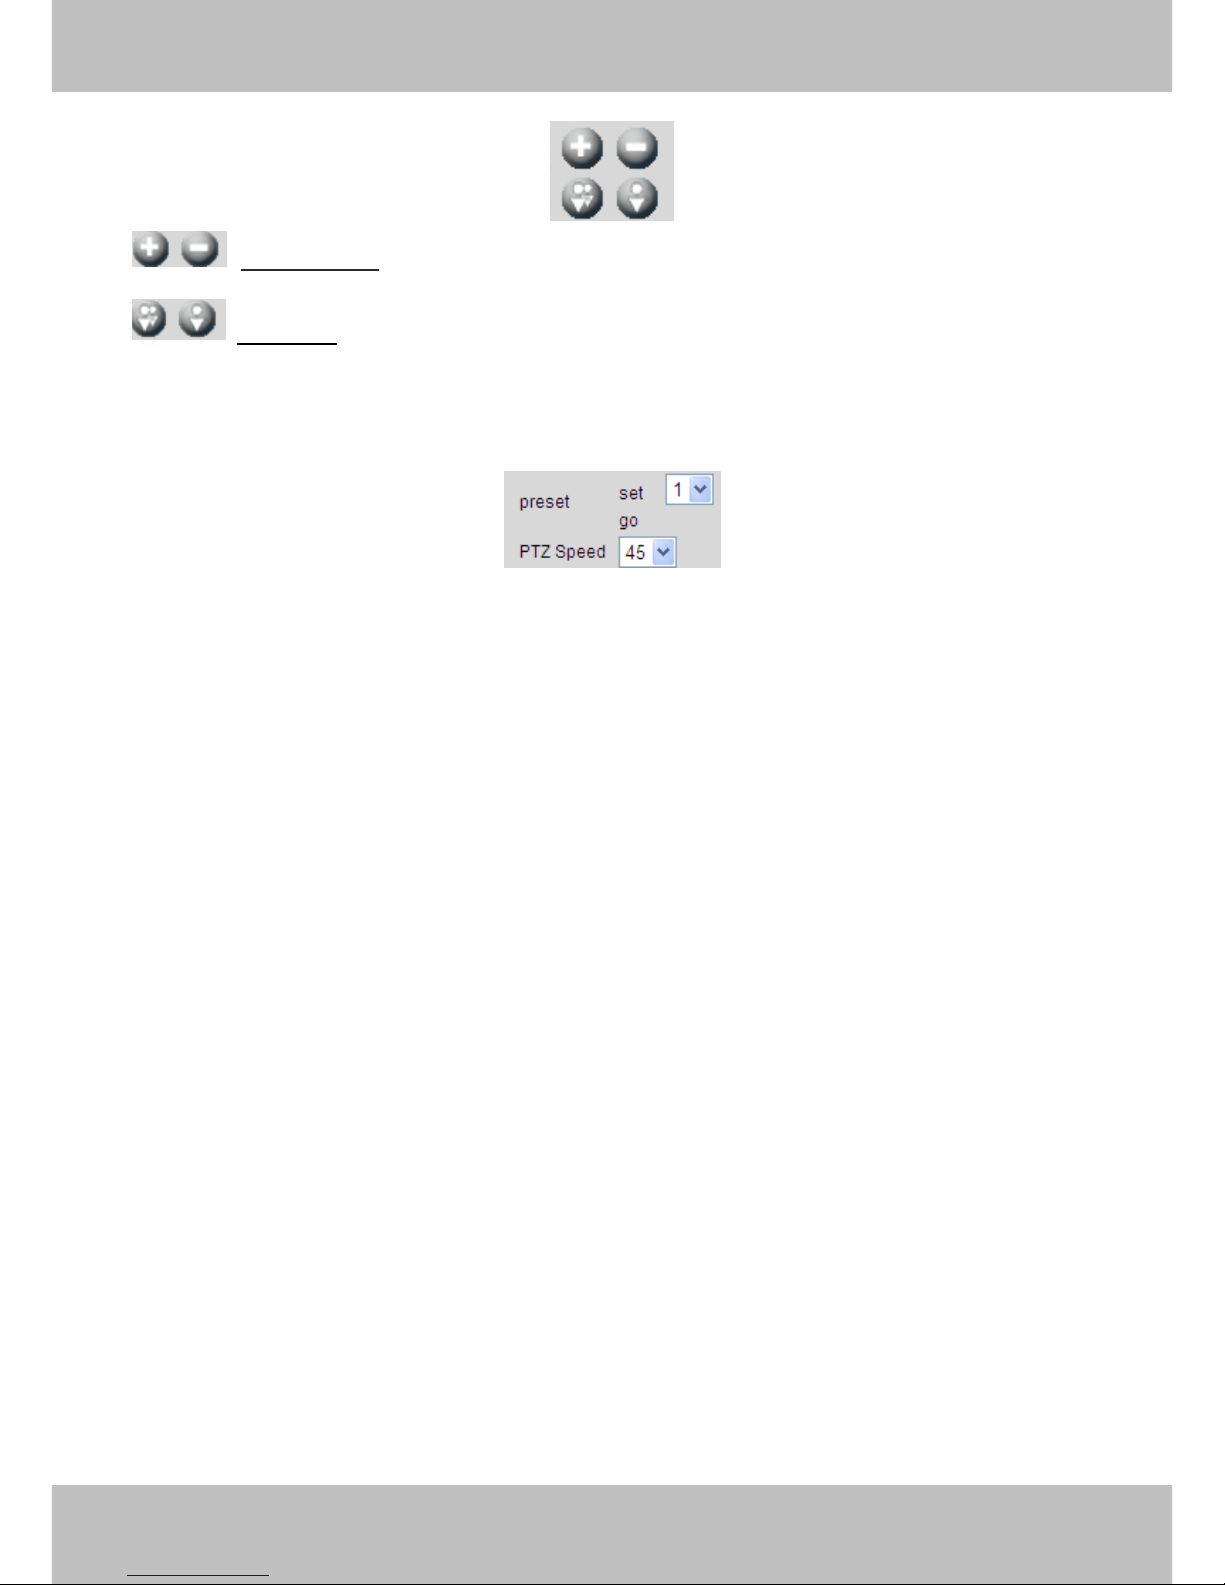
: Zoom in/out. The lens has 10x optical zoom. The biggest optical zoom time is 10
times.
: Focus +/-. This function can help you see more clearly.
Section4 Preset/ Go/ PTZ Speed
1) Preset----------Support 8 preset position, which is considered enough for DIY home & small
business surveillance market
2) Set----------- Click Set to save the position you need the camera to remember
3) Go----------- Click Go to make the camera move the preset position
4) Number button from 1 to 8--------You can click the number button with preset position, and the
camera will go to the preset position.
5) PTZ Speed-------- The default PTZ speed is 45, you can change another one between 1 and
63. The larger the number, the faster the speed will be.
How to do preset position?
We can start preset settings from position 1.
Firstly, select no. 1 within the menu of Preset on the panel.
Secondly, move the camera and stop at a place where you want make preset position.
Thirdly, click set button to save it as position 1 and you have done preset of position 1.
After that, you can select no. 2 within the menu of Preset on the panel, and move the camera and
stop at another place, and set as preset position 2. You can do all the 8 preset positions with this
method.
If you want to see the preset position you have set, such as the position 1, only select the set
no.1 ,and click go button, the camera will go to position no.1.

13
w
w
wwwwww..ffoossccaamm..ccoomm
SShheennzzhheenn FFoossccaamm IInntteelllliiggeenntt TTeecchhnnoollooggyy CCoo..,, LLiimmiitteedd
TTeell:: 8866 775555 22667744 55666688 FFaaxx:: 8866 775555 22667744 55116688
13
Section5 For Administrator
Path to Administrator Control Panel, Click it, and it will lead to Administrator Control Panel.
Section6 OSD
If you have added time and camera name in the video, you can see it in the surveillance window.
Go to For Administrator ---Video panel, and you can add camera name and time on the live
window. Here you can change another device name. The default device name is IP Camera.
Go to For Administrator ---Date&Time settings panel and adjust the device time.
Section7 Status bar
Figure 2.7
There is a status column below the view window (Figure2.7).
1) The current state of IPCAM
2) After the view has been digital amplified, click the icon, the view will be digital narrowed.
3) Click the icon, the view window will be digital amplified.
4) Click the icon, the view window will restore the original size.
NOTE: Firefox, Google Chrome and Safari have not these functions because the ActiveX does
not support it.
14
w
w
wwwwww..ffoossccaamm..ccoomm
SShheennzzhheenn FFoossccaamm IInntteelllliiggeenntt TTeecchhnnoollooggyy CCoo..,, LLiimmiitteedd
TTeell:: 8866 775555 22667744 55666688 FFaaxx:: 8866 775555 22667744 55116688
14
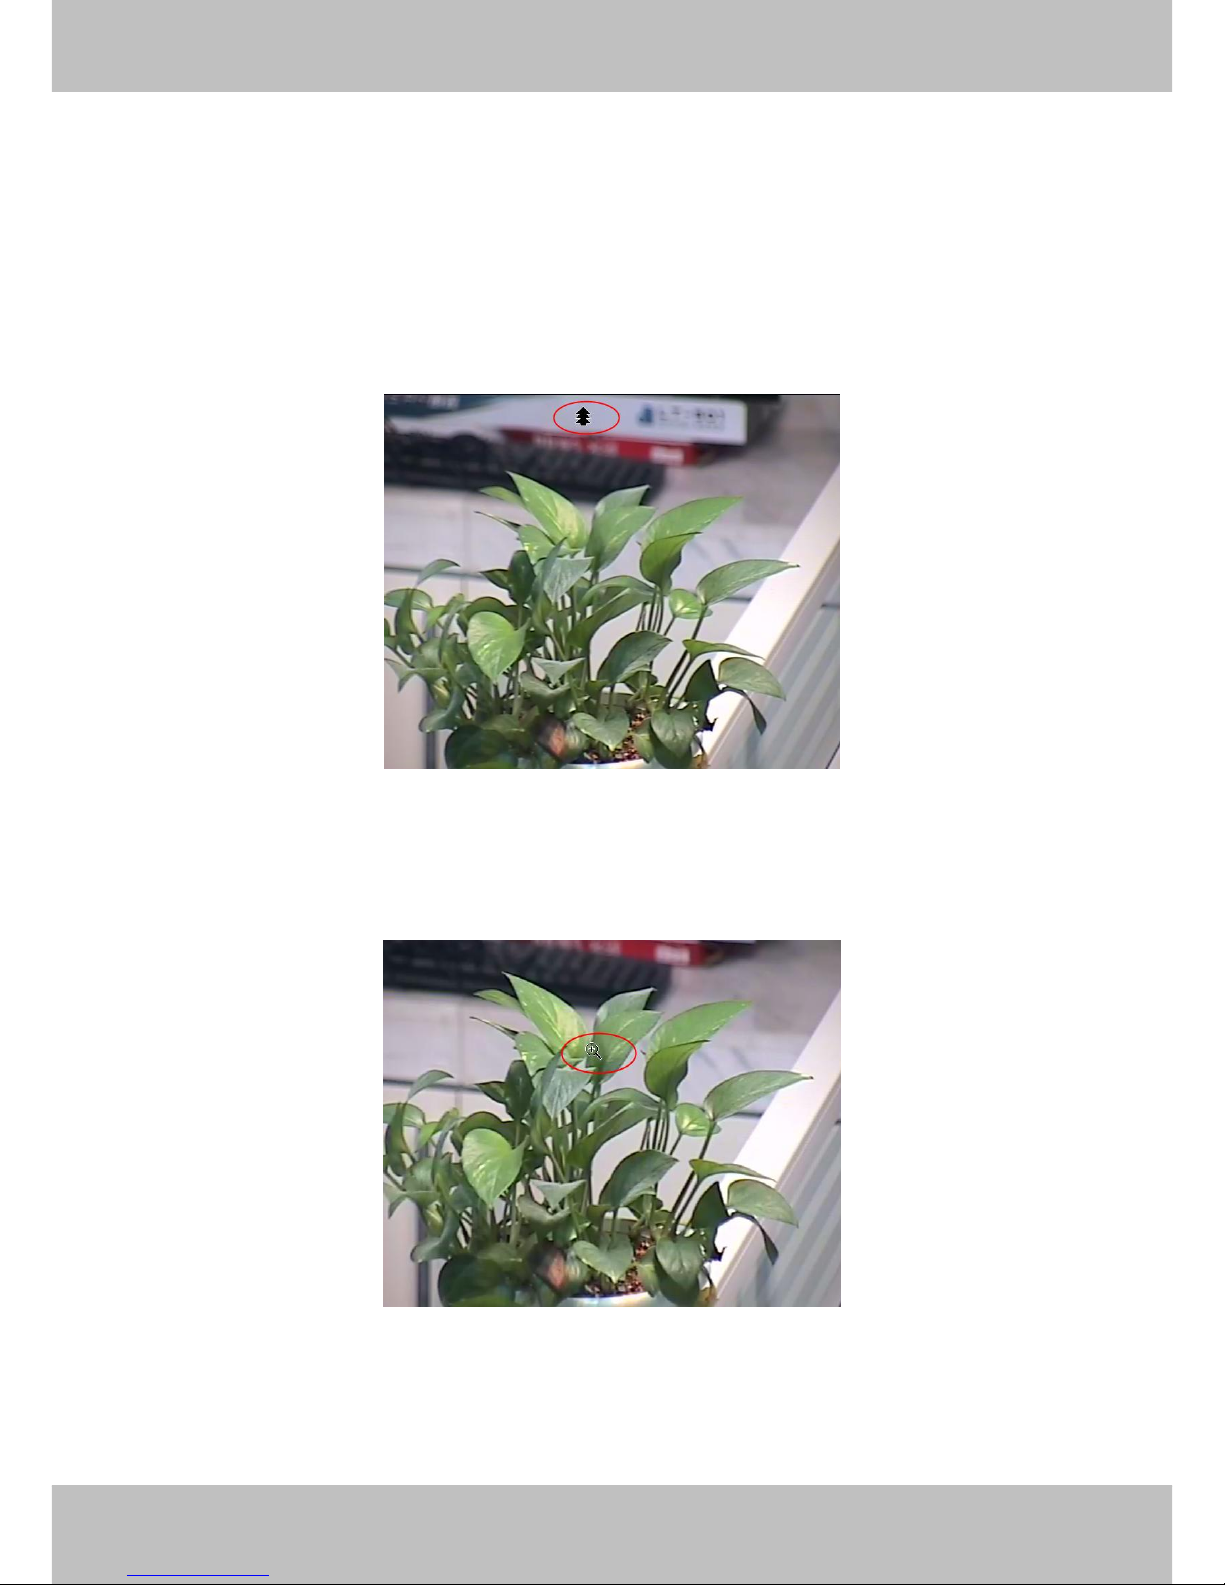
Onscreen Mouse Control
Put the mouse on the screen and you can see a arrow. Press the mouse and the camera’s len
will move to the corresponding direction.
For example, put the mouse on the upper-right corner of the screen and you can see a arrow,
press the mouse, then the cameras lens will move toward the upper-right direction.
When the icon has three arrows, the speed of the rotation is fastest. And when the icon has one
arrow, the speed is lowest.
Figure 2.8
Put the mouse at the center of the living video, you will see the icon of the magnifying glass
(Figure 2.9). Press the left mouse and you can use the optical zoom.
Figure 2.9
15
w
w
wwwwww..ffoossccaamm..ccoomm
SShheennzzhheenn FFoossccaamm IInntteelllliiggeenntt TTeecchhnnoollooggyy CCoo..,, LLiimmiitteedd
TTeell:: 8866 775555 22667744 55666688 FFaaxx:: 8866 775555 22667744 55116688
15
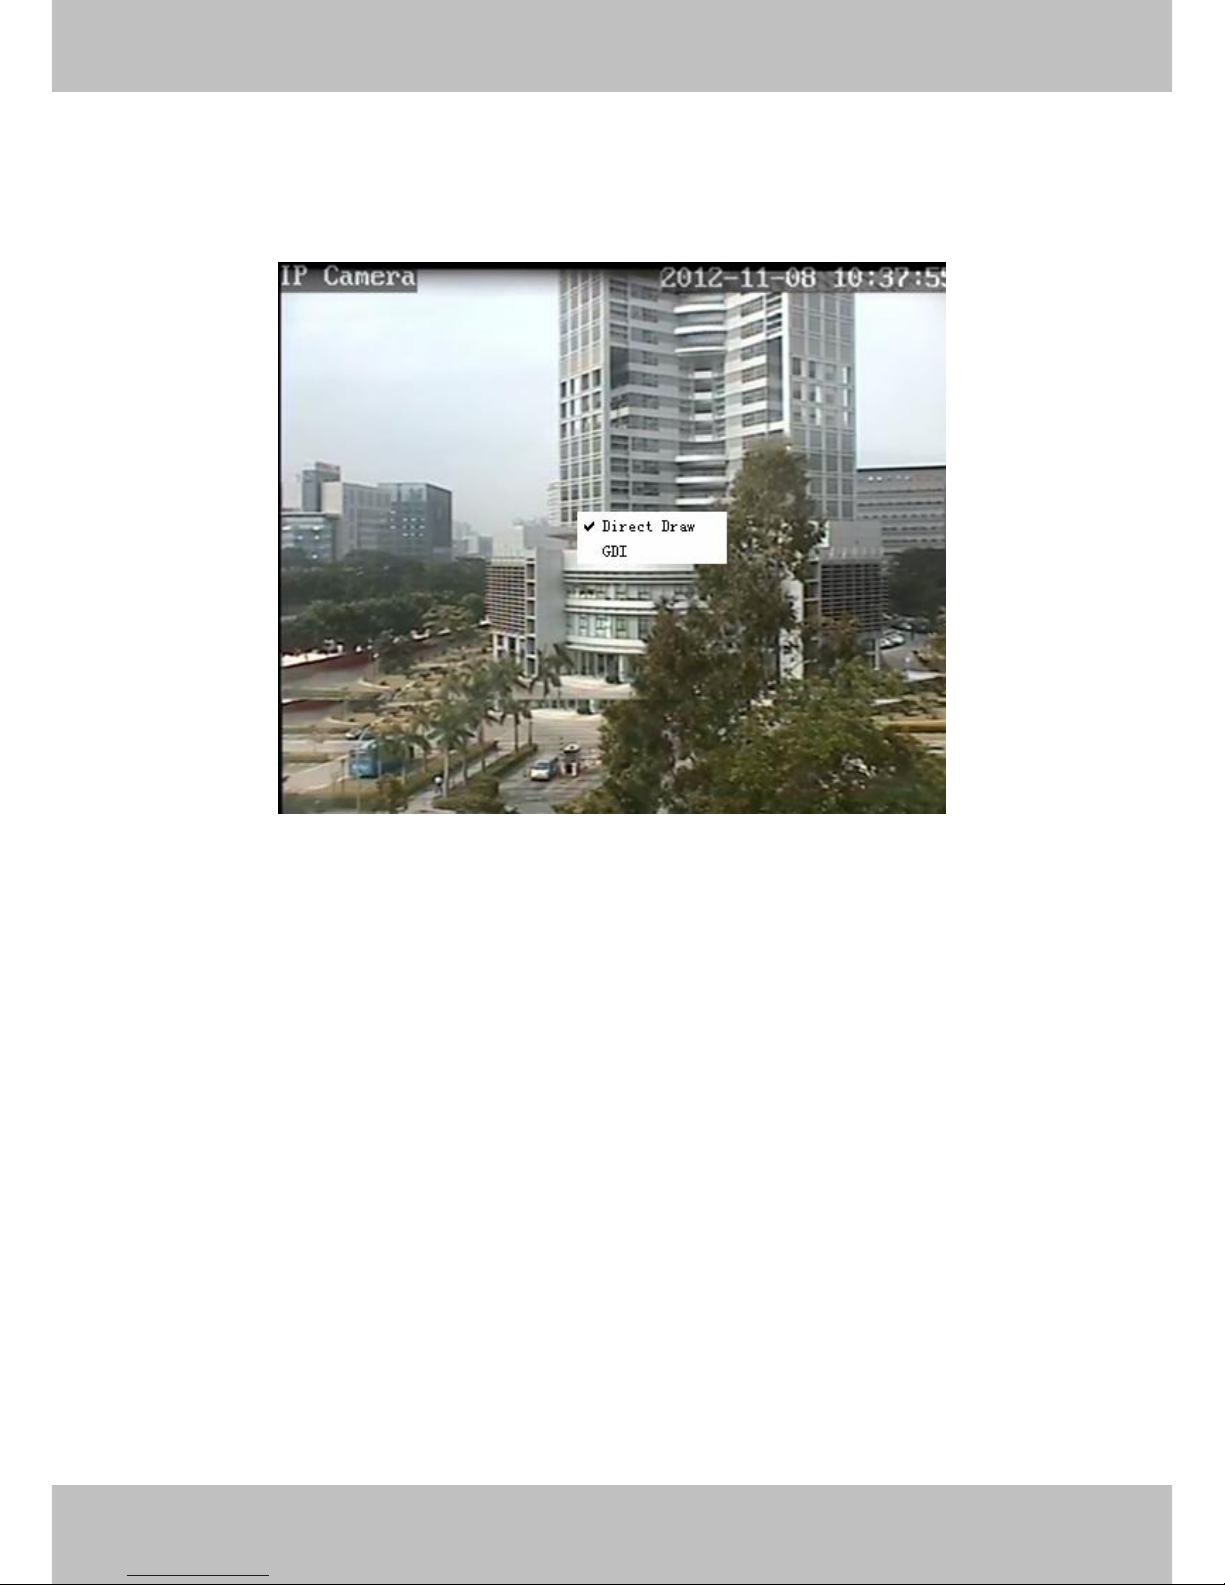
Right click on the screen, you can see two graphic display modes: Direct Draw and GDI. The
default mode is Direct Draw, and almost graphic card support this mode. But some old graphic
card cannot display normally under Direct Draw, you can select GDI to try again.
Figure 2.10
NOTE:
Under GDI mode, you cannot see the motion detect region lines when set motion detection.(For
more details: read chapter 3.10 Motion Detection)

16
w
w
wwwwww..ffoossccaamm..ccoomm
SShheennzzhheenn FFoossccaamm IInntteelllliiggeenntt TTeecchhnnoollooggyy CCoo..,, LLiimmiitteedd
TTeell:: 8866 775555 22667744 55666688 FFaaxx:: 8866 775555 22667744 55116688
16
33 AAddvvaanncceedd CCaammeerraa SSeettttiinnggss
Click the bar “For Administrator”, goes to Administrator Control Panel to make advanced camera
settings.
3.1 Device Information
Click For Administrator, you will see the Device Information.
It contains Device ID, firmware version of the camera and other status of the camera.
Device ID: It displays “IP Camera”. This ID is different form the camera name. You can set any
camera name you like for the camera in “For Administrator—> Video—>Parenthesis Options”
and the camera name can be showed at the video window, but the device ID will always display
IP Camera.
Network Connection: LAN. If the camera gets wired connection successfully, here will show
LAN.
Current Client: It shows that how many people are viewing the video. For example, the Current
Client shows 0, that means no people are viewing the video. If someone have logged in the
camera but do not open the video, the Current Client will not change.
Device Firmware Version/Device Embedded Web UI Version: The camera’s software
version.
Mac Address: Each camera has its own MAC ID. For example Device ID is 00606E8C5058, the
same MAC ID sticker is found at the bottom/back of the camera.
 Loading...