

Page 1
User's Manual
Manuel de l'utilisateur
Manual del Usuario
Bedienungsanleitung
Manuale d'uso
2.4 '' Touch-Screen
Wireless Video Baby Monitor
ENGLISH
ESPAÑOL
DEUTSCH
ITALIANO
FRANÇAIS
Page 2
Product Layout / Description du produit / Esquema del producto
/ Produktübersicht / Struttura del prodotto
Figures and Quick Guide / Figures et Guide d'utilisation rapide
/ Figuras y guía rápida / Abbildungen und Schnellanleitung
/ Figure e Guida rapida
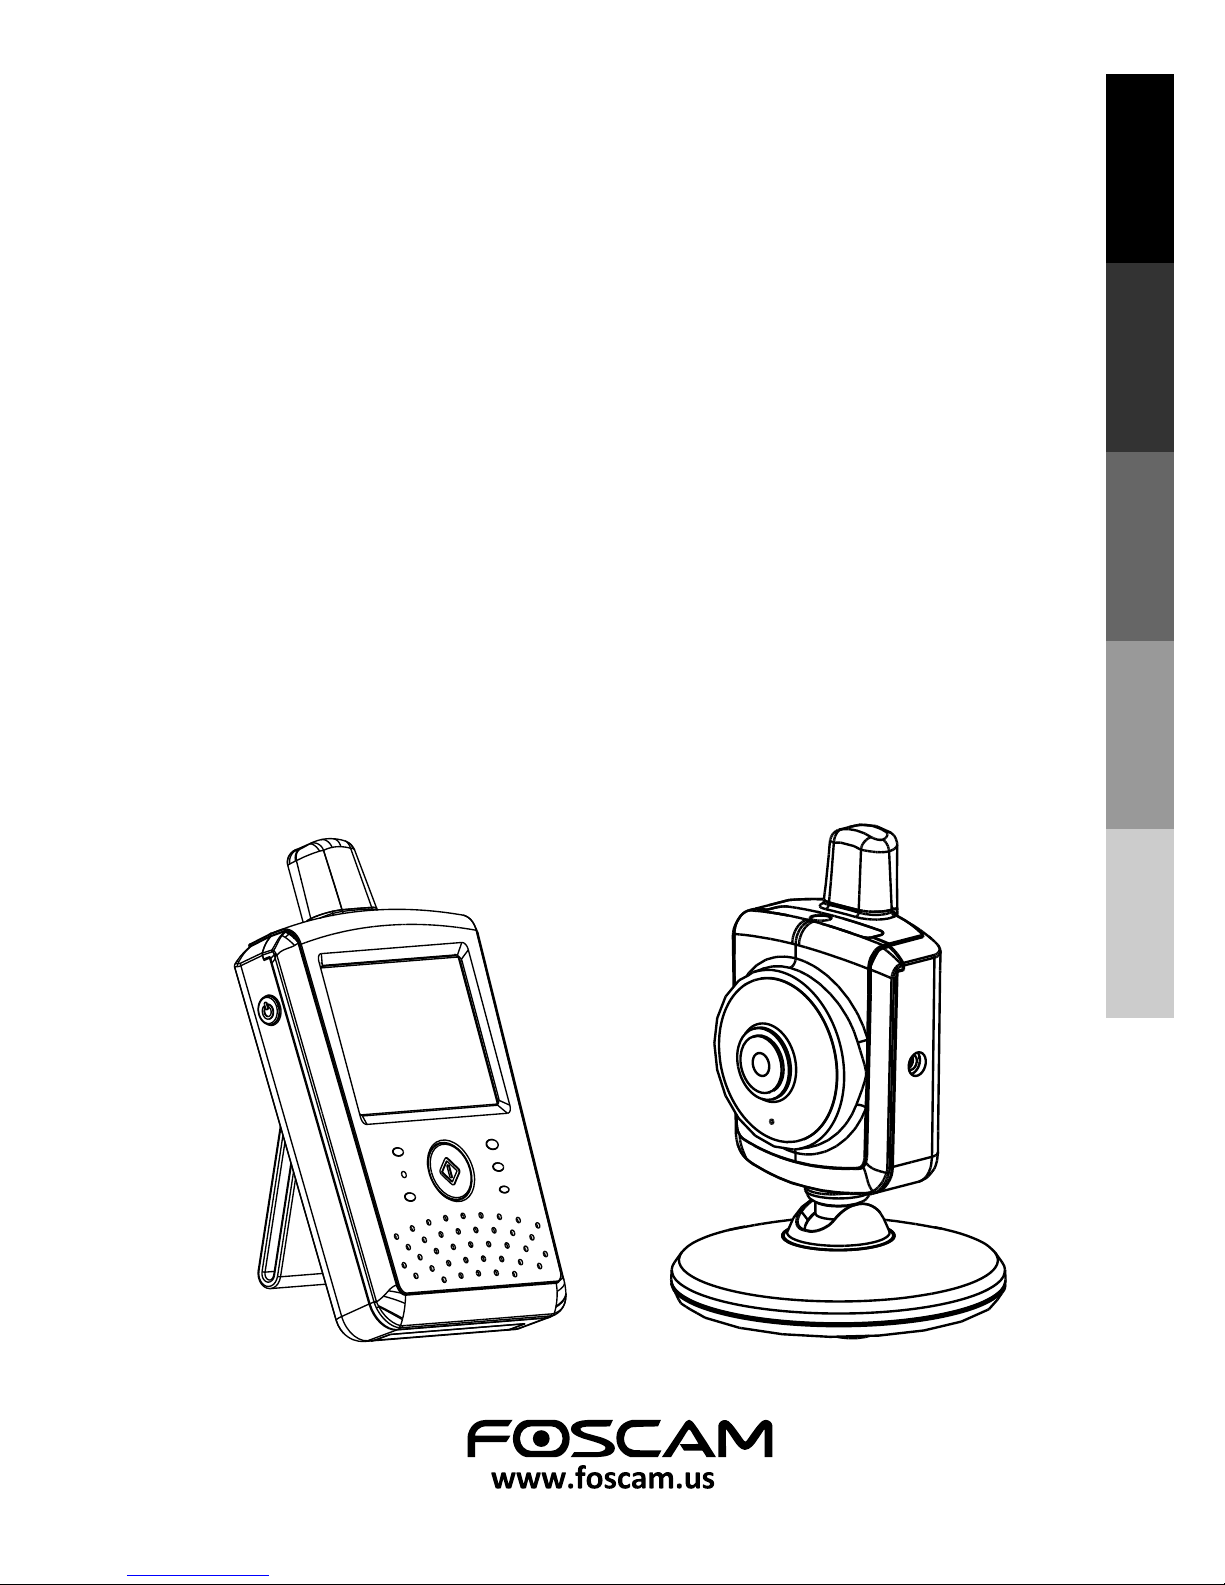
Camera / Caméra / Cámara / Kamera / Telecamera
Fig. 1
i
Monitor / Moniteur
Fig. 2
1
2
3
4
5
6
7
8
9
7
8
9
10
11
1
2
3
4
5
6
Page 3

Setup / Installation / Configuración / Einrichtung / Installazione
1
Fig. 3
ii
Camera Setup / Installation de la caméra / Configuración de la cámara
/ Kameraeinrichtung / Installazione della telecamera
1.1
Power Supply - Using AC Power
Alimentation - Avec alimentation secteur
Fuente de alimentación - Utilizar la alimentación de CA
Stromversorgung – über Netzstrom
Alimentazione - Uso dell'alimentazione CA
1.2
Fine Tuning /
Réglages précis /
Enfoque /
Feineinstellung /
Regolazione
Fig. 4
Page 4
Fig. 5
iii
2
Monitor Setup / Installation du moniteur / Configuración del monitor
/ Monitoreinrichtung / Installazione del monitor
Power Supply / Alimentation / Fuente de alimentación / Stromversorgung
/ Alimentazione
2.1
Loading the Battery / Installation de la batterie / Insertar las pilas
/ Akku einlegen / Inserimento delle batterie
Using AC Power/Utilisation de l'alimentation secteur
/ Uso de la alimentación de CA / Netzstrom verwenden
/ Uso dell'alimentazione CA
Fig. 6
11
3
2
1
2
3
Page 5
iv
3
Menu Options / Options du menu / Opciones del menú
/ Menüoptionen / Opzioni del menu
Fig. 8
Fig. 7
12
21 3
54 6
87
9
1110
Brightness Setting / Réglage de la luminosité / Configuración del brillo
/ Helligkeitseinstellung / Impostazione della luminosità
3.1
Fig. 9
Page 6
v
Fig. 10
3.2
Volume Setting / Réglage du volume
/ Configuración del volumen
/ Lautstärkeeinstellung / Impostazione del volume
Fig. 11
3.3
Camera Selection / Sélection de la caméra / Selección de la cámara
/ Kameraauswahl / Selezione telecamera
3.4
Night Light / Veilleuse / / / Luz nocturna Nachtlicht Luce notturna
Fig. 12
Page 7
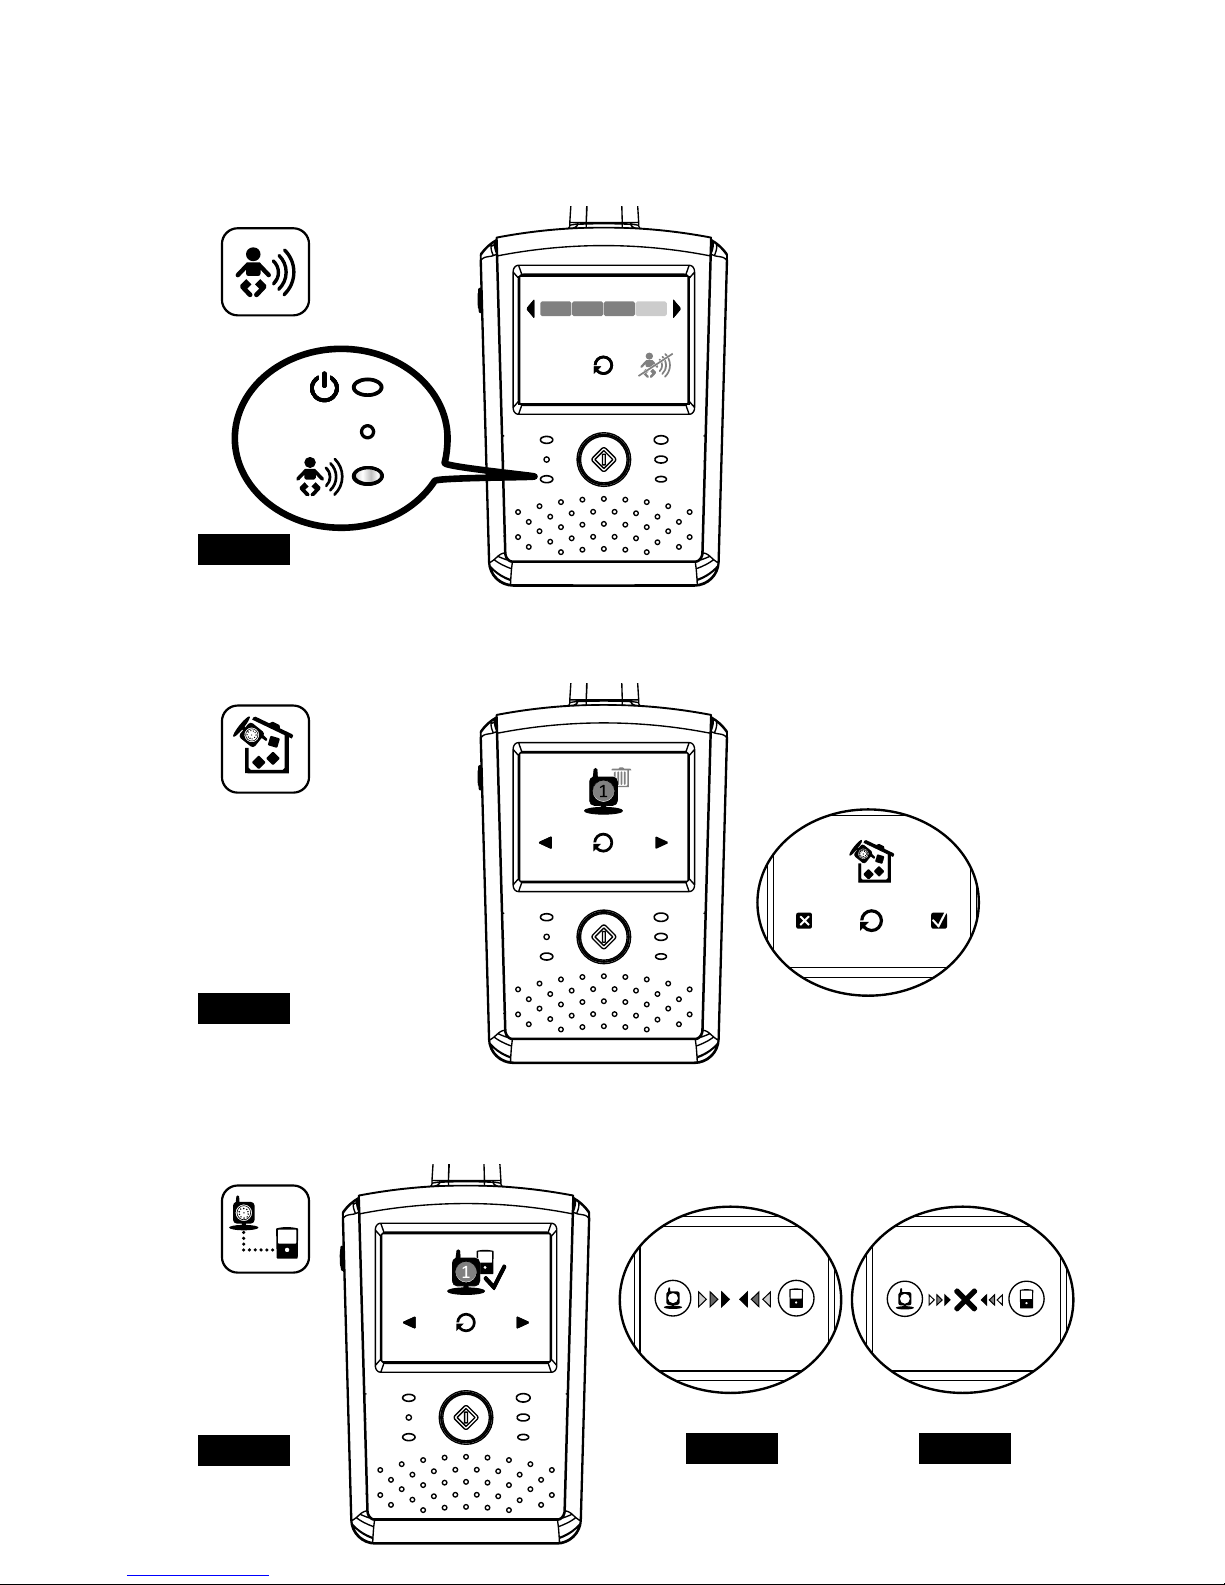
Fig. 14
3.6
Delete Camera / supprimer une caméra / quitar cámara
/ Kamera hinzufügen / Elimina telecamera
3.7
ADD Camera / Ajouter caméra / Añadir cámara / Kamera löschen
/ Aggiungi telecamera
Fig. 15
Fig. 17Fig. 16
3.5
VOX (Voice-Operated Transmission) Function / Fonction TCV
(Transmission de Commande Vocale) / Función VOX (transmisión de
activación por voz) / VOX-Funktion (geräuschaktivierte Übertragung)
Funzione VOX (trasmissione attivata a voce)
Fig. 13
vi
Page 8
3.9
Display Frequency and White Balance Setting /
Paramètres d'affichage et de balance des blancs /
Parámetros Frecuencia de visualización y Balance de blanco /
Einstellung der Anzeigefrequenz und des Weißabgleichs /
Frequenza di visualizzazione e impostazione del bilanciamento
del bianco
Fig. 19
vii
3.8
Flip Function / Fonction Retourner / Función de volteo/
Umdrehfunktion / Funzione Flip (Capovolgi)
Fig. 18
Page 9
1
4
Status Information /
/ /
/
Informations de statut
Información de estado Statusinformationen
Informazioni di stato
1
2 31
Fig. 21
3.10
Restore Default / /
/
/
Restaurer défaut Restaurar los valores
predeterminados Werkseinstellungen wiederherstellen
Ripristino predefiniti
Fig. 20
viii
Page 10

Page 11

1
ENGLISH
Package Contents
One Monitor
Two Power Adapters
One Battery for Monitor ( 3.7V 700mAh Li-ion )
Two Cable Clips
Two Screws and Two Wall Anchors
This User's Manual
Product Layout
Camera (Fig. 1)
1. Night Light
2. Power indicator LED
3. Lens
4. Microphone
5. Power adapter plug
6. Antenna
7. Light sensor
8. Power/Pairing button
9. Infrared LEDs
Monitor (Fig. 2)
1. Power button
2. Power indicator LED
3. VOX indicator LED
4. Volume indicator LEDs
5. Speaker
6. Antenna
7. LCD screen (Touch panel)
8. Menu button
9. Power adapter plug
10. Holder
11. Battery compartment
One Camera
Page 12

2
Setup
P
Plug one end of the provided power adapter into a wall outlet and the other end
into the back of the camera. See Fig. 3.
Note 1: Use the adapter labeled OUTPUT: 6V DC with the camera.
Note 2: Press and hold the Power button over two seconds to turn off the
camera.
Fine Tuning
Place the camera in a convenient location, point the lens toward the observation
area. See Fig. 4.
Night Vision
The camera has eight high-intensity LEDs for picking up clear images in the
dark. When the light sensor detects low ambient light levels, the LEDs will be
automatically activated.
Pairing
The system comes with a camera unit that has already been paired with the
monitor unit. The pairing function gives each camera unit a separate channel on
the monitor unit. This is necessary for configuring additional camera units.
1. Press and hold power button over 3 seconds on camera. The power LED
will light up (red light) and night light will start blinking (orange light).
This will turn on the power of camera and camera will wait for pairing.
2. Press the Power button to turn on the monitor and the power LED
will light up (green).
3. In the submenu (8. Add Camera see Fig. 8.) on monitor.
4. Please choose which number of cameras you want to add, and then press
the icon. See Fig. 15.
5. Pairing is completed, it will show " " on the monitor.
6. Pairing is failed, it will show the picture on the monitor. See Fig. 17.
Note : Make sure the camera and the monitor are within range of each other.
If there is out of range, the picture (Fig. 17.) will be displayed on the
LCD screen and the warning sound will be emitted from the monitor
unit if the monitor exceeds the range (unlink). The warning sound will
be emitted from the monitor until you press any button to stop.
Camera Setup
ower Supply - Using AC Power
1
1.1
1.2
1.3
1.4
Page 13
3
Power Supply
current.
Loading the Battery
1. Open the battery compartment cover on the rear of the monitor.
See Fig. 5.
2. Insert the battery with the metal facing the battery compartment.
See Fig. 5.
3. Close the battery compartment cover, and make sure it is locked securely.
4. Press the POWER button to turn on the monitor. See Fig. 5.
Note 1: When power is sufficient, the "Power" LED will light up (green light).
Note 2: Press and hold the Power button over two seconds to turn off the
monitor.
Note 3: Remove the battery from the monitor if you do not plan to use it for
a prolonged period of time.
Using AC Power
1. Plug one end of the provided power adapter into a wall outlet and the other
end into the monitor, the "Power" LED will appear red. See Fig. 6.
Note : Use the adapter labeled OUTPUT: 6V DC with the monitor.
2. Press the POWER button to turn on the monitor. See Fig. 6.
Note 1: When power on the monitor, "Power" LED will appear orange
Note 2: Press and hold the Power button over two seconds to turn off the monitor.
Note 3: When power on and charging starts, and battery status will appear
. If charging is finished (fully charged) the battery
status will appear . When power off and charging starts, and "Power"
LED will appear red. If charging is finished (fully charged) the "Power"
LED will turn green.
Monitor Setup
The monitor uses 3.7V 700mAh (Li-ion) battery or the household AC power
2.1
2
Page 14

4
1. Press the menu button on the monitor unit to display the main menu
on the screen (touch panel). See Fig. 7.
2. There are two main menus. See Fig. 8.
(1) Brightness Setting
(2) Volume Setting
(3) Camera Selection
(4) Night Light Setting
(5) VOX Function
(6) Next Page
(7) Delete Camera
(8) Add Camera
(9) Flip Function
(10) Last Page
(11) Display Frequency and White Balance Setting
(12) Restore Default
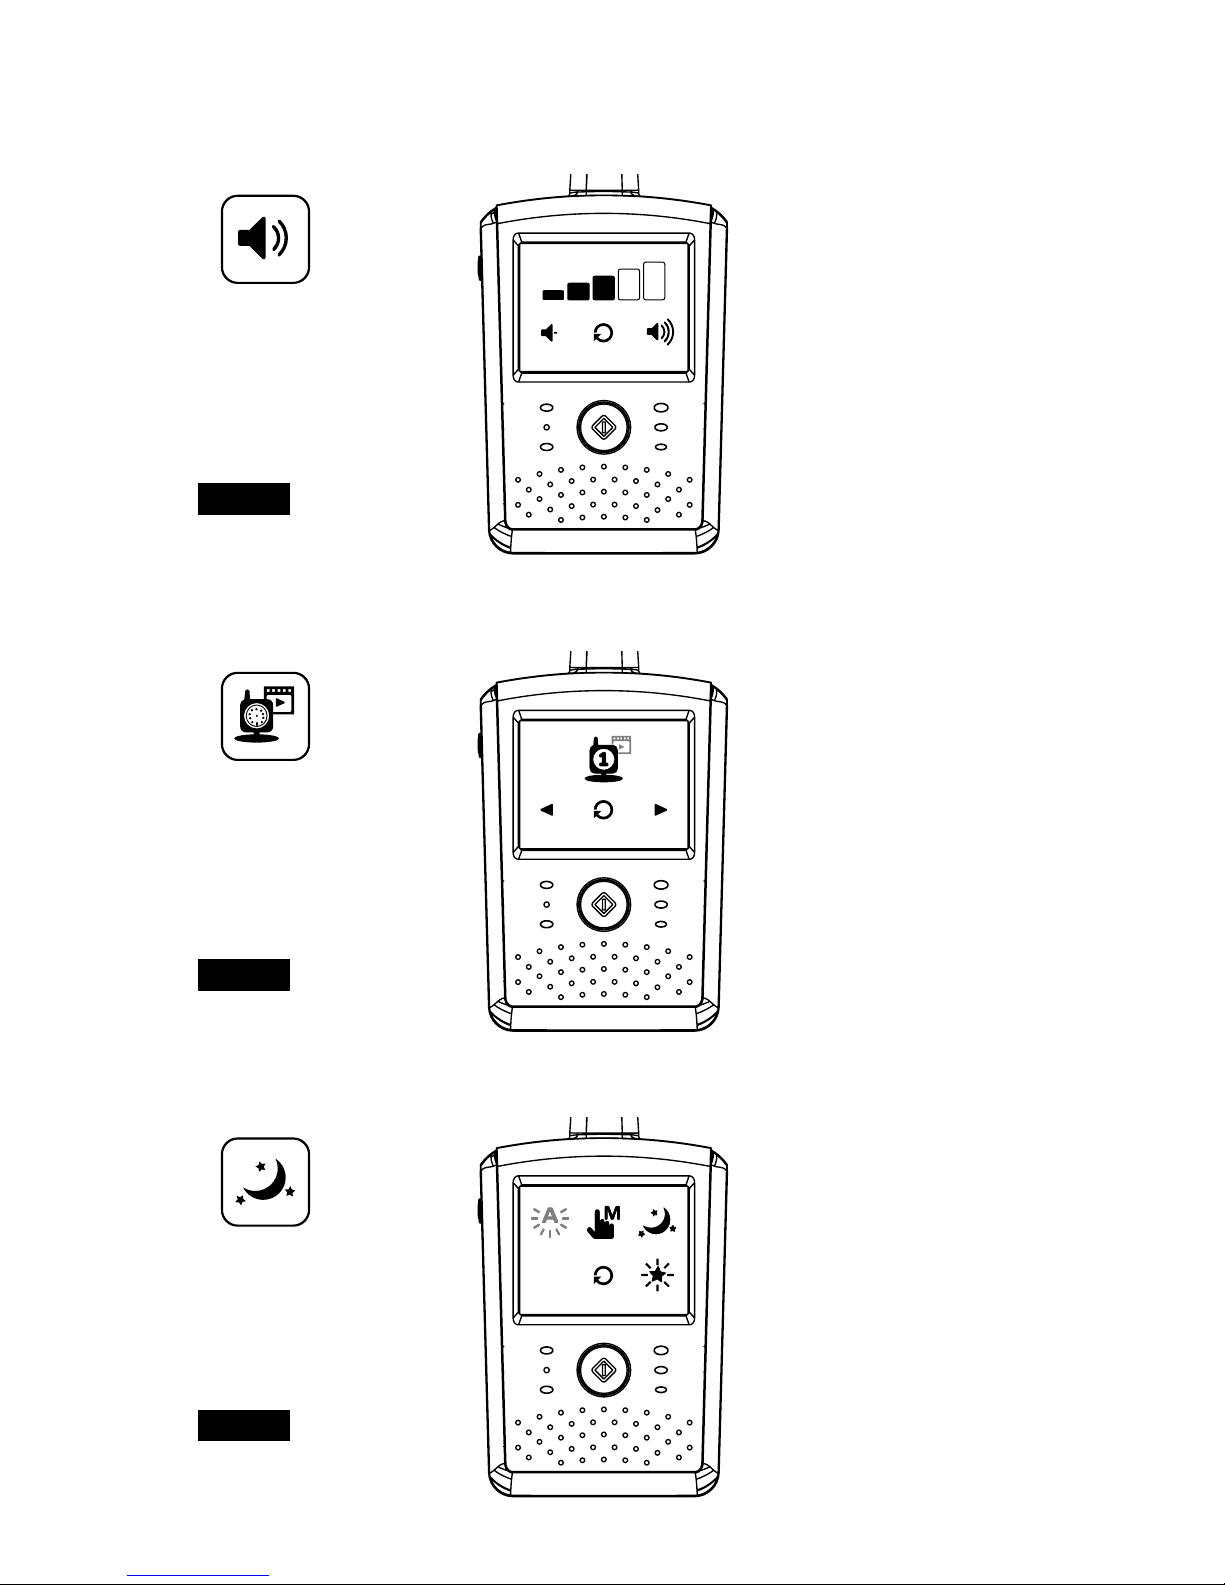
Brightness Setting ( Brightness )
In this submenu you can adjust brightness of the screen. See Fig. 9.
Volume Setting
In this submenu you can adjust volume level on monitor side. See Fig. 10.
Camera Selection ( Camera Select )
In this submenu you can select which camera that you want to display on the
screen. See Fig. 11.
Night Light Setting
1. When you enable the auto mode , the icon will light up. You can
choose the sensitivity level. With the level set to high, the light will detect
higher light. See Fig. 12.
2. When the light from the camera reaches the set level, the night light will
turn on as setting.
3. When you enable the manual mode , you can turn ON/OFF the night
light as setting.
4. Press the icon , you can change the color of night light. There are
three colors of night light (yellow, green, orange).
5. Press the icon , you can change the level of brightness. There are four
levels of brightness.
Menu Options
3
3.1
3.2
3.4
3.3
Page 15

5
VOX (Voice-Operated Transmission) Function
1. This submenu lets you choose the VOX sensitivity level. With the level set to
high, the microphone will detect lower sounds. See Fig. 13.
2. When you enable the VOX on the monitor unit, the icon will
light up. Press the menu button to back to display screen for complete
setting and the VOX LED will remain ON (blue light).
3. This will turn off the screen within 10 seconds and enter power
saving mode.
4. When the sound from the camera reaches the set level, the screen
will turn on automatically and a warning sound will be emitted from
the monitor unit.
Delete Camera
In this submenu you can delete a paired camera.
1. Please press which number of cameras you want to delete. See Fig. 14.
2. Press to delete.
Add Camera
The system comes with a camera unit that has already been paired with the
monitor unit. The pairing function gives each camera unit a separate channel on
the monitor unit. This is necessary for configuring additional camera units.
1. In this submenu you can add a new camera. See Fig. 15.
2. Please choose which number of cameras you want to add, and then press
the icon .
3. The monitor will wait for pairing and then please also press the pairing button
over three seconds on camera side. You don’t need to turn on the power of
camera.
4. Pairing is completed, it will show " " on the monitor.
5. Pairing is failed, it will show the picture on the monitor. See Fig. 17.
Flip Function
In this submenu you can flip the video horizontally when mounting the camera
on the ceiling. See Fig. 18.
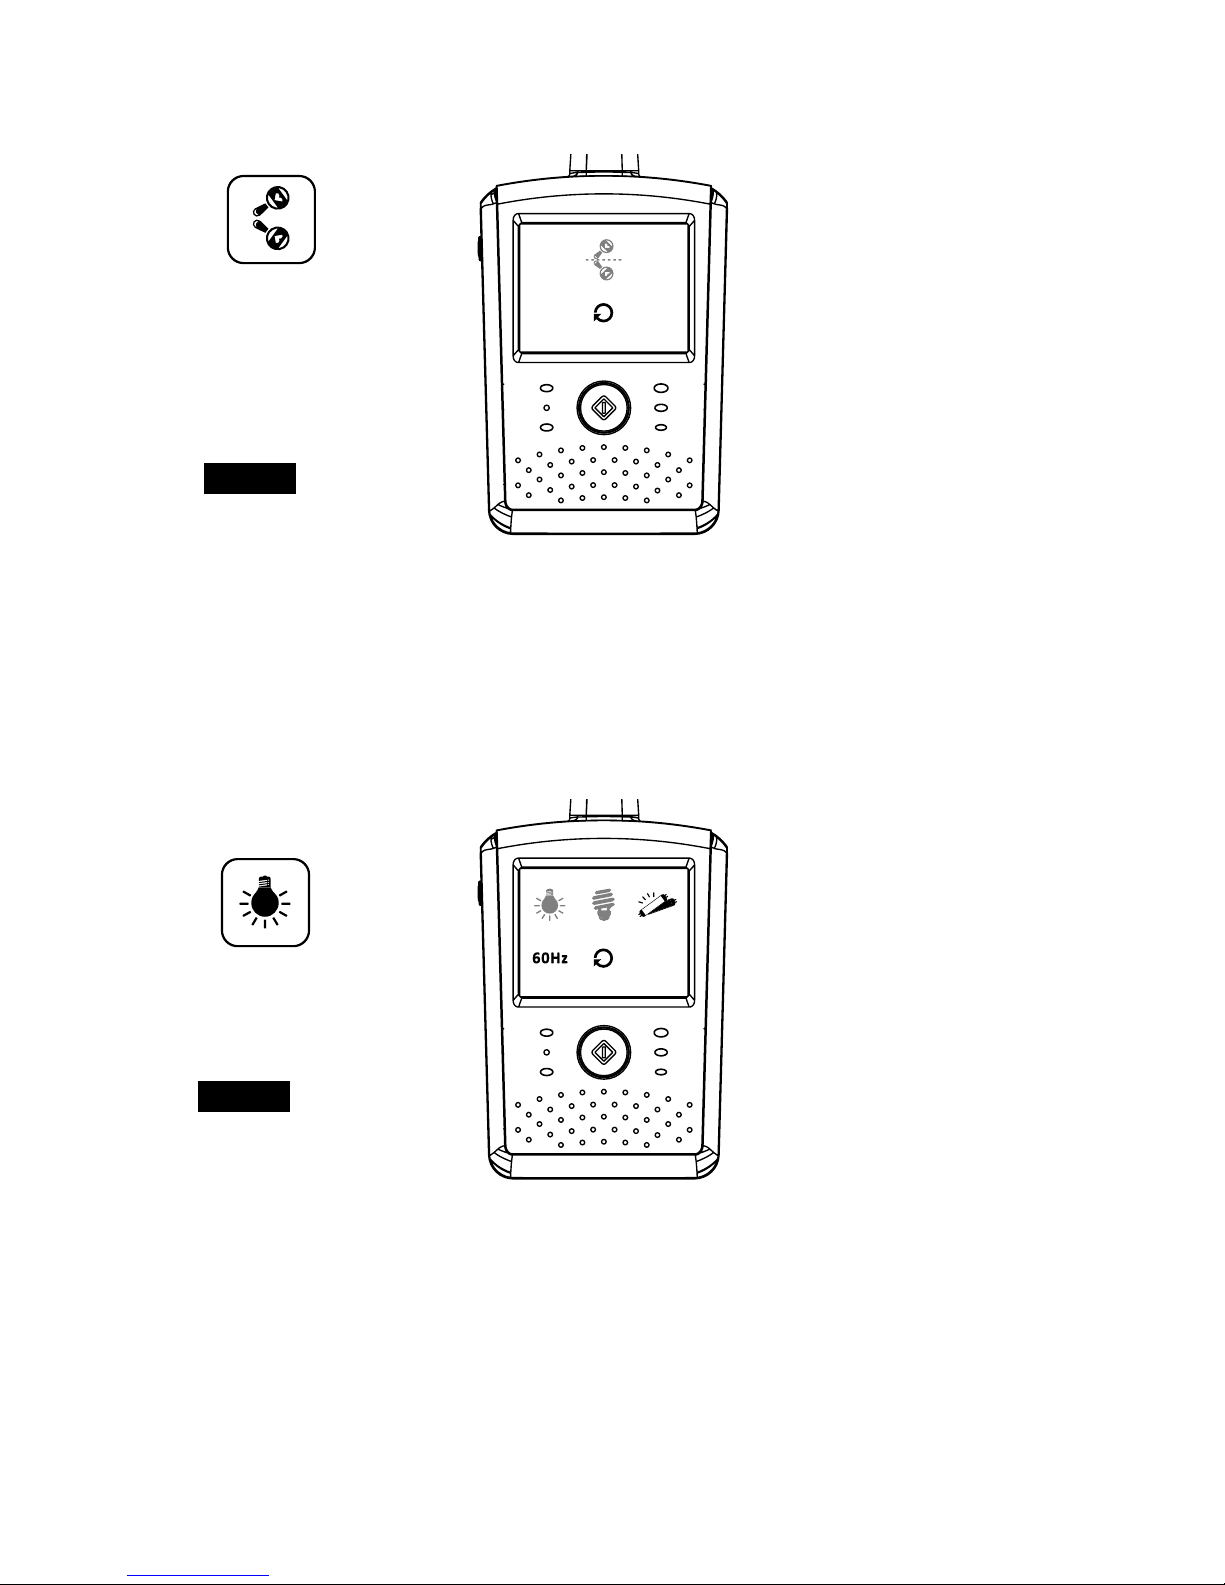
Display Frequency and White Balance Setting
1. In this submenu you can choose what frequency and color temperature are
better on the monitor. See Fig. 19.
2. There are three types of color temperature and two frequencies (50Hz or
60Hz).
3.7
3.6
3.9
3.5
3.8
Page 16
6
Warning Alarm
The warning sound will be emitted from the monitor unit in the following cases.
4.2
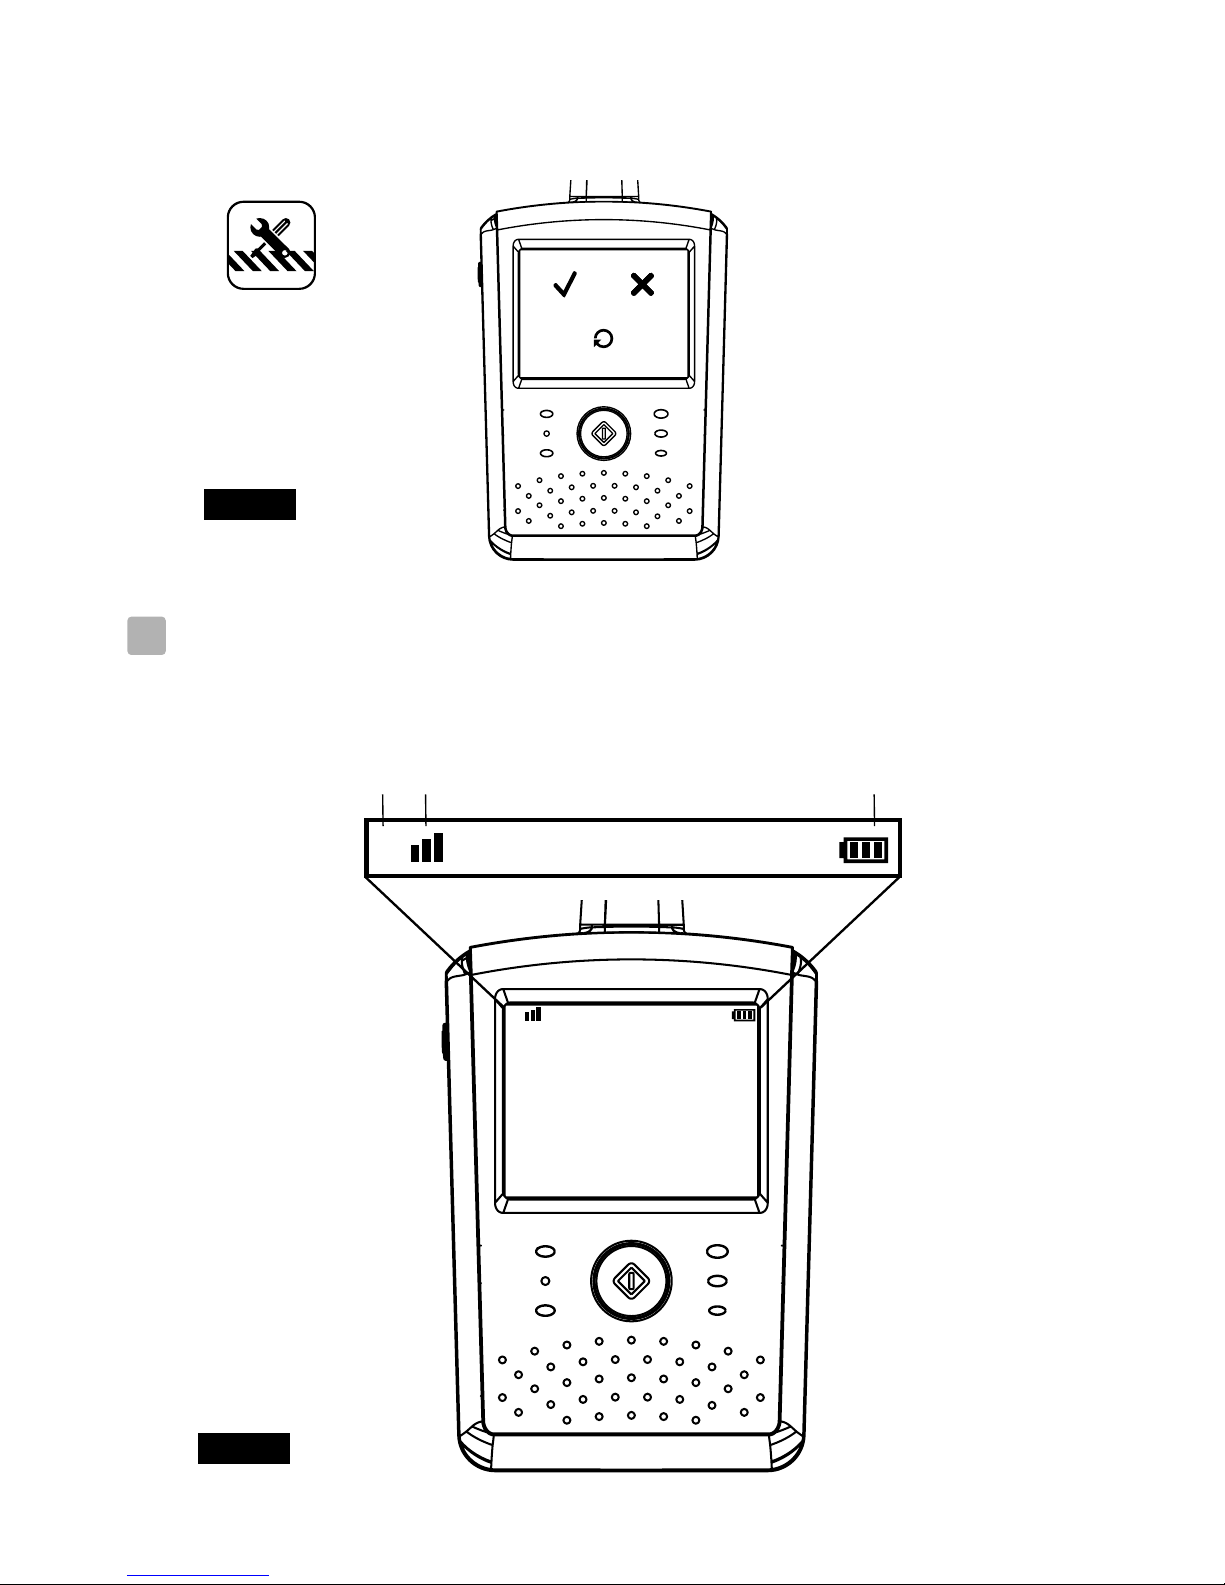
Status Bar
The status bar will be displayed on the top of the screen. See Fig. 21.
1. Camera number indicator
2. Signal strength indicator
3. Battery status / Charging indicator
Status Information
4
4.1
3.10
Restore Default
In this submenu you can reset the system to default. Press to make sure.
See Fig. 20.
Status Indication Action
Out of range
Lost connection
Continuous beeps
for one minute
Move the monitor closer
to the camera. Check the
power of camera.
Note : You can press any key of monitor stop the alarm.
VOX alarm 3 consecutive beeps Disable VOX function
(See Setup 3.5)
Low battery
2 consecutive beeps and
on the screen
blinking
Connect the monitor unit
to the AC adapter.
(See Setup 2.1)
Page 17

7
Ÿ
Ÿ Make sure the power plugs are pushed all the way in.
If the signal is poor, or there is interference
Ÿ If there is a microwave oven in use in the path between the camera and
monitor, remove the microwave oven or turn it off.
Ÿ Make sure the camera and the monitor are within range of each other
(range of approximately 984 feet; 300 meters in a clear line of sight).
Care and Maintenance
Ÿ Keep all parts and accessories out of children's reach.
Ÿ Fingerprints or dirt on the lens surface can adversely affect camera
performances. Avoid touching the lens surface with your fingers.
Ÿ Should the lens become dirty, use a blower to blow off dirt and dust, or a
soft, dry cloth to wipe off the lens.
Ÿ Keep the camera dry. Precipitation, humidity, and other liquids contain
minerals will corrode electronic circuits.
Ÿ Do not use or store in dusty, dirty areas.
Ÿ Do not store in hot areas. High temperatures can shorten the life of
electronic devices and warp or melt certain plastics.
Ÿ Do not store in very cold areas. When the system warms up (to its normal
temperature), moisture can form inside the case, which may damage
electronic circuit boards.
Ÿ Do not attempt to open the case. Non-expert handling of the device may
damage the system.
Ÿ Avoid dropping or strong shocks.
Ÿ Operate this product using only with the power supply included or
provided as an accessory.
Ÿ Do not overload electrical outlets or extension cords this can result in fire
or electric shocks.
Ÿ Do remember that you are using public airwaves when you use the system
and that sound and video may be broadcast to other 2.4 GHz receiving
devices. Conversations, even from rooms near the camera, may be
broadcast. To protect the privacy of your home, always turn the camera off
when not in use.
Troubleshooting
Make sure the camera and the monitor are turned on.
You are not getting any signal at all
Page 18

8
Caution
FCC Statement
This equipment has been tested and found to comply with the limits for a Class B
digital device, pursuant to Part 15 of the FCC Rules. These limits are designed to
provide reasonable protection against harmful interference in a residential
installation. This equipment generates, uses and can radiate radio frequency
energy and, if not installed and used in accordance with the instructions, may
cause harmful interference to radio communications. However, there is no
guarantee that interference will not occur in a particular installation. If this
equipment does cause harmful interference to radio or television reception, which
can be determined by turning the equipment off and on, the user is encouraged to
try to correct the interference by one or more of the following measures:
Reorient or relocate the receiving antenna
Increase the separation between the equipment and receiver
Connect the equipment into an outlet on a circuit different from that to
which the receiver is connected
Consult the dealer or an experienced radio/TV technician for help
This device complies with Part 15 of the FCC Rules. Operation is subject to the
following two conditions: (1) this device may not cause harmful interference,
and (2) this device must accept any interference received, including interference
that may cause undesired operation.
To comply with FCC RF exposure compliance requirements, a separation
distance of at least 20 cm must be maintained between the antenna of this
device and all persons.
This Transmitter must not be co-located or operating in conjunction with
any other antenna or transmitter.
Changes or modifications to this unit not expressly approved by
the party responsible for compliance could void the user authority to operate
the equipment.
Page 19

9
Monitor
Frequency
Antenna
LCD screen size
Number of color
Dimensions
Weight
Power
Operating temperature
2.4 GHz
Monopole antenna
Touch panel 2.4-inch
Full-color
69.4(W) x 122.5(H) x 32.2(D) mm
104g (with battery)
DC 6V, 800mA, Li-ion battery
o o o o
0 C ~ 40 C (32 F ~ 104 F)
This item is i n co mpliance with the e ss ential require ments and other re levant provisions of Di rectiv e 19 99/5/EC.
Specifications
Specifications subject to change without notice
Camera
Frequency
Antenna
Transmission distance
Modulation
Date rate
Image sensor
Effective pixels
Lens
Viewing angle
Dimensions
Power
Operating temperature
2.4 GHz
Monopole antenna
300m (LoS)
GFSK
4M
Color CMOS
320H x 240V pixels
f 3.0mm, F2.4
o
Horizontally 300 , Vertically 80
80(W) x 117.2(H) x 80(D) mm
DC 6V, 800mA
o o o o
0 C ~ 40 C (32 F ~ 104 F)
o
To prevent deaths and injuries associated with baby monitor cords
Make sure the baby unit and AC adapter cords are always out of reach of the
baby at least 3 feet (1 meter) away.
It's important even if your baby is not yet standing or mobile.
Use a wireless baby monitor to avoid risk of strangulation.
Never use extension cords with AC adapters. Only use the AC adapters
provided.
Following the safety tips
:
Note :
Page 20

Page 21

1
FRANÇAIS
Contenus de la boîte
Une caméra
Un moniteur
Deux adaptateurs de courant
Batterie pour le moniteur (3,7V 700mAh Li-ion)
Deux clips de câble
Ce Manuel de l'utilisateur
Description du produit
Caméra (Fig. 1)
1. Veilleuse
2. Voyant d'alimentation DEL
3. Objectif
4. Microphone
5. Prise de l'adaptateur de courant
6. Antenne
7. Capteur de lumière
8. Bouton d'alimentation/appariement
9. DEL infrarouges
Moniteur (Fig. 2)
1. Bouton d'alimentation
2. Voyant d'alimentation/recharge
3. LED indicateur VOX
4. LED Indicateur du volume
5. Haut-parleur
6. Antenne
7. Écran LCD
8. Bouton menu
9. Prise de l'adaptateur de courant
10. Support
11. Compartiment de la batterie
Deux vis et deux ancrages de mur
(écran tactile)
Page 22

2
Installation
Configuration de la caméra
Alimentation - Utilisation du courant secteur
Branchez un côté de l'adaptateur d'alimentation fourni sur une prise de courant et l'autre
côté sur la prise derrière la caméra. Voir Fig. 3.
Remarque 1: Utilisez l'adaptateur indiqué SORTIE : 6V c.c. avec la caméra.
Remarque 2: Appuyez sur le bouton ALIMENTATION sans arrêter plus de 2 secondes
pour éteindre la caméra.
Réglages précis
Placez la caméra à un emplacement pratique, pointez l'objectif vers la zone d'observation.
Voir Fig. 4.
Vision nocturne
La caméra dispose de huit DEL haute intensité pour obtenir des images claires dans le noir.
Lorsque le capteur de lumière détecte des niveaux de lumière ambiante faibles, les DEL
seront activées automatiquement.
Pairage
Le système est proposé avec une unité de caméra qui a déjà été pairée avec l'unité du
moniteur. La fonction de pairage permet d'utiliser un canal différent pour chaque unité de
caméra sur l'unité du moniteur. Cela est nécessaire pour configurer d'autres unités de
caméra.
1. Appuyez sur le bouton d'alimentation et maintenez-le plus de 3 secondes sur la
caméra : La DEL d'alimentation s'allumera (lumière rouge) et la veilleuse
commencera à clignoter (lumière orange). Ceci allumera la caméra et celle-ci
attendra le pairage.
2. Appuyez sur le bouton d'alimentation pour allumer l'écran et la DEL
d'alimentation s'éclairera (vert).
3. Dans le sous-menu (8. Ajouter caméra voir Fig. 8.) sur le moniteur.
4. Veuillez choisir le nombre de caméras que vous souhaitez ajouter, puis appuyez sur
l'icône. Voir Fig. 15.
5. Le pairage est terminé, " " s'affichera sur l'écran.
6. Le pairage a échoué, l'image s'affichera sur l'écran. Voir Fig. 17.
Remarque : Assurez-vous que la caméra et le moniteur sont à portée l'un de l'autre. S'ils
sont hors de portée, l'image Voir Fig. 17. s'affichera sur l'écran LCD et le
son d'avertissement sera émis de l'unité du moniteur lorsque le moniteur est
hors de portée (aucune liaison). Le son d'avertissement sera émis depuis le
moniteur jusqu'à ce que vous appuyiez sur n'importe quel bouton pour
l'arrêter.
( )
1
1.1
1.2
1.3
1.4
Page 23

3
Installation du moniteur
Alimentation
Le moniteur utilise une batterie 3,7V 700 mAh (Li-ion) ou une prise de courant
secteur de la maison.
Installation de la batterie
1. Ouvrez le couvercle du compartiment de la batterie à l'arrière du moniteur.
Voir Fig. 5.
2. Insérez la batterie avec la partie métallique faisant au compartiment de la
batterie. Voir Fig. 5.
3. Fermez le couvercle du compartiment de la batterie et vérifiez qu'il est bien
fermé.
4. Appuyez sur le bouton ALIMENTATION pour allumer le moniteur.
Voir Fig. 5.
Remarque 1 : Lorsque l'alimentation est suffisante, la DEL Alimentation
s'allumera (lumière verte).
Remarque 2 : Appuyez sur le bouton ALIMENTATION sans arrêter plus de 2
secondes pour éteindre le moniteur.
Remarque 3 : Retirez la batterie du moniteur si vous n'allez pas l'utiliser pendant
une longue période.
Utilisation du courant secteur
1. Branchez un côté de l'adaptateur d'alimentation fourni sur une prise de courant
et l'autre côté sur le moniteur, la DEL d'alimentation s'éclairera en rouge. Voir
Fig. 6.
Remarque : Utilisez l'adaptateur indiqué SORTIE : 6V CC avec le moniteur.
2. Appuyez sur le bouton ALIMENTATION pour allumer le moniteur.
Voir Fig. 6.
Remarque 1: Lorsque vous allumez le moniteur, la DEL d'alimentation sera
orange
Remarque 2: Appuyez sur le bouton ALIMENTATION sans arrêter plus de 2
secondes pour éteindre le moniteur.
Remarque 3: Lorsque l'allumage et le chargement commencent, l'état de la
batterie s'affiche comme suit . Lorsque le
chargement est fini (complètement chargé), l'état de la batterie
s'affiche comme suit . Lorsque l'arrêt et le chargement
commencent, la DEL d'alimentation est de couleur rouge. Lorsque
le chargement est fini (complètement chargé), la DEL d'alimentation
est de couleur verte.
" "
2.1
2
Page 24

4
Options du menu
1. Appuyez sur le bouton de menu sur l'unité de l'écran pour afficher le
menu principal de l'écran (écran tactile). Voir Fig. 7.
2. Vous trouverez duex menus principaux. Voir Fig. 8.
(1) Paramètre de luminosité
(2) Paramètre de volume
(3) Sélection de la caméra
(4) Paramètre de veilleuse
(5) Fonction VOX
(6) Page suivante
(7) Supprimer caméra
(8) Ajouter caméra
(9) Fonction Retourner
(10) Dernière page
(11) Paramètres d'affichage et de balance des blancs
(12) Restaurer défaut
Paramètre de luminosité (luminosité)
Dans ce sous-menu, vous pouvez ajuster la luminosité de l'écran. Voir Fig. 9.
Paramètre de volume
Dans ce sous-menu, vous pouvez ajuster le niveau de volume sur le côté de
l'écran. Voir Fig. 10.
Sélection de la caméra (Sélectionner la caméra)
Dans ce sous-menu, vous pouvez sélectionner la caméra que vous souhaitez
afficher à l'écran. Voir Fig. 11.
Paramètre de veilleuse
1. Lorsque vous activez le mode automatique , l'icône s'éclaire. Vous
pouvez choisir le niveau de sensibilité. Lorsque le niveau de sensibilité est
élevé, la lumière détectera la lumière la plus intense. Voir Fig. 12.
2. Lorsque la lumière de la caméra atteint le niveau défini, la veilleuse
s'allumera comme configuré.
3. Lorsque vous activez le mode manuel , vous pouvez allumer/éteindre
la veilleuse comme configuré.
4. Appuyez sur l'icône , vous pouvez modifier la couleur de la veilleuse.
Il existe trois couleurs de veilleuse (jaune, vert, orange).
5. Appuyez sur l'icône vous pouvez modifier le niveau de luminosité. Il
existe quatre niveaux de luminosité.
3
3.1
3.2
3.3
3.4
Page 25

5
Fonction VOX (transmission par commande
vocale)
1. Ce sous-menu vous permet de choisir le niveau de sensibilité de la
fonction VOX. Lorsque le niveau de sensibilité est élevé, le microphone
détectera les sons plus faibles. Voir Fig. 13.
2. Lorsque vous activez le VOX sur l'unité du moniteur, l'icône s'éclaire.
Appuyez sur le bouton Menu pour revenir à l'écran d'affichage pour les
réglages complets et la DEL VOX restera éclairée (lumière bleue).
3. Ceci éteindra l'écran sous 10 secondes et démarrera le mode d'économie
d'énergie.
4. Lorsque le son de la caméra atteint le niveau défini, l'écran s'allumera
automatiquement et un son d'avertissement sera émis depuis l'unité du
moniteur.
Supprimer caméra
Dans ce sous-menu, vous pouvez supprimer une caméra pairée.
1. Veuillez appuyer sur les numéros des caméras que vous souhaitez
supprimer. Voir Fig. 14.
2. Appuyez sur pour supprimer.
Ajouter caméra
Le système est proposé avec une unité de caméra qui a déjà été pairée avec
l'unité du moniteur. La fonction de pairage permet d'utiliser un canal différent
pour chaque unité de caméra sur l'unité du moniteur. Cela est nécessaire pour
configurer d'autres unités de caméra.
1. Dans ce sous-menu, vous pouvez ajouter une nouvelle caméra.
Voir Fig. 15.
2. Veuillez choisir le nombre de caméras que vous souhaitez ajouter, puis
appuyez sur l'icône.
3. Le moniteur attendra le pairage. Appuyez alors sur le bouton de pairage
pendant plus de trois secondes sur le côté de caméra. Vous n'avez pas
besoin d'allumer la caméra.
4. Le pairage est terminé, " " s'affichera sur l'écran.
5. Le pairage a échoué, l'image s'affichera sur l'écran. Voir Fig. 17.
Fonction Retourner
Dans ce sous-menu, vous pouvez retourner la vidéo à l'horizontale lorsque vous
montez la caméra au plafond. Voir Fig. 18.
3.6
3.7
3.5
3.8
Page 26

6
Alarme d'avertissement
Le son d'avertissement sera émis de l'unité du moniteur dans les cas suivants.
Informations d'état
Barre d'état
La barre d'état s'affichera sur le sommet de l'écran. Voir Fig. 21.
1 Indicateur du numéro de la caméra
2. Indicateur de puissance de signal
3. État de la batterie / Indicateur de recharge
.
Paramètres d'affichage et de balance des blancs
1. Dans ce sous-menu, vous pouvez choisir la fréquence et la température de
couleur les plus adaptées sur l'écran. Voir Fig. 19.
2. Il existe trois types de température de couleur et deux fréquences (50 Hz ou
60 Hz).
Restaurer défaut
Dans ce sous-menu, vous pouvez réinitialiser le système aux valeurs par défaut.
Appuyez sur pour vérifier. Voir Fig. 20.
Remarque : Vous pouvez appuyer sur n'importe quelle touche de l'écran pour
arrêter l'alarme.
État Indication Action
Hors portée
Connexion perdue
Bips continus pendant
une minute
Déplacez le moniteur plus
près de la caméra.
Vérifiez l'alimentation
de la caméra.
Alarme de
température
2
l'indicateur de
température à l'écran
clignote
bips consécutifs et
Vérifiez la température
du côté de la caméra.
Désactivez l'alerte de
température
(voir Installation 3.4)
Batterie faible
2
clignote à l'écran
bips consécutifs et
Branchez l'unité du
moniteur à l'adaptateur
secteur. (voir Installation 2.1)
4.2
4
4.1
3.9
3.10
Page 27

7
Vous ne recevez aucun signal.
Ÿ
Ÿ Assurez-vous que les prises sont bien branchés jusqu'au fond.
Si le signal est faible ou qu'il y a des interférences.
Ÿ Si vous avez un four à micro-ondes dans le chemin entre la caméra et le
moniteur, déplacez le four à micro-ondes ou éteignez-le.
Ÿ Assurez-vous que la caméra et le moniteur sont à une distance raisonnable
l'un de l'autre (la plage est d'environ 984 pieds ou 300 mètres avec une vue
directe).
Entretien et maintenance
Ÿ Gardez toutes les pièces et les accessoires hors de la portée des enfants.
Ÿ Les empreintes de doigt ou de la poussière sur la surface de l'objectif
peuvent affecter les performances de la caméra. Evitez donc de toucher la
surface de l'objectif avec les doigts.
Ÿ Si l'objectif est sale, utilisez un souffleur pour enlever la saleté et la
poussière, ou un chiffon doux et sec pour essuyer l'objectif.
Ÿ Gardez la caméra au sec. La pluie, l'humidité et les liquides contenant des
minéraux peuvent endommager les circuits électroniques.
Ÿ Ne pas utiliser ou ranger l'appareil dans des endroits sales ou poussiéreux.
Ÿ Ne pas ranger l'appareil dans des endroits chauds. Les températures élevées
peuvent réduire la durée de vie des appareils électroniques et déformer ou
faire fondre certains plastiques.
Ÿ Ne pas ranger l'appareil dans des endroits très froids. Lorsque l'appareil se
réchauffe à sa température normale, de la buée peut se former à l'intérieur,
ce qui pourrait endommager les circuits électroniques.
Ÿ Ne tentez pas d'ouvrir le boîtier. Une utilisation incorrecte de l'appareil peut
l’endommager.
Ÿ Evitez de le faire tomber ou de le cogner.
Ÿ Utilisez cet appareil uniquement avec la source d'alimentation fournie avec
celui-ci ou en tant qu'accessoire optionnel.
Ÿ Ne pas surcharger les prises murales ou les rallonges électriques, car cela
risquerait de causer un incendie ou une électrocution.
Ÿ Souvenez-vous que vous utilisez les ondes publiques lorsque vous utilisez
cet appareil et que l'audio et la vidéo peut être reçue sur d'autres appareils
récepteurs fonctionnant sur 2,4 Ghz. Les conversation dans les pièces près
de la caméra peuvent être diffusées. Pour protéger votre vie privée, éteignez
toujours la caméra lorsque vous ne voulez pas l'utiliser.
Guide de dépannage
Assurez-vous que la caméra et que le moniteur sont allumés.
Page 28

8
Suivez les astuces suivantes de sécurité
Pour protéger contre les blessures ou la mort à cause des cordons
du moniteur de bébé :
Ÿ Assurez-vous que l'unité de bébé et que le cordon de l'adaptateur
secteur sont hors de la portée des bébés, par au moins 3 pieds (1 mètre).
Remarque: Cela est important même si votre bébé ne peut pas encore
marcher ou se déplacer.
Ÿ Utilisez un moniteur de bébé sans fil pour éviter le risque d'étranglement.
Ÿ N'utilisez jamais des cordons d'extension avec les adaptateurs électriquess.
Utilisez uniquement les adaptateurs électriques fournis.
Cet élémen t es t conforme aux disp os itions et aux terme s sp écifiques de la Directive 1 99 9/5/EC.
3 pieds
(1 mètre)
unité du bébé
3 pieds
(1 mètre)
Câble
d'ada ptateur
Page 29

1
ESPAÑOL
Contenido del paquete
Una cámara
Un monitor
Dos adaptadores de alimentación
Pila para el monitor (3,7 V 700 mAh, de iones de litio)
Dos abrazaderas de cables
Dos tornillos y dos tacos para pared
Este Manual del usuario
Esquema del producto
Cámara (Fig. 1)
1. Luz nocturna
2. LED del indicador de alimentación
3. Objetivo
4. Micrófono
5. Enchufe del adaptador de alimentación
6. Antena
7. Sensor luminoso
8. Botón de encendido y asociación
9. LED de infrarrojos
Monitor (Fig. 2)
1. Botón de alimentación
2. LED del indicador de alimentación y carga
3. Indicador LED de VOX
4. Indicadores LED de volumen
5. Altavoz
6. Antena
7. Pantalla LCD
8. Botón Menú
9. Enchufe del adaptador de alimentación
10. Soporte
11. Compartimento de las pilas
(panel táctil)
Page 30

Configuración
2
Configuración de la cámara
Fuente de alimentación - Utilizar alimentación
de CA
Enchufe un extremo del adaptador de alimentación proporcionado a una toma de
corriente eléctrica y el otro extremo en la parte posterior de la cámara. Vea la Fig. 3.
Nota 1: Utilice el adaptador cuya etiqueta es SALIDA: 6 VCC con la cámara.
Nota 2: Presione sin soltar el botón de alimentación durante más de dos segundos
para apagar el cámara.
Enfoque
Coloque la cámara en una ubicación adecuada y apunte el objetivo hacia el área de
observación. Vea la Fig. 4.
Visión nocturna
La cámara tiene ocho LED de alta intensidad para capturar imágenes claras en la
obscuridad. obscuridad. Cuando el sensor de luz detecte bajos niveles de luz ambiente,
los LED se activarán automáticamente.
Asociación
El sistema incluye una unidad de cámara que ya se ha asociado con la unidad del
monitor. La función de asociación proporciona a cada unidad de cámara un canal
independiente en la unidad del monitor. Esto es necesario para configurar las unidades
de cámaras adicionales.
1. Presione sin soltar el botón de alimentación de la cámara durante más de 3
segundos. El LED de alimentación se iluminará (rojo) y la luz nocturna
comenzará a parpadear (naranja). Esta función activará la alimentación de la
cámara y esta esperará al proceso de asociación.
2. Presione el botón de alimentación para activar el monitor. El LED de
alimentación se iluminará (verde).
3. En el submenú (8. Añadir cámara; vea la Fig. 8.) del monitor.
4. Elija el número de cámaras que desea agregar y, a continuación, presione el
icono. Vea la Fig. 15.
5. La asociación se ha completado. Se mostrará " " en el monitor.
6. La asociación ha fallado. Se mostrará la imagen en el monitor. Vea la Fig. 17.
Nota : Asegúrese de que la cámara y el monitor se encuentran dentro del alcance uno
del otro. Si están fuera del alcance, la imagen (Vea la Fig. 17.) se mostrará en
la pantalla LCD y la unidad del monitor emitirá el sonido de advertencia si
dicho monitor supera el alcance (desconexión). El sonido de advertencia se
emitirá desde el monitor hasta que presione cualquier botón.
1
1.1
1.2
1.3
1.4
Page 31

3
Configuración del monitor
Fuente de alimentación
El monitor utiliza pilas de iones de litio de 3,7V 700 mAh o la alimentación de CA
doméstica.
Insertar la batería
1. Abra la tapa del compartimento de las pilas que se encuentra en la parte
posterior del monitor. Vea la Fig. 5.
2. Inserte la batería con la parte metálica orientada hacia el compartimento de las
pilas. Vea la Fig. 5.
3. Cierre la tapa del compartimento de la batería y asegúrese de que queda
bloqueada.
4. Presione el botón de alimentación para encender el monitor. Vea la Fig. 5.
Nota 1: Cuando la energía sea insuficiente, el LED "Alimentación" se iluminará
(verde).
Nota 2: Presione sin soltar el botón de alimentación durante más de dos segundos
para apagar el monitor.
Nota 3: Quite la batería del monitor si no piensa utilizarlo durante un período
prolongado de tiempo.
Uso de la alimentación de CA
1. Enchufe un extremo del adaptador de alimentación proporcionado a una toma
de corriente eléctrica y el otro extremo en el monitor. El LED "Alimentación"
se iluminará en rojo. Vea la Fig. 6.
Nota : Utilice el adaptador cuya etiqueta es SALIDA: 6 VCC con el monitor.
2. Presione el botón de alimentación para encender el monitor. Vea la Fig. 6.
Nota 1: Cuando encienda el monitor, el LED "Alimentación" se iluminará en
naranja.
Nota 2: Presione sin soltar el botón de alimentación durante más de dos segundos
para apagar el monitor.
Nota 3: Cuando encienda el producto y se inicie la carga, el estado de la batería se
mostrará como . Si la carga ha finalizado
(completamente), el estado de la batería se mostrará como .
Cuando apague el producto y se inicie la carga, el indicador LED
"Alimentación" se iluminará en rojo. Si la carga ha finalizado
(completamente), el indicador LED "Alimentación" se iluminará en verde.
2.1
2
Page 32

4
Opciones del menú
1. Presione el botón de menú de la unidad del monitor para mostrar el
menú principal en la pantalla (panel táctil). Vea la Fig. 7.
2. Hay dos menús principales. Vea la Fig. 8.
(1) Parámetro Brillo
(2) Parámetro Volumen
(3) Selección de cámara
(4) Parámetro Luz nocturna
(5) Función VOX
(6) Página siguiente
(7) Quitar cámara
(8) Añadir cámara
(9) Función de volteo
(10) Última página
(11) Parámetros Frecuencia de visualización y Balance de blanco
(12) Restaurar los valores predeterminados
Parámetro Brillo (Brillo)
En este submenú puede ajustar el brillo de la pantalla. Vea la Fig. 9.
Parámetro Volumen
En este submenú puede ajustar el nivel de volumen del monitor. Vea la Fig. 10.
Selección de cámara (seleccionar cámara)
En este submenú puede seleccionar qué cámara desea mostrar en la pantalla.
Vea la Fig. 11.
Parámetro Luz nocturna
1. Cuando habilite el modo automático , el icono se iluminará. Puede
elegir el nivel de sensibilidad. Con el nivel establecido en alto, se
detectará la luz más intensa. Vea la Fig. 12.
2. Cuando la luz procedente de la cámara alcance el nivel establecido, la luz
nocturna se activará según la configuración.
3. Cuando habilite el modo manual , podrá activar o desactivar la luz
nocturna según la configuración.
4. Presione el icono , para cambiar el color de la luz nocturna. Existen
tres colores de luz nocturna: amarillo, verde y naranja.
5. Presione el icono , para cambiar el nivel de brillo. Existen cuatro
niveles de brillo.
3
3.1
3.2
3.3
3.4
Page 33

5
Función VOX (transmisión de activación por voz)
1. Este submenú permite elegir el nivel de sensibilidad VOX. Con el nivel
establecido en alto, el micrófono detectará los sonidos más bajos. Vea la
Fig. 13.
2. Si habilita la función VOX en la unidad del monitor, el icono se
iluminará. Presione el botón de menú para volver a la pantalla de
visualización para completar la configuración. El LED VOX permanecerá
encendido (azul claro).
3. Esto desactiva la pantalla en un plazo de 10 segundos y se activa el modo
de ahorro de energía.
4. Cuando el sonido de la cámara alcance el nivel establecido, la pantalla se
activará automáticamente y la unidad del monitor emitirá un sonido de
advertencia.
Quitar cámara
En este submenú puede eliminar una cámara asociada.
1. Presione el número de cámaras que desea eliminar. Vea la Fig. 14.
2. Presione para llevar a cabo la eliminación.
Añadir cámara
El sistema incluye una unidad de cámara que ya se ha asociado con la unidad
del monitor. La función de asociación proporciona a cada unidad de cámara un
canal independiente en la unidad del monitor. Esto es necesario para configurar
las unidades de cámaras adicionales.
1. En este submenú puede añadir una nueva cámara. Vea la Fig. 15.
2. Elija el número de cámaras que desea agregar y, a continuación, presione
el icono .
3. El monitor esperará al proceso de asociación. Presione también el botón
de asociación durante más de tres segundos en la cámara. No es necesario
encender la cámara.
4. La asociación se ha completado. Se mostrará " " en el monitor.
5. La asociación ha fallado. Se mostrará la imagen en el monitor. Vea la Fig. 17.
Función de volteo
En este submenú puede voltear el vídeo horizontalmente cuando instale la
cámara en el techo. Vea la Fig. 18.
Parámetro Frecuencia de visualización y
Balance de blanco
1. En este submenú puede elegir qué frecuencia y temperatura de color son
mejores en el monitor. Vea la Fig. 19.
2. Existen tres tipos de temperatura de color y dos frecuencias (50 Hz o 60
Hz).
3.6
3.7
3.5
3.8
3.9
Page 34

6
4.2
4
4.1
3.10
Alarma de advertencia
La unidad del monitor emitirá el sonido de advertencia en los casos siguientes.
Información de estado
Barra de estado
La barra de estado se mostrará en la parte superior de la pantalla. Vea la Fig. 21.
1. Indicador de número de la cámara
2. Indicador de potencia de la señal
3. Estado de la batería / Indicador de carga
Restaurar los valores predeterminados
En este submenú puede restablecer los valores predeterminados del sistema.
Presione para asegurarse. Vea la Fig. 20.
Nota : Para detener la alarma, presione cualquier botón del monitor.
Estado Indicación
Acción
Fuera de alcance
Conexión perdida
Pitidos continuos durante
un minuto
Acerque el monitor a la
cámara. Compruebe la
energía de la cámara.
Alarma de
temperatura
2 pitidos consecutivos e
indicador de temperatura
intermitente en la pantalla
Compruebe la temperatura de
la cámara. Deshabilite la alerta
de temperatura (consulte la
sección de configuración 3.4).
Batería con
poca carga
2 pitidos consecutivos
y intermitente en la
pantalla
Conecte el monitor al
adaptador de CA. (Consulte
la sección de configuración
2.1).
Page 35

7
No recibe ninguna señal en absoluto
Ÿ
Ÿ Asegúrese de que los enchufes de alimentación están insertados por
completo.
Si la señal es deficiente o hay interferencias
Ÿ Si hay un microondas en uso entre la cámara y el monitor, retírelo o
apáguelo.
Ÿ Asegúrese de que la cámara y el monitor estén dentro del alcance uno del
otro: alcance de aproximadamente 300 metros (984 pies) en una línea clara de
visión.
Cuidado y mantenimiento
Ÿ Mantenga todas las piezas y los accesorios fuera del alcance de los niños.
Ÿ Las huellas digitales o la suciedad en la superficie del objetivo pueden
afectar negativamente a las prestaciones de la cámara. Evite tocar la
superficie del objetivo con los dedos.
Ÿ Si el objetivo está sucio, utilice un ventilador para soplar la suciedad y el
polvo, o un paño seco para limpiar el objetivo.
Ÿ Mantenga la cámara seca. La lluvia, la humedad y otros líquidos contienen
minerales que pueden corroer los circuitos electrónicos.
Ÿ No utilice ni almacene los dispositivos en áreas con polvo y sucias.
Ÿ No almacene los dispositivos en áreas donde la temperatura sea elevada.
Las altas temperaturas pueden reducir la vida útil de los dispositivos
electrónicos, y deformar o derretir ciertos plásticos.
Ÿ No almacene los dispositivos en zonas donde la temperatura sea baja.
Cuando el sistema se calienta (hasta su temperatura normal), se puede
formar humedad dentro de la carcasa, lo que puede dañar las placas del
circuito.
Ÿ No intente abrir la carcasa. El manejo del dispositivo por personas no
expertas puede dañar el sistema.
Ÿ Evite las caídas o fuertes descargas.
Ÿ Utilice este producto solo con la fuente de alimentación incluida o
proporcionada como accesorio.
Ÿ No sobrecargue las tomas eléctricas o extensiones, ya que esto puede
provocar un incendio o un cortocircuito.
Ÿ Recuerde que utiliza ondas de radio públicas al utilizar el sistema, y que el
sonido y el vídeo se pueden transmitir a otros dispositivos de recepción de
2,4 GHz. Las conversaciones, incluso desde las habitaciones cercanas a la
cámara, se pueden transmitir. Para proteger la privacidad de su hogar,
apague la cámara cuando no esté en uso.
Resolución de problemas
Asegúrese de que la cámara y el monitor están encendidos.
Page 36

8
Consejos de seguridad
Para evitar la muerte y las lesiones asociadas con los cables del
monitor para bebés:
Ÿ Asegúrese de que la unidad del bebé y los cables del adaptador de CA
siempre están fuera del alcance del bebé, al menos a 1 metro.
Nota: es importante incluso si su bebé aún no se pone de pie o se mueve.
Ÿ Utilice un monitor para bebés inalámbrico para evitar el riesgo de
estrangulamiento.
Ÿ Nunca utilice cables de extensión con adaptadores de CA. Utilice solo los
adaptadores de CA proporcionados.
Este artíc ul o está en conformid ad c on los req uisitos esencia le s y otras disposici on es pertinentes de l a Di rect iv a 1999/5/CE.
unidad del be bé
1 metro
(3 pies)
1 metro
(3 pies)
cable
del adaptador
Page 37

1
DEUTSCH
Lieferumfang
Eine Kamera
Ein Monitor
Zwei Netzteile
Akku für Monitor (Lithium-Ionen-Akku, 3,7 V, 700 mAh)
Zwei Kabelklemmen
Zwei Schrauben und zwei Dübel
Diese Bedienungsanleitung
Produktübersicht
Kamera (Abb. 1)
1. Nachtlicht
2. Betriebsanzeige-LED
3. Objektiv
4. Mikrofon
5. Netzteilstecker
6. Antenne
7. Lichtsensor
8. Ein/Aus-/Kopplungstaste
9. Infrarot-LEDs
Monitor (Abb. 2)
1. Ein-/Austaste
2. Betriebs-/Ladeanzeige-LED
3. VOX-Anzeige-LED
4. Lautstärkeanzeige-LEDs
5. Lautsprecher
6. Antenne
7. LCD-Bildschirm
8. Menütaste
9. Netzteilstecker
10. Halterung
11. Batteriefach
(Touch-Bildschirm)
Page 38

2
Einrichtung
Kameraeinrichtung
Stromversorgung - über Netzstrom
Schließen Sie ein Ende des mitgelieferten Netzteils an eine Steckdose und das andere Ende
an die Rückseite der Kamera an. Siehe Abb. 3.
Hinweis 1: Verbinden Sie das mit OUTPUT: 6V DC (Ausgang: 6 V DC) gekennzeichnete
Netzteil mit der Kamera.
Hinweis 2: Halten Sie die Ein-/Austaste mehr als zwei Sekunden lang gedrückt, um die
Kamera auszuschalten.
Feineinstellung
Stellen Sie die Kamera an einem geeigneten Ort auf und richten Sie das Objektiv auf den zu
überwachenden Bereich. Siehe Abb. 4.
Nachtsicht
Die Kamera verfügt über acht hochempfindliche LEDs, um deutliche Bilder auch im
Dunkeln aufzunehmen. Stellt der Lichtsensor eine schwach ausgeleuchtete Umgebung fest,
aktivieren sich die LEDs automatisch.
Kopplung
Das System wird zusammen mit einer Kamera ausgeliefert, die bereits mit dem Monitor
gekoppelt wurde. Die Kopplungsfunktion weist jeder Kamera einen separaten Kanal am
Monitor zu. Dies ist zur Konfiguration zusätzlicher Kameras erforderlich.
1. Halten Sie die Ein-/Austaste der Kamera mehr als 3 Sekunden lang gedrückt. Die
Betriebsanzeige-LED leuchtet (rot) und das Nachtlicht fängt an zu blinken (orange).
Die Kamera schaltet sich jetzt ein und wartet auf den Kopplungsvorgang.
2. Drücken Sie die Ein-/Austaste , um den Monitor einzuschalten, woraufhin die
Betriebsanzeige-LED leuchtet (grün).
3. Im Untermenü (8. Kamera hinzufügen siehe Abb. 8.) am Monitor.
4. Legen Sie bitte fest, wieviele Kameras Sie hinzufügen möchten, und drücken Sie
dann das Symbol. Siehe Abb. 15.
5. Nach erfolgreicher Kopplung erscheint " " auf dem Monitor.
6. Bei fehlgeschlagener Kopplung wird das Bild auf dem Monitor angezeigt.
Siehe Abb. 7.
Hinweis : Achten Sie darauf, dass die Kamera und der Monitor sich im gegenseitigen
Erfassungsbereich befinden. Ist dieser Bereich am Monitor überschritten, wird
das Bild auf dem LCD-Bildschirm angezeigt und der Monitor gibt einen
Warnton aus (die Verbindung ist unterbrochen). Siehe Abb. 17.
Der Monitor gibt den Warnton solange aus, bis Sie ihn durch Drücken einer
beliebigen Taste stoppen.
1
1.1
1.2
1.3
1.4
Page 39

3
Monitoreinrichtung
Stromversorgung
Der Monitor wird über einen Lithium-Ionen-Akku (3,7 Volt, 700 mAh) oder das Haushaltsnetz
mit Strom versorgt.
Akku einlegen
1. Öffnen Sie die Akkufachabdeckung an der Rückseite des Monitors. Siehe Abb. 5.
2. Legen Sie den Akku so ein, dass sein Metallende in Richtung des Akkufachs zeigt.
Siehe Abb. 5.
3. Schließen Sie die Akkufachabdeckung und achten Sie darauf, dass sie gut verschlossen
ist.
4. Drücken Sie die Ein-/Austaste um den Monitor einzuschalten. Siehe Abb. 5.
Hinweis 1: Bei ausreichender Stromversorgung leuchtet die Betriebsanzeige -LED (grün).
Hinweis 2: Halten Sie die Ein-/Austaste mehr als zwei Sekunden lang gedrückt, um den
Monitor auszuschalten.
Hinweis 3: Nehmen Sie den Akku aus dem Monitor heraus, wenn Sie ihn längere Zeit nicht
benutzen werden.
Netzstrom verwenden
1. Schließen Sie ein Ende des mitgelieferten Netzteils an eine Steckdose und das
andere Ende an den Monitor an, woraufhin die "Betriebsanzeige"-LED rot leuchtet.
Siehe Abb. 6.
Hinweis : Verbinden Sie das mit Ausgang: 6V DC gekennzeichnete Netzteil mit dem Monitor.
2. Drücken Sie die Ein-/Austaste um den Monitor einzuschalten. Siehe Abb. 6.
Hinweis 1: Wird der Monitor eingeschaltet, leuchtet die "Betriebsanzeige"-LED orange.
Hinweis 2: Halten Sie die Ein-/Austaste mehr als zwei Sekunden lang gedrückt, um den
Monitor auszuschalten.
Hinweis 3: Beim Laden in eingeschaltetem Zustand erscheint die Akkustandanzeige .
. Wenn der Akku komplett geladen ist, wird das
Symbol angezeigt. Wenn der Ladevorgang bei ausgeschaltetem Gerät
beginnt, leuchtet die "Betriebsanzeige"-LED rot. Sobald der Ladevorgang
abgeschlossen ist (vollständig geladen), leuchtet die "Betriebsanzeige"-LED grün.
" "
2.1
2
Page 40

4
Menüoptionen
1. Drücken Sie die Menütaste am Monitor, um das Hauptmenü auf dem
Bildschirm (Touch-Bildschirm) anzuzeigen. Siehe Abb. 7.
2. Es gibt zwei Hauptmenüs. Siehe Abb. 8.
(1) Helligkeitseinstellung
(2) Lautstärkeeinstellung
(3) Kameraauswahl
(4) Nachtlichteinstellung
(5) VOX-Funktion
(6) Nächste Seite
(7) Kamera löschen
(8) Kamera hinzufügen
(9) Umdrehfunktion (10) Letzte Seite
(11) Einstellung der Anzeigefrequenz und des Weißabgleichs
(12) Standardeinstellungen wiederherstellen
Helligkeitseinstellung ( Helligkeit )
In diesem Untermenü können Sie die Helligkeit des Bildschirms einstellen.
Siehe Abb. 9.
Lautstärkeeinstellung
In diesem Untermenü können Sie den Lautstärkepegel des Monitors einstellen.
Siehe Abb. 10.
Kameraauswahl ( Kamerawahl )
In diesem Untermenü können Sie einstellen, welche Kamera auf dem
Bildschirm angezeigt werden soll. Siehe Abb. 11.
Nachtlichteinstellung
1. Wenn Sie den Automatikmodus aktivieren, leuchtet das Symbol. Sie
können den Empfindlichkeitsgrad festlegen. Ist eine hohe Empfindlichkeit
eingestellt, wird mehr Licht erkannt. Siehe Abb. 12.
2. Erreicht das Licht von der Kamera den eingestellten Wert, schaltet sich
das eingestellte Nachtlicht ein.
3. Wenn Sie den manuellen Modus aktivieren, können Sie das
eingestellte Nachtlicht ein-/ausschalten.
4. Drücken Sie das Symbol , können Sie die Farbe des Nachtlichts
ändern. Drei Farben sind für das Nachtlicht auswählbar (gelb, grün,
orange).
5. Drücken Sie das Symbol , können Sie die Helligkeitsstufe ändern. Es
gibt vier Helligkeitsstufen.
3
3.1
3.2
3.3
3.4
Page 41

5
3.6
3.7
3.5
VOX-Funktion (geräuschaktivierte Übertragung)
In diesem Untermenü können Sie den VOX-Empfindlichkeitsgrad
festlegen. Ist eine hohe Empfindlichkeit eingestellt, erkennt das Mikrofon
leisere Geräusche. Siehe Abb. 13.
Wird die VOX-Funktion am Monitor aktiviert, leuchtet das Symbol
Kehren Sie durch Drücken der Menütaste zum Anzeigebildschirm
zurück, um die Einstellung abzuschließen, wobei die VOX-LED jetzt
durchgehend leuchtet (blau).
Der Bildschirm schaltet sich jetzt innerhalb von 10 Sekunden aus und es
aktiviert sich der Energiesparmodus.
Erreicht das Geräusch von der Kamera den eingestellten Wert, schaltet
sich der Bildschirm automatisch ein und der Monitor gibt einen Warnton
aus.
" "
Umdrehfunktion
In diesem Untermenü können Sie Videos horizontal umdrehen, wenn die
Kamera an der Decke montiert wurde. Siehe Abb. 18.
1.
2.
3.
4.
Kamera löschen
In diesem Untermenü können Sie eine gekoppelte Kamera löschen.
1. Legen Sie bitte durch Drücken fest, welche Kameras Sie löschen
möchten. Siehe Abb. 14.
2. Für den Löschvorgang drücken Sie .
Kamera hinzufügen
Das System wird zusammen mit einer Kamera ausgeliefert, die bereits mit dem
Monitor gekoppelt wurde. Die Kopplungsfunktion weist jeder Kamera einen
separaten Kanal am Monitor zu. Dies ist zur Konfiguration zusätzlicher
Kameras erforderlich.
1. In diesem Untermenü können Sie eine neue Kamera hinzufügen.
Siehe Abb. 15.
2. Legen Sie bitte fest, wieviele Kameras Sie hinzufügen möchten, und
drücken Sie dann das Symbol.
3. Der Monitor wartet auf den Kopplungsvorgang und drücken Sie dann
bitte auch drei Sekunden lang die Kopplungstaste an der Kamera. Dabei
braucht die Kamera nicht eingeschaltet zu sein.
4. Nach erfolgreicher Kopplung erscheint auf dem Monitor.
5. Bei fehlgeschlagener Kopplung wird das Bild auf dem Monitor angezeigt.
Siehe Abb. 17.
3.8
Page 42

6
Warnalarm
In folgenden Fällen gibt der Monitor einen Warnton aus.
4.2
Statusinformationen
Statusleiste
Die Statusleiste wird oben im Bildschirm angezeigt. Siehe Abb. 21.
1 Kameranummernanzeige
2. Signalstärkeanzeige
3. Akkustatus / Ladestandanzeige
.
4
4.1
Einstellung der Anzeigefrequenz und des
Weißabgleichs
1. In diesem Untermenü können Sie die optimale Frequenz und
Farbtemperatur für den Monitor festlegen. Siehe Abb. 19.
2. Es stehen drei Farbtemperaturen und zwei Frequenzen zur Auswahl
(50 Hz und 60 Hz).
.
Standardeinstellungen wiederherstellen
In diesem Untermenü können Sie das System auf seine Standardwerte
zurücksetzen. Drücken Sie , um sich vergewissern. Siehe Abb. 20
3.9
Hinweis : Durch Drücken einer beliebigen Taste am Monitor können Sie den
Alarm anhalten.
Status
Anzeige
Maßnahme
Außerhalb des
Bereichs
Verbindung
unterbrochen
Ununterbrochene
Signaltöne über eine
Minute
Schieben Sie den Monitor
näher an die Kamera heran.
Prüfen Sie die
Stromversorgung der Kamera.
Temperaturalarm 2 nacheinander ausgegebene
Signaltöne und blinkende
Temperaturanzeige auf
dem Bildschirm
Prüfen Sie den Temperaturwert
der Kamera. Deaktivieren Sie
den Temperaturalarm
(siehe Einrichtung unter 3.4)
Schwacher Akku
2 nacheinander ausgegebene
Signaltöne und
blinkend auf dem Bildschirm
Schließen Sie den Monitor
an das Netzteil an.
(Siehe Einrichtung unter 2.1)
3.10
Page 43

7
Sie empfangen keinerlei Signale
Ÿ
Ÿ Prüfen Sie, ob die Netzstecker vollständig eingesteckt sind.
Bei schwachem Signal oder Signalstörungen
Ÿ Falls sich eine Mikrowelle im Pfad zwischen Kamera und Monitor befindet,
stellen Sie die Mikrowelle an einen anderen Ort bzw. schalten Sie sie aus.
Ÿ Stellen Sie sicher, dass sich Kamera und Monitor innerhalb der unterstützten
Reichweite zueinander befindet (ca. 300 Meter in direkter Sichtverbindung).
Pflege und Wartung
Ÿ Bewahren Sie alle Teile und sämtliches Zubehör außerhalb der Reichweite
von Kindern auf.
Ÿ Fingerabdrücke und Schmutz an der Linsenoberfläche können sich
erheblich auf die Kameraleistung auswirken. Achten Sie darauf, die
Linsenoberfläche nicht mit Ihren Fingern zu berühren.
Ÿ Sollte die Linse schmutzig werden, beseitigen Sie Schmutz und Staub mit
einem Druckluftreiniger oder einem weichen, trockenen Tuch.
Ÿ Halten Sie die Kamera trocken. Niederschlag, Feuchtigkeit und andere
Flüssigkeiten mit Mineralien lassen elektronische Schaltkreise korrodieren.
Ÿ Verwenden oder lagern Sie das Produkt nicht an staubigen, schmutzigen
Orten.
Ÿ Bewahren Sie das Produkt nicht an heißen Orten auf. Hohe Temperaturen
können die Lebenszeit elektronischer Geräte verkürzen und bestimmte
Kunststoffteile verformen oder schmelzen lassen.
Ÿ Bewahren Sie das Produkt nicht an sehr kalten Orten auf. Wenn sich das
System erwärmt (auf normale Betriebstemperatur) kann sich Feuchtigkeit
im Inneren des Gehäuses bilden und die elektronische Schaltkreise
beschädigen.
Ÿ Versuchen Sie nicht, das Gehäuse zu öffnen. Unsachgemäße Handhabung
des Gerätes kann das System beschädigen.
Ÿ Lassen Sie das Gerät nicht fallen, setzen Sie es keinen starken
Erschütterungen aus.
Ÿ Betreiben Sie das Produkt nur mit dem mitgelieferten oder als Zubehör
bereitgestellten Netzteil.
Ÿ Überlasten Sie Steckdosen oder Verlängerungskabel nicht, da dies Brand-
und Stromschlaggefahr bergen kann.
Ÿ Denken Sie daran, dass Sie beim Einsatz des Systems öffentliche
Funkwellen verwenden und Ton und Video auf andere 2,4-GHz Empfangsgeräte übertragen werden können. Es können sogar Gespräche
von Orten in der Nähe der Kamera übertragen werden. Schalten Sie die
Kamera zum Schutz Ihrer Privatsphäre immer aus, wenn Sie sie nicht
verwenden.
Problemlösung
Stellen Sie sicher, dass Kamera und Monitor eingeschaltet sind.
Page 44

8
Sicherheitstipps befolgen
So vermeiden Sie (lebensgefährliche) Verletzungen in Verbindung
mit den Kabeln des Babymonitors:
Ÿ Achten Sie darauf, dass sich die Kabel von Babyeinheit und Netzteil immer
außerhalb der Reichweite des Babys befinden (mindestens 1 Meter
entfernt).
Hinweis: Dies ist auch dann zu beachten, wenn Ihr Baby noch nicht stehen
oder sich bewegen kann.
Ÿ Verwenden Sie zur Vermeidung von Strangulierungsgefahr einen kabellosen
Babymonitor.
Ÿ Verwenden Sie niemals Verlängerungskabel in Verbindung mit Netzteilen.
Verwenden Sie nur die mitgelieferten Netzteile.
Dieses Ger ät s timmt mit den grund le genden Anforderung en u nd anderen rel ev anten Bestimm un ge n der
Richtlin ie 1 999/5/EG überein.
Babyeinheit
1 Meter
1 Meter
Netzteilkabel
Page 45

1
ITALIANO
Contenuti della confezione
Una telecamera
Un monitor
Due adattatori di corrente
Batterie per il monitor (ioni di Litio, 3.7V, 700mAh)
Due fermacavo
Due viti e due grappe
Questo Manuale d'uso
Layout del prodotto
Videocamera (Fig. 1)
1. Luce notturna
2. LED di alimentazione
3. Obiettivo
4. Microfono
5. Spina adattatore di corrente
6. Antenna
7. Sensore luci
8. Tasto di alimentazione/associazione
9. LED a infrarossi
Monitor (Fig. 2)
1. Tasto d'alimentazione
2. LED di alimentazione/carica
3. LED indicatore VOX
4. LED Indicatori del volume
5. Diffusore
6. Antenna
7. Schermo LCD
8. Tasto menu
9. Connettore adattatore di corrente
10. Supporto
11. Scomparto batterie
(touchscreen)
Page 46

2
Installazione
Impostazione telecamera
Alimentazione - Uso di alimentazione CA
Inserire un'estremità dell'adattatore di alimentazione in dotazione in una presa di
corrente e l'altra estremità nella parte posteriore della telecamera. Vedere la Fig. 3.
Nota 1: Usare l'adattatore con l'etichetta OUTPUT: 6 V CC con la telecamera.
Nota 2: Tenere premuto il tasto di alimentazione per due secondi per spegnere la
telecamera.
Regolazione
Collocare la telecamera in una posizione comoda e puntare l'obiettivo verso l'area di
osservazione. Vedere la Fig. 4.
Visione notturna
La telecamera dispone di otto LED ad alta intensità per scegliere immagini nitide
notturne. Quando il sensore di luce rileva livelli bassi di luce ambientale, i LED si
attivano automaticamente.
Accoppiamento
Il sistema è dotato di una telecamera che è già stata accoppiata con il monitor. La
funzione di accoppiamento assegna a ciascuna unità un canale separato sul monitor.
Questo è necessario per la configurazione di altre telecamere.
1. Tenere premuto il tasto di alimentazione per 3 secondi sulla telecamera. IL
LED di alimentazione si accende (spia rossa) e la luce notturna inizia a
lampeggiare (spia arancione). In tal modo si accende la telecamera, che
attende l'accoppiamento.
2. Premere il tasto di alimentazione per accedere il monitor e il LED di
alimentazione si accende (verde).
3. Nel menu secondario (8. Add Camera (Aggiungi telecamera), vedere la Fig.
8.) sul monitor.
4. Selezionare il numero di telecamere da aggiungere, quindi premere l'icona.
Vedere la Figura 15.
5. Al termine dell'accoppiamento, sul monitor viene visualizzato " " .
6. Se l'accoppiamento non riesce, sul monitor viene visualizzata l'immagine.
Vedere la Fig. 17.
Nota : Assicurarsi che la telecamera e il monitor rientrino nel raggio reciproco. Se
non riestrano nel raggio, sullo schermo LCD viene visualizzata l'immagine e
dal monitor viene emesso un suono di avvertenza se il monitor non rientra
nel raggio (scollegato).Vedere la Fig. 17.
Dal monitor viene emesso un suono di avvertenza finché non si preme un
tasto per arrestarlo.
1
1.1
1.2
1.3
1.4
Page 47

3
Impostazione del monitor
Alimentazione
Il monitor funziona con una batteria da 3,7 V 700 mAh (ioni di Litio) o con corrente
elettrica CA.
Inserimento delle batterie
1. Aprire il coperchio dello scomparto batterie sulla parte posteriore del monitor.
Vedere la Fig. 5.
2. Inserire la batteria con la parte metallica rivolta verso lo scomparto batterie.
Vedere la Fig. 5.
3. Chiudere il coperchio scomparto batterie ed accertarsi che sia bloccato in
sicurezza.
4. Premere il tasto di alimentazione per accendere il monitor.
Vedere la Fig. 5.
Nota 1: Se l'alimentazione non è sufficiente, il LED di alimentazione si accende
(spia verde).
Nota 2: Tenere premuto il tasto di alimentazione per due secondi per spegnere il
monitor.
Nota 3: Rimuovere la batteria dal monitor se si prevede di non usarlo per un
periodo prolungato.
Uso dell'alimentazione CA
1. Inserendo un'estremità dell'adattatore di alimentazione in dotazione in una
presa di corrente e l'altra estremità nel monitor, il LED di alimentazione è di
colore rosso. Vedere la Fig. 6.
Nota : Usare l'adattatore con l'etichetta OUTPUT: 6 V CC con il monitor.
2. Premere il tasto di alimentazione per accendere il monitor. Vedere la Fig. 6.
Nota 1: Quando si accende il monitor, il LED di alimentazione è di colore
arancione.
Nota 2: Tenere premuto il tasto di alimentazione per due secondi per spegnere il
monitor.
Nota 3: Quando la procedura di accensione e caricamento si avvia, lo stato della
batteria diventa . Al termine della procedura di
caricamento (completamente carico), lo stato della batteria diventa .
Quando la procedura di spegnimento e caricamento si avvia, il LED di
alimentazione è di colore rosso. Al termine della procedura di caricamento
(completamente carico), il LED di alimentazione diventa verde.
2.1
2
Page 48

4
Opzioni del menu
1. Premere il tasto del menu sul monitor per visualizzare il menu
principale sullo schermo (touchscreen). Vedere la Fig. 7.
2. Vi sono due menu principali. Vedere la Fig. 8.
(1) Impostazione luminosità
(2) Impostazione volume
(3) Selezione telecamera
(4) Impostazione luce notturna
(5) Funzione VOX
(6) Pagina successiva
(7) Elimina telecamera
(8) Aggiungi telecamera
(9) Funzione Capovolgi (10) Ultima pagina
(11) Frequenza di visualizzazione e impostazione del bilanciamento del
bianco
(12) Ripristino predefiniti
Impostazione luminosità (Luminosità)
In questo menu secondario è possibile regolare la luminosità dello schermo.
Vedere la Fig. 9.
Impostazione volume
In questo menu secondario è possibile regolare il livello di volume del monitor.
Vedere la Fig. 10.
Selezione telecamera (Selezione telecamera)
In questo menu secondario è possibile selezionare la telecamera da visualizzare
sullo schermo. Vedere la Fig. 11.
Impostazione luce notturna
1. Quando si abilita la modalità automatica , l'icona si accende. È
possibile scegliere il livello di sensibilità. Con il livello impostato su High
(Alto), viene rilevata la luce più alta. Vedere la Fig. 12.
2. Quando la luce della telecamera raggiunge il livello impostato, la luce
notturna si accende come nell'impostazione.
3. Quando si abilita la modalità manuale , è possibile attivare/disattivare
la luce notturna come nell'impostazione.
4. Premendo l'icona , è possibile modificare il colore della luce notturna.
Vi sono tre colori di luce notturna (giallo, verde, arancione).
5. Premendo l'icona , è possibile modificare il livello di luminosità. Vi
sono quattro livelli di luminosità.
3
3.1
3.2
3.3
3.4
Page 49

5
3.6
3.7
3.5
Funzione VOX (trasmissione attivata a voce)
1. Il presente menu secondario consente di selezionare il livello di sensibilità
VOX. Con il livello impostato su High (Alto), il microfono rileverà suoni
più bassi. Vedere la Fig. 13.
2. Quando si abilita VOX sul monitor, l'icona si accende. Premere il
tasto del menu per tornare alla schermata per completare l'impostazione. Il
LED VOX rimane acceso (spia blu).
3. Il taal modo si spegne lo schermo entro 10 secondi e si accede alla
modalità di risparmio energetico.
4. Quando l'audio della telecamera raggiunge il livello impostato, lo
schermo si accende automaticamente e dal monitor viene emesso un
suono di avvertenza.
Capovolgi
In questo menu secondario è possibile capovolgere il video in orizzontale
durante il montaggio della telecamera sul soffitto. Vedere la Fig. 18.
Elimina telecamera
In questo menu secondario è possibile eliminare una telecamera accoppiata.
1. Premere il numero di telecamere da eliminare. Vedere la Fig. 14.
2. Premere per eliminare.
Aggiungi telecamera
Il sistema è dotato di una telecamera che è già stata accoppiata con il monitor.
La funzione di accoppiamento assegna a ciascuna unità un canale separato sul
monitor. Questo è necessario per la configurazione di altre telecamere.
1. In questo menu secondario è possibile aggiungere una nuova telecamera.
Vedere la Fig. 15.
2. Selezionare il numero di telecamere da aggiungere, quindi
premere l'icona.
3. Il monitor attende l'accoppiamente, quindi premere anche il tasto di
accoppiamento per tre secondi sulla telecamera. Non è necessario
accendere la telecamera.
4. Al termine dell'accoppiamento, sul monitor viene visualizzato " ".
5. Se l'accoppiamento non riesce, sul monitor viene visualizzata l'immagine.
Vedere la Fig. 17.
3.8
Page 50

Frequenza di visualizzazione e impostazione del
bilanciamento del bianco
1. In questo menu secondario è possibile scegliere la frequenza e la
temperatura di colore ottimali sul monitor. Vedere la Fig. 19.
2. Vi sono tre tipi di temperatura colore e due frequenze (50 Hz o 60 Hz).
Ripristino predefiniti
In questo menu secondario è possibile ripristinare le impostazioni predefinite
del sistema. Premere per assicurarsi. Vedere la Fig. 20.
6
3.9
Allarme di avvertenza
Dal monitor viene emesso il suono di avvertenza nei seguenti casi.
4.2
Informazioni di stato
Barra di stato
La barra di stato viene visualizzata sulla parte superiore della schermata.
Vedere la Fig. 21.
1. Indicatore numero telecamera
2. Indicatore di potenza del segnale
3. Stato batteria / Indicatore di carica
4
4.1
Nota : È possibile premere un tasto del monitor per arrestare l'allarme.
Stato
Indicazione Azione
Fuori range
Connessione persa
Emette un segnale
acustico continuo per
un minuto
Avvicinare il monitor alla
telecamera. Controllare
l'alimentazione della
telecamera.
Allarme
temperatura
2 segnali acustici
consecutivi e indicatore
di temperatura sullo
schermo lampeggiante
Controllare la temperatura
della telecamera. Disabilitare
l'allarme temperatura (vedere
l'impostazione 3.4).
Livello di carica
batteria basso
2 segnali acustici
consecutivi e sullo
schermo lampeggiante
Collegare il monitor
all'adattatore CA (vedere
l'impostazione 2.1).
3.10
Page 51

7
Non si riceve alcun segnale
Ÿ
Ÿ Assicurarsi che le spine siano completamente inserite nelle prese.
Se il segnale è scarso, o ci sono interferenze
Ÿ Se nel percorso tra la telecamera ed il monitor c'è un forno a microonde in
uso, rimuovere il forno a microonde o spegnerlo.
Ÿ Assicurarsi che la telecamera ed il monitor si trovino all'interno dei
rispettivi campi di copertura (portata di circa 984 piedi o 300 metri di una
linea di vista senza ostacoli).
Cura e manutenzione
Ÿ Tenere tutte le parti e gli accessori lontani dalla portata dei bambini.
Ÿ Impronte digitali o sporcizia sulla superficie dell'obiettivo possono
influenzare negativamente sulle prestazioni della telecamera. Evitare di
toccare la superficie dell'obiettivo con le dita.
Ÿ Se l'obiettivo è sporco, usare un soffiatore per rimuovere lo sporco e la
polvere, oppure usare un panno morbido e asciutto per pulire l'obiettivo.
Ÿ Tenere la telecamera asciutta. Pioggia, umidità e altri liquidi contengono
minerali che possono danneggiare i circuiti elettronici.
Ÿ Non usare o conservare in aree sporche e polverose.
Ÿ Non conservare in ambienti caldi. Le temperature elevate possono ridurre la
durata utile dei dispositivi elettronici e deformare o fondere alcune
plastiche.
Ÿ Non conservare in ambienti molto freddi. Quando il sistema si riscalda
(al sua normale temperatura) al suo interno si può formare della condensa
che può danneggiare le schede dei circuiti elettronici.
Ÿ Non tentare di aprire la copertura. Il sistema può subire danni se è
maneggiato da personale non specializzato.
Ÿ Evitare cadute o forti impatti.
Ÿ Far funzionare il prodotto usando solo l'alimentatore incluso o fornito come
accessorio.
Ÿ Non sovraccaricare le prese a muro e le prolunghe, perché si possono
provocare incendi e scosse elettriche.
Ÿ Ricordare che, quando si usa il sistema, si usano onde radio pubbliche e
audio e video possono essere trasmessi ad altri dispositivi di ricezione
2.4 GHz. Possono essere trasmesse conversazioni, anche tenute in stanze
vicine alla telecamera. Per proteggere la privacy della propria casa,
spegnere sempre la telecamera quando non è in uso.
Risoluzione dei problemi
Assicurarsi che sia la fotocamera ed il monitor siano accesi.
Page 52

8
Osservare le istruzioni sulla sicurezza
Per prevenire la morte e lesioni in associazione ai cavi del baby
monitor:
Ÿ Assicurarsi che i cavi dell'unità e dell'adattatore AC siano sempre fuori della
portata del bambino, ad una distanza di almeno 3 piedi (1 metro).
Nota: È importante, anche se il vostro bambino non è ancora in grado di
stare in piedi o di muoversi autonomamente.
Ÿ Usare un baby monitor wireless per evitare il rischio di strangolamento.
Ÿ Non usare mai prolunghe con gli adattatori AC. Usare solo gli adattatori
AC forniti in dotazione.
Questa att rezzat ur a è conforme ai requisiti ess en ziali e ad altri requisiti relativi d el la Diret tiva 1999/5/CE.
3 piedi
(1 metro)
Cavo
adattatore
Baby monitor
3 piedi
(1 metro)
Page 53

Page 54

408-000780-00
 Loading...