

Page 1
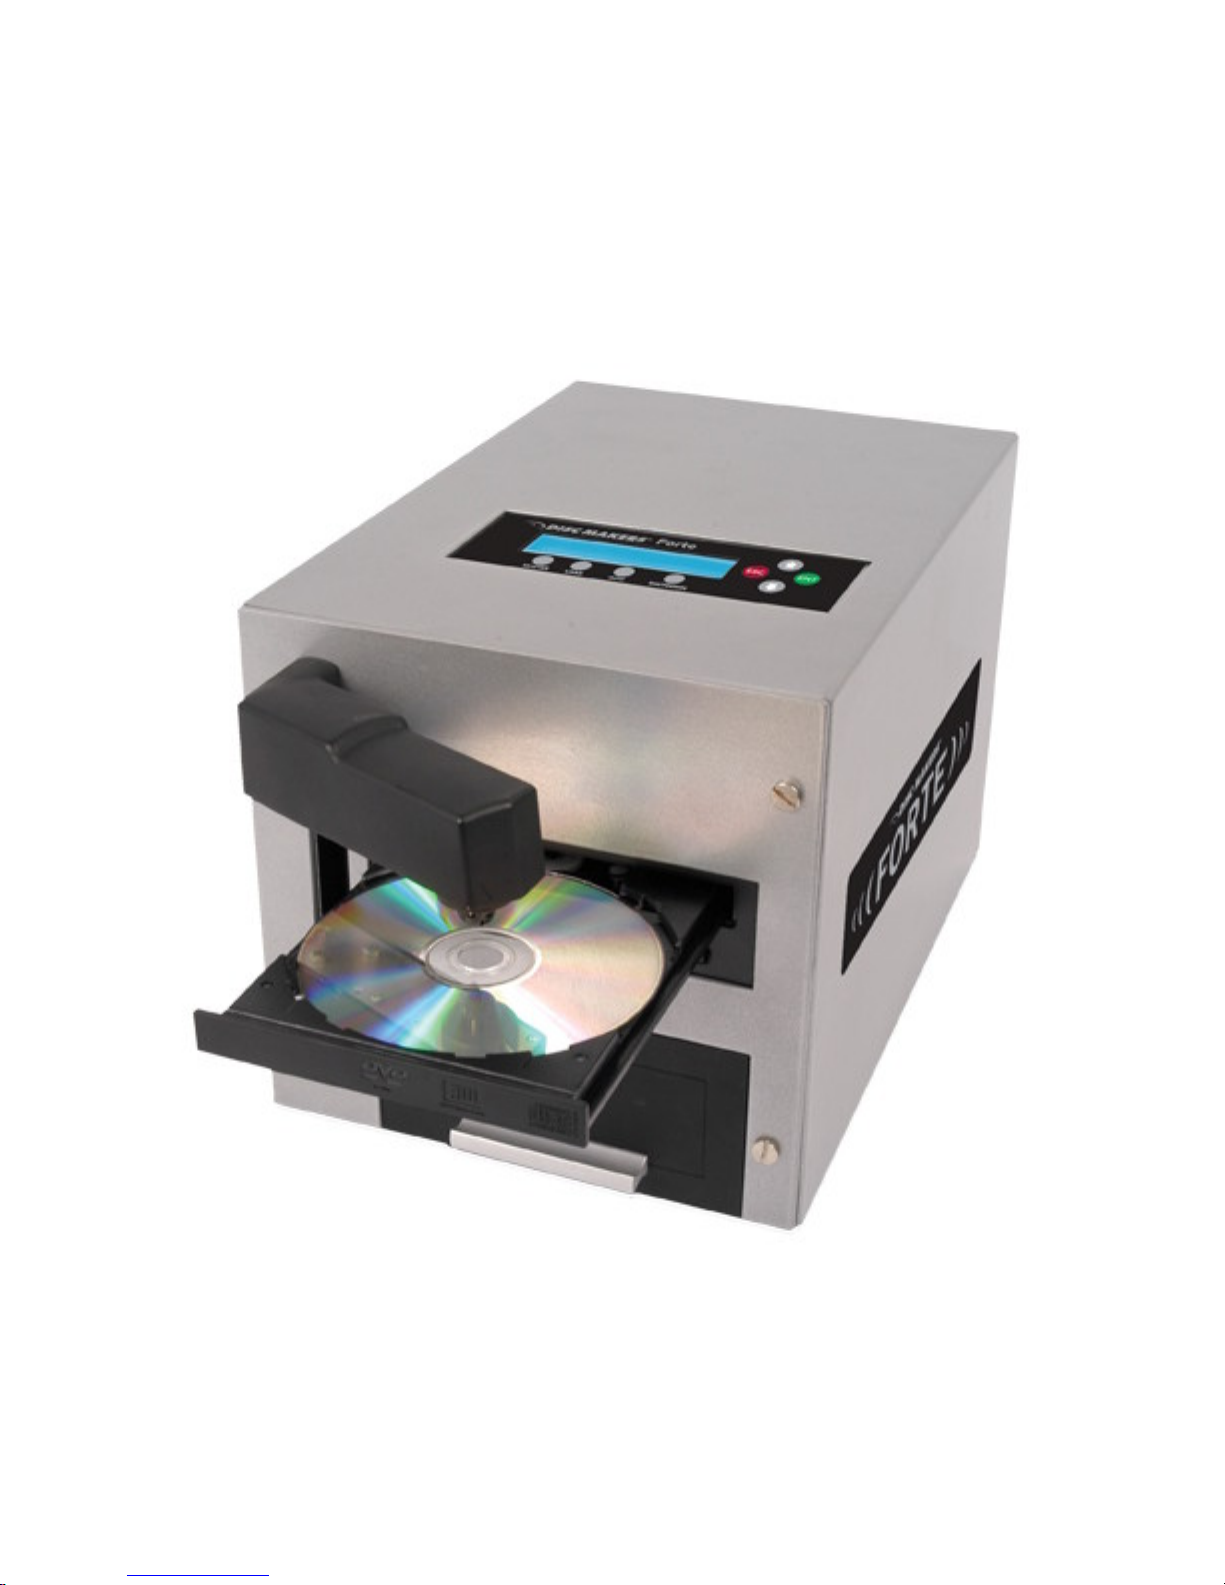
User Manual
For Reflex Forte Duplicator
V 3.0.6
25 Disc Capacity
Page 2

WARNING!
THIS CD/DVD/BLU-RAY/LIGHTSCRIBE
DUPLICATOR IS MEANT FOR BACK UP
AND DISTRIBUTION OF ORIGINAL DATA AUTHORED OR OWNED BY THE USER.
ANY DUPLICATED DIS
CS MADE F
ROM A THIS CD/DVD/BLU-RAY/LIGHTSCRIBE
DUPLICATOR IS THE COPYRIGHT OWNERSHIP OF THE AUTHOR OR COMPANY
WHICH OWNS THE SOURCE DISC. ANY UNAUTHORIZED COPYING, EDITING, OR
ANY PART THEREOF OF A COPYRIGHT DISC IS STRICTLY PROHIBITED. WE
DISCOURAGE THE USE OF A
NY SUCH ACTION THAT GIVES RISE TO CRIMINAL
INTENT AND PROSECUTION.
THE SELLER OF THIS PRODUCT IS NOT RES
PONSIBLE FOR ANY POTENT
IAL
ILLEGAL ACTIONS OF THE USER
DUE TO ACTIVITIES BEYOND THE SCOPE OF
THE PRODUCTS INTENDED USE.
POT
ENTIALLY HAZARDOUS MOVI
NG PARTS
KEEP FINGERS AND OTHER BODY PARTS AWAY.
Copyrights and Trademarks
Page 3

ALL RIGHTS RESERVED. NO PART OF THIS PUBL
ICATION MAY BE
REPRODUCED IN ANY ME
DIUM PRINTED OR ELEC
TRONIC WITHOUT THE P
RIOR
WRITTEN PERMISSION FR
OM THE MANUFACTURER
. COPYRIG
HT©2000-200
8.
ALL RIGHTS RESERVED.
Page 4

Table of Contents
Title
Page
Chapter 1: Introduction ... 1
1.
Overview .
1
2.
The Robotic Platform .
4
3.
The LCD Control Panel
5
4.
Menu Overview ..
6
5.
Single Master and Multi Master Modes .
10
6.
Setting Counters and Assigning Names
12
6.1.
Setting Counters
12
6.2.
Editing Names
13
Chapter 2:
Operation ..
14
1.
Copy .
14
1.1.
Making Copies in Single Master Mode ...
14
1.2.
Making Copies in Multi Master Mode .
17
2.
Test ..
20
3.
Compare .
20
4.
Test+Copy ..
21
5.
Copy+Compare .
21
6.
Select Burn Speed
22
7.
Select Source .
23
8.
Master Mode ..
23
9.
Erase ..........
24
10. Hard Drive Setup ...
25
10.1.
Select Partition ..
25
10.2.
Load Partition .
26
10.3.
Rename Partition ..
27
10.4.
Delete Partition ..
27
10.5.
Partition Info ...
28
10.6.
Select Loading Drive. .
28
10.7.
Format Hard Drive .
28
11. Setup ...
29
11.1.
Language
29
11.2.
Read Error Skip .
29
11.3.
CD Writing Mode ...
30
11.4.
Max Audio, VCD & CDG Speed .. .
30
Page 5

Title
Page
11.5.
Buzzer .
31
11.6.
Startup Menu ............
31
11.7.
Screen Saver .
31
11.8.
Counter ...
32
11.9.
DVD+R High Compatibility Mode ...
32
11.10.
ISRC
32
11.11.
CD Overburn ...
33
12. System Utilities ..
33
12.1.
Disc Info ..
33
12.2.
System Info
34
12.3.
Device Info .
34
12.4.
Load Default ...
34
12.5.
Update Firmware ...
34
13. Loader Utilities ...
35
13.1.
Update Robot Firmware .
35
14.
Manage A
ccounts .
35
14.1.
View User ...
36
14.2.
Create User
36
14.3.
Edit User Info .
37
14.4.
Delete User
37
14.5.
Password on Bootup .
38
15. AUTOCOPY
38
16. Shutdown ..
40
Chapter 3: Trouble Shooting .. ...
41
Chapter 4: List of Error Codes ..
43
Chapter 5: Menu Tree . ..
46
Page 6

1
Chapter 1: Introduction
1. Overview
Welcome
The
FORTE autoloader is a reliable, high performance, high speed, standalone, robotic CD,
DVD
and/or
Blu-Ray (Optional)
autoloader
. With its profes
sional industrial design and simple user
interface, it makes your duplic
ating experience easier than ever.
With the
FORTE autoloader, you have a capacity of 25 discs that can duplicate continuously for
24 hours, even with multiple masters. You get the highest quality duplication all at an extremely
affordable price. The
FORTE is the most reliable and affordable autoloader on the market.
Before you start using this
autoloader
, please read the following to ensure proper operation:
BD/
DVD Duplication Limitations
The
autoloader will not copy any
BD/
DVDs that have Copy Prote
ction en
coded in the content.
Typically, most
Blu-Ray movies or DVD movies you purchase or
rent contain Copy Protection.
In addition to the copy protection limitation, the
autoloader will only copy a
single layer
Blu-Ray/DVD disc
to another
single layer Blu-Ray/DVD recordable
media. If your
autoloader has
double layer Blu-Ray/DVD capability, you can copy a
double layer Blu-Ray/DVD disc to another
double layer Blu-Ray/DVD recordable media
, but you cannot duplicate a
single layer
Blu-Ray/DVD disc to
double layer Blu-Ray/DVD recordable
media or vice versa.
Temperature Warning
If the
autoloader was stored in a location where the temperature dropped be
low 32° F (0° C)
within the past 24 hours, leave the
autoloader in a warm room with temperatures at least 65° F
(19° C) for four hours prior to powering it on for the first time. Failure to do so may cause
irreparable harm and prevent the
autoloader from functioning.
Maintenance
It is very important to operate and keep the
autoloader in a dust free, clean en
vironment since
dust is the number one killer of CD/DVD
/Blu-Ray recording devices. Failure to do so can severely
damage your
autoloader
. We strongly suggest that you constantly use an Air Duster (Canned Air)
to clear off any dust on the surface of the
autoloader.
Note: Do not try to use an Air Duster to clean the
autoloader while the writer trays are open. In
doing so, you may inadvertently blow dust into the recording device and damage it.
Proper Shutdown
To avoid possible system failures, you need to shut down the
autoloader prop
erly. To shut down
the
autoloader
, scroll to menu 16. Shutdown and follow the instructions on the screen. Not
performing this function increases the risk of damaging the
autoloader.
Page 7
2
Disc Static and Sticky Media Issue
s
T
he most common
problems when using an autoloader
are the disc stat
ic and sticky media issues.
These
static charge
problems cause multiple discs to stick to
gether, resulting in improper
operation and more severely, can shock the robotic arm while loadin
g a disc
causing the
system
to freeze
. Even though the autoloader has a sticky media separator function to
help
prevent
media from sticking, you should
still
follow these steps to prevent sticky media from disrupting
your operation and protect your system
from
disc static charge.
This issue is most commonly seen when you buy a 100 pack of blank discs and insert them into
the autoloader without any treatment. If you have expe
rienced this kind of problem, please do the
following to remove the adhesive stat
ic between the discs:
Separate the blank discs before you place them into the autoloader's spindle(s).
Separating them will greatly reduce the static between discs.
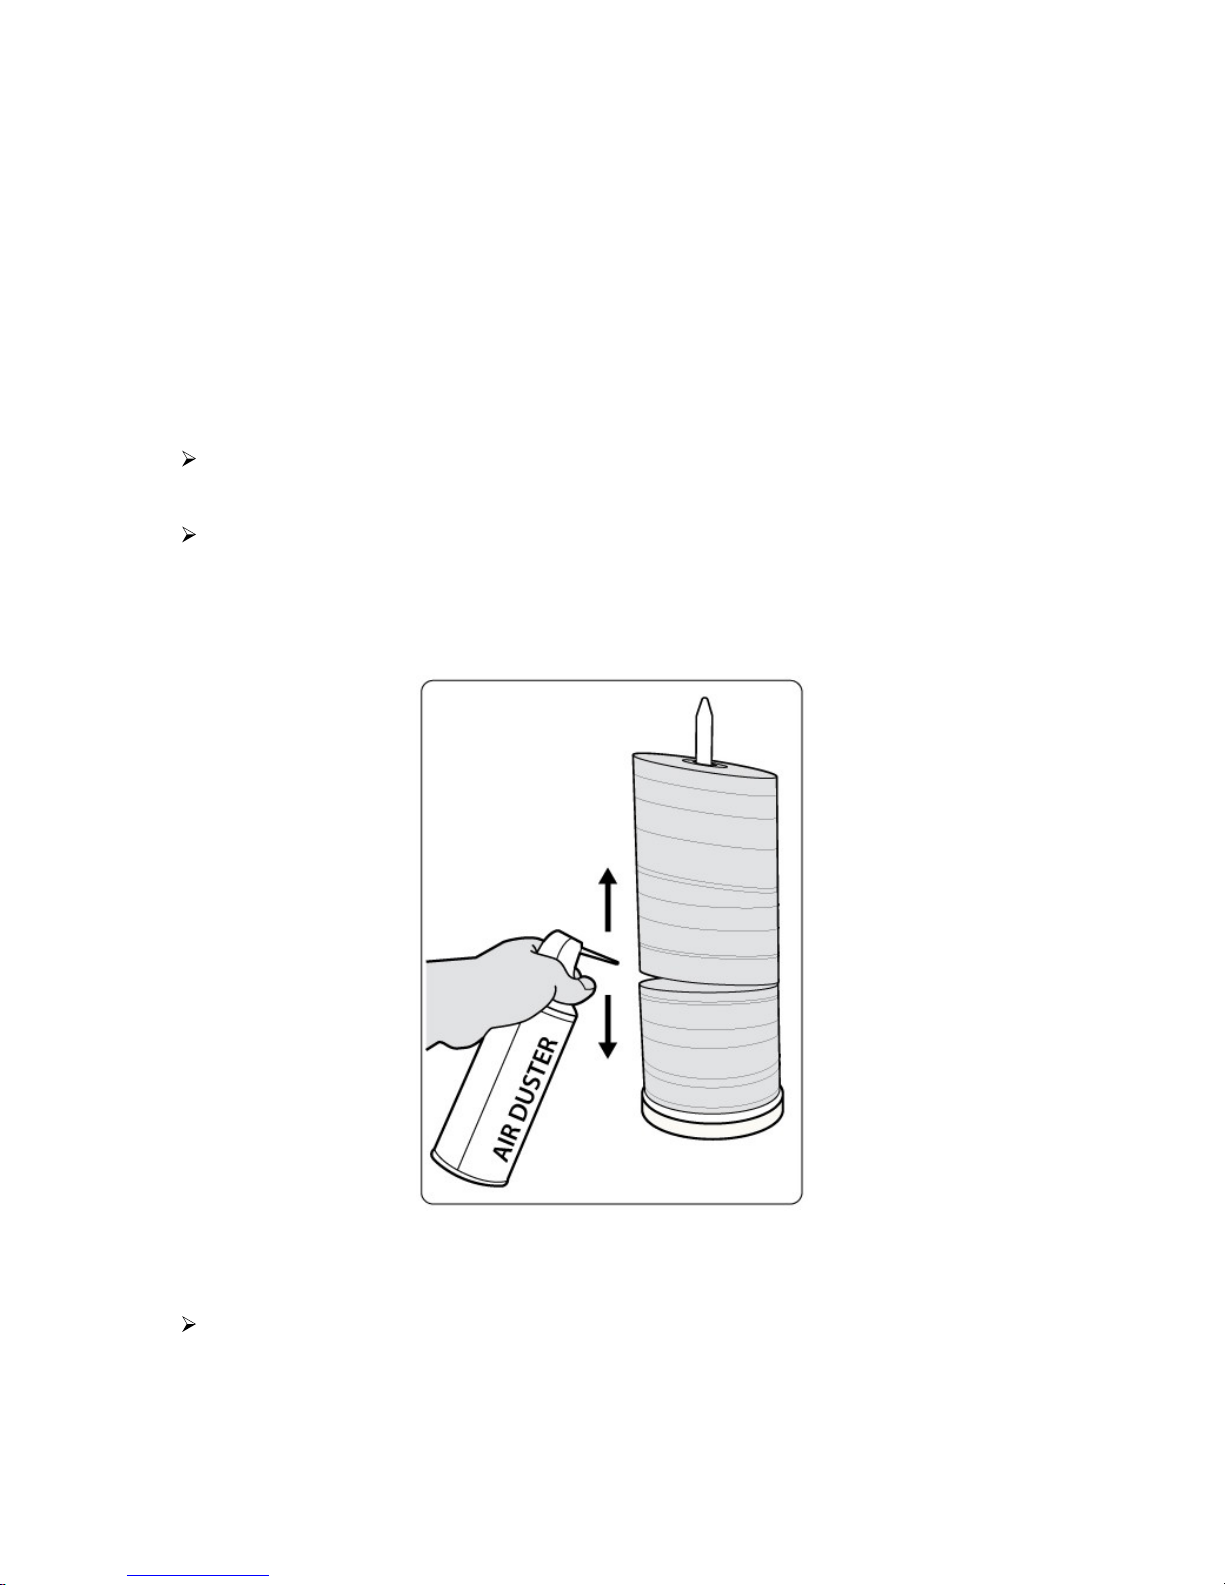
If this doesn't achieve the desired outcome, use an air duster (canned air) to blow air
around the circular edge of the blank discs as shown in Figure 1-1. This process reduces
the static between the discs up to 90%. The amount of air to use depends on factors
specific to your environment.
Figure 1-1 Using Canned Air to Reduce Static
If you are still having problems, put your media into the refrigerator (NOT in the freezer) for
three hours. Afterwards, store
it
at room temper
ature for one hour prior to use. Studies
show that cold temperature (with no condensation) will also reduce th
e static charges
between objects dramatically.
Page 8

3
Spindles vs. Bins
The
FORTE autoloader
has
one area for holding CDs
, DVDs and/or
Blu-Ray Discs
. Although the
manual refers to them as spindles, many of the messages shown on the LCD display
will
refer to
them as bins in order to create a more concise mes
sage. Don t panic. Spindles and bins are the
same.
Page 9
4
2. The Robotic Platform
The
FORTE autoloader, with
25
Disc Capacity, has
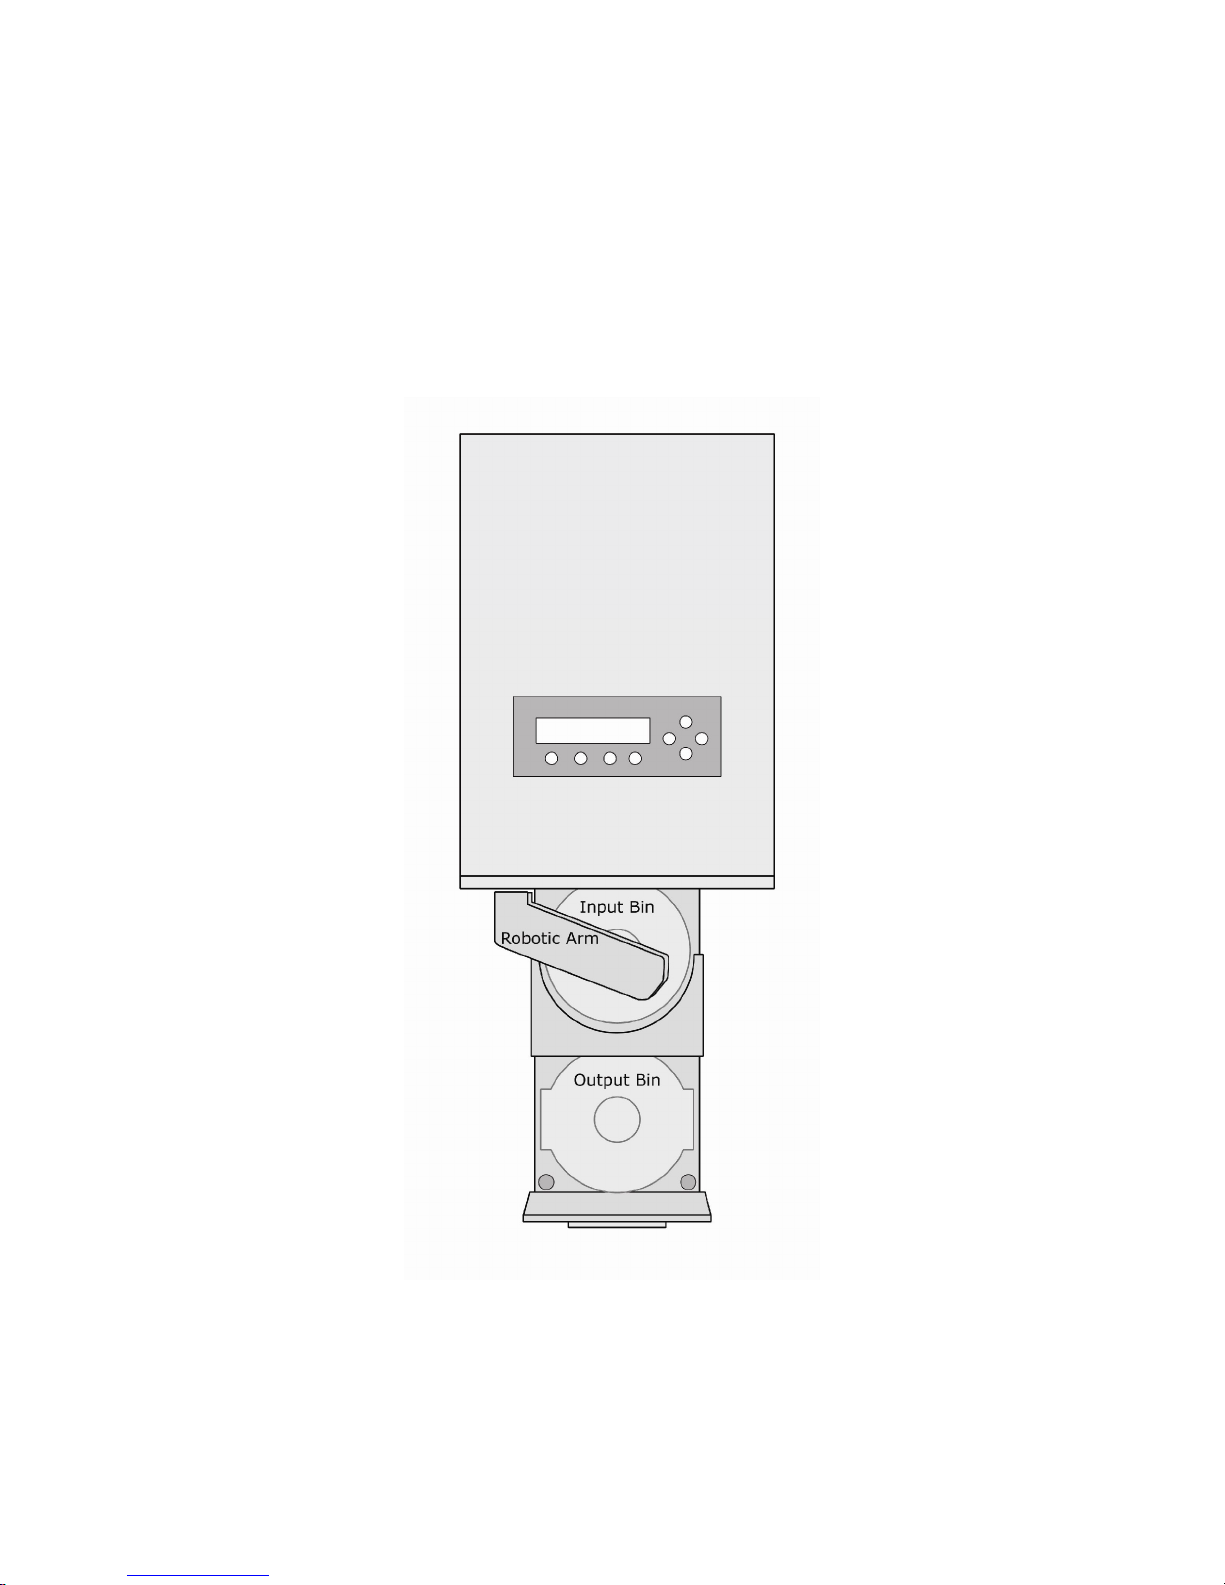
two bins (see Figure 1-3). Each
bay
hold
s
approximately 25
discs (Actual quan
tity varies depend
ing on the media thickness).
Place the
media you wish to copy
into the Input Bin. The robotic arm will pick discs from
Input Bin then place
the successfully copied discs onto
the
Output Bin
.
If any discs were rejected due to failure,
the
disc will be ejected and the job will be automatically aborted.
Figure 1- 3
Forte Robotic Duplicator (25 Capacity)
Top View
Page 10
5
3. The LCD Control Panel
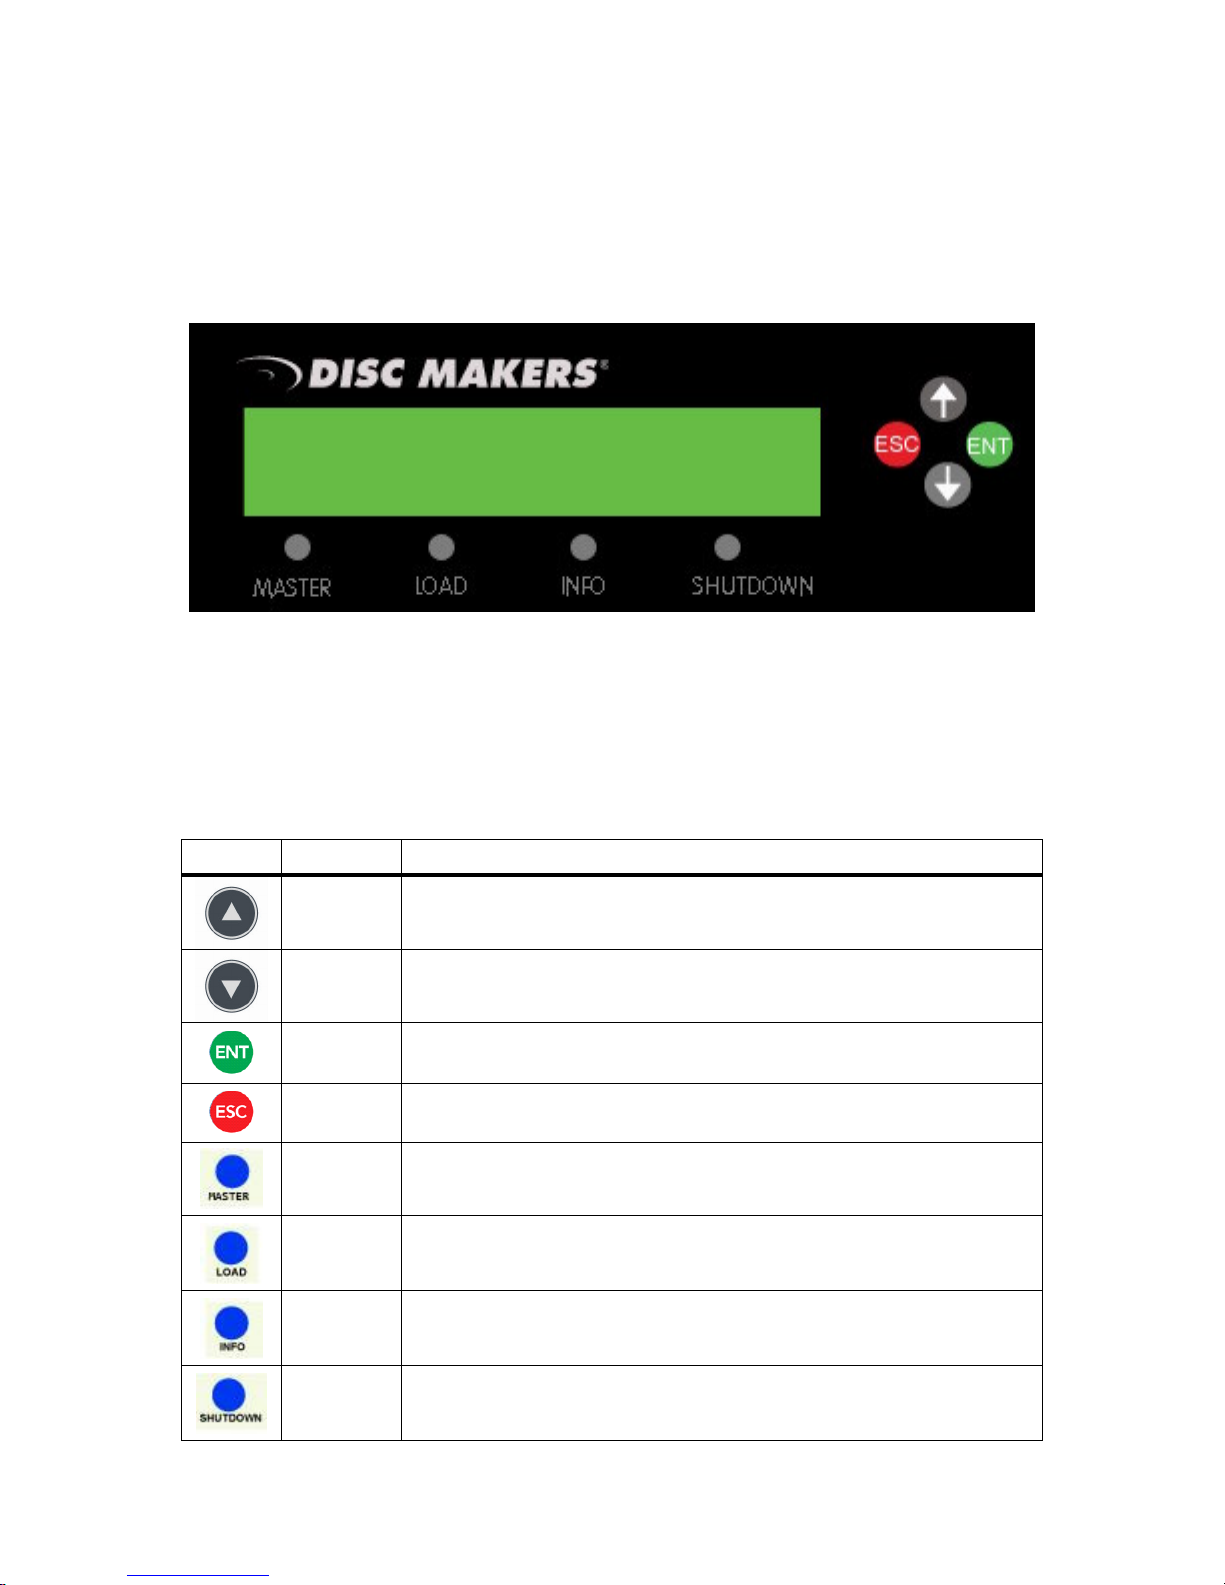
*The below image is for reference only. Your key assignment and appearance may differ.
Figure 1-5
below
shows the LCD Control Panel. This panel has a two-line by 20 character LCD
display to provide user feedback and eight push buttons to control the operation of this system
.
The functions for these buttons are shown in Table 1-1.
Figure 1
-5
LCD Control Panel Layout
Table 1-1: Front Panel Controls
Control
Name
Function
Up
Scroll up through the menu or list.
Down
Scroll down through the menu or list.
Enter
Execute the function. Also referred to as OK in the Menus.
Escape
Go back to the previous function.**
Master
Quick key to
choose Master Mode **
Load
Quick key to
load the master to the hard drive**
Info
Quick key to
see information about discs in the drives**
.
Shutdown Quick key
: to shutdown duplicator**
Page 11

6
4. Menu Overview
This section provides an overview of the menu options.
These menu options are explained in
detail on the referenced pages.
1. Copy
page
16
Use the
Copy menu to make CD/DVD/Blu-Ray Disc (Optional) copies. Before you start a
copy proc
ess
, make sure you have selected the correct
Master Mode. Please refer to
Single Master and Multi Master Modes on page 13
for additional information.
If you plan to use Single Master Mode, please make sure you have successfully loaded
your master disc t
o a partition on
the Hard Drive.
If you plan to use Multi Master Mode, please make sure you have placed every master
disc on top of
the
corresponding number of blank discs.
For additional information on copying on either Master Mode
, see Making Copies
in
Single Master Mode on page 16 or Making Copies in Multi Master Mode on
page 18.
2. Test
page 21
Use the
Test
menu or
Test quick key to simulate the copy process. With sim
ulation, write
once recordable discs such as DVD-R, or CDR will be reusable. The purpose of simulation
is to ensure error free duplication.
Note: Due to physical limitati
ons of the BD-R/
DVD+R recordable for
mat, if you try to
simulate BD-R/
DVD+R copying, you will encounter failure messages.
Warning: If you are using CD/DVD
/BD Rewritable discs as your blank media during the
simulation, the
content on those discs will be permanently erased.
3. Compare
page 21
Use the Compare function to perform a bit-by-bit comparison between the content of your
m
aster
disc(s)
in the Hard Drive
and the
contents of all
disc
s it copied
. This en
sures that all
of your copies ar
e identical to original master disc(s).
Note: The
bit-by-bit
comparison will only apply on all
Blu-Ray Discs,
DVDs and Data CDs.
A
readability check will be applied for othe
r formats like
Audio CDs, CD+G,
and
Video CDs
discs due to their lack of error correction mechanisms.
4. Test + Copy
page
22
Use the
Test + Copy menu option to simulate the copying process initially. Then, the
autoloader performs the actual copy process on the blank disc(s)
if they passed the
simulation
. If
any
part of this
process
fails, the
job will be aborted.
5. Copy + Compare
page 2
2
Use the
Copy + Compare menu option to make
100% reliable
copies. After the copy
process is done, the
autoloader
auto
matically compares the copies
from the content of
your original master disc. If any part of this process fails,
the job will be aborted.
6. Select Burn Speed
page 2
3
Use the
Select Burn Speed menu option or the
Speed quick key to adjust the duplication
s
peed for the various
blank disc formats
.
Page 12

7
7. Select Source
page 2
4
Use the
Select Source
menu or the
Source quick key to
tell the system where the content
of the master disc resides during duplication. At this point, Hard Drive is the only
option in
this
setting since it is the only
place where the content of the master disc resides during
duplication.
8. Master Mode
page 2
4
Use the Master Mode menu to select either Single Master
Mode(SM) or Multi Master
Mode (MM). For more information on these modes, s
ee Single Master and Multi Master
Modes on
page 13.
9. Erase
page
24
Use the Erase menu to erase your
Rewritable discs. There are two options:
Full Erase: This option erases the entire disc, destroying all previously written data in
the process.
Qu
ick Erase: This option erases the
index (TOC) of the
Rewritable disc, not the data
section. It is much faster than Full Erase. However, the data section is still recoverable.
If you prefer the old content not be recovered for security purposes, please perform
Full Erase.
10. Hard Drive Setup
page 2
5
Use the Hard Drive Setup menu to perform various hard drive-related opera
tions. These
options include loading, renaming, or deleting your images.
11. Setup
page 2
8
Use the Setup menu options to control how
the
autoloader operates. You can scroll
between the various options using the
Up or
Down
button.
1.
Language
Use this setting to choose the language used to na
vigate the
autoloader
. The
autoloader officially supports English and Span
ish menus. More languages could
be added.
2. Read Error Skip
Normally, when the
autoloader encounters a read error while reading the master
disc, all the duplication will be aborted and all the recordable media in the writers
will be ruined. However, if you believe tha
t your master disc has a small,
insignificant error due to physical damage, you can utilize
this setting to allow the
autoloader to skip any read errors tha
t it encounters. It is Off with Retry
by
default.
Important:
When this function is ON , it
does
not fix the error; it only skips it to
continue
copying the rest of the readable data. This is recommended for Video and
Audio duplication purpose
s.
3.
CD Writing Mode
Use this setting to select the mode you would like use to duplicate a CD. There are
tw
o different modes: Disc at Once and Track at Once. Unless you understand
completely what they mean, we strongly sug
gest you to set it as Disc at Once .
4. Max Audio,
VCD & CDG Speed
Page 13

8
Due to the lack of error checking mechanism for Audio CD,
Video CD and CD+G
format,
duplicating them at too high a
speed can cause frequent errors like glitches
and skips. Use this setting to adjust the maximum duplication speed for Audio
,
Video CD and CD+G format to ensure reliable duplication for such formats.
5. Buz
zer
Use this setting to choose whether you want to hear a beep when you press a
button and when a task has been completed or have it turned off for silent
operation.
6. Startup Menu
Use this setting to choose which menu you would like to see first when you turn on
the autoloader
.
7. Screen Saver
Use this setting to enable or disable the Screen Saver feature
. When this is en
-
abled, a screen saver is displayed whenever your
autoloader has been idle for a
set period of time.
8. Counter
Use the Counter
menu to enable or disable the
Counter feature. The counter tells
you how many discs have copied and how many discs are left to go during the
duplication process stop
ping the job once the
desired
number of copies has been
made
.
9. DVD+R Compatibility Mode
This feature allows you to turn the
DVD+R High Compatibility Mode feature ON or
OFF. The purpose of this feature is to increase the com
patibility of DVD+R media
with a broader range of DVD Video play
ers.
10. ISRC
This option will allow you to enable/di
sable copying
the
ISRC code of an
Audio CD.
ISRC is the serial number of the audio track that uniquely identifies the song in that
audio track. This ISRC code is commonly found in commercial Audio CDs and
rarely seen on home made Audio CDs. By enabling th
is feature, the duplication
performance will be lowered.
11
. CD Overburn
Most CD-
R media is either
650MB or
700MB
. T
he burning starts from the center of
the CD and works its way out but stops before the physical edge of the CD.
Overburning is
a
burning method to bypass the limitations
of burning further out
onto the edge of the CD
. T
his can result in s
lightly higher
storage
capacity,
however, it
has also been known to have compatibility playback issues. Please use
it with caution.
12. System Utilities
page 34
1. Disc Info
Use the Disc Info utility to identify the type
and other information about your
blank
recordable media.
2. System Info
The System Info menu provides
important hardware information such as firmware
versions, Duplication/Robot Control
Boards types, etc
Page 14

9
3. Device Info
This menu allows you to see information about the recording devices built inside
your autoloader.
4. Load Default
Use this menu option to reset all of the options back to the manufactur
er's default
values. You can us
e this function if your
autoloader is acting abnormally.
5. Update Firmware
Use this utility to update the software in your
autoloader
. To update, in
sert the
manufacturer s Certified Update CD into
the
1
st
tray and
make sure no other di
scs
are in rest
of
the
trays. Then you can
press the ENT/
Enter button to update.
Important: You should not upgrade your
autoloader
's firmware unless your
system is becoming unstable or you are advised to
do
so by Tech Support.
13. Loader Utilities
page 3
5
Use the Load
er Utilities menu options to access the various utilities built into the
autoloader
. You can scroll between the various options using the
Up or Down
button.
1.
Update Robot Firmware
Use this utility to update the software in your autoloaders robot cont
roller. To
update, in
sert the manufacturer s Certified
Robot
Update CD into the 1
st
tray and
make sure no other discs are in
the other
trays. Then you can press the ENT/
Enter
button to update.
Important: You should not updat
e your autoloader's robot firm
ware unless your
system is becoming unstable or you are advised to do so by Tech Support.
14. Manage Accounts
page 40
Use this menu option to:
Create user accounts and passwords to prevent unauthorized use of the
autoloader.
Edit existing user account information, including name and password.
Delete existing user account(s).
Enable/Disable this feature.
15
. AUTOCOPY
page
42
The Autocopy function is the simplest way to make CD/DVD/Blu-Ray Disc copies. It
simplifies the copy process by automatically c
opying from a Master Disc, which should be
placed on top of the first Input Spindle,
instead of a preloaded master image on the HDD,
to all of the blank discs which follow it. The benefit of this operation is to decrease the time
needed to initiate the co
py process for a master disc that does not need to be stored on the
HDD permanently.
16
. Shutdown
page 4
4
Use this menu option to turn off your system. Once you see the Ready to Power Off
message, you can safely turn off the machine using the power switch. Turning off your
autoloader without performing this function increas
es the risk of damaging it and all
settings changed since
the
last boot up will not be saved.
Page 15

10
5
. Single Master and Multi Master Modes
There are two ways to make copies using the autoloader:
Single Master Mode:
This mode requires that a single master disc is loaded onto the hard drive prior to initiating
the duplication process. This mode is ideal if your job involves one or very few master
disc(s).
Multi
Master Mode (Batch Mod
e):
This mode does not require you to manually
pre-load your master onto the HDD
. Simply
place the master disc(s) on top of the
corresponding
stack of blank discs needed for that
particular
job. This mode is ideal if you
have numerous master discs and few
er copies for
each master disc.
The Multi Master mode uses the Reserve partition to temporarily store the
content of
the
current master disc for duplication purpose
. Once the task is
complete and a new master
disc has been detected, the reserve partition'
s content
(of previous master disc) will be
replaced with the
content of the new master disc.
You can tell immediately which mode you are in by looking at any of the Copy or Test menus:
The (SM) indicates Single Master
Mode
, and the (MM)
indicates Multi Master Mode.
For example, if you need to make:
5
copies of job A
6
copies of job B
7
copies of job C
Under Multi Master
Mode
, you would need to follow
the below
steps:
1. Make sure
the
Input Spindle is empty.
2. Place 7 blank discs for job C
first
on the input spindle.
3. Place the master disc for job C on top of the
stacked
blank discs for job C.
4. Place 6 blank discs for job B on top of the master disc for j
ob C.
5. Place the master disc for job B on top of the stacked
blank discs for job B.
6. Place 5 blank discs for job A on top of the master disc for job B.
7. Place the master disc for job A on top of
the stacked blank discs for Job A.
Discmakers
X.xx
1. Copy
(SM)
Discmakers X.xx
1. Copy
(MM)
Page 16

11
After you have completed these steps, the Input Spindle should be loaded
in the order shown in Figure 1-6:
When you star
t the copy operation, the robotic arm will pick up discs from
the Input Spindle and place them into the drives. If any of the discs in the
drives contains data, (in this case, that would be the first disc, Master A)
,
the autoloader will
copy
the
entire con
tent of this disc (Master A) onto the
internal hard drive while simultaneously copying to all of the
blank discs in
the
remaining
writer
drives.
Once the
copy process is completed, Master disc A
and the
successfully
copied discs will be
removed from
the drives and dropped
on
to the Output
Spindle
. At the same time, the system will pick up the next discs from the
input bin and place t
hem in the
corresponding writer drive
(s)
. Then the
copying process will start over again from the hard drive
.
If a new mast
er is detected (in this
case, it
would be the Master B)
, the
autoloader will complete the previous job, unload the
copied discs
, and fill
the drive tray
(s)
wit
h blank discs for the next job.
The robotic arm will continue to load media into the drive
(s)
as
the duplicated discs are
placed in the
Output
Spindle
. Once a drive (any drive) detects an
other Master disc, the
same process is repeated for the new Master disc.
Master A
5
Blank discs
for
Master A
Master B
6
Blank discs for
Master B
Master C
7
Blank discs for
Master C
Figure 1
-6
The Order of Discs
in MM mode
Page 17
12
Counter:
Specify Counter
Specify Counter:
[0 ] OK?
Counter:
No Counter
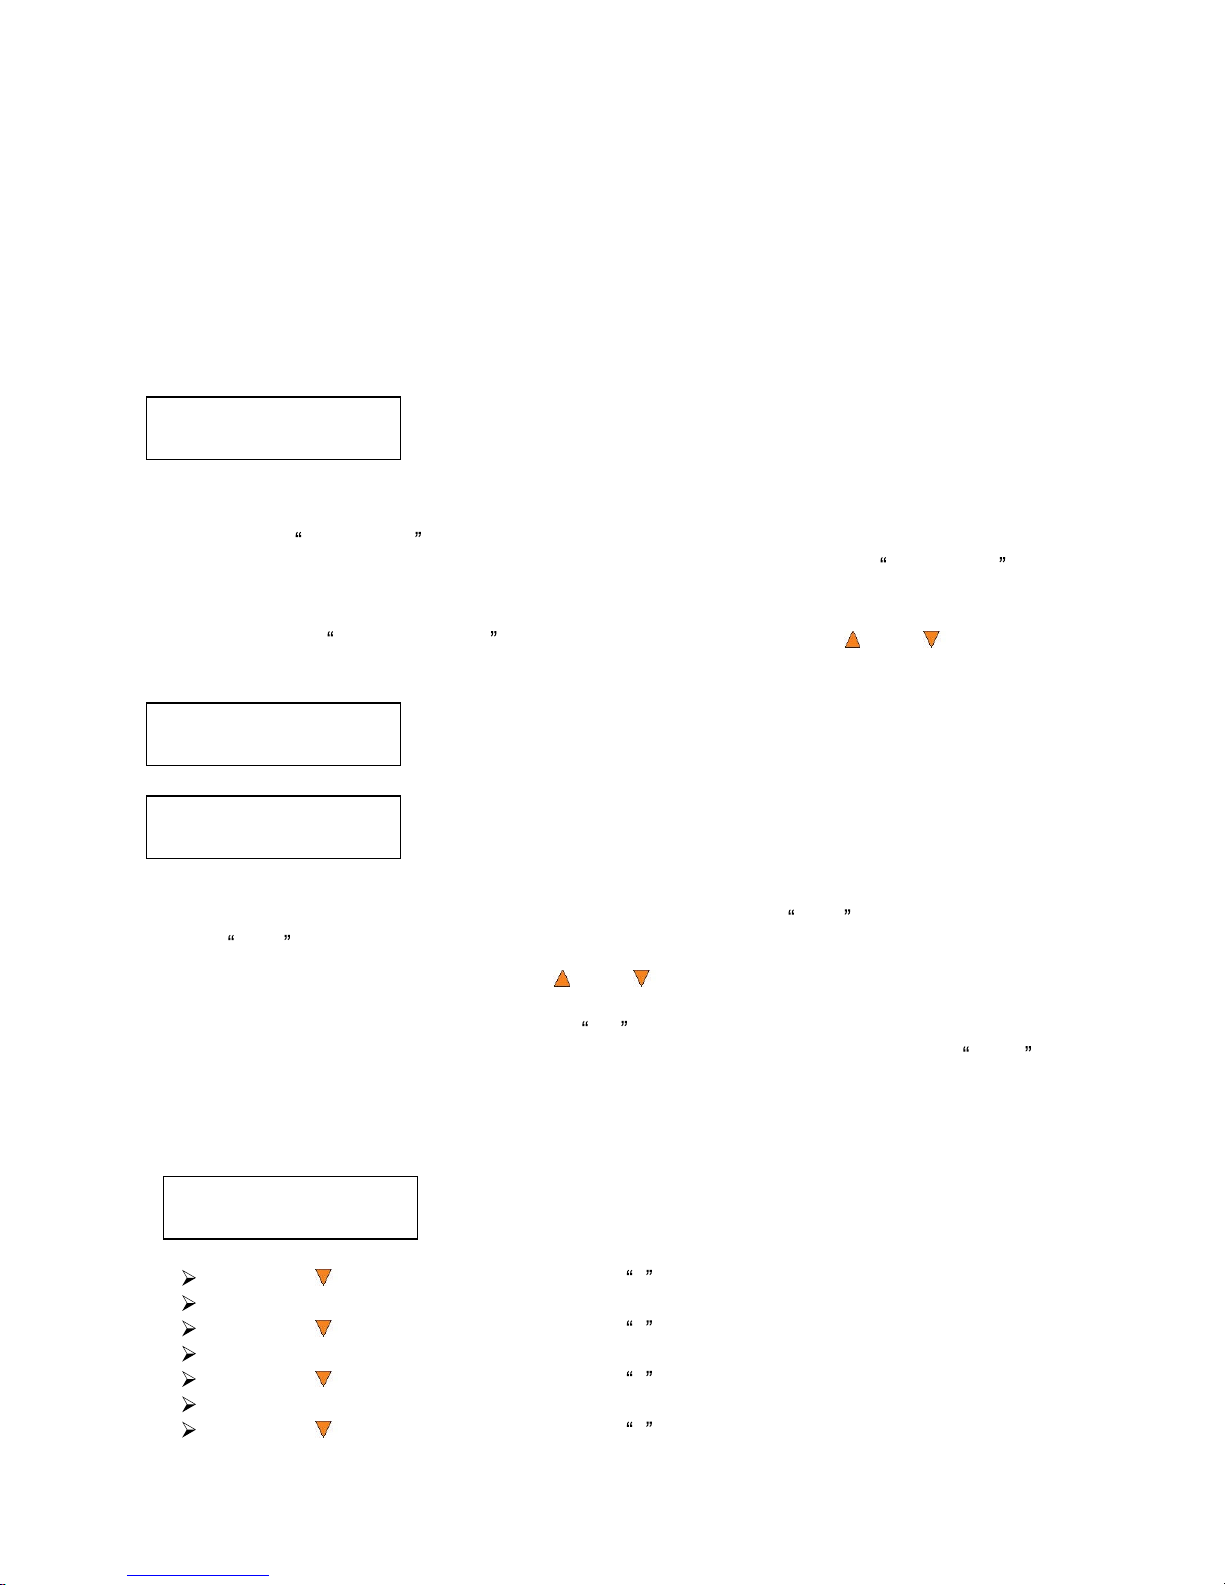
6
. Setting
Counters and Assigning Names
Two frequently used tasks are setting counters a
nd assigning names to parti
tions. Directions for
these tasks are given here.
6
.1 Setting Counters
The
autoloader frequently gives you the option to set a counter so that the machine can keep
track of the number of copies made. Fol
low these steps when y
ou see
the Counter Selection
Menu:
The Counter Selection Menu lets you set how many copies you
want to make for your project. The Counter Selection feature tells
the
autoloader to count the number of successful copies you have
made and
stop the job
when
the desired number of successfully
co
pie
d discs has been
reached.
You can select No Counter if you prefer to copy continuously with no in
terruption. (It will still
count the number of copies, but it will not notify you when to stop.) To select No Counter , simply
press the
ENT/
Enter button when you see the screen above.
Or, you can select Specify Counter between 1 to 9999 by pressing the
Up or Down button
to go to
the Specify Counter menu:
Press the
ENT/
Enter button to select this option. You w
ill see the
next
Specify Counter menu.
To specify the number of copies for your project, you need to
enter/input a four-digit number.
If you need to specify a number that is less than four digits, fill the leading spaces with zeros (any
leading zeros
will be skipped). Examples of four
-digit numbers are 0234 (two hundred and thirty
four), or 0010 (ten).
To enter the number, you need to use the
Up or Down button to select the number for each
digit and use
the
ENT/
Enter
button or
the
ESC
/Escape button
to move the cursor position right or
left. Once you've finished, move the cursor to OK and press
the
ENT/
Enter button. For example,
if you want to specify a counter value of 21 (twenty one). The 4
-digit value would be 0021. To
input the de
sired qu
antity, do the following:
Make sure the cursor is located at the first
position (
First blinking position):
Press the Down button
repeatedly until 0 is displayed.
Press
ENT/
Enter button once to move the cursor to the
next position.
Press the
Down
button repeatedly until 0 is displayed.
Press
ENT/
Enter button once to move the cursor to the next position.
Press the
Down
button repeatedly until 2 is displayed.
Press
ENT/
Enter button once to move the cursor to th
e next position.
Press the Down
button repeatedly until 1 is displayed.
S
pecify Counter:
[0 ] OK?
Page 18
13
Now, 0021 is displayed, press
ENT/
Enter
button once and the cursor moves to OK .
Then, press the
ENT/
Enter button once to submit your counter value.
The loader will now start
loading disc from the input Spindle and place them into
all drive trays.
6
.2 Editing Names
When you create either a new user or a partition, you need to assign a name to it. The example
shown here shows how to name or rename a partition, but the proces
s for naming or renaming
the
user name
is identi
cal.
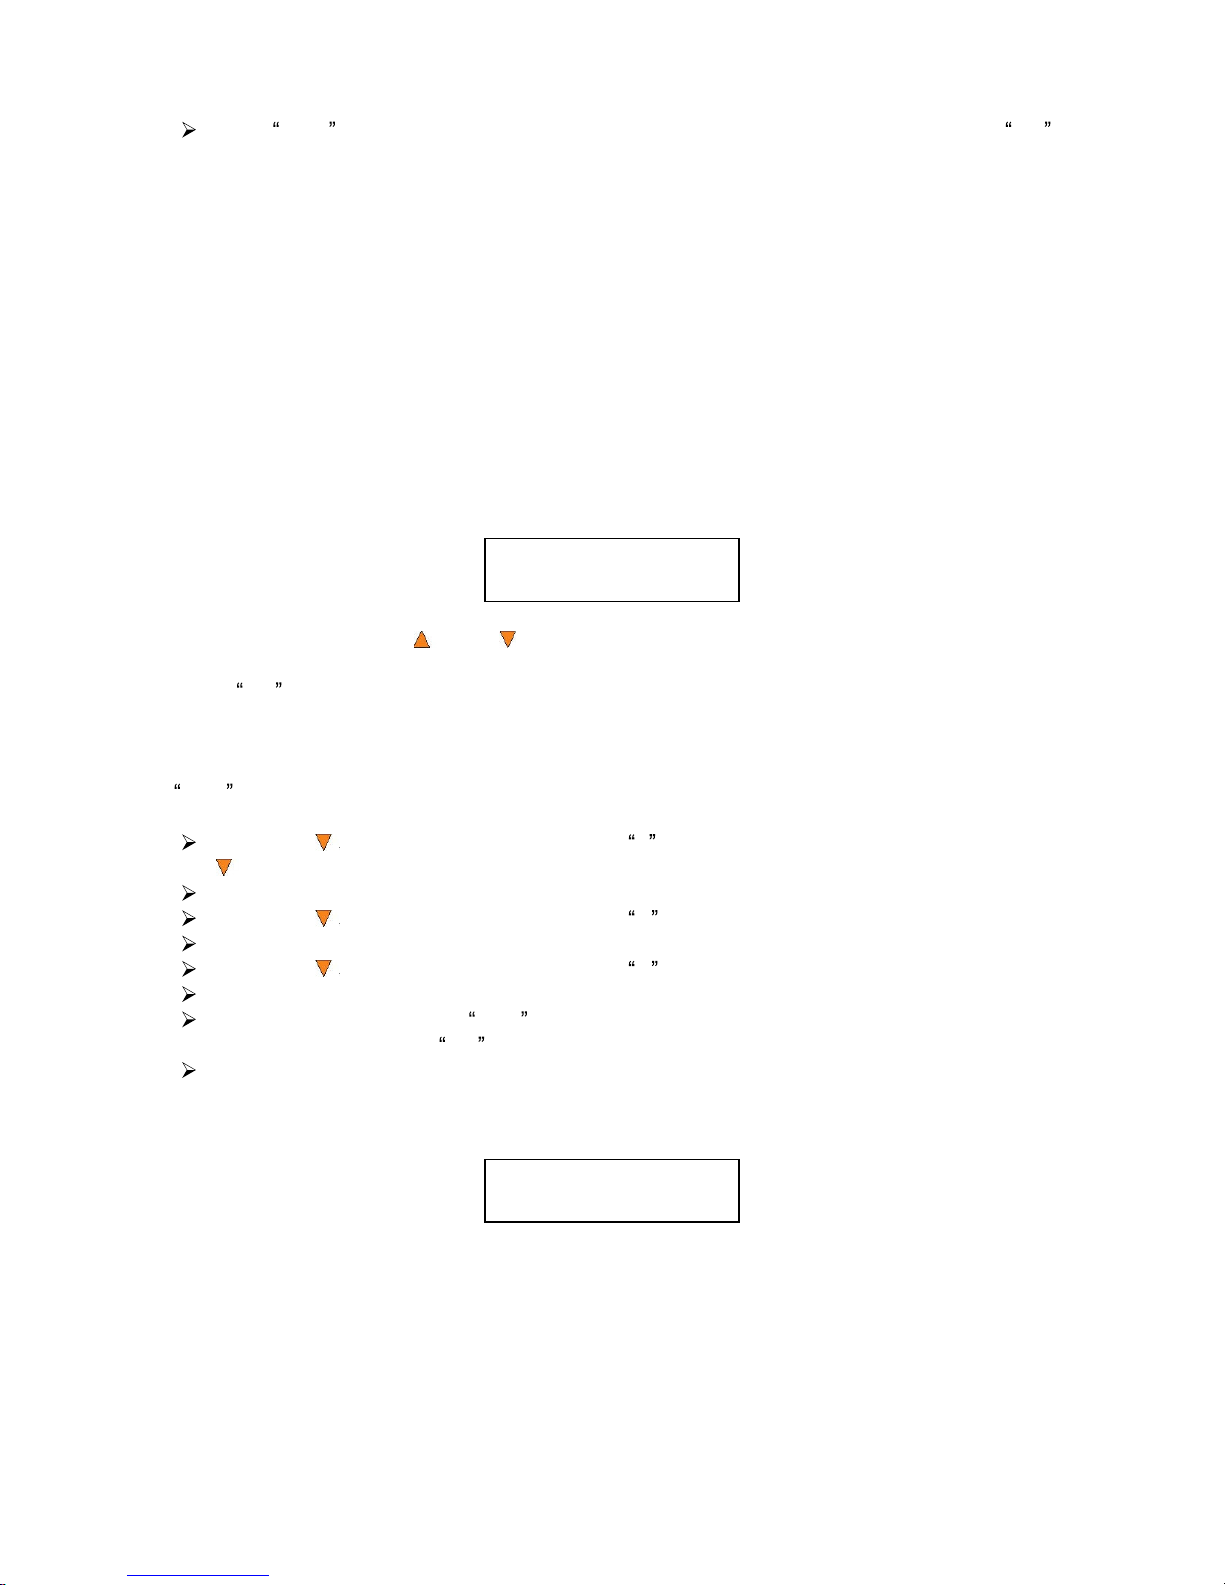
During the process of creating a new partition
, you will see the Edit Partition Name menu:
To enter the name, use the
Up or
Down button to select the character and u
se the
ENT/
Enter or
ESC
/Escape button to move the cursor position. Once you've finish
ed, move the
cursor to OK and
press the
ENT/
Enter button.
The name for a partition can be up to eight characters long, and the characters can be any alpha
(A...Z) or n
umeric (0...9) value. For ex
ample, if you want to name the partition for your master disc
as FUN . Then follow this example:
Press the Down
button repeatedly until F is displayed. (You can also hold the
Down button
down, and the
autoloader will scr
oll through the alphabet.)
Press the
ENT/
Enter button once to move the cursor to the next posi
tion.
Press
the Down
button repeatedly until U is displayed.
Press the
ENT/
Enter button once to move the cursor to the next posi
tion.
Press the Down but
ton repeatedly until N is displayed.
Press the
ENT/
Enter button once to move the cursor to the next posi
tion.
Once yo
u have the name FUN displayed
, press
the
ENT/
Enter button repeatedly until
the
cursor is moved to OK .
Then press the
ENT/
Enter bu
tton once to submit your name selection.
You will now see the following confirmation screen:
Note: After you submitted the Partition name, the system will automatically append a
suffix of .VEF. However, this does NOT apply for User Name input.
Press the
ENT/
Enter button to confirm.
Loading Partition?
[FUN.VEF], OK?
Edit Partition Name
[ ] OK?
Page 19

14
Discmakers X.xx
1. Copy (SM)
Discmakers X.xx
8. Master Mode
Master Mode:
Multi Master
Master Mode:
Single Master
Chapter 2: Operation
This chapter shows each of the menu options and how they are used.
1. Copy
The Copy menu option or the front panel Copy quick key have two different modes of operation:
Single Master Mode: This mode requires that a single master disc is loaded onto the hard
drive prior to initiating the duplication process. This mode is ideal if your job involves one
or very few master disc(s).
Multi Master Mode (Batch Mode):
This m
ode does not require you to manually pre-load
your master onto the HDD. Simply place the master disc(s) on top of the corresponding
stack of blank discs needed for that particular job. This mode is ideal if you have numerous
master discs and fewer copies f
or each master disc.
These modes are described in detai
l in Single Master and Multi Master Modes on
page 13. If you
are making copies in Single Master Mode, contin
ue on to the next section. If y
ou are making
copies in Multi Master Mode, jump ahead to
Making Copies in Multi Master Mode on
page 18.
1.1 Making Copies in Single Master Mode
This process will copy your master disc on to several blank discs simulta
neously. This mode
requires that your master disc is loaded into a partition on the Hard Driv
e. See Load Partition on
page 26 for
instructions on how to do this.
Turn on your
autoloader and wait until it has booted up. It
may take several minutes for the
autoloader to go through
its self adaptive
test and auto-calibration pro
cedures. You shoul
d see
the following signifying your
autoloader is ready:
1.1.1 Select Single Master Mode
Make sure the
Master Mode is set to Single
Master m
ode (SM).
If it is
already in Single Master Mode (SM), please skip to
step 1.1.2 that
starts the copy process.
If it
is not, use the
Up or
Down button
to navi
gate to the
8. Master Mode screen.
Press the
ENT/
Enter button to enter the
Master Mode Menu and you
will see a screen similar to one of the following:
Use the
Up or
Down
button to se
lect Single
Master Mode.
Press
the
ENT/
Enter button to submit your selection.
Page 20
15
Discmakers X.xx
1. Copy
(SM)
Choose Partition
[FUN.VEF] 4012MB
Counter:
No Counter
Preparing...
Please Wait
OK: 0 NG: 0 NB: 0
Input Bin > Drive01
Processing...
Please Wait
1.1.2 Start the Copying Process
Go back to the
1. Copy Menu.
Use the
Up or
Down
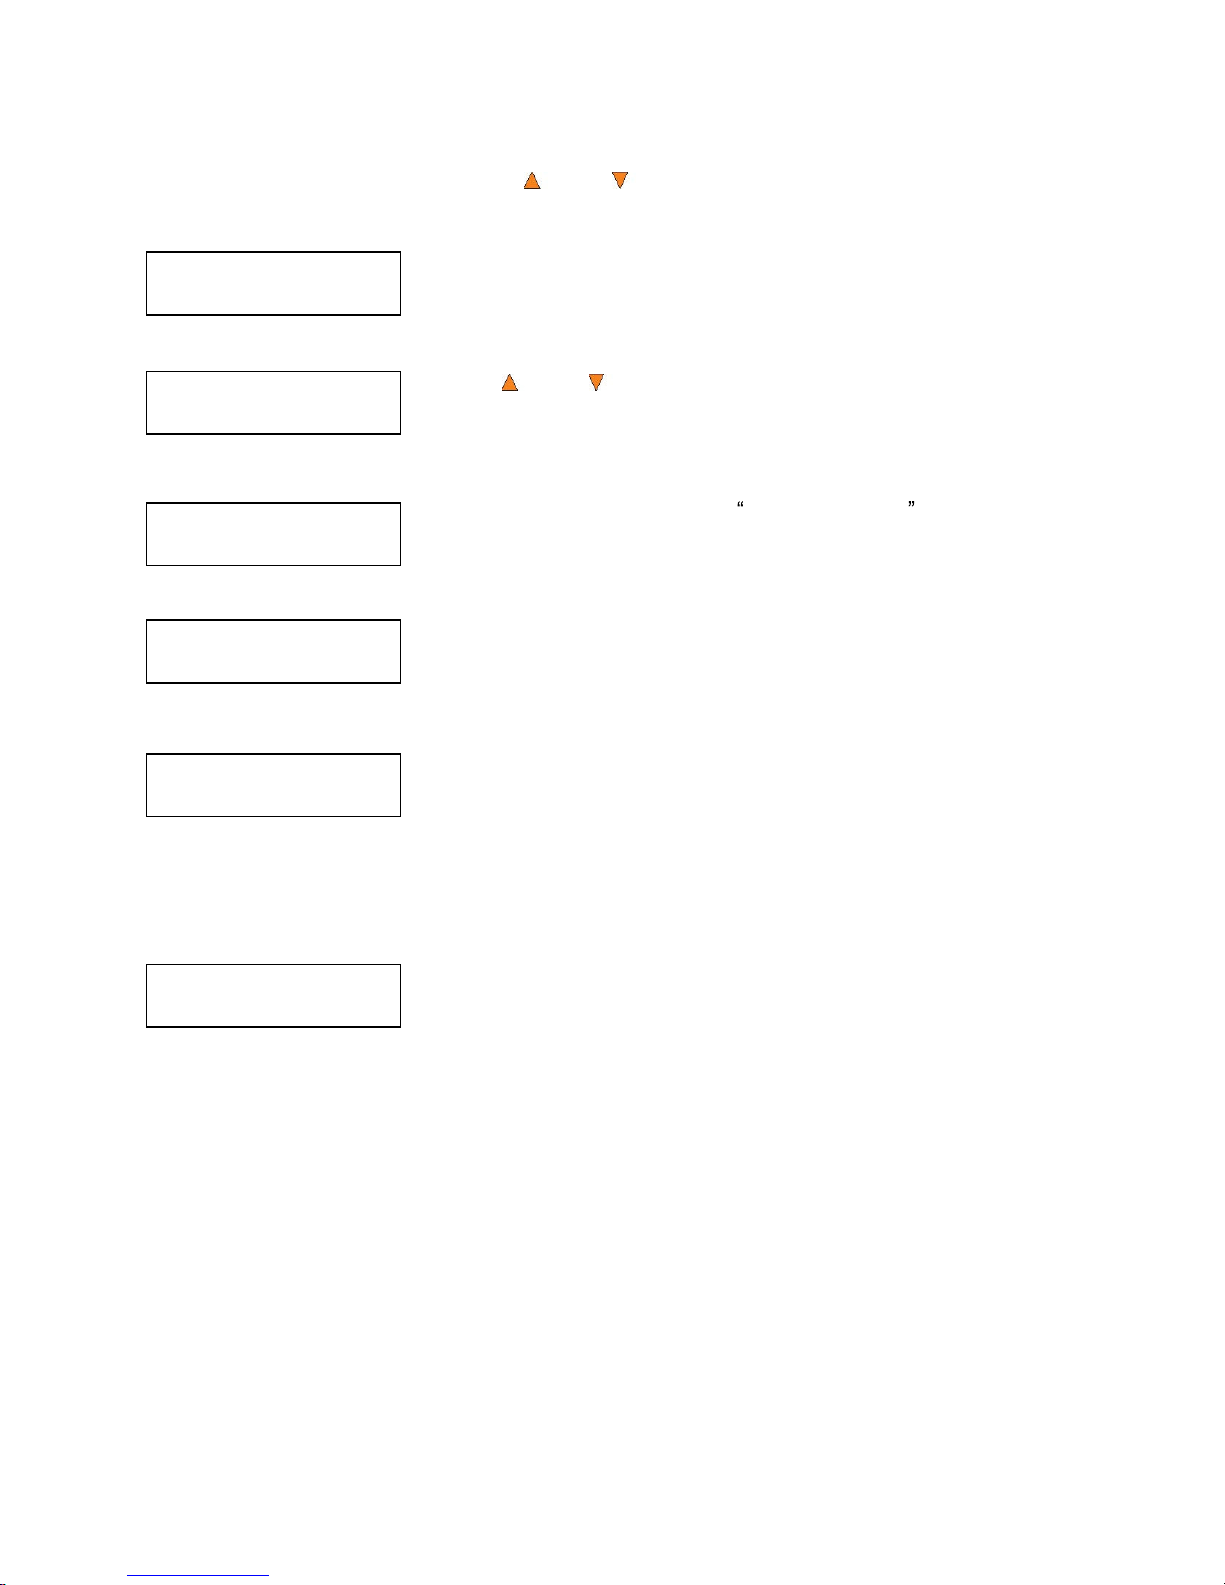
button to navigate to the following
screen:
Start the Copy Process. Insert your blank discs on to the
Input
Sp
indle and press the
ENT/
Enter button to enter the 1.Copy menu.
You will see the
Choose Partition menu:
Use the
Up or
Down button to find the partition where your
master disc is stored. Press
the
ENT/
Enter button to select that
Partition. Next, you wi
ll
see the Counter Selection menu:
Follow the instructions shown in Setting Counters on
page 14
to
continue. Once the counters have been set, press
the
ENT/
Enter
button to confirm. You will see the Pr
eparing screen:
After a short interval, the rob
otic loader will pick the top disc from the
input spindle and place it into one of the
drives
. As this is happening,
you will see a screen similar to
below:
This information screen shows what is happening. In this case, the
loader has taken a disc from the input spindle and is placing it into
Drive 1.
The loader will continue to remove discs from the input spindle and place
those into drives until
either all of the drives are full, or the count that you loaded into the counter is reached.
It take
s a few seconds for the
autoloader to recognize all the discs.
Page 21
16
OK: 3 NG: 0 NB: 0
Input Bin > Drive01
Input Bin Empty
Reset Hopper?
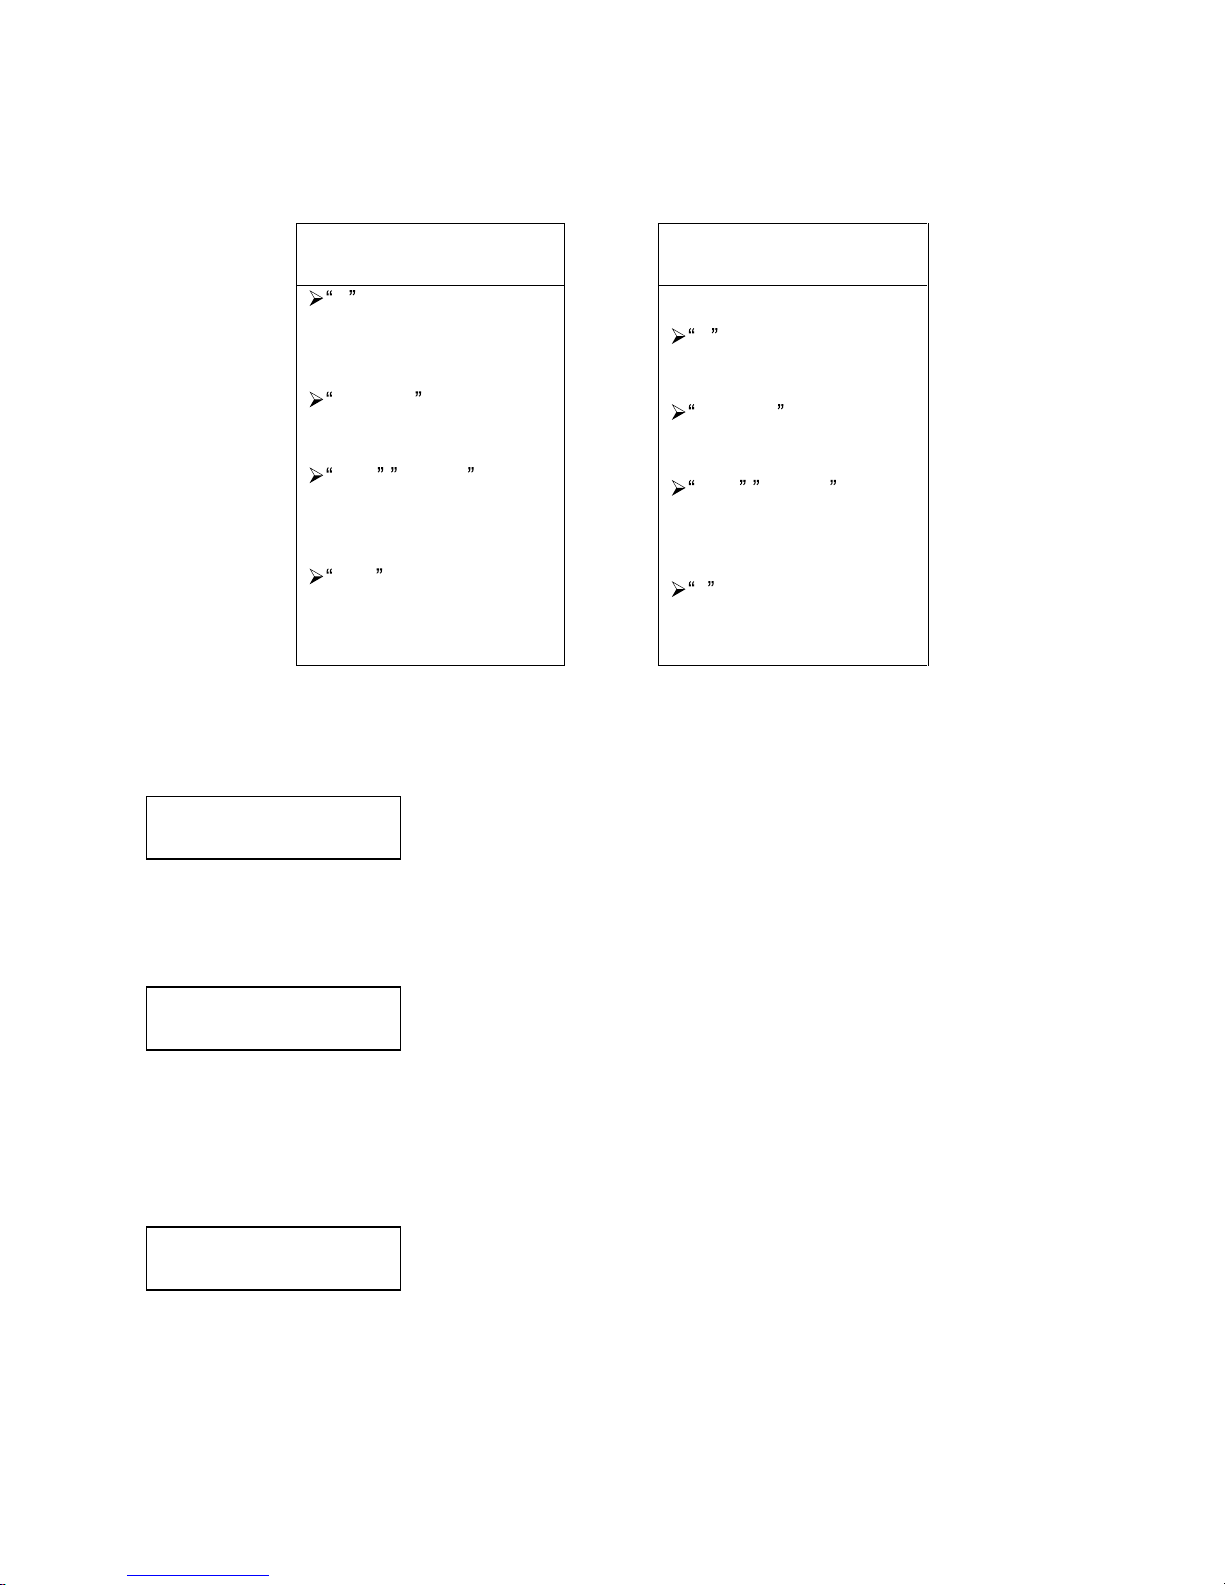
After two or three seconds of processing time, one of the following
Copy Progress screens will
appear.
Counter Specified
No Counter Specified
Copying...
H4012MB
0/21 12%
481MB
or:
Copying... H4012MB
0
12%
481MB
H indicates the
source of the job
resides in the Hard
Drive
.
4012MB indicates the
ca
pacity of the master
disc.
12% / 481MB
indicates the current
progress of the
duplication.
0/21 indicates you
have
a project size of
21 copies and you have
made 0 copies so far.
H indicates the source
of the job resides in the
Hard Drive.
4012MB indicates the
ca
pacity of the master
disc.
12% / 481MB
indicates the current
progress of the
duplication.
0 indi
cates you have
made 0 copies so far.
Note: It is normal to see the progress indicator stay at 0%-
10% and 100% for
approximately 30 seconds for CD duplication and up to one minute for DVD
/Blu-Ray Disc
duplication. That is caused by the initializing and fi
nalizing stages.
Once the duplication run is completed, the loader will remove the
fi
nished disc from a drive and place the successful copy on the
Output Spindle or if
it is a bad
/NG copy,
the job will be aborted.
After the loader has placed the copied disc into the Output Spindle, t
he loader will then pick up
another blank disc and load it into the drive.
The copying process will continue until you either run out of blank
discs or until the count that you loaded into the counter is reached.
If y
ou run out of blank discs and the job is not complete, the
autoloader will give you an opportunity
to fill the spindle:
Important: When you add discs to the input spindle, be sure to remove your finished discs
f
rom the
Output Spindle
.
At this point you
can
either put more discs on to the input spindle
and
press
the
ENT/
Enter button to continue, or press the
ESC
/Escape
button to terminate your project.
OK: 3 NG: 0 NB: 0
Drive01
> Output Bin
Page 22
17
Discmakers X.xx
1. Copy (MM)
Discmakers X.xx
8. Master Mode
Drive 1
OK: 1 NG: 0 NB: 0
Access Drive Log?
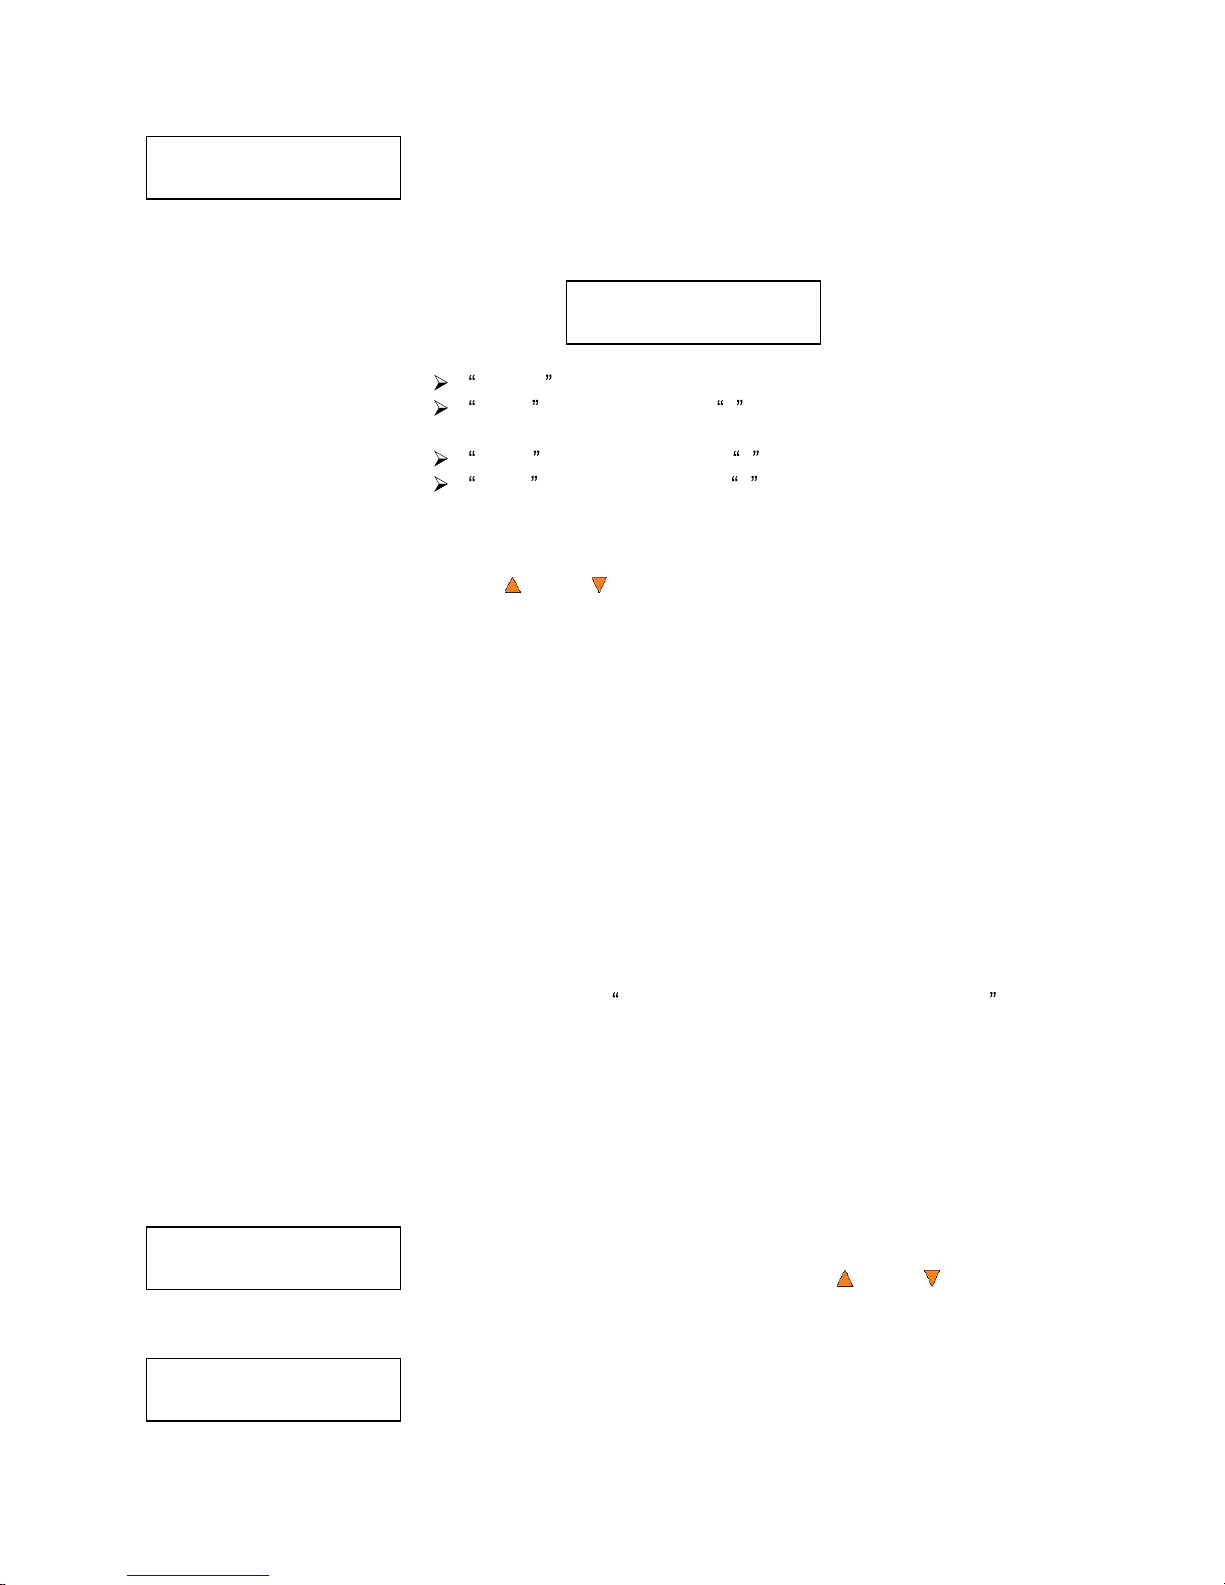
Upon project termination, you shall see the
Access
Drive Log menu.
You can press the
ENT/Enter butto
n one more time to see the
drive
log that indicates the number of passes and fails for every drive/tray,
or simply press the
ESC
/Escape button to go back to the main menu.
If you choose to see the
drive
log file, you will see a screen similar to
below:
Drive 1 indicates
the below
results
are for the
1
st
drive.
OK: 1 indicates there is 1 success
ful
copy made by this
drive.
NG: 0 indicates there are 0 bad copies
created by this
drive.
NB: 0 indicates there are 0 discs in this
drive that were
not
recorded due to non-recording error such as invalid media type,
etc.
U
se the
Up or
Down buttons to look at the drive
log file for the
various drives. Press the ESC
/Escape button to return to the
1.Copy
menu
1.2 Making Copies in Multi Master Mode
This mode does not require you to manually load your master on to the HDD
. Simply place the
master disc(s) on top of the stack of blank discs needed for that particular job. This mode is ideal
if you have numerous master discs and fewer copies for each ma
ster disc.
The Multi Master mode uses the Reserve partition to temporarily store the content of
the
current
master disc. Once the task is complete and a new master disc has been de
tected, the reserve
partition's content (of
the
previous master disc) wil
l be replaced with the content of the new master
disc.
For more information on Multi Master Mode, see Single Master and Multi Master Modes on
page
13.
Turn on your
autoloader and wait until it has booted up. It
may
take several minutes for the
autolo
ader to go through its self adaptive test and auto-calibration pro
cedures. You should see
the following signifying your
autoloader is ready:
1.2.1 Select Multi Master Mode
Make sure the
autoloader is set to
Multi Master mode (MM).
If it is
already in Multi
Master mode (MM),
please skip to step 1.2.2 that
starts the copy process. If it is not, use the
Up or
Down button
to navi
gate to
the screen 8. Master Mode.
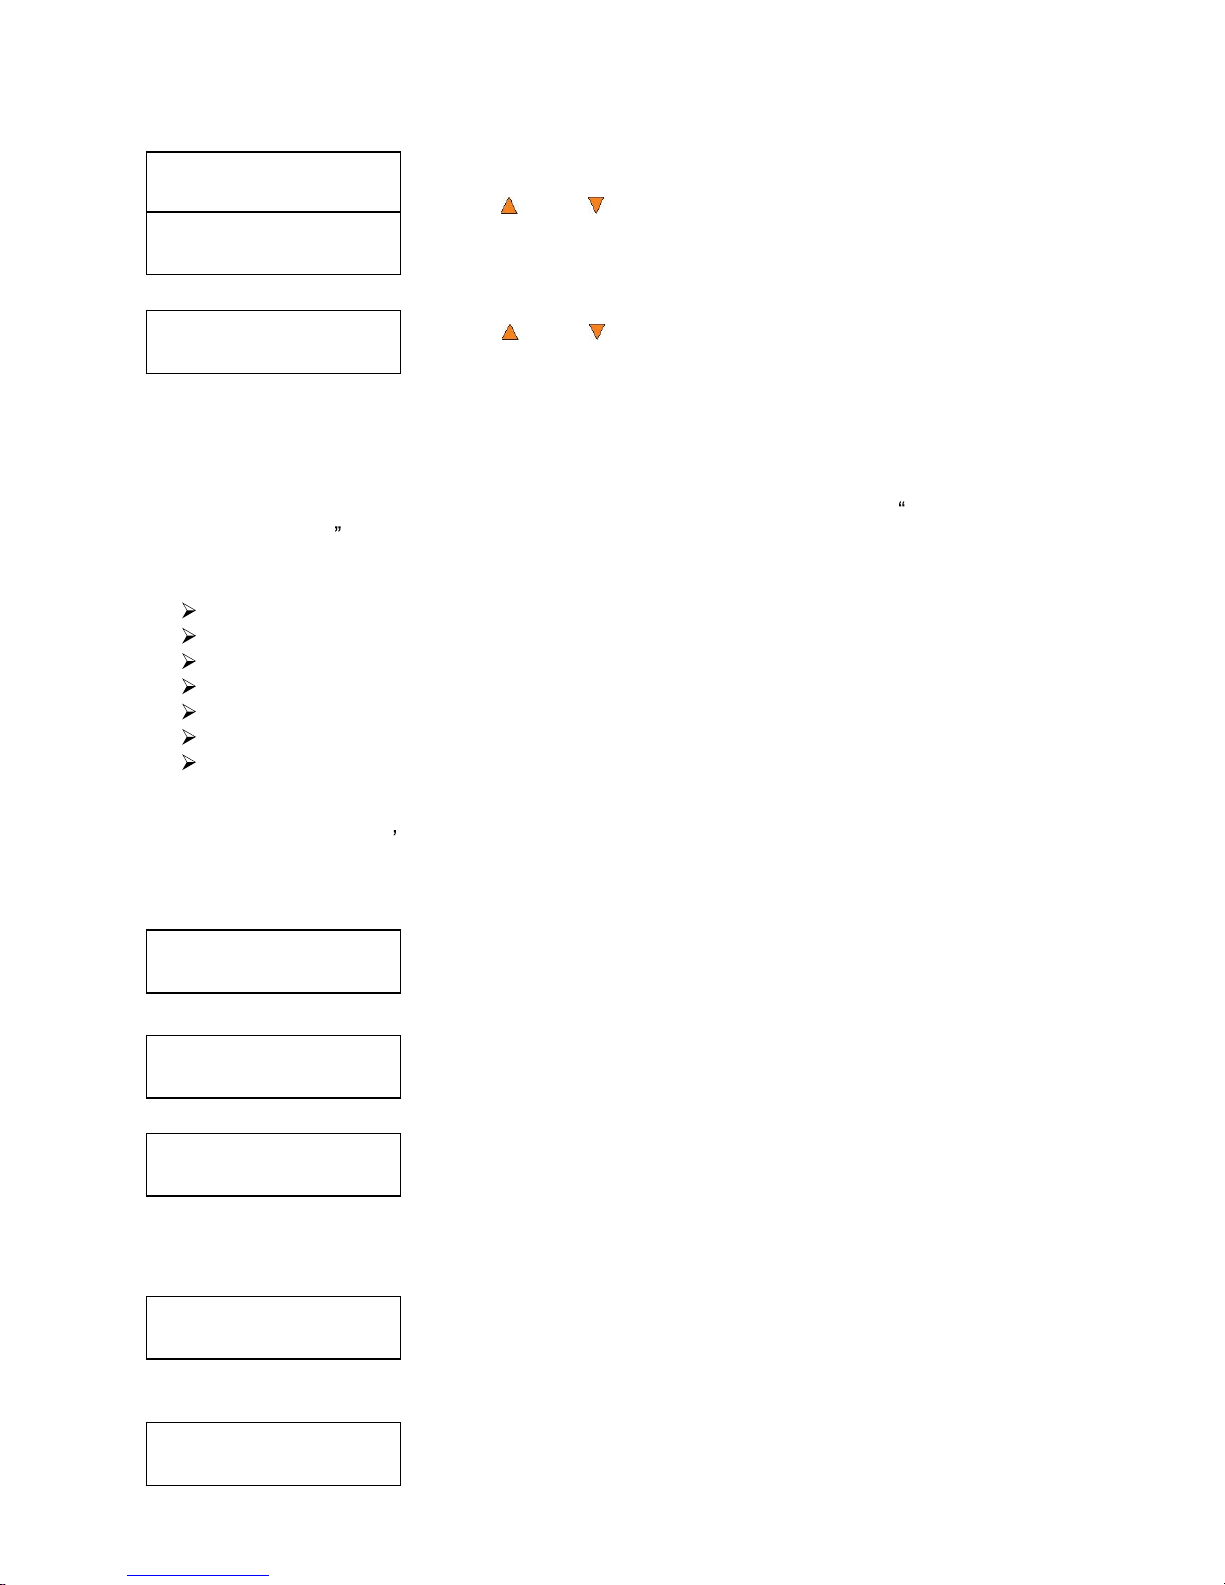
Press the
ENT/
Enter button to enter the
Master Mode Menu and you
will see a screen similar to one of the following:
Page 23
18
Master Mode:
Single Master
Master Mode:
Multi Master
Discmakers
X.xx
1. Copy
(MM)
Discmakers X.xx
1. Copy
(MM)
Preparing...
Please Wait
OK: 0 NG: 0 NB: 0
Input Bin > Drive01
Processing...
Please Wait
Copying... H4012MB
0
12%
481MB
Use the
Up or
Down
button to se
lect
Multi Master Mode. Press
the ENT/
Enter button to submit your selection.
Use the
Up or
Down
button to navigate
back to the
1. Copy
Menu.
1.2.2 Start the Copying Process
Place your mas
ter discs and blank discs onto the
Input Spindle as described
in Single Master and
Multi
Master Modes on
page 13. In general, the order of the discs on the spindle will be,
from top
to bottom:
The master
disc
for the first job
The blank discs for the
first job
The master
disc
for the second job
The blank discs for the second job
The master
disc
for the third job
The blank discs for the third job
etc.
Duplication Jobs with different formats among CD/DVD/BD can be
intermixed. The
autoloader will
au
tomatically detect a job s master and blank disc format and copy them when they match.
You should still be at the
1. Copy Menu:
Press the
ENT/
Enter button to start the duplication job.
After a short interval, the robotic loader will pick the top
disc (master
disc) from the
Input Spindle and place it into one of the drives. As this
is happening, you will see a screen similar to
below:
This information screen shows what is happening. In this case, the
loader has taken a disc from the
Input Spindle and is placing it into
Drive 1.
The loader will con
tinue to
take discs from the
Input Spindle and place them into drives until e
ither
all of the drives are full or
the
Input Spindle is empty.
It takes a few seconds for the
autoloader to recognize all of the discs
in the trays.
Once all of the discs are detected, the
autoloader will
detect the
master disc and the duplication process will start for the remaining
Page 24
19
Input Bin Empty
Press OK to Finish
Master 01
OK: 1 NG: 0 NB: 0
Access Job Log?
Access Drive Log?
Drive 1
OK: 1 NG: 0 NB: 0
blank discs. When the duplication process is through, the loader will
place the master d
isc and successful copies onto the Output
Spindle
.
In Multi Master Mode, the robotic arm continues to load more media into the drives from Input
Spindle while the duplicated discs are placed in the Output Spindle. Once a new Master disc
has
been detected
by any of the drives, this process will repeat for the new Master disc.
When all of the jobs are complete, and the
autoloader detects
the Input
Spindle is empty, it
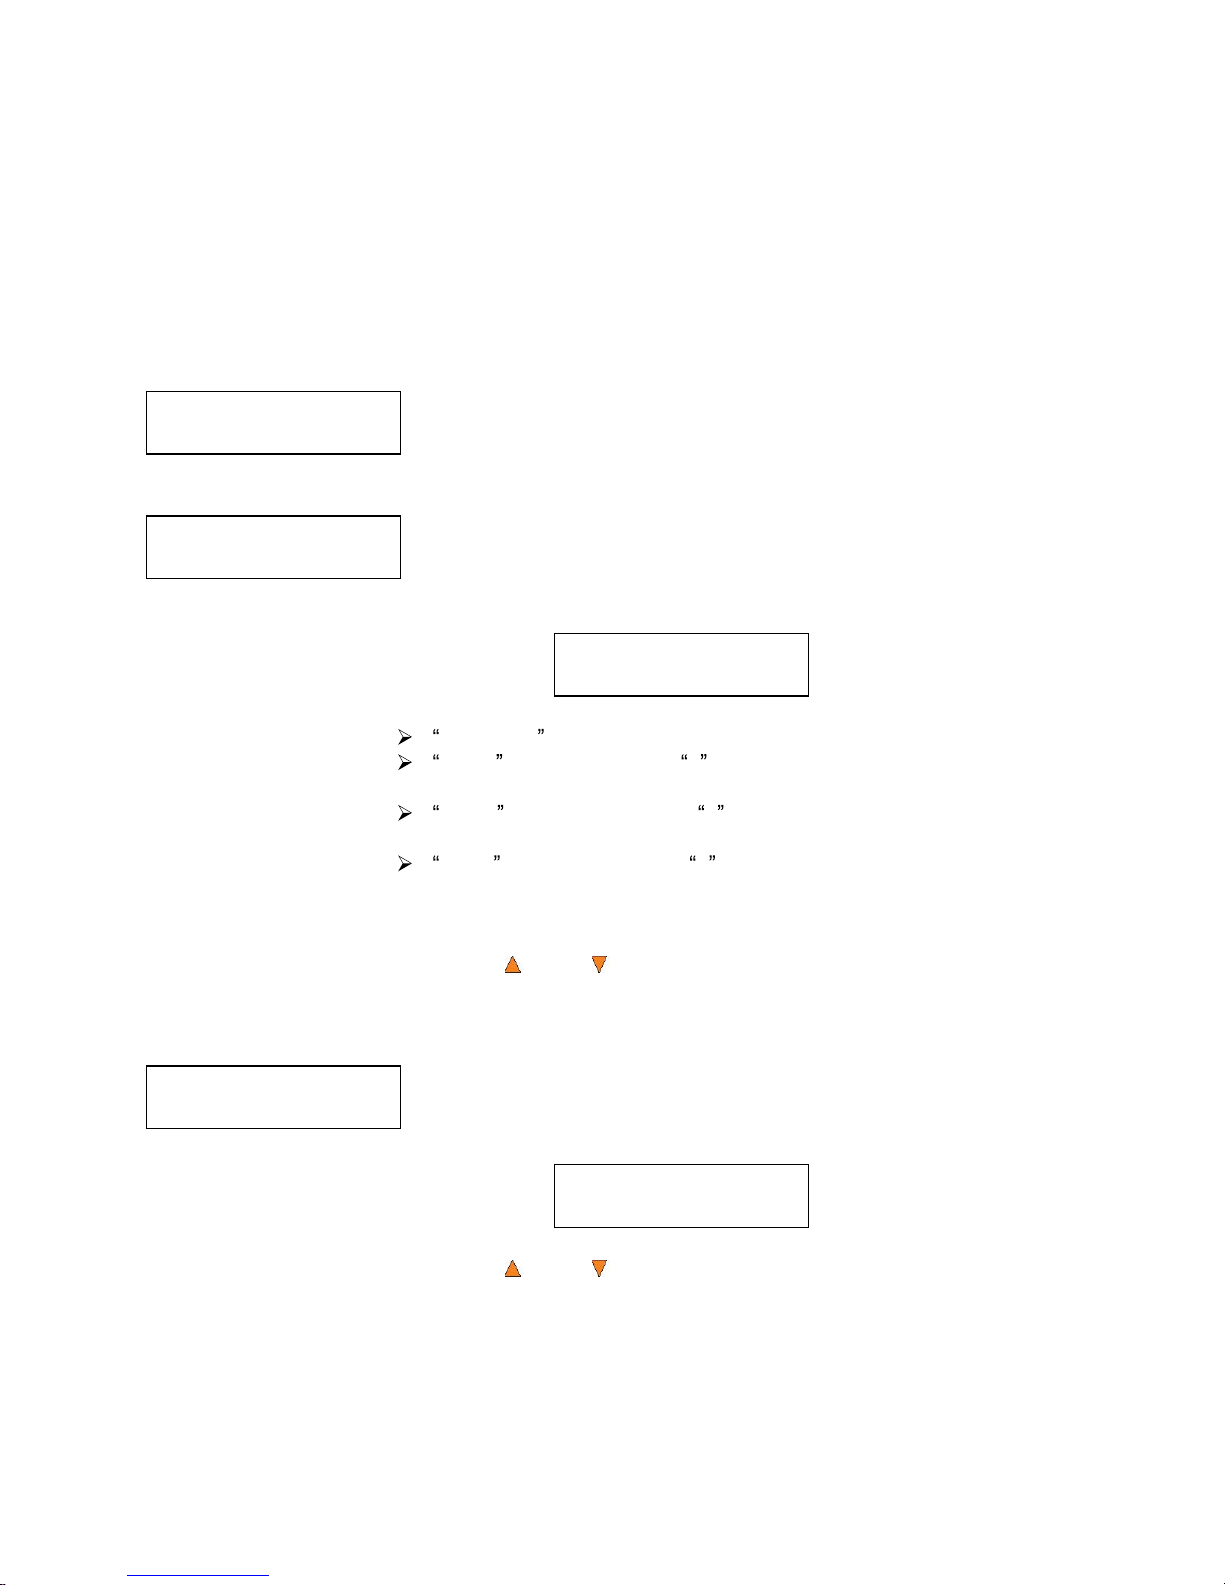
presents you with the Input Bin Empty message:
P
ress the
ENT/
Enter button to continue and
you will see the
Access
Job
Log screen:
You can press the
ENT/
Enter button one more time to see the
job
log that indicates the number of passes and fails for every
job/Master
Disc
, or simply press the
ESC
/Escape button to go to the
Access
Drive Log screen
. If you choose to see the
job
log file, you will see a
screen similar to below:
Master
01
indicates the below results are for the 1
st
master disc.
OK: 1 indicates there is 1 success
ful copy made
for this master
disc
.
NG: 0 indicates there are 0 bad copies c
reated
from this master
disc
.
NB: 0 indicates there are 0 discs that w
ere not recorded
from this
master disc
due to non-recording errors such as invalid media type,
etc.
Use the
Up or
Down buttons to look at the log file for
the
various jobs. Press the ESC
/Escape button to
go to the
Access
Drive Log screen
You can press the
ENT/
Enter button one more time to see the
drive
log that indicates the number of passes and fails for every drive/tray,
or simply press the
ESC
/Escape bu
tton to go to the
main menu
. If
you choose to see the
drive
log file, you will see a screen similar to below:
Use the
Up or
Down buttons to look at the drive
log file for the
various
drives
. Press the ESC
/Escape button to return to the
1.Copy
menu
Page 25
20
Discmakers X.xx
1. Copy
(MM)
Discmakers X.xx
3. Compare
Choose Partition
[FUN.VEF] 4012MB
Counter:
No Counter
Preparing...
Please Wait
Loader Processing
Input Bin > Drive 1
2. Test
Use the
Test
menu or
Test quick key to simulate the copy process. With sim
ulation, write once
recordable discs such as DVD-R, or CDR will be reusable. The purpose of simulation is to ensure
error free duplication.
Note: Due to physical lim
itations of the BD-R/
DVD+R recordable format, if you try to
simulate BD-R/
DVD+R copying, you will encounter failure messages.
Warning
: If you are using CD/DVD
/BD Rewritable discs as your media during the
simulation, the content on those discs will be perm
anently erased.
Operation in Test mode is identical to operation in Copy mode. See Copy on
page 16 for
instructions.
3. Compare
Use the Compare function to perform a bit-by-bit comparison between the content of your master
disc(s) in the Hard Drive
and the contents of all discs it copied. This en
sures that all of your copies
are identical to original master disc(s).
Note: The bit-by-bit comparison will only apply on all
Blu-Ray Discs,
DVDs and Data CDs.
A
readability check will be applied for othe
r formats like Audio CDs, CD+G, and
Video CD discs due to their lack of error correction mechanisms.
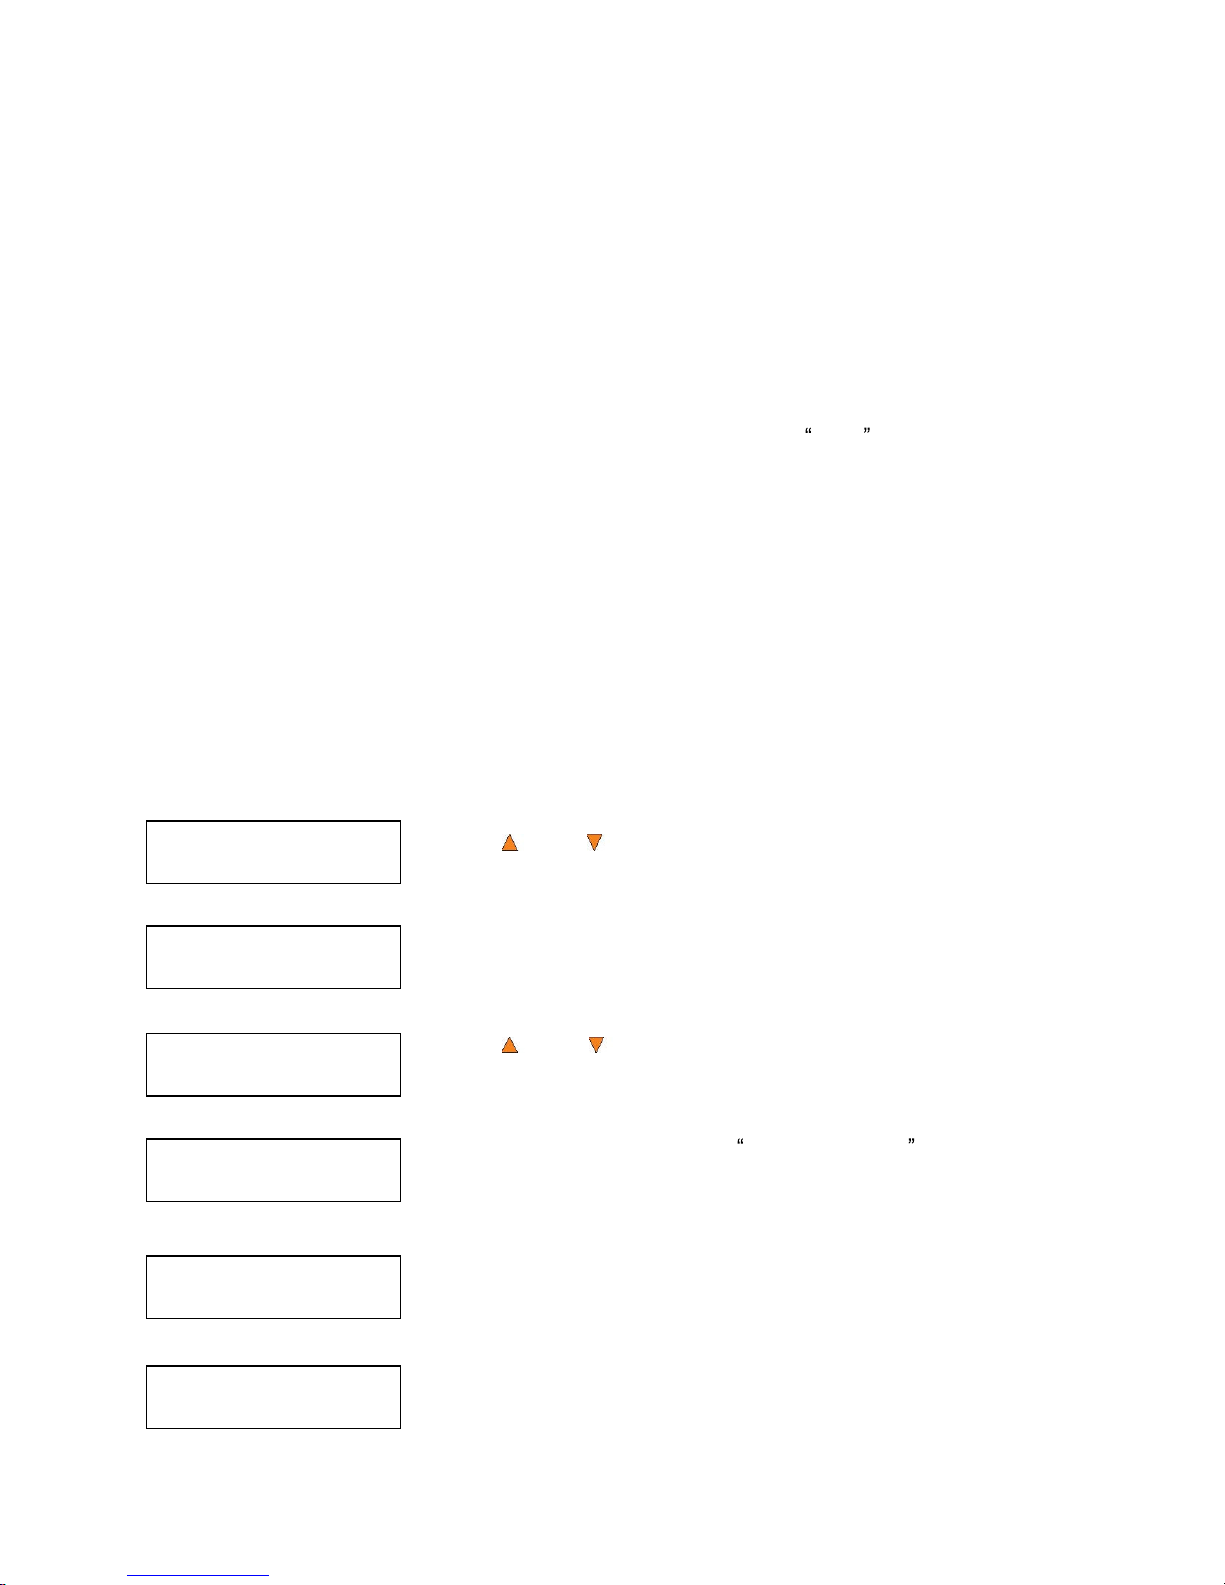
If you are at the
1. Copy Menu,
do the following
:
Use the
Up or
Down button to find the
3. Compare menu.
Press the
ENT/
Enter
button
on
3. Compare menu
to enter the
Choose Partition Menu and you will see a screen similar to the
following:
Use the
Up or
Down button to find the partition where your
master disc is stored. Press the
ENT/
Enter button to select that
Partition. Next, you will see the Counter Selection menu:
Follow the instructions shown in Setting Counters on
page
14
to
continue. Once the counters have been set, press the
ENT/
Enter
button to confirm. You will see the
Preparing screen.
After a short interval, the robotic loader will pick the top disc from the
input spindle and place it into one of the drives. As this is happening,
you will see a screen similar to below:
This information screen shows what is happening. In this case, the
loader has taken a disc from the input sp
indle and is placing it into
Drive 1.
Page 26
21
Processing...
Please Wait
The loader will continue to remove discs from the input spindle and place them into drives until
either all of the drives are full, or the count that you loaded into the counter is reached.
It takes a few seconds
for the
autoloader to recognize all the discs.
T
he
system will
then
compare the discs in the trays to the
content of the
master disc residing in the
Hard Drive partition you specified
. When the comparison
job
is complete, the
autoloader will
place
the good discs
and failed discs into corresponding areas and
you will see a PASS/FAIL
result
screen similar to this:
Counter Specified
No Counter Specified
PASS 16 FAIL 0
Job Completed!
Press OK to Finish
or:
Input Bin Empty
Reset Hoppers?
PASS 16 indi
cates 16 discs
have
been
compared successfully
.
FAIL 0
indicates
none of the discs
have failed
.
Press the
ENT/
Enter
button to finish
Input Bin Empty
indicates that the
system has run out of discs to
compare.
If you have more discs to compare, yo
u
can empty the Output
Spindle; place
the discs to be compared in the Input
Spindle and Press the
ENT/
Enter
button to continue.
If you have no more discs to compare,
press
the
ESC
/Escape button to
terminate the operation.
4. Test+Copy
With the Test
+ Copy menu option, the autoloader simulates the copying process, and then
makes copies if everything works correctly. If a failure is encountered
on a disc
during the
simulation,
it will not be copied during the copying process
. T
he discs that passed the
simulation
will move on to the copying process. If any part of this process fails, the job will be aborted.
Operation in
Test+Copy menu is identical to operation in
Copy menu
. See Copy on p
age 16 for
instructions.
5. Copy+Compare
The
Copy + Compare
menu option is used to make verified copies. After the copy process is done,
the
autoloader automatically compares the
copies to the master content resid
ing in the h
ard
drive
to ensure that they are identical. When the operation is complete, the
autoloa
der automatically
places good disc
s on to the O
utput
Spindle. If any part of this process fails, the job will be aborted.
Operation in
Copy+Compare menu is identical to operation in
Copy
menu. See Copy on
page 1
6
for instructions.
Page 27
22
Discmakers X.xx
1. Copy
(MM)
Discmakers X.xx
6. Select Burn Speed
HDD to CD Speed
32x
Select Burn Speed
HDD to CD Speed
6. Select Burn Speed
The
Select Burn Speed menu option or the
Speed quick
key is used to adjust the duplicatio
n
speed for the various
disc formats. By default, the duplication speed will be set to the optimal
speed. However, under some circumstances you might want to lower down the duplication speed.
Those circumstances are:
Poor Blank Media Quality - When your media quality is
sub-par
, lowering the duplication
speed is necessary to make good copies.
Duplication Quality - Overall, the lower the speed, the higher the qual
ity of your duplicates.
If you have time, it is a good choice to lower the speed to produce the best quality
duplicates.
If you are at the
1. Copy Menu,
do the following
:
Use the
Up or
Down button to find the
6. Select
Burn
Speed
menu.
Press the ENT/
Enter button at
6. Select Burn Speed menu
and you
will see the
Select Burn Speed menu similar to below:
There are
three recording speed types that can be set:
HDD to CD: Copy Hard Drive CD Content to CD-R/RW Discs
speed.
HDD to DVD: Copy Hard Dri
ve DVD Content to DVD±R/RW Discs.
HDD to BD: Copy Hard Drive Blu-Ray Content to BD-R/RE
Discs.
Depending upon the type of duplication and your
autoloader restrictions, you need to select the
correct
format in order to take effect. To select the recording speed
options
, use the
Up or
Down button to find the desired speed for the appropriate format and p
ress the
ENT/
Enter
button to enter the menu
. Y
ou will see a menu sim
ilar to this:
Use the
Up or
Down button to find the desired speed. Press
the
ENT/
Enter button to
set the desired recording speed.
Page 28
23
HDD to CD Speed
Adjusted to: 8x
Di
scmakers X.xx
1. Copy
(SM)
Discmakers X.xx
8. Master Mode
Master Mode:
Single Master
Master Mode:
Multi Master
The options that are available are shown in Table 2-1.
Duplication Type Speeds Available
HDD to CD Speed
1x, 2x, 4x, 8x,
10x,
12x, 16x, 24x, 32x,
40x, 48x, 52x
HDD to DVD
Speed
1x, 2x, 2.4x, 4x, 6x, 8x,
12x, 16x, 18x,
20x
HDD to
BD
Speed
1x, 2x, 2.4x, 4x, 6x, 8x, 12x, 16x, 18x,
20x
Table 2-1 Duplication Speeds
These options migh
t change depending on the CD, DVD
or Blu-Ray Disc W
riters
pre-installed in
your
system.
Note: The speed that you
choose may be adjusted by the drives and/or the media for
optimized duplication.
Once your selection has been changed successfully, you
will
see the following screen for 2
seconds:
You will automatically be returned to the Main Menu.
7. Select So
urce
The
Select Source menu or the
Source quick
key is used to set the Master Reading Source. In the
autoloader, the Master Reading Source is always
the
Hard
Drive.
8. Master Mode
The
Master Mode menu is used to select between Single Master mode or Mu
lti Master mode. For
more information on the modes,
see Single Mas
ter and Multi
Master Modes on
page 13.
If you are at the
1. Copy Menu,
do the following
:
Use the
Up or
Down button to find
the
8. Master Mode
menu.
Press the
ENT/
Enter button
on
8. Master Mode to enter the menu
and you will see one of the following screens:
Use the
Up or
Down button to choose between Multi Master
mode and Single Master mode. Press the
ENT/
Enter button to enter
your selection. The system will return you ba
ck to the main menu.
Page 29
24
Discmakers X.xx
1. Copy
(SM)
Discmakers X.xx
9. Erase
Counter:
No Counter
Loader Processing
Input Bin > Drive0
1
Processing ...
Please Wait
Quick Erasing...
0/25
Erase
Full Erase
Erase
Quick Erase
9. Erase
Use the
Erase
menu to erase your Rewritable discs.
Use the
Up or
Down button to find the
9.
Erase
menu.
Press the ENT/
Enter
button on
9.
Erase to enter the menu and you
will see the following screens:
There are
two options:
Full Erase: This option erases the entire disc, destroying all
previously written data in the process.
Quick Erase: This option erases the index (TOC) of the
Rewritable disc, not the data section. It is much faster than
Full Erase. However, t
he data section is still recoverable. In
order to ensure all old content on the RW disc is completely
ereased and unable to be recovered for security purposes,
you must utilize the FULL ERASE function.
Use the
Up or
Down buttons to se
lect between the two options and press the
ENT/
Enter
button to continue.
Follow the instructions shown in Setting Counters on
page
14
to
continue. Once the counters have been set, press
the
ENT/
Enter
button to confirm.
The Robotic Arm will
initiate and pick the dis
cs to be erased from the
Input
Spindle and place them into the drives. As soon
as
the drives
are all full, or the number programmed into the counter is reached,
you will see the following:
The system will check all discs in the drive and prepare them to
be
erased. As soon as the checking process completes, the Erase RW
process starts.
The 0 indicates that zero discs have been erased so far. The 25
indicates the number programmed into the counter. Once
all
the
discs have been erased, you
will
see one
of these PASS/FAIL
screens
(next page):
Page 30
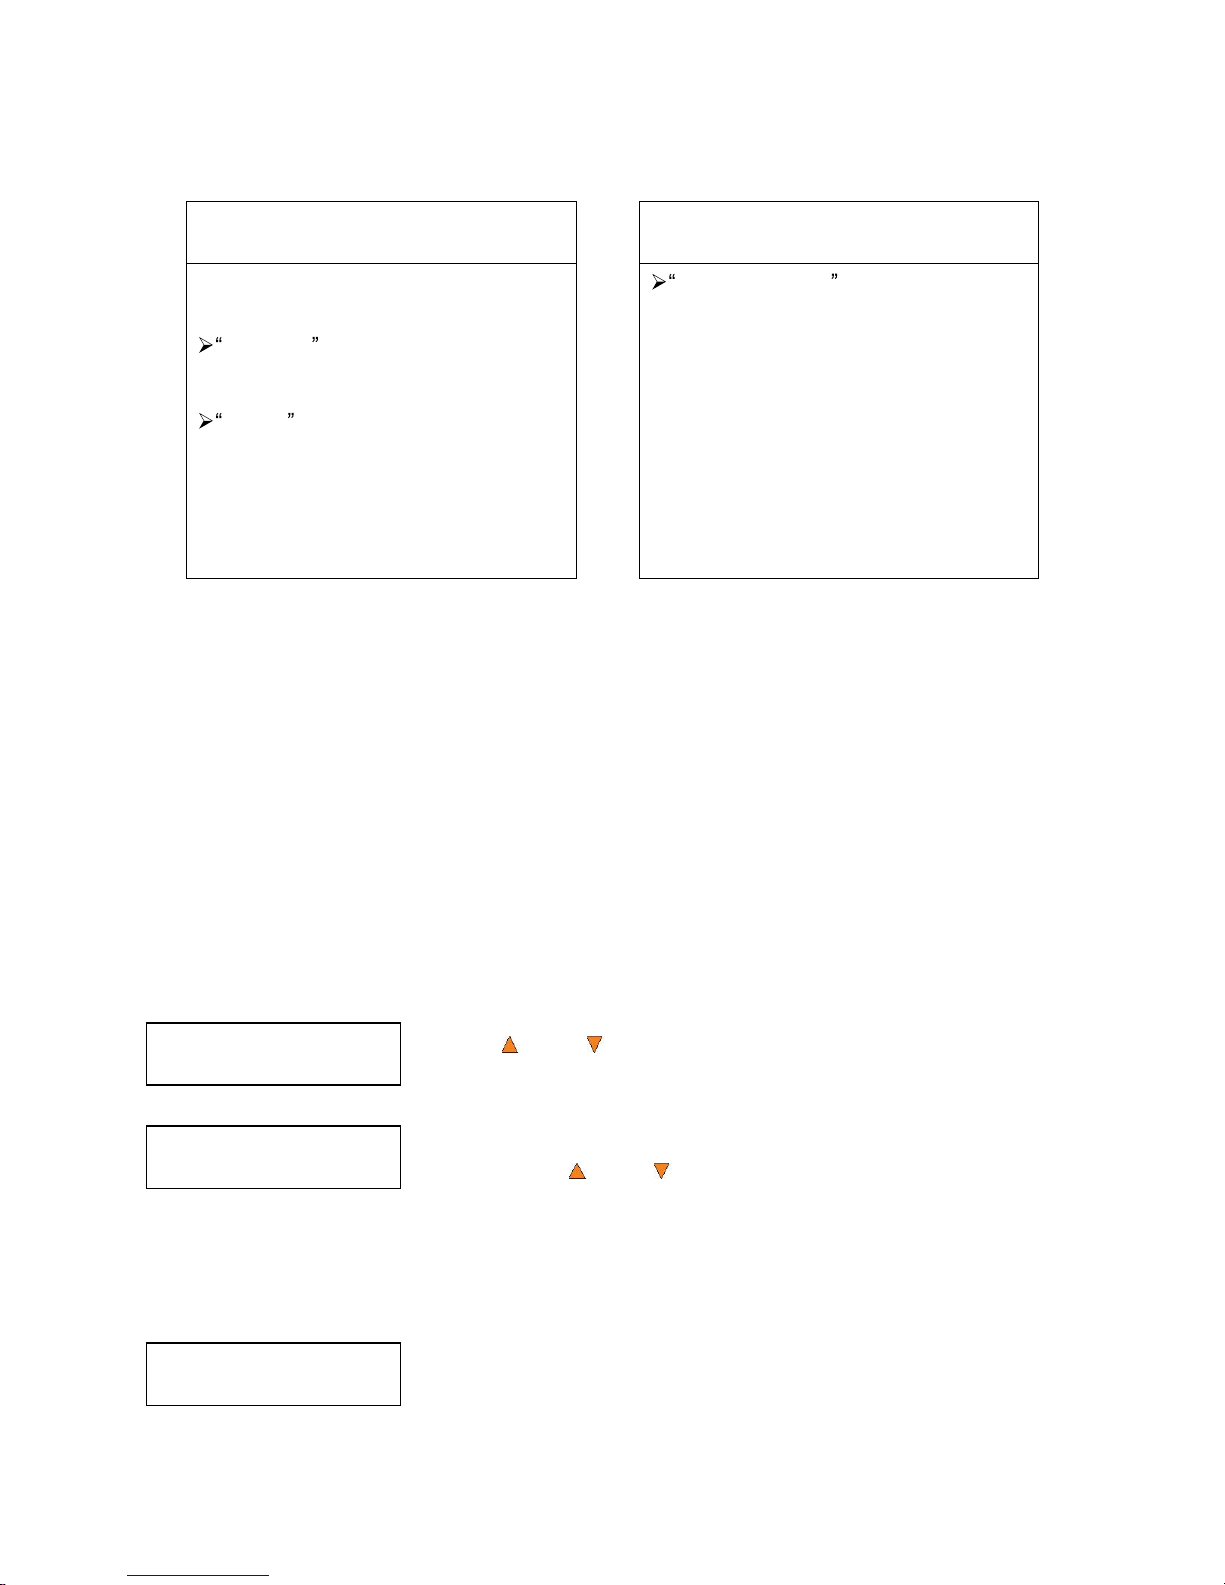
25
Discmakers X.xx
1. Copy
(SM)
Discmakers X.xx
10. Hard Drive Setup
Hard Drive Setup
1. Select Partition
Counter Specified
No Counter Specified
PASS 25 FAIL 0
Job Completed! Press OK to Finish
or:
Input Bin Empty
Reset Hoppers?
PASS 25 indicates 25
discs have
been
erased successfully.
FAIL 0 indicates no
disc
s have
failed the
erase process
.
Press the
ENT/
Enter
button to finish
Input Bin Empty
indicates that the
system has run out of discs to
erase
.
If you have more discs to
erase
, you
can empty the Output Spindle; place
the discs to be
erased in the Inpu
t
Spindle and Press the
ENT/
Enter
button to continue.
If you have no more discs to
erase
,
press the
ESC
/Escape button to
terminate the operation.
10. Hard Drive Setup
The Hard Drive Setup menu consists of
following sub-menus:
1
Select Partition
2
Load
Partition
3
Rename Partition
4
Delete Partition
5
Partition Info
6
Select Loading Drive
7
Format Hard Drive
Each of these menus is discussed in its ow
n subsection.
If you are at the
1. Copy Menu,
do the following
:
Use the
Up or
Down button to find
10. Ha
rd Drive Setup.
Press the
ENT/
Enter button on
10.
Hard Drive Setup to enter the
menu. Use the
Up or
Down button to select between th
e
options.
10.1 Select Partition
The
Select Partition submenu is used to select the partition on the Hard Drive tha
t will be used as
the
default partition
choice for various Hard Drive related tasks.
Press the
ENT/
Enter button to enter the
Select Partition menu.
Page 31
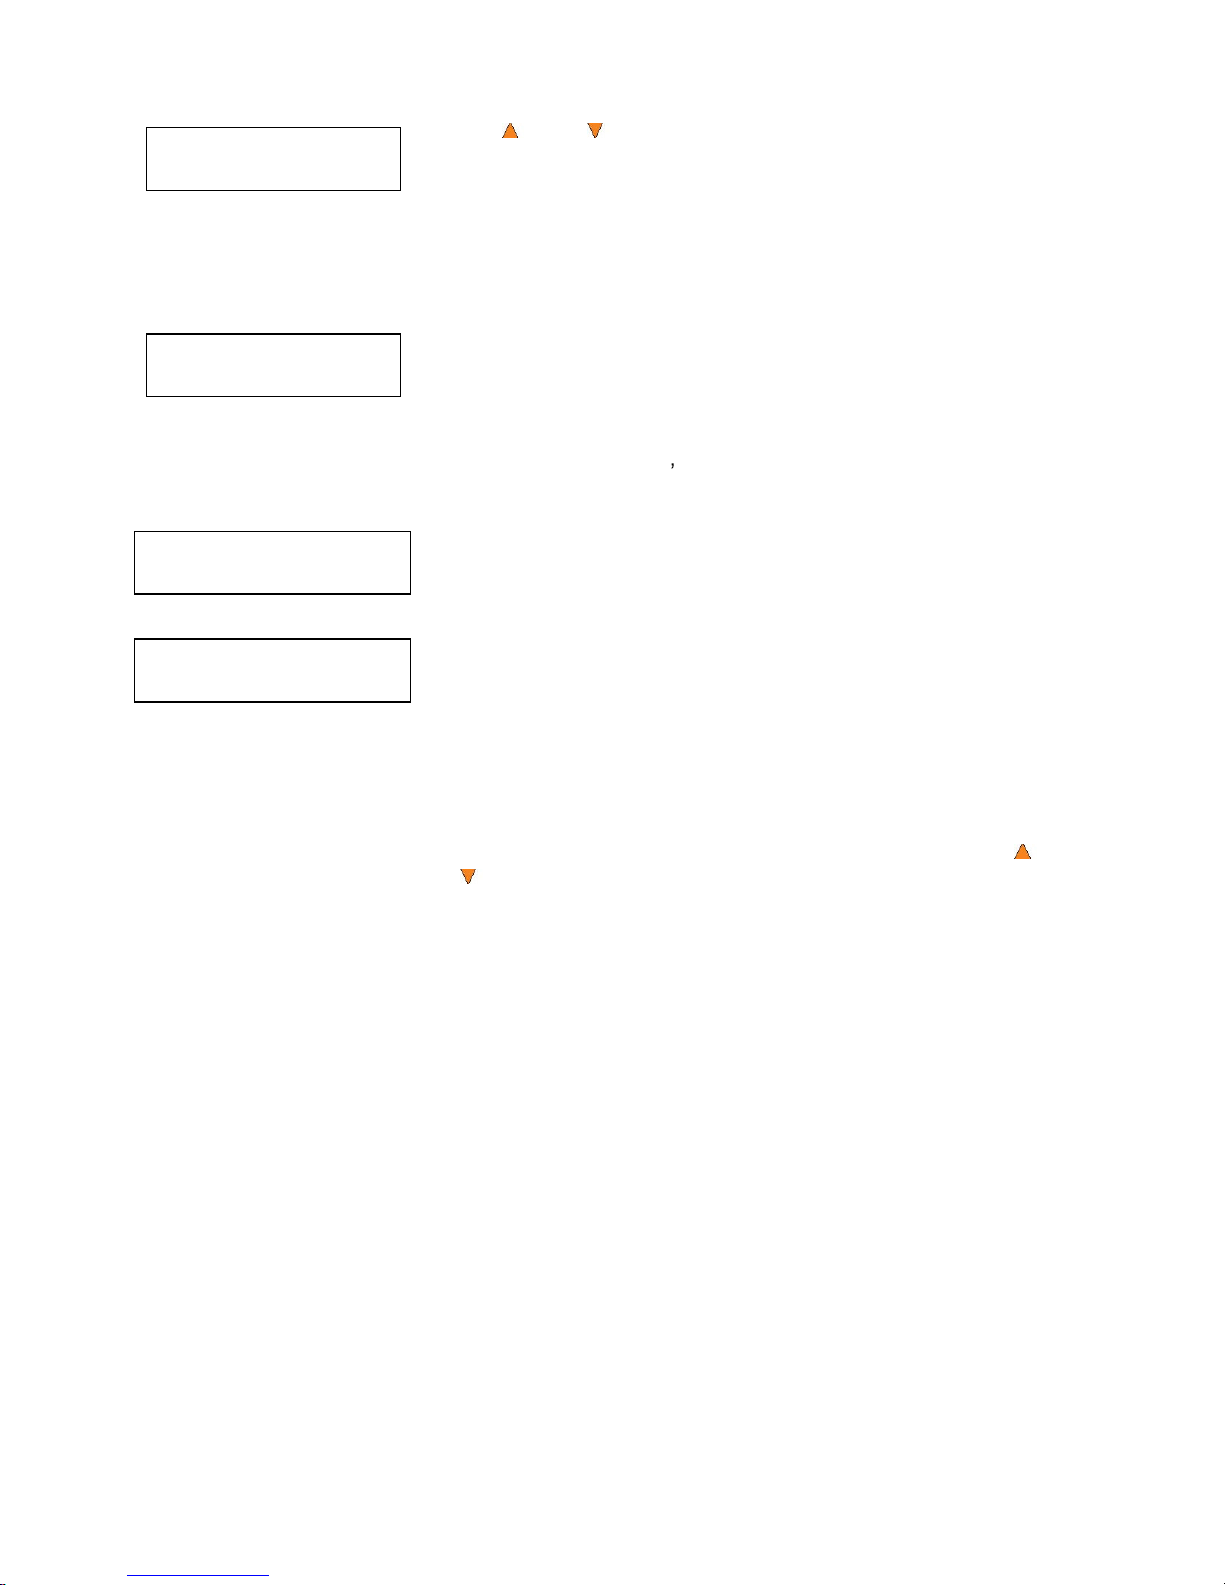
26
Choose Partition
[Reserved.VEF] 82MB
Choose Partition
[FUN.VEF] 4012MB
Hard Drive Setup
2. Load Partition
Load Partition [148GB]
Load -> New Partition
Use the
Up or
Down button to se
lect the desired partition. The
RESERVED partition is reserved for
use by the
System under
Multi-Master mode.
Note:
The RESERVED partition can also be renamed to a
customized name in order to keep
the content permanently if
desired.
Press the
ENT/
Enter button to select the desired partition (named
FUN in this ex
amp
le).
10.2 Load Partition
The Load Partition menu is used to load a master disc
s content
into
the
desired partition on the
Hard Drive.
Press the
ENT/
Enter button to enter the 2. Load Partition menu.
You now have a choice to load your master disc into a new (empty)
parti
tion or overwrite one of the existing partitions (if any exists,
including re
served partitions) by inputting and modifying the name you desire
or you
can simply choose Auto Generate to have the system automatically
gen
-
erate a partition name for you. Afterwards, simply pre
ss the
Up
or
Down button to find your desired selection and press
ENT/Enter to submit your selection. You should see the following
screen (next page)
:
Page 32
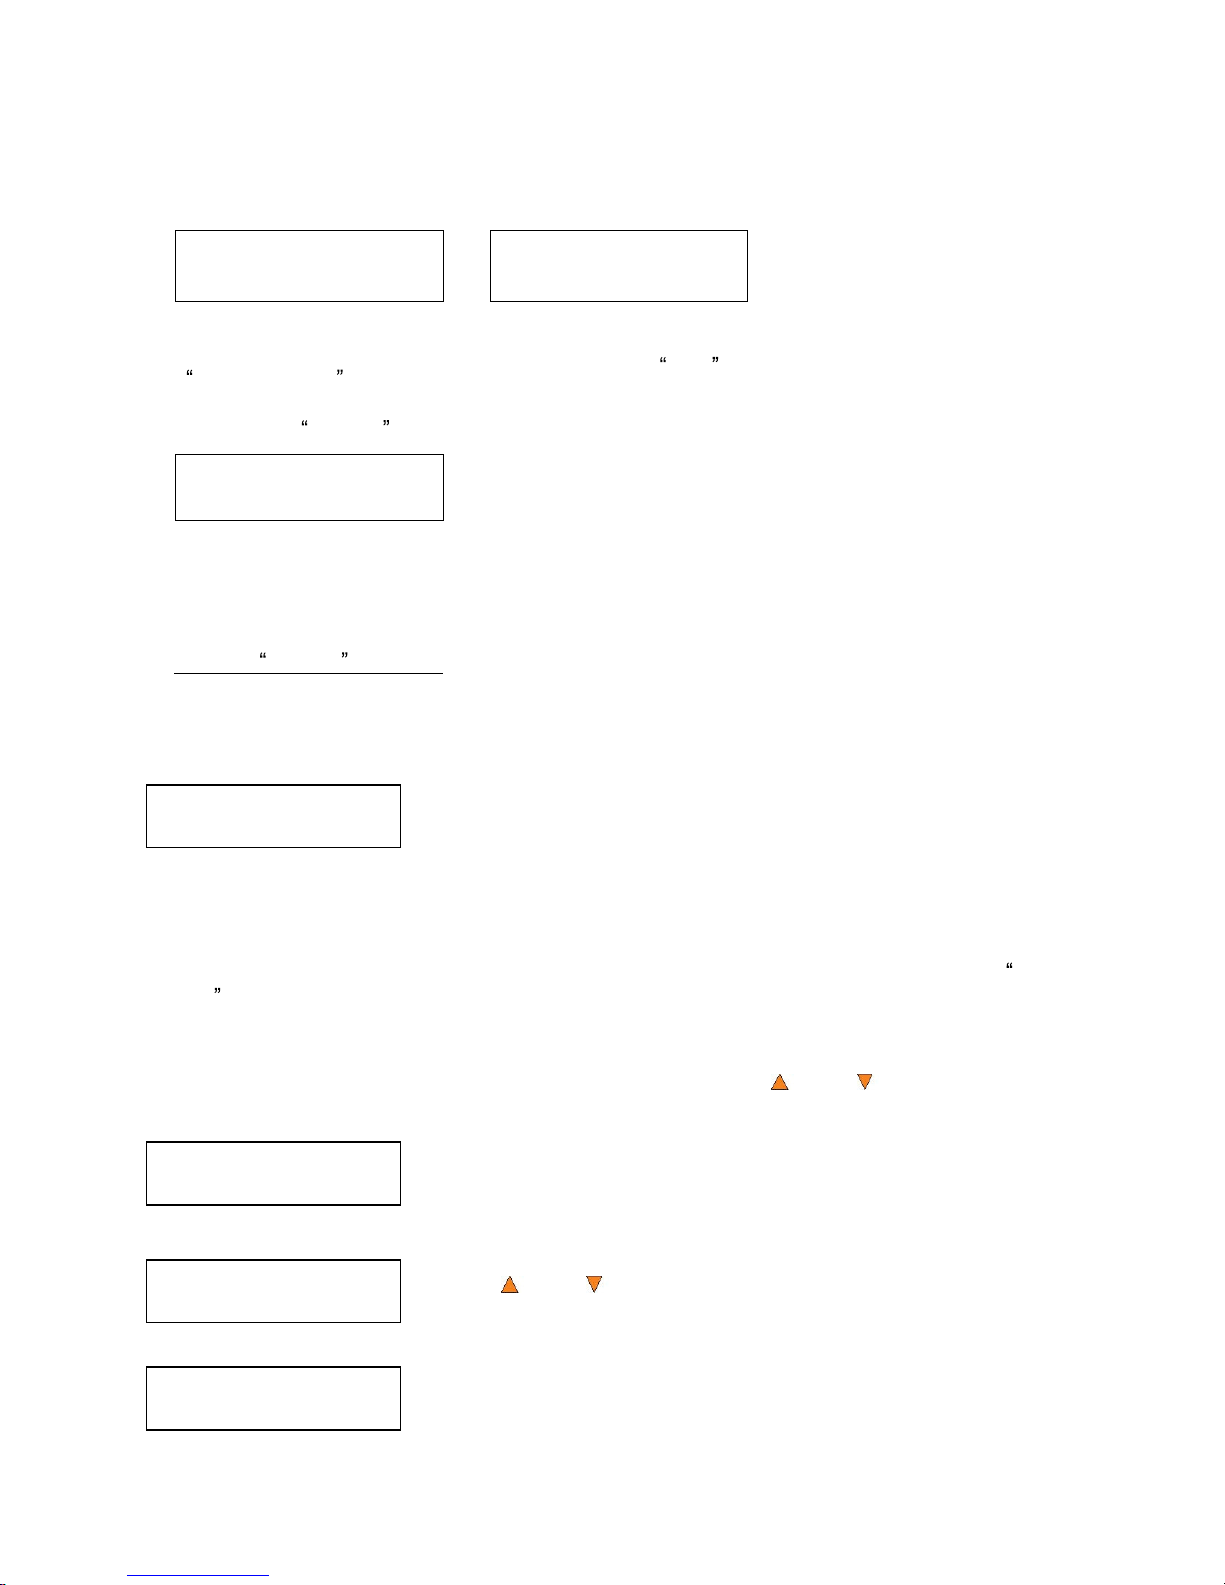
27
Load Partition OK!
Press OK to Finish
Hard Drive Setup
4. Delete Partition
Choose Partition
[FUN.VEF] 4012MB
Delete Partition
[FUN.VEF], OK?
Load -> New Partition
Overwrite
[Existing Partition]
Load -> Auto
Generate
Edit Partition Name
[ ] OK?
or:
This will Overwrite
[FUN.VEF ],OK?
or:
System will
automatically create a
Enter a new partition
name as described in
Editing Names on page
15
. For this exampl
e, we
will name it HAPPY .
Press the
ENT/Enter
button to overwrite the
partition named FUN .
Before continuing, the
autoloader will ask you
again to confirm it.
Load Partition
[HAPPY ], OK?
The system will display a
verification message
before continuing. Pres
the
ENT/Enter button to
start loading the partition
named HAPPY .
The master should be placed on the first
input
spindle. The robotic arm will pick it up and place it
into one of the drives, and the contents
of the master disc
will
be loaded into the
desired
partition.
Pres the
ENT/
Enter button to
finish.
10.3 Rename Partition
When you load your master disc onto a hard drive partition, you are asked to give it a name.
However, you can rename it at anytime afterwards. Instructions for this are shown in Editing
Names on
page 15.
10.4 Delete Partition
The
Delete Partition option deletes an existing partition.
Use the
Up or
Down button
to
navigate to the 4.Delete Partition menu.
Press the
ENT/
Enter button to enter the Delete Partition menu. The
autoloader will first ask you to choose the partition to be deleted:
Use the
Up or
Down button
to find the partition that you want to
delete. Press the
ENT/
Enter button to select the partition.
The
autoloader displays
the
Delete Par
tition confirmation message.
Press the
ENT/
Enter button
to continue.
Page 33
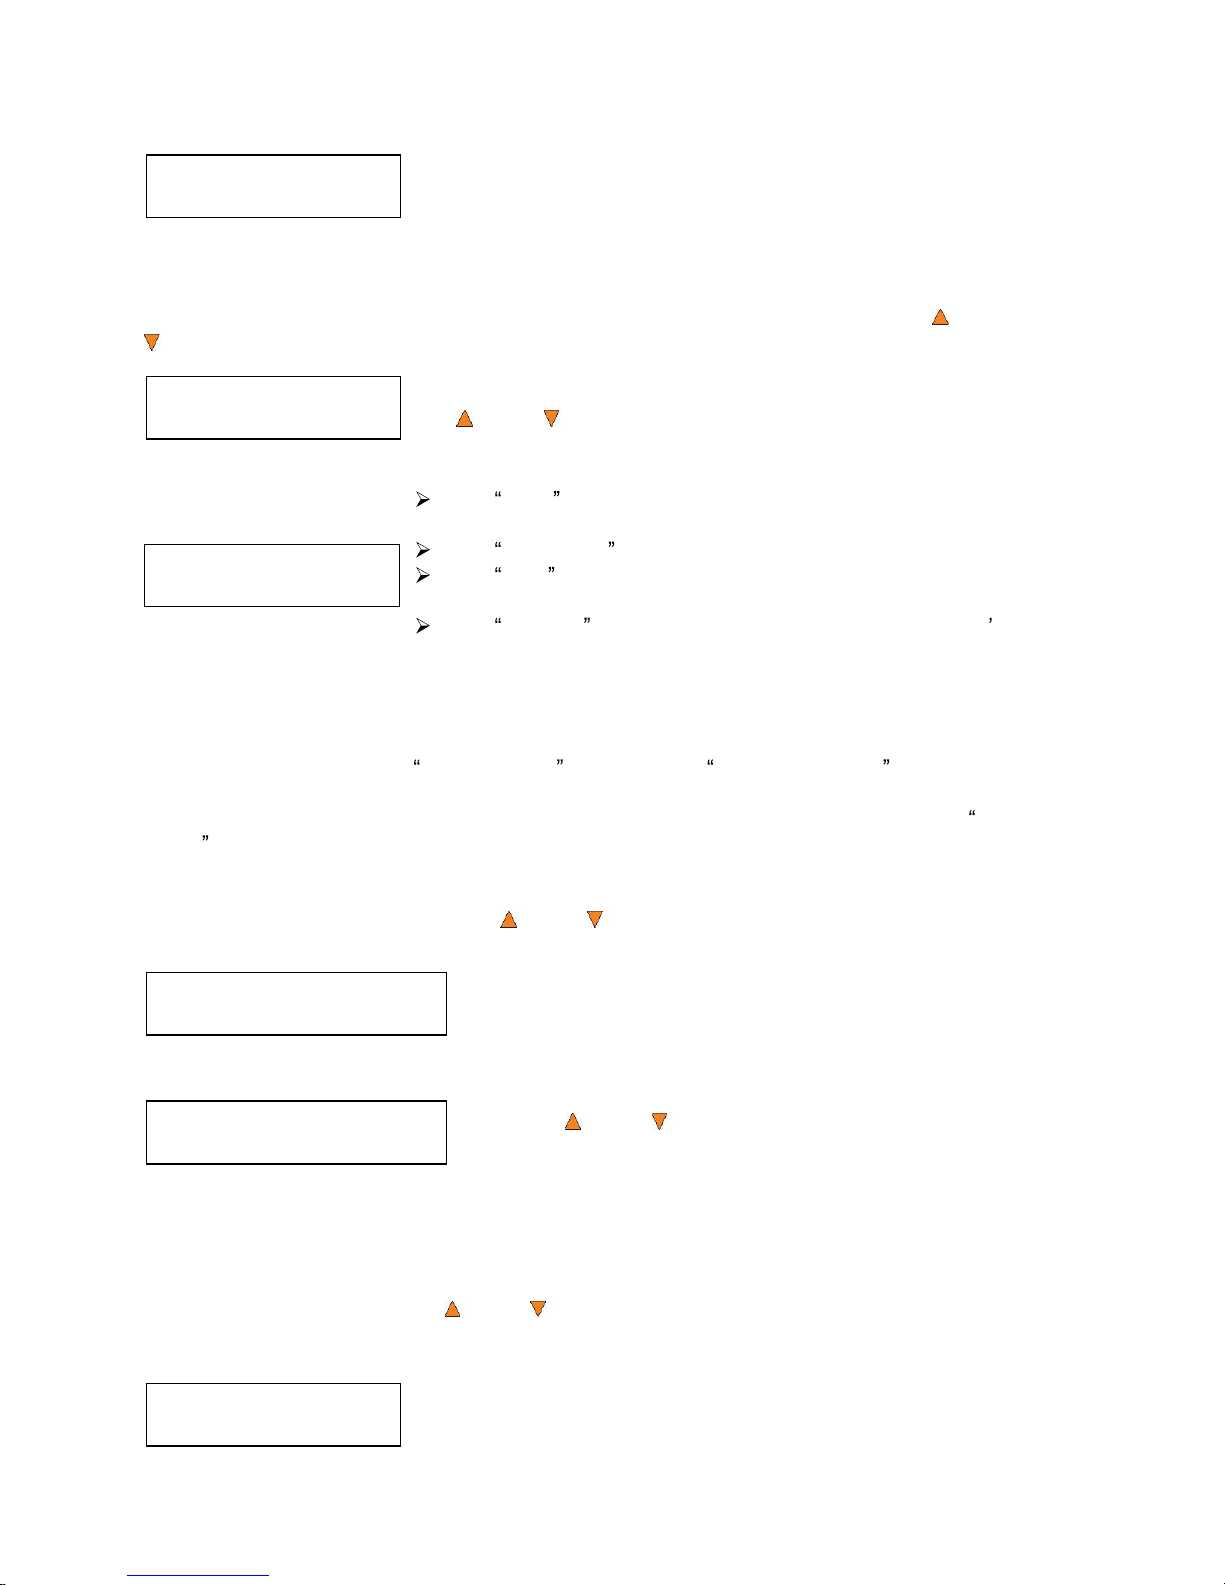
28
[FUN.VEF]
Deleted!
Hard Drive Setup
5. Partition Info
Hard Drive Setup
6. Select Loading Drive
Drive 1 Port 0
PIONEER DVD-RW DVR-115D
Hard Drive Setup
7. Format Hard Drive
The
autoloader displays the
Deleted message for two s
econds and
then returns you to the
Delete Partition menu.
10.5 Partition Info
The
Partition Info option provid
es information about an existing partition. Use the
Up or
Down
button to
navigate to
the
5. Partition Info menu.
Press the
ENT/
Enter button to enter the
Partition Info menu, and use
the
Up or
Down button to find the partition that you want
informati
on about.
The (002) field indicates that it is the second partition on the
drive.
The [
FUN
.VEF
] field shows the name of the partition.
The
DVD
field indicates that the master stored in this
partition is a
DVD.
The 4021MB field indicates the capacity of the master s
content stored in this partition.
(002) DVD 4012MB
FUN.VEF
10.6
Select Loading Drive
Select Loading Drive gives you the co
ntrol of choosing which drive the master should be loaded
from when you perform the
Load Partition feature under Hard Drive Setup .
Please note that this setting does NOT apply
to
any feature other than settings within Hard Drive
Setup .
If your system has ONLY one writer, there will only be one option available for you to
choose.
To change the loading drive
, use the
Up or
Down button to navigate to the
6.
Select Loading
Drive menu:
Press the
ENT/
Enter button to enter the
Select Loading Drive
menu.
Press the
Up or
Down button to select the desired
Drive
.
Press the
ENT/
Enter button to se
lect the
Loading Drive.
The selected drive will now be used to load a partition to the Hard Drive.
10.7 Format Hard Drive
This function formats the Hard
Drive. It deletes all
partitions and re-initiates the
Hard D
rive. To
format the Hard Drive, use the Up or
Down button to navigate to the
7. Format Hard Drive
menu:
Press the
ENT/
Enter button to enter the
Format Hard Drive menu.
Page 34
29
All Stored Data will be erased
.
Press OK to Continue
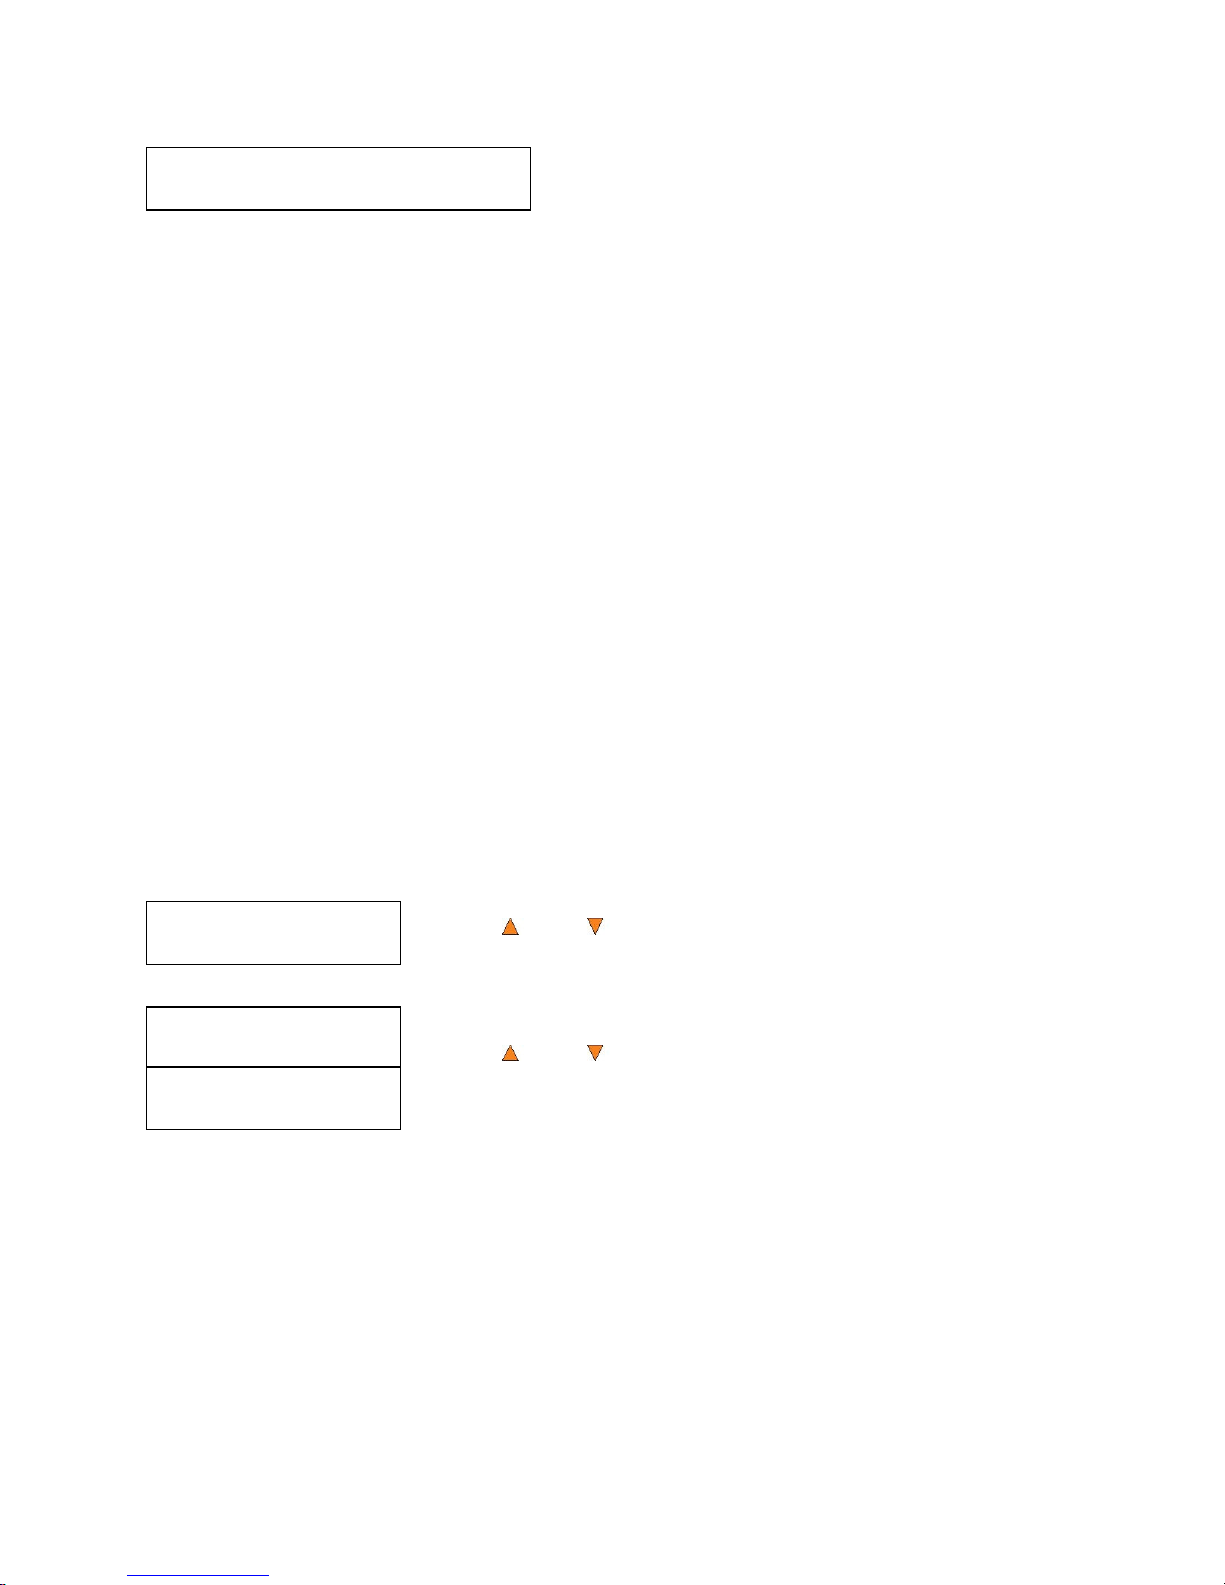
Setup
1. Language
Language:
English
Language:
Espanol
Press the
ENT/
Enter
button to
format
the
Hard D
rive.
After the
Hard Drive
has been format
ted, the
system
will return you to the
Format Hard Drive menu.
11. Setup
The 11.Setup menu options are used to configure various options on the
autoloader
. The Setup
menu consists of the following
sub-menus:
1
Language
2
Read Error Skip
3 CD Writing Mode
4
Max Audio,
VCD
& CDG Speed
5
Buzzer
6
Startup Menu
7
Screen Saver
8
Counter
9
DVD+R Compatibility Mode
10
ISRC
11
Disable Drives**
12
CD Overburn**
13
Max Failures per Job**
14
Max Failures per Drive**
Each of these options is discussed in its own subsection.
**these options not available for all
models
11.1 Language
This setting allows you to choose the language that you prefer to use when navigating the
autoloader
. The
autoloader sup
ports
multiple languages.
Use the
Up or
Down button to se
lect the Language menu and
press the
ENT/
Enter but
ton to enter that menu.
Use the
Up or
Down button to se
lect between the languages
and press the
ENT/
Enter button to select that option.
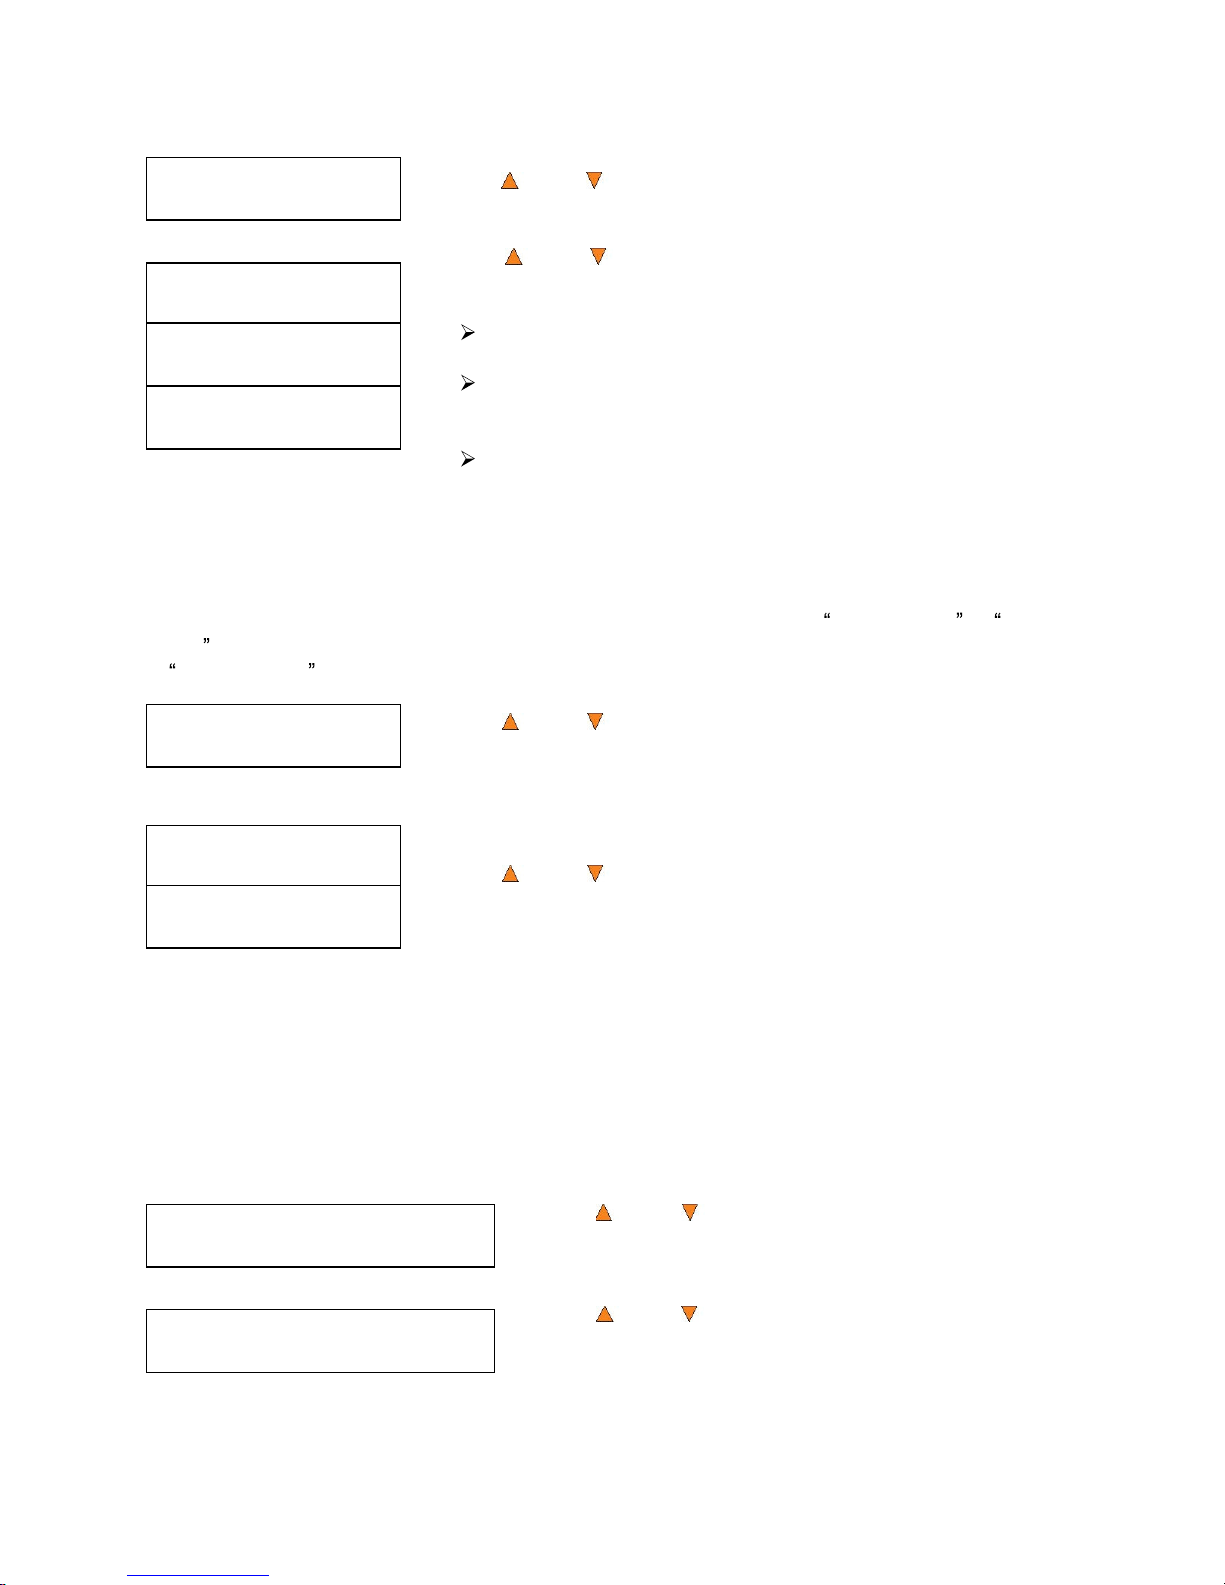
11.2 Read Error Skip
Normally, when the
autoloader encounters a read error while reading your master disc,
the
duplication is aborted and all the recordable media in the writers are ruined. However, if you
believe that your master disc has a small, insignificant error due to physical damage, you can
enable this setting to al
low the
autoloader to skip any read
errors it encounters.
Note: This function does not fix the error; it only skips it to make the rest of the data readable.
Page 35
30
Setup
2. Read Error Skip
Setup
3. CD Writing Mode
CD Writing Mode
Disc at Once
CD Writing Mode
Track at Once
Setup
4. Max Audio, VCD & CDG Speed
Max Audio, VCD & CDG Speed
16x
Read Error Skip
On
Read Error Skip
Off
Read Error Skip
Off with Retry
Use the
Up or
Down button to se
lect the
Read Error Skip menu
and press the
ENT/
Enter button to enter that menu.
Use the
Up or
Down button to se
lect whether
Read Error Skip
is On, Off or Off with Retry and press the
ENT/
Enter button to se
lect
that option.
On:
By select this setting, you instruct the system to skip
any Read Errors during the duplication process.
Off:
By s
elect this setting, you instruct the system
to
fail
the entire duplication process when a Read Error
occur
s.
Off with Retry: By select this setting, you instruct the system
to
perform additional retrie
s when a Read Error
occurs
, however, upon retry attempt failed, the
entire duplication process will be failed.
11.
3 CD Writing Mode
This setting allows you to select which mode to use to duplicate a CD; Disc at Once or Track at
Once. Unless you understand completely what these modes are, we strongly sugge
st you set it
to Disc at Once.
Use the
Up or
Down button to select the
CD Writing Mode
menu and press the
ENT/
Enter button to enter that menu.
Use the
Up or
Down button to se
lect either
Disc at Once
or
Track at Once
, and press the
ENT/
Enter button to select that option.
11.4 Max Audio, VCD
& CDG
Speed
Due to the lack of error checking mechanism for Audio CD, Video CD and CD+G format,
duplicating them at too high a speed can cause frequent errors like glitches and skips. Use this
setti
ng to adjust the maximum duplication speed for Audio, Video CD and CD+G format to ensure
reliable duplication for such formats.
The options are: 1x, 2x, 4x, 8x,
10x,
12x, 16x, 24x, 32x, 40x, 48x, and 52x.
Use the
Up or
Down button to select the
Max
Audio,
VCD & CDG
Speed menu and press the
ENT/
Enter button
to enter that menu.
Use the
Up or
Down button to select the
desired
maximum writing speed for Audio,
VCD and CDG
, and
press the
ENT/
Enter button to select that option.
Note: The ac
tual spee
d that is
selected may be determined by the drives or by the
blank
media.
Page 36
31
Setup
5. Buzzer
Buzzer:
On
Buzzer:
Off
Setup
6. Startup Menu
Startup Menu
Copy
Setup
7. Screen Saver
Screen Saver:
On
Screen Saver:
Off
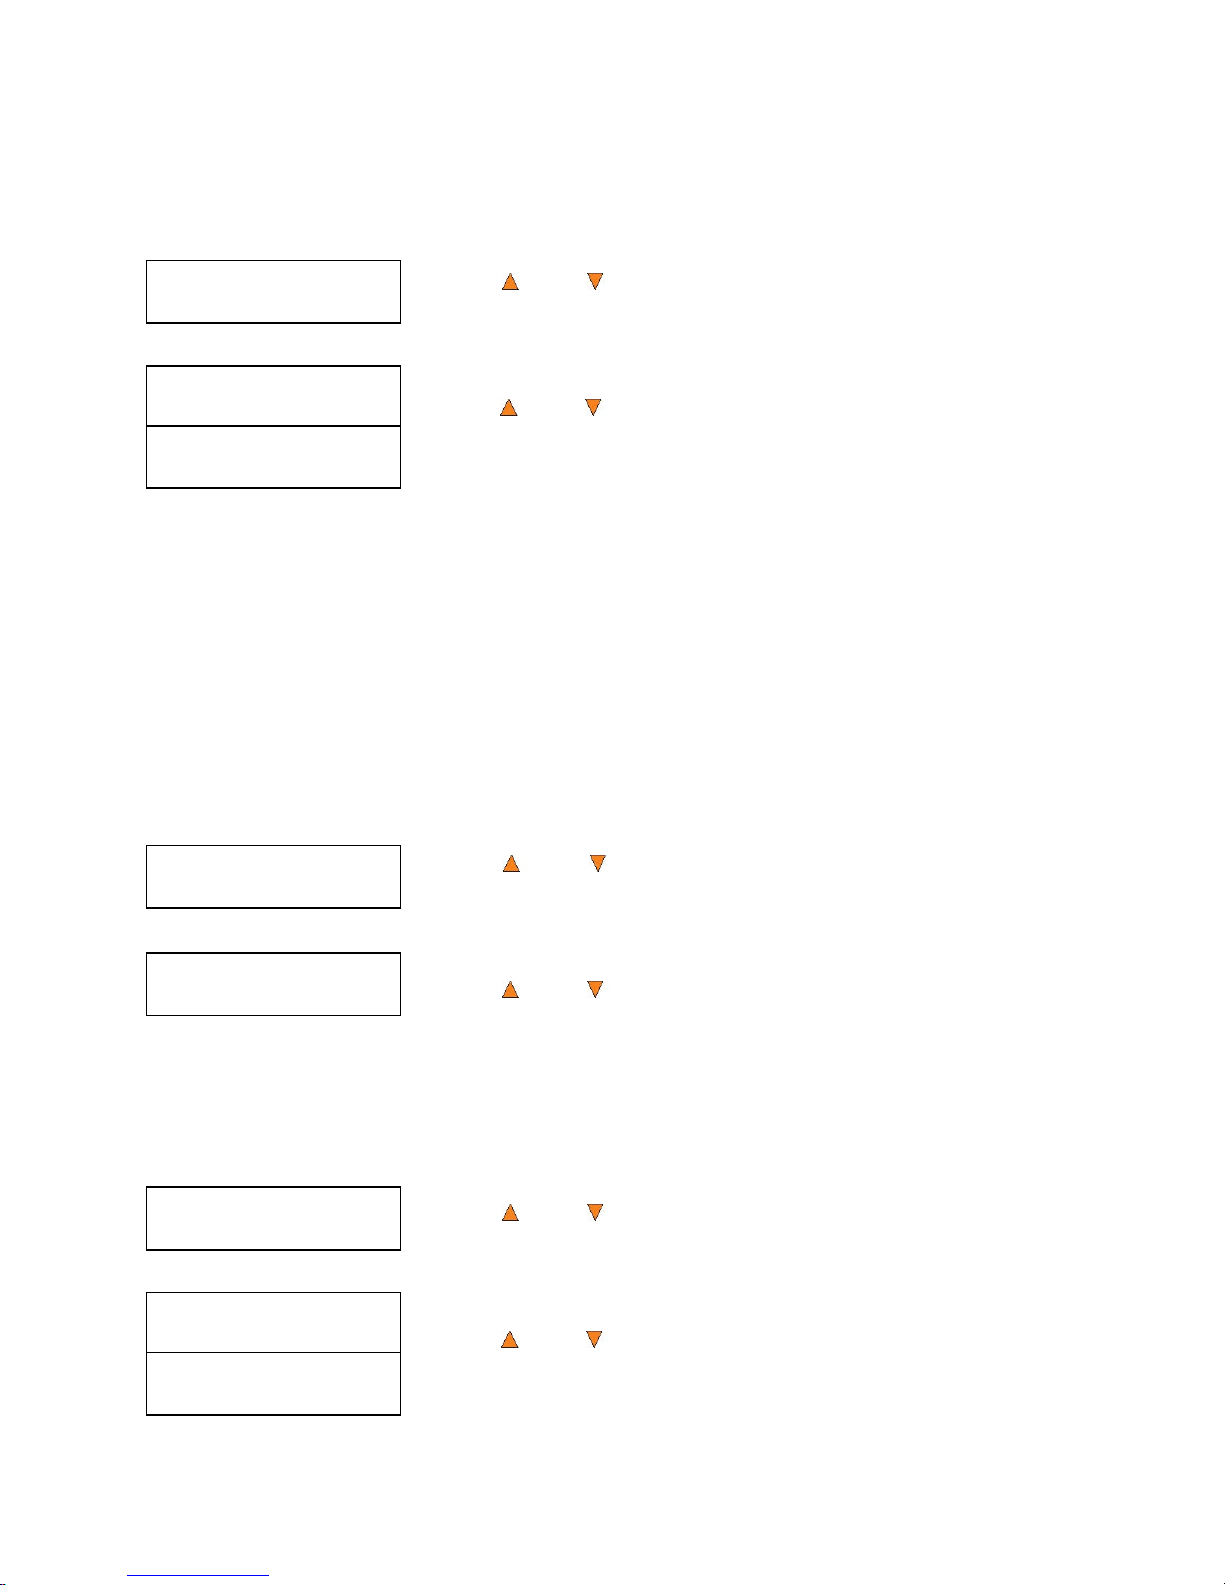
11.5 Buzzer
This setting will allow you to choose whether you want to hear a beep when you press a button or
when a task has been completed.
Use the
Up or
Down button to se
lect the
Buzzer menu and
press the
ENT/Enter button to enter that menu.
Use the
Up or
Down button to se
lect whether
Buzzer is on or off,
and press the
ENT/
Enter button to select that option.
11.6 Startup Menu
This setting will allow you to choose the menu option that you will see first when you turn on the
autoloader
. The options are:
1
Copy
2
Test
3
Compare
4
Test+Copy
5
Copy+Compare
6
AutoCopy
Use the
Up or
Down button to select the
Startup Menu option
and press the
ENT/
Enter button to e
nter that menu.
Use the
Up or
Down button to se
lect the desired startup menu,
and press the ENT/
Enter button to select that option.
11.7 Screen Saver
This menu allows you to choose whether you want to enable the Screen Saver feature. By
enablin
g this feature, a screen saver will be displayed when your
autoloader has been idle for a
specific period of time.
Use the
Up or
Down buttons to se
lect the
Screen Saver menu
and press the
ENT/
Enter button to enter that menu.
Use the
Up or
Down button to se
lect whether the
Screen Saver
is on or off, and press the
ENT/
Enter button to se
lect that option.
Page 37
32
Setup
8. Counter
Counter:
On
Counter:
Off
Setup
9.DVD+R High Compatibility Mode
DVD+R High Compatibility Mode:
On
DVD+R High Compatibility Mode:
Off
Setup
10.ISRC
ISRC
On
ISRC
Off
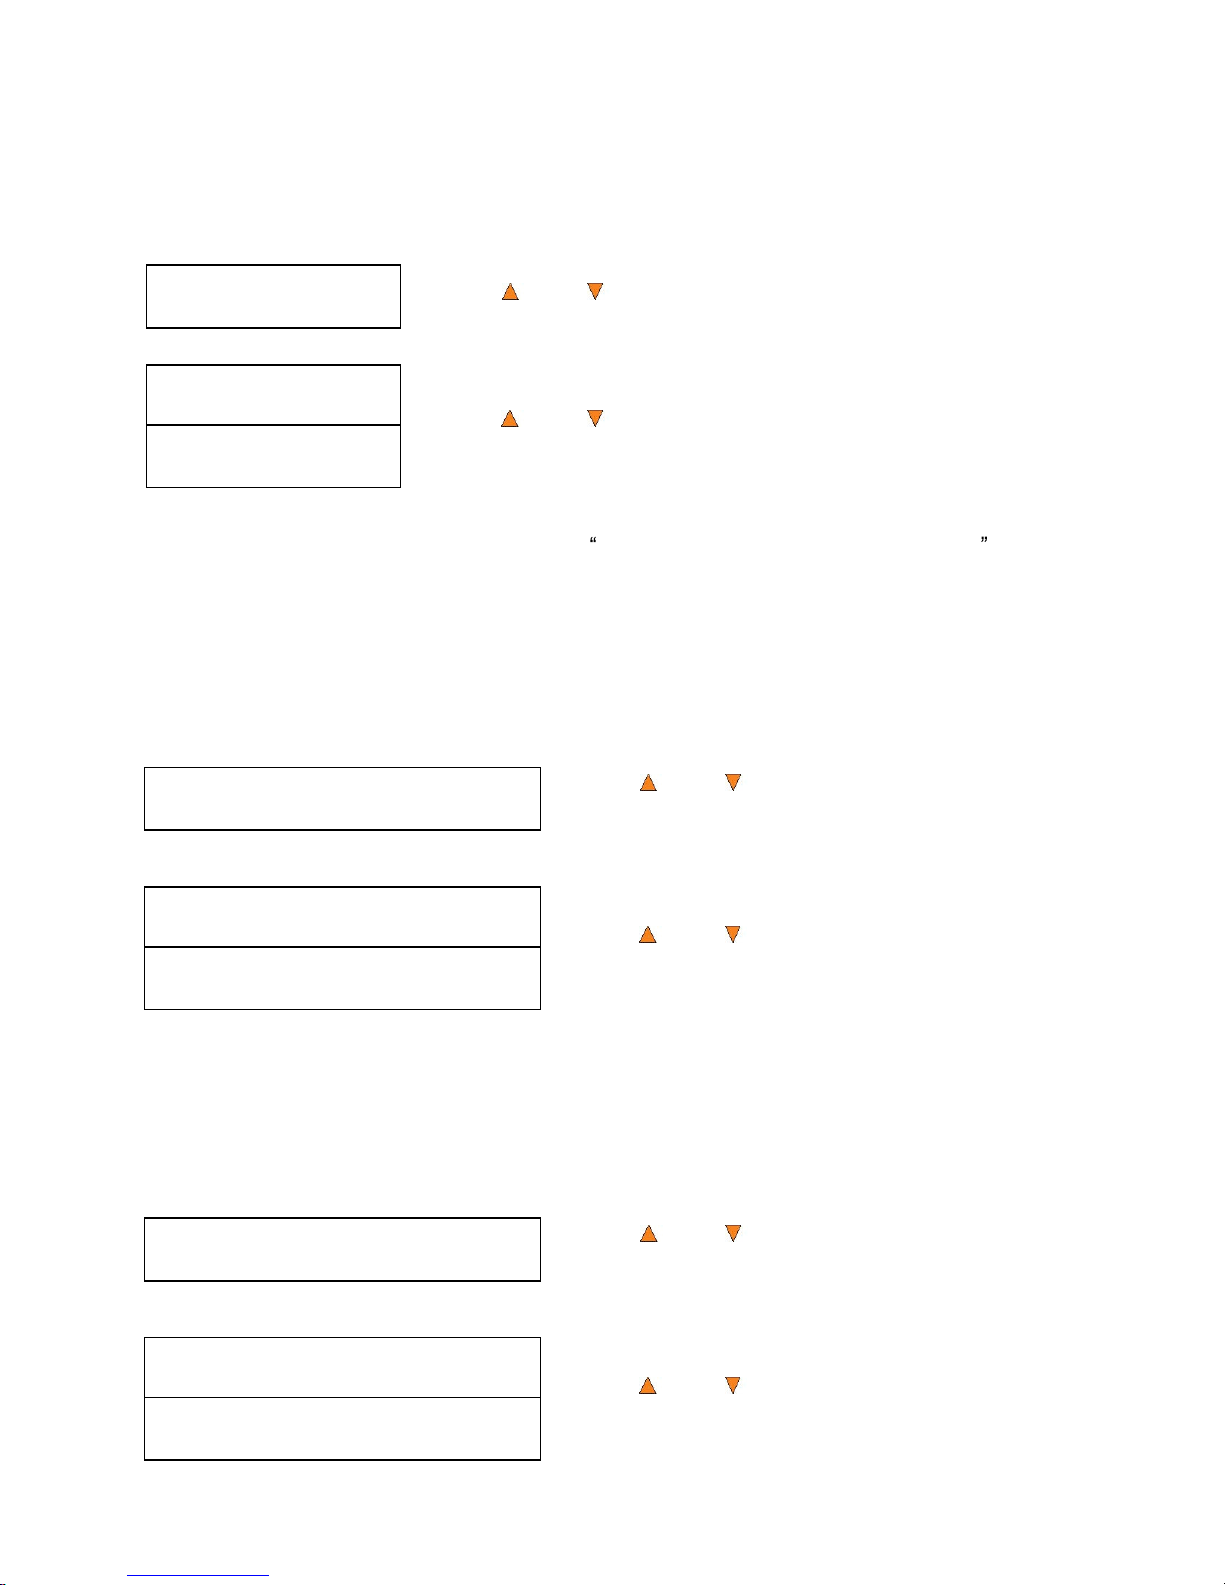
11.8. Counter
This menu allows you to choose whether you want to enable the
Counter
fea
ture. By enabling this
feature, the
autoloader will
prompt you to enter a counter amount and
continuously burn discs
until it reaches the value set into the counter.
Use the
Up or
Down button to select the
Counter menu and
press the
ENT/
Enter button to enter that menu.
Use the
Up or
Down
butto
n to se
lect whether the
Counter is on
or off, and press the
ENT/
Enter button to select that option.
For infor
mation on entering
the counters, see Setting Counters and Assigning Names on page
14.
11.9
DVD+R High Compatibility Mode
This feature al
lows you to turn the DVD+R High Compatibility Mode feature ON or OFF. The
purpose of this feature is to increase the compatibility of DVD+R media with a broader range of
DVD Video players. This process will increase the amount of time required to duplicate your
disc(s).
Use the
Up or
Down button to se
lect the
DVD+R
High Compatibility Mode
menu and press the
ENT/
Enter but
ton to enter that menu.
Use the
Up or
Down button to se
lect whether the
DVD+R High Compatibility Mode is on or off, and
press the
ENT/
Enter but
ton to select that option.
11.10 ISRC
This option will allow you to enable/disable copying ISRC code of the Audio CD. ISRC is the serial
number of the audio tracks that uniquely identifies the song in that audio track. This ISRC co
de is
commonly found in commercial Audio CDs and rarely seen on the home made Audio CDs. By
enabling this feature, the duplication performance will be lowered.
Use the
Up or
Down button to select the
ISRC
menu and press the
ENT/
Enter
but
ton to enter
that
menu.
Use the
Up or
Down button to se
lect whether the
ISRC
is ON or OFF, and press the
ENT/
Enter
but
ton
to select that option.
Page 38
33
System Utilities
1. Disc Info
Disc Info
Please Insert Disc
Disc Info
3 Disc Detected, GO?
Setup
12. CD Overburn
CD Overburn
ON
CD Overburn
OFF
11.11 CD Overburn
Most CD-R media
has a capacity of 650MB or 700MB. The burning starts from the center of the
C
D and works its way out but stops before the physical edge of the CD. Overburning is a burning
method to bypass the disc limitations
for the edge of the CD
. T
his can
provide
slightly higher
capacity storage, however, it has also been known to create compat
ibility issues. Please use it
with caution.
Use the
Up or
Down button to select the
12.
CD Overburn
menu and press the
ENT/
Enter button to enter that menu.
Use the
Up or
Down button to se
lect whether the
CD Overburn
feature is ON or OFF, and pr
ess the
ENT/
Enter but
ton to select that
option.
12. System Utilities
System Utilities is
used to provide information pertaining to the
autoloader as well as modification
to maintain proper functioning. The System Utilities are:
1
Disc Info
2
System Info
3
Device Info
4
Load Default
5
Update Firmware
12.1 Disc Info
Use the Disc Info utility to identify the type and other information about your blank recordable
media.
.
Note: The Disc Info function does not use the robotic capabilities of the
system
. Y
ou must
manually insert the discs into the drives.
Use the
Up or
Down button to
select
the
Disc Info menu and
press the
ENT/
Enter button to enter that menu. The
system will
pro
ceed to the
Please Insert Disc menu.
Place your disc(s) into the drives.
After a few seconds, the
system will detect the discs and ask you if
you want to proceed. Wait until all of
the discs have been detected
and press the
ENT/
Enter button to continue.
Page 39
34
System Utilities
2. System Info
System Utilities
3. Device Info
System Utilities
4. Load Default
Load Default
Press OK to Continue
12.2 System Info
The System Info menu
provides
a lot of
hardwar
e information about the autoloader such as
firmware versions, Duplic
ation/Robot Control Boards type
, etc
. You can scroll through the various
specifications by pressing the
Up or
Down button.
Use
the
Up or
Down button
to se
lect the System Info menu a
nd
press the
ENT/
Enter button
to enter that menu.
12.3 Device Info
This menu allows you to see information about the
recording
devices built inside your
autoloader
.
This
information includes, but is not limited to, manufacturer, model number, etc.
Use the
Up or
Down button to select the Device Info menu and
press the
ENT/
Enter button to enter that menu.
12.4 Load Default
This function will reset all of the options back to the manufacturer's default set
tings. You should
only perform this fun
ction if your
autoloader is acting ab
normally.
Use the
Up or
Down button to select the
Load Default menu
and press
the
ENT/
Enter button to
enter that m
enu.
Press
the
ENT/
Enter button to load the de
fault parameters or the
ESC
/Escape button to re
turn to the
System
Utilities menu.
12.5 Update Firmware
This function will update the software of your
autoloader
. To update, you need to insert the
manufacture
r s Certified Update CD into
the
1
st
tray and select this function by pressing the
ENT/
Enter button. We strongly suggest that you
do
not upgrade your
autoloader
's firmware
unless your
autoloader has become un
stable or you are instru
cted to do so by Tech Support.
Warning: When you update the firmware on your
system, there
may be a chance that you
will lose all of the data (
contents of
master discs) stored in the user HDD partitions. Make
sure that you
back up
all of
the data on the HDD before
attempting this procedure.
Page 40

35
Discmakers X.xx
14.Manage Accounts
Enter PWD
[ ] OK?
13. Loader Utilities
The Loader
Utilities menu consists of following subme
nu(s):
1
Update Robot Firmware
13.1 Update Robot Firmware
Use this utility to update the software in your autoloader
s robot controller. To update, in
sert the
manufacturer s Certified Update CD into the 1
st
tray and make sure no other discs are in the
other
trays. Then you can press the ENT/Enter button to update. You should not upgrade your
autoloader's robot firmware unless your system is becoming unstable or you are advised to do so
by Tech Support.
14. Manage Accounts
This feature allows the adm
inistrator to:
Create user accounts and passwords to prevent unauthorized use of this
autoloader.
Edit existing user account information, including name and password.
Delete existing user account(s).
Enable or disable
Manage Accounts
Manage Accounts
is disabled by default. Prior to activating the Manage Accounts feature, the
autoloader recognizes all users as the Administra
tor. The pre-defined password for this function is
0000. By adding additional users, each individual user has his or her own
settings.
To take advantage of this feature, follow these instructions:
Change the Administrator password. Refer to Edit User Info on page 41
for additional
information.
Create a User Name and Password for each authorized person on this autoloader. R
efer
to Create User on
page 41 for additional infor
mation.
Enable the Manage Accounts feature by turning on the Password on Bootup setting.
Refer to Password on Bootup on page 42
for additional information.
Note: This system comes with a standard license that allows you to create up to 32
users. However, if you desire to create more than 32 users, please contact Tech
Support Service regarding our special 64 user license pack.
To access the
Manage Accounts feature, you need to perform the follo
wing tasks:
Use the
Up or
Down button to select the
Manage Accounts
menu and press the
ENT/Enter button to enter that menu. You will
be shown the
Enter Password menu.
The
system will ask you for the Administrator's Pass
word.
Page 41
36
Manage Accounts
1. View User
Manage Accounts
1. View User
View User
1. [ADMIN ]
Manage Accounts
2. Create User
Edit User s Name
[RALPH ] OK?
Enter PWD
[0 ] OK?
User Ralph
Added!
The default Admi
nistrator's Password is 0000. To enter, press the
Up or
Down
button to
select the first digit of your password and press the
ENT/Enter button to submit the current digit.
You will automatically move to the next digit. Repeat these steps until you've se
lected all four
digits
for
your password. After you have entered the password, press the
ENT/Enter button to
OK the
submission of
your password.
Once your password is validated, you will be guided to the main Manage Ac
counts screen:
The submenu
s of Manage Accounts are discussed in the sec
tions that follow.
14.1 View User
This menu allows you to view current existing user accounts.
Note:
User Admin is the administrative a
ccount. It will always be there.
Press the
ENT/Enter button to enter
this menu
Use
the
Up or
Down button to scroll through the list of users.
Press the
ESC
/Escape button
to go back to the
Manage Accounts
menu.
14.2 Create User
This menu allows you to create additional user accounts. Each user has their own settings and
hard drive partitions. During this process, you will be prompted to enter a new username and user
password for a new account.
Note: The User name consists of a maximum of eight
alphanumeric letters or numbers.
Note: The User password consists of fo
ur numbers.
Press the
ENT/Enter button to enter this menu.
Enter the user
s name using the instruc
tions shown in Setting
Counters and Assigning Names on page 14
. Press
the
ENT/Enter
button to move on to the Enter Password stage.
Enter the users password using the in
structions shown in
Setting
Counters and Assigning Names on page 14.
Press
the
ENT/Enter to complete.
The
autoloader will display a confirma
tion message and
automatically return you to the Manage Accounts menu.
Page 42
37
Manage Accounts
3. Edit User Info
Edit User Info
1. [ADMIN ]
Edit User s Name
[RALPH ] OK?
Enter PWD
[0 ] OK?
User Ralph
Changed!
Manage Accounts
4. Delete User
Delete User
3. [RALPH ]
Delete User
[RALPH ] OK?
14.3 E
dit User Info
The Edit User Info menu allows you to change the existing users account name and password.
During this process, you will be asked to select the ex
isting account and then you will be prompted
to enter the new user name and new user password for this account.
Note:
User Admin is the administrative account, you cannot change the user name for
this account, but can change the password for this account.
Note: The User name consists of a maximum of eight alphanumeric letters or numbers.
Note:
The User password consists of four numbers.
Press the
ENT/Enter button to enter this menu.
Use the
Up or
Down button to scroll through the list of users.
Press
the
ENT/Enter button to select user.
Edit the user
s name using the instruc
tio
ns shown in Setting
Counters and Assigning Names on
page 14. Press the
ENT/Enter button to move on to the
Enter Password stage.
Enter the new password for this user via the instructions shown in
Setting Counters and Assigning Names on page 14
. Pres
s the
ENT/Enter button to complete.
The
autoloader will display a confirma
tion message, and
automatically return you to the Manage Accounts menu.
14.4 Delete User
This menu allows you to delete an
existing users account. During this process, you w
ill be asked
to select the existing account to be removed.
Note:
The user Admin is the administrative account; you can t
delete this account.
Press the ENT/Enter button to enter into this menu.
Use the
Up or
Down button to scroll through th
e list of users.
Press the
ENT/Enter button to select the user to delete
.
The
autoloader will ask you to confirm the deletion
. Press the
Page 43
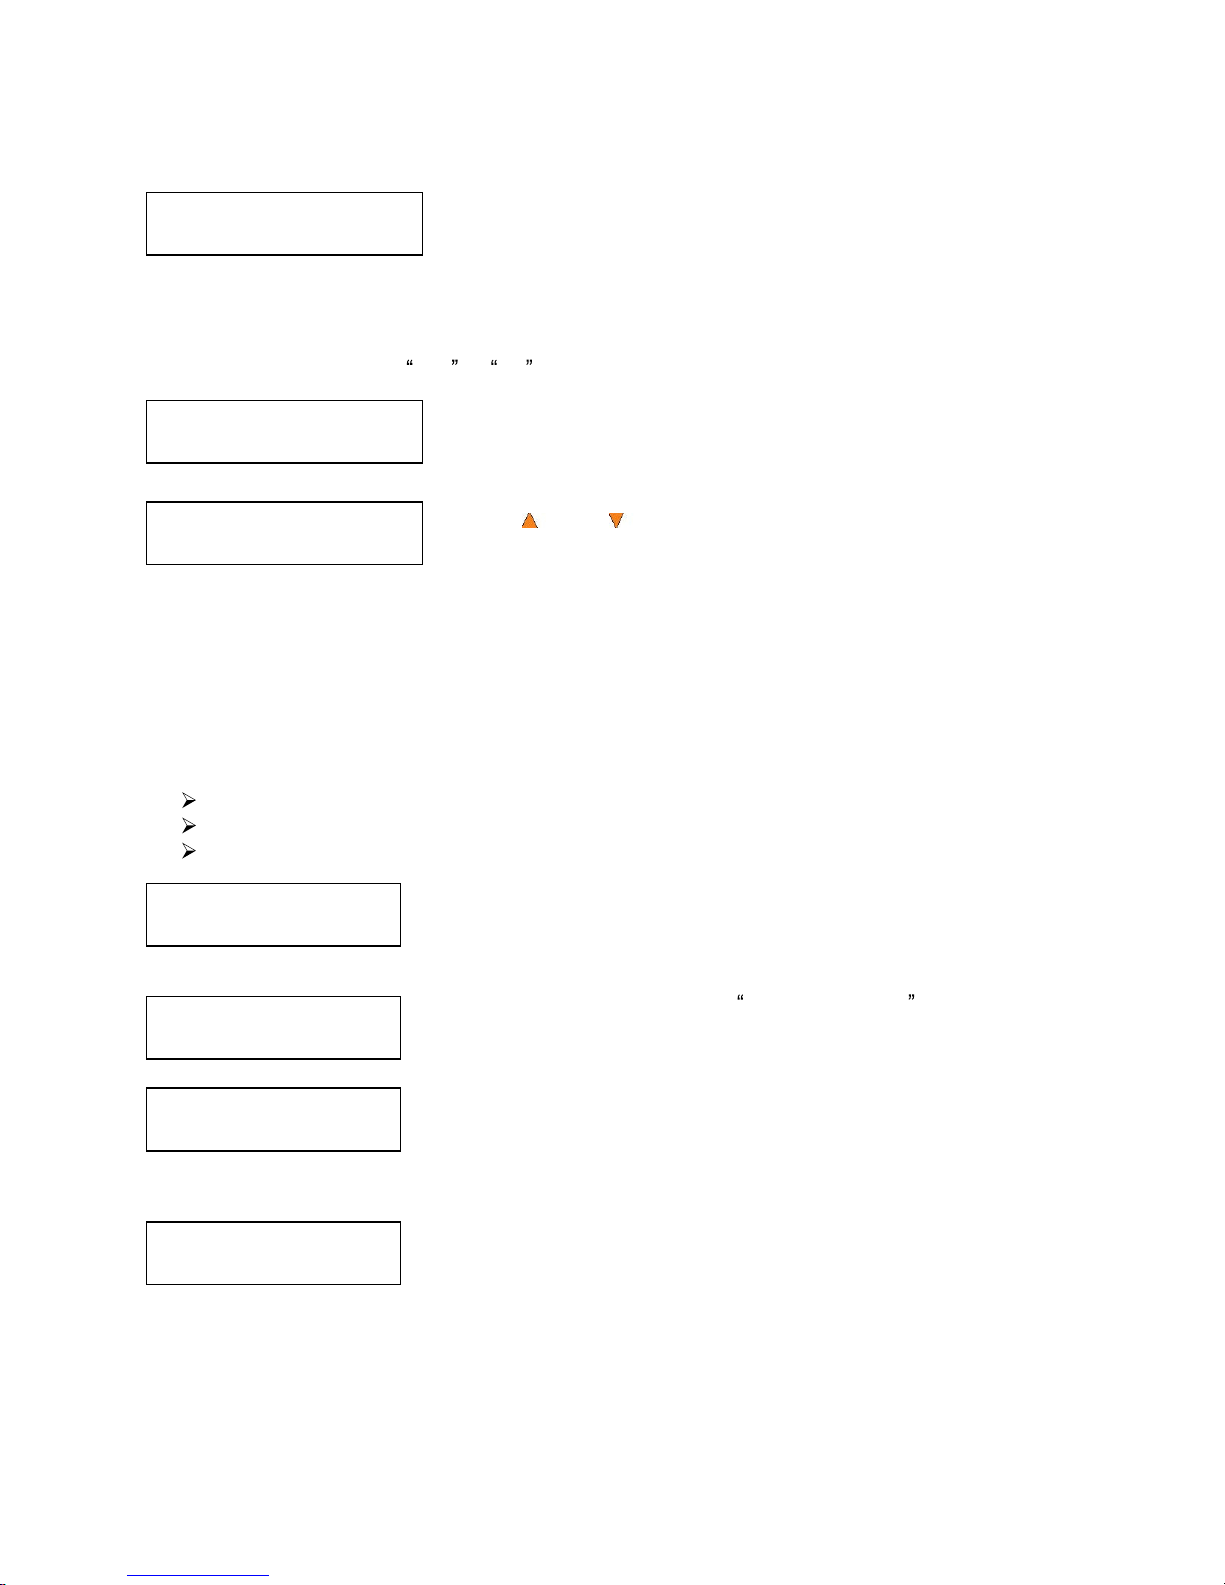
38
Manage Accounts
5. Password on Bootup
Password on Bootup:
Yes
User Ralph
Deleted!
Discmakers X.xx
15
. AUTOCOPY
Counter:
No Counter
Preparing...
Please Wait
OK: 0 NG: 0 NB: 0
Input Bin > Drive01
ENT/Enter button to delete the user.
The
autoloader will display a confirma
tion message, and
automatically retu
rn you to the Manage Accounts menu.
14.5 Password on Bootup
This menu allows you to enable or disable the Password on Boot-up feature. During this process,
you will be asked to select Yes or No (enable or dis
able).
Press the ENT/Enter button
to enter into this menu.
Use the
Up or
Down button to se
lect either Yes or No. Press
the ENT/Enter button to enter the selection.
15. AUTOCOPY
The Autocopy function is the simplest way to make CD/DVD
/Blu-Ray Disc copies. It simplifies the
copy pro
cess by
not requiring that the
project be pre-loaded on the hard drive. Simply place
the
master disc on
top of the first Input Spindle and it will be loaded onto a reserve partition
in the HDD.
T
he data is transferred automatically to all of the blank dis
cs which follow it. To make copies in
Autocopy mode, you simply:
Fill the input spindle(s) with the required number of blank discs
Place the Master disc on top of the stack in the first input spindle
Press the
15. AUTOCOPY button
Fill the input spin
dle(s) with blank discs. Place the Master disc on top
of the stack
of blank discs o
n the first input spin
dle, and press the
ENT/Enter button. You will then
see the
Counter Selection menu.
Follow the instructions shown in Setting Counters on page 14 to
continue. Once the counter has been set, press the
ENT/Enter
button to confirm. You will
then
see the
Preparing screen:
After a short interval, the robotic loader will pick the top disc (the
Maser Disc) from the input spindle and place it into one of th
e drives.
As this is happening, you will see a screen similar to below:
This information screen shows what is happening. In this case, the
loader has taken a disc from the input spindle and is placing it into
Drive 1.
The loader will
perform the load
ing process which will transfer the content of your master disc into
the reserved partition of the hard drive.
Upon
the
successful loading process, the system will drop the Master Disc onto the output
spindle.
Page 44
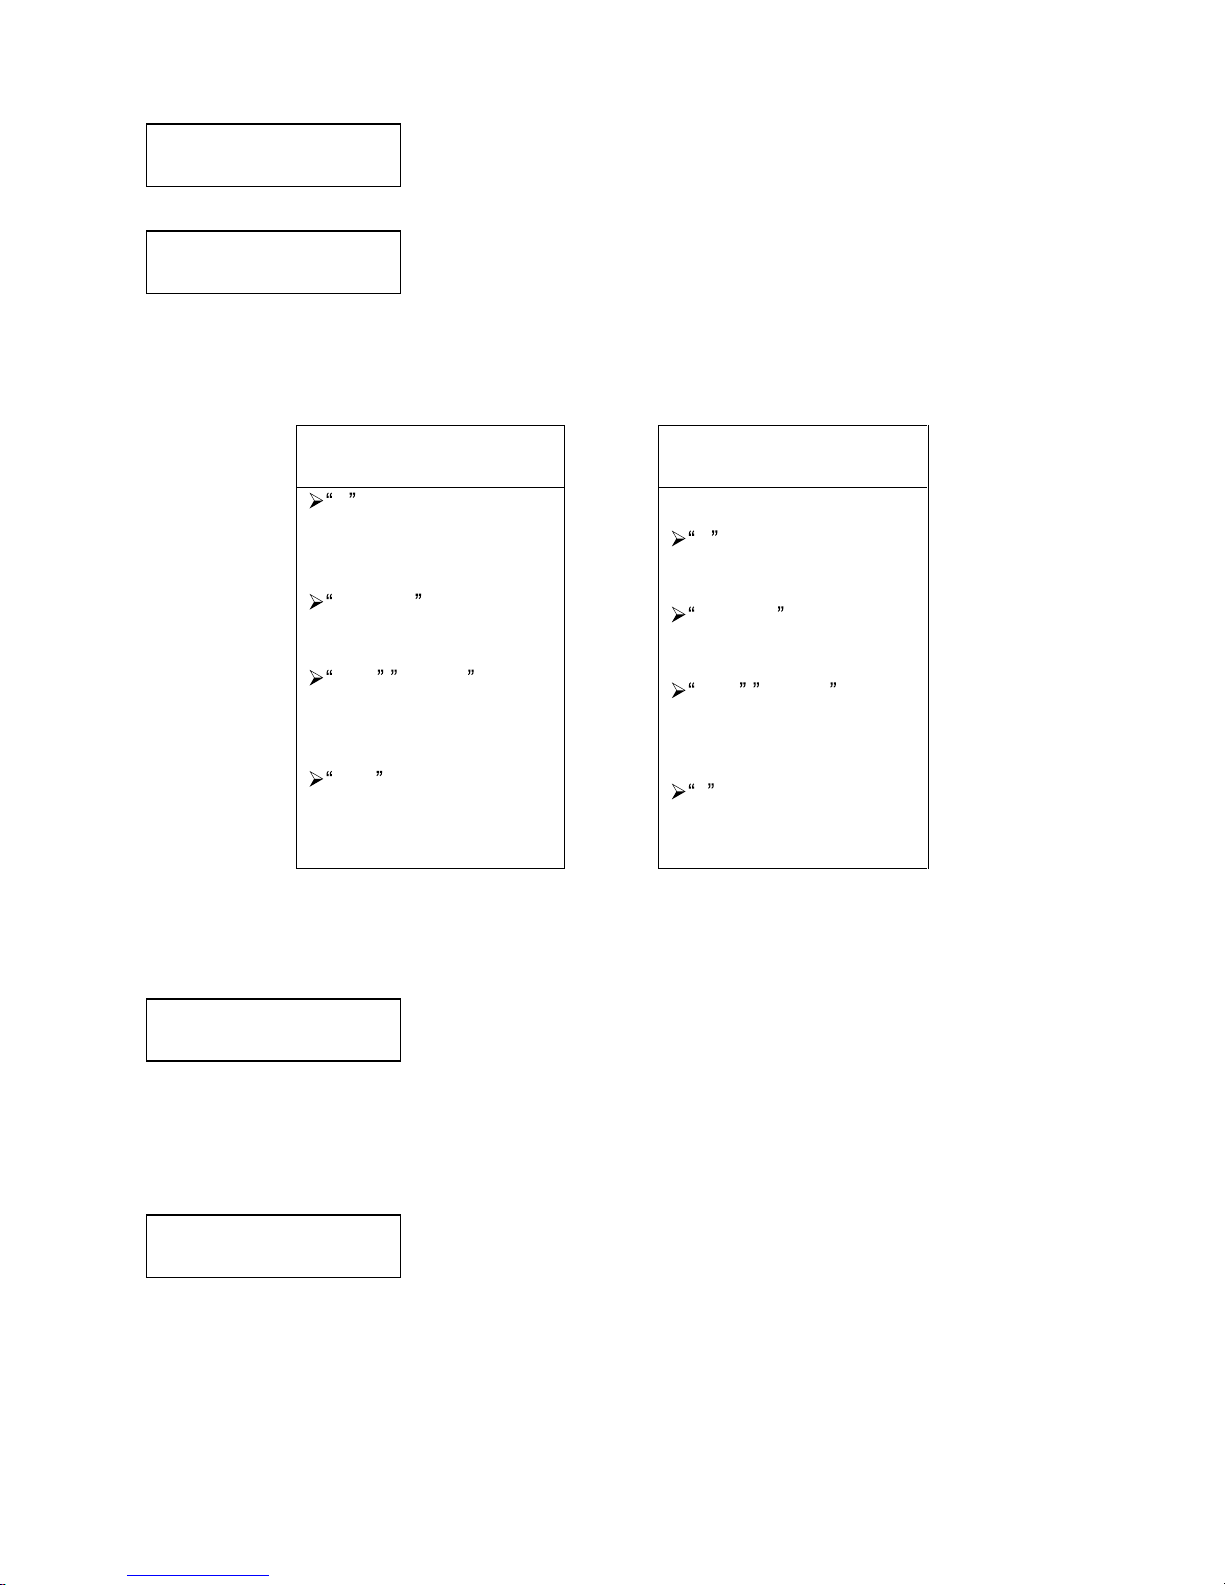
39
Processing...
Please Wait
OK: 3 NG: 0 NB: 0
Input Bin > Drive01
OK: 0 NG: 0 NB: 0
Input Bin > Drive0
1
It will then pick up the blank discs from
the input spindle and place
those into drives until either all of the drives are full, or the count that
you loaded into the counter is reached.
It takes a few seconds for the autoloader to recognize all the discs.
After two or three seconds of proc
essing time, one of the following
Copy Progress screens will
appear.
Counter Specified
No Counter Specified
Copying... H4012MB
0/21 12% 481MB
or:
Copying... H4012MB
0 12% 481MB
H indicates the
source of the job
resides in the Hard
Drive.
4012MB indicates the
ca
pacity of the master
disc.
12% / 481MB
indicates the current
progress of the
duplication.
0/21 indicates you
have a project size of
21 copies and you have
made 0 copies so far.
H indicates the source
of the job r
esides in the
Hard Drive.
4012MB indicates the
ca
pacity of the master
disc.
12% / 481MB
indicates the current
progress of the
duplication.
0 indicates you have
made 0 copies so far.
Note:
It is normal to see the progress indicator stay at 0%-
10% and 100% for
approximately 30 seconds for CD duplication and up to one minute for DVD/Blu-Ray Disc
duplication. That is caused by the initializing and finalizing stages.
Once the duplication run is completed, the loader will remove the
finished disc fro
m a drive and place the successful copy on the
Output Spindle
.
After the loader has placed the copied disc into the Output Spindle, t
he loader will then pick up
another blank disc and load it into the drive.
The copying process will continue until y
ou either run out of blank
discs or until the count that you loaded into the counter is reached.
OK: 3 NG: 0 NB: 0
Drive01 -> Output Bin
Page 45
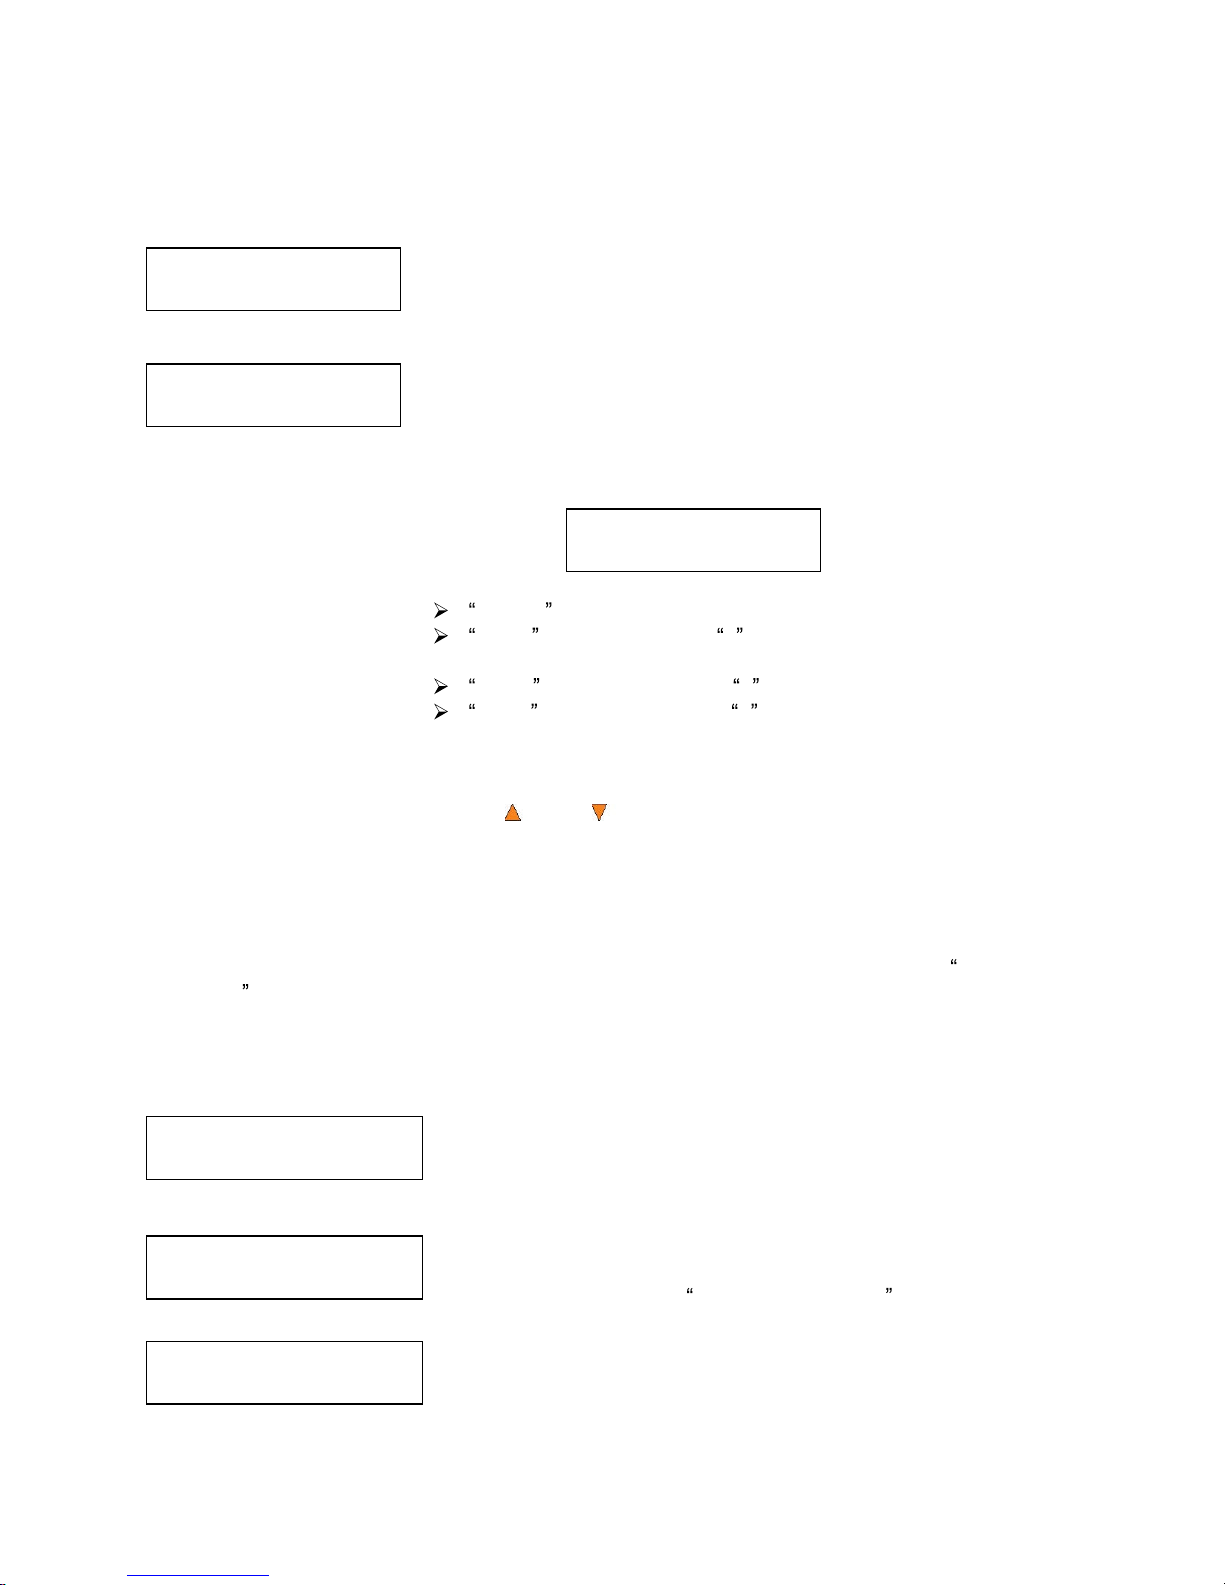
40
Duplicator 2.
20
16.Shutdown
Shutdown
Press OK to Shutdown
Shutdown
Ready to Power Off
Input Bin Empty
Reset Hopper?
Drive 1
OK: 1 NG: 0 NB: 0
Access Drive Log?
If you run out of blank discs and the job is not complete, the autoloader will give you an opportunity
to fill the spindle:
Important: When you add discs
to the input spindle, be sure to remove your finished discs
from the Output Spindle.
At this point you can either
load more discs on to the input spindle
and press the
ENT/Enter button to continue, or press the
ESC/Escape button to terminate your project.
Upon project termination, you shall see the
Access Drive Log menu.
You can press the
ENT/Enter button one more time to see the drive
log that indicates the number of passes and fails for every drive/tray,
or simply press the
ESC/Escape button to go ba
ck to the main menu.
If you choose to see the drive log file, you will see a screen similar to
below:
Drive 1 indicates the below results are for the 1
st
drive.
OK: 1 indicates there is 1 successful copy made by this
drive.
NG: 0 indicates there are 0 bad copies created by this drive.
NB: 0 indicates there are 0 discs in this drive that were not
recorded due to non-recording error such as invalid media type,
etc.
Use the
Up or
Down buttons to look at the drive log file for the
various drives. Press the ESC/Escape
button to return to the
1.Copy
menu
16
. Shutdown
This function will make sure it is safe to turn off your
autoloader
. Once you see the
Ready to
Power Off message, you can safely turn off the machine using the power switc
h.
Turning off your
autoloader without performing this function will increase the risk of damaging your
autoloader.
Press the
ENT/Enter button to enter into this menu.
Press the
ENT/Enter button to shut down the
autoloader
. The
autoloader will d
o all of its internal housekeeping and then display
a confirmation message:
Ready to Power Off
Press the power button to power off the system.
Page 46

41
Chapter 3: Trouble Shooting
No display on LCD or the unit does not operate when the power is on.
Check t
he connections for the power cable and ensure that the power outlet is working
correctly.
Make sure that the rear-panel power voltage setting matches the voltage of your power
outlet.
If the
autoloader was stored in a location where the temperature
dropp
ed below 32°F (0°C)
within
the past 24 hours, leave the
autoloader in a warm room with a temp
erature of at
least 65°F (19°C)
for four hours prior to powering the
autoloader on.
Drives cannot read disc and shows error message.
Check the format of the mas
ter CD/DVD
/BD
Check the master CD/DVD
/BD itself for damage.
Your master disc may be copy protected. Normally, most of the
Blu-Ray or DVD movies
and some of the CDs you purchase from stores have copy protect
ion encoded on them.
Buttons do not function.
The
autoloader may still be busy performing a task. Give it some t
ime and press the button
again.
To interrupt the current running pro
cess, press the
ESC/Escape button a
nd hold it
for several seconds.
If it still doesn't work, turn the machine off, and t
hen restart the
machine after a minute.
Copy completed, but the
copies are not readable
/
execut
able.
Use the compare feature to check the copied disc (data discs only).
Based on our experience, the quality of your media plays a big role on this part. Try to use
high quality media to prevent such problems.
Use another
BD/
DVD/CD player/ROM to test the copied media. Some
times, your
BD/
DVD/CD Player/ROM may not be compatible with record
able
BD/
DVD/CD disc.
The failure rate is high.
Lower the write speed and try again. See Select Burn Speed on
page 23.
The quality of your blank discs may be poor.
The quality of your master disc may be poor.
Do I need to upgrade my autoloader
's firmware?
Unless your system is getting unstable, we strongly sugg
est n
ot upgrad
ing your
autoloader
's
firmware. Please contact Tech Support if your system is getting unstable.
Cannot boot-up or fails to upgrade firmware.
Contact Tech Support.
Can I load data directly from my computer to my
autoloader
's Hard Drive?
No, your
autoloader
's Hard Drive has a unique file system that comput
ers will not
recognize. Thus, you can't perform any read/write operations to the Hard Drive from your
computer.
Page 47

42
Why won't some
drives copy?
Reset the system settings back to defaul
t. (See Load Default on page 35)
Drives are consumable parts and every drive
has a
finite
lifespan. After a period of time,
they do tend to wear out. Please contact
Tech Support Service for assistance.
F.Y.I
-
Replacing any component
(s) of the autoload
er without Tech Support Service s
consent will void the autoloader s warranty
instantly
.
Contact Tech Support.
Why does my
autoloader
stay at System Bootup ?
The reason the
autoloader may remain frozen at system bootup is caused by improper
shut down. To solve the problem, contact the Tech Support department. Even though this
problem can be solved, all the hard drive information will be lost due to this failure.
How do I reset my
autoloader back to default?
See Load Default on page 35.
Page 48

43
Chapter 4
: List of
Robot
Error Code
s
Code Short Description
Full Description
R10
Arm did not return to
top position
If error code 10 is shown, it represents that the picking arm did
not return to the top position within 10 seconds after a
command was sent out. Th
e picking arm must return to the top
position after each action. This indicates an obstruction or
mechanical failure prevented the picking arm from completing
the requested action.
R11
Arm did not detect
specified location in
the allotted time
If error co
de 11 is shown, it represents that when the picking
arm is instructed to pick up a disc, it has failed to detect
anything (including the bottom of the bin) within 10 seconds.
This would apply to inserting a disc in a drive and not detecting
anything within 10 seconds if the Z Maneuver feature is
disabled. This error indicates that an obstruction, missing
component or mechanical failure has prevented the picking
arm from detecting a disc, drive, etc to perform the assigned
task.
R12
Unable to move to
the n
ext input/output
bin
If error code 12 is shown, it represents that the picking arm
did
not travel to its destination input/output bin from any other bin
within 10 seconds. This error indicates that an obstruction or
mechanical failure has prevented the pic
king arm from rotating
to the assigned input/output bin.
R13
Unable to move into
the drop disc
position
If error code 13 is shown, it represents that the picking arm
did
not reach the drop position within 4 seconds when placing a
disc to
the
output bin.
The drop position represents the safe
distance between the picking arm and the spindle where the
disc can be placed securely onto the spindle. This error
indicates that an obstruction, missing component or
mechanical failure has prevented the picking ar
m from
performing the assigned task.
R14
Unable to perform
the horizontal Z
Maneuver from bin #
1 to the starting point
If error code 14 is shown, it represents that the picking arm did
not reach the horizontal starting position for placing a disc into
th
e appropriate drive starting from spindle bin #1 within 4
seconds during the insert process. (This error is only shown
when the Z Maneuver is enabled).
R15
Unable to perform
the horizontal Z
Maneuver from the
starting point to the
original position
If er
ror code 15 is shown, it represents that the picking arm did
not reach the drive position within 4 seconds from the Z position
starting point. This takes place when the picking arm has
descended to the appropriate drive location and should move
horizontall
y to center the disc over the opened drive tray but
fails to do so in the specified allotted time. (This error is only
shown when the Z Maneuver is enabled).
R16
Unable to perform
vertical Z Maneuver
while placing disc in
drive tray
If error code 16 is sh
own, it represents that the picking arm
did
not descend and place the disc into the opened drive tray within
4 seconds after the picking arm has centered the disc above
the opened drive tray. (this error is only shown when the Z
Maneuver is enabled).
Page 49
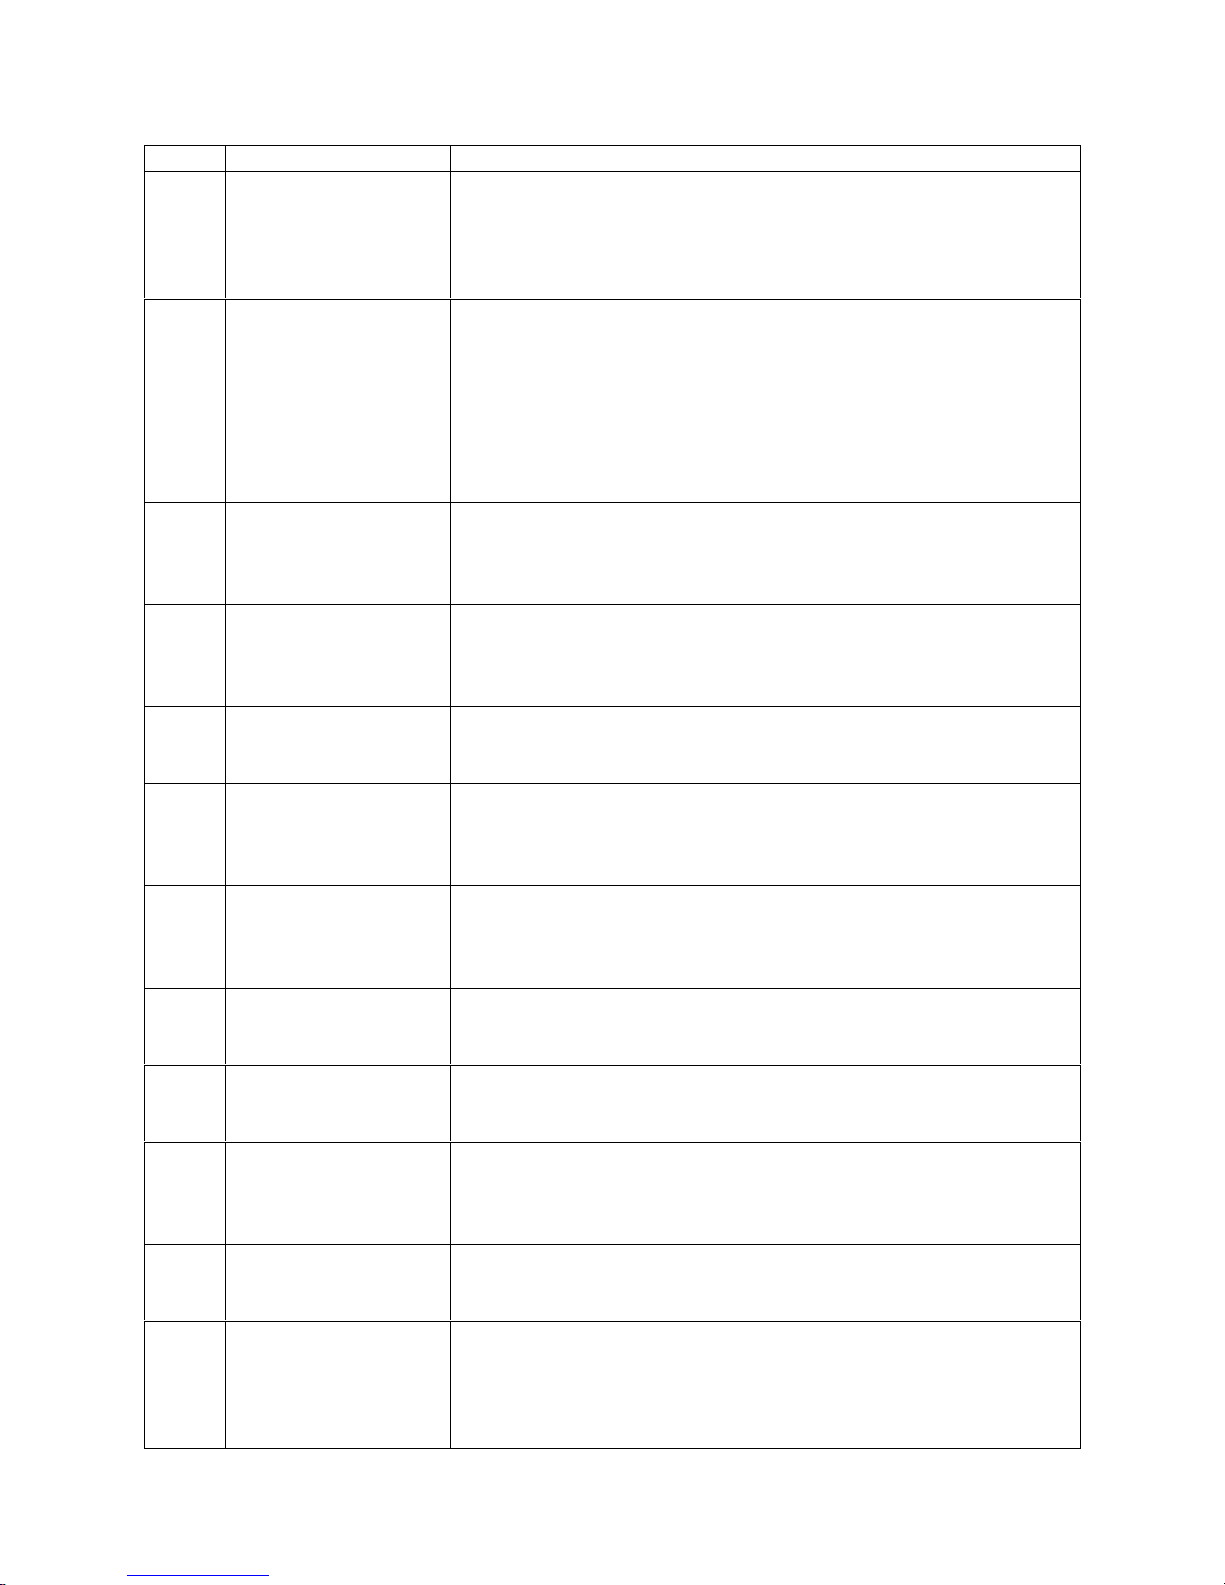
44
Code
Short Description
Full Description
R17
Unable to perform
the horizontal Z
Maneuver from the
original position to
the starting point
If error code 17 is shown, it represents that the picking arm
did
not return to starting horizontal position for the re
verse Z
Maneuver within 4 seconds to return the disc to the output bin.
(This error is only shown when the Z Maneuver is enabled).
R20
Input bin empty
If error code 20 is shown, it represents that all of the input bins
are empty. This error commonly comes up every time the
autoloader does not detect anymore blank media to load into
the drives. If this error arises and you are finished, press the left
arrow to end the copy process. If you are not finished, restack
the blank media from the first input bin to the remaining bins as
needed and push
ENT/Enter button to continue the duplicating
procedure.
R21
Input bin missing
If error code 21 is shown, it represents that the input bin is
missing. This error indicates that an obstruction, missing
component or mec
hanical failure has prevented the picking
arm from detecting the input bin to perform the assigned task.
R30
Unable to locate
drive tray for output
of the disc
If error code 30 is shown, it represents that the picking arm
did
not detect an opened tray bef
ore reaching its lowest
descending limit when attempting to pick up a finished disc
from a specified drive tray.
R40
Clear previous error If error code 40 is shown, it represents that a
system command
sequence is corrupted. Please abort the current job an
d start
over
with
a new job.
R50
Drawer not fully
opened
If error code 50 is shown, it represents that the disc drawer is
not fully opened. If you believe the drawer is opened, please
close it and try open it once more until you hear a clicking
sound.
R60
Unable to locate
drive tray for input of
the disc
If error code 60 is shown, it represents that the picking arm
did
not detect an opened tray before reaching its lowest
descending limit when attempting to place a blank disc into a
specified drive tray.
R70
Disc dropped during
input procedure
If error code 70 is shown, it represents that a disc was picked
from an input bin and the picking arm dropped the disc on the
way to one of the drive trays.
R71
Failure to pick up a
disc from input bin
If error code 71 is shown, it represents that the picking arm
failed to pick up a disc from an input bin after 3 continuous
attempts.
R80
Disc Remaining On
Robotic Arm Not
Loaded On To The
Drive Tray
If error code 80 is shown, it represents that a disc attempting to
b
e placed on a drive tray remained attached to the
robot pick up
arm and was not properly dropped into the drive tray.
R90
Disc dropped during
output procedure
If error code 90 is shown, it represents that a disc was picked
from a drive tray and the pickin
g arm dropped the disc on the
way to the appropriate output bin.
R160 Output bin full
If
error code 160 is shown, it represents that the output bin is
full. This commonly occurs if the input bin was filled with more
discs while completed discs were deposi
ted to the output bins
increasing the total disc capacity beyond the maximum output
capacity.
Page 50

45
R176 Cannot detect disc in
drive tray
If
error code 176 is shown, it represents that the picking arm is
attempting to remove a disc from a drive tray and canno
t detect
the disc. This commonly occurs when the disc was removed
from the tray before the picking arm had an opportunity to pick it
up.
R192
~19
7
Disc miss-loaded in
output bin #
If error code
192 ~
197 is shown, it represents that a disc being
returned t
o the output/NG
was not properly dropped from the
picking arm onto the output bin 0 ~ 5, respectively, where bin 0
indicates the position right in front of the drive housing.
R255 High static shock
error
T
oo much static electricity built up from the disc(s)
. This error
occurs when the static electricity on the disc is too high. Either
the facility produces too much static electricity or the current
climate is conducive to high concentration of static electricity.
This error is caused by the buildup of an electric static charge
which shocks the robotic arm while loading a disc. If this error
should occur, the user must completely reboot the system by
turning the unit off at the power button. When the unit is turned
on again, it should operate normally, b
ut you will need to
reprogram the job it was running.
Page 51

46
Chapter 5: Menu Tree
1.
Copy
<Partition> <Counter>
2. Test
<Partition> <Counter>
3. Compare
<Partition> <Counter>
4. Test+Copy
<Partition> <Counter>
5. Copy+Compare
<Partition> <Counter>
6. Select
Burn Speed <HDD to CD | HDD to DVD>
7. Select Source
<Hard Drive>
8. Master Mode
<SM | MM>
9. Erase
<Quick | Full>
10. Hard Drive Setup
10.1 Select Partition
10.2 Load Partition
10.3 Rename Partition
10.4 Delete Partition
10.5 Partition Info
10.6 Select Loading Drive
10.7 Format Hard Drive
11. Setup
11.1 Language
11.2 Read Error Skip
<On | Off | Off with Retry
>
11.3 CD Writing Modes
11.4 Max Audio, VCD, and CDG Speed
<1x, 2x, 4x, 8x,
10x,
12x, 16x, 24x, 32x,
40x & 52x>
11.5 Buzzer
<On | Off
>
11.6 Startup Menu
11.7 Screen Saver
<On | Off>
11.8 Counter
<On | Off>
11.9 DVD+R Compatibility Mode <On | Off>
11.10 ISRC <On | Off>
11.11 CD Overburn <On | Off>
12. System Utilities
12.1 Disc Info
12.2 System Info
12.3 Device Info
12.4 Load De
fault
12.5 Update Firmware
13. Loader Utilities
13.1 Update Robot Firmware
14. Manage Accounts
14.1 View User
14.2 Create User
14.3 Edit User Info
14.4 Delete User
14.5 Password on Bootup
15. AUTOCOPY
16. SHUTDOWN
Page 52

Technical Support Information
Webs
ite
Please visit our website at
http://www.discmakers.com/techsupport/techsupport.asp
For videos manuals and quick start guides for your duplicator
If you require further assistance wi
th this unit, our technical support staff will be happy to assist
you. There may be a cost associated with any repairs if your warranty has expired.
Email
Please contact us by email at
techsupport@discmak
ers.com
Telephone
Call (800) 468-9353
 Loading...