

Page 1

FASTECH
1-1
FORMULA
Section 1
Introduction
Welcome Aboard
Dear Formula Owner:
Welcome aboard! We appreciate how much careful thought, research and planning you put into the
decision to purchase a new boat, and we are pleased to welcome you as a new member of the Formula
family.
Members of the Formula team – your local dealership’s personnel as well as all the Formula employees
who had a part in building, inspecting and providing support for your boat – are dedicated to delivering the
highest quality product possible, and we all share in your pride of ownership.
Your Formula boat will afford you many hours of relaxation and pleasure on the water. Along with the
enjoyment, however, comes responsibility for not only yourself but also your passengers and others on
the water. This Owner Information Manual is designed to help you familiarize yourself with your new
Formula before you take her out on the water and as a quick-reference tool whenever a little information
is needed. Your selling dealer will also be glad to help you learn more about your new boat should any
questions arise.
We also encourage you, and all those who will be boating with you, to take a safe boating course. The
United States Coast Guard Auxiliary, the United States Power Squadron, and the American Red Cross all
offer free courses. Call 1-800-336-BOAT for information on the boating course nearest you (in Virginia,
call 1-800-245-BOAT). The more you know about boating, the more fun you will have!
Congratulations on your wise decision. We wish many satisfying hours of boating pleasure to you and
your crew!
Sincerely,
Scott D. Porter
President
Page 2
1-2
FORMULA
FASTECH
FASTECH
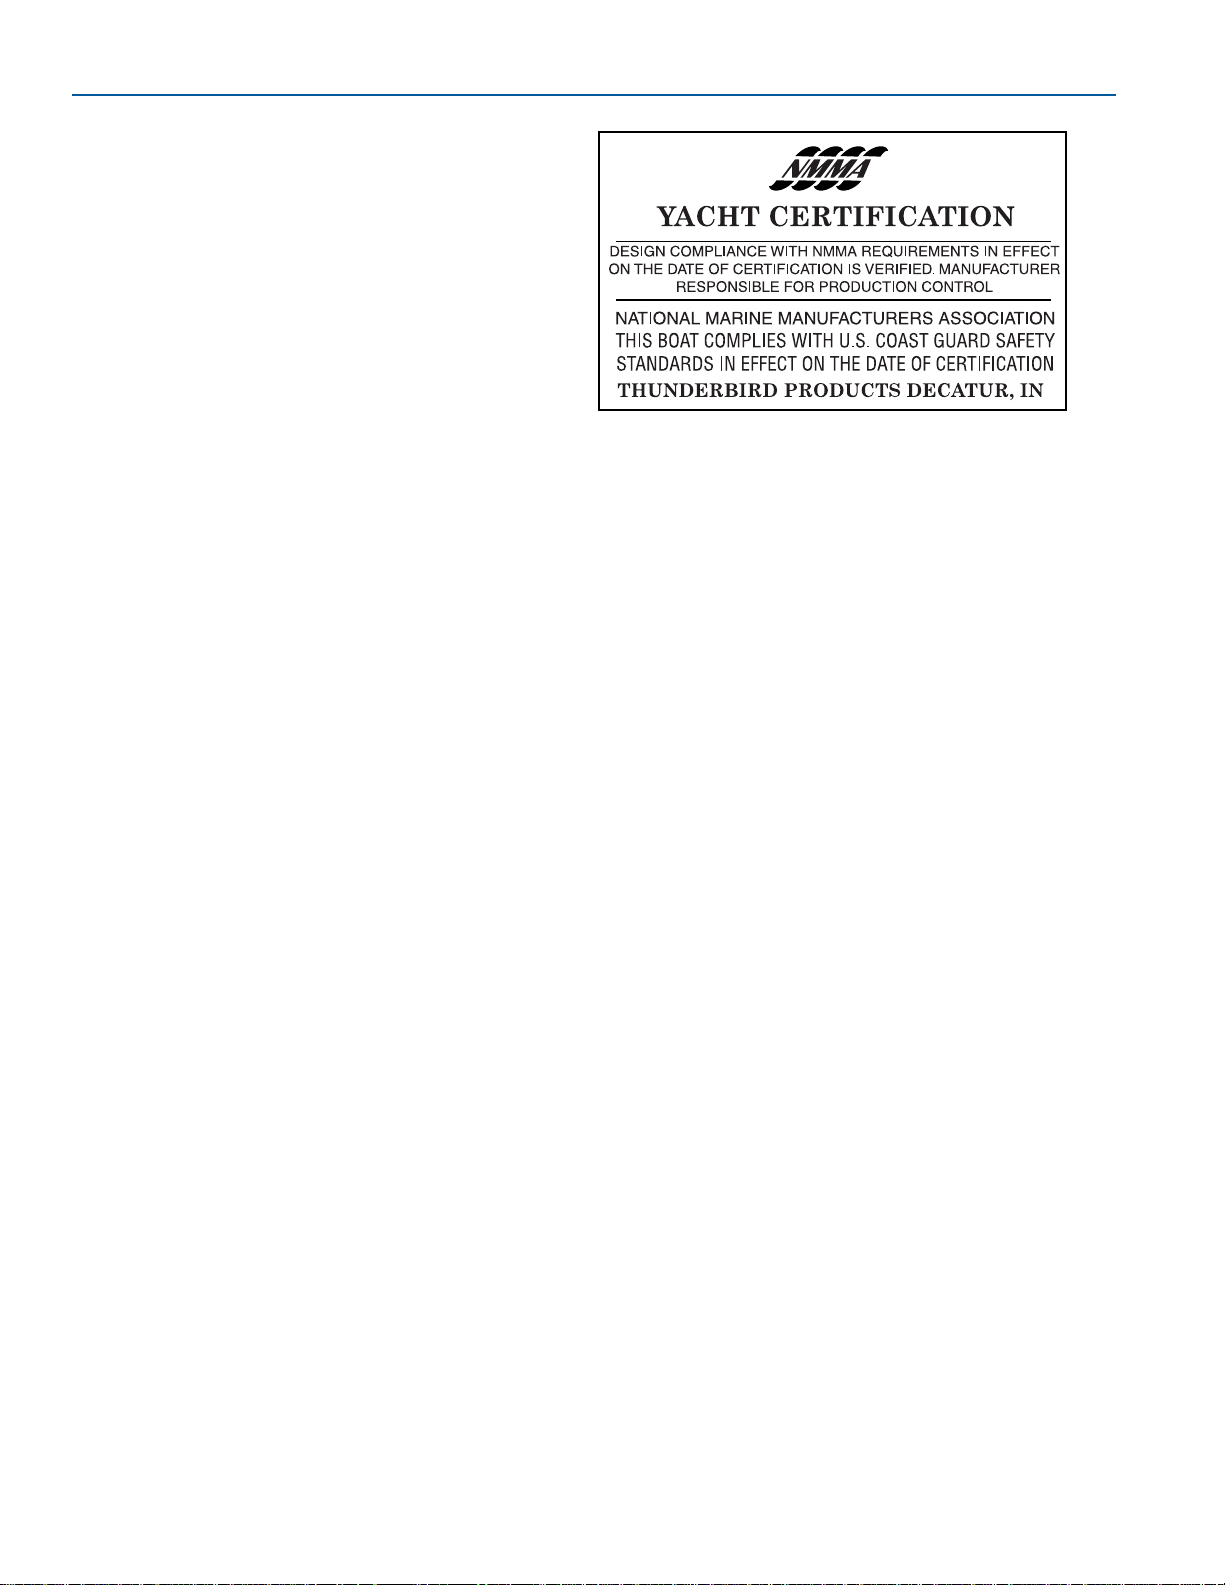
NMMA Certification
Formula is a charter member of the National
Marine Manufacturers Association (NMMA). This
independent organization members include boat,
engine and marine equipment manufacturers that
are focused on the improvement and safety of
boating.
Your new Formula boat is NMMAcertified. A
NMMA certification not only satisfies the U. S.
Coast Guard (USCG) regulations but also the
more rigorous equipment and system standards
based on those established by the American Boat
and Yacht Council, Inc. (ABYC). Your Formula
meets or exceeds NMMA safety-based
certifications.
DECLARATION OF
CONFORMITY
A CE mark means the boat complies with
European directives for recreational vessels as
published by the International Organization for
Standardization (ISO).
Yacht Certification
Figure 1-1
FOR191
Page 3

1-3
FORMULA
INTRODUCTION
FASTECH
TABLE OF CONTENTS
Section 1—Introduction
Declaration of Conformity ...........................1-2
Table of Contents........................................1-3
Owner/Operator Responsibilities................1-5
Publications.................................................1-5
Qualified Boat Operators ............................1-5
Education Opportunities..............................1-5
Federal, State and Local Regulations........1-6
Reporting Accidents....................................1-6
Rendering Assistance.................................1-6
Serial Number Locations.............................1-6
Repair and Modifications ............................1-6
Environmental Considerations....................1-7
Section 2—Boating Safety
Signal Words/Definitions.............................2-1
Required Safety Equipment........................2-2
Recommended Equipment.........................2-5
Emergency Considerations.........................2-5
Hazardous Conditions.................................2-6
Operating By Minors...................................2-9
Communication ...........................................2-9
Section 3—Specifications and Layout
Boating Terminology....................................3-1
Dimensions..................................................3-2
271 FASTech...............................................3-3
292 FASTech...............................................3-5
353 FASTech...............................................3-7
382 FASTech...............................................3-9
Section 4—Controls and Indicators
Gauges........................................................4-1
Switches......................................................4-3
Circuit Breakers...........................................4-7
Steering.......................................................4-7
Remote Controls.........................................4-8
Helm Controls and Indicators .....................4-9
Cabin Controls and Indicators...................4-11
Battery Selector Switches.........................4-14
Section 5—System Operation and Equipment
Powertrain ...................................................5-1
Fuel System ................................................5-1
Helm System...............................................5-1
Bilge and Blower System ............................5-2
DC Electrical................................................5-2
AC Electrical ................................................5-3
Shore Power ...............................................5-5
Generator (Optional)...................................5-7
Battery Charger...........................................5-8
Fresh Water System...................................5-8
Gray Water System.....................................5-9
Waste Water (Head) System....................5-10
Raw Water System ..................................5-10
Automatic Fire Extinguisher System ........5-10
Equipment .................................................5-11
Section 6—Getting Underway
Safety Checklist ..........................................6-1
Basic Safe Boating Rules...........................6-1
Fueling.........................................................6-4
Pre-Operational Checks..............................6-5
Boat Trim/Loading.......................................6-6
Boarding......................................................6-6
Section 7—Operation
Starting........................................................7-1
Shifting.........................................................7-3
Steering.......................................................7-3
Running.......................................................7-3
Stopping ......................................................7-3
Engine Flushing ..........................................7-4
Operating at High Speed............................7-5
Propeller Effect ............................................7-6
Maneuvering Techniques............................7-6
Boating At Night ..........................................7-8
Special Operating Conditions.....................7-8
Holding Position..........................................7-8
Trimming-Drive Units and Trim Tabs..........7-9
Anchoring and Sea Anchors.....................7-14
Towing and Being Towed..........................7-16
Heavy Weather .........................................7-17
Swimming and Diving ...............................7-19
Docking......................................................7-20
Mooring Lines............................................7-21
Using Fenders...........................................7-22
Navigational Hints.....................................7-22
Section 8—Schedule Checks and Service
After Each Run ............................................8-1
Scheduled Maintenance Checks................8-1
Section 9—Care and Maintenance
Interior Cleaning..........................................9-1
Exterior Cleaning.........................................9-2
Unscheduled Maintenance.........................9-4
Bilge.............................................................9-6
Corrosion and Electrolysis..........................9-6
Galvanic Corrosion Protection....................9-7
Section 10—Storage
In-Water Storage Preparation ...................10-1
Lifting the Boat..........................................10-1
Storage Cradle..........................................10-2
Storage/Winterization................................10-2
Re-activating the Boat After Storage........10-2
Section 11—Troubleshooting
Page 4

1-4
FORMULA
FASTECH
FASTECH
Section 12—Warranty and Service
Thunderbird Limited Warranty Policy.......12-2
Section 13—Forms
Service Log ...............................................13-1
Fuel Log ....................................................13-2
Float Plan..................................................13-3
Useful Information.....................................13-4
Transfer Form............................................13-5
Page 5

1-5
FORMULA
INTRODUCTION
FASTECH
OWNER/OPERATOR
RESPONSIBILITIES
At the time of delivery, the owner/operator is
responsible for:
●
Understanding warranty terms and conditions
of both the propulsion units and boat.
●
Obtaining insurance.
●
Examining boat to ensure proper operation of
all systems.
Before operating the boat, the owner/operator is
responsible for:
●
Obtaining state registration of the boat.
●
Providing the proper USCG required safety
equipment.
●
Following proper break-in procedure for the
propulsion units.
●
Understanding safety information and proper
operating procedures within this manual.
While operating the boat, the owner/operator is
responsible for:
●
Knowing that all safety equipment and
personal floatation devices (PFDs) are in
good condition and suitable for your boat and
passenger load.
●
Having at least one other passenger who is
capable of handling the boat in an
emergency.
●
Following safe operating practices and the
“Rules of the Road.”
●
Understanding proper maintenance and
knowledge of the boat’s operating systems.
●
Providing safety training for the passengers.
●
Avoiding use of alcohol and other drugs.
●
Providing assistance to other boaters.
Insurance
You must obtain insurance before operating your
new boat. Insurance for loss by fire, theft or other
causes, or liability protection against accidents is
a must for responsible boaters. The boat owner is
legally responsible for any damage or injury
caused when he, or someone else operating the
boat, is involved in an accident. Many states have
laws detailing minimum insurance needs. Your
insurance agent or your dealer may be able to
supply you with more information.
Registration/Documentation
The USCG requires that all power boats operated
on the navigable waters of the U. S. must be
registered in the state of main use; also, many
states require registration in that state whenever
boating on waters within their state boundary.
Contact your state boating authorities (and
neighboring states) for registration information on
boats and trailers. Your Formula dealer can
supply you with the appropriate forms.
PUBLICATIONS
Your Owner Information Binder includes
information about onboard systems and
equipment furnished by suppliers other than
Formula Boats. Please refer to these
manufacturer’s manuals for additional operation
and maintenance instructions not covered in this
manual.
QUALIFIED BOAT
OPERATORS
This manual is not intended to provide complete
training on all aspects of boat operation. We
strongly recommend that all operators of this boat
seek additional training on boat handling and
safety. Have all operators become familiar with
the handling characteristics, and proper steering
and control system usage before attempting highspeed operation.
Some states require youths 16 years of age and
younger to complete a boating safety course
before operating any watercraft. Many others
require operators under the age of 18 to be
licensed in small boat operation.
EDUCATION OPPORTUNITIES
Boat smart from the start, take a boating safety
course and get a free vessel safety check
annually for your boat. For more information,
contact: United States Coast Guard Auxiliary,
1-800-368-5647, www.cgaux.org; United States
Power Squadrons, 1-888-FOR-USPS,
www.usps.org.
Page 6

1-6
FORMULA
FASTECH
FASTECH
Most boaters can enhance their enjoyment of
boating experiences through increased knowledge
of safe operation, navigation and regulation of
pleasure boats. The following is a list of some
other agencies and organizations that offer Water
Safety, First Aid and CPR courses or information.
To find boating safety courses in your area, call
your state’s local boating agency or the USCG
boating safety courseline at 1-800-336-2628
(1-800-245-2628 in Virginia).
●
American Red Cross
●
State Boating Offices
●
Canadian Power and Sail Squadrons
●
Boat Owners Association of the United States
●
National Safe Boating Council
●
Yacht Clubs
FEDERAL, STATE AND LOCAL
REGULATIONS
The USCG is the authority of the waterways; they
are there to help the boating public. State boating
regulations are enforced by local authorities. You
are subject to marine traffic laws and “Rules of the
Road” for both federal and state waterways; you
must stop if signaled to do so by enforcement
officers, and permit to be boarded as asked.
REPORTING ACCIDENTS
The USCG requires the owner or operator of a
boat involved in an accident, to report the incident
to the proper marine law enforcement agency for
the state in which the accident occurred.
Immediate notification to the nearest State boating
authority is required if a person dies or disappears
as a result of a recreational boating accident. If a
person dies or sustains injuries requiring more
than first aid, a formal report must be filed within
48 hours of the accident. Aformal report must be
filed within 10 days for accidents exceeding $500
in property damage or complete loss of boat.
RENDERING ASSISTANCE
If you see a distress signal or suspect a boat is in
trouble, you must assume it is a real emergency
and render assistance immediately. By law, the
operator in charge of the craft is obligated to
provide assistance to any individual in danger if
such assistance can be provided safely. Failure to
render assistance can result in a fine and/or
imprisonment.
The 1971 Boating Safety Act grants protection to
a “Good Samaritan” boater providing good faith
assistance, and absolves a boater from any civil
liability arising from such assistance.
SERIAL NUMBER
LOCATIONS
Your Formula boat, its engines and propulsion
units, and other equipment onboard will have a
serial number for identification. It is a good
practice to prepare a list of all serial number items
and store it in a safe place other than onboard the
boat. An Important Information Form is located at
the end of this manual. Please refer to the
equipment operator’s manuals supplied in your
Owner Information Binder for location of serial
numbers.
REPAIRS AND
MODIFICATIONS
Your Formula boat has been designed for safety
in the harsh marine environment and thoroughly
tested and certified for compliance with applicable
safety standards. Because of the possibility of
interference with the structural design of the boat,
owner installation of additional equipment or
modifications of factory equipment is not
recommended and may void manufacturer's
warranties.
In addition, do not attempt to make repairs unless
you are certified to do so. Be sure to have the
necessary authorized repair information, and use
approved marine replacement parts.
Your Formula dealer is qualified to ensure repairs,
additions or modifications to your boat will not
compromise safety, design integrity or warranty
coverage.
Page 7
1-7
FORMULA
INTRODUCTION
FASTECH
ENVIRONMENTAL
CONSIDERATIONS
As a boater, you already appreciate nature’s
beauty and the peace of the great outdoors. It is a
boater’s responsibility to protect the natural
environment by keeping waterways clean.
MARPOL Treaty
The USCG enforces the International Convention
for the Prevention of Pollution from ships,
commonly referred to as the MARPOL Treaty
(MARine POLlution). This treaty prohibits the
overboard dumping of all ship-generated plastics,
chemicals, garbage and oil.
Fuel/Oil Spillage
Fumes from rags can collect in bilge and
be extremely hazardous. Do not store rags
used to wipe-up fuel or solvent spills in the
boat. Dispose of rags properly ashore.
The spilling of fuel or oil into our waterways
contaminates the environment and is dangerous
to wildlife. Do not discharge or dispose of fuel, oil
or other chemicals into the water; it is prohibited
and you can be fined. These are two common,
accidental types of discharge:
●
Overfilling the fuel tanks
●
Pumping contaminated bilge water
Discharge/Disposal of Waste
Waste means all forms of garbage, plastics,
recyclables, food, wood, detergents, sewage, and
even fish parts in certain waters – in short, nearly
everything. We recommend you bring back
everything you take out with you for proper
disposal ashore.
Use an approved pump-out facility at your marina.
Many areas prohibit the discharge of sewage
overboard or even an operable overboard waste
discharge.
Marine Sanitation
NOTICE
Direct disposal of sanitation waste into
some waters is prohibited and could result
in being fined. Be sure to check local
regulations.
To avoid damaging the waste disposal
system and the environment, do not place
facial tissues, paper towels or sanitary
napkins in the head.
Have your Formula dealer properly service the
waste disposal system when needed.
Excessive Noise
Noise means engine noise, radio noise or even
voices. Many bodies of water have adopted noise
limits. Don’t use thru-transom exhaust unless
you’re well off shore. Music and loud conversation
can carry a considerable distance on water,
especially at night. Be sure to follow regulations
and be courteous.
Wake/Wash
You are responsible for injury and damage
caused by your wake/wash.
Be alert for NO WAKE zones. Prior to entering a
no wake zone, come off plane to the slowest
steerable speed. Use caution when operating
around smaller crafts, in channels and marinas,
and in congested areas.
Exhaust Emissions
Increased exhaust (hydrocarbon) emissions
pollute our water and air. Keep your engine tuned
and boat hull clean for peak performance. Consult
your Formula dealer and propulsion unit
operator’s manual for information.
Paints
If your boat is kept in water where marine growth
is a problem, the use of anti-fouling paint may
reduce the growth rate. Be aware of
environmental regulations that may govern your
paint choice. Contact your local boating
authorities for information.
KCCPROP65G
WARNING
!
CAUTION
WARNING
!
WARNING
The engine exhaust from this product
contains chemicals known to the
State of California to cause cancer, birth
defects or other reproductive harm.
Page 8

1-8
FORMULA
FASTECH
FASTECH
Cleaning Agents
Household cleaners should be used sparingly and
not discharged into waterways. Do not mix
cleaners and be sure to use plenty of ventilation
in enclosed areas. DO NOT use products which
contain phosphates, chlorine, solvents, nonbiodegradable or petroleum based products.
Citrus-based cleaners are excellent for marine
cleaning purposes and are safe for you and the
environment.
Fishery Resources
There is a tremendous drain on our fishery
resources. Over-fishing and pollution have
strained the fish population. Do your part by
keeping only what you will eat and practice catchand-release.
Foreign Species
If you trailer your boat from lake to lake, you may
unknowingly introduce a foreign aquatic species
from one lake to the next. Thoroughly clean the
boat below the water line, remove all weeds and
algae, and drain the bilge before launching the
boat in a new body of water.
Page 9
FASTECH
2-1
FORMULA
Your safety, the safety of your passengers, and
other boaters are among your responsibilities as
operator of this boat. Your boat must be in
compliance with USCG safety equipment
regulations. You should know how to react
correctly to adverse weather conditions, have
good navigation skills, and follow the “rules of the
road” as defined by the USCG and
state/county/local regulations.
●
Read and understand this manual, the
propulsion unit manual, and the
generator manual. Be sure that you
understand all controls and operating
instructions before attempting to
operate the boat. Improper operation
can be extremely hazardous.
●
Be in control of your boat. Do not
operate your boat under the influence of
alcohol or other drugs.
Before each outing you should check all safety
equipment, such as fire extinguishers, personal
floatation devices (PFDs), flares, distress flags,
flashlights, and the engine stop switch. They
should be operable, in good condition, readily
visible, and easily accessed.
Check local weather reports before casting off; do
not leave the dock area when strong winds and
electrical storms are in the area or predicted to be
in the area.
Tell someone your travel plans and leave a float
plan. Afloat plan makes the job of search and
rescue much easier for authorities. Afloat plan
template can be found in the back of this manual.
SIGNAL WORDS/
DEFINITIONS
The popularity of boating and other water sports
has undergone an explosion in growth the past
few years. Because of this, safety is an important
issue for everyone who shares in the use of our
waterways.
Throughout this manual specific precautions and
symbols identify safety related information.
The Safety Alert Symbol means ATTENTION!
BECOME ALERT! YOUR SAFETY IS INVOLVED!
Indicates the presence of a hazard which
WILL cause SEVERE injury, death or
substantial property damage.
Indicates the presence of a hazard which
CAN cause SEVERE injury, death or
substantial property damage.
Indicates the presence of a hazard which
WILL or CAN cause MINOR or MODERATE
personal injury or property damage.
Section 2
Boating Safety
WARNING
!
DANGER
! !
WARNING
!
CAUTION
Page 10
2-2
FORMULA
FASTECH
FASTECH
NOTICE
Indicates installation, operation or
maintenance information which is
important but not hazard-related.
The precautions listed in this manual and on your
Formula boat are not all-inclusive. If a procedure,
method, tool, or part is not specifically
recommended, you must satisfy yourself that it is
safe for you and others, and that the boat will not
be damaged or made unsafe as a result of your
decision. REMEMBER-- USE COMMON SENSE
WHEN OPERATING YOUR BOAT!
REQUIRED SAFETY
EQUIPMENT
The Federal Boat Safety Act of 1971 (FBSA/71)
established minimum safety standards for boats
and associated equipment, specified by the
USCG. In addition, the ABYC and the NMMA
work with boat builders to develop voluntary
standards that exceed base requirements.
The included safety equipment on your Formula
meets or exceeds the standards of the USCG,
ABYC and the NMMA. Some required safety
equipment such as PFDs are not included with
your Formula boat. Your Formula dealer can help
you choose the appropriate equipment.
NOTICE
Many states’ equipment requirements go
beyond USCG requirements. Contact your
state boating office for further information.
Equipment requirements for coastal and inland
waters differ. Check with local authorities or the
USCG for further information about coastal water
requirements.
The following equipment may or may not be
required by federal/local regulations.
Life Saving Equipment
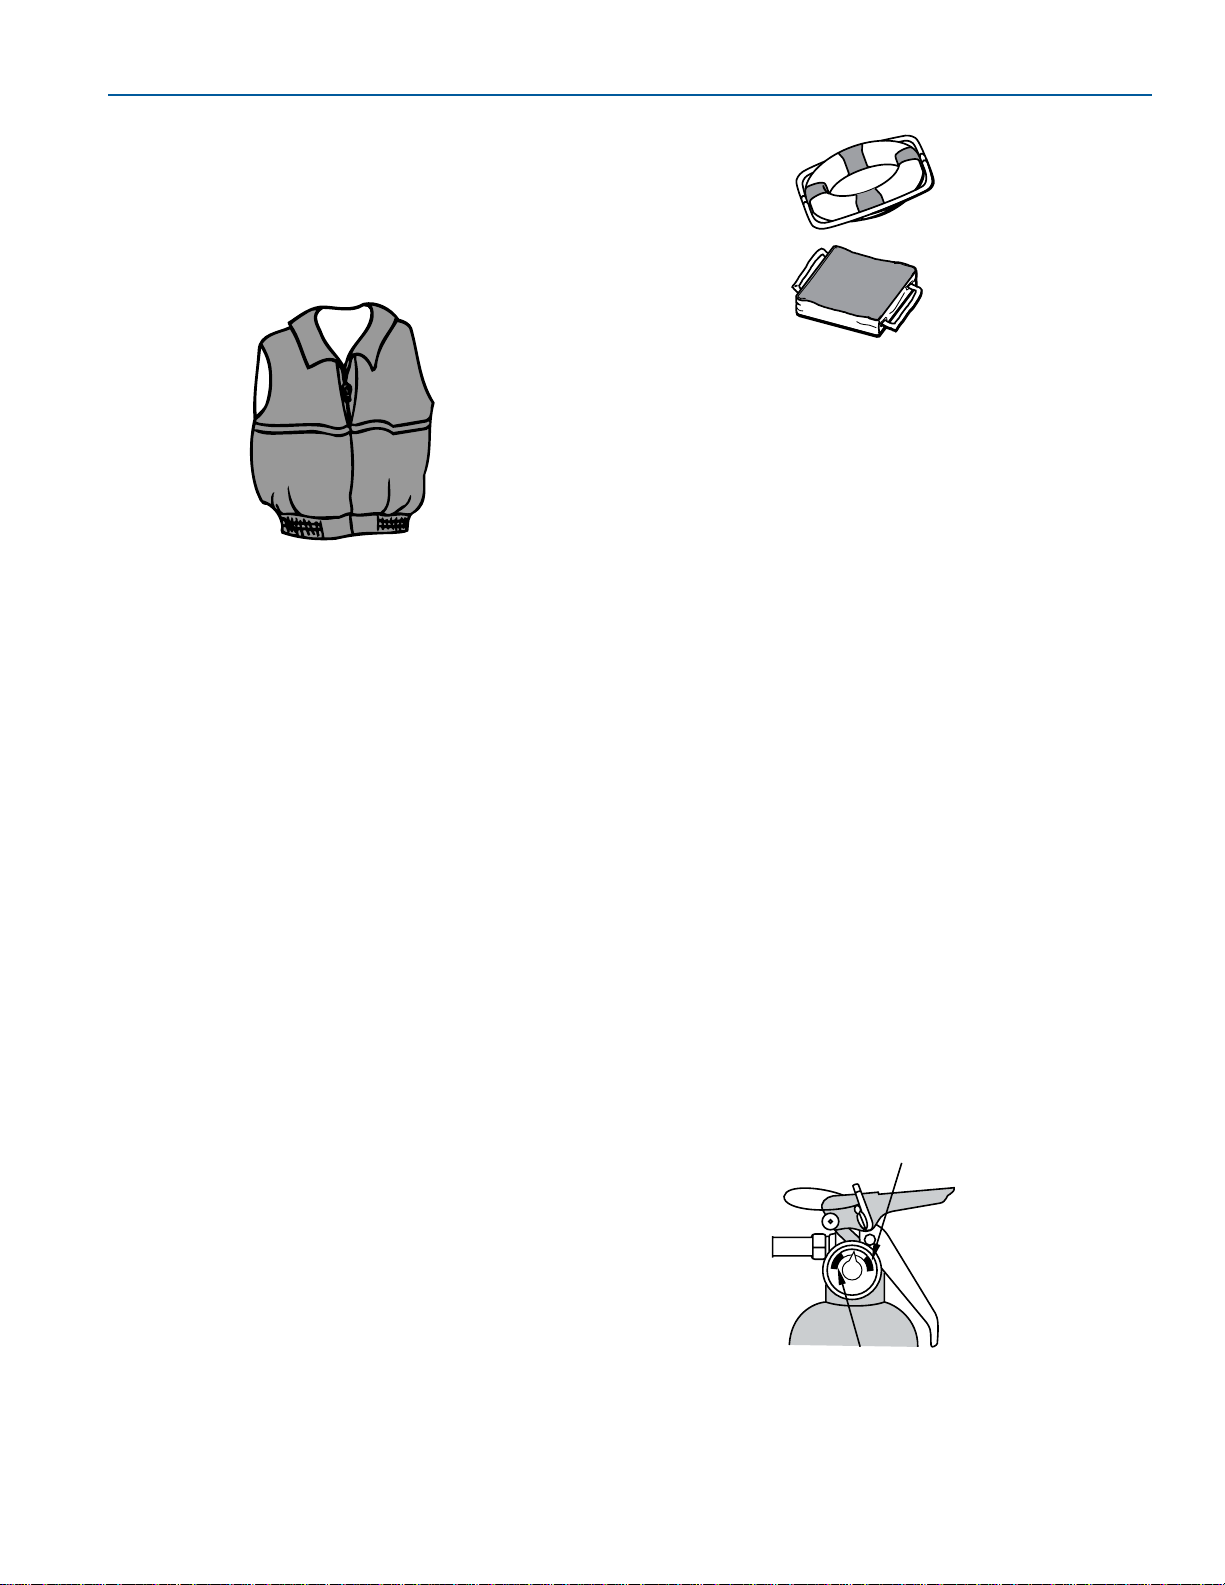
Federal law requires at least one Type I, II, III, or
V Personal Floatation Device (PFD), of the proper
size, for each person on board or being towed,
and at least one Type IV throwable PFD in the
boat.
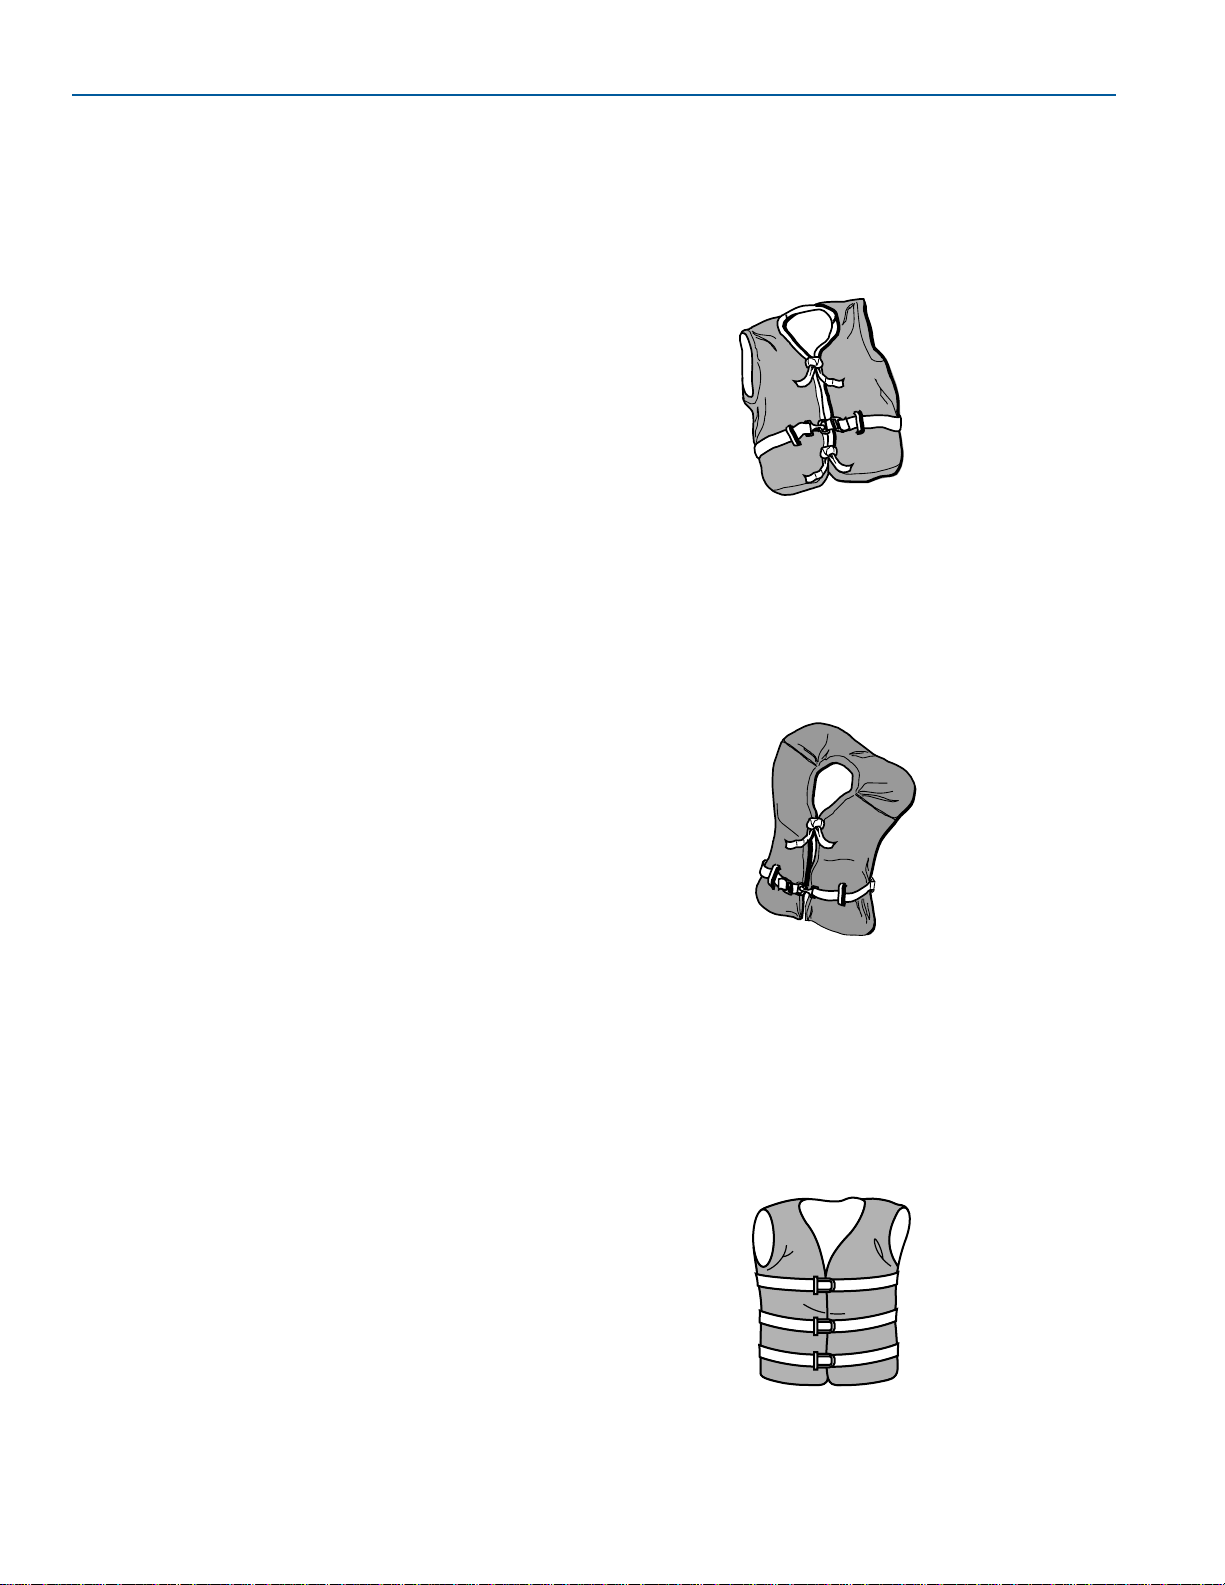
There are four types of PFDs to wear and one
type used for throwing in emergency situations.
Type I Life Preserver: Most buoyant PFDs are
effective on all waters, especially open, rough
water.
Type II Buoyant Vest: Good for calm water near
shore on most inland waters where quick rescue
is likely.
Type III Flotation Aid: Good for most inland water
applications where quick rescue is likely. Comes
in various styles and some are designed for water
sport activities.
Type III
Flotation Aids
Figure 2-3
Type II
Buoyant Vests
Figure 2-2
Type I
Life Preservers
Figure 2-1
KC-0041
KC-0051
KC-0042
Page 11
2-3
FORMULA
BOATING SAFETY
FASTECH
Type V Hybrid PFD: Inflatable design for special
use activities and may be used instead of a Type
I, II, or III PFD if used in accordance with the
approval conditions on the label and if worn when
the boat is underway. Some Type V PFDs provide
increased protection against hypothermia.
●
AType V PFD must be worn to be
counted toward the minimum carriage
requirements.
●
Special PFDs are available for skiing and
other water sports. These PFDs are
constructed with materials suitable for
high impact falls.
PFDs are intended to help save lives. The
operator should set an example by wearing one.
Wear a PFD whenever boating. It is especially
important that children and non-swimmers wear
a PFD at all times. Make certain all passengers
know how to put on and properly adjust their
PFDs. Also, selecting the proper type PFD for
your kind of outing helps ensure your time on
the water can be the safest possible.
At the beginning of each season, check PFDs
for damage and test for proper flotation. Refer to
the PFD manufacturer’s information.
All boats over 16 feet (4.8 meters) in length
must carry one USCG approved Type IV
throwable lifesaving device, such as a ring buoy
or buoyant cushion. To meet requirements, each
lifesaving device must have a current, legible
USCG approval stamp permanently affixed.
Type IV Throwable Device: Intended for heavy
traffic inland waters where help is available.
Designed to be thrown to a person in the water
and should never be worn.
Type V
Hybrid PFD
Must Be Worn
When Underway
Figure 2-4
Your Formula dealer can help you select
appropriate PFDs and throwable lifesaving
devices for your area.
Navigation Lights
All power boats underway between sunset and
sunrise must display proper navigation lights. All
boats at anchor must display a proper anchor
light. The anchor light must be visible 360
degrees. Your Formula boat is equipped with
international navigation lights.
Horn or Whistle
All boats over 4.8 meters (16 feet) in length
must be equipped with an operable horn or
whistle, audible from one mile. Your Formula
boat is equipped with a USCG approved horn.
Fire Extinguisher
All boats must carry an appropriate portable
marine type B (gasoline, oil or grease) fire
extinguisher in operable condition and in an
accessible location. Your Formula boat is
equipped with two portable and a fixed system
fire extinguisher. All passengers should know
the location and operating procedure of each
extinguisher.
Portable Fire Extinguisher
Figure 2-6
OVERCHARGED
RECHARGE
Type IV
Throwable Devices
Figure 2-5
KC-0071
KC-0043
KC-0083
Page 12
2-4
FORMULA
FASTECH
FASTECH
Check the pressure gauge regularly for proper
pressure; have the extinguisher filled if
necessary.
A fixed automatic fire
extinguisher is mounted on
the engine compartment
forward bulkhead. The
extinguisher is activated
when the heat sensitive head
reaches a predetermined
temperature. The extinguisher
discharges and saturates the
engine compartment,
smothering the fire. For
additional information, refer to
Halon Automatic Fire
Extinguisher, Section 5.
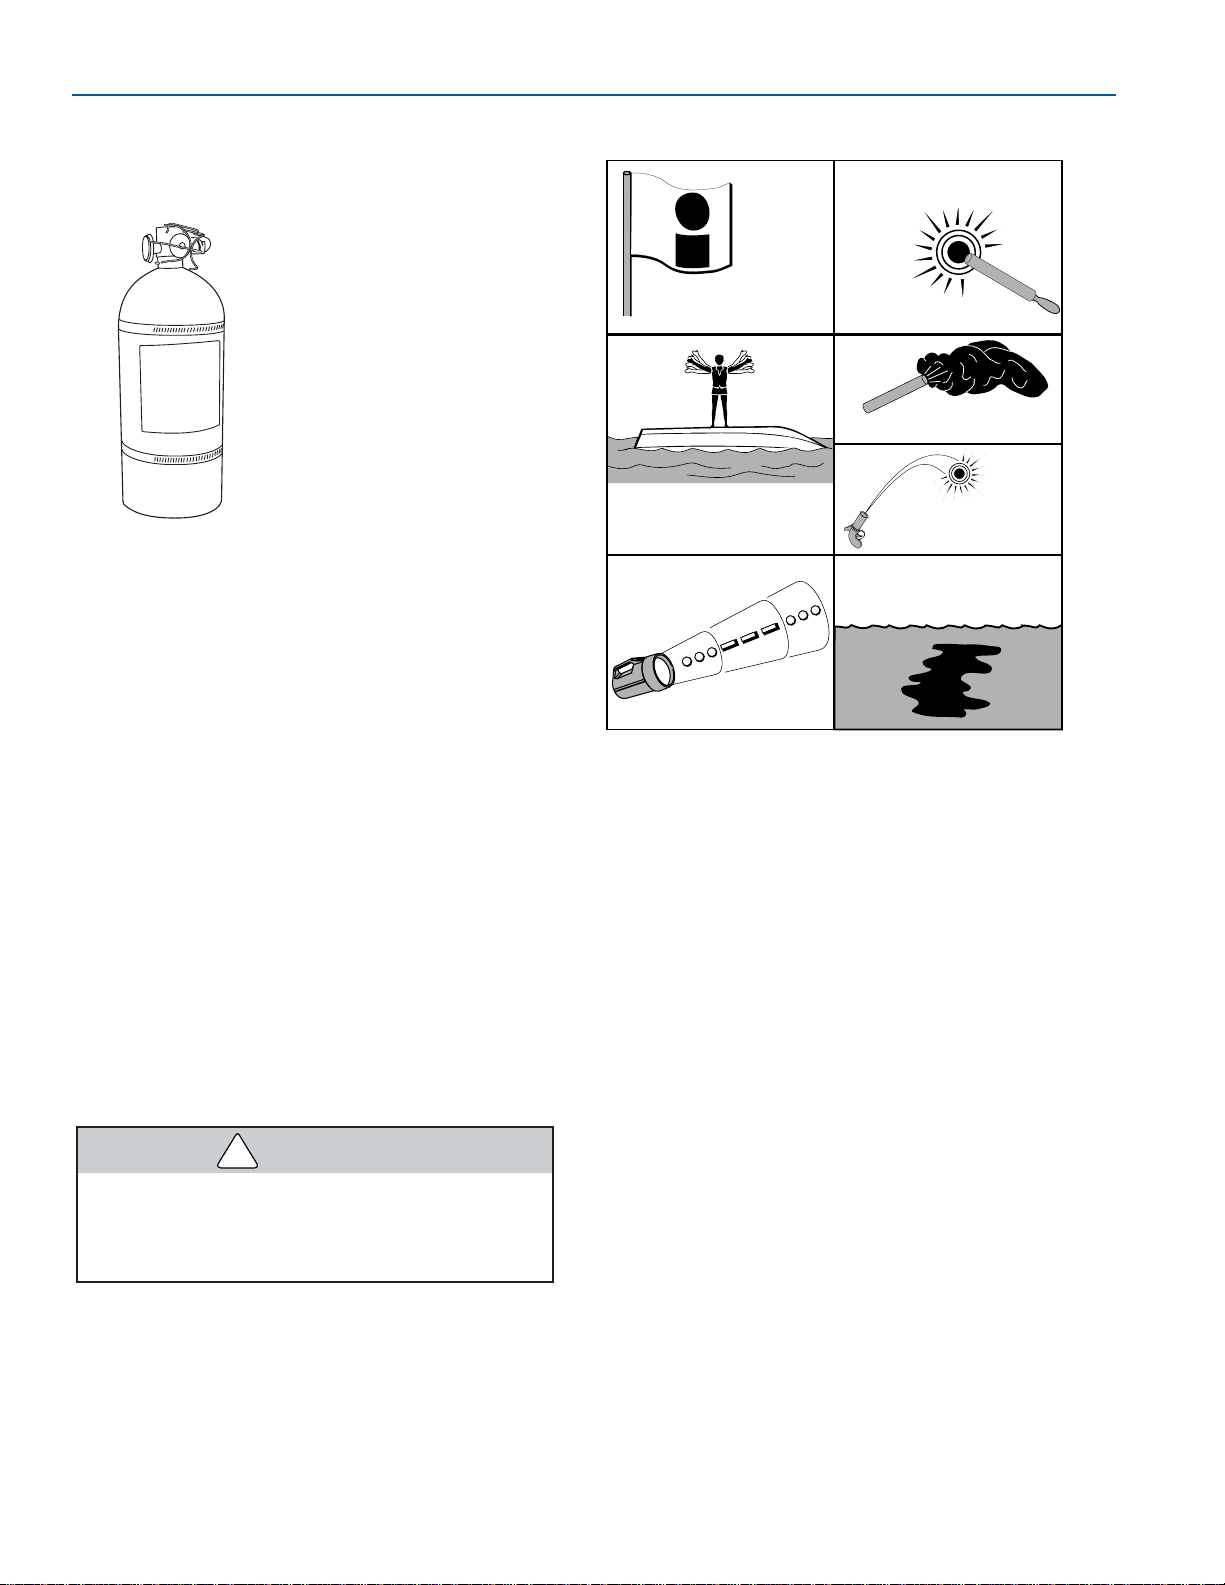
Visual Distress Signals
All boats over 16 feet (4.8 meters) must have
onboard day and night visual distress signals
when operating on coastal waters, the Great
Lakes, territorial seas or those waters directly
connected to them, up to a point where the
body of water is less than two miles wide. Carry
several types of signaling devices to handle a
variety of conditions. Your Formula dealer can
help you select appropriate visual distress
signals for your area.
If you are required to carry distress signals, you
must have three USCG approved pyrotechnic
devices. Be sure they are in serviceable
condition, not exceeding the expiration date and
stored in a cool, dry location in a waterproof
container. Have enough signals on board to last
three days.
Pyrotechnic signaling devices can cause
injury and property damage if improperly
handled. Follow the manufacturer’s
directions.
Visual Distress Signals
Figure 2-8
ORANGE
FLAG
RED DISTRESS FLARE
(HAND)
ORANGE SMOKE
SIGNAL (HAND)
USE DAY AND NIGHT
O
S
S
VISUAL DISTRESS SIGNALS
USE DAY AND NIGHT
USE NIGHT ONLY
DYE MARKER
USE DAY ONLY
ARMS SIGNALS
(USE BRIGHT CLOTH)
USE
DAY
ONLY
ELECTRIC
DISTRESS
LIGHT
RED METEOR FLARE
USE DAY ONLY
USE DAY ONLY
Fixed Automatic
Fire Extinguisher
Figure 2-7
KC-0082
FOR021
WARNING
!
Page 13
2-5
FORMULA
BOATING SAFETY
FASTECH
RECOMMENDED
EQUIPMENT
In spite of all efforts to the contrary, problems or
mishaps sometime occur while boating. Stock
these items listed below on your boat to help
make unexpected events more manageable.
●
Sea anchor and anchor line
●
Life raft
●
Tow line
●
Mooring lines and fenders
●
Compass
●
First aid kit and manual
●
Day/night distress signals
●
Radar reflector
●
Flashlight and spare batteries
●
Cellular phone
●
Binoculars
●
Portable AM/FM radio with weather band
●
Emergency Position Indicating Radio Beacon
(EPIRB)
●
Engine, drive unit and trim tab lubricant
●
Tool kit
●
Spare propeller and mounting hardware
●
Spare fuses and bulbs
●
Boat hook
●
Spare keys
●
Sun glasses and sun block lotion
●
Bottled water
Sea Anchors
You should have a separate sea anchor
onboard to slow drifting. In heavy seas, a sea
anchor is set from the bow to control the boat’s
behavior. The sea anchor holds the bow to the
sea and a slow drift. Please consult your
Formula dealer for sea anchor
recommendations.
Life Raft
If operating offshore, you should consider
carrying an inflatable life raft. AUSCG approved
life raft meets a number of stringent
specifications. The life raft must be large enough
to hold all the boat’s occupants and have its own
equipment pack including a paddle.
EMERGENCY
CONSIDERATIONS
Be prepared to deal with emergencies before
they happen. Try to formulate a plan for each
type in advance so that decisions can be made
quickly and without hesitation. Precious
moments lost can mean the difference between
losing and saving a life.
Fire/Explosion
You must be prepared and act quickly when
dealing with a fire. It is not recommended to
battle a fire for an extended period of time. Turn
engines off and abandon the boat if the fire
cannot be extinguished quickly. Swim at least 25
yards (23 meters) upwind from the boat and use
the visual distress signals to get assistance.
Gasoline will float on top of water and can
burn. If the boat is abandoned, swim up
wind, far enough to avoid fuel that may
spread over the surface of the water.
Onboard fires involving the fuel system usually
result in either an explosion that completely
destroys the boat, or the boat burning to the
waterline and self-extinguishing. Deciding on
abandoning the boat or staying to fight the fire is
difficult and depends on many factors. Try to
formulate a fire plan in advance to make that
decision quickly and without hesitation.
Be sure to:
●
Use caution and do not smoke when
refueling.
●
Verify that fuel does not leak.
●
Use only marine approved equipment on
your boat.
WARNING
!
Page 14

2-6
FORMULA
FASTECH
FASTECH
Flooding/Swamping
Improper loading, handling, water conditions,
weather and anchoring are the most common
causes of flooding. Insist on a safe, stable load.
Do not operate the boat exceeding your ability
to maneuver it. Use extreme caution in
hazardous weather and rough water conditions.
Anchor from the bow when using one anchor.
Collisions/Leaks
If a collision occurs, immediately account for all
passengers. Assess the hull for damage and
activate the bilge pumps to reduce any water
intake. Try to operate the boat to keep the
damaged area above water. If necessary, call or
signal for assistance.
If a leak is discovered, immediately determine the
cause. Acollision with an underwater object could
cause the hull to develop a leak. Aloose fitting or
hose clamp on a piece of equipment could cause
a leak. Try to repair the leak if possible. If a leak is
threatening the safety of you and your
passengers, call or signal for assistance.
Grounding
In the event you run aground, assess the situation
before proceeding. Immediately stop any water
from entering the boat. Inspect the propulsion
units, steering and control systems, and the hull
for damage. Maneuver the boat to safe water only
if the hull and all operating systems are in
satisfactory operating condition. Otherwise, call or
signal for assistance.
Water Rescue (Man Overboard)
Immediately react to a person who has fallen
overboard. Keep the victim constantly in your
sight. Safely return to the victim as soon as
possible. Throw the person a life preserver. Turn
off the engines and help the person into the boat.
Medical Emergency
Be prepared in the event of an emergency. Know
how to use your first aid kit. Be aware of any
special medical conditions of your passengers.
Drowning
React to a drowning victim the same as described
in Water Rescue. Handle the victim with care.
They could be injured. If necessary, resuscitate
the victim. Immediately signal for help and keep
the victim warm.
Operation Failure
If you experience a propulsion, steering or control
failure, immediately turn off the engines. Set the
anchor if possible or release a sea anchor to
prevent drifting. Try to determine the failure and
repair, if possible. Otherwise, call or signal for
assistance.
HAZARDOUS CONDITIONS
Every waterway poses hazards that you should
avoid, such as shallow water, tree stumps and
sand bars. Ask local boaters for information and
consult a marine chart when boating on unfamiliar
waters. As the operator of the boat, you should try
to avoid all hazards, known and unknown. The
following information does not contain all possible
water hazards.
Operating in shallow water presents a number of
hazards. Mud, sand, weeds and debris can foul a
propulsion unit propeller or its cooling water. If a
propulsion unit strikes an underwater object,
check the propulsion unit and boat for damage. If
a vibration is noticed after striking an object, it
may indicate a damaged propeller.
Sand bars in narrow inlets are constantly shifting,
making it difficult to mark them with buoys. Tides
in coastal areas affect water levels producing
sand bars. Sometimes sand bars are indicated by
waves as they form into breakers when passing
over the sand bar. Refer to Grounding, in this
section, if you run aground on a sand bar.
The water level around a dam spillway is a
hazardous area. It is subject to rapid changes
caused by currents and turbulence. Keep clear of
the spillway areas below dams.
Visibility
Clear visibility must be maintained at all
times. If necessary, arrange passengers
and equipment for maximum visibility.
Designate a passenger to assist when
visibility is limited due to operating
conditions.
Visibility is not only sight, but also hearing. It is
very important the operator maintains good
visibility at all times. Arrange passengers and
equipment to ensure you have unobstructed
vision at all times. Check for other boats or any
obstacles before turning the boat.
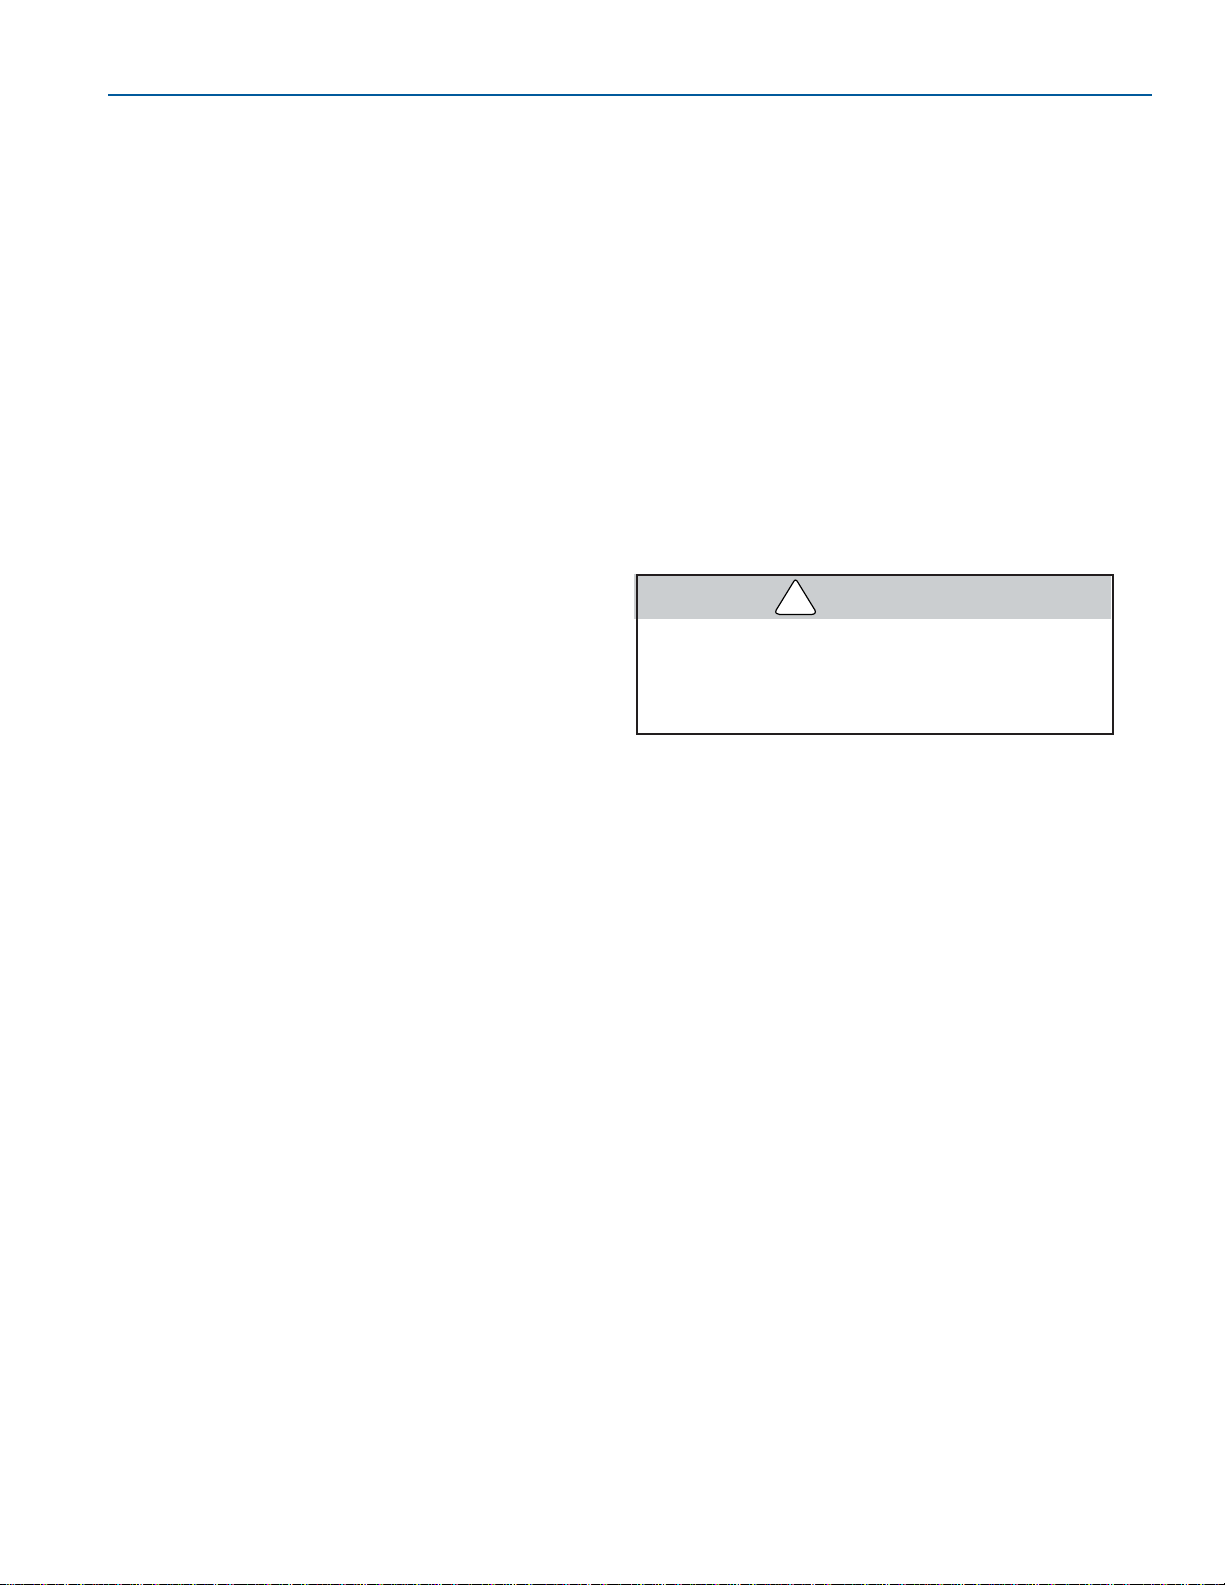
WARNING
!
Page 15
2-7
FORMULA
BOATING SAFETY
FASTECH
Drugs/Alcohol
Federal and state law prohibit operating a
boat under the influence of alcohol and
other drugs. These regulations are actively
enforced. Impaired operation may result in
severe personal injury or death.
Mixing boating with the use of alcohol and other
drugs results in many marine accidents and
deaths each year. These substances reduce your
reaction time and affect your better judgement.
Combined with the sun, wind, waves, and noise of
other watercraft, the effects of drugs are
increased and will significantly reduce your
reaction time. As the owner/operator, you are
responsible for the alcohol/drug use and onboard
behavior of your passengers.
NOTICE
If the operator’s blood alcohol content is
0.10% (0.08% in some states) or above,
violators are subject to a civil penalty up to
$1,000.00 or criminal penalty up to
$5,000.00, one year imprisonment or both.
Operating a boat under the influence can
also result in a loss of automobile driving
privileges.
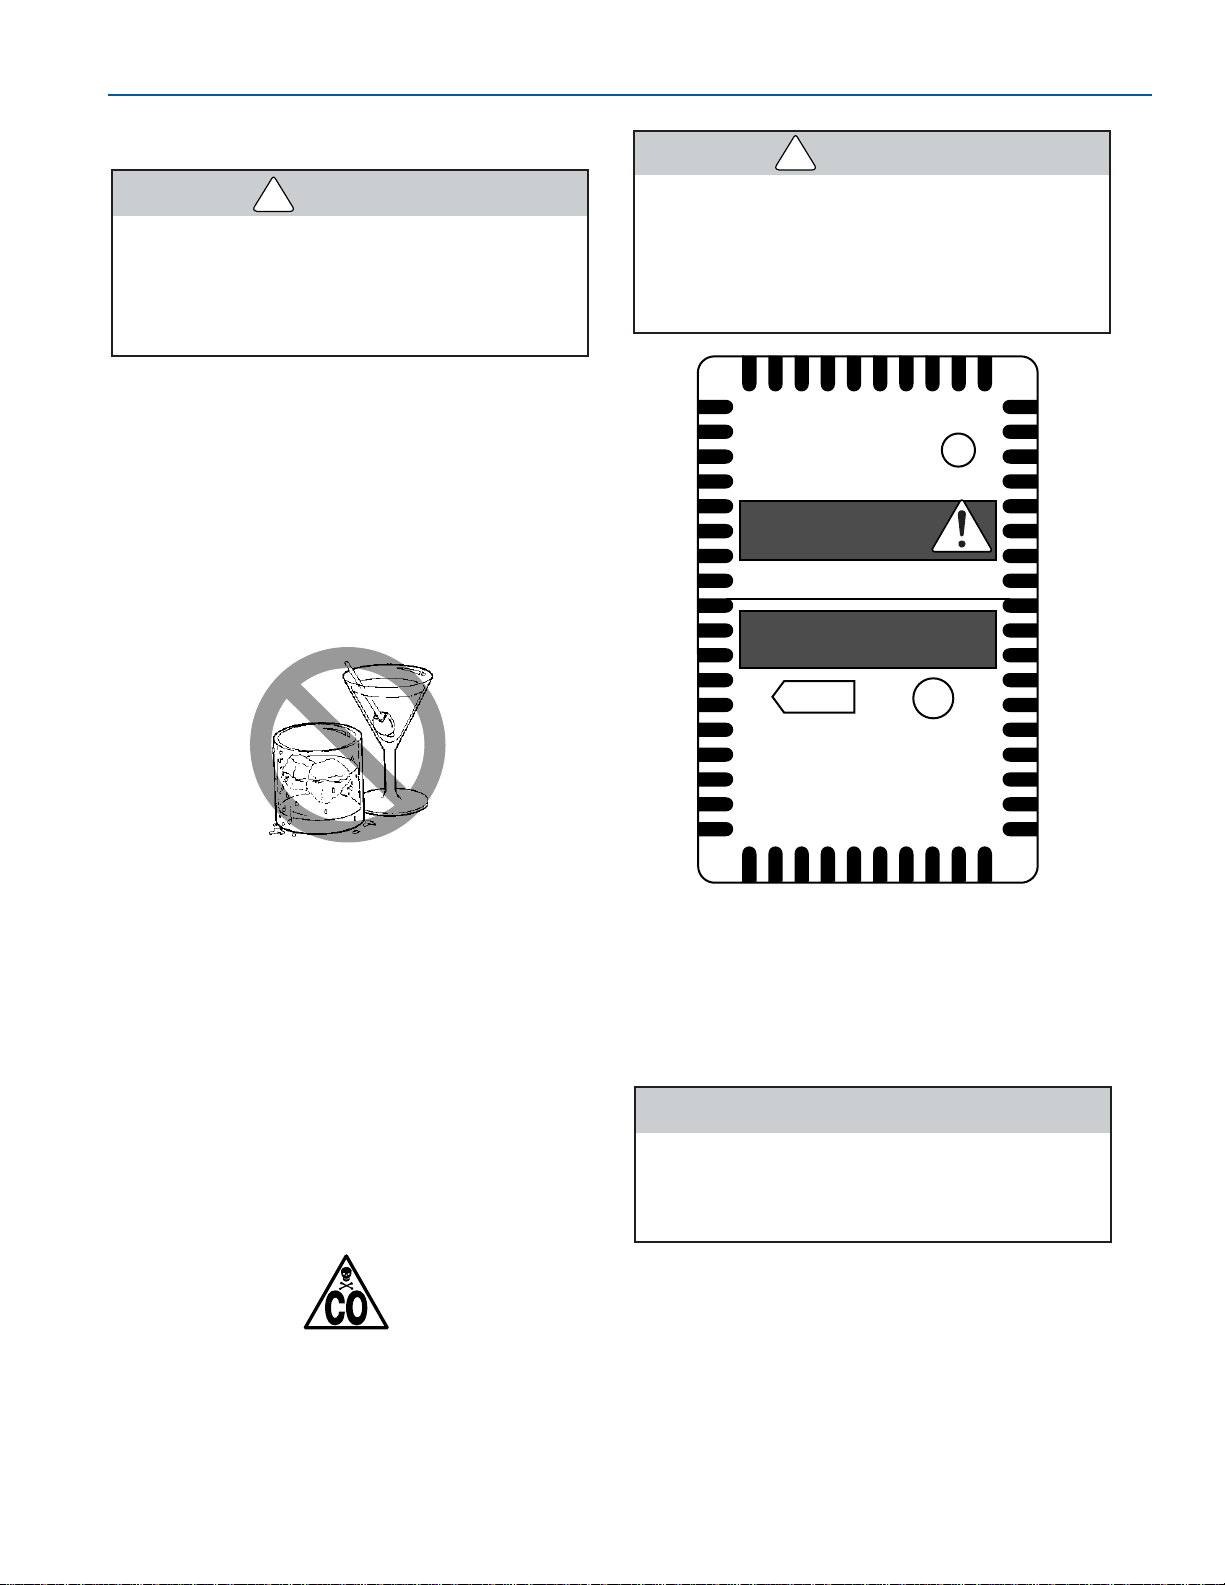
Carbon Monoxide
Carbon Monoxide Safety Symbol
Figure 2-10
KC-5032
No Alcohol or Other Drugs
Figure 2-9
Test the carbon monoxide detectors
operation before each trip, at least once a
week and after the boat has been in
storage. Do not tamper with the operation
of the carbon monoxide detectors. They
are installed for your safety.
Your Formula boat is equipped with at least one
carbon monoxide (CO) detector located in the
cabin.
A carbon monoxide (CO) detector will only
detect the presence of carbon monoxide
gas at its sensor. Carbon monoxide may
be present in other areas.
NOTICE
A carbon monoxide detector will not detect
other vapors such as gasoline.
Carbon Monoxide Detector
Figure 2-11
POWER
TEST
MONTHLY
DO NOT PAINT
READ OWNER”S MANUAL
CARBON MONOXIDE
DETECTOR
KC-0153
KC-5032
FOR069
WARNING
!
WARNING
!
CAUTION
Page 16
2-8
FORMULA
FASTECH
FASTECH
Carbon Monoxide (CO) is a colorless and
odorless gas produced by all engines and fuel
burning appliances such as heaters, stoves and
generators. Even with the best boat design and
construction, plus the utmost care in inspection,
operation, and maintenance, hazardous levels of
CO may still be present in accommodation spaces
under certain conditions. Dizziness, ears ringing,
headaches, nausea, unconsciousness and cherry
red skin color are symptoms of carbon monoxide
poison.
To reduce CO accumulation:
●
Ventilate the boat interior by opening the
deck hatches, windows and cabin door to
provide adequate ventilation.
●
Do not operate the engines or generator with
the canvas installed.
●
Only operate fuel burning appliances in wellventilated areas.
●
Avoid idling or using the generator while at
idle for extended periods.
●
Regularly inspect the engine and generator
exhaust system for proper operation.
●
Do not use any fuel burning appliances with
a transom exhaust port when swimming from
the stern swim platform.
Have a suspected CO victim deeply breathe fresh
air and immediately seek medical attention.
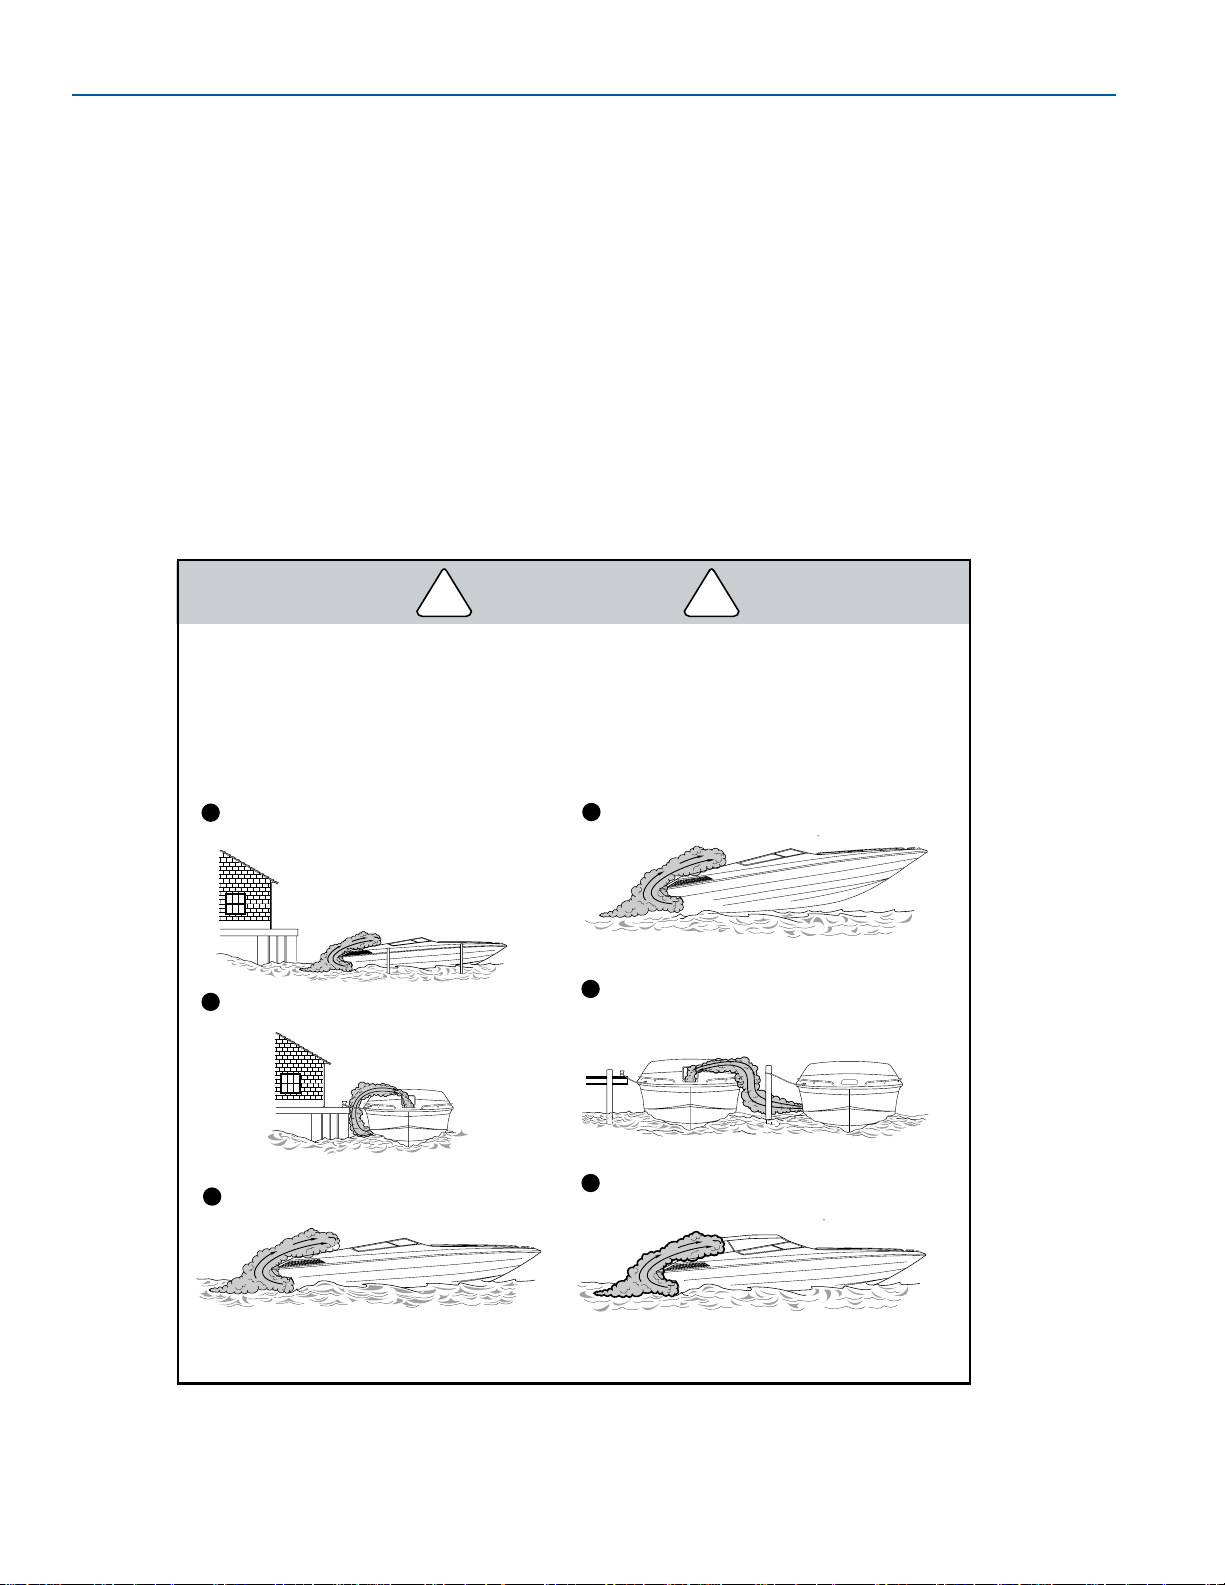
EXTREME HAZARD — Carbon monoxide gas (CO) is colorless,
odorless and extremely dangerous. All engines and fuel
burning appliances produce CO as exhaust. Direct and
prolonged exposure to CO will cause BRAIN DAMAGE or
DEATH. Signs of exposure to CO include nausea, dizziness
and drowsiness. Sources of CO include:
Blockage of boat exhausts by
obstruction.
1
Exhaust traveling along obstruction.
2
Operating with high bow angle.
4
Exhausts from other vessels in confined
areas.
5
Operating with canvas tops and side
curtains in place without ventilation.
6
Operating at slow speed or while dead
in the water.
3
ENSURE ADEQUATE VENTILATION FOR CORRECT AIR MOVEMENT THROUGH BOAT!
KC-0469
!
DANGER
!
Carbon Monoxide
Figure 2-12
FOR050
Page 17
2-9
FORMULA
BOATING SAFETY
FASTECH
Fume Alarm
Your Formula boat is equipped with a fume
detector that provides an audible and visual alarm
whenever explosive gases are detected in the
bilge area.
In the event the detector goes into the alarm
mode, immediately operate the engine
compartment blowers and inspect for the source
of fumes.
For testing procedure and additional information,
refer to the fume detector instructions in your
Owner Information Binder.
OPERATING BY MINORS
Minors must be supervised by an adult whenever
operating a boat. Many states have laws
regarding the minimum age and licensing
requirements of minors. Be sure to contact the
state boating authorities for information.
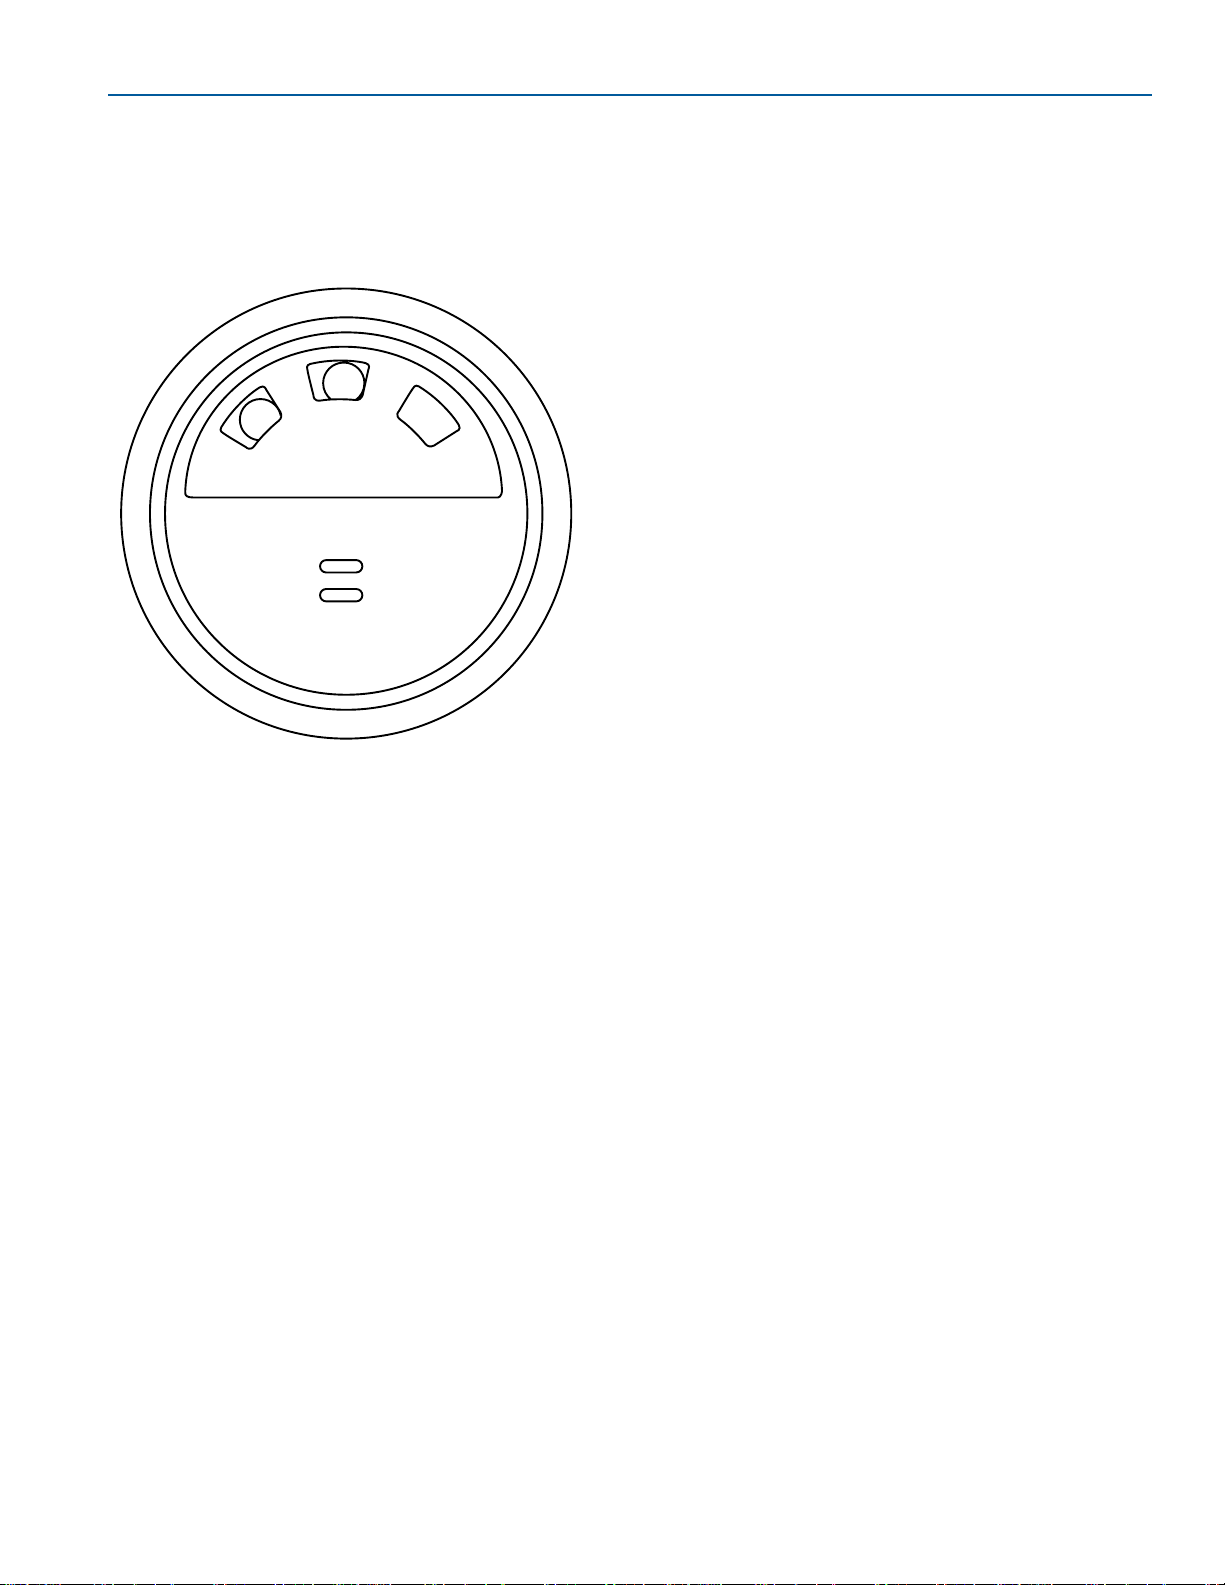
Fume Detector
Figure 2-13
GASOLINE FUME DETECTOR
MUTETEST
M-1
COMMUNICATION
Radio communication is the most important
avenue of receiving weather reports and Coast
Guard warnings, and for transmitting information
such as a request for assistance. Use a VHF/FM
radio for short-range communication, and a
single-sideband radio (SSB) for long-range.
For all U. S. waters, the National Weather Service
operates the NOAA Weather Radio (NWR). This
service provides continuous weather information
on the following VHF/FM frequencies:
●
162.400 MHz
●
162.425 MHz
●
162.450 MHz
●
162.475 MHz
●
162.500 MHz
●
162.525 MHz
●
162.550 MHz
It is good practice to periodically monitor the
weather. For additional information, refer to your
radio operator’s manual in your Owner Information
Binder.
A distress call is transmitted on VHF/FM radio
channel 16 (156.800 MHz) or 2182 kHz (SSB).
Know your audible signals:
●
For emergency, the call sign is “Mayday.”
●
An urgent situation, the call sign is “Pan-Pan.”
●
For navigational safety and weather
warnings, the call sign is “Security.”
Repeat the call sign three times.
Immediately react to a distress call. Assist, if
possible, using an emergency frequency.
Otherwise continue to monitor the situation until
help has arrived.
Cellular Telephone
A cellular phone can be extremely convenient.
Cellular telephone service continues to improve
by expanding service areas and advancing
technology.
Seek the latest available information regarding
network providers in your boating area before
purchasing cellular telephone service.
FOR012
Page 18

2-10
FORMULA
FASTECH
FASTECH
Emergency Position Indicating Radio
Beacon (EPIRB)
Every boat that goes offshore beyond the 20 mile
VHF radio range should carry a satellite EPIRB.
The latest satellite EPIRBs are known as 406
EPIRB. The operating frequency is 406.0 MHz.
This is a dedicated frequency free from
interference from other communications. When
activated, the satellite 406 EPIRB transmits a
unique registration number for identification. The
system detects a signal, checks the registration
number against a database (boat and owner
information), calculates an accurate distress
position and quickly alerts rescue personnel.
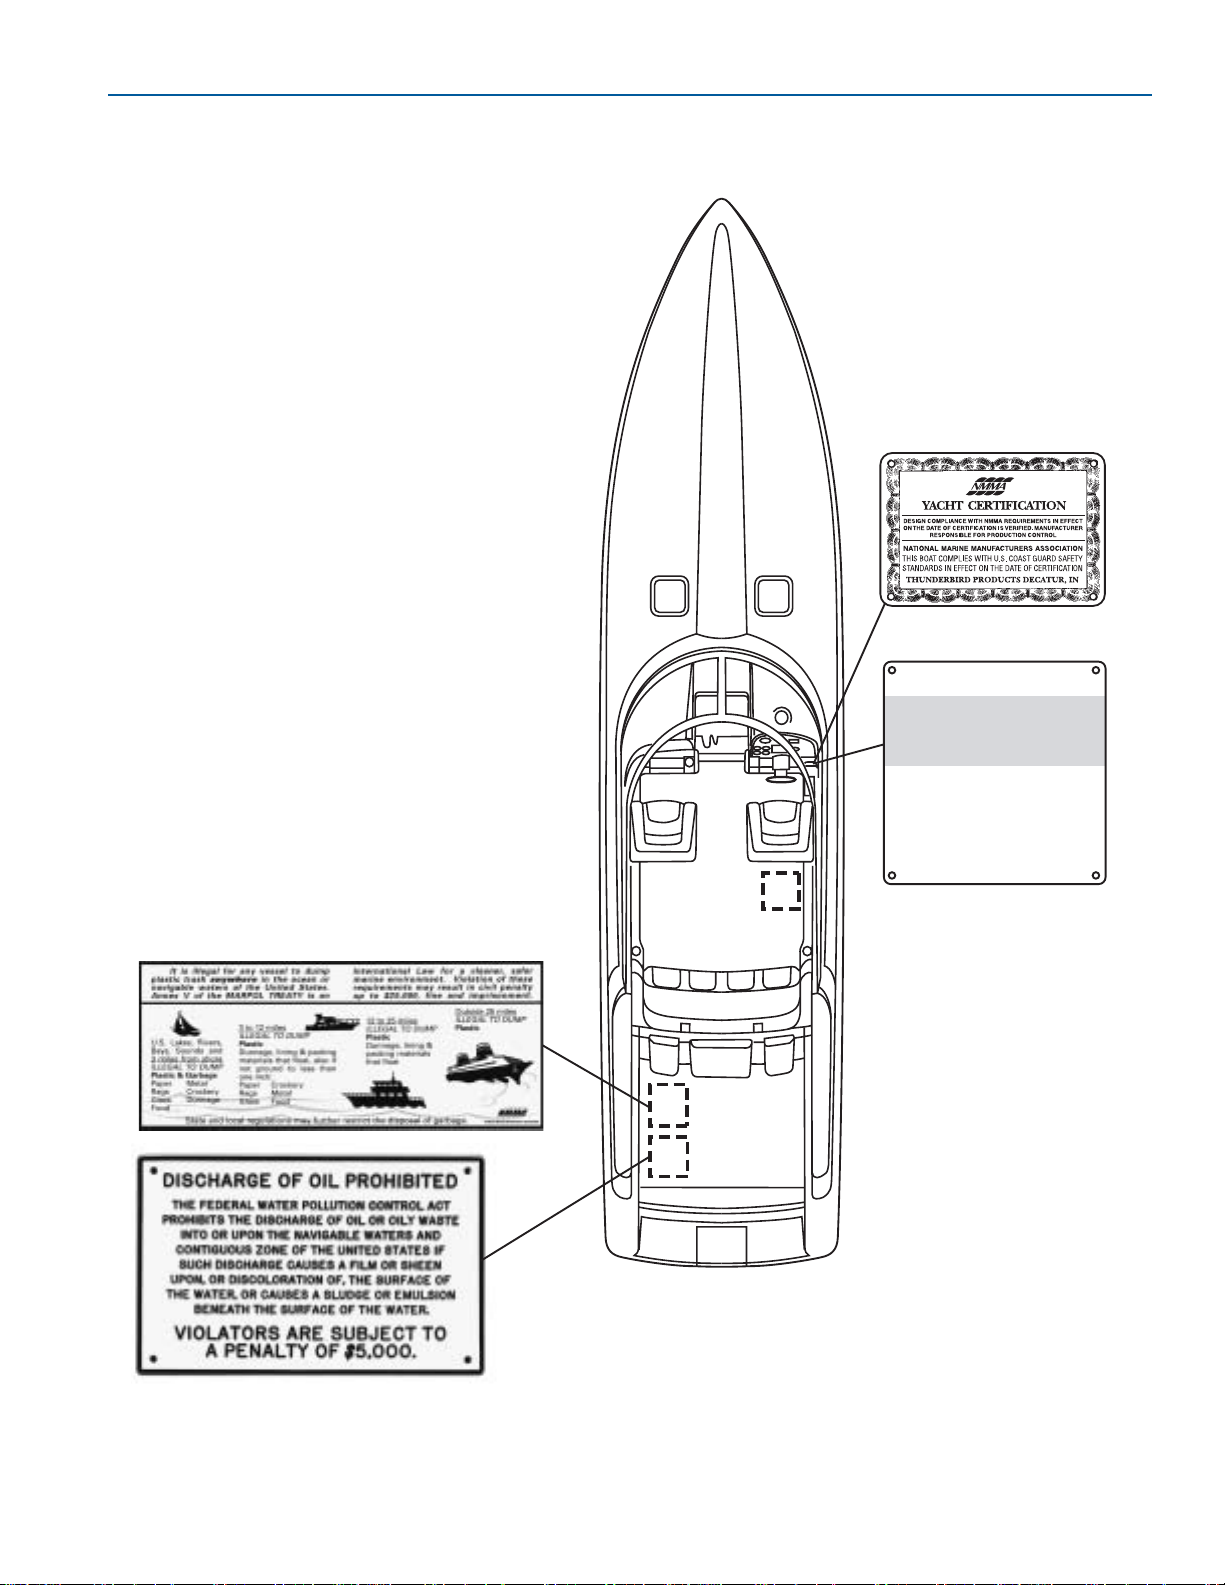
Warning Label Location
Your boat has various safety labels at the time of
manufacture. These labels appear at specific
locations on the craft where safety is of particular
concern.
NOTICE
Included in your Owner Information Binder
is a label regarding the discharge of
overboard trash. Thunderbird Products
does not affix this label to the boat. It is the
owner’s/operator’s responsibility to read,
understand and comply with the label’s
requirements.
Safety labels must remain legible. If you suspect a
label is missing or becomes damaged, please
contact your Formula dealer for immediate
replacement.
Page 19
2-11
FORMULA
BOATING SAFETY
FASTECH
Warning Label Location
Warning Label Location
Figure 2-14
CAUTION
WHEN USING BOARDING PLATFORM
ENGINE MUST BE IN OFF POSITION
MANEUVERABILITY ABOVE 50 MPH IS LIMITED.
SUDDEN TURNS MAY CAUSE LOSS OF CONTROL.
WARNING
READ OWNER'S MANUAL!
FOR278
Page 20

2-12
FORMULA
FASTECH
FASTECH
Page 21
FASTECH
3-1
FORMULA
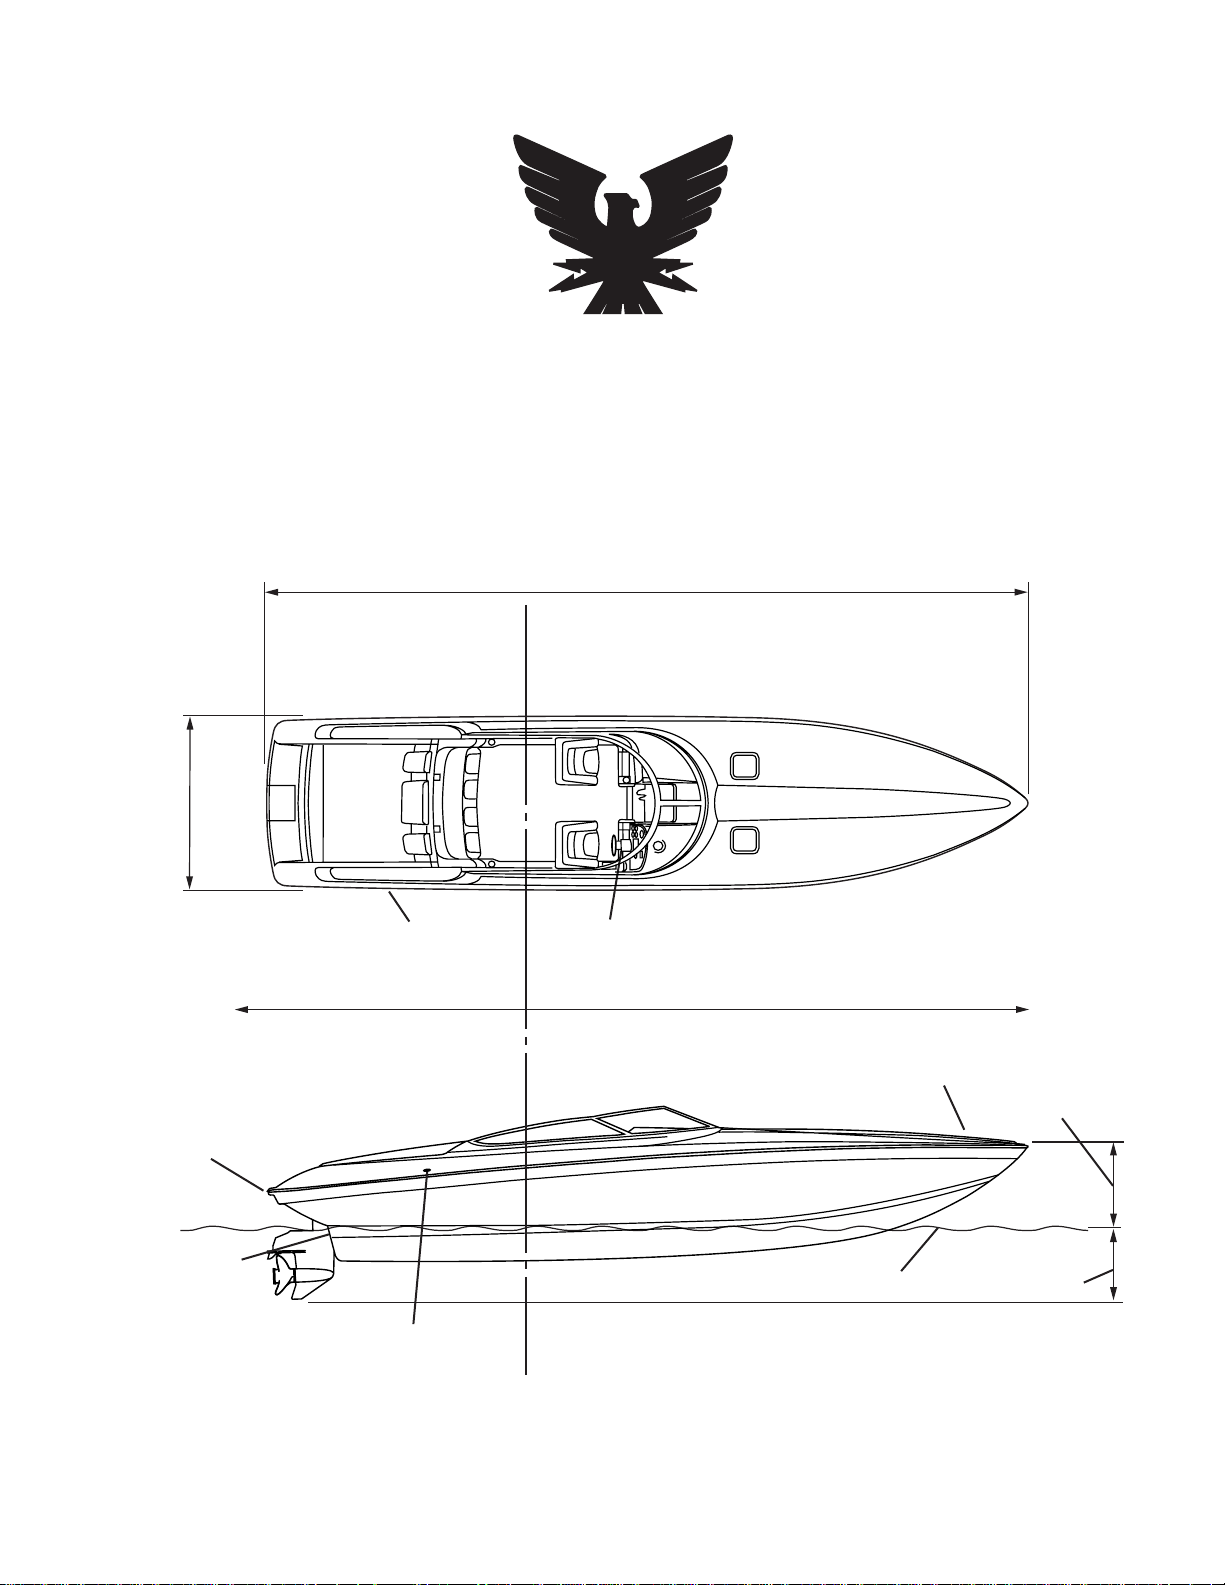
BOATING TERMINOLOGY
LENGTH OVERALL (LOA)
BOW
AFT
FORWARD
PORT SIDE
STARBOARD SIDE
FREEBOARD
DRAFT
STERN
WATERLINE
HELM
BEAM
TRANSOM
GUNWALE
GUNWALE
* An easy way to remember PORT side from STARBOARD side is “PORT” and “LEFT” both have four
letters.
FOR185
Section 3
Specifications and Layout
Page 22
3-2
FORMULA
FASTECH
FASTECH
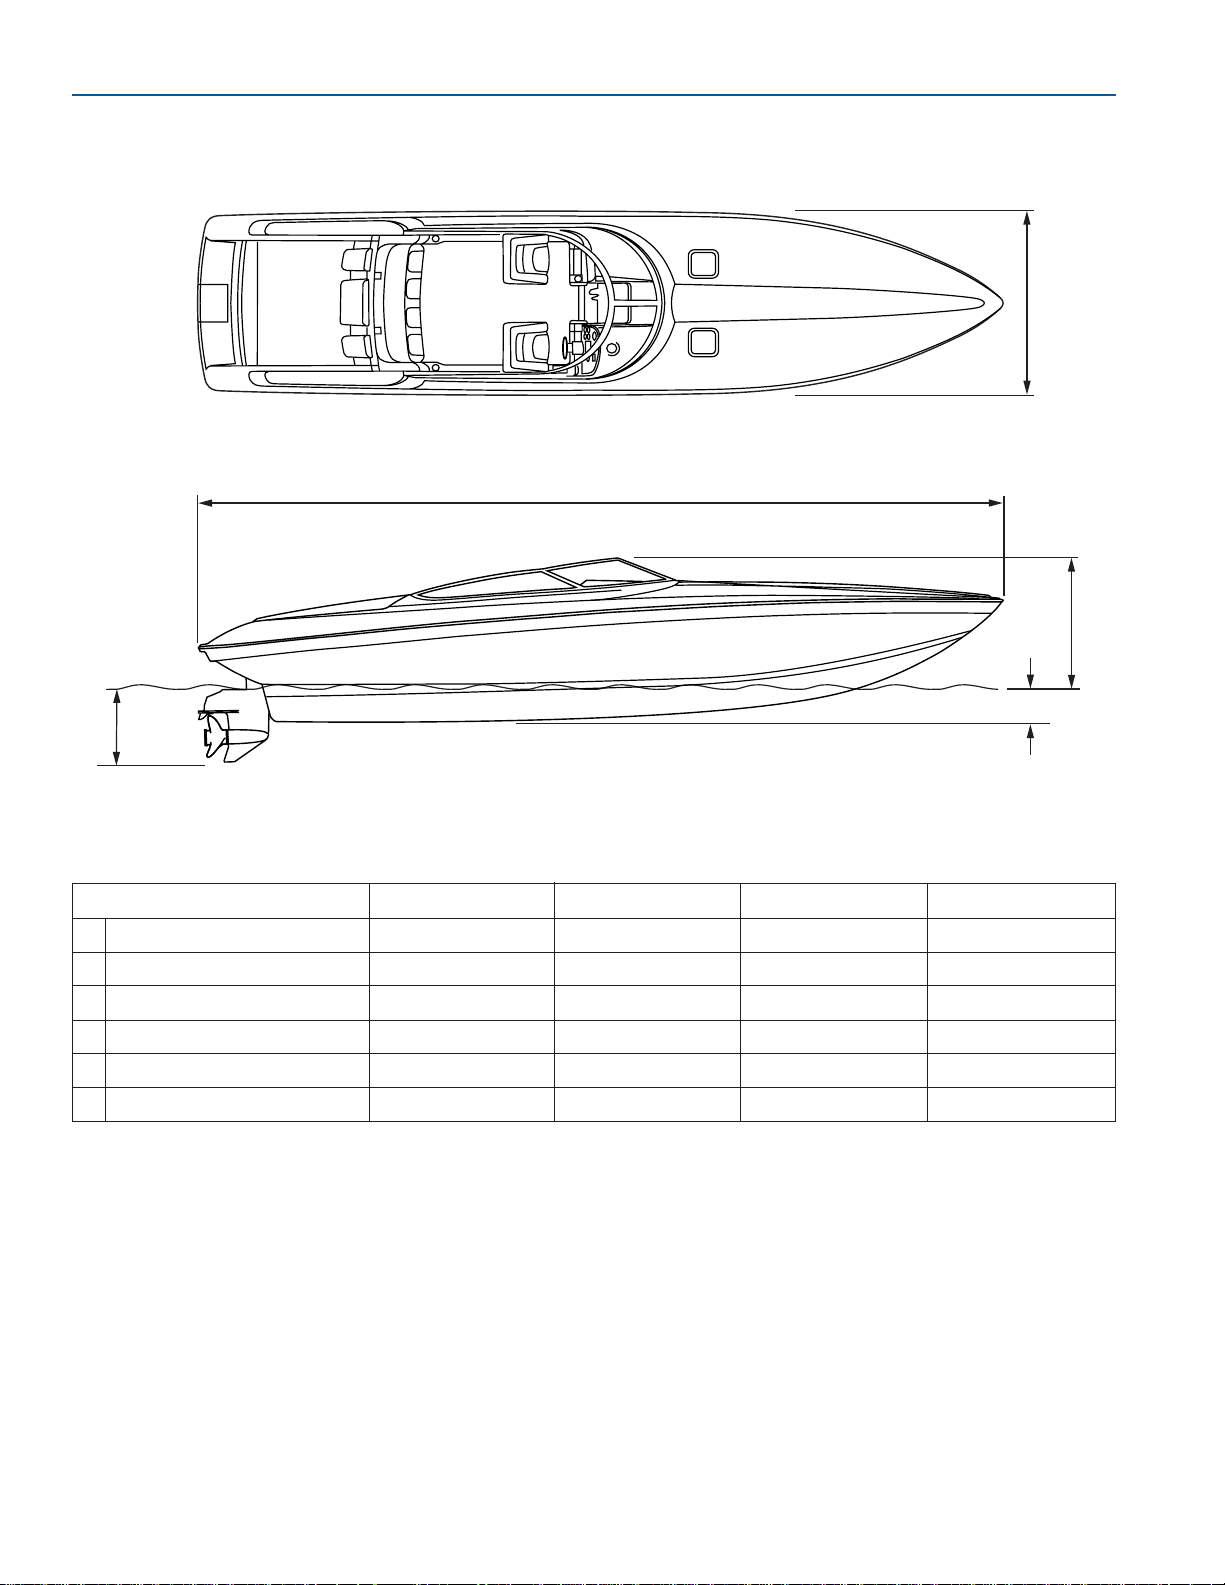
DIMENSIONS
E
B
C
D
A
FOR186
A
B
C
D
E
F
Maximum Beam
Centerline Length
Bridge Clearance - Dry
Draft - Drive Unit Up
Draft - Drive Unit Down
Dead Rise
271 Fastech
8'3" (2.5 m)
27'1" (8.3 m)
4'11" (1.5 m)
31" (78.7 cm)
34" (86 cm)
24°
292 Fastech
8'3" (2.5 m)
29'2" (8.9 m)
4'11" (1.5 m)
30" (76.2 cm)
33" (84 cm)
24°
353 Fastech
8'3" (2.5 m)
35'3" (10.7 m)
5'4" (1.6 m)
33" (84 cm)
36" (91 cm)
24°
382 Fastech
8'3" (2.5 m)
38'2" (11.6 m)
5'6" (1.6 m)
30" (76.2 cm)
33" (84 cm)
24°
Page 23
3-3
FORMULA
SPECIFICATIONS AND LAYOUT
FASTECH
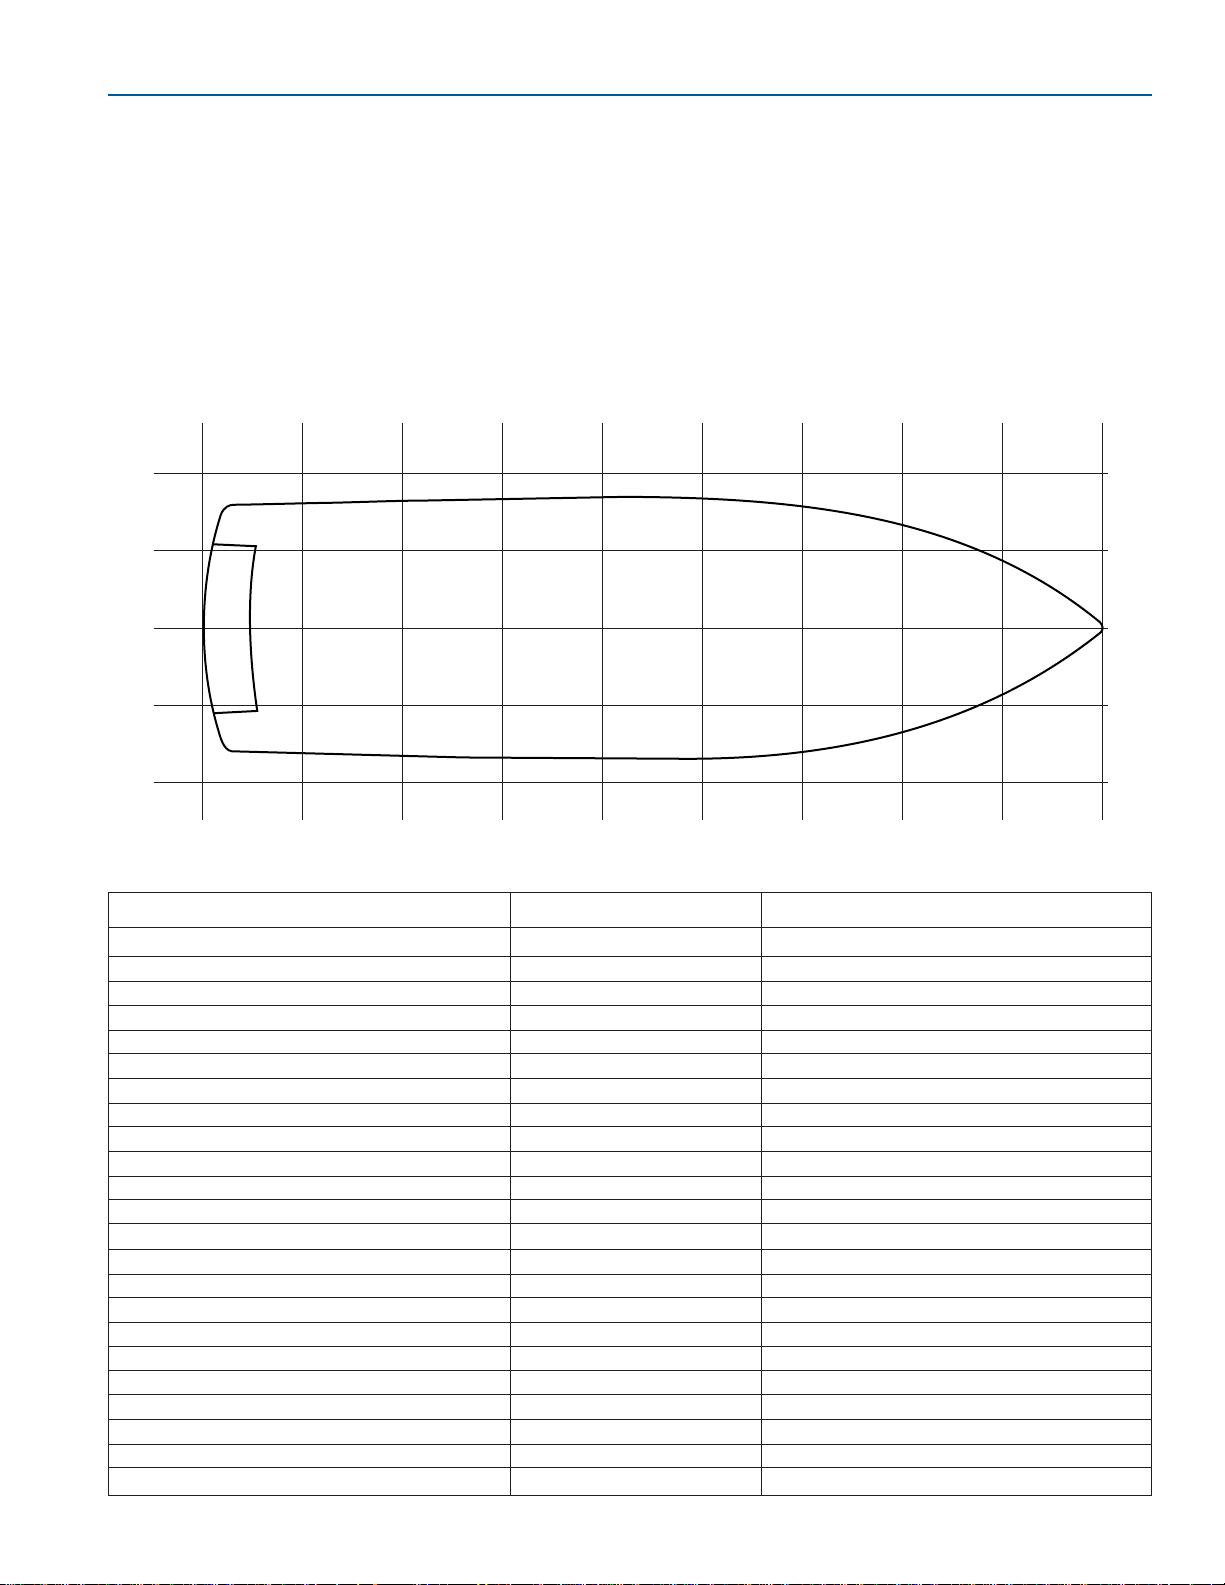
271 FASTECH
Specifications
Approximate Weight 5,685 Lbs. (2,579 Kg)
Capacities:
Fuel Tank 105 Gal. (397 L)
Fresh Water Tank 19 Gal. (72 L)
Holding Tank 2.6 Gal. (9.8 L)
Steering System Cable to Hydraulic Assist Ram - I/O
Full Hydraulic (Engine Pump) - I/O
1
A
B
C
D
23456789
FOR187
Item
AC/DC Control Panel
Air Conditioning Control
Automatic Fire Extinguisher
Battery Charger
Battery ON/OFF Switch
Battery Parallel Switch
Bilge Pump FWD
Bilge Pump AFT
Carbon Monoxide Detector
Central Vacuum
Circuit Breaker Panel - Helm
Circuit Breaker Panel - AFT
Circuit Breaker - Shore Power 1
Circuit Breaker - Shore Power 2
Circuit Breaker - Windlass
Circuit Breaker - Auxiliary Power
Drive Unit Trim Pump - Port
Drive Unit Trim Pump - STBD
Engine Compartment Blowers
Engine Compartment Hatch Handle
Engine Compartment Switch
Fire Extinguisher - Cabin
Fire Extinguisher - Cockpit
Location
N/A
N/A
A-2
N/A
A/B-3
N/A
N/A
B/C-2
A/B-5
N/A
D-5
A/B-3
N/A
N/A
N/A
A/B-3
A-1
N/A
A/D-1
N/A
D-4
A-3
Remarks
Port side transom
Under aft seat
Hull floor FWD of engine
Port side next to stereo unit
Inside helm storage
Under aft seat
Under aft seat
Port side engine compartment
Port/STBD hull side engine comp.
Helm dash
Inside port storage
271 Equipment Location
Page 24

3-4
FORMULA
FASTECH
FASTECH
Item
Fresh Water Dockside Hookup
Fresh Water Level Indicator
Fresh Water Pump
Fuel Tank Fill - Port
Fuel Tank Fill - STBD
Helm Hydraulic Steering Fill
Horn Air Compressor
Hull Indentification Number
Seacock - Air Conditioning Intake
Seacock - Generator Intake
Seacock - Macerator Discharge
Seacock - Manual Head Intake
Seacock - Raw Water Engine Intakes
Strainer - Air Conditioning Intake(s)
Strainer - Generator Intake
Telephone Dockside Inlet
Transom Shower
Transom Stereo Control
Trim Tab Pump
TV Antenna/Cable Switch
TV Signal Amplifier
Waste Deck Plate
Gray Water Manifold(s)
Gray Water Sump Tank
Fresh Water Fill
Horn
Macerator Y-Valve
Location
N/A
N/A
A/B-6
N/A
D-3
N/A
A-3
D-1
N/A
N/A
C-2
N/A
B/C-2
N/A
N/A
N/A
A/B-1
A/B-1
D-1
N/A
N/A
C/D-1
N/A
B/C-5/6
C-9
A-2
D-1
Remarks
Under V-berth
STBD deck side above rub rail
Inside port storage behind false wall
Hull below rub rail, aft STBD corner
Hull floor, FWD of engine
Hull floor, FWD of engine
Port deck side at swim platform
Port deck side at swim platform
STBD hull side engine compartment
STBD deck side at swim platform
Under head unit
Inside STBD bow rail
Port side attached to deck in vent
(engine room)
STBD hull side engine compartment
271 Equipment Location
Page 25
3-5
FORMULA
SPECIFICATIONS AND LAYOUT
FASTECH
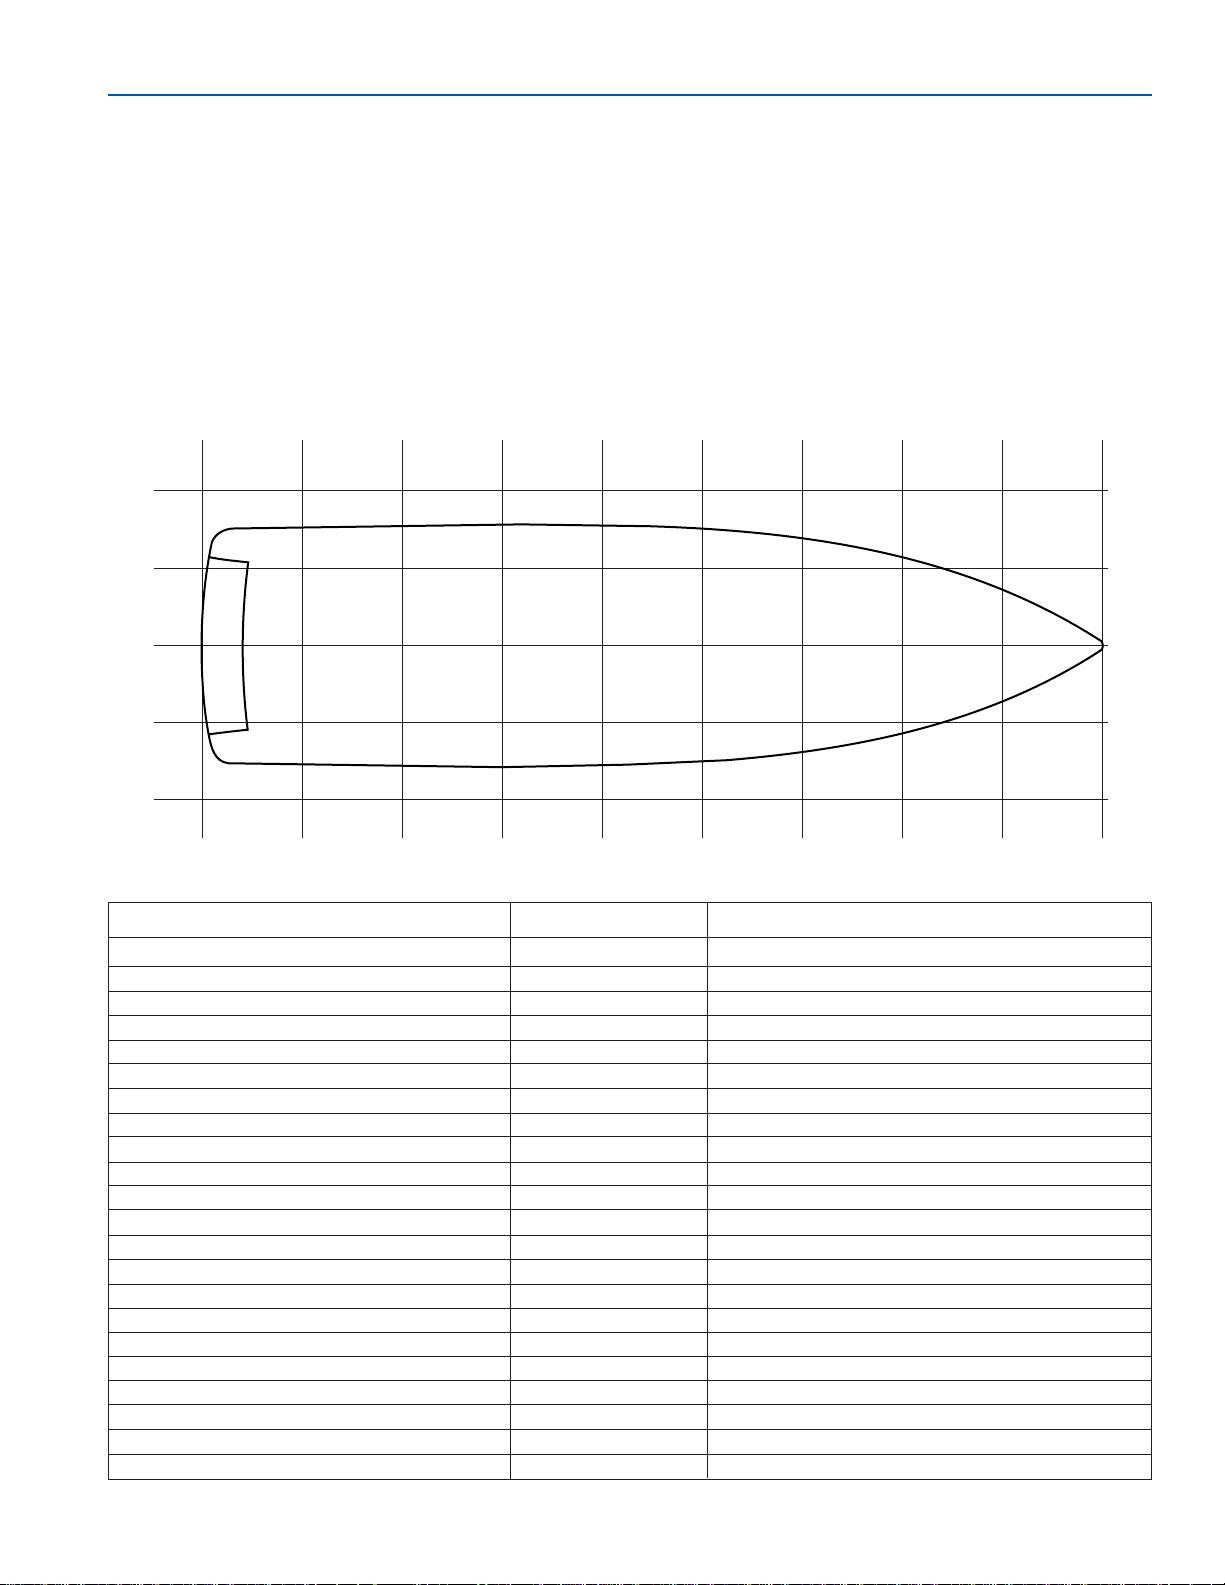
292 FASTECH
Specifications
Approximate Weight 7,000 Lbs. (3,175 Kg)
Capacities:
Fuel Tank 113 Gal. (428 L)
Fresh Water Tank 19 Gal. (72 L)
Holding Tank 2.6 Gal. (9.8 L)
Steering System Cable to Hydraulic Assist Ram - I/O
Full Hydraulic (Engine Pump) - I/O
1
A
B
C
D
23456789
FOR188
292 Equipment Location
Item
AC/DC Control Panel
Air Conditioning Control
Automatic Fire Extinguisher
Battery Charger
Battery ON/OFF Switch
Battery Parallel Switch
Bilge Pump FWD
Bilge Pump AFT
Carbon Monoxide Detector
Central Vacuum
Circuit Breaker Panel - Helm
Circuit Breaker Panel - AFT
Circuit Breaker - Shore Power 1
Circuit Breaker - Shore Power 2
Circuit Breaker - Windlass
Circuit Breaker - Auxiliary Power
Drive Unit Trim Pump - Port
Drive Unit Trim Pump - STBD
Engine Compartment Blowers
Engine Compartment Hatch Handle
Engine Compartment Switch
Fire Extinguisher - Cabin
Location
N/A
N/A
A-2
N/A
B-3
B-3
N/A
B/C-2
A-5
N/A
D-5
B-3
N/A
N/A
N/A
B2
A-1/2
D-1/2
A/D-1
N/A
D-4
A-3
Remarks
Port hull side engine compartment
Under aft seat
Under aft seat
FWD engine compartment center strainer
Port side below stereo/storage
Deck wall under helm unit
Under aft seat
Under aft seat
Port hull side engine compartment
STBD hull side engine compartment
Port/STBD hull side engine comp.
Helm dash
Storage compartment below sink
Page 26

3-6
FORMULA
FASTECH
FASTECH
Item
Fire Extinguisher - Cockpit
Fresh Water Dockside Hookup
Fresh Water Level Indicator
Fresh Water Pump
Fuel Tank Fill - Port
Fuel Tank Fill - STBD
Helm Hydraulic Steering Fill
Horn Air Compressor
Hull Indentification Number
Seacock - Air Conditioning Intake
Seacock - Generator Intake
Seacock - Macerator Discharge
Seacock - Manual Head Intake
Seacock - Raw Water Engine Intakes
Strainer - Air Conditioning Intake(s)
Strainer - Generator Intake
Telephone Dockside Inlet
Transom Shower
Transom Stereo Control
Trim Tab Pump
TV Antenna/Cable Switch
TV Signal Amplifier
Waste Deck Plate
Gray Water Manifold(s)
Gray Water Sump Tank
Fresh Water Fill
Horn
Macerator Y-Valve
Location
N/A
N/A
A-6
N/A
D-3
N/A
A-3
D-1
N/A
N/A
C-2
N/A
B/C-2
N/A
N/A
N/A
A/B-1
A/B-1
D-1
N/A
N/A
C/D-1
N/A
B/C-6/7
C-8
A-2
D-1
Remarks
Under V-berth
STBD deck side above rub rail
Inside port storage behind false wall
Hull below rub rail, aft STBD corner
Hull floor, FWD of engine
Hull floor, under engine
Port deck side at swim platform
Port deck side at swim platform
STBD hull side engine compartment
STBD deck side at swim platform
V-berth under head unit
Inside bow rail STBD deck
Port side attached to deck in vent
(engine room)
STBD hull side engine compartment
292 Equipment Location
Page 27
3-7
FORMULA
SPECIFICATIONS AND LAYOUT
FASTECH
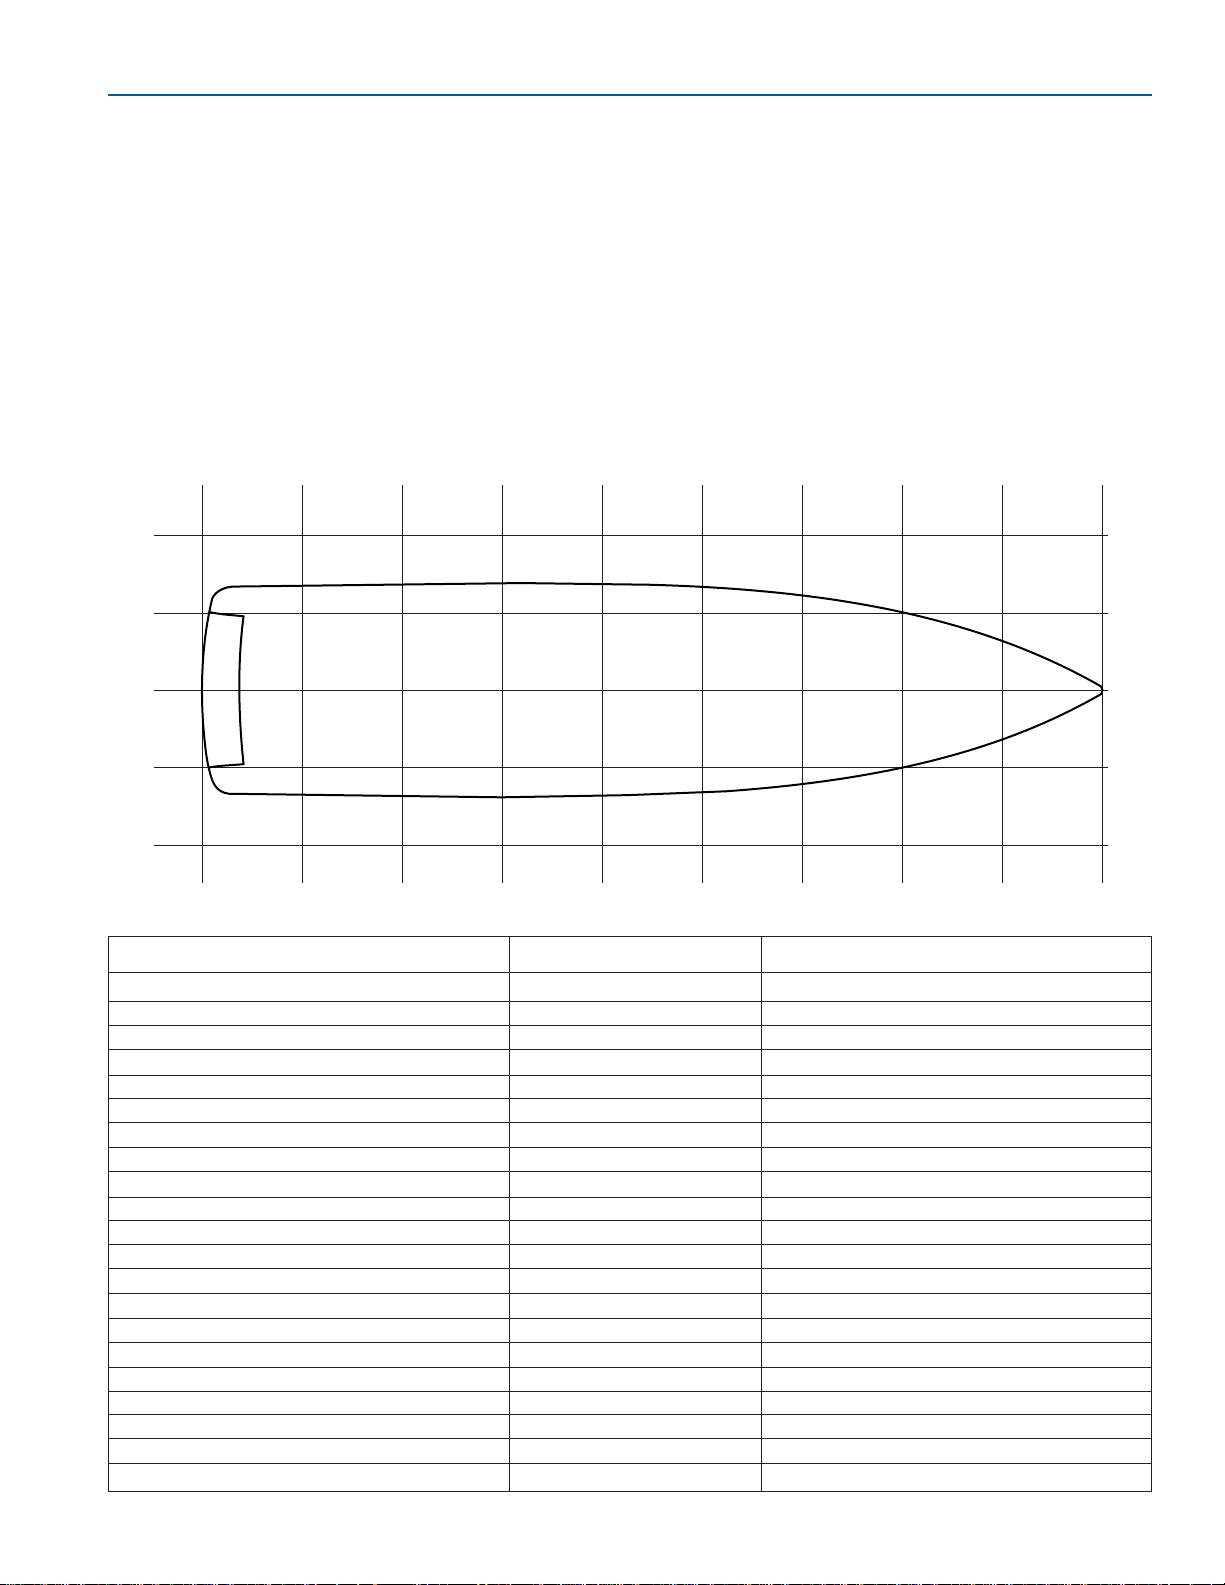
353 FASTECH
Specifications
Approximate Weight 8,575 Lbs. (3,890 Kg)
Capacities:
Fuel Tank 154 Gal. (583 L)
Fresh Water Tank 19 Gal. (72 L)
Holding Tank 2.6 Gal. (9.8 L)
Optional Holding Tank 6.5 Gal. (24.6 L)
Battery Charger 50 Amp
Steering System Full Hydraulic (Engine Pump) - I/O
1
A
B
C
D
23456789
FOR189
353 Equipment Location
Item
AC/DC Control Panel
Air Conditioning Control
Automatic Fire Extinguisher
Battery Charger
Battery ON/OFF Switch
Battery Parallel Switch
Bilge Pump FWD
Bilge Pump AFT
Carbon Monoxide Detector
Central Vacuum
Circuit Breaker Panel - Helm
Circuit Breaker Panel - AFT
Circuit Breaker - Shore Power 1
Circuit Breaker - Shore Power 2
Circuit Breaker - Windlass
Circuit Breaker - Auxiliary Power
Drive Unit Trim Pump - Port
Drive Unit Trim Pump - STBD
Engine Compartment Blowers
Engine Compartment Hatch Handle
Engine Compartment Switch
Location
B-5
N/A
B/C-2
A-2
A-2/3
A-2/3
N/A
B/C-2
A-5/6
N/A
D-5
A-2/3
D-1
N/A
N/A
A-2/3
B-2
C-2
A/D-1
N/A
D-4/5
Remarks
Inside refrigerator storage
FWD engine bulkhead
FWD engine bulkhead
Under aft seat
Under aft seat
Hull bottom FWD engine compartment
Below stereo compartment
Deck side under dash storage
Under aft seat
STBD trunk area
Under aft seat
FWD engine bulkhead
FWD engine bulkhead
Hull side engine compartment
Helm dash
Page 28

3-8
FORMULA
FASTECH
FASTECH
Item
Fire Extinguisher - Cabin
Fire Extinguisher - Cockpit
Fresh Water Dockside Hookup
Fresh Water Level Indicator
Fresh Water Pump
Fuel Tank Fill - Port
Fuel Tank Fill - STBD
Helm Hydraulic Steering Fill
Horn Air Compressor
Hull Indentification Number
Seacock - Air Conditioning Intake
Seacock - Generator Intake
Seacock - Macerator Discharge
Seacock - Manual Head Intake
Seacock - Raw Water Engine Intakes
Strainer - Air Conditioning Intake(s)
Strainer - Generator Intake
Telephone Dockside Inlet
Transom Shower
Transom Stereo Control
Trim Tab Pump
TV Antenna/Cable Switch
TV Signal Amplifier
Waste Deck Plate
Gray Water Manifold(s)
Gray Water Sump Tank
Fresh Water Fill
Horn
Macerator Y-Valve
Location
B-5
A-2/3
N/A
N/A
B-6
N/A
D-2
N/A
A-1
D-1
N/A
N/A
C-2
N/A
B/C-2
N/A
N/A
N/A
A-1
A-1
A/D-2
N/A
N/A
D-1
N/A
N/A
C-8
A-2
D-1
Remarks
Inside refrigerator storage
Port side storage
Under V-berth
STBD deck side above rub rail
Port storage behind false wall
Hull below rub rail, aft STBD corner
Hull bottom FWD of STBD engine
Hull bottom FWD of engines
Port side trunk area
Port deck side at swim platform
FWD engine bulkhead
STBD deck side at swim platform
Inside bow rail
Engine compartment attached to deck
vent
STBD hull side engine compartment
353 Equipment Location
Page 29
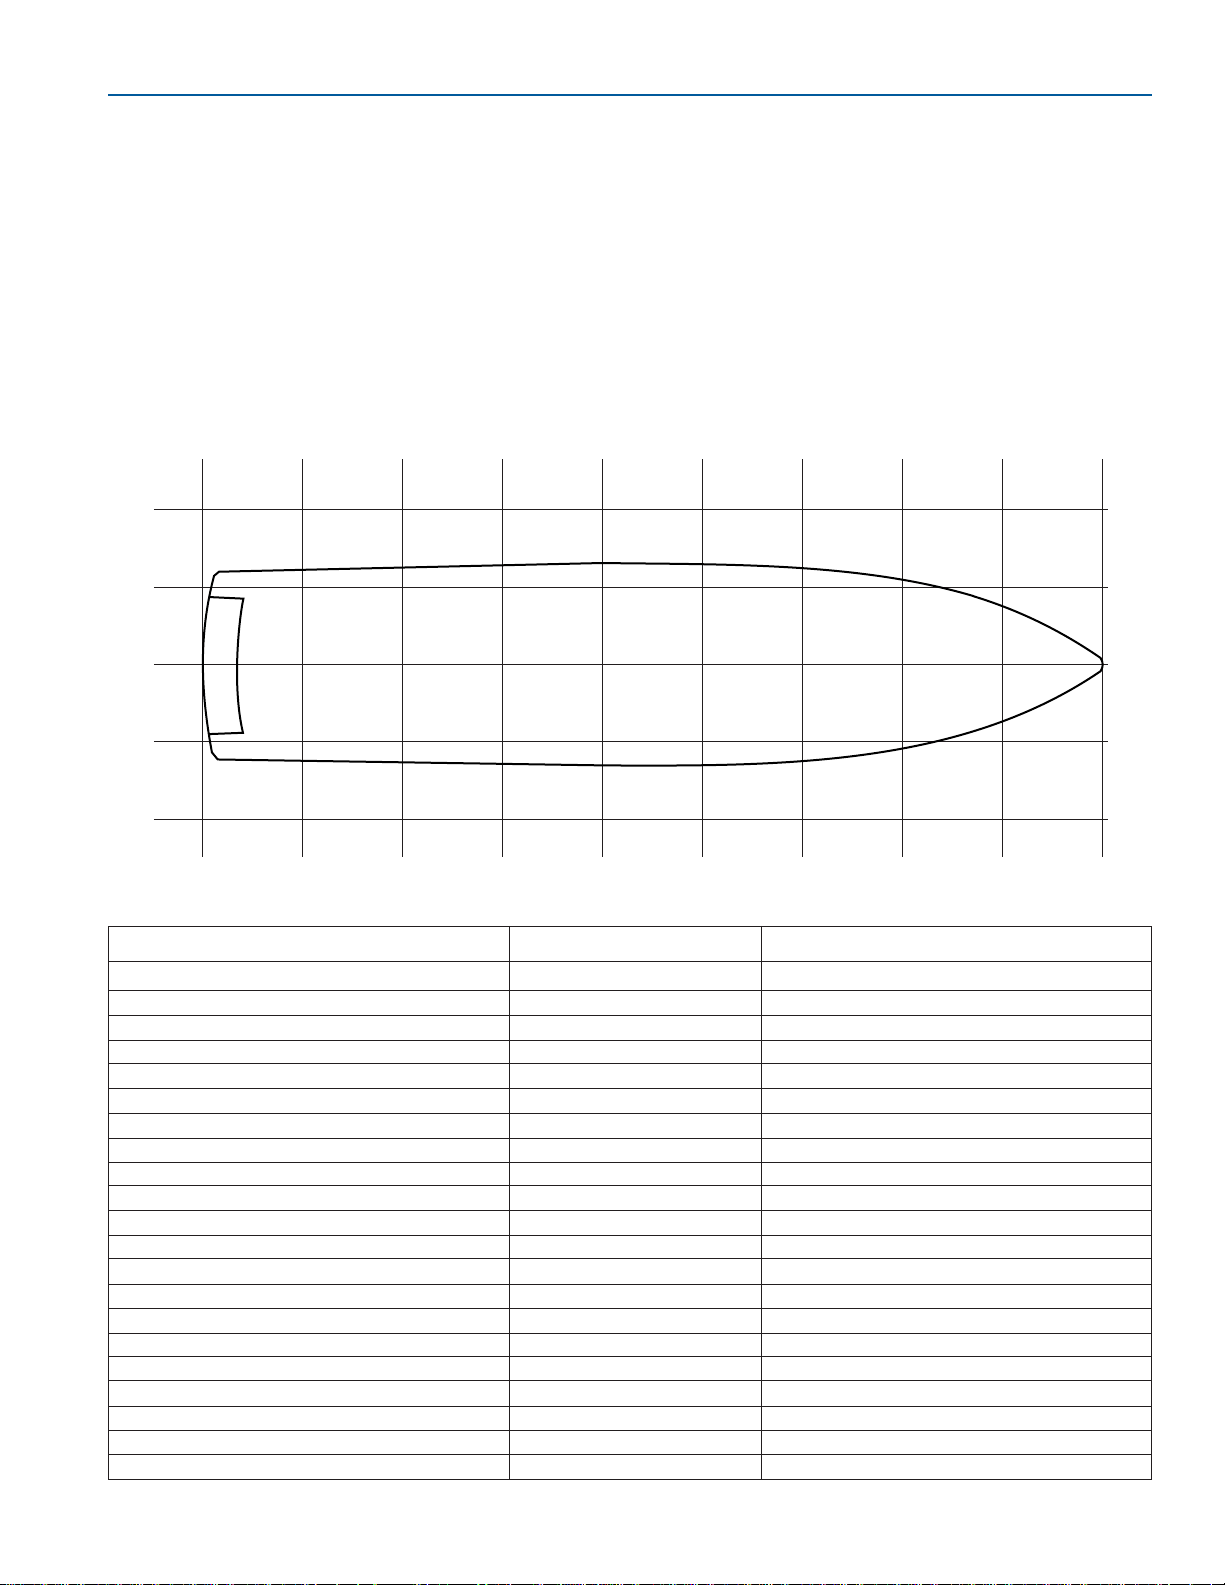
3-9
FORMULA
SPECIFICATIONS AND LAYOUT
FASTECH
382 FASTECH
Specifications
Approximate Weight 10,450 Lbs. (4,740 Kg)
Capacities:
Fuel Tank 195 Gal. (738 L)
Fresh Water Tank 19 Gal. (72 L)
Optional Hot Water Tank 6 Gal. (22.7 L)
Holding Tank 2.6 Gal. (9.8 L)
Optional Holding Tank 6.5 Gal. (24.6 L)
Steering System Full Hydraulic (Engine Pump) - I/O
Battery Charger 60 Amp
1
A
B
C
D
23456789
382 Equipment Location
FOR190
Item
AC/DC Control Panel
Air Conditioning Control
Automatic Fire Extinguisher
Battery Charger
Battery ON/OFF Switch
Battery Parallel Switch
Bilge Pump FWD
Bilge Pump AFT
Carbon Monoxide Detector
Central Vacuum
Circuit Breaker Panel - Helm
Circuit Breaker Panel - AFT
Circuit Breaker - Shore Power 1
Circuit Breaker - Shore Power 2
Circuit Breaker - Windlass
Circuit Breaker - Auxiliary Power
Drive Unit Trim Pump - Port
Drive Unit Trim Pump - STBD
Engine Compartment Blowers
Engine Compartment Hatch Handle
Engine Compartment Switch
Location
D-5
D-5
B/C-2
A-2
A-3
A-3
B-5
B/C-2
A-5
N/A
D-5
A-3
D-1
N/A
N/A
A-3
A-2
D-2
A/D-1
N/A
D-4
Remarks
Along side TV
Along side TV
Engine room FWD bulkhead
Port side engine room FWD bulkhead
Under AFT seat port side
Under AFT seat port side
Under cabin entry step
FWD of engine center stringer
Above refrigerator vent
Inside helm storage
Under aft seat
Trunk compartment STBD side
Port side under aft seat
Engine compartment FWD bulkhead
Engine compartment FWD bulkhead
Hull side port/STBD
Helm dash
Page 30

3-10
FORMULA
FASTECH
FASTECH
Item
Fire Extinguisher - Cabin
Fire Extinguisher - Cockpit
Fresh Water Dockside Hookup
Fresh Water Level Indicator
Fresh Water Pump
Fuel Tank Fill - Port
Fuel Tank Fill - STBD
Helm Hydraulic Steering Fill
Horn Air Compressor
Hull Indentification Number
Seacock - Air Conditioning Intake
Seacock - Generator Intake
Seacock - Macerator Discharge
Seacock - Manual Head Intake
Seacock - Raw Water Engine Intakes
Strainer - Air Conditioning Intake(s)
Strainer - Generator Intake
Telephone Dockside Inlet
Transom Shower
Transom Stereo Control
Trim Tab Pump
TV Antenna/Cable Switch
TV Signal Amplifier
Waste Deck Plate
Gray Water Manifold(s)
Gray Water Sump Tank
Fresh Water Fill
Horn
Macerator Y-Valve
Location
A/B-4/5
A-2/3
N/A
N/A
A/B-6
N/A
D-3
N/A
A-3
D-1
B/C-5
B-2
C-2
N/A
B/C-2
B/C-5
N/A
N/A
A-1
A-1
A/D-2
C/D-5
C/D-5
D-1
N/A
B/C-5
C-9
A-2
D-2
Remarks
Inside refrigerator storage
Inside port storage
Under V-berth
Deck side above rub rail
Inside port storage
Hull below rub rail, aft STBD corner
Under cabin entry step
Hull floor FWD of engine
Hull floor FWD of engine
Hull floor FWD of engine
Under cabin entry step
Trunk compartment port side
Port deck side at swim platform
Engine compartment FWD bulkhead
Inside A/C compartment
Inside A/C compartment
STBD deck side at swim platform
Under cabin entry step
Behind FWD cleat
Attached to port deck in vent
(engine room)
Hull side
382 Equipment Location
Page 31
FASTECH
4-1
FORMULA
Knowing the controls and indicators on your boat
is essential for safe and proper operation.
GAUGES
Each engine has its own set of gauges. On dual
engine boats, the port set of gauges is for
monitoring operation of the port engine. The
starboard set is for monitoring operation of the
starboard engine. The gauges are illuminated for
night operation.
On occasion, a small fluctuation in a gauge
reading is not unusual. If an instrument reading is
outside the normal or recommended ranges,
determine the cause or see your Formula dealer.
Refer to the propulsion unit operator’s manual for
normal recommended ranges.
Tachometer—Registers engine speed in
revolutions per minute (RPM). Use this gauge to
keep the engine within the proper operating
range.
An hour meter is incorporated in the tachometer.
The hour meter accumulates engine operating
time, and is activated when the ignition switch is
ON. Consult your propulsion unit operator’s
manual for the proper RPM operating range for
your engines.
Tachometer
Figure 4-1
3
2
4
5
6
7
8
0
RPM x 1000
0
HOURS
1
Speedometer—Registers forward speed in miles
per hour. Use this gauge to monitor fuel
consumption and propeller performance. Since its
input is received from a water pressure hose,
accuracy is only approximate.
Fuel Level Gauge—
Measures approximate
level of fuel in a fuel tank.
The ignition switch must
be in the RUN position to
activate the gauge. Since
the accuracy of your
gauge varies with the
attitude of your Formula
boat (trim and list), and
the fuel pick-up tube
cannot withdraw all fuel out of the tank, please
observe the One Third Rule. Use one third of your
fuel to go out, one third to come back and one
third as a reserve.
LEVEL
LOW
FUEL
F
E
1
2
Speedometer
Figure 4-2
3
2
4
5
6
7
8
9
10
MPH X 10
Fuel Level Gauge
Figure 4-3
FOR269
FOR268
FOR264
Section 4
Controls and Indicators
Page 32
4-2
FORMULA
FASTECH
FASTECH
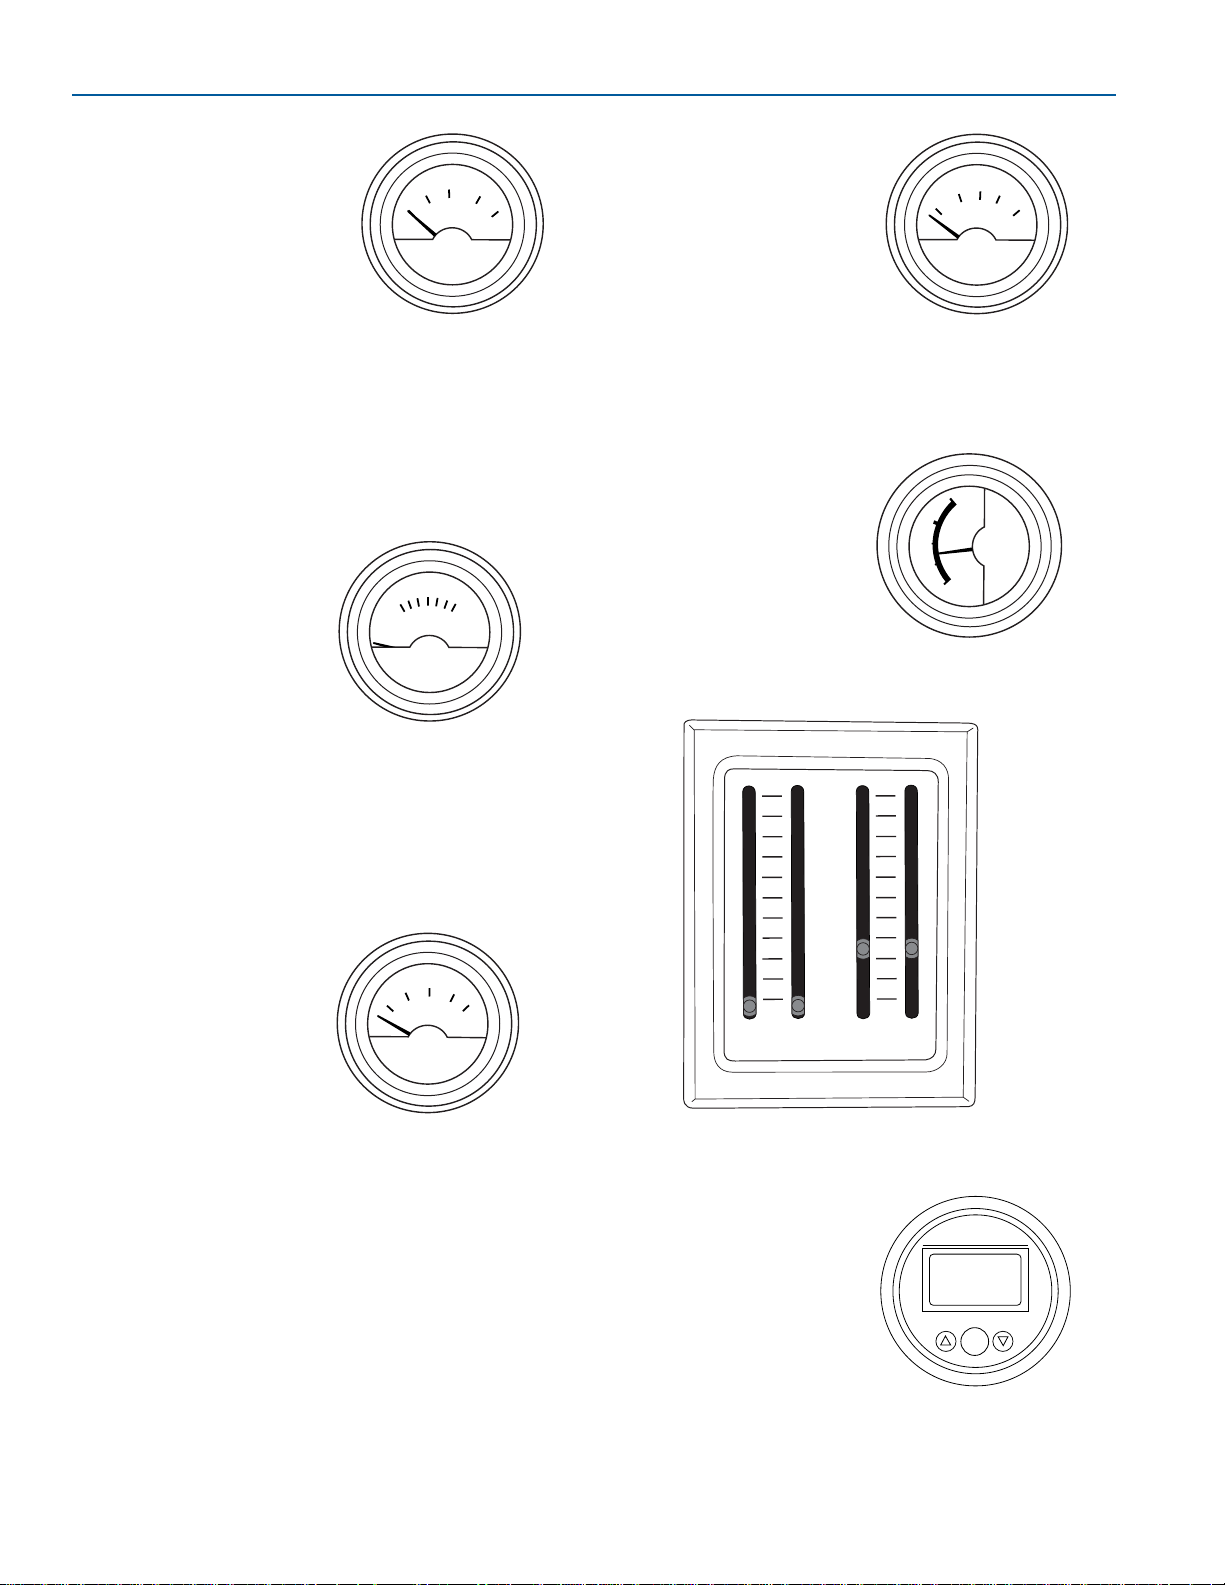
Engine Water Temperature
Gauge—Indicates the
water/coolant temperature
inside the engine. Refer to
the propulsion unit operator’s
manual for normal operating
temperature. After starting
the engine, check your
temperature gauge for
abnormally high readings. If
the reading is outside the
manufacturer’s operating
range, immediately turn off the engine. An
abnormally high temperature is the result of
cooling water blockage. Consult your Formula
dealer when experiencing a high engine
temperature reading.
Voltmeter—Indicates the
condition of the engine’s
cranking battery in volts
DC. With the ignition
switch on and the engine
not running, a reading
between 11.5 and 12.5
volts indicates a fully
charged battery. With the
engine running at idle,
the gauge should read
between 10 and 12 volts. With the engine running
at cruising speeds and above, it should show 12
to 14 volts. Have your Formula dealer check the
charging system if the voltmeter reads below
these normal ranges.
Engine Oil Pressure
Gauge—Measures the
pressure of the engine’s
lubricating oil. Refer to
the propulsion unit
operator’s manual for
normal operating
pressure. Many serious
engine problems are
reflected on oil pressure
gauge readings. If the
pressure is lower than
the manufacturer’s specification, immediately shut
off the engine. Contact your Formula dealer to
correct the problem before operating the engine.
OIL PRESS
0
20
40
60
80
VOLTS
12
14
16
10
WATER TEMP
130
150
180
240
100
Engine Oil Temperature
Gauge (Optional)—
Measures the temperature of
the engine’s lubricating oil.
Refer to the propulsion unit
operator’s manual for the
normal operating temperature.
If the temperature is higher
than the manufacturer’s
specification, immediately
shut off the engine. Contact
your Formula dealer to
correct the problem before operating the engine.
Trim Gauge—Displays the
position of the drive unit.
Depending on your model,
this gauge will either be an
analog gauge or a
mechanical indicator.
Depth Gauge—Displays the
depth of the water under the
boat. To avoid running
aground in shallow water,
add distance to the meter
reading and maintain a very
slow speed. Aswitch at the
helm activates the gauge.
For operating instructions,
refer to the depth gauge
instructions in your Owner
Information Binder.
SET
DEPTH
Mechanical Trim Indicator
Figure 4-9
9
8
7
6
5
4
3
2
1
0
IN
DRIVES
TABS
UP
9
8
2
3
4
5
6
7
9
8
POWER
TRIM
OIL TEMP
200
230
260
320
140
Voltmeter
Figure 4-5
FOR276
FOR267
FOR263
Engine Water
Temperature Gauge
Figure 4-4
Trim Gauge
Figure 4-8
Depth Gauge
Figure 4-10
FOR055
Engine Oil
Pressure Gauge
Figure 4-6
FOR274
Trim Gauge
Figure 4-7
FOR270
FOR272
Page 33
4-3
FORMULA
CONTROLS AND INDICATORS
FASTECH
SWITCHES
NOTICE
Some accessory switches (engine hatch,
horn) are MOMENTARY switches. These
switches must be held in place to operate
the accessory. The switch returns to the
OFF position when it is released.
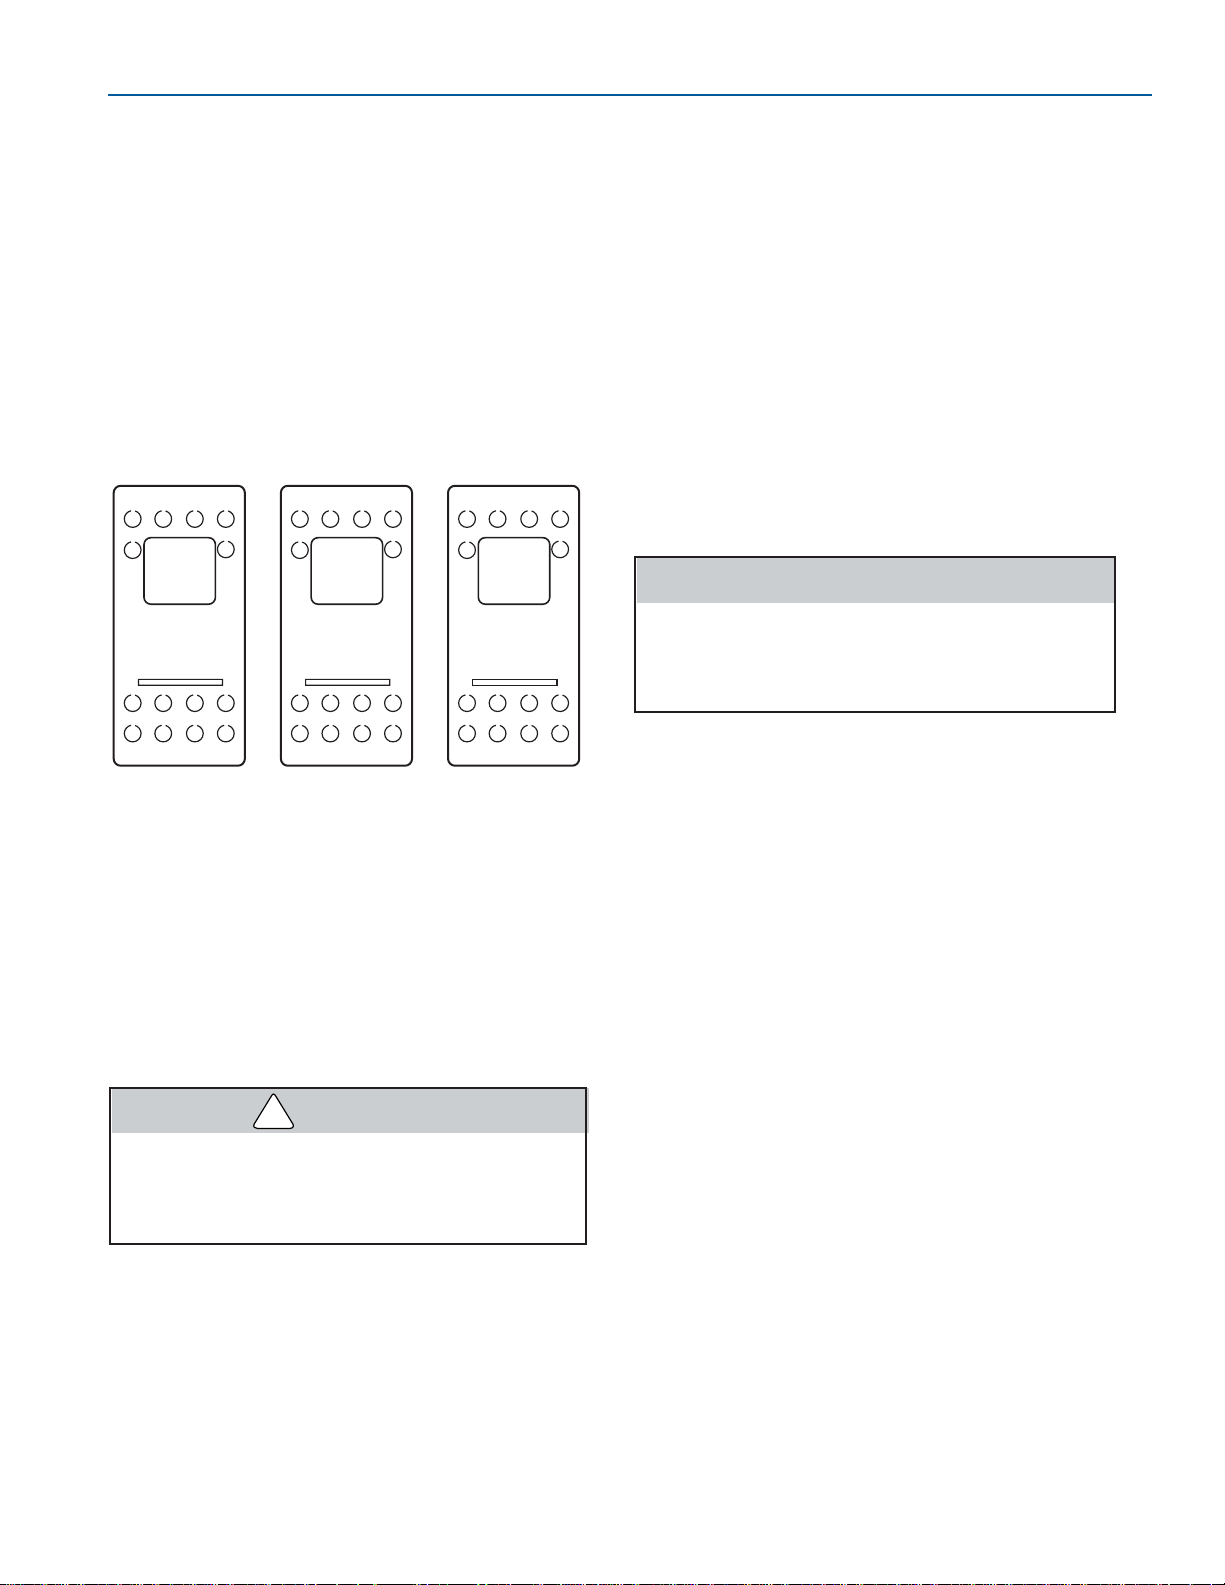
Rocker-type switches are used in your Formula
boat to activate an electrical circuit. Push the
bottom of the switch to activate the circuit. The
switch will remain ON and a light will illuminate the
switch. Push the top of the switch to turn it OFF.
Blower Switch—Activates the engine
compartment ventilation blower to remove
explosive fumes from the area.
The blower must be operated for a minimum of
four minutes before starting the engines or
generator. In addition, the blower should be
operated continuously when at idle or running at
slow speeds.
Failure to operate the blower can lead to
conditions favorable for an explosion
which can cause severe personal injury or
death.
Bilge Pump Switch—Manually controls the
operation of the bilge pump.
Navigational Light Switch—This three position
switch activates the navigational (running) lights
and the anchor light. Push the top of the switch to
activate the navigational lights and all-around
white anchor light. The center position is OFF.
Push the bottom of the switch to activate only the
anchoring light.
Typical Rocker-Style Switches
Figure 4-11
BLOWER
BILGE
PUMP
NAV
LIGHTS
NOTICE
Operate the boat between sunset and
sunrise using your navigational lights.
Navigational lights are legally required to
indicate direction and right-of-way at night.
Cockpit Courtesy Lights Switch—Operates
both the interior courtesy lighting and the bilge
compartment lighting.
Panel Light Switch—Illuminates the instrument
panel when in the ON position.
Docking Lights Switch—Operates the docking
lights. Docking lights are to be used for docking
only. It is illegal to use your docking lights while
cruising.
Docking lights are intended for short term
use only. Use of lights for extended
periods may damage the hull and/or the
lights.
Horn—Depending on model, a rocker-type switch
or a push-button switch is used to activate the
horn.
●
Press the bottom of a rocker-type switch to
activate the horn.
●
Press the center on a push-button switch to
activate the horn.
Engine Hatch Switch—Activates the engine
compartment hatch electronic lift system. This
switch is located at the helm.
If the battery is low or disconnected, the engine
compartment hatch can be opened manually. Lift
the front edge of the engine hatch/sun-pad six to
eight inches (152-203 mm). Remove the fast pin
connecting the hatch to the hydraulic system.
Exhaust Diverter Switch—Controls the exhaust
direction on the exhaust diverter system, if
equipped.
Accessory Switch—This switch is available to
operate an accessory item.
FOR056
CAUTION
WARNING
!
Page 34
4-4
FORMULA
FASTECH
FASTECH
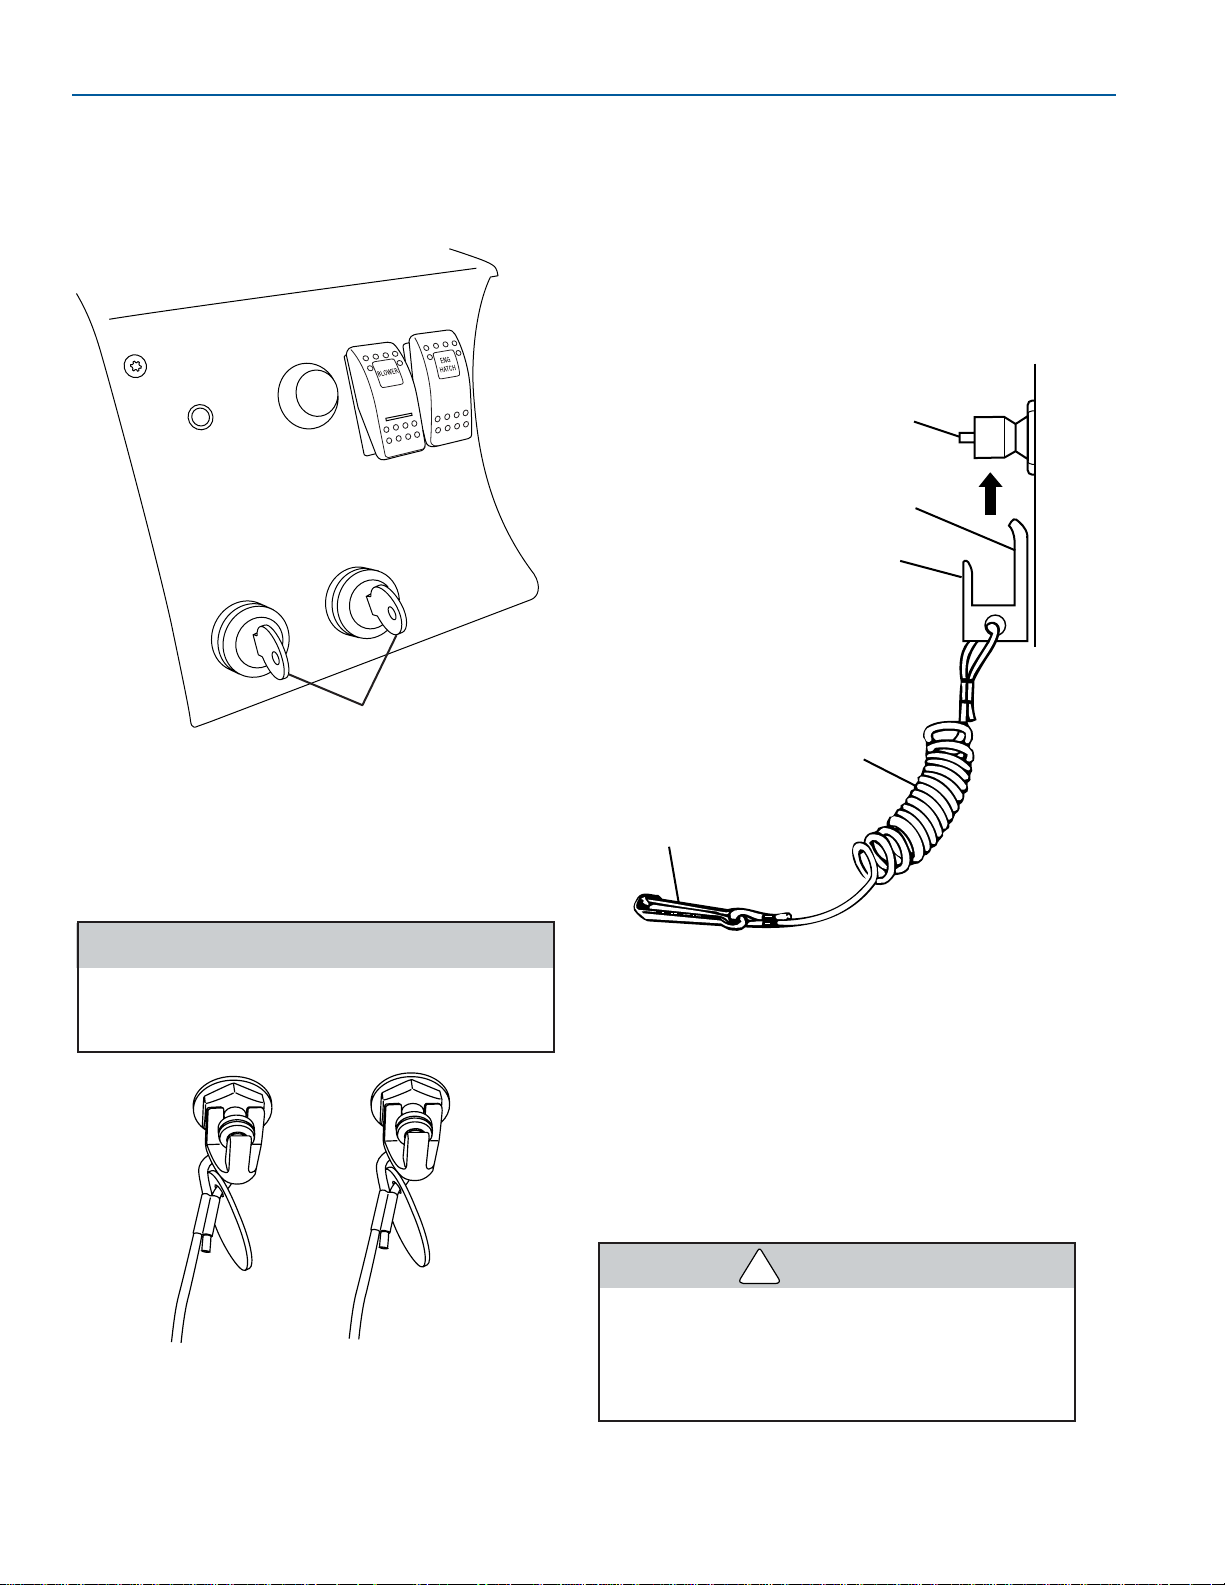
Ignition Switches—Each engine has a separate
ignition switch. The left switch is for the port
engine, and the right switch is for the starboard
engine.
1. Ignition Switches
Ignition Safety Switches—Your Formula boat is
equipped an ignition safety switch for each engine.
Do not allow your Formula boat to be
operated without the proper use of the
ignition safety switch and lanyard.
Ignition Safety Switches
Figure 4-13
Ignition Switches
Figure 4-12
ALARM WILL
SOUND WHEN
OIL PRESSURE IS LOW
OR ENGINE IS HOT.
LIGHT ON
SYSTEM
CHARGED
HALON
HORN
LIGHT OFF
SYSTEM
DISCHARGED
WARNING
:
GASOLINE V
APORS
CAN EX
PLODE. B
EFORE STARTING ENGINE
:
–CHECK
ENGINE
C
OMPARTMENT F
OR GASOLINE OR VAPORS.
–OPERATE B
LOWERS F
OR 4 MINUTES. RUN
B
LOWER BELOW
C
RUSING SPEED.
1
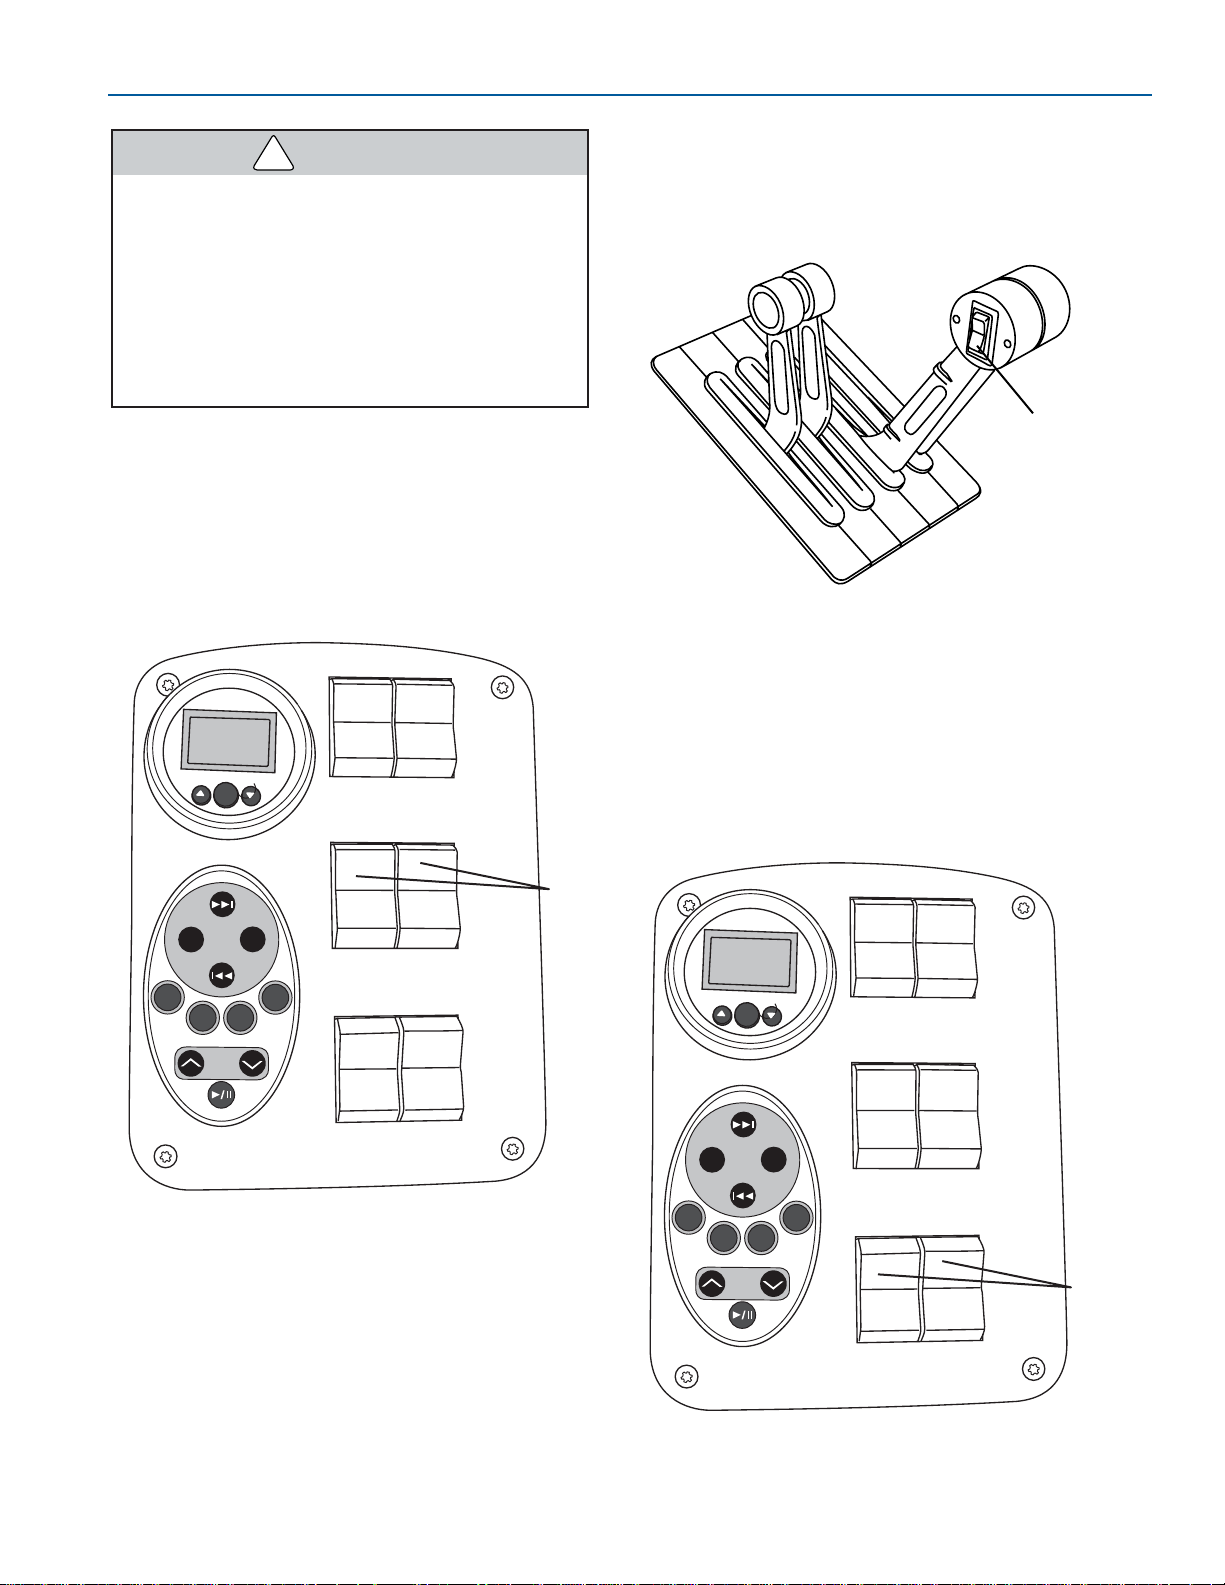
The ignition safety switch and lanyard will stop an
engine in case of an emergency. Attach the
lanyards to the boat operator whenever the
engines are running but be aware there will be a
loss of boat control if the switches are activated. If
the operator is thrown from the seat or moves too
far from the helm, the lanyards will become
disconnected from the ignition safety switches,
shutting off the engines.
1. Ignition Safety Switch Button
2. Fork
3. Center Prong covers Safety Switch Button
4. Lanyard
5. Clothing Hook
To attach a lanyard, connect the clip to the ignition
safety switch and the hook to a strong piece of
clothing on the operator, such as a belt loop.
Attach the ignition safety switches’
lanyards to the operator before starting the
engines. This will prevent the boat from
becoming a runaway if the operator is
accidentally thrown away from the helm.
Installing Lanyard to Ignition Safety Switch
Figure 4-14
1
2
3
4
5
FOR281
FOR057
FOR124
CAUTION
WARNING
!
Page 35
4-5
FORMULA
CONTROLS AND INDICATORS
FASTECH
The ignition safety switches can only be
effective when they are in good working
condition. Observe the following:
●
Do not remove or modify an ignition
safety switch and/or its lanyard.
●
The lanyard must be free from
obstructions that could interfere with its
operation.
Drive Unit Trim Switch—Labeled “Drives,” these
switches activate the drive units’ power trim
feature. The starboard switch controls the
starboard drive unit’s power trim. Push and hold
the top of the switch to raise the drive unit. Push
and hold the bottom of the switch to lower the
drive unit. Use this switch in combination with the
trim gauge to maximize your boat’s performance.
1. Trim Switches
Typical Trim Switches
Figure 4-15
SET
DEPTH
D
R
I
V
E
S
D
R
I
V
E
S
OUT
DOWN
FM AM
IN
OUT
T
R
A
I
L
E
R
TAPE
TUN
CD
CD
CH
OFF
UP
1
On some remote controls, a combination port and
starboard drive unit trim switch is located in the
throttle handle of the remote control. Push and
hold the switch until both drive units are at the
desired angle.
1. Trim Switch
All FASTech models have separate switches that
activate the tilt feature. These switches are
labeled “Trailer.” The port switch activates the port
drive unit’s power tilt. The starboard switch
activates the starboard drive unit’s power tilt. Push
the top of the switch to raise the drive unit.
1. Typical Trailer Switches
Typical Trailer Switches
Figure 4-17
SET
DEPTH
D
R
I
V
E
S
D
R
I
V
E
S
OUT
DOWN
FM AM
IN
OUT
T
R
A
I
L
E
R
TAPE
TUN
CD
CD
CH
OFF
UP
1
Remote Control Trim Switch
Figure 4-16
1
FOR273
FOR062
FOR279
WARNING
!
Page 36
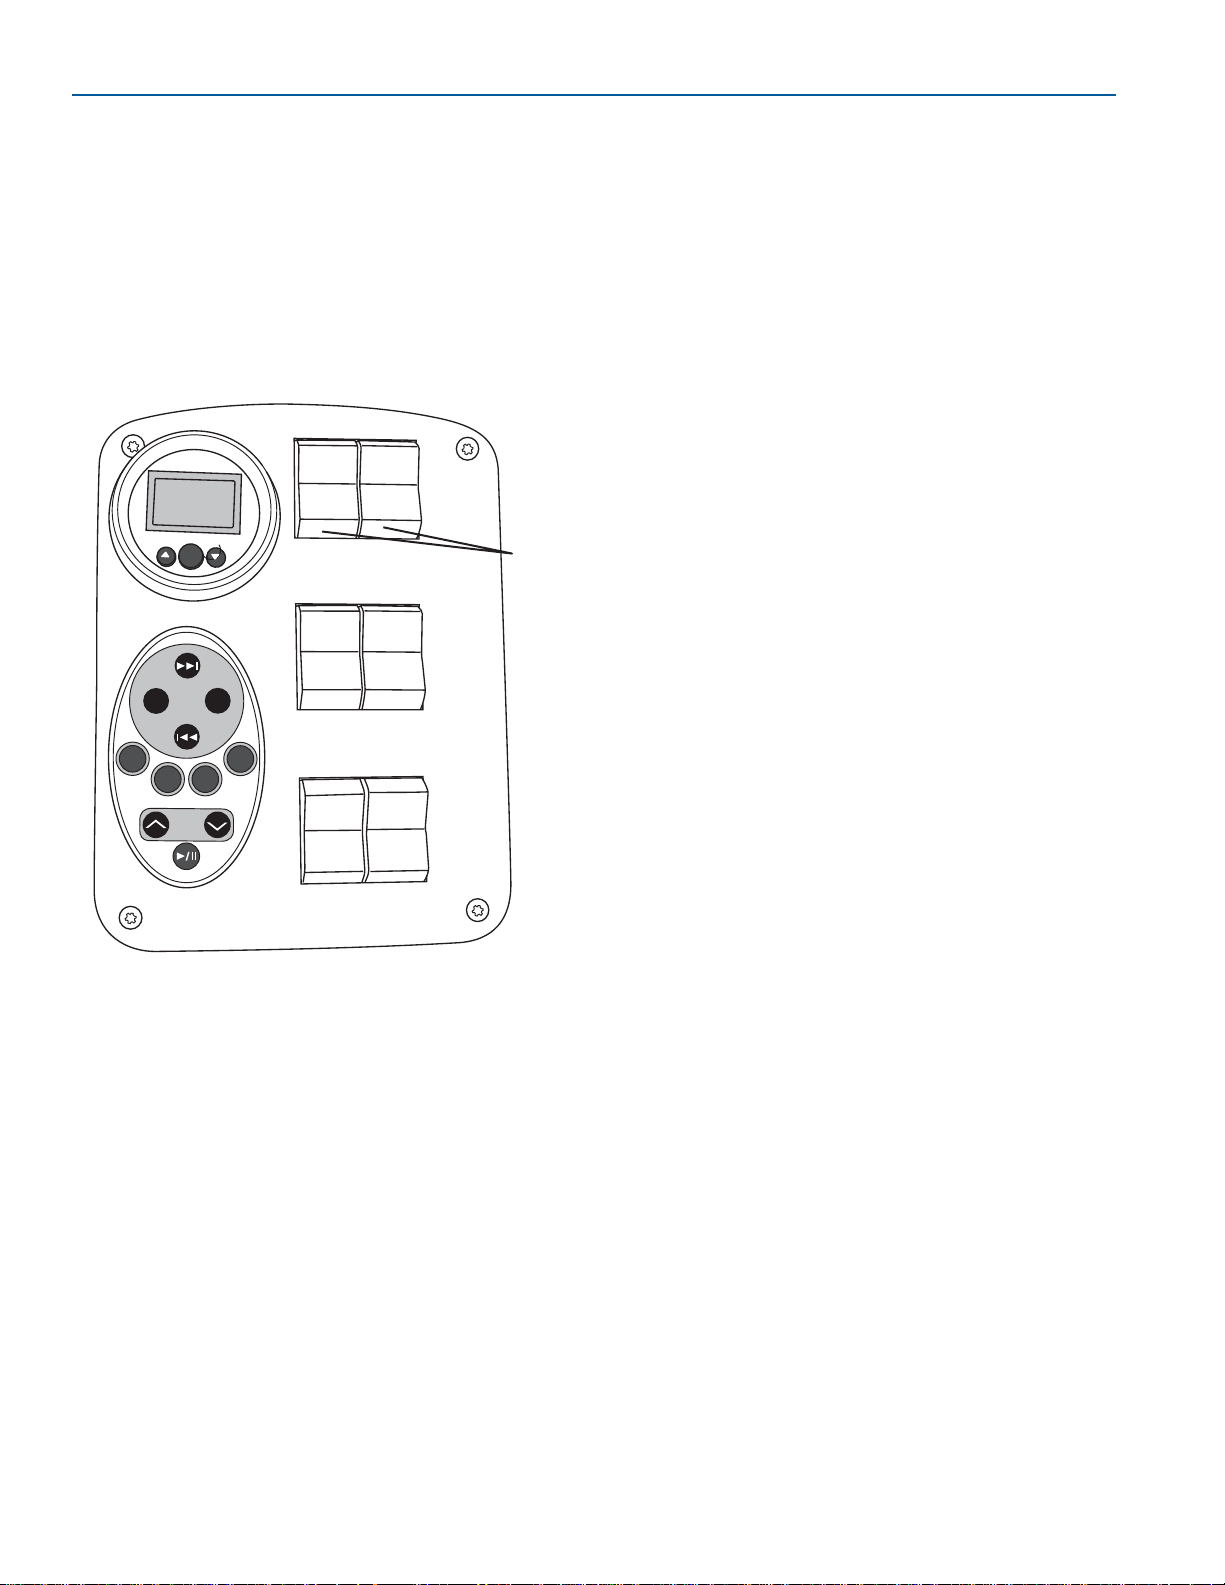
4-6
FORMULA
FASTECH
FASTECH
Refer to Trimming-Drive Units and Trim Tabs,
in Section 7, for additional information.
Trim Tab Switch—Labeled "TABS," these
switches control the operation of the trim tabs.
Adjusting trim tabs will improve the ride of your
boat and correct listing from side to side due to
varying weight distribution and/or sea and wind
conditions. Refer to Trimming-Drive Units and
Trim Tabs, in Section 7, for further trimming
procedures.
1. Trim Tab Switches
Typical Trim Tab Switches
Figure 4-18
SET
DEPTH
D
R
I
V
E
S
D
R
I
V
E
S
OUT
DOWN
FM AM
IN
OUT
T
R
A
I
L
E
R
TAPE
TUN
CD
CD
CH
OFF
UP
1
FOR073
FOR280
Page 37
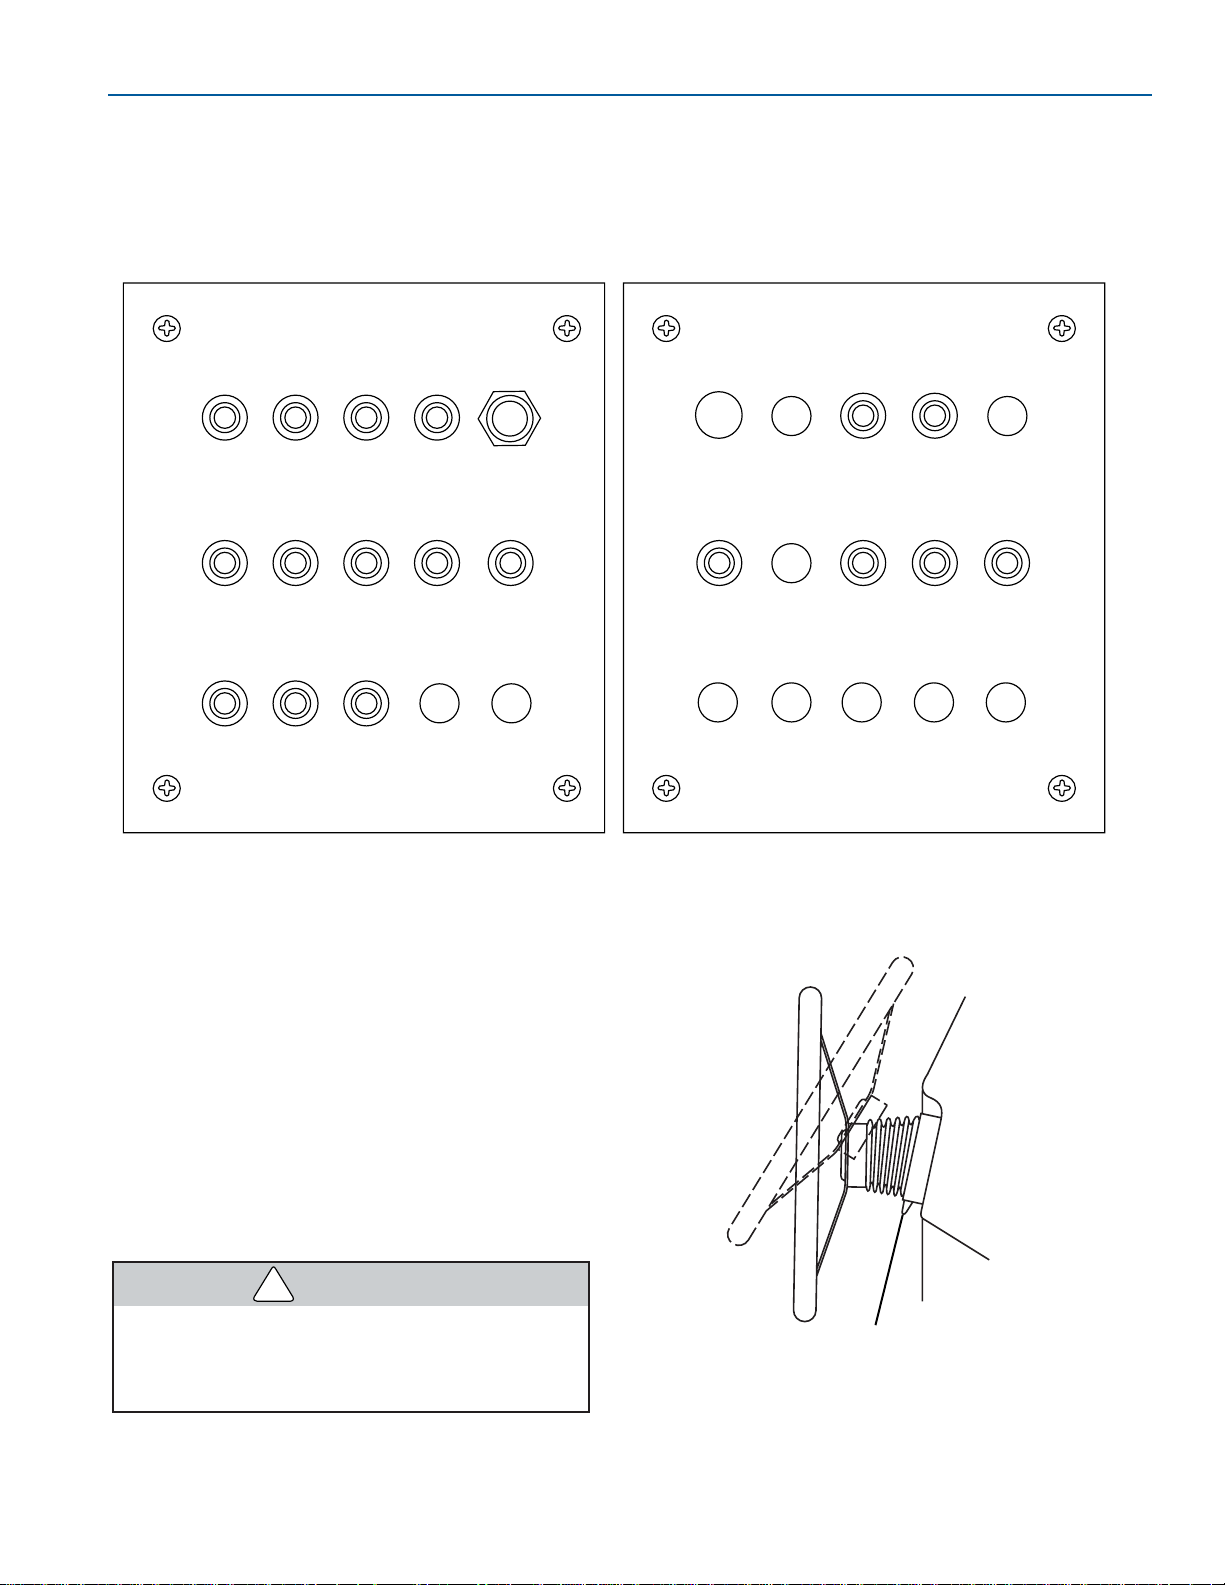
4-7
FORMULA
CONTROLS AND INDICATORS
FASTECH
Your Formula has additional circuit breaker
panels. For location of these panels, refer to
Specifications, in Section 3, for your specific
model.
STEERING
Your Formula boat is equipped with a tilt steering
wheel. Adjust the tilt position by grasping the top
of the steering wheel and depressing the release
lever with your thumb. Release the lever to lock
the steering wheel when achieving a comfortable
position.
Do not adjust the steering wheel tilt
position while the boat is moving. Sudden
boat movement may cause loss of balance
resulting in loss of control and/or injury.
1. Release Lever
Tilt Steering Wheel
Figure 4-20
1
FOR059
PORT
IGN
STBD
IGN
PORT
WIPER
STBD
WIPER
BILGE
PUMP
ENGINE
HATCH
12 VOLT
OUTLET
VHF
RADIO
ACC ACC ACC ACC ACC
SPOT
LIGHT
TRIM
TAB
HIGH
WATER
ALARM
GPS
ACCACCLIGHTS WNDLS
FUME
DETCTR
HORN BLOWERS
CABIN
BILGE
PUSH TO RESET – PUSH TO INTERRUPT
AUTO
PILOT
ENGINE
SYNC
DEPTH
SOUNDER
PLOTTER RADAR
PUSH TO RESET – PUSH TO INTERRUPT
Typical Circuit Breaker Panel
Figure 4-19
FOR011
CIRCUIT BREAKERS
A circuit breaker panel(s) is located at the helm.
Most electrical equipment is controlled with circuit
breakers. These breakers will activate if
overloaded and cut power to the switch. To
restore power, push the button in and release. If a
circuit continuously overloads under normal
operating conditions, have your boat inspected by
your Formula dealer immediately.
WARNING
!
Page 38
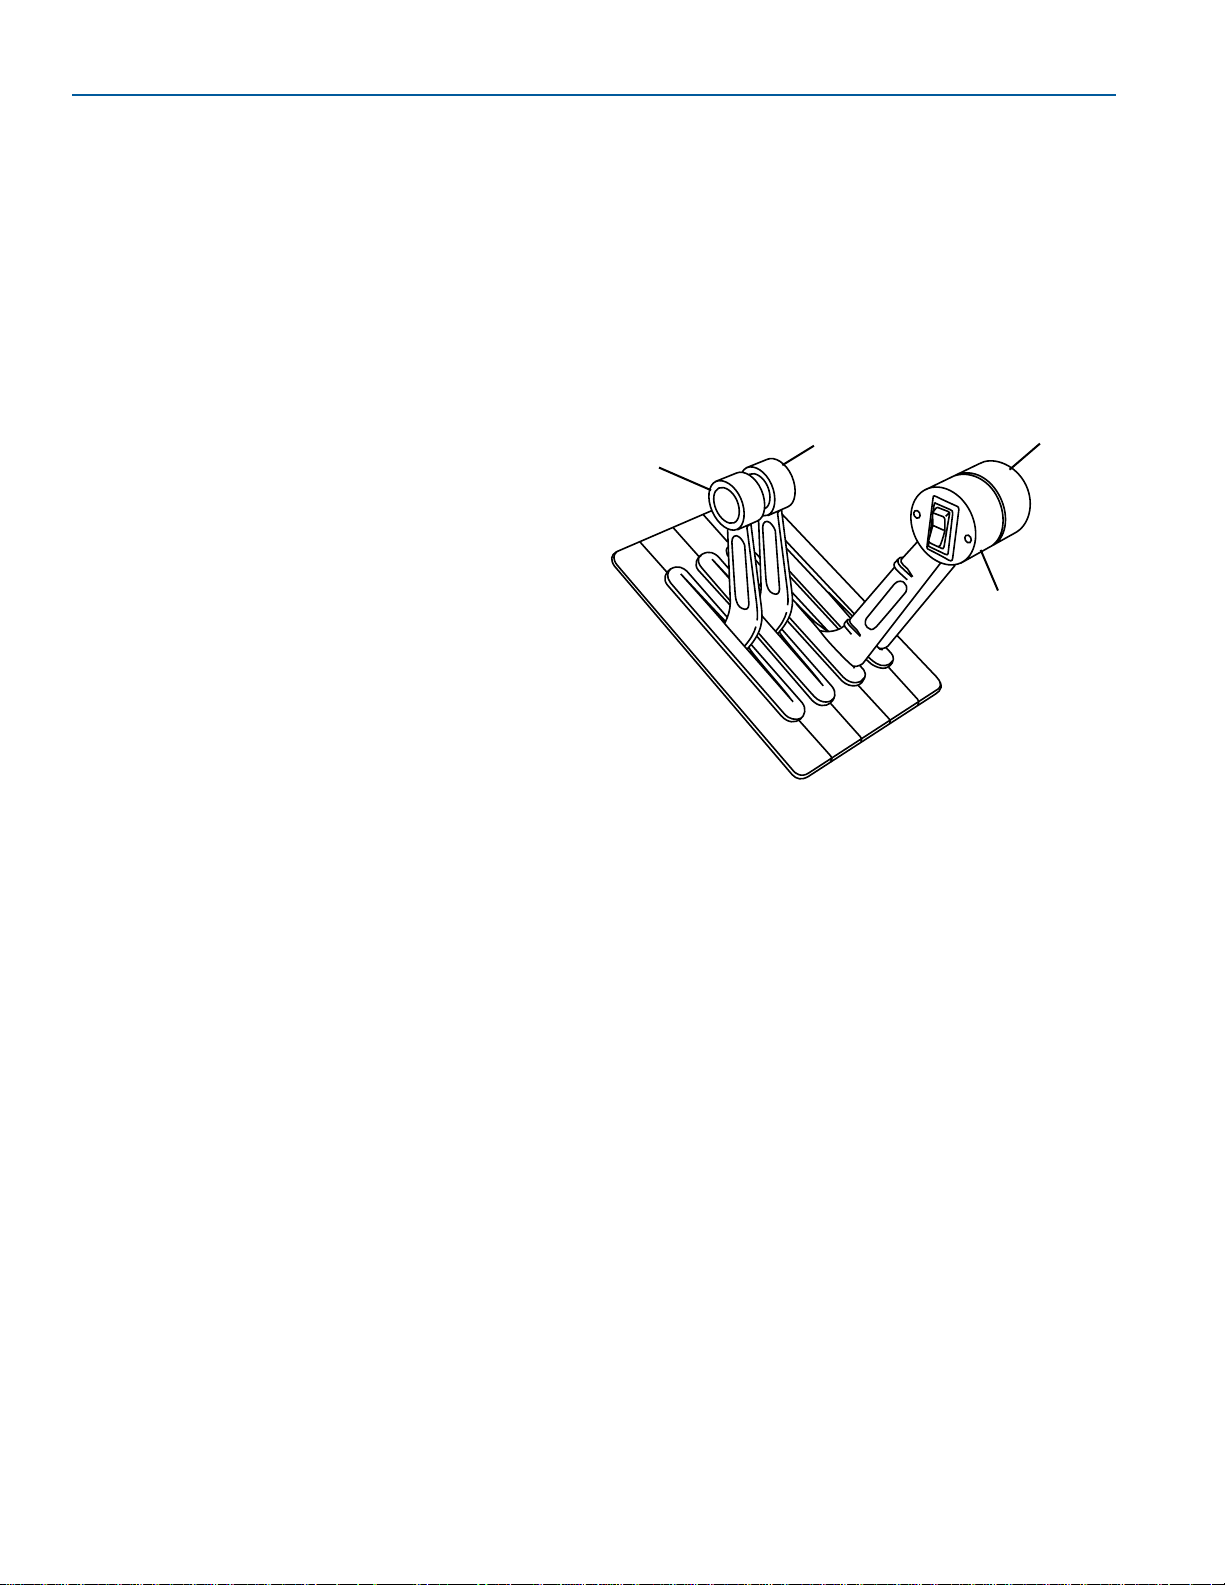
4-8
FORMULA
FASTECH
FASTECH
REMOTE CONTROLS
NOTICE
Your Formula boat is equipped with a
safety switch for “start-in-neutral-only”
operation. Be sure the shift lever is in
NEUTRAL before attempting to start an
engine.
Duel lever controls are used on all FASTech
models. The shift lever controls the drive unit
operation. The throttle lever controls the engine
speed. The shorter lever(s) is the shift control,
while the longer lever controls the engine speed.
In dual engine applications, the left lever of each
shift/throttle pair controls the port engine and the
right lever of each pair controls the starboard
engine.
NOTICE
The small rocker switch in the throttle lever
permits trim of the drive(s) while
maintaining control of the throttle lever.
Dual Lever Controls
Dual lever controls have separate shift and
throttle levers for each engine. The levers may all
be combined into one unit as shown, or separate
shift and throttle units.
The left levers are for the port engine and the
right levers are for the starboard engine. The
controls are arranged with the shift levers (all one
size and color) grouped together and throttle
levers (all the same size and color, and larger
than the shift levers) grouped together.
1. Port Engine Shift Lever
2. Starboard Engine Shift Lever
3. Port Engine Throttle Lever
4. Starboard Engine Throttle Lever
Typical Dual Lever Remote Control
Figure 4-21
3
4
1
2
FOR097
Page 39
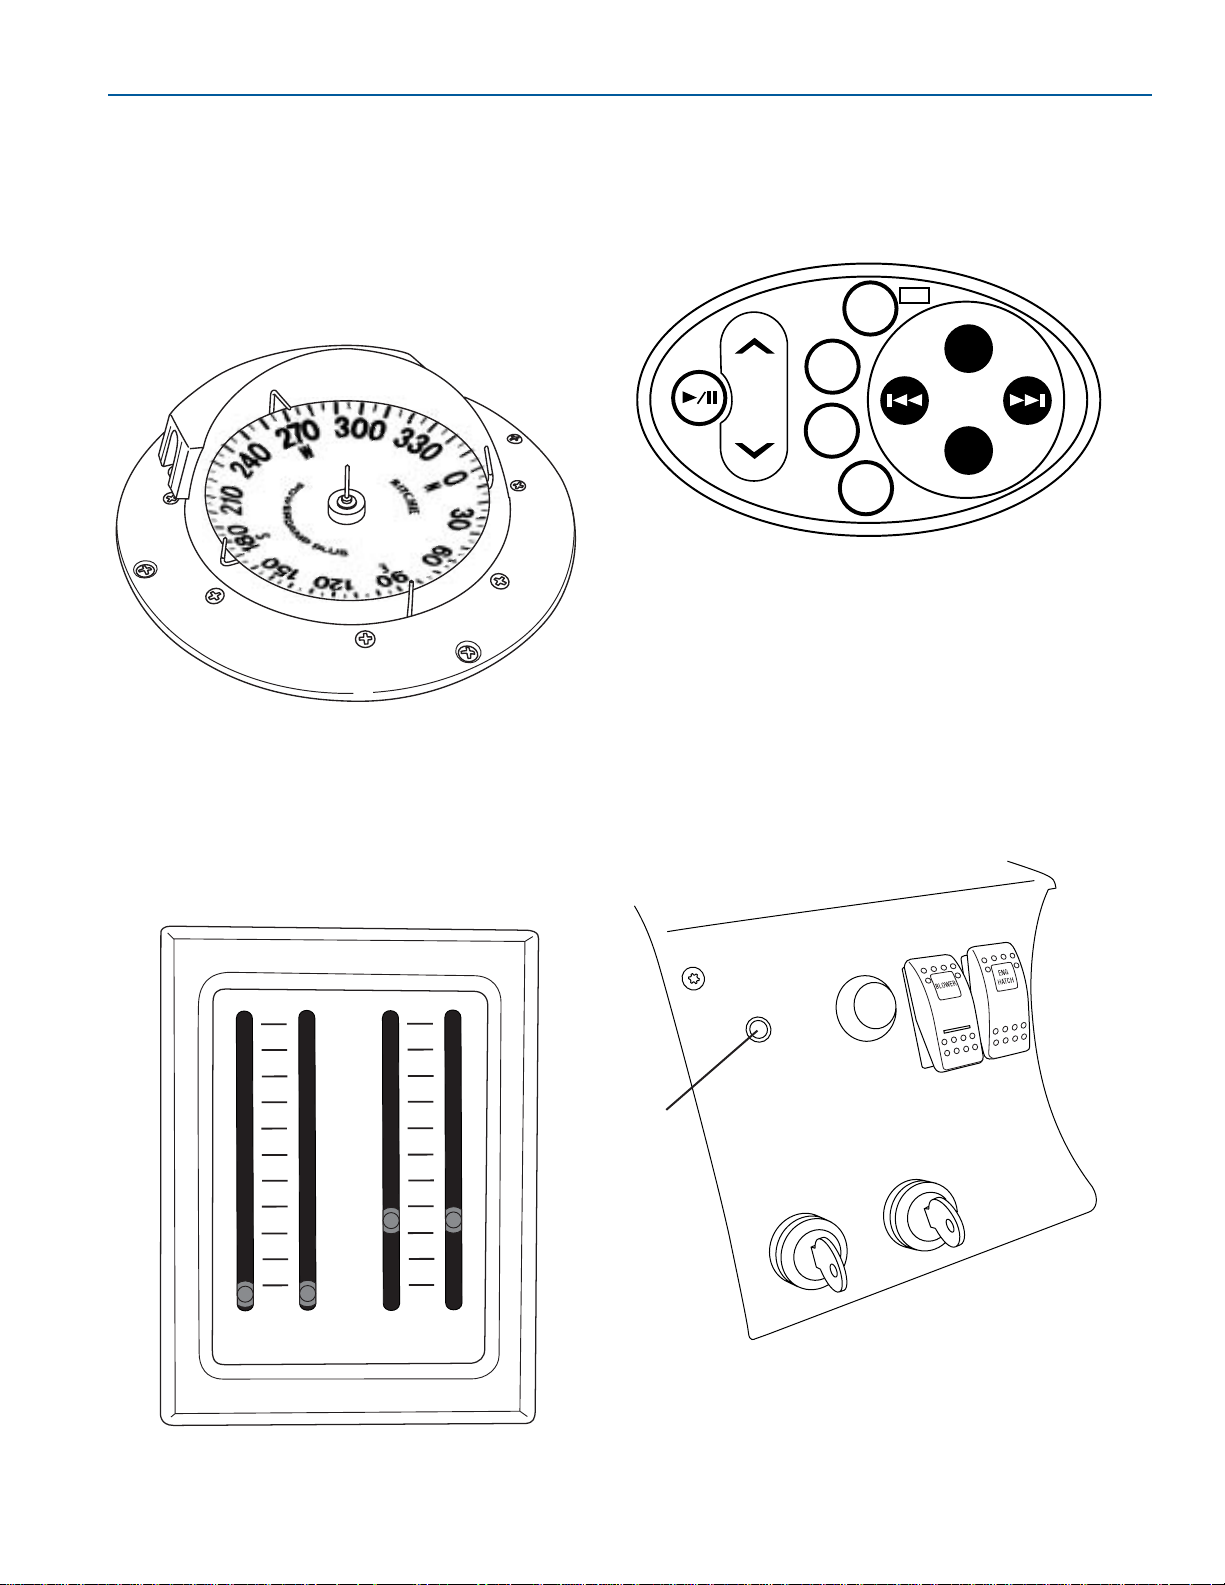
4-9
FORMULA
CONTROLS AND INDICATORS
FASTECH
HELM CONTROLS AND
INDICATORS
Compass—Aids in navigation of your Formula
boat, a compass is mounted at the helm. Refer to
the compass user’s manual supplied in your
Owner Information Binder for operating
information.
Trim Tab/Drive Indicators—If equipped, your
boat may include mechanical indicators for both
the trim tabs and drives. Refer to Trimming-Drive
Units and Trim Tabs, in Section 7, for trim tab
operation.
Trim Tab Indicators
Figure 4-23
9
8
7
6
5
4
3
2
1
0
IN
DRIVES
TABS
UP
9
8
2
3
4
5
6
7
9
8
Compass
Figure 4-22
Stereo Remote Control—Provides full-feature
stereo control from the helm and/or swim
platform. Depending on the particular FASTech
model, one or more volume controls may be
installed (Figure 4-23).
Automatic Fire Extinguisher Indicator—
Monitors the fixed automatic fire extinguisher
mounted in the engine compartment. The
automatic fire extinguisher indicator light is
located at the helm. When the light is on, the
system is charged. When the light is off, the
system is discharged and needs attention. Refer
to Automatic Fire Extinguisher, in Section 5, for
additional information.
1. Indicator Light
Automatic Fire Extinguisher Indicator Light
Figure 4-25
ALARM WILL SOUND WHEN
OIL PRESSURE IS LOW
OR ENGINE IS HOT.
LIGHT ON
SYSTEM
CHARGED
HALON
HORN
LIGHT OFF
SYSTEM
DISCHARGED
WARNING
:
GASOLINE V
APORS
C
AN EX
PLODE. B
EFORE STARTING ENGINE
:
–C
HEC
K
ENGINE
C
OMPARTMENT F
OR GASOLINE OR VAPORS.
–OPERATE B
LOWERS F
OR 4 MINUTES. RUN
B
LOWER BELOW
C
RUSING SPEED.
1
Stereo Remote Control
Figure 4-24
DISC UP
DISC DOWN
TRACK/TUNE
FM
TUN
CD
TAPE
VOLUME
CD
CH
OFF
SRC
AM
FOR262
FOR272
FOR037
FOR266
Page 40
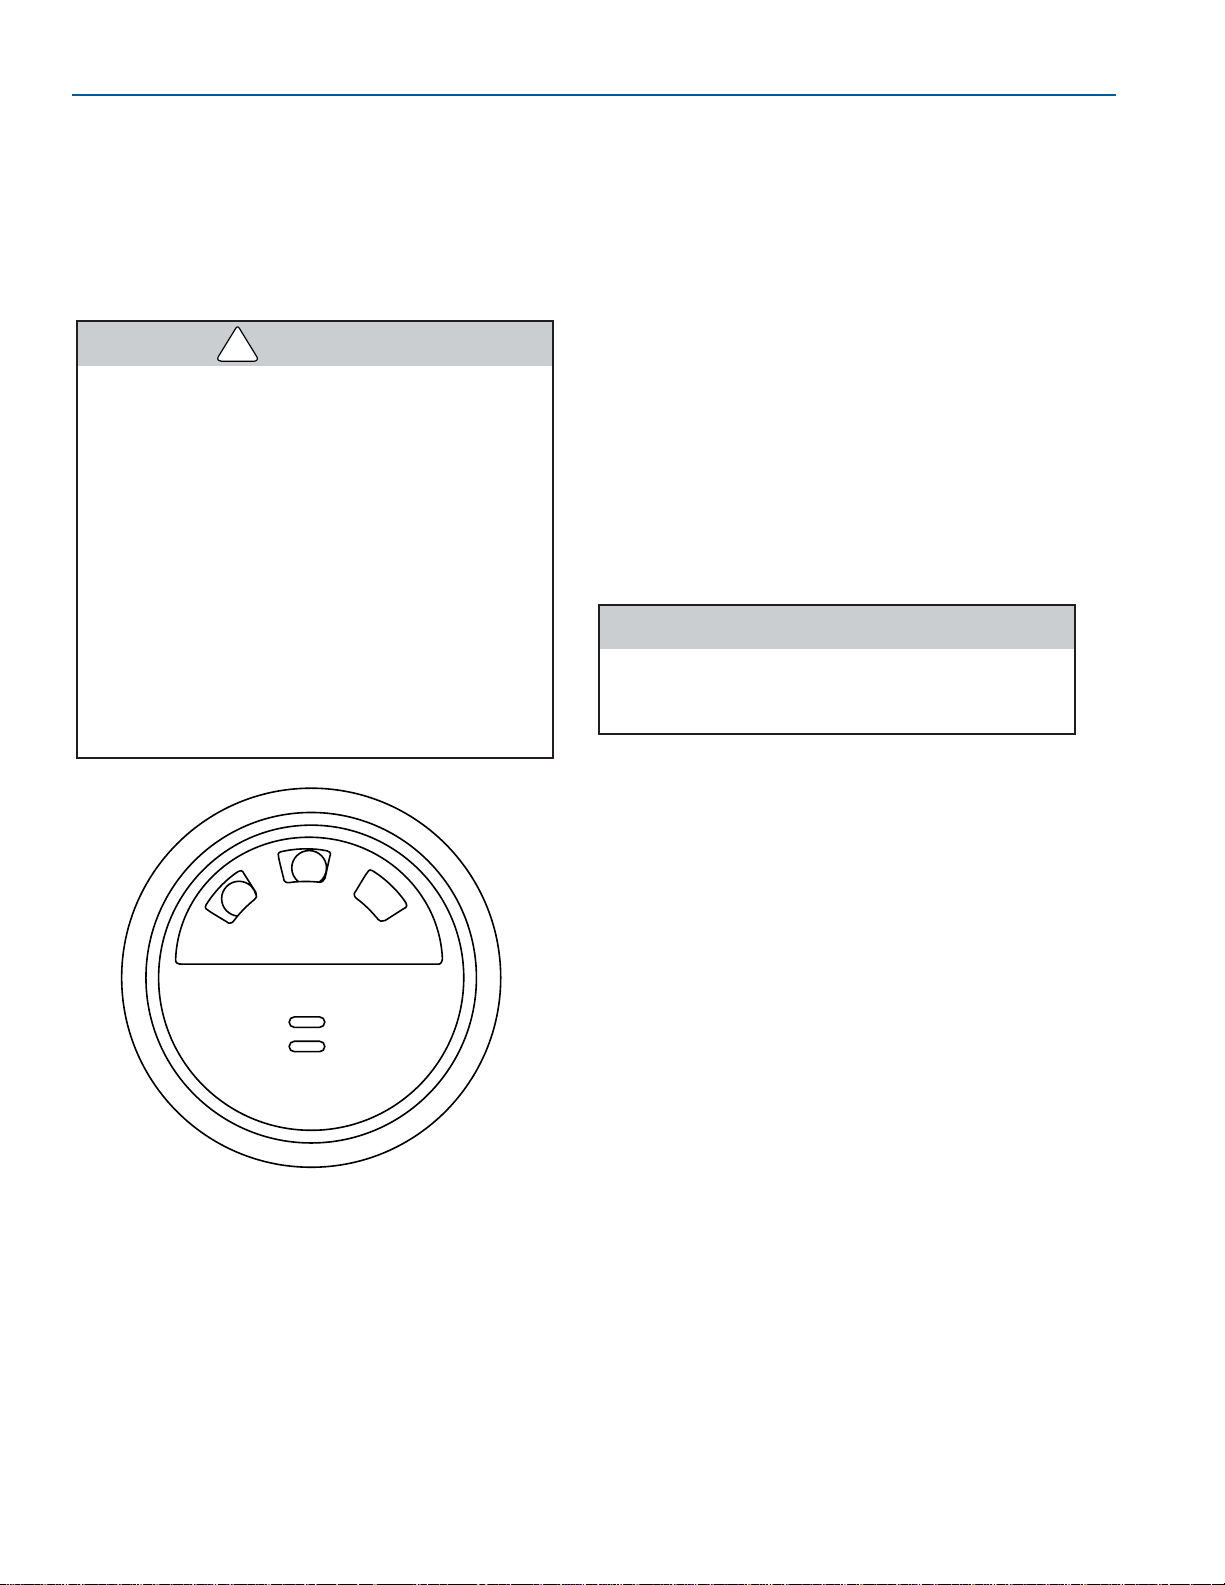
4-10
FORMULA
FASTECH
FASTECH
Fume Detector Gauge—Monitors the engine
compartment for excessive fuel fumes. The gauge
is mounted at the helm and a sensor is located in
the bilge area where fumes collect. The system
also monitors for unburned hydrocarbons from a
faulty exhaust system and hydrogen battery
vapors. Refer to the fume detector owner’s
manual for additional information.
The fume detector system is not meant to
replace standard safety practices, which
should always be observed around
explosive gases.
If the fume detector indicates a dangerous
condition, do the following:
●
Do not operate electrical equipment.
●
Extinguish open flames and smoking
materials immediately.
●
Turn OFF the engines and generator.
●
Wait five minutes before opening the
engine compartment to investigate the
cause.
●
Determine the cause and correct it
immediately before resuming operation.
Fume Detector Gauge
Figure 4-26
GASOLINE FUME DETECTOR
MUTETEST
M-1
Bilge High Water Alarm—Sounding of the alarm
may be an indication of a) problems with the
automatic bilge pump system, b) an intrusion of
water which exceeds the bilge pump system’s
removal capabilities. Asensor mounted in the
engine compartment activates the alarm. When
activated, a continuous horn will sound. The alarm
will stop once the excessive water is cleared.
There is a built-in 10 second delay to avoid
nuisance tripping. Refer to Bilge and Blower
System in Section 5.
Engine Alarm—Sounds an alarm when an
engine temperature exceeds the set limit, the oil
pressure drops below the set range, or the drive
fluid volume falls to a critical level. If the alarm
sounds during operation, immediately turn OFF
the engine and determine the cause. Consult the
propulsion unit owner’s manual in your Owner
Information Binder for additional information.
Continued operation of an engine after the
warning alarm has sounded may cause
severe engine damage.
FOR012
WARNING
!
CAUTION
Page 41
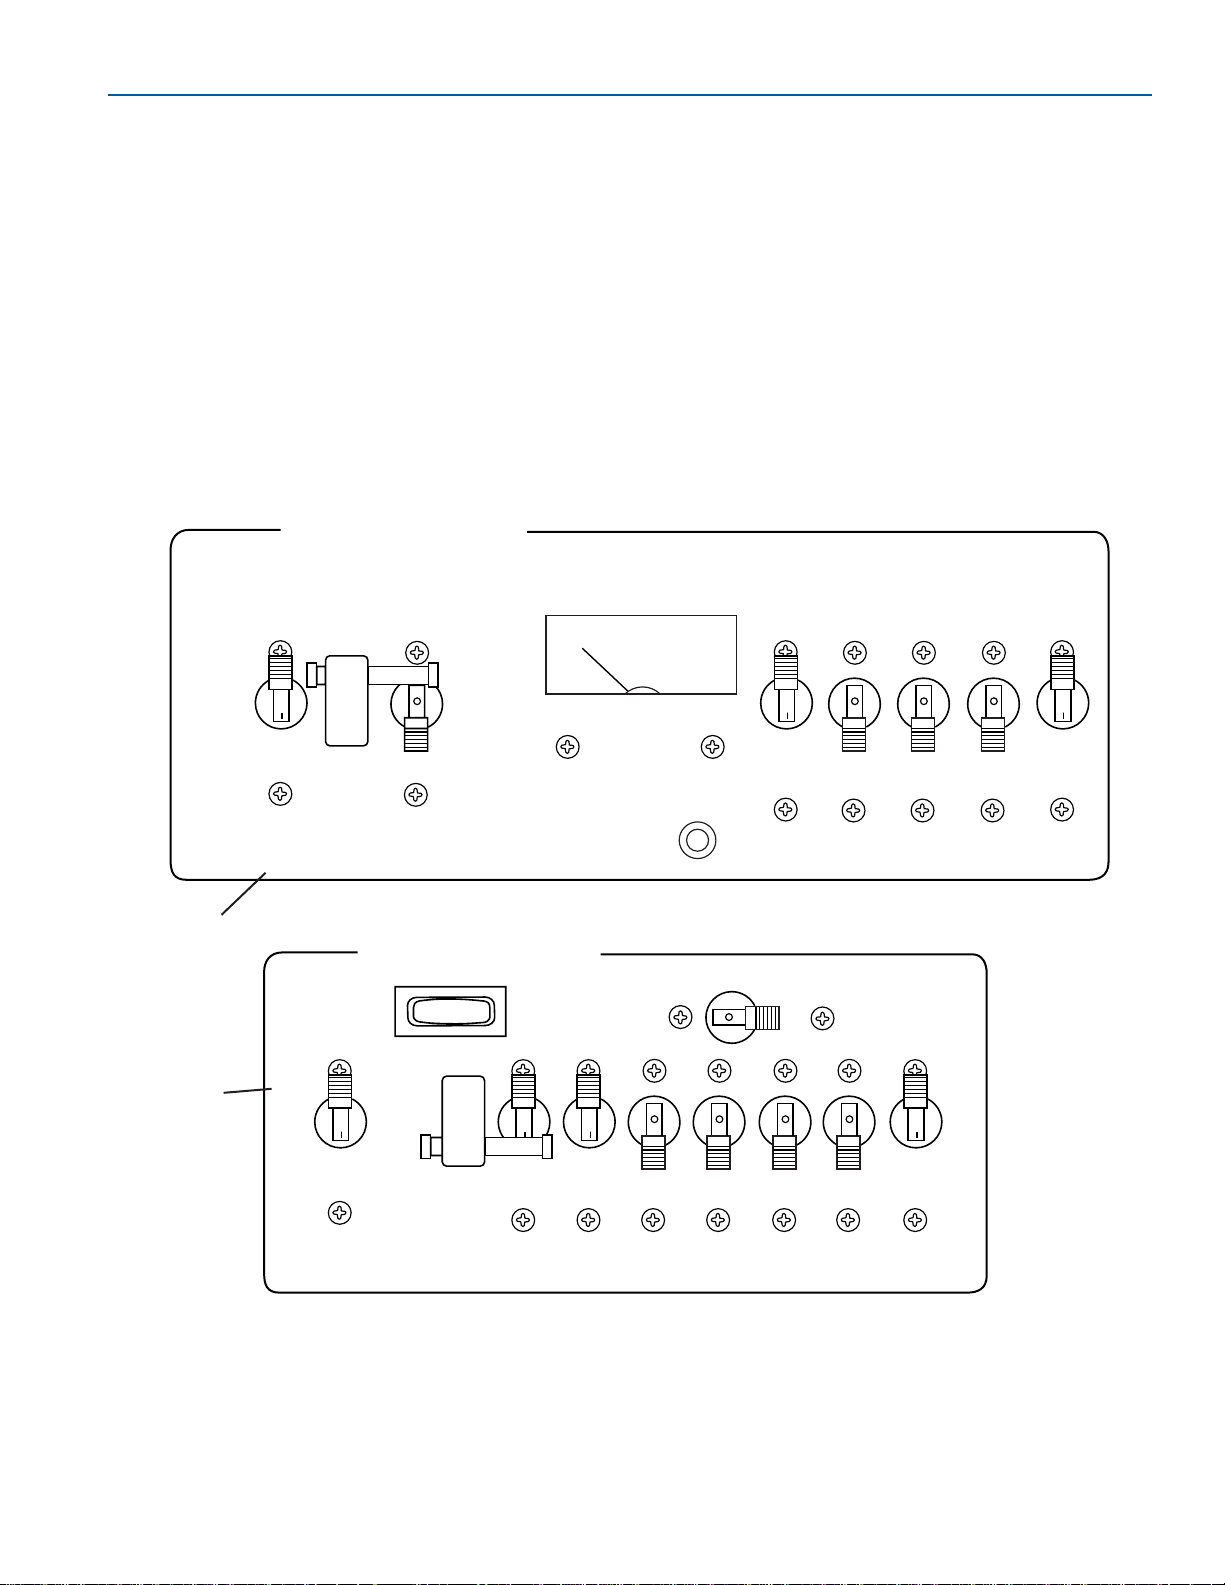
4-11
FORMULA
CONTROLS AND INDICATORS
FASTECH
CABIN CONTROLS AND
INDICATORS
AC/DC Control Panel—This panel controls the
distribution of the 110-volt alternating current
(VAC) electrical system and the 12-volt direct
current (VDC) electrical system.
Both the AC and DC circuits are controlled by a
switch-type circuit breaker. The circuit breaker
functions in two ways. It allows you to manually
enable or interrupt a circuit by moving the switch
ON or OFF. They protect the system by
automatically opening the circuit if a short or
overloaded condition occurs.
Check the circuit if a particular piece of equipment
stops working. Atripped circuit breaker indicates
the circuit is overloaded. You should determine
and correct the cause of a problem before
resetting a circuit breaker.
Reset the breaker by pressing it back into place.
Contact your Formula dealer if a circuit beaker
keeps tripping.
Refer to Section 5, for operation of the 12-VDC
and 110-VAC electrical systems.
1. AC Control Panel
2. DC Control Panel
AC/DC Control Panel
Figure 4-27
ONON
ON ON ON
ON
OFF
BATT.
CHARG.
REFRIG. CABIN
OUTLETS
WATER
HEATER
AIR
COND.
REVERSED
POLARITY
OFF
OFF
OFF OFF
120V 60HZ AC SYSTEM
12 VOLT DC SYSTEM
START
STOP
GENERATOR ROOM BLOWERS
MAIN
GENERATOR CONTROLS
INT.
LIGHTS
REFIG. STERO
SYSTEM
WATER
PUMP
WASTE
SYSTEM
12 V0L T
OUTLET
CO
SENSOR
1
2
ON
OFF OFF OFF OFF
FOR137
Page 42
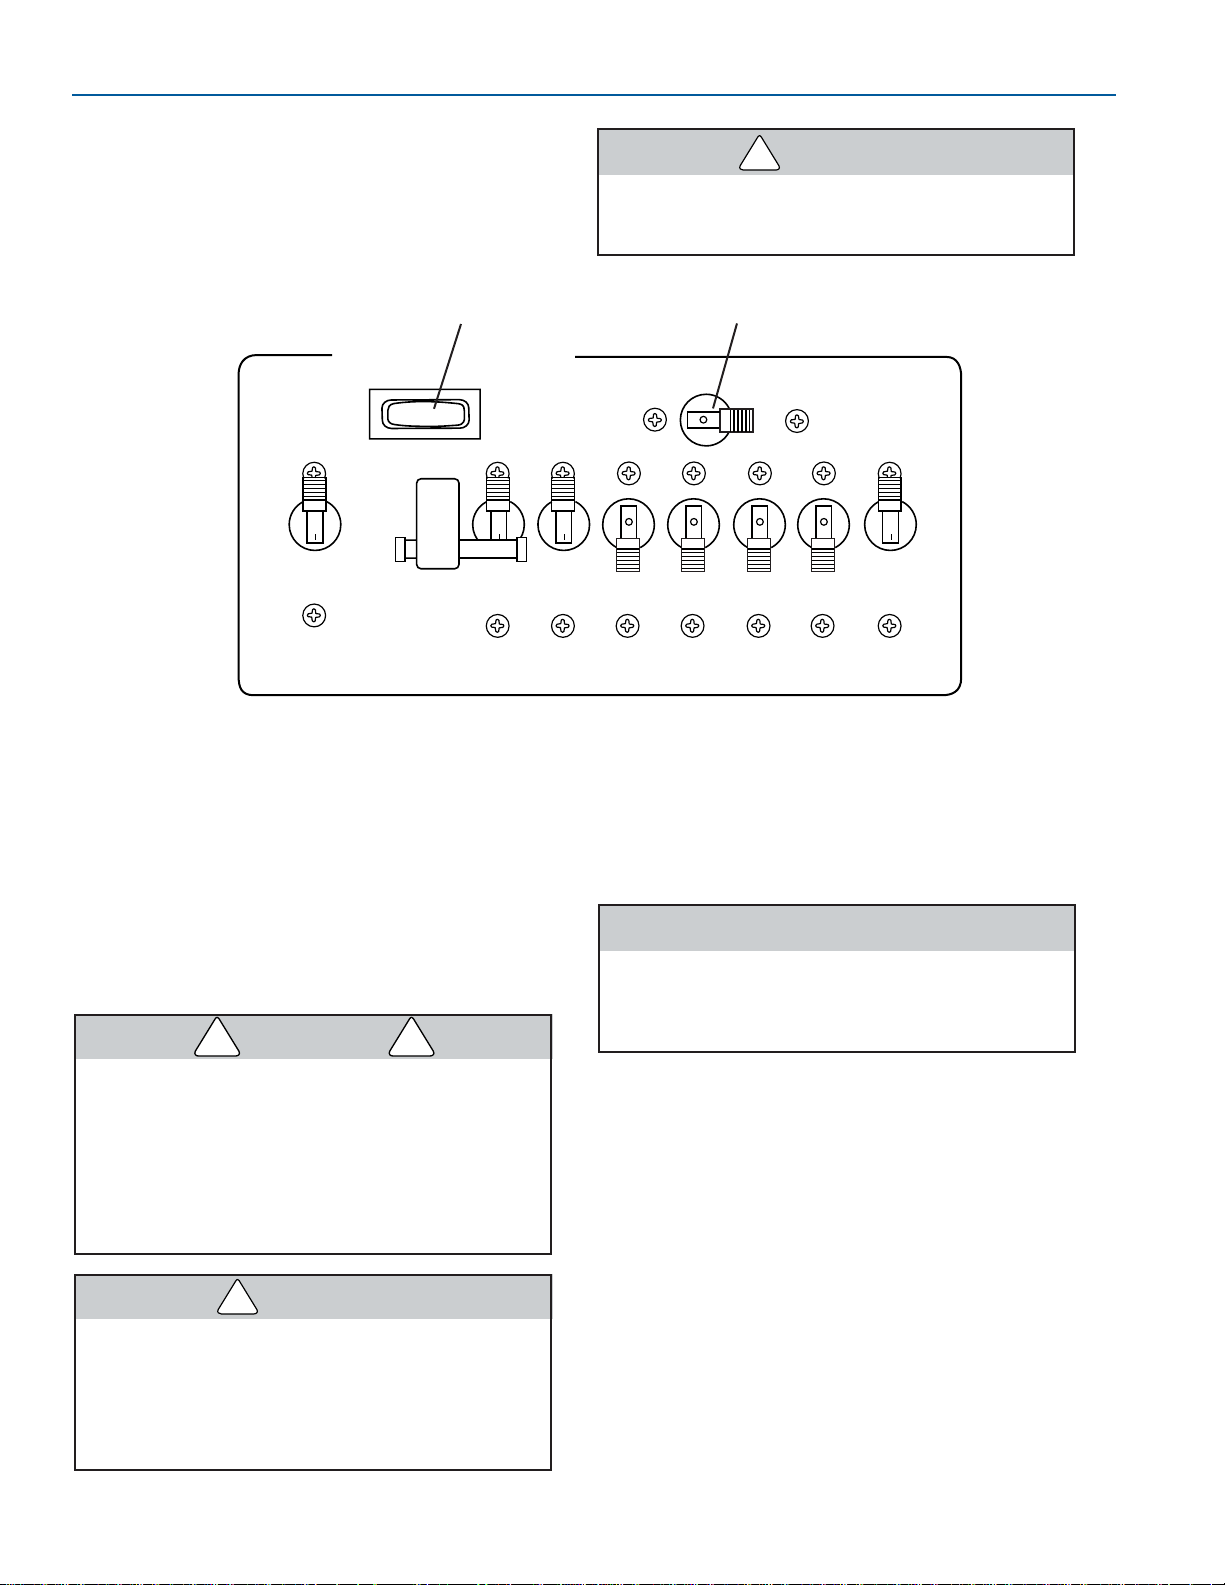
4-12
FORMULA
FASTECH
FASTECH
Generator Control Panel—Controls operation of
the optional generator. The generator control
panel is located on the AC/DC control panel.
Refer to Generator, in Section 5, for operating
information.
Operate the generator blower for at least
four minutes each time before you start
the generator.
1. Start/Stop Switch
2. Blower Switch
Generator Control Panel
Figure 4-28
ON ON ON
OFF
12 VOLT DC SYSTEM
START
STOP
GENERATOR ROOM BLOWERS
MAIN
GENERATOR CONTROLS
INT.
LIGHTS
REFIG. STERO
SYSTEM
WATER
PUMP
WASTE
SYSTEM
12 V0L T
OUTLET
CO
SENSOR
1
2
ON
OFF OFF OFF OFF
FOR138
Carbon Monoxide Detector—Detects carbon
monoxide gas. Carbon monoxide detectors are
located in primary berthing areas such as the aft
cabin and v-berth.
Carbon monoxide gas (CO) is colorless,
odorless and extremely dangerous. All
engines and fuel burning appliances
produce CO as exhaust. Direct and
prolonged exposure to CO will cause
BRAIN DAMAGE or DEATH. Signs of
exposure to CO include nausea, dizziness
and drowsiness.
Test the carbon monoxide detectors
operation before each trip, at least once a
week and after the boat has been in
storage. Do not tamper with the operation
of the carbon monoxide detectors. They
are installed for your safety.
A carbon monoxide (CO) detector will only
detect the presence of carbon monoxide
gas at its sensor. Carbon monoxide may
be present in other areas.
NOTICE
A carbon monoxide detector will not detect
other vapors such as gasoline.
WARNING
!
DANGER
! !
WARNING
!
CAUTION
Page 43
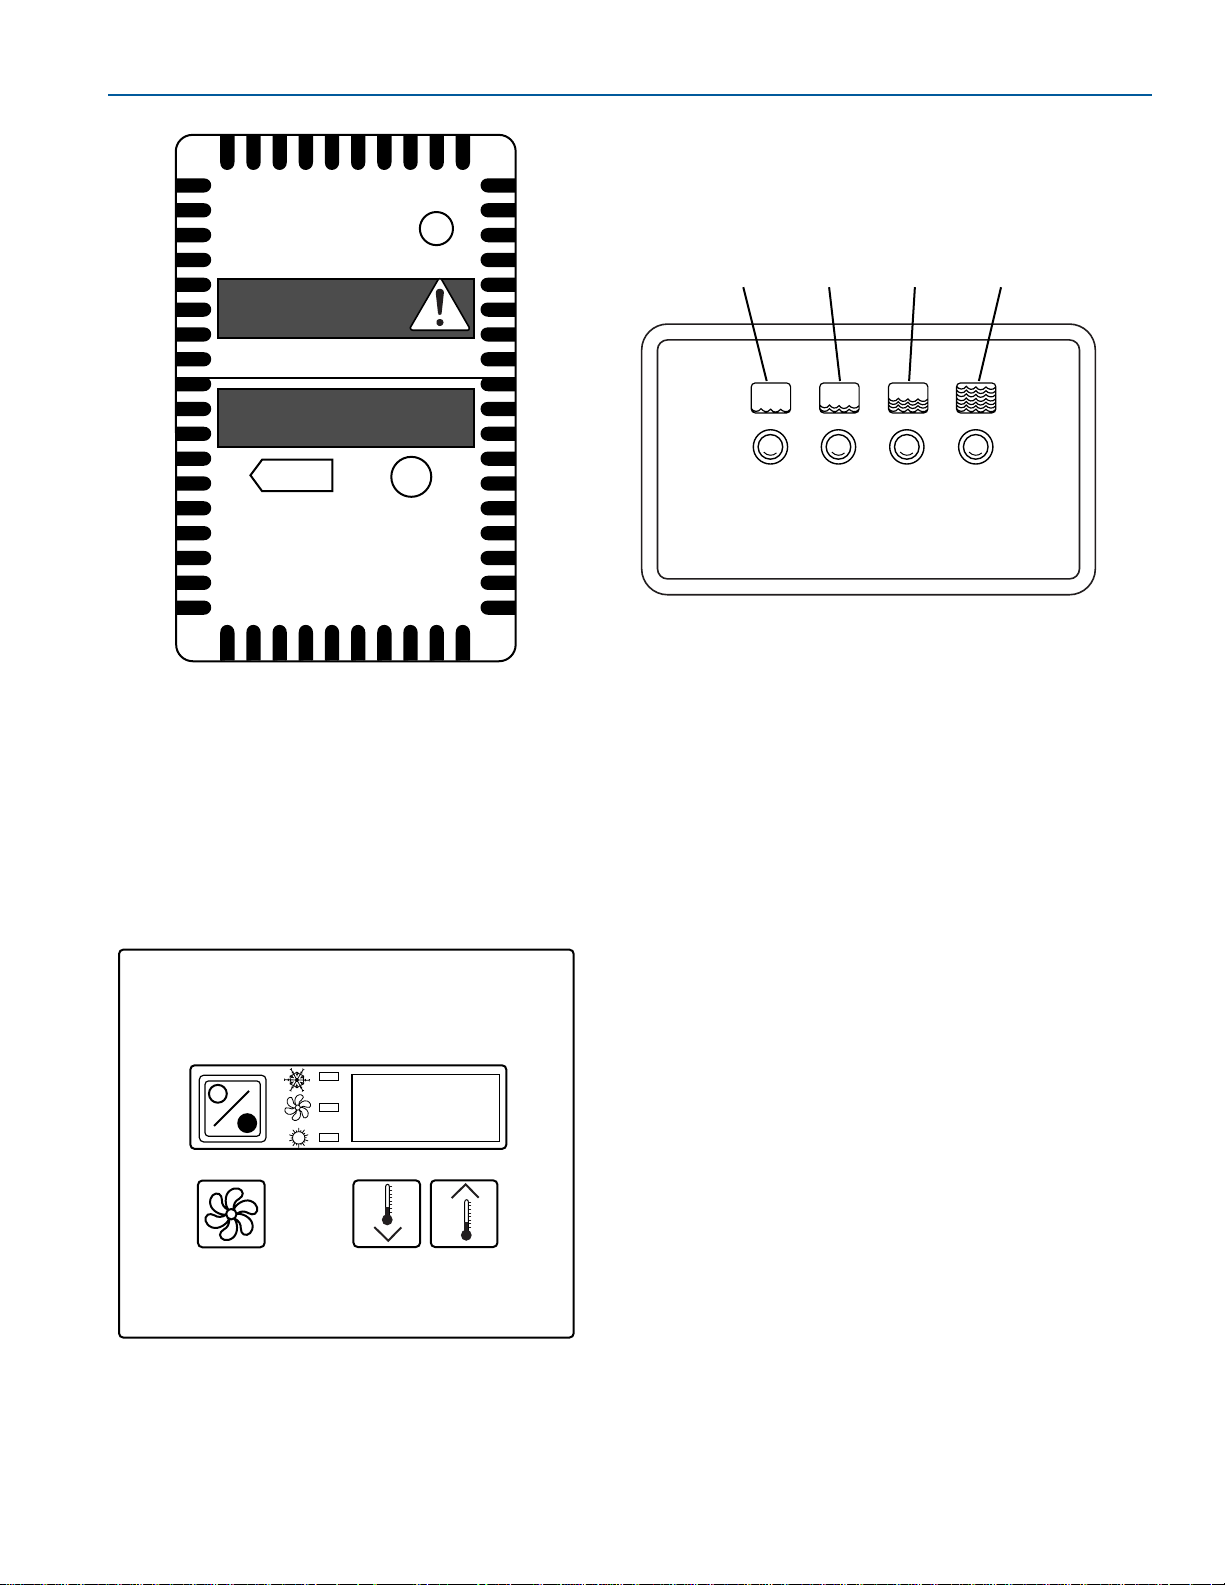
4-13
FORMULA
CONTROLS AND INDICATORS
FASTECH
Air Conditioning Controller—Displays
information and controls certain aspects relative to
the associated air conditioning system (optional).
Controller (Figure 4-29) for each unit is located
centrally, relative to the area being cooled/heated.
Refer to the air conditioning owner’s manual in
your Owner Information Binder for operating
instructions.
Air Conditioning Controller
Figure 4-30
Carbon Monoxide Detector
Figure 4-29
POWER
TEST
MONTHLY
DO NOT PAINT
READ OWNER”S MANUAL
CARBON MONOXIDE
DETECTOR
Waste Tank Level Indicator—Displays the level
of waste water in the waste tank. The indicator is
located in the head compartment. Refer to Waste
Water System, in Section 5, for additional
information.
1. Green Light—Empty
2. Yellow Light—Low
3. Orange Light—Mid
4. Red Light—Full
VacuFlush
®
—Flushing is controlled by pushing
down on the pedal at the base of the toilet. Lifting
up on the pedal will raise the water level in the
bowl, if needed. NOTE: Once the waste holding
tank is “FULL,” the head pump is automatically
disabled to prevent further flushing of the toilet
until the tank has been evacuated.
Please refer to the head unit’s operator manual
located in your Owner’s Information Binder for
additional information.
Waste Tank Level Indicator
Figure 4-31
EMPTY LOW MID FULL
1234
FOR018
FOR069
FOR016
Page 44
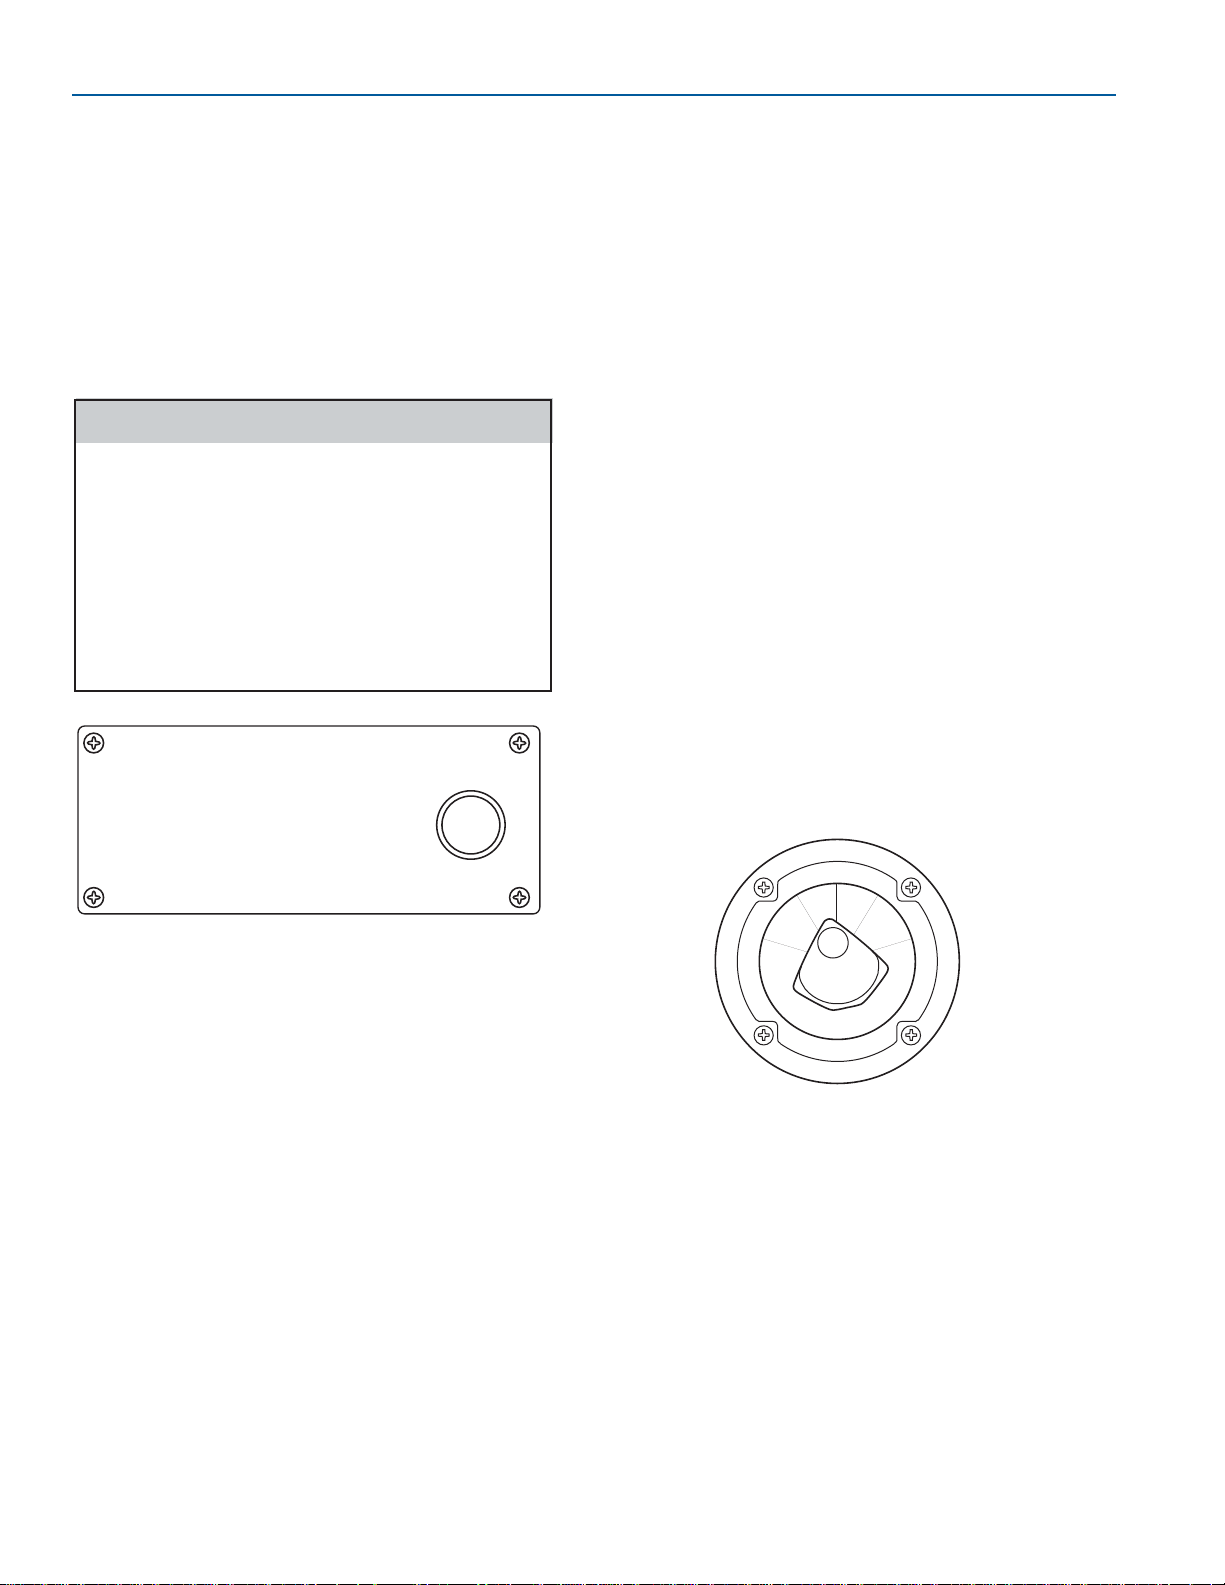
4-14
FORMULA
FASTECH
FASTECH
Macerator Control—Controls operation of the
macerator waste system. Your Formula boat may
be equipped with a macerator system that allows
the discharging of waste water directly overboard
through a seacock. The macerator control is
located in the head compartment (Figure 4-31).
The macerator overboard Y-valve must be opened
to allow discharge of the waste, but the switch
operates independently of the Y-valve’s position.
For additional operating information, refer to the
macerator operator’s manual.
Overboard discharge of waste water
should only be used in approved areas. It
is your responsibility to comply with local
regulations regarding the discharge of
waste. You could be fined if your boat has
an operable overboard discharge system.
Removing the handle of the seacock while
in a closed position, or disabling the
system by other means may be required to
avoid a fine.
Macerator Control
Figure 4-32
MACERATOR
CAUTION: BEFORE OPERATING MACERATOR;
1. SWITCH Y-VALVE TO DIRECT FLOW TO MACERATOR
2. OPEN SEACOCK
3. PRESS AND HOLD SWITCH TO DISCHARGE WASTE
4. RELEASE SWITCH WHEN WASTE IS DISCHARGED
5. CLOSE SEACOCK
NOTICE:
COAST GUARD REGULATIONS DO NOT ALLOW DISCHARGING
OF NON-TREATED WASTE IN FRESH WATER BODIES OR
IN SALT WATER BODIES, WITHIN THREE MILES OF SHORE.
BATTERY SELECTOR
SWITCHES
Your Formula boat is equipped with a battery
switch for each engine. The switch provides
isolation and positive disconnect of the battery to
protect against tampering, electrical fire hazards
and draining the battery’s power. The battery
switch used in each Formula boat is dependent
upon model and engine options.
Typical Single Engine Battery Switch—This
battery switch (Figure 4-32) connects one or two
batteries to the electrical circuit of an engine.
Rotate the switch to:
• No. 1 position – Power supplied to engine and
12 VDC system from battery 1 (engine
alternator recharges battery 1).
• No. 2 position – Power supplied to engine and
12 VDC system from battery 2 (engine
alternator recharges battery 2).
• ALL position – Power supplied to engine and
12 VDC system from batteries 1 and 2 (engine
alternator recharges batteries 1 and 2).
• OFF position – Neither the engine or 12 VDC
system is supplied with power.
Note: Power is supplied to the bilge pumps, high
water alarm, stereo memory, and galvanic
protection system through the constant power
circuit, independent of the battery switch position
(i.e., these components receive power even with
the battery switch in the OFF position).
Typical Battery Selector Switch
Figure 4-33
1
A
L
L
2
O
F
F
S
T
O
P
E
N
G
I
N
E
S
B
E
F
O
R
E
S
W
I
T
C
H
I
N
G
"
O
F
F
"
FOR222
KC-1642
CAUTION
Page 45
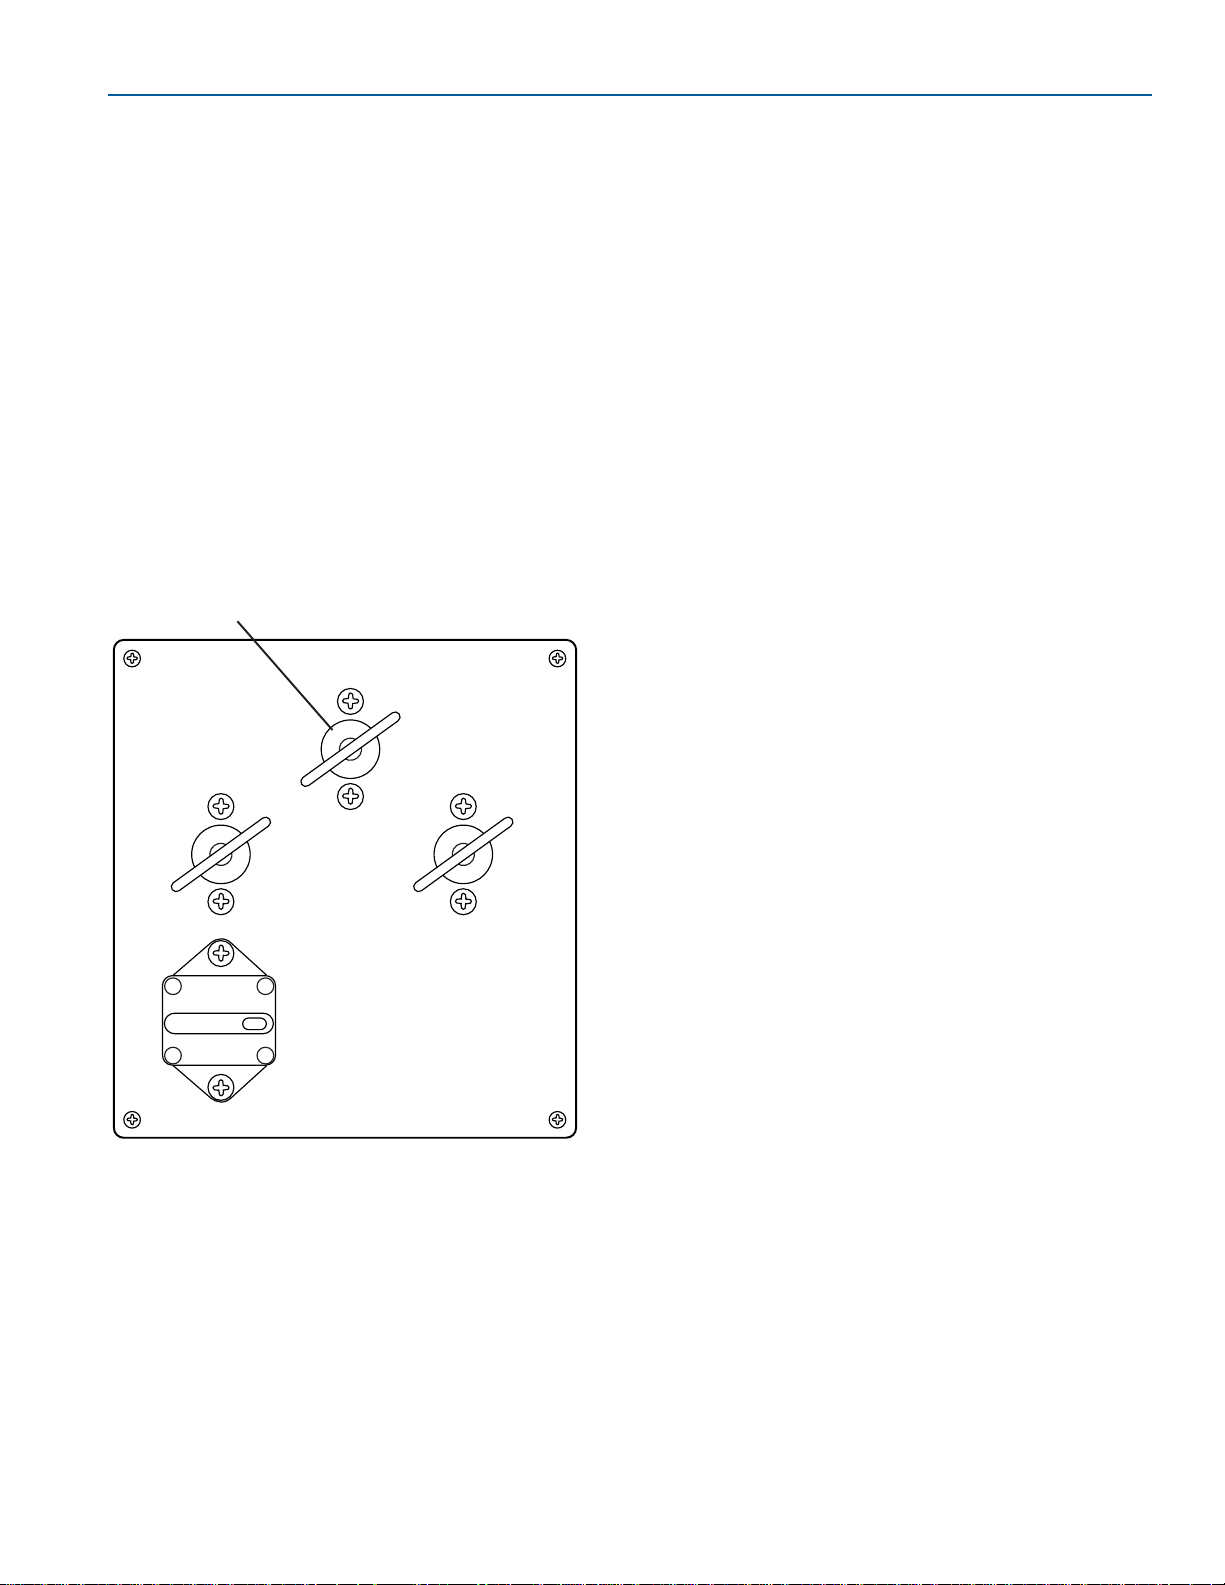
4-15
FORMULA
CONTROLS AND INDICATORS
FASTECH
Formula recommends starting your engine with
the battery switch in the ALLposition. This will
supply your engine with the most cranking power
as well as charge both batteries while the engine
is running. If you intend to use 12 VDC accessory
power for an extended period of time without the
engine running, switch to only one battery.
For the location of the battery selector switch,
refer to Specifications, in Section 3.
Typical Twin Engine Battery Switch—In twin
engine applications, the port engine START
battery doubles as the auxiliary (12 volt
accessories) power source. The starboard engine
START battery is solely used to start the
starboard motor. To turn the battery(ies) ON, turn
the battery switch clockwise to the ON position.
To turn the battery(ies) OFF, turn the switch
counterclockwise to the OFF position.
1. Battery Parallel Switch
Typical Twin Engine Battery Switch
Figure 4-34
OFF
OFF
AUXILIARY
POWER
ON
ON
QFF
ON
BATTERY
PARALLEL
STBD
START
PORT
START/AUX
CAUTION!
THE BATTERY PARALLEL
SWITCH IS TO BE USED
FOR EMERGENCY STARTING
PROCEEDURES ONLY!
DURING NORMAL BOAT
OPERATION IT SHOULD
REMAIN IN THE “OFF”
POSITION.
1
Note: Power is supplied to the bilge pumps, high
water alarm, stereo memory, and galvanic
protection system through the constant power
circuit, independent of the battery switches’
positioning (i.e., these components receive power
even with the switches in the OFF position).
Each twin engine boat is equipped with a battery
parallel system (Figure 4-33). The battery parallel
switch allows you to start either engine off of
either battery. The switch should be in the OFF
position during normal use. Should one of the
START batteries be low on cranking power, turn
the battery parallel switch ON. This allows the
engine with the low battery to start by using power
from the other engine’s battery. Once both
engines are running, turn the battery parallel
switch OFF. If you continue to have a low battery
problem, please contact your Formula dealer.
For the location of the battery selector switches,
refer to Specifications, in Section 3.
FOR039a
Page 46

4-16
FORMULA
FASTECH
FASTECH
Page 47
FASTECH
5-1
FORMULA
This section describes the basic operational
principles of major systems and equipment.
Your Formula boat’s powertrain consists of one or
two gasoline-powered stern drive units.
Regularly inspect and maintain all systems
to prevent unexpected hazards associated
with worn or faulty components. When
replacement parts are required, use marine
grade parts with equivalent characteristics,
including type, strength and material.
Using substandard parts could result in
injury and product failure.
POWERTRAIN
Your Owner Information Binder includes the
operator’s manual for your propulsion units. All
operation, specifications and maintenance
information for your engines is in this manual. Be
sure to read, understand and follow the safety,
operating and maintenance information.
Some Formula boats have counter-rotating
propellers. Aright-hand propeller is installed on
the starboard drive and a left-hand propeller is on
the port drive. Counter-rotating propellers
increases your ability to maneuver by the use of
differential power.
FUEL SYSTEM
Check your fuel system before each
operation. Have your fuel system
thoroughly checked at least once a year by
a certified Formula service technician.
Gasoline is highly flammable. Use extreme
caution at all times.
The line between the fuel tank and the fuel inlet of
the engine is made of a synthetic material. Alcohol
can deteriorate it, especially during periods of
storage. Have your Formula dealer inspect this
fuel line at least annually and replace, if
necessary.
In models with the generator option, the fuel tank
is shared between the engine and generator. (The
generator fuel pick-up is considerably shorter than
the engine pick-up to ensure the engines have
enough fuel to make it to port.) Refer to
Specifications, in Section 3, for the fuel tanks
capacities.
Refer to your propulsion unit operator’s manual
for additional fuel system information.
HELM SYSTEM
The helm (steering) system is not self-centering.
Be sure to keep a sure grip on the steering wheel
at all times.
Your Formula boat is equipped with one of the
following systems:
Power Steering—A mechanical cable connects
the steering wheel to a hydraulic cylinder
mounted on the engine. Ahydraulic pump is
also mounted to the engine. The pump has two
hoses running to the hydraulic cylinder giving it
power assist. Movement of the hydraulic
cylinder controls the unit(s).
Hydraulic Steering—Hydraulic hoses connect
the steering wheel to external hydraulic steering
rams. Apump mounted on the engine produces
hydraulic pressure for the system. Movements
of the steering rams control the drive unit(s).
Section 5
System Operation and Equipment
WARNING
!
WARNING
!
Page 48
5-2
FORMULA
FASTECH
FASTECH
BILGE AND BLOWER
SYSTEM
NOTICE
The Federal Water Pollution Control Act
prohibits the discharge of oil or oily waste
into the water. Violators can be fined
$5,000.00.
Water will enter the boat under a number of
adverse conditions such as heavy seas, strong
storms and long periods of rain. The bilge is the
deepest part of the hull where the water settles.
The bilge pump(s) removes the collected water
from the bilge through an opening in the hull.
Most bilge pumps are automatically operated by a
switch that monitors the level of water in the bilge.
The bilge pump system is designed to function
automatically when the battery switches are in the
OFF position. The bilge pump can also be
manually operated by a switch located at the
helm, provided the system is supplied with power
(the house battery switch is ON).
Do not allow the bilge pump to operate
after all the water has been cleared from
the bilge area. Damage to the pump will
occur if the pump is allowed to operate
without water.
Bilge blowers ventilate the engine compartment.
The blowers are controlled by a switch at the
helm or from a switch on the generator panel of
the DC control panel.
Operate the blower for at least four
minutes each time you start the engines. In
addition, the blower should be operated
continuously when at idle and during slow
speed operation. Failure to operate the
blower can cause an explosion.
DC ELECTRICAL
Your Formula boat has a battery powered 12-volt
negative ground DC system. The positive wire is
hot, and feeds current from the batteries to all
12-volt equipment; the negative wire is the ground
and completes the circuit back to the battery.
Models Without Shore Power
Single engine application: Until the engine is
running, all DC electrical power is supplied by the
auxiliary/start battery. Once the engine is running,
the DC electrical power is provided by the engine
alternator. The alternator provides more power as
the engine speed increases. When the engine is
operating, the alternator is also charging the
battery.
Twin engine application: The starboard battery
supplies power only to the starboard engine. All
DC Power is still provided by the port
auxiliary/start battery. Once the engine is
operating above 1200 RPM, the engine’s
alternator provides the electrical power, which
continues to increase as the engine speed rises.
The alternator also charges the respective
engine’s battery. Refer to Battery Selector
Switches in Section 4.
Note: In twin engine applications, if the use of DC
equipment has depleted the power in the battery
to the point it will not start the port engine, the
following procedure must be used. Start the
starboard engine, engage the Battery Parallel
switch and start the port engine. Once the port
engine is running, disengage the parallel switch.
Note: Power is supplied to the bilge pumps, high
water alarm, galvanic protection system and
stereo memory, through the constant power
circuit, even with the battery switch turned “OFF.”
Models With Shore Power
The cabin DC panel distributes power through the
main circuit breaker which in turn supplies
electricity to operate the:
●
CO Detector
●
Interior Lights
●
Waste Pump
●
Refrigerator
●
Stereo
●
Fresh Water Pump
●
12-volt Outlets
A 100-amp circuit breaker labeled AUXILIARY
POWER protects the DC electrical system from
the batteries to the DC control panel. Refer to
Specifications, in Section 3, for location of the
circuit breaker.
CAUTION
WARNING
!
Page 49
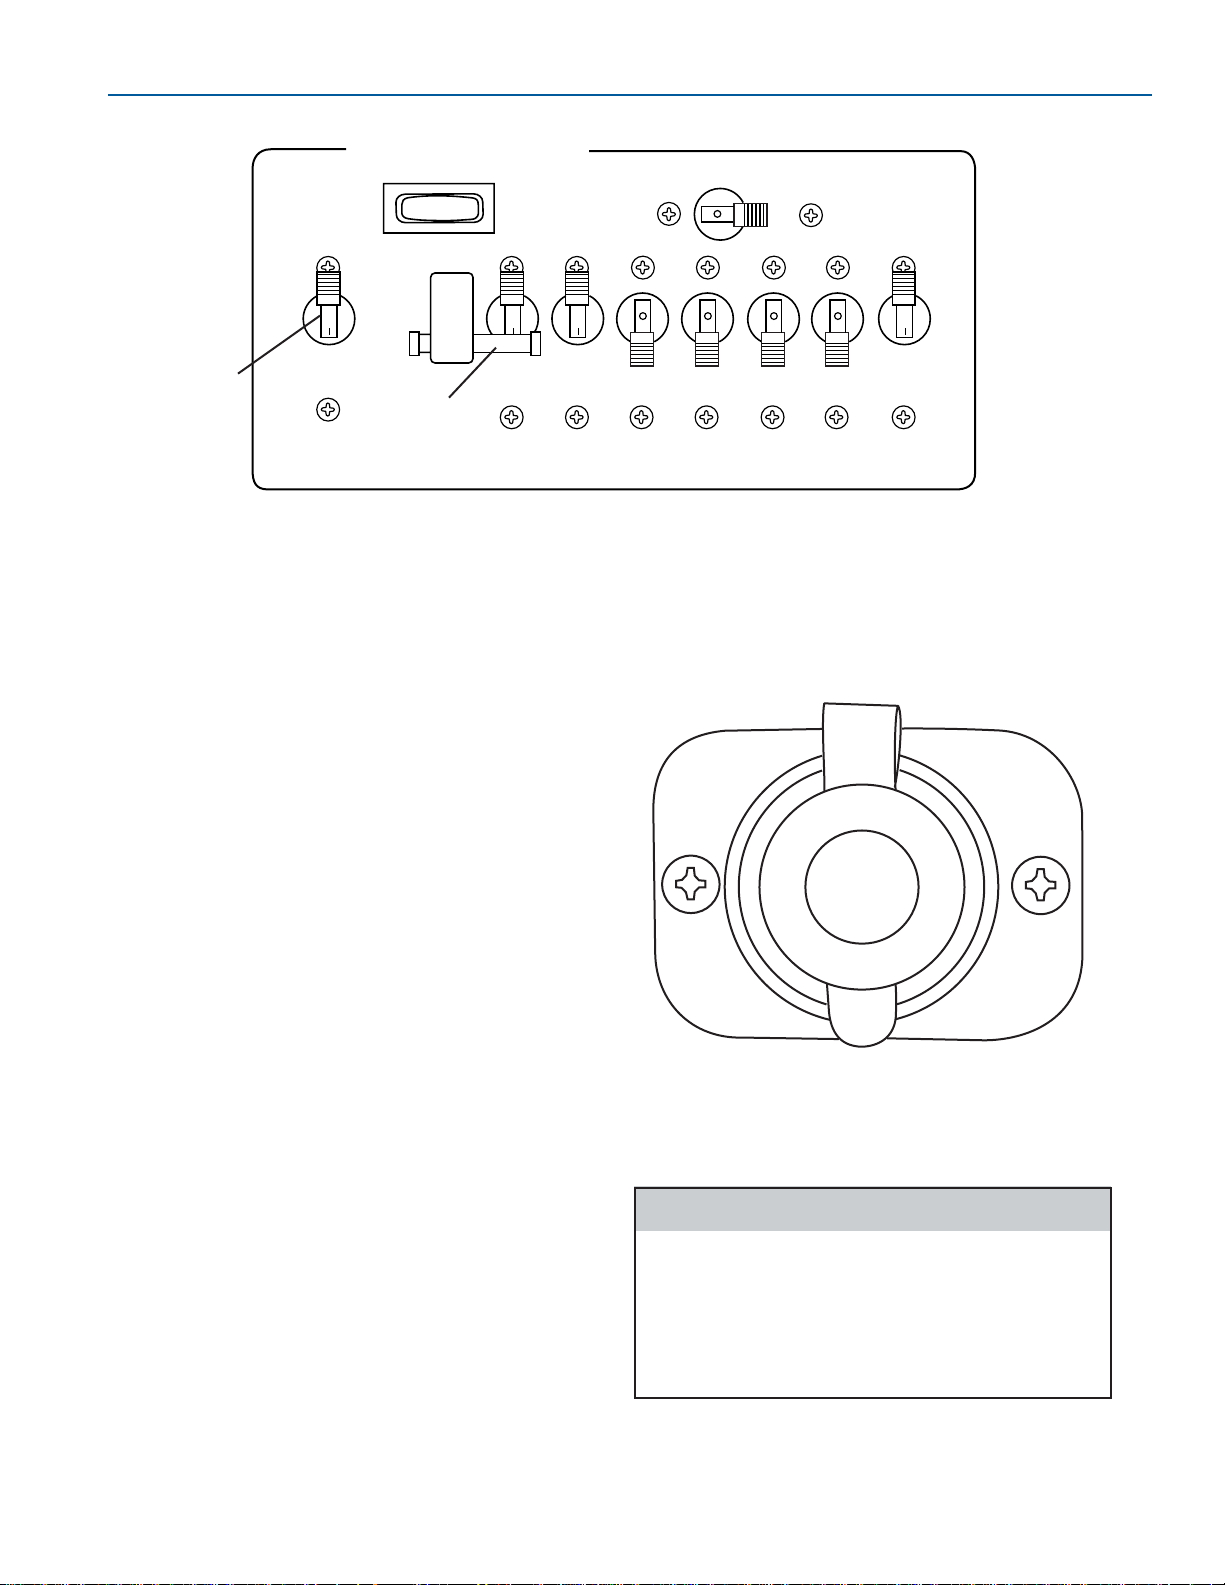
5-3
FORMULA
SYSTEM OPERATION AND EQUIPMENT
FASTECH
The 12 VDC system consists of a 30-amp main
circuit breaker and a series of switch-type circuit
breakers, including a dedicated circuit for the CO
detector.
The CO detector (sensor) circuit breaker must be
in the ON position at all times with the slide lock
engaged. Only disengage the slide lock and turn
OFF the CO detector circuit breaker during long
periods of storage.
To operate the 12 VDC system:
●
Turn ON the DC main circuit breaker.
●
Activate the individual component circuit
breaker.
12-Volt Accessory Power Receptacle—Your
Formula is equipped with a 12-volt accessory
power receptacle(s). The receptacle provides
electricity to operate 12 VDC accessory items.
AC ELECTRICAL
Any modification performed on the boat’s
AC system must be made by a qualified
marine technician. The modification must
be checked to assure compliance with
ABYC guidelines and National Electrical
Codes.
12-Volt Accessory Power Receptacle
Figure 5-2
FOR140
FOR087
1. DC Main Circuit Breaker
2. CO Detector Circuit Breaker
DC Electrical Panel
Figure 5-1
ON ON ON
OFF
12 VOLT DC SYSTEM
START
STOP
GENERATOR ROOM BLOWERS
MAIN
GENERATOR CONTROLS
INT.
LIGHTS
REFIG. STERO
SYSTEM
WATER
PUMP
WASTE
SYSTEM
12 V0L T
OUTLET
CO
SENSOR
1
2
ON
OFF OFF OFF OFF
CAUTION
Page 50
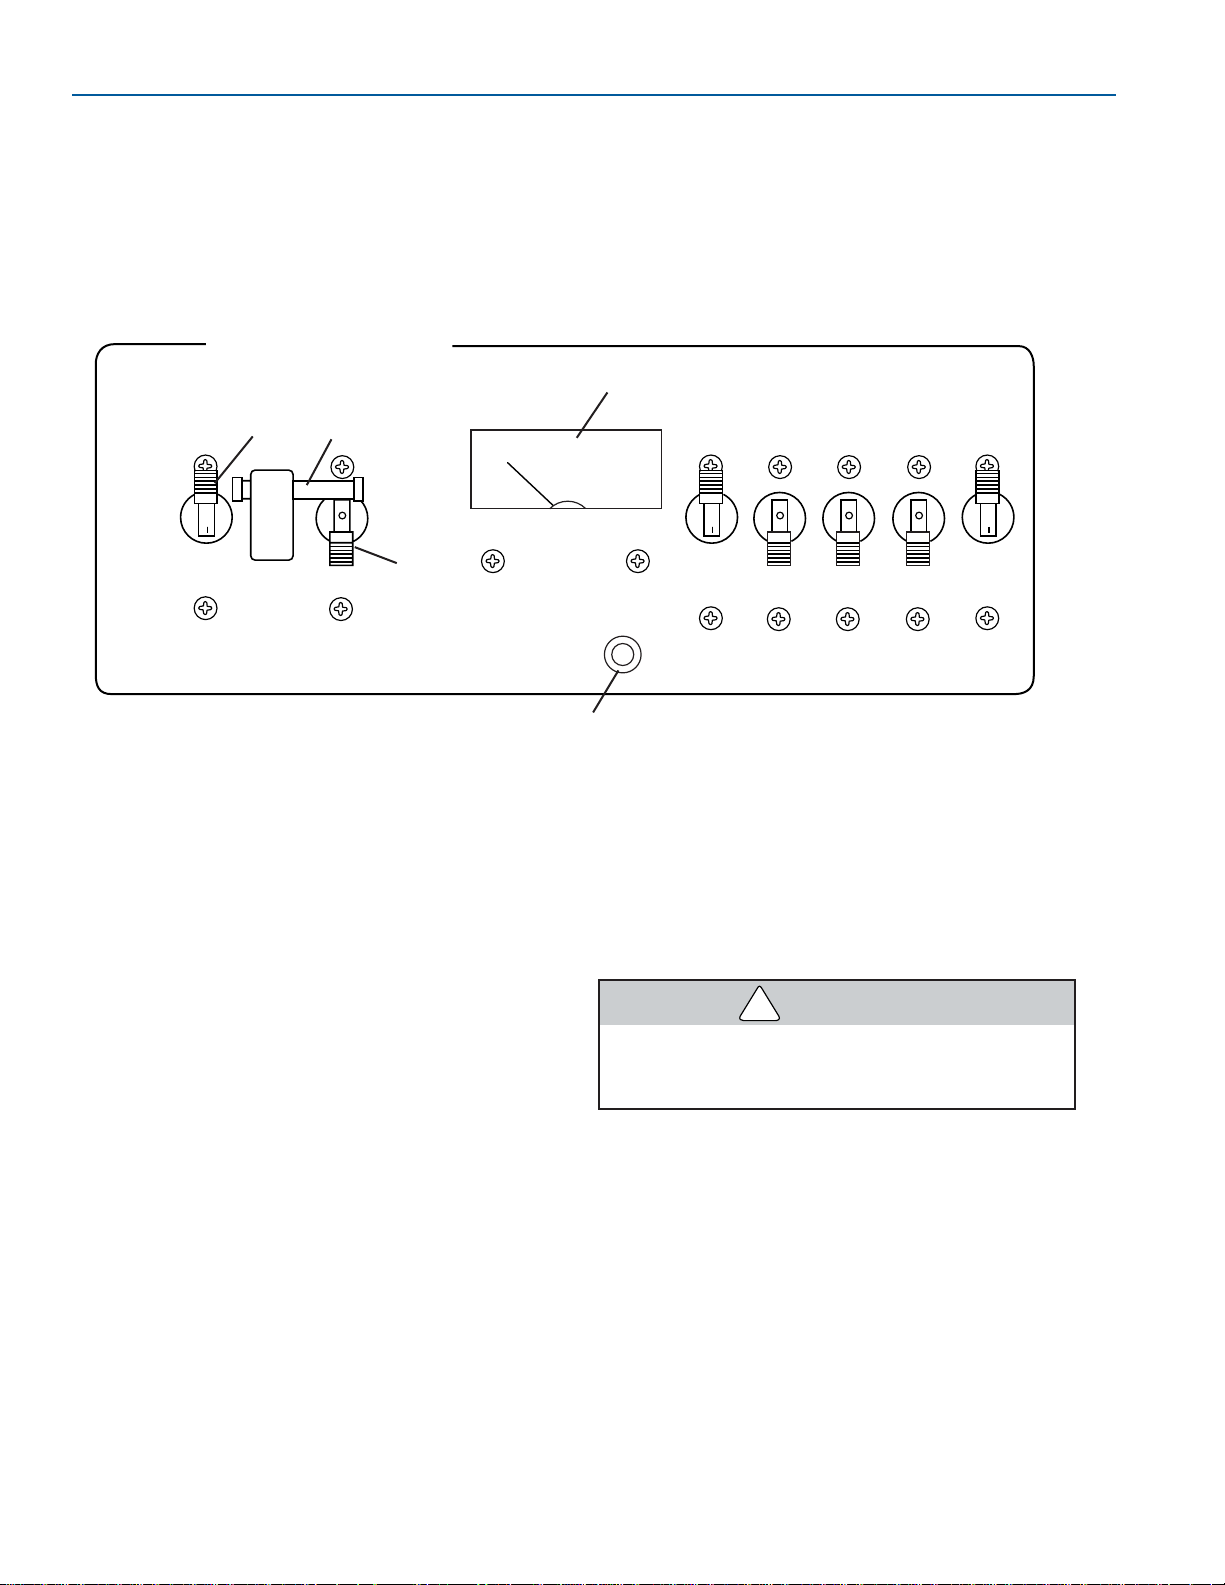
5-4
FORMULA
FASTECH
FASTECH
The voltmeter monitors the AC voltage. Damage
can occur to your equipment if the voltage is less
than 105 volts. Do not use AC powered
equipment if voltage is less than 105 volts.
The shore power switch is also a 30-amp main
circuit breaker and controls individual component
circuit breakers. This allows you to check for
proper voltage and polarity immediately after
making the shore power cable connection without
damaging any equipment.
FOR141
The reversed polarity light indicates if the polarity
of the shore power has been reversed.
If the reverse polarity light is activated,
immediately disconnect the shore power
cable.
1. Shore Power Switch
2. Lock
3. Generator Power Switch
4. Voltmeter
5. Reverse Polarity Light
If your boat is equipped with shore power, the AC
portion of the control panel receives AC power
from the shore power cable or the generator. The
AC panel distributes power through the shore
power switch or the generator power switch which
in turn supplies electricity to the individual branch
circuit breakers.
AC electricity operates the following equipment:
●
Electrical Outlets
●
Refrigerator
●
Battery Charger
●
Hot Water Heater
●
Air Conditioning
AC Electrical Panel
Figure 5-3
120V 60HZ AC SYSTEM
1
2
OFF
3
4
ONON ON
BATT.
CHARG.
REVERSED
POLARITY
5
OFF OFF OFF
REFRIG. CABIN
OUTLETS
WATER
HEATER
AIR
COND.
WARNING
!
Page 51
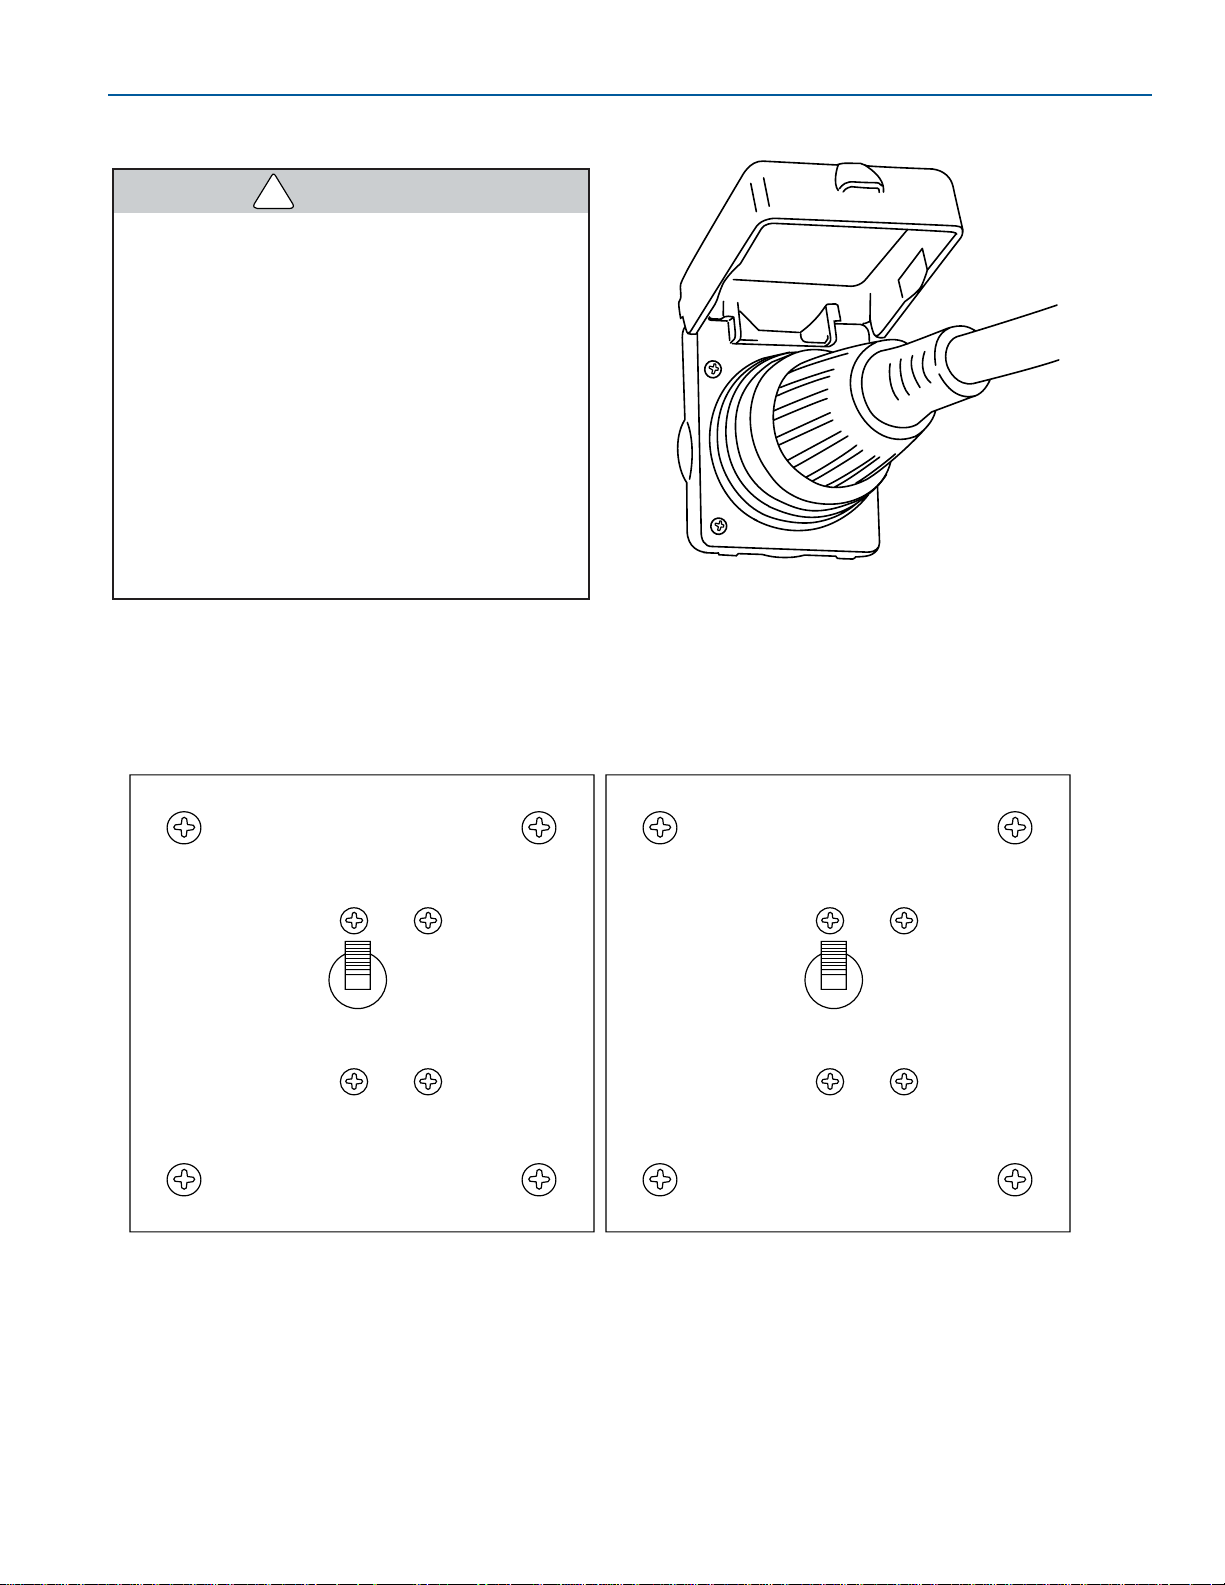
5-5
FORMULA
SYSTEM OPERATION AND EQUIPMENT
FASTECH
When the shore power cord is plugged in and the
shore power switch is in the ON position, all AC
equipment can be operated.
Shore Power Receptacle
Figure 5-4
SHORE POWER
To minimize shock and fire hazards:
●
Turn the AC main circuit breaker OFF
before connecting or disconnecting
shore cable.
●
Connect the shore power cable at the
boat first, then to the dockside
connection.
●
If the reverse polarity light is activated,
immediately disconnect shore power
cable.
●
Disconnect shore power cable at shore
outlet first.
●
Do not alter shore power cable
connections.
FOR143
FOR142
Shore Power Inlet Breaker
Figure 5-5
SHOREPOWER
MAIN #2
120 VAC
60 HZ
ON
SHOREPOWER
MAIN #1
120 VAC
60 HZ
ON
A shore power inlet breaker protects the AC circuit
from the boat’s shore power connector to the AC
control panel. Refer to Specifications, in Section
3, for shore power inlet breakers' location.
WARNING
!
Page 52
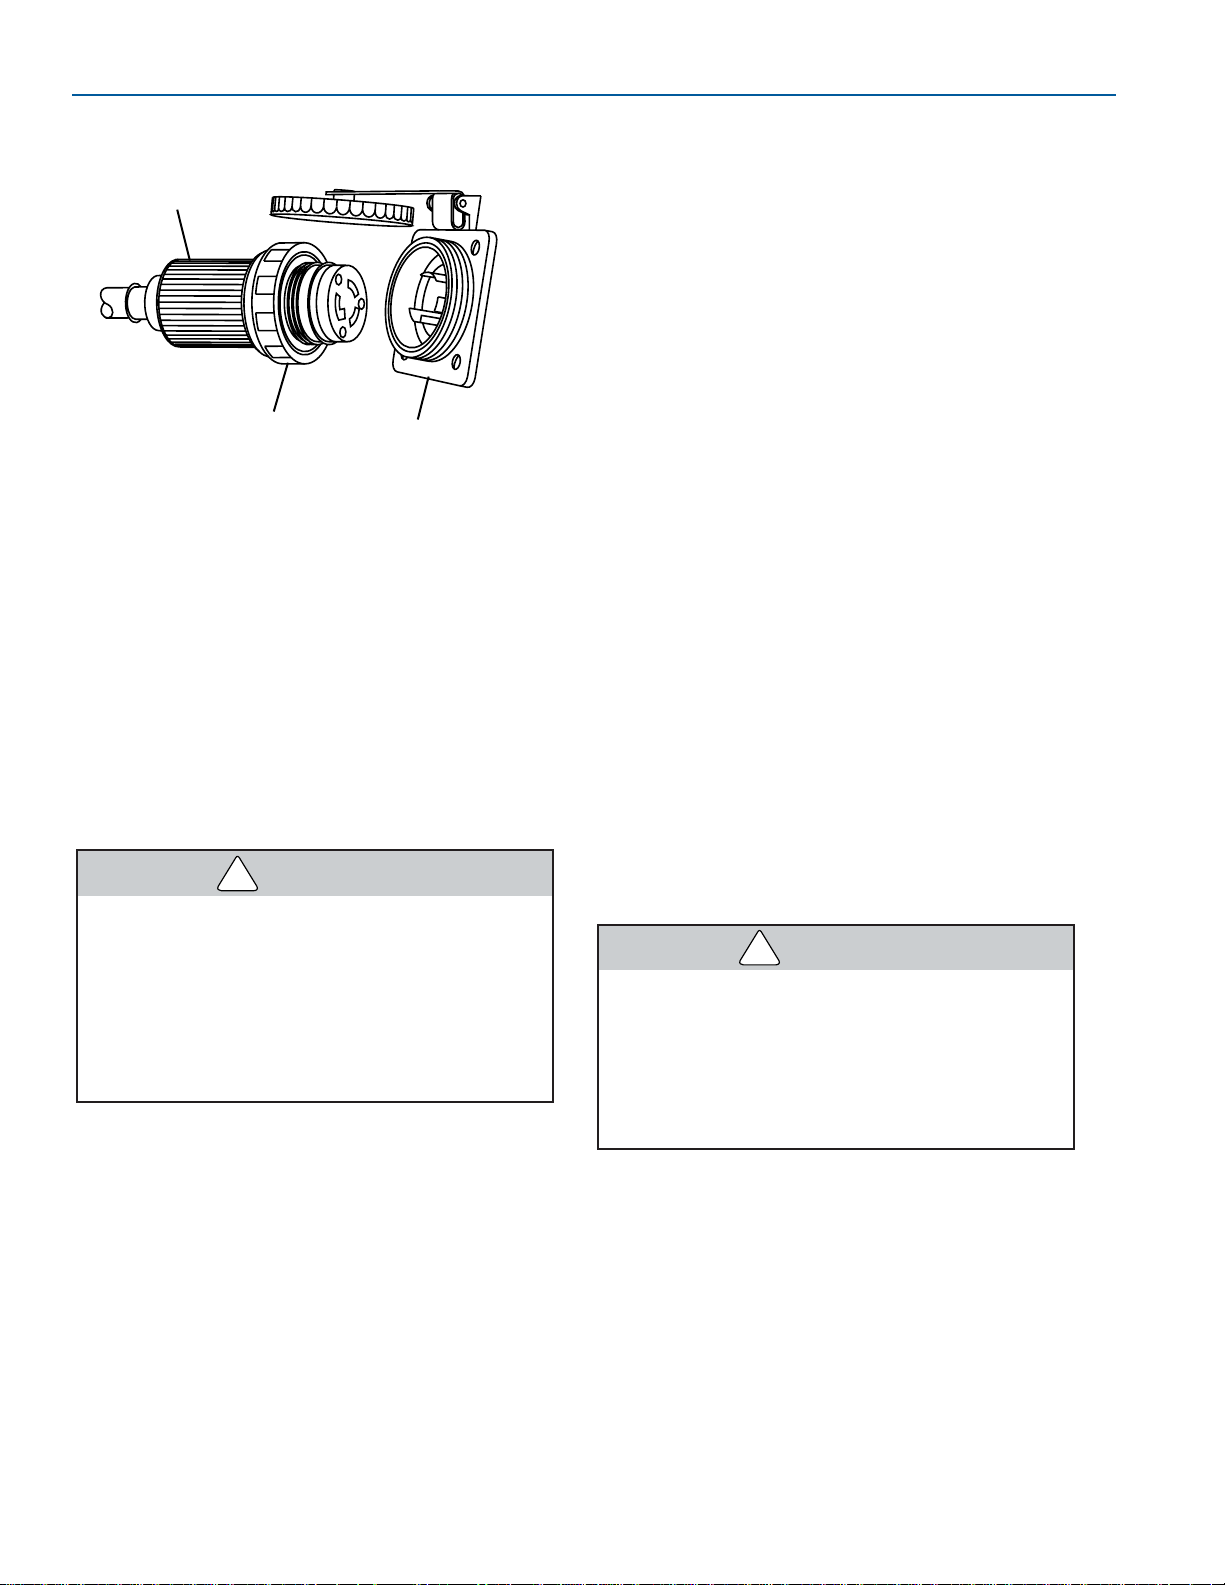
5-6
FORMULA
FASTECH
FASTECH
Shore Power Connection
1. Shore Power Cord
2. Threaded Locking Collar
3. Boat Receptacle
The shore power system requires a special,
marine grade three-conductor cable to make a
proper connection to the shore. Dockside
connections and the boat side connections are
plug-in. Boatside connections are also locked in
position with a threaded locking collar to prevent
accidental disconnection and to enhance water
resistance. Refer to Specifications, in Section 3,
for the location of your shore power receptacles.
Plugs and receptacles for different
systems are designed in noninterchangeable configurations. A plug
from one system cannot fit into the
receptacle of another system. Do not
modify a shore power cable. Use only
commercially available adapters for
system modification.
To Connect:
1. Turn OFF the generator power switch on the
AC control panel. Move the lock over to
secure the switch in place.
2. Turn OFF the shore power switch on the AC
control panel.
Ensure Shore Power Inlet Breaker(s) (Figure 5-5)
is switched OFF.
Shore Power Connection
Figure 5-6
1
3
2
3. If the outlet on the dock has a disconnect
switch, turn the switch OFF.
4. Connect the shore power cable at the boat
first.
5. Make sure the cable has more slack than the
mooring lines.
6. Remove the cap from the outlet on the dock.
Connect the cable to the outlet.
7. Turn ON the dock’s outlet breaker(s). Turn ON
the Shore Power Inlet Breaker(s).
8. Turn ON the shore power switch on the AC
control panel. If the reverse polarity light
remains ON, immediately turn OFF the shore
power switch and disconnect the shore power
cable at the shore outlet. Contact your
Formula dealer to service the system before
you use it.
9. Turn ON the respective branch circuit
breakers as needed.
To Disconnect:
1. Turn OFF the shore power switch.
2. If the shore outlet has a disconnect switch,
turn it to the OFF position.
3. Disconnect the shore power cord at the shore
outlet.
4. Disconnect the cable from the boat and close
the cap.
Some marinas have been known to
“break” shore power ground circuits to
prevent electrolysis. Opening the ground
circuit creates a potentially dangerous
onboard shock hazard. Use caution when
using a "break" shore power ground
circuit.
For further information regarding your shore
power system, please contact your Formula
dealer.
FOR078
WARNING
!
WARNING
!
Page 53
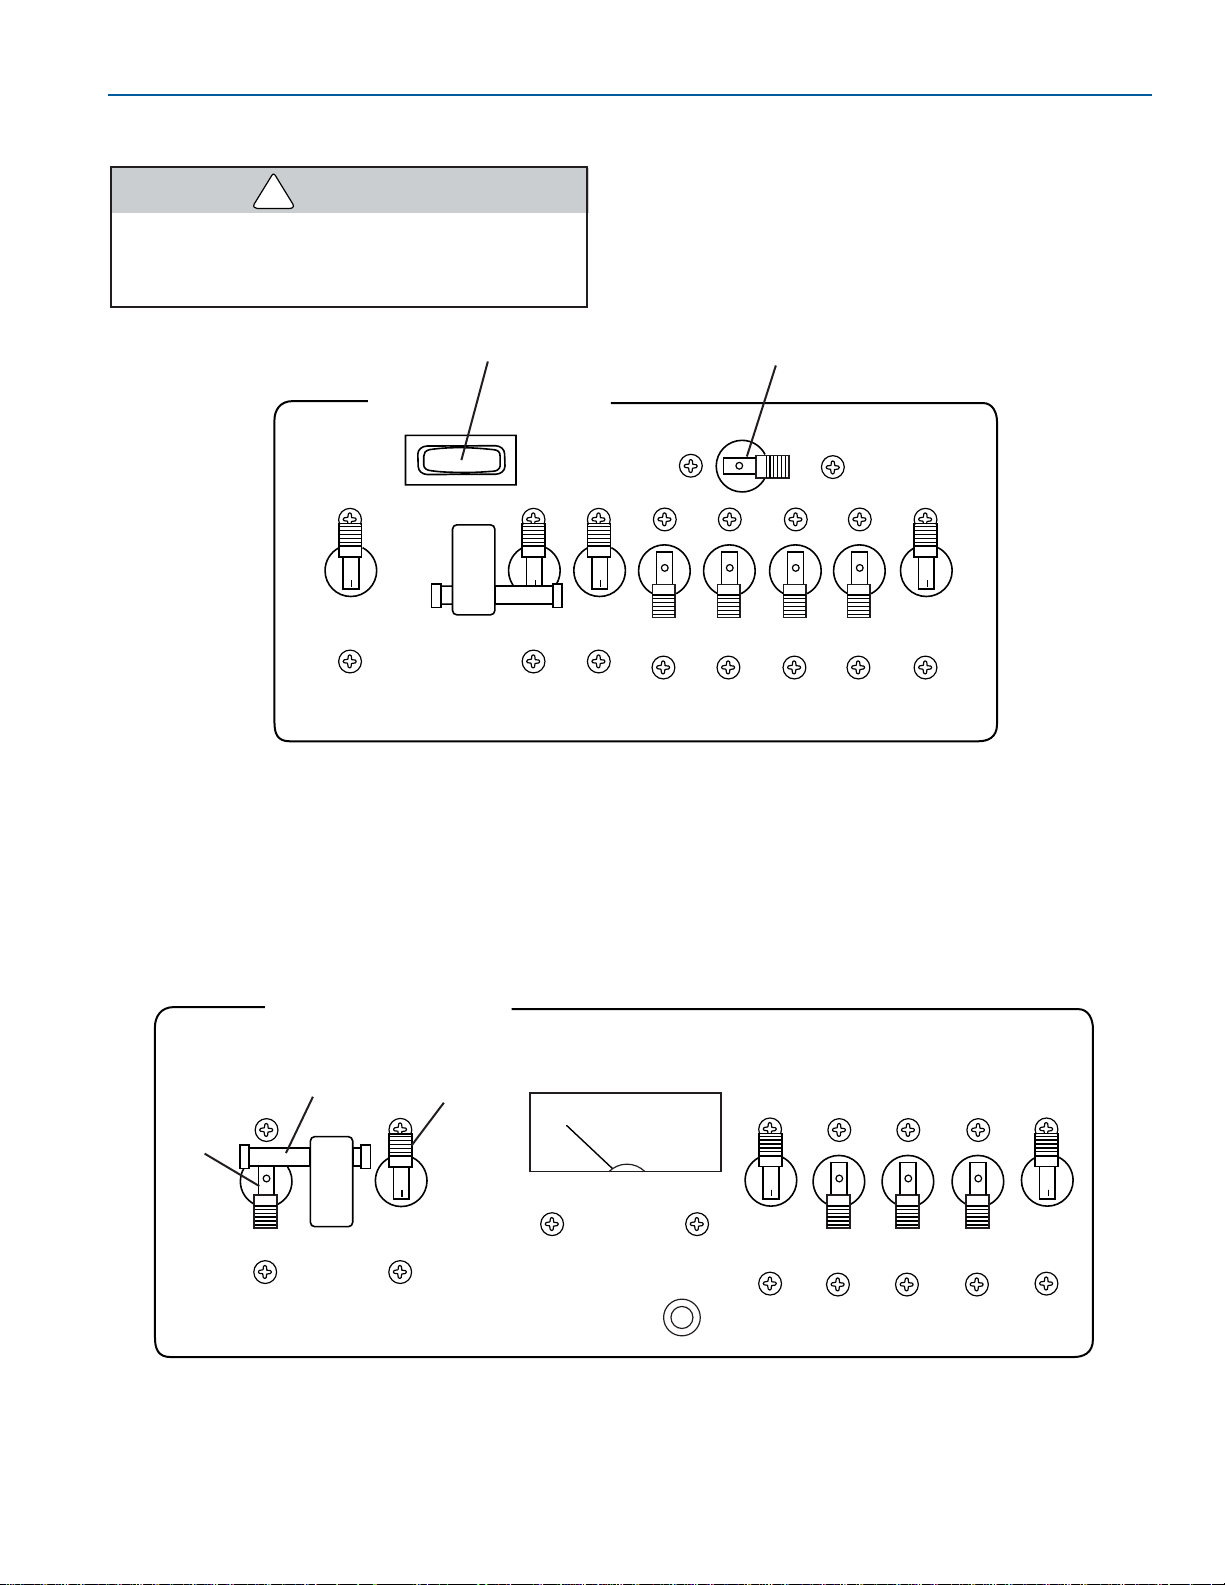
5-7
FORMULA
SYSTEM OPERATION AND EQUIPMENT
FASTECH
GENERATOR (OPTIONAL)
Operate the blower for at least four
minutes each time before you start the
generator.
The generator control panel is mounted on the
DC control panel. The generator control panel
contains the blower switch and the Start/Stop
switch.
The generator is used to provide AC power when
shore power is not available.
1. Make sure the generator seacock is open.
1. Start/Stop Switch
2. Blower Switch
Generator Control Panel
(Configuration varies with models)
Figure 5-7
ON ON ON
OFF
12 VOLT DC SYSTEM
START
STOP
GENERATOR ROOM BLOWERS
MAIN
GENERATOR CONTROLS
INT.
LIGHTS
REFIG.
STERO
SYSTEM
WATER
PUMP
WASTE
SYSTEM
12 V0L T
OUTLET
CO
SENSOR
1
2
ON
OFF OFF OFF OFF
FOR144
1. Shore Power Switch
2. Lock
3. Generator Switch
Generator Power Switch
(Configuration varies with models)
Figure 5-8
ON
ON
ON
BATT.
CHARG.
REFRIG. CABIN
OUTLETS
WATER
HEATER
AIR
COND.
REVERSED
POLARITY
OFFOFF OFF OFF
120V 60HZ AC SYSTEM
1
2
3
FOR145
WARNING
!
Page 54
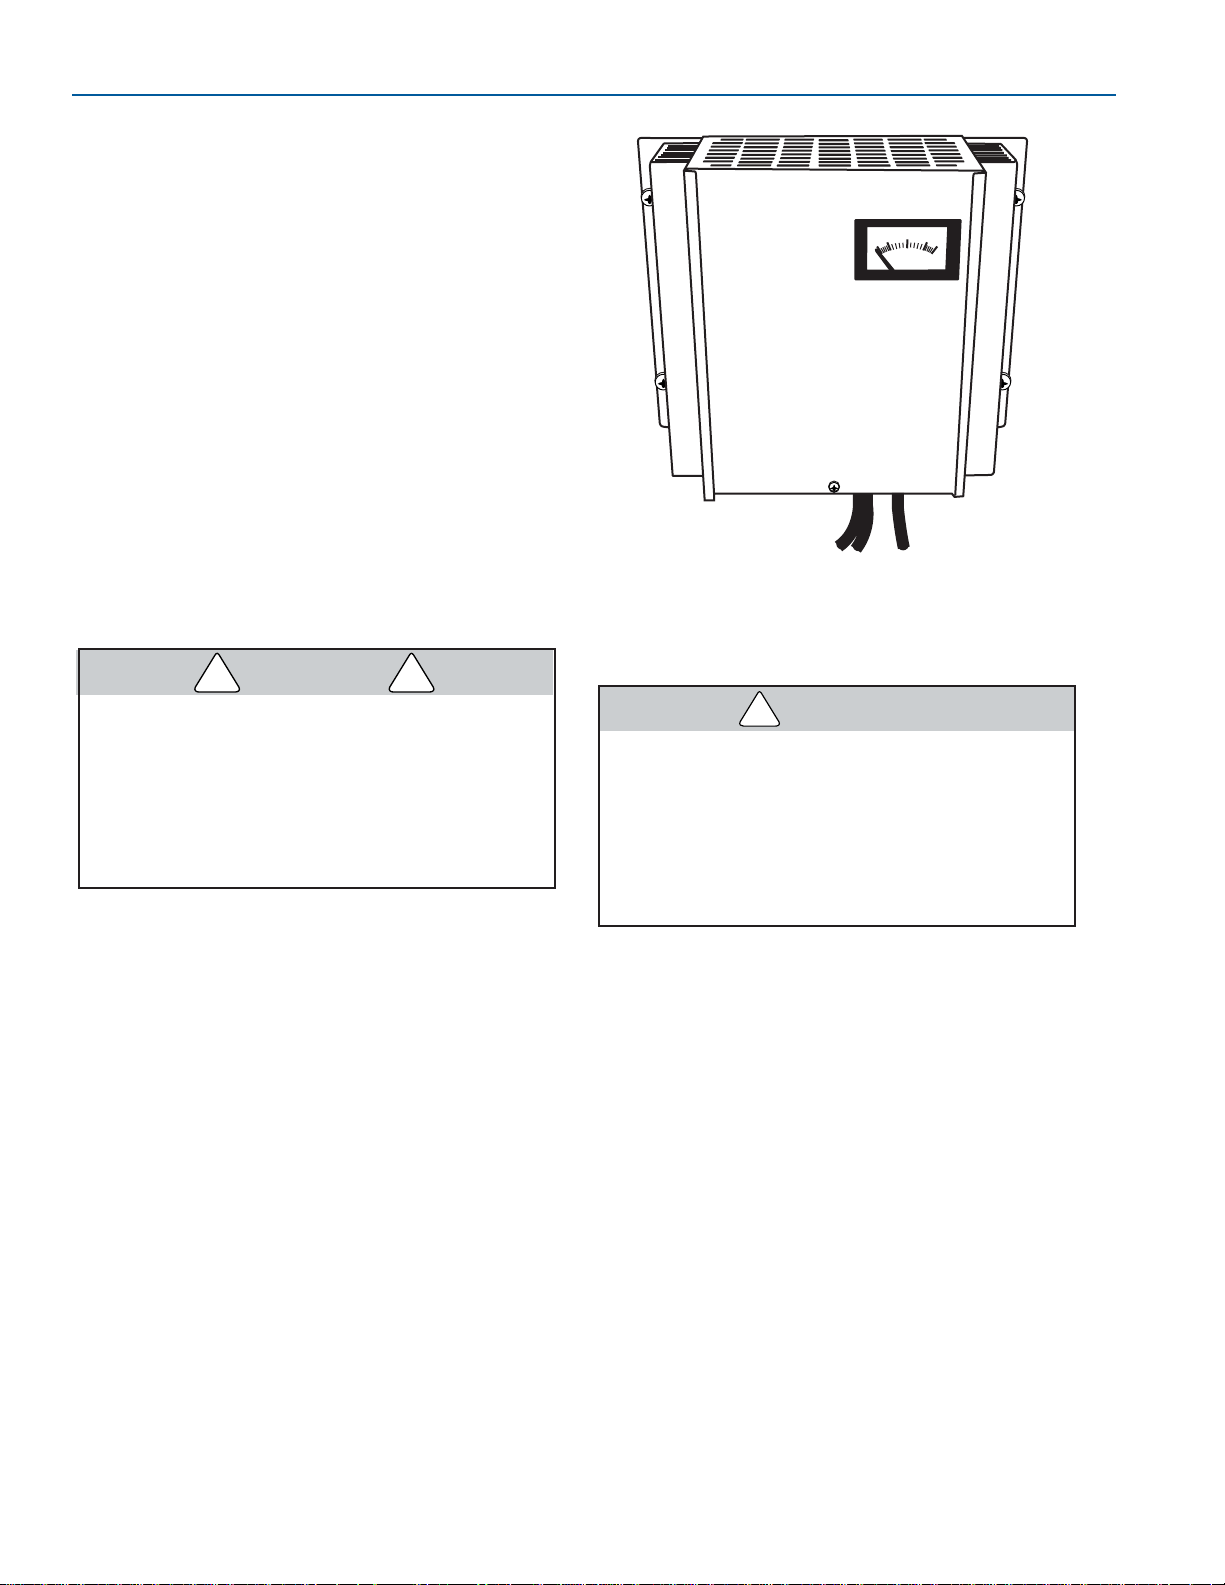
5-8
FORMULA
FASTECH
FASTECH
2. Turn OFF the shore power switch on the AC
control Panel. Move the lock over to secure the
switch in place.
3. Turn OFF the generator power switch.
4. Turn ON the blower and operate it for at least
four minutes.
5. Push the START side of the generator’s
Start/Stop switch. Allow generator to operate
for at least one minute to stabilize voltage.
6. Turn ON the generator power switch.
7. Switch the respective branch breakers below it
as needed. In this configuration, all
components can be used with power supplied
by the generator up to a maximum of 30 amps.
8. Do not operate the generator in conjunction
with high speed operation of the boat. The
resulting reduction in water flow to the
generator could damage the unit’s water pump
impeller.
Carbon monoxide gas (CO) is colorless,
odorless and extremely dangerous. All
engines and fuel burning appliances
produce CO as exhaust. Direct and
prolonged exposure to CO will cause
BRAIN DAMAGE or DEATH. Signs of
exposure to CO include nausea, dizziness
and drowsiness.
Stop the generator by pressing the STOP side of
the Start/Stop switch. Close the generator’s
seacock.
BATTERY CHARGER
Your Formula boat may be equipped with a
battery charger located in the engine
compartment. Anytime your boat is connected to
shore power or the generator is running and the
BATTERY CHARGER switch at the AC control
panel is ON, the battery charger will operate and
act to keep the batteries fully charged. Please
refer to the battery charger operator’s manual for
additional information.
NOTICE
On models with a factory installed generator,
Formula installs a small 6 amp charger
dedicated to the generator starting battery.
This charger is operational anytime the AC/DC
panel is supplied with 110 V power and the
BATTERY CHARGER switch is ON.
FRESH WATER SYSTEM
Before connecting to any water fitting,
dockside or otherwise, make sure the
water is potable and suitable for human
consumption. A special sanitary drinking
water hose is required for potable water
connection. Do not use common garden
hose for drinking water.
The fresh water system provides potable
(drinkable) water to the sinks, showers, hot water
heater and transom shower if the boat is so
equipped. Refer to Specifications, in Section 3,
for the fresh water tank capacity for your model.
The onboard fresh water system is operated by a
12 VDC water pump. To use the vessel’s onboard
water supply, the 12 VDC system must be
activated and the WATER PUMP switch turned
ON. Depending on the boat model, the fresh
water pump
“switch” may be a re-settable circuit
breaker.
The water pump works on demand. It will not
automatically shut off when the fresh water tank is
empty. Monitor the level of water in the tank. If the
water pump is allowed to run continuously, it may
overheat.
Battery Charger
Figure 5-9
DC AMEPRES
0
5
10
15
20
FOR147
DANGER
! !
WARNING
!
Page 55
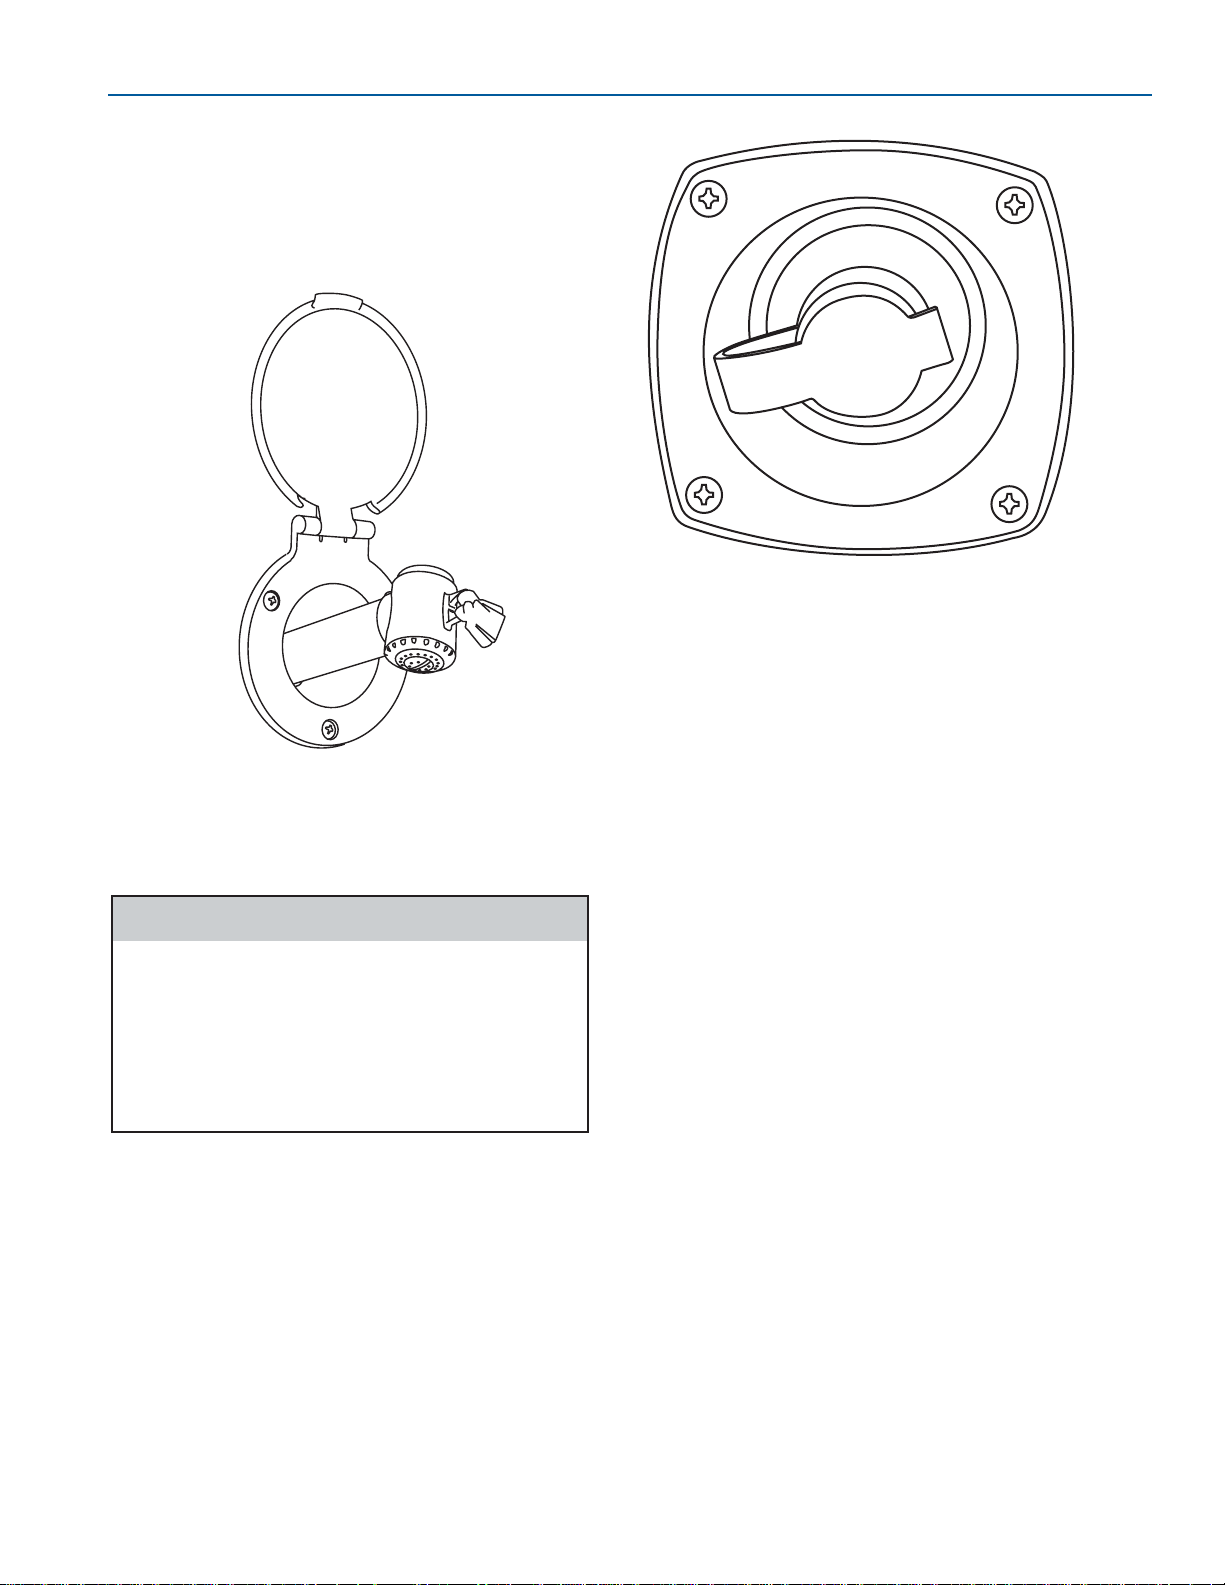
5-9
FORMULA
SYSTEM OPERATION AND EQUIPMENT
FASTECH
Transom Shower—The optional transom washdown shower is located at the stern of the boat.
The shower model will vary depending on the
boat model. The 12 VDC WATER PUMP circuit
breaker switch must be ON for the unit to
function.
Fresh Water Dockside Hookup
Monitor the fresh water dockside hookup
during the initial use. The boat is
connected to an unlimited supply of water.
Do not leave the boat unattended while
using this feature. Any major leak or break
in the system will allow continuous water
flow into the boat causing severe damage.
A fresh water dockside hookup is available in
some models, which allows usage of city water
while docked. Refer to Specifications, in Section
3, for location.
Water supplied through this hookup will not
replenish the fresh water supply in the on-board
tank. Consequently, the tank can only be filled at
the fresh water fill plate.
Transom Shower
Figure 5-10
To connect to city water:
1. Turn the 12 VDC WATER PUMP circuit
breaker OFF.
2. Remove the plug from the boat’s water inlet
fitting.
3. Attach the proper sanitary drinking water hose
to the dockside city water outlet. Turn on the
water and flush the hose before connecting it
to your boat.
GRAY WATER SYSTEM
In some models, the gray water from the sink
drains, shower drains and air conditioning
condensation drain flows into a shower sump box.
When the gray water in the sump box reaches a
predetermined level, a switch activates a pump.
The water is then evacuated overboard or, in the
case of boats with the “gray water” option, into the
waste holding tank.
Gray water from the head is also stored in the
waste tank. Refer to Specifications, in Section
3, for waste tank capacity.
Fresh Water Dockside Hookup
Figure 5-11
FOR250
FOR081
CAUTION
Page 56
5-10
FORMULA
FASTECH
FASTECH
WASTE WATER (HEAD)
SYSTEM
Do not flush into a full holding tank.
Attempting to flush the head when the tank
is full could result in damage to the waste
system.
The waste tank level indicator shows the level of
the water in the waste tank. Refer to Waste
Water Level Indicator, in Section 4.
To clear the tank of waste water, you will need to
use the dockside pump-out services provided at
marinas. Hook a suction hose to the pump-out
deck fitting marked WASTE (Refer to
Specifications in Section 3) and to the dockside
pump. The marina will handle the proper disposal
of the waste and may charge for this service.
It is strongly recommended that you regularly add
chemicals to your waste tank by flushing it
through the head to control odor and break down
the waste. Follow the waste tank manufacturer’s
recommendations on chemical use.
VacuFlush
®
—The VacuFlush head system is
active when the 12 VDC system is energized and
the switch marked HEAD PUMP is turned ON.
Vacuum energy is maintained in the system at all
times. When the toilet is flushed, the vacuum
energy stored in the system is released instantly
clearing the bowl of waste. Avacuum pump will
operate automatically every so often to recharge
the vacuum. Please refer to the head unit
operator’s manual in your Owner Information
Binder for additional information.
Macerator Discharge Pump—The optional
macerator system allows the discharging of waste
water directly overboard through a seacock. The
seacock’s valve must be opened to allow
discharge of the waste, but the switch operates
independently of the Y-valve’s position. For
additional operating information, refer to the
macerator operator’s manual supplied with your
Formula boat.
Overboard discharge of waste water is
prohibited in many areas. It is your
responsibility to comply with local
regulations regarding the discharge of
waste. You could be fined if your boat has
an operable overboard discharge system.
Removing the handle of the seacock while
in closed position, or disabling the system
by other means may be required to avoid a
fine.
RAW WATER SYSTEM
Your Formula boat may have as many as two
accessory components (generator and air
conditioning) - in addition to the engines - with
complete raw water systems.
Each raw water system will have its own thru-hull
water intake, seacock and strainer. The seacock
is very important. It protects the boat from sinking
if a hose or fitting should fail. It is important to
close any seacock not in use.
Waste water from the generator is routed with the
generator’s exhaust system. Waste water from the
air conditioning unit is directed overboard through
a drain port in the hull.
Your engines have their own raw water system for
cooling. Refer to the propulsion unit operator’s
manual for engine cooling information.
AUTOMATIC FIRE
EXTINGUISHER SYSTEM
A fixed automatic fire extinguisher that uses FE241 (FM-200 for European requirements) as an
extinguishing agent is mounted on the engine
compartment forward bulkhead. The extinguisher
is activated when the heat sensitive head reaches
a predetermined temperature. The extinguisher
discharges and saturates the engine compartment,
smothering the fire.
When the fire extinguisher discharge
occurs, turn OFF all engines, bilge blowers
and electrical system components. Refrain
from opening the engine compartment
hatch, as the introduction of oxygen could
accelerate any fire present there.
CAUTION
CAUTION
WARNING
!
Page 57
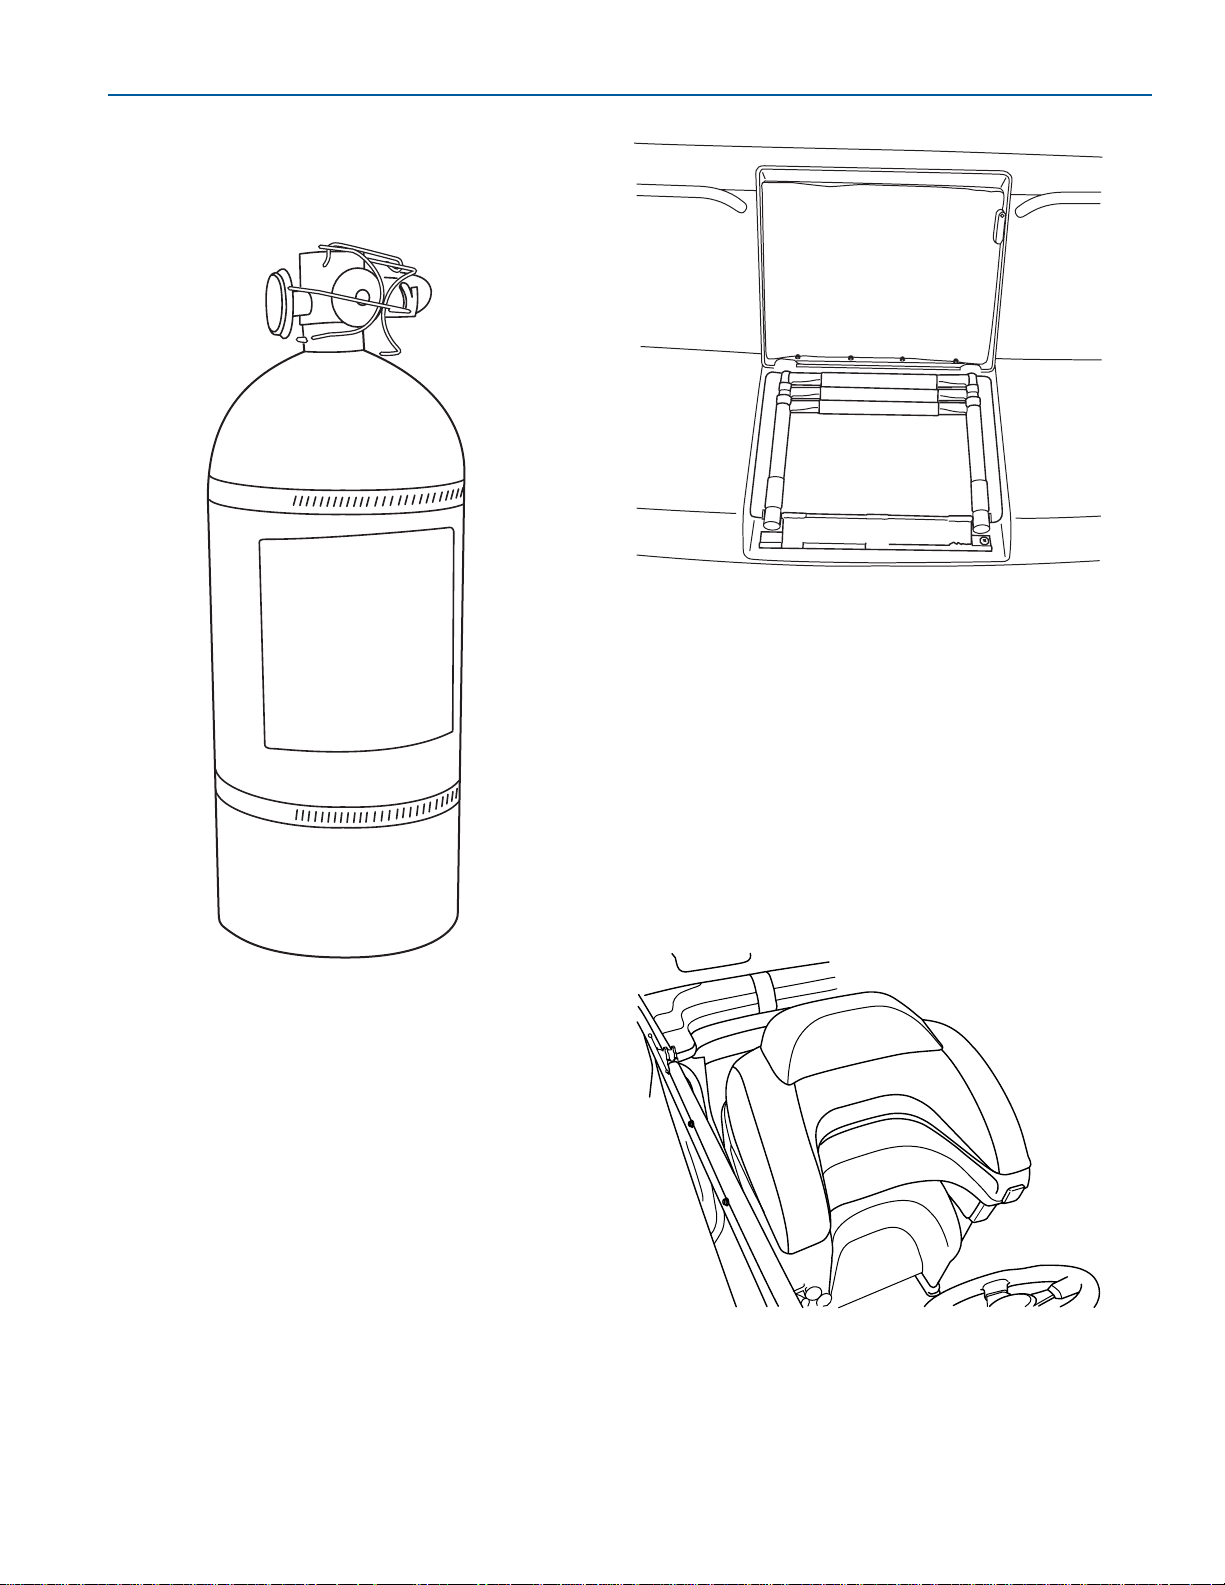
5-11
FORMULA
SYSTEM OPERATION AND EQUIPMENT
FASTECH
Allow the extinguishant to soak for 15 minutes
after it discharges. With a portable fire
extinguisher in your hand, cautiously inspect for
damage. Avoid breathing fire vapors or fumes.
Refer to Automatic Fire Extinguisher Indicator,
in Section 4, for information on the automatic fire
extinguisher monitoring indicator.
EQUIPMENT
Boarding Ladder—The boarding ladder is
mounted on the swim platform at the stern of the
boat. In most applications, a fiberglass lid covers
the stowed ladder. Lift this lid to access the
ladder.
Automatic Fire Extinguisher
Figure 5-12
Bolster—Your captain’s chair and passenger’s
chair have an electronic bolster for greater
visibility and maneuverability while docking. You
can sit on the seat cushion or lower it, which will
allow you to stand in front of or lean against the
backrest. Standing while driving your boat should
only be attempted by an experienced driver, and
then only while maneuvering at an idle speed.
You can raise or lower the seat cushion by using
the switch on the bolster armrest.
Bolster
Figure 5-14
Boarding Ladder
Figure 5-13
FOR170
FOR251
FOR021
FOR172
Page 58
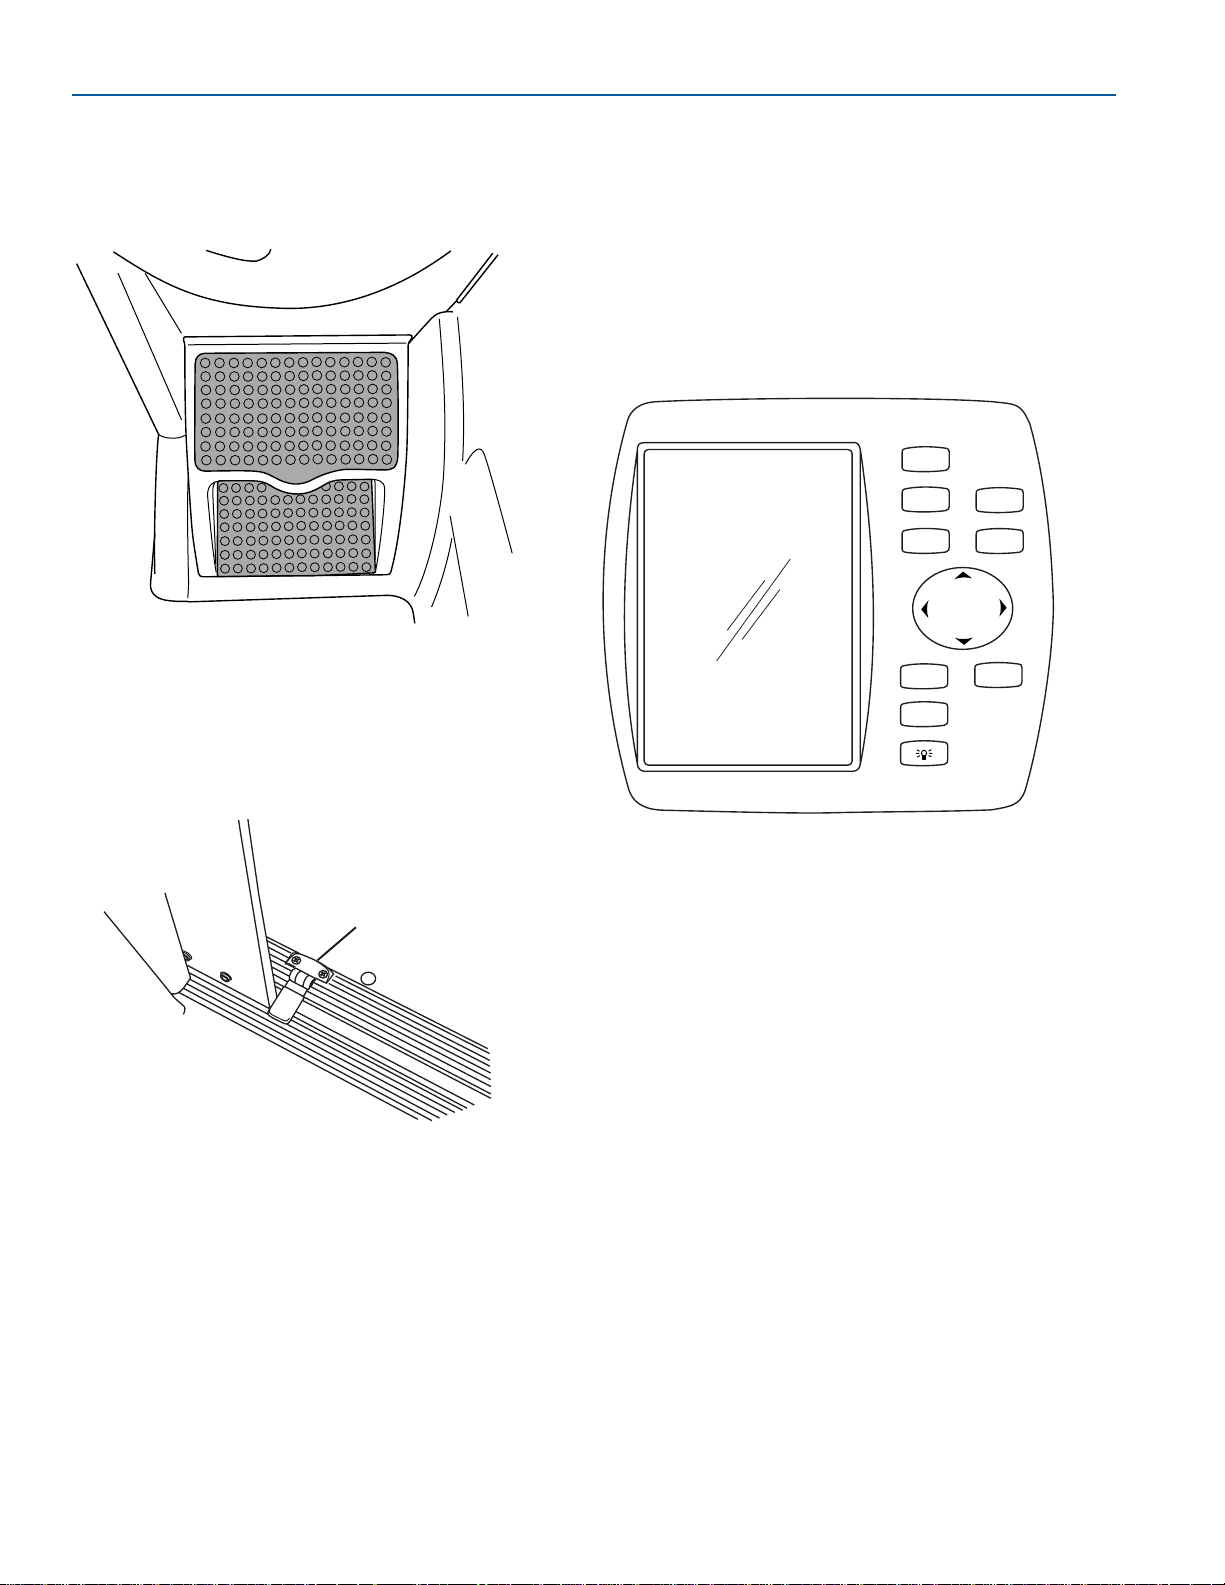
5-12
FORMULA
FASTECH
FASTECH
Footrests—Some models are also equipped with
adjustable footrests. These models will have a
second switch on the bolster armrest to raise or
lower the footrest.
Cabin Access Door—Whenever practical, secure
the door in the open position (see door stop,
Figure 5-16) before operating boat.
1. Door Stop
Cabin Access Door
Figure 5-16
1
Adjustable Footrest
Figure 5-15
Global Positioning Satellite (GPS)—A
standalone GPS unit is an available option on
some FASTech models. AGPS provides precise
information regarding a vessel’s location and
speed and can also be used to plan and record
trip routes. Refer to the manufacturer’s owner
manual in the Formula Owner Information Binder
for specific information relative to your boat’s
GPS. Take time to read this manual to take full
advantage of this system.
Take time to read the manual supplied with your
GPS to take full advantage of the system.
Hot Water Heater—Ahot water heater is an
available option on some FASTech models. When
the engines are operating, hot engine coolant is
circulated through a coil in the water heater,
heating the fresh water. Refer to Specifications,
in Section 3, for your hot water tank capacity.
The water heater operates on 110V AC power. To
operate the water heater, the AC/DC panel must
be supplied with 110Vpower and the AC panel
switch labeled WATER HEATER must be ON.
Water heaters unused for more than two weeks
may produce hydrogen gas. To reduce the risk of
injury under these conditions, open the hot water
faucet for several minutes at the galley sink
before you use any electrical appliance adjacent
to the hot water system.
GPS Unit
Figure 5-17
FOR251
FOR030a
OUT
ZOOM
IN
QUIT
MARK
MOB
12 CHANNEL
PAGE
ENTER
GOTO
FOR265
Page 59
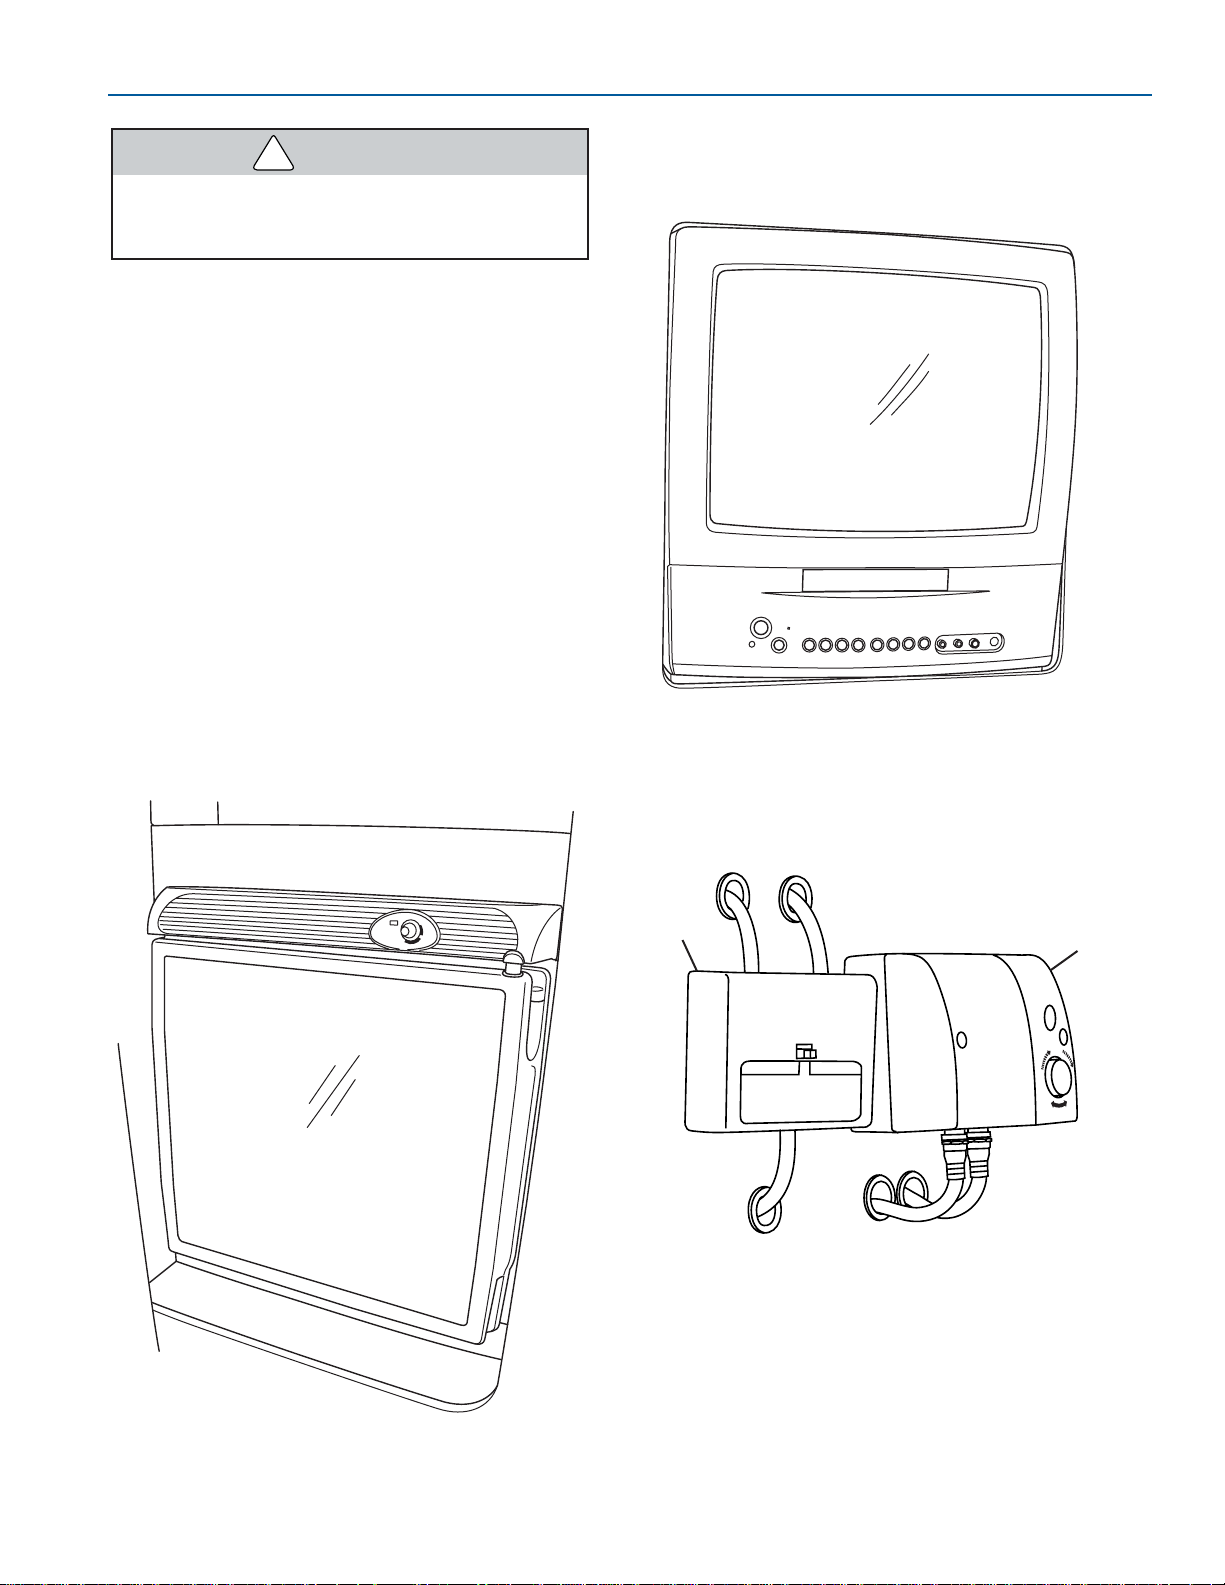
5-13
FORMULA
SYSTEM OPERATION AND EQUIPMENT
FASTECH
Do not smoke or have any flame near an
open faucet; hydrogen gas is extremely
flammable.
If hydrogen is present, you probably will hear
unusual sounds like air escaping through the pipe
as water begins to flow. Allow the water to flow
until these sounds disappear.
Refrigerator—The dual electric refrigerator can
be operated from both the 110 VAC system and
the 12VDC system.
●
When operating the refrigerator using the 12
VDC system, the REFRIGERATOR circuit
breaker on the DC control panel must be ON,
and the REFRIGERATOR circuit breaker on
the AC control panel must be OFF.
●
When operating the refrigerator using the 110
VAC system, the REFRIGERATOR circuit
breaker on the AC control panel must be ON,
and the REFRIGERATOR circuit breaker on
the DC control panel must be OFF.
Refer to the refrigerator operator’s manual in your
Owner Information Binder.
Refrigerator
Figure 5-18
0
1
2
4
5
TV/DVD—The television includes a DVD
machine. Refer to the manufacturer’s operating
information in your Owner Information Binder.
ATV antenna amplifier maximizes the TV signal
in your area. Refer to manufacturer’s operating
information.
1. TV Antenna Amplifier
2. Antenna/Cable TV Switch
An antenna/cable TV switch allows you to access
dockside cable television. Refer to Specifications,
in Section 3, for location.
TV Switch and Amplifier
Figure 5-20
2
1
TV/DVD
Figure 5-19
FOR275
FOR015
FOR271
WARNING
!
Page 60
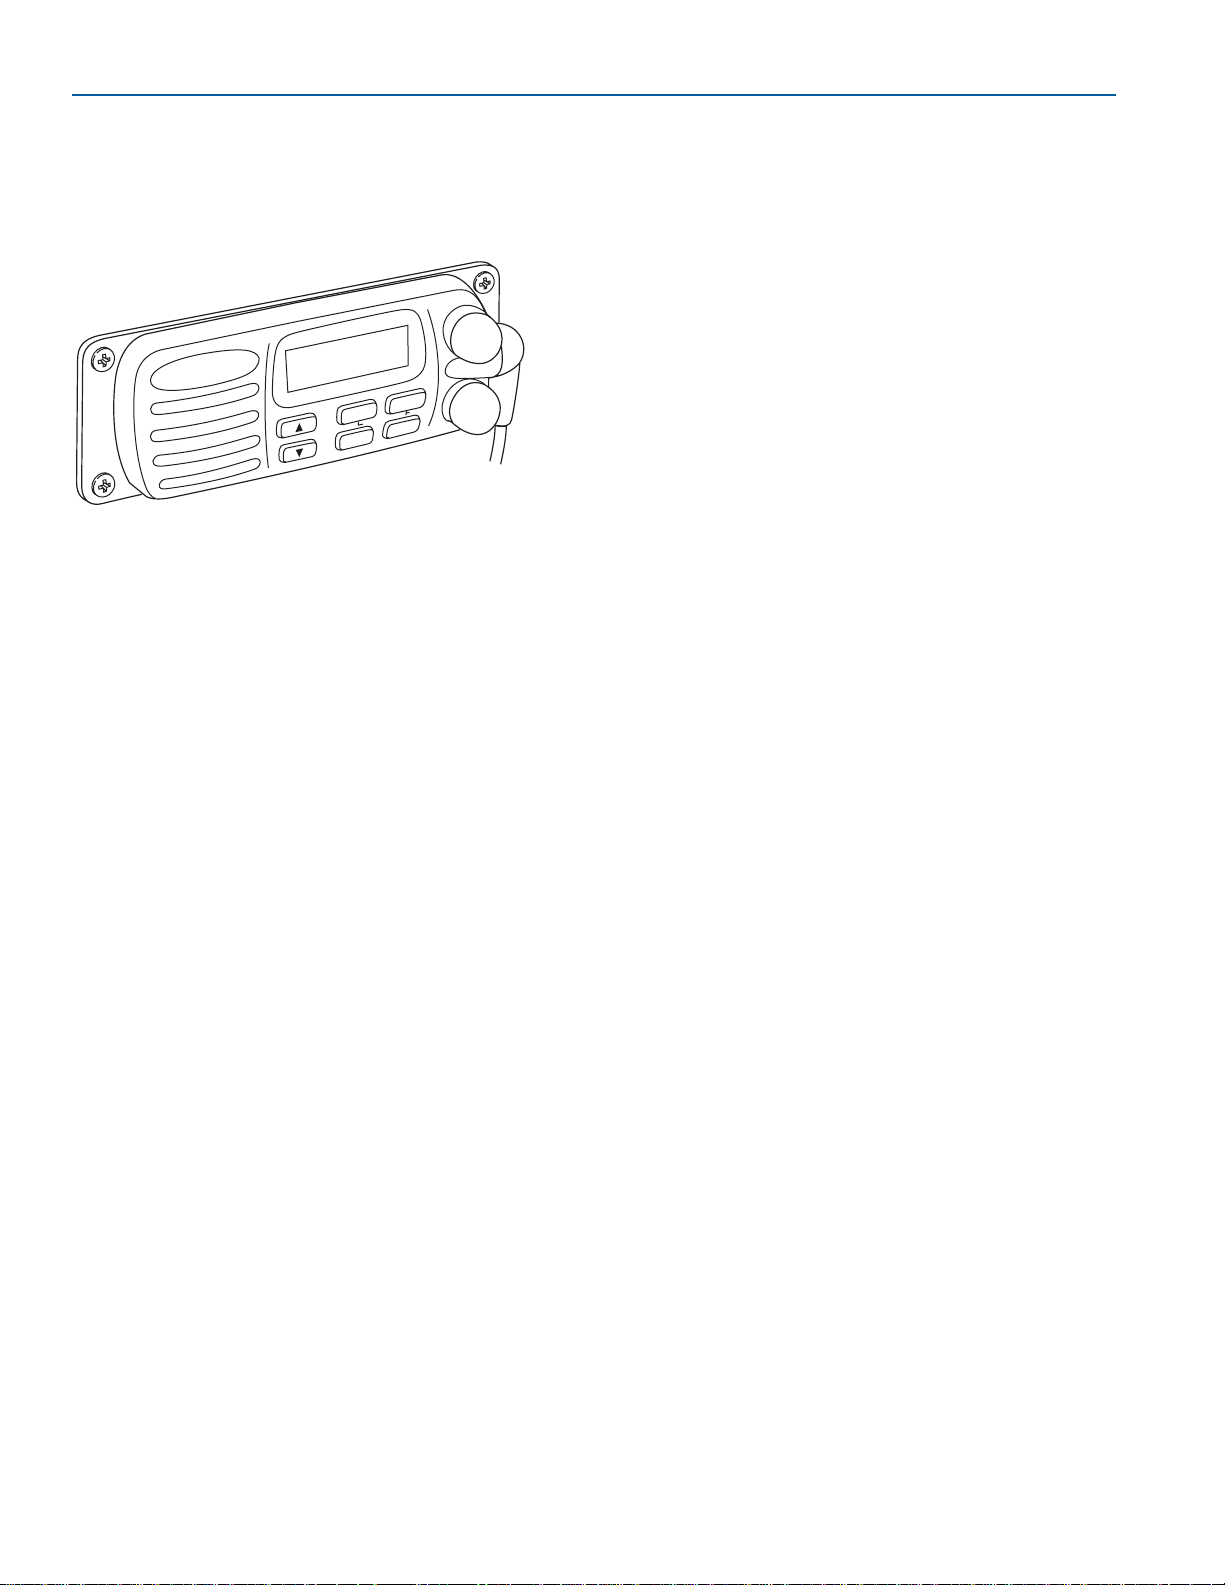
5-14
FORMULA
FASTECH
FASTECH
VHF/FM Marine Radio—Provides reliable
communications between boats, and between a
boat at sea to public and private shore stations.
For operating information, refer to the radio
owner’s manual in your Owner Information Binder.
VHF/FM Marine Radio
Figure 5-21
STANDARD
SCAN
HORIZON
ECLIPSE +
H&L
WX
MEM
U
LC
SQL
VOL/
PWR
TG/R
FOR260A
Page 61
FASTECH
6-1
FORMULA
There are many things to consider to make your
boating trip safe and enjoyable. You are
responsible for the safety of all passengers, the
boat and any damage the boat or its wake may
cause. Keep passengers from blocking your view
so that you do not run into other boats, swimmers,
water skiers, personal water vehicles or aids to
navigation.
SAFETY CHECKLIST
Do not operate the boat if any problem is
found during this inspection. A problem
could lead to an accident during the outing
causing severe injury or death. Problems
found during this inspection should be
handled by your Formula dealer.
The following checks are essential to safe boating
and must be performed before starting the
engines.
●
Check the weather report, wind and water
conditions.
●
Check that required safety equipment is
onboard and in proper operating condition.
●
Check that fire extinguishers are fully
charged.
●
Test operation of the carbon monoxide
detectors.
●
Be sure the boat is not overloaded.
●
Check that all maintenance has been
performed.
BASIC SAFE BOATING
RULES
The General Prudential Rule regarding right-ofway is that if a collision appears unavoidable,
neither boat has right-of-way. As prescribed in the
“Rules of the Road,” both boats must act to avoid
collision.
The information in this section outlines only the
most basic of the nautical rules of the road. For
more information, contact your local USCG
Auxiliary.
The nautical rules of the road must be
followed to prevent collisions between
vessels. Like traffic laws for automobiles,
the operator is legally required to follow
the rules.
NOTICE
In general, boats with less maneuverability
have right-of-way over more agile craft.
You must stay clear of the vessel with
right-of-way and pass to his stern.
Signaling other boats with a whistle or horn is
similar to using turn signals on an automobile. It is
not necessary to sound a signal every time a boat
is nearby. In general, boat operators should signal
their intention to avoid potentially confusing or
hazardous situations.
Section 6
Getting Underway
WARNING
!
WARNING
!
Page 62
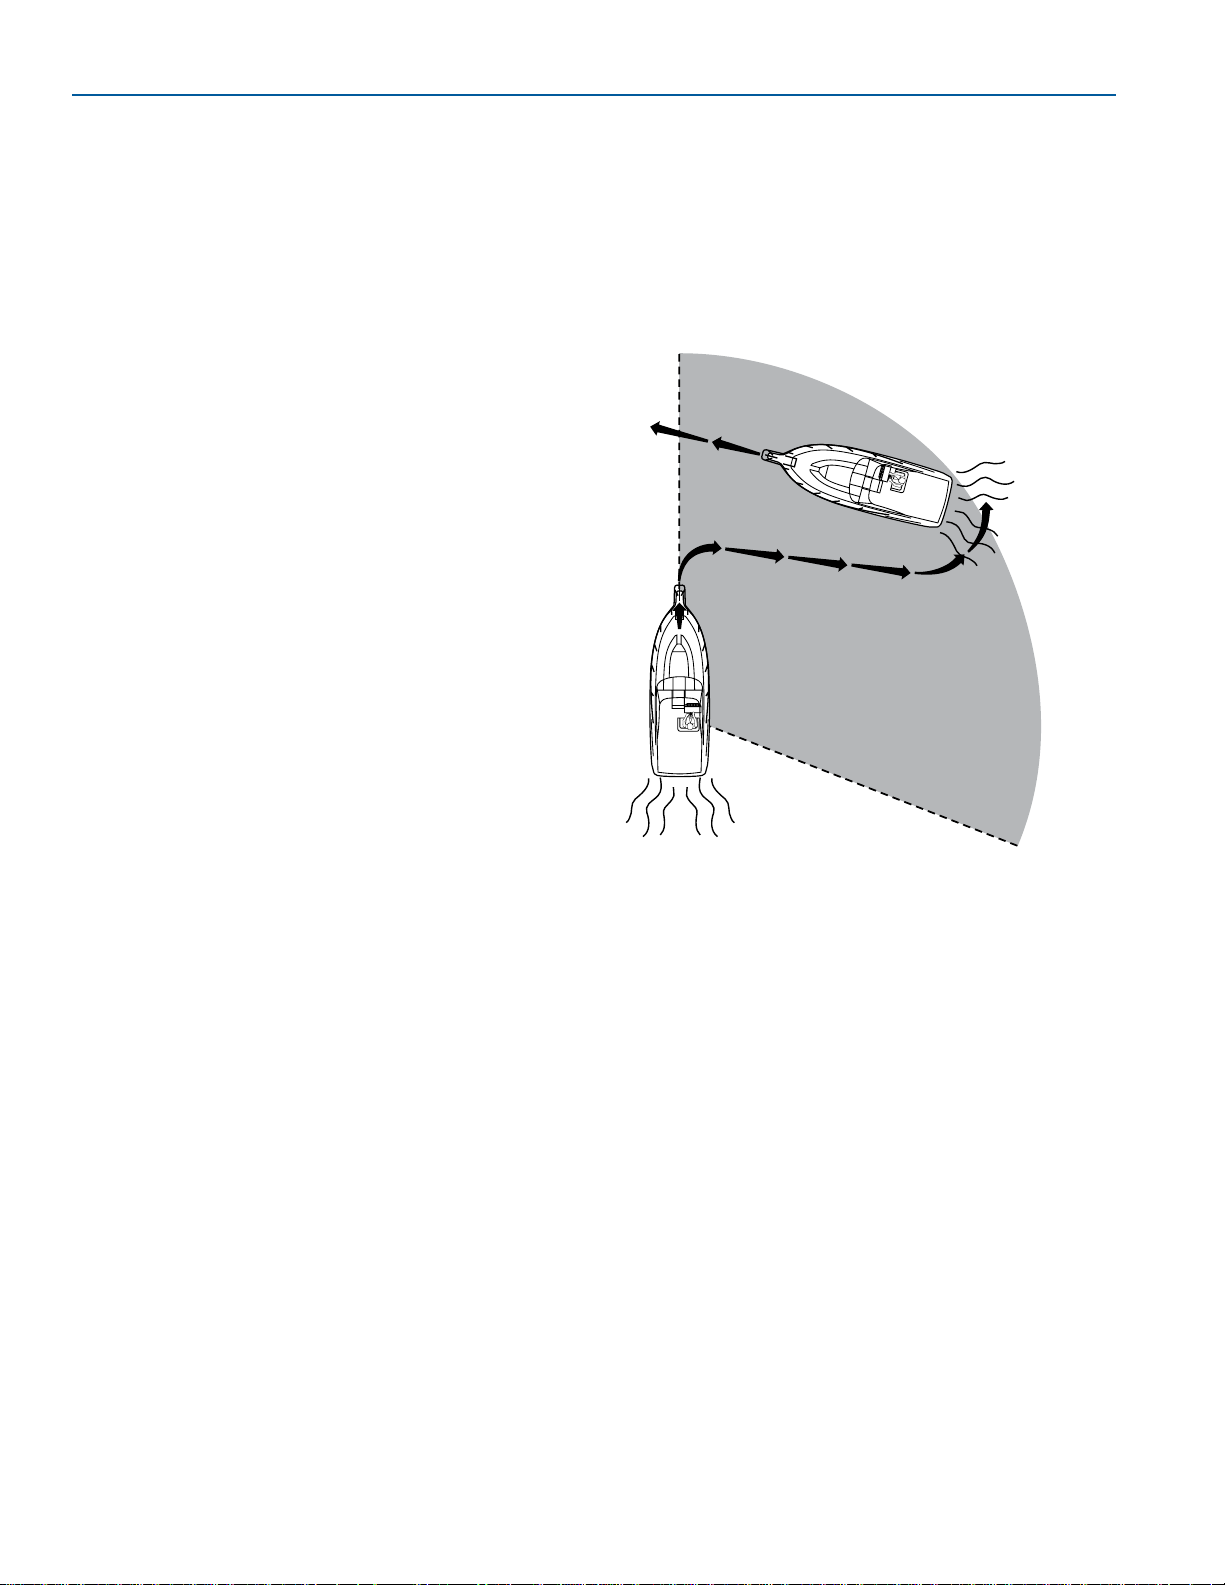
6-2
FORMULA
FASTECH
FASTECH
It is customary for the privileged boat to signal
first, and the give-way boat to return the same
signal to acknowledge she understands and will
comply. Use the danger signal (five or more short
and rapid blasts) if intent is not clear.
Use the following signal blast early enough to be
noticed and understood by other boaters:
●
One long blast: Warning signal (coming out
of slip or passing astern)
●
One short blast: Pass on my port side
●
Two short blasts: Pass on my starboard side
●
Three short blasts: Engines in reverse
●
Five or more short and rapid blasts: Danger
signal!
Privileged Boats
Privileged boats have right-of-way and can hold
course and speed. Sailboats and boats paddled
or rowed have the right-of-way over motor boats.
Sailboats under power are considered
motorboats. Small pleasure crafts must yield to
large commercial boats in narrow channels.
Burdened Boats
The burdened boat is the boat that must make
whatever adjustment to course and speed
necessary to keep out of the way of the privileged
boat.
Crossing Situation
In crossing situations, the boat to the right from
the 12 o’clock to the 4 o’clock position has the
right-of-way. It must hold course and speed. The
burdened boat keeps clear and passes behind the
privileged boat. Boats going up and down a river
have the privilege over boats crossing the river.
Crossing
Figure 6-1
GIVE-WAY
(BURDENED)
VESSEL
DANGER ZONE
STAND-ON
(PRIVILEGED)
VESSEL
12 O'CLOCK
4 O'CLOCK
KC-0477
Page 63
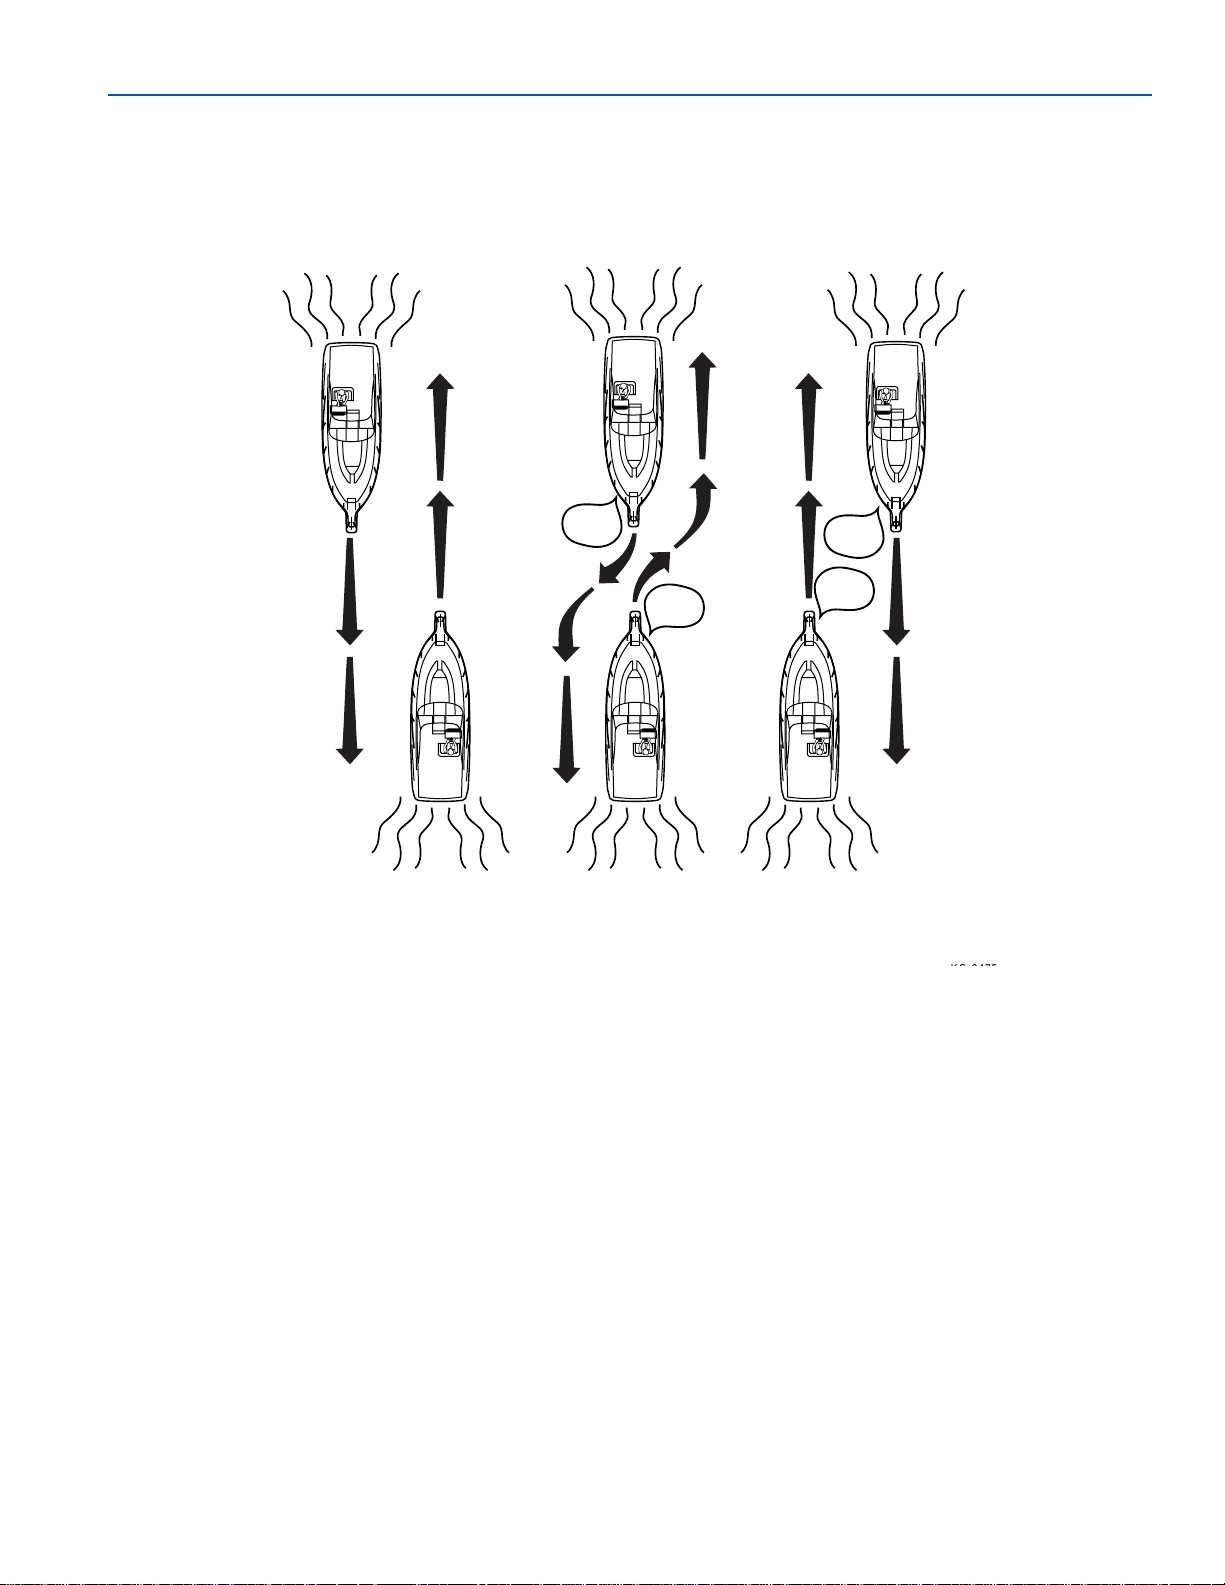
6-3
FORMULA
GETTING UNDERWAY
FASTECH
Meeting Head-On
Neither boat has the right-of-way in this situation.
Both boats should decrease speed, turn to the
right, and pass port-to-port. However, if both boats
are on the left side of the channel, each vessel
should sound two short blasts and pass
starboard-to-starboard.
KC-0475
PASSING
PORT TO
PORT
MEETING
HEAD TO
HEAD
PASSING
ST ARBO ARD T O
STARBOARD
HONK
HONK
HONK
HONK
HONK
HONK
Meeting Head-On
Figure 6-2
Page 64
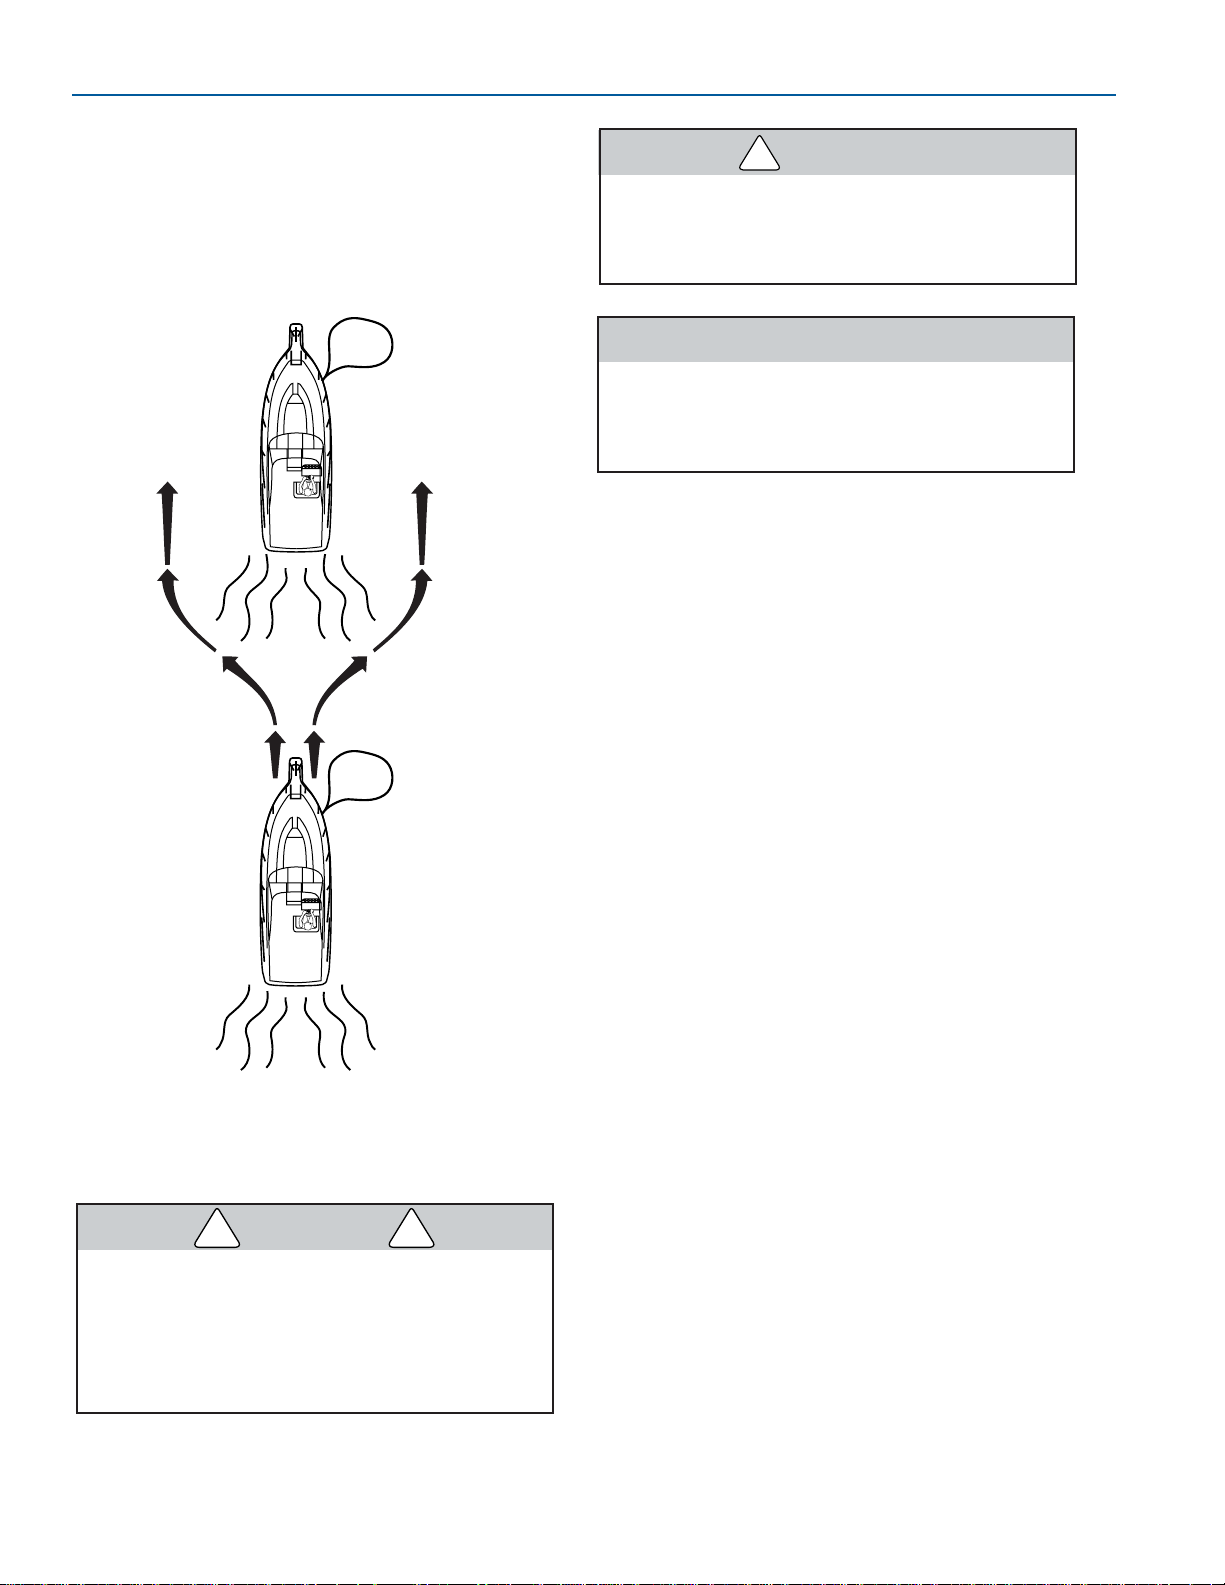
6-4
FORMULA
FASTECH
FASTECH
Overtaking
The boat that is overtaking one ahead of it is the
give-way boat and must make any adjustments
necessary to keep out of the way of the stand-on
boat. The stand-on boat should hold its course
and speed.
FUELING
Gasoline is extremely flammable and
highly explosive under certain conditions.
Stop the engines and generator, and do
not smoke or allow open flames or sparks
within 15 meters (50 feet) of the fueling
area.
Overtaking
Figure 6-3
STAND-ON
(PRIVILEGED)
VESSEL BEING
OVERTAKEN
GIVE-WAY
(BURDENED)
VESSEL
OVERTAKING
HONK
(LONG)
HONK
(LONG)
All precautions must be taken every time
you fuel your boat, whether it’s gasoline or
diesel fuel. Diesel fuel is non-explosive,
but it will burn.
To prevent unwarranted engine damage,
refer to your propulsion unit operator’s
manuals for recommended fuel type and
octane rating.
Take care not to spill gasoline. If gasoline is
accidentally spilled, wipe up all traces of it with dry
rags and immediately dispose of the rags properly
ashore. Spilled fuel may yellow the gelcoat finish
and damage gunwale trim and discolor Imron.
When fueling:
1. Know your fuel tank capacity. Be sure to have
enough fuel to reach your destination. If
departing for an extended cruise, know the
availability of fuel along your route. Practice
the One Third Rule; 1/3 to reach the
destination, 1/3 to return and 1/3 in reserve.
2. Avoid fueling at night, except under welllighted conditions.
3. Moor your boat securely to the dock. Know
the location of the fire extinguisher in case of
emergency.
4. Keep accurate records of your fuel
consumption. Afuel log tracking fuel use over
time will help determine average
consumption.
5. Close all doors, hatches, windows and other
compartments.
6. Extinguish cigarettes, pipes, and all other
flame producing items.
7. Make sure all power is off, and do not operate
any electrical switches.
8. Remove the fuel fill cap using the deck plate
key supplied with your boat.
KC-0476
WARNING
!
CAUTION
DANGER
! !
Page 65
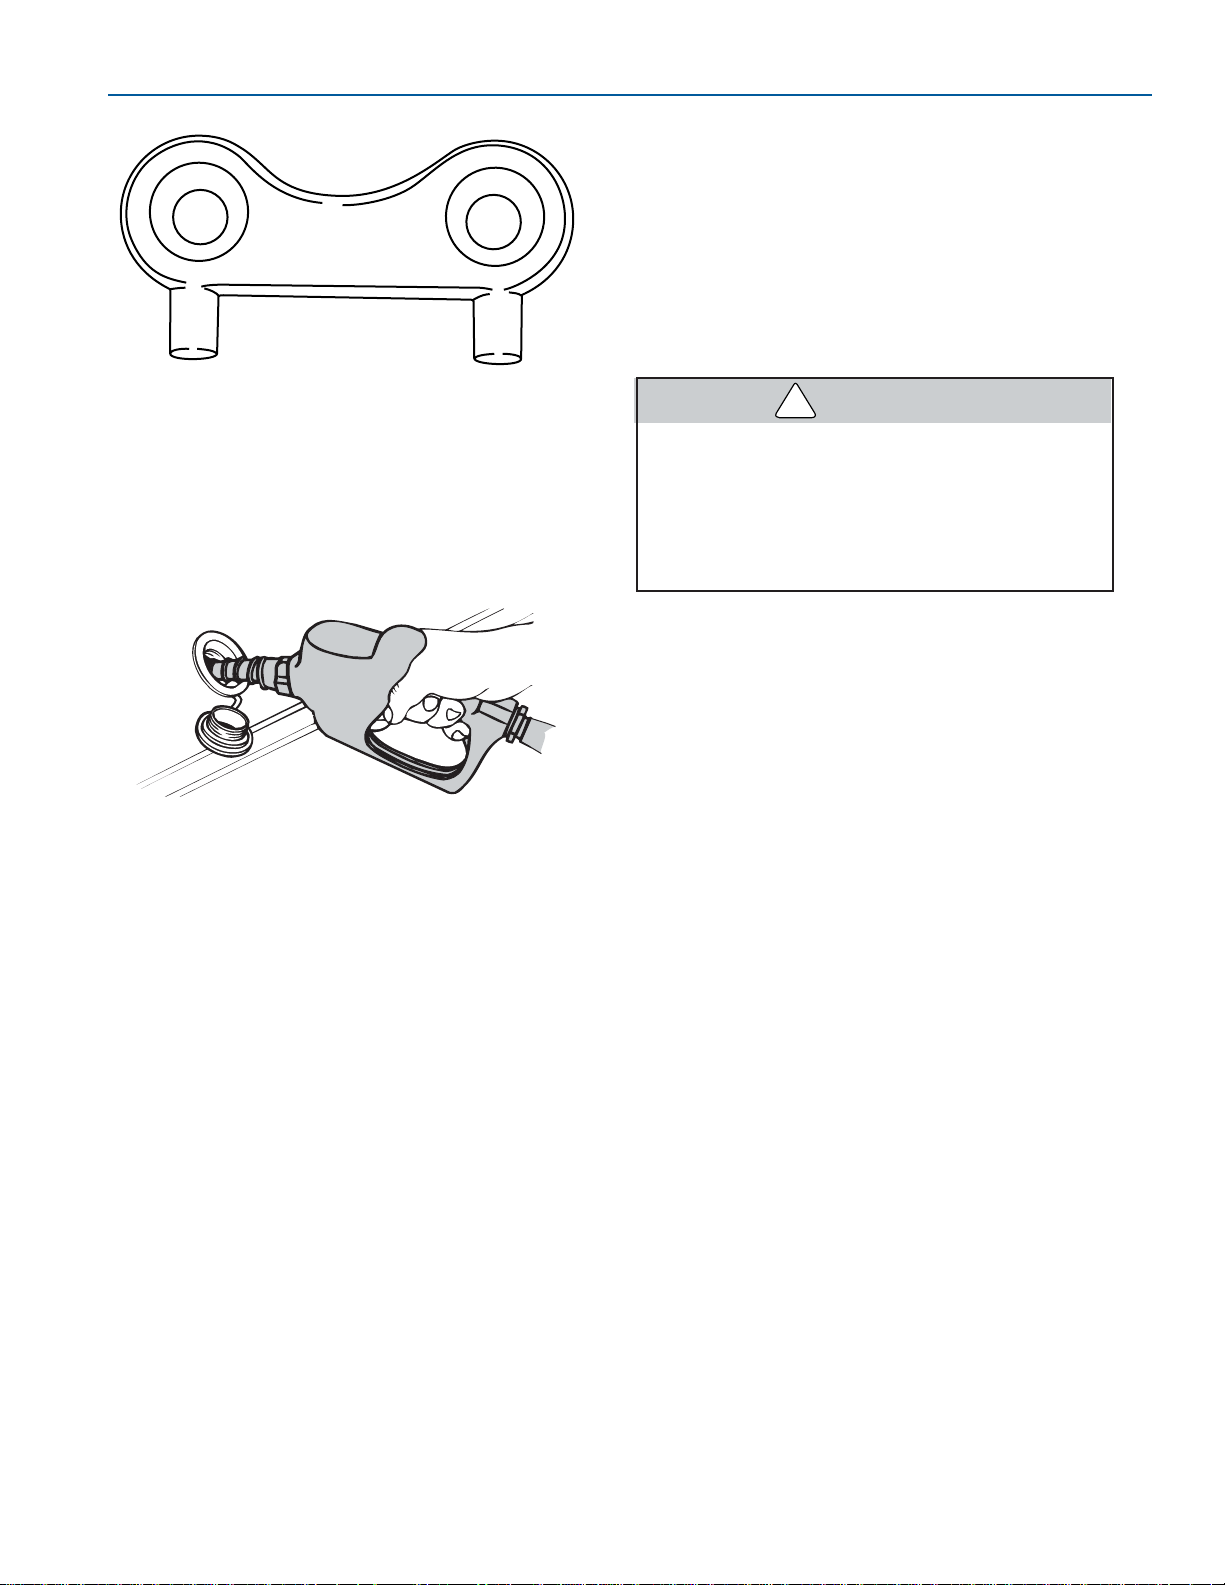
6-5
FORMULA
GETTING UNDERWAY
FASTECH
9. Insert the hose nozzle and make sure nozzle
is in contact with or grounded against fill
opening. This will reduce the risk of static
spark.
10. Add fuel in accordance with the propulsion
unit operator’s manual. Do not overfill, and
allow enough room for fuel expansion.
NOTICE
●
Each time you refuel, inspect all fuel
lines, hoses and connections for leaks
and deterioration.
●
The Federal Water Pollution Control Act
prohibits the discharge of oil or oily
waste into the water. Violators can be
fined $5,000.00. We urge you to protect
our fragile environment by avoiding any
type of discharge, trash or litter into our
waterways.
After fueling:
1. Tighten the fuel fill cap using the deck plate
key. Wipe up any fuel spillage.
2. Open all windows, hatches, doors and
compartments.
Fueling
Figure 6-5
Deck Plate Key
Figure 6-4
3. Check all fuel lines, hoses and connections for
leaks and deterioration.
4. Be sure to run the blower for at least four
minutes before starting the engines. If you
smell gasoline fumes, do not start the
engines; continue to run the blower until
fumes have dissipated.
PRE-OPERATIONAL CHECKS
Do not operate the boat if any problem is
found during this inspection. A problem
could lead to an accident during the outing
causing severe injury or death. Have any
problem attended to by your Formula
dealer.
Get into the habit of performing these checks in
the same order each time so that it becomes
routine.
●
Make sure to check all safety items listed in
Safety Checklist, in this section.
●
Check that bilge drain plug(s) is properly
installed.
●
Check that all batteries are fully charged and
have the proper level.
●
Verify the amount of fuel in the fuel tanks.
●
Be sure the lights, horn, bilge pumps and
other electrical equipment are in operating
condition.
●
Check that no fuel, oil or water is leaking or
has leaked into the bilge compartment.
●
Check all hoses and connections for leakage
and damage.
●
Open all seacocks and check for leaks.
●
Check seawater strainers for leaks and
accumulation of debris.
●
Open raw water drain valves.
●
Check that steering system operates
properly.
●
Make sure the shift lever(s) is in NEUTRAL
position.
●
Do not overload your boat.
●
Operate the bilge blowers for at least four
minutes before starting the engines or
generator.
FOR047
KC-0991
WARNING
!
Page 66

6-6
FORMULA
FASTECH
FASTECH
BOAT TRIM/LOADING
All passengers should be carefully seated
while the boat is moving. Do not sit on the
bow, bow pulpit, deck or gunwale when
the boat is moving.
Know the weight capacity of your boat. Do not
overload your boat. Overloading of passengers,
personal equipment and supplies could result in
an accident, especially in rough waters.
The performance of your boat is dependent on
load weight and distribution, drive unit trim and
trim tab position. Passengers should distribute
themselves to maintain trim. Remember to
distribute weight from right to left, and also from
front to back.
●
Avoid excess weight in the bow or stern.
●
Securely stow all extra gear in stowage areas
to prevent load shifting. Do not stow gear on
top of safety equipment; safety equipment
must be quickly accessible.
●
In adverse weather, reduce the load in the
boat. People/load capacity ratings are based
upon normal boating conditions.
Overloading of passengers, personal equipment
and supplies could result in an accident,
especially in rough waters. Maintain a balanced
load at all times.
BOARDING
When boarding the boat, always step in. Do not
jump. Avoid stepping on smooth fiberglass or
other potentially slippery surfaces. Board one
person at a time.
Do not board the boat while carrying gear. Set the
gear on the dock, board the boat and then pick up
the gear.
Do not use the drive units as a boarding ramp,
use the boarding ladder. To prevent injury, make
sure the engines are OFF when swimmers,
drivers and skiers are boarding.
WARNING
!
Page 67
FASTECH
7-1
FORMULA
This section describes the basics of starting,
running, stopping, steering, trimming and docking
your boat. Formula strongly recommends all
operators of your boat seek additional training on
boat handling and safety. Have all operators
become familiar with the handling characteristics
and proper steering and control system usage
before attempting high-speed operation.
Whenever you are going for an outing, make sure
at least one passenger is familiar with the
operation and safety aspects of the boat in case
of emergency. Show all passengers the location
of emergency equipment and explain how to use
it. Don’t allow passengers to drag their feet or
hands in the water, or sit on the bow, bow pulpit,
deck, gunwale or transom platform while the
engines are running.
STARTING
Your Formula boat may be equipped with a
warning system that will sound an alarm if an
engine problem develops. The horn may emit a
short chirping sound during starting to verify
operation. If the warning horn sounds when
operating the boat, IMMEDIATELY throttle back to
idle speed and shift into NEUTRAL.
IMMEDIATELY check the gauges and stop the
engines.
Continued operation after the warning
alarm has sounded may cause severe
engine damage.
Test the carbon monoxide detectors
operation before each trip, at least once a
week and after the boat has been in
storage. Do not tamper with the operation
of the carbon monoxide detectors. They
are installed for your safety.
Starting Gas Engines
Operate the blower for at least four
minutes each time you start the engines. In
addition, the blower should be operated
continuously when at idle and during slow
speed operation. Failure to operate the
blower can cause an explosion.
Complete the safety checklist before starting the
engines. Please refer to the propulsion unit
operator’s manual for additional starting
procedure information.
●
Attach the ignition safety switches’
lanyards to the operator before starting
the engines. This will prevent the boat
from becoming a runaway if the
operator is accidentally thrown away
from the helm.
●
Start the engines with the shift lever(s)
in NEUTRAL. Your boat is equipped with
a neutral safety switch which will not
allow engines to be started unless the
shift lever(s) is in the NEUTRAL
position.
Section 7
Operation
CAUTION
WARNING
!
WARNING
!
WARNING
!
Page 68
7-2
FORMULA
FASTECH
FASTECH
1. Attach the ignition safety switch clips to the
switches; connect the hooks to a secure place
on the operator.
2. Move shift lever(s) to the NEUTRAL position.
3. Move throttle lever(s) to the IDLE position.
4. Turn the ignition key of one engine to START
position. Release the key immediately after
the engine starts. If the engines fail to start,
refer to the propulsion unit operator’s manual
for additional information.
Failure to release the ignition key after the
engine starts may damage the engine’s
starter motor.
5. Operate the engine at approximately 1000
RPM. Check the oil pressure gauge. If the oil
pressure is not within specified range, stop the
engine immediately. Contact your Formula
dealer to service the engine.
6. Repeat starting procedure for the second
engine. The second engine may be difficult to
hear when it starts due to the noise of the first
engine. Observe the tachometer of the second
engine. When the RPMs increase, release the
ignition key immediately.
7. Allow the engines to warm up. Check the
water temperature gauges to be sure water
temperature remains within the specified
range. If the temperature gauge reads
abnormally high, stop the engine immediately.
Check the drive unit’s water inlets for
blockage. If the inlets are open, contact your
Formula dealer to service the engine.
Starting Diesel Engines
Operate the blower for at least four
minutes each time you start the engines. In
addition, the blower should be operated
continuously when at idle and during slow
speed operation. Failure to operate the
blower can cause an explosion.
Complete the safety checklist before starting the
engines. Please refer to the propulsion unit
operator’s manual for additional starting
procedure information.
●
Attach the ignition safety switches’
lanyards to the operator before starting
the engines. This will prevent the boat
from becoming a runaway if the
operator is accidentally thrown away
from the helm.
●
Start the engines with the shift lever(s)
in NEUTRAL. Your boat is equipped with
a neutral safety switch which will not
allow engines to be started unless the
shift lever(s) is in the NEUTRAL
position.
1. Attach the ignition safety switch clips to the
switches; connect the hooks to a secure place
on the operator.
2. Move shift lever(s) to the NEUTRALposition.
3. Move the throttle lever of the engine to be
started to approximately one-half throttle
position.
4. Turn the ignition key of one engine to START
position. Release the key immediately after
the engine starts. If the engines fail to start,
refer to the engine operator’s manual for
additional information.
Failure to release the ignition key after the
engine starts may damage the engine’s
starter motor.
5. Operate the engine at approximately 1400
RPM. Check the oil pressure gauge. If the oil
pressure does not rise to specified range in
15 seconds, stop the engine immediately.
Contact your Formula dealer to service the
engine.
6. Repeat starting procedure for the second
engine. The second engine may be difficult to
hear when it starts due to the noise of the first
engine. Observe the tachometer of the
second engine. When the RPMs increase,
release the ignition key immediately.
7. Allow the engines to warm up. Check the
water temperature gauges to be sure water
temperature remains within the specified
range. If the temperature gauge reads
abnormally high, stop the engine immediately.
Check the drive unit’s water inlets for
blockage. If the inlets are open, contact your
Formula dealer to service the engine.
CAUTION
WARNING
!
WARNING
!
CAUTION
Page 69
7-3
FORMULA
OPERATION
FASTECH
SHIFTING
●
Go slowly in REVERSE to avoid taking
water in over the transom. You can
swamp the boat by taking on too much
water.
●
Do not shift too quickly from FORWARD
to REVERSE. Damage to the engines
may result. When shifting from
FORWARD to REVERSE, pause in
NEUTRAL until the engines are at idle
speed and the boat has slowed.
Follow these guidelines when shifting your boat:
●
Keep the control area clean and clear of
obstructions.
●
Pause in NEUTRAL before shifting from
FORWARD to REVERSE, or REVERSE to
FORWARD.
●
Avoid shifting into REVERSE while the boat
is traveling forward at speed.
STEERING
The boat’s steering system is not selfcentering. Propeller torque, trim setting,
water condition and boat speed affects the
steering. Constant attention to the steering
system is required for safe operation.
The steering system must be working correctly
and properly maintained. Be sure to:
●
Keep mooring lines, tow lines and other
obstructions clear of the steering system.
●
Keep the steering system’s moving parts
clean and lubricated.
●
Regularly inspect the steering system for
kinks, damage and corrosion.
RUNNING
Make sure the transom door remains closed when
operating your boat. Observe the tachometers
and maintain equal RPMs on both engines.
Exhaust Diverter System (optional on select
stern drives)—Some stern drive Formulas have
an optional exhaust diverter system which
switches the output of the engines’ exhaust either
to thru-hull exhaust pipes (above water) or down
through the propeller hub (below water). The
exhaust diverter switch determines the routing of
the engine exhaust.
In the ON position, engine exhaust is routed
through the hull pipes. This position produces the
most engine power, but is not acceptable near
shore or on inland lakes and rivers.
In the OFF position, engine exhaust is routed
down through the hub of the propeller. This
position releases the exhaust underwater
providing a quieter engine sound.
Be sure to check local regulations regarding noise
restrictions before operating this system.
To avoid damage to the exhaust system,
do not switch the exhaust above 3,000
RPM.
STOPPING
Stopping (checking headway) is a technique that
must be developed. Reverse thrust of the engines
is used to slow and stop the boat. The boat’s
momentum will vary according to load, speed and
water condition. Slow the engine speed to an idle,
shift to NEUTRAL and pause, before shifting to
REVERSE. Refer to your propulsion unit
operator’s manual for additional information
concerning shifting.
Stopping Gas Engine
Do not use the ignition safety switch and
lanyard for normal stopping of the
engines. Doing so will impair your ability
to restart the engines quickly or may
create a hazardous swamping condition.
1. Slowly bring the throttle lever(s) to the IDLE
position.
2. Move the shift lever(s) to NEUTRAL.
3. After operating at high speeds, allow a 2-3
minute engine cool-down period at low idle.
4. Turn the ignition keys to OFF position.
CAUTION
CAUTION
WARNING
!
WARNING
!
Page 70
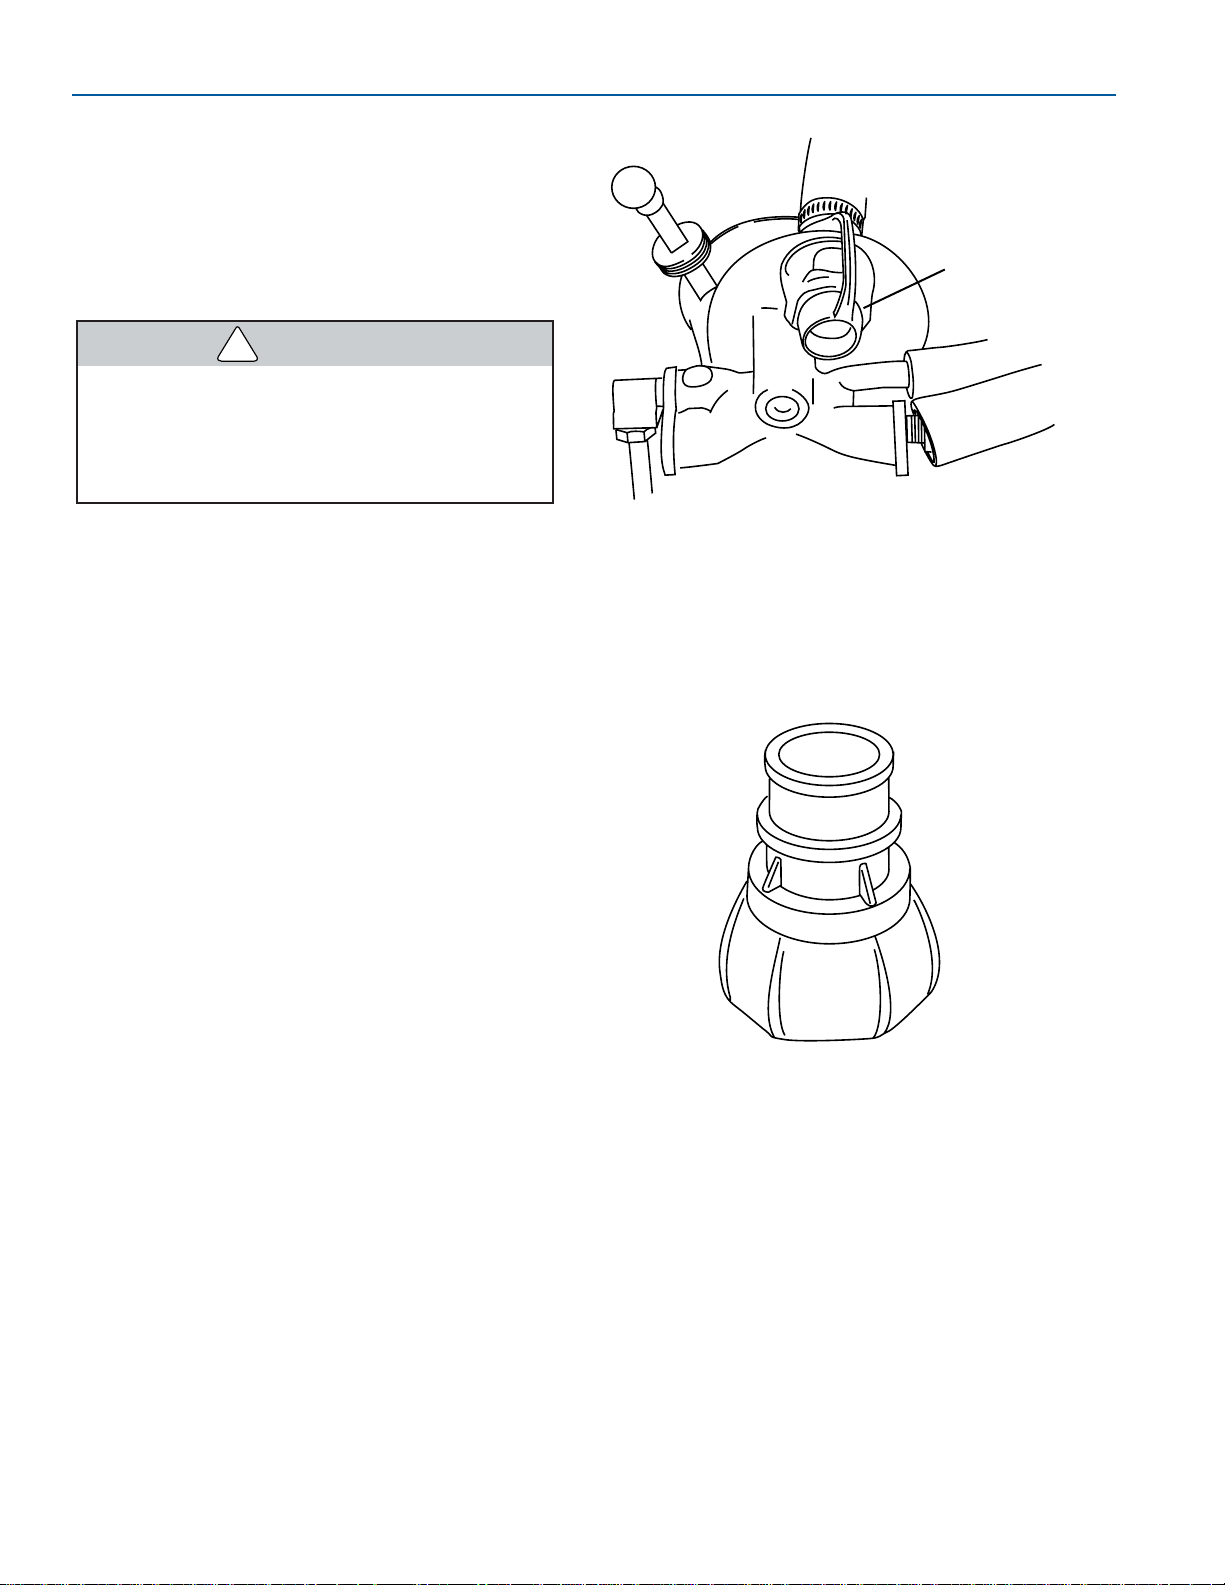
7-4
FORMULA
FASTECH
FASTECH
NOTICE
If any problems are encountered during the
outing, have your boat inspected by your
Formula dealer and request any necessary
repairs before your next outing.
Stopping Diesel Engines
Do not use the ignition safety switch and
lanyard for normal stopping of the
engines. Doing so will impair your ability
to restart the engines quickly or may
create a hazardous swamping condition.
1. Slowly bring the throttle lever(s) to the IDLE
position.
2. Move the shift lever(s) to NEUTRAL.
3. Move the throttle lever(s) forward until engine
speed is approximately 1400 RPM. Refer to
propulsion unit operator’s manual for cool
down procedure.
4. After cooling the engines, move the throttle
lever(s) back to the IDLE position.
5. Turn the ignition keys to OFF position.
NOTICE
If any problems are encountered during the
outing, have your boat inspected by your
Formula dealer and request any necessary
repairs before your next outing.
ENGINE FLUSHING
If your engines are not equipped with a closewater cooling system, fresh water flush your
engines after each use in salty, polluted or
brackish water. Flushing your engines will
minimize the formation of deposits that can clog
cooling passages.
Formula offers a fresh water flushing system on
engines that do not have a closed-water cooling
system. The optional flushing port is located on
the front starboard side of the engine.
1. Fresh Water Flushing Port
An adapter is included with your boat to connect a
garden hose to the port.
Flushing Adapter
Figure 7-2
Fresh Water Flushing Port
Figure 7-1
1
FOR052
FOR053
WARNING
!
Page 71
7-5
FORMULA
OPERATION
FASTECH
NOTICE
Your Formula boat must be out of the water
and on a trailer or lift when the engine is
flushed.
To Flush an Engine:
1. Remove cap from flushing port.
2. Connect a garden hose to the adapter. Snap
the adapter into the port. Do not turn on the
water until the engine is started.
3. Start the engine to be flushed. Immediately
turn ON the water. Run the engine at idle
speed only for 5 to 10 minutes.
4. Turn OFF the engine and the water. Depress
the tab on the adapter to remove it. Install the
cap on the flushing port.
OPERATING AT HIGH SPEED
● Maneuverability above 50 MPH is
limited. Sudden turns may cause loss of
control.
● Your Formula boat is not designed for
wake jumping. When crossing another
boat’s wake, throttle back to prevent
your boat from leaving the water. Wake
jumping is very dangerous. It is
possible for the boat to reenter the
water on its side, transom or bow. You
and your passengers could suffer
serious injury. Also, damage to the boat
could take place causing a hazardous
condition.
When operating any boat at high speed, exercise
a great deal of caution. This is particularly true
during turns. Gradual turns can be completed at
high speed by a competent driver, but, it must be
emphasized that sudden turns at any speed and
particularly at high speed can be especially
dangerous. It is possible to throw passengers
from their seats and even from the boat if caution
is not exercised. Remember, common sense is
the rule for safe boating.
We recommend you should have ten hours of
experience with the boat before any full throttle
operation. Do not operate your boat until you are
completely experienced with its handling
characteristics. The following are some guidelines
for performance operation.
●
Keep bottom of the hull clean and free of
barnacles and other growth. Growth on the
hull can slow the boat down considerably.
●
Prepare the boat. Be sure all gear is properly
stowed and compartments are latched.
●
Weight distribution affects performance. Keep
weight in the boat to a minimum and evenly
distributed.
●
The propellers should be of the proper pitch
to turn the recommended RPM rating for the
engine with an average boat load. Refer to
your propulsion unit operator’s manual for
additional information.
●
Watch the tachometer. Keep the engines
within the full throttle operating range. Refer
to the propulsion unit operator’s manual for
full throttle operating range.
Keep one hand on the steering wheel and
the other on the throttle levers at all times.
If the boat begins to operate in an unsafe
way, pull back on the throttle levers. Trim
the drive units IN at the same time. Failure
to maintain control could result in severe
injury or death.
High-speed operation on smooth water is very
stable, but quick reactions and adjustments are
needed to maintain control. Know your limits and
stay within them. Keep one hand on the steering
wheel and the other on the throttle levers;
constant adjustments are necessary for rapidly
changing conditions. Small inputs of throttle and
steering movement are exaggerated at high
speeds. Keep watch well ahead so you have
enough time to react.
WARNING
!
WARNING
!
Page 72
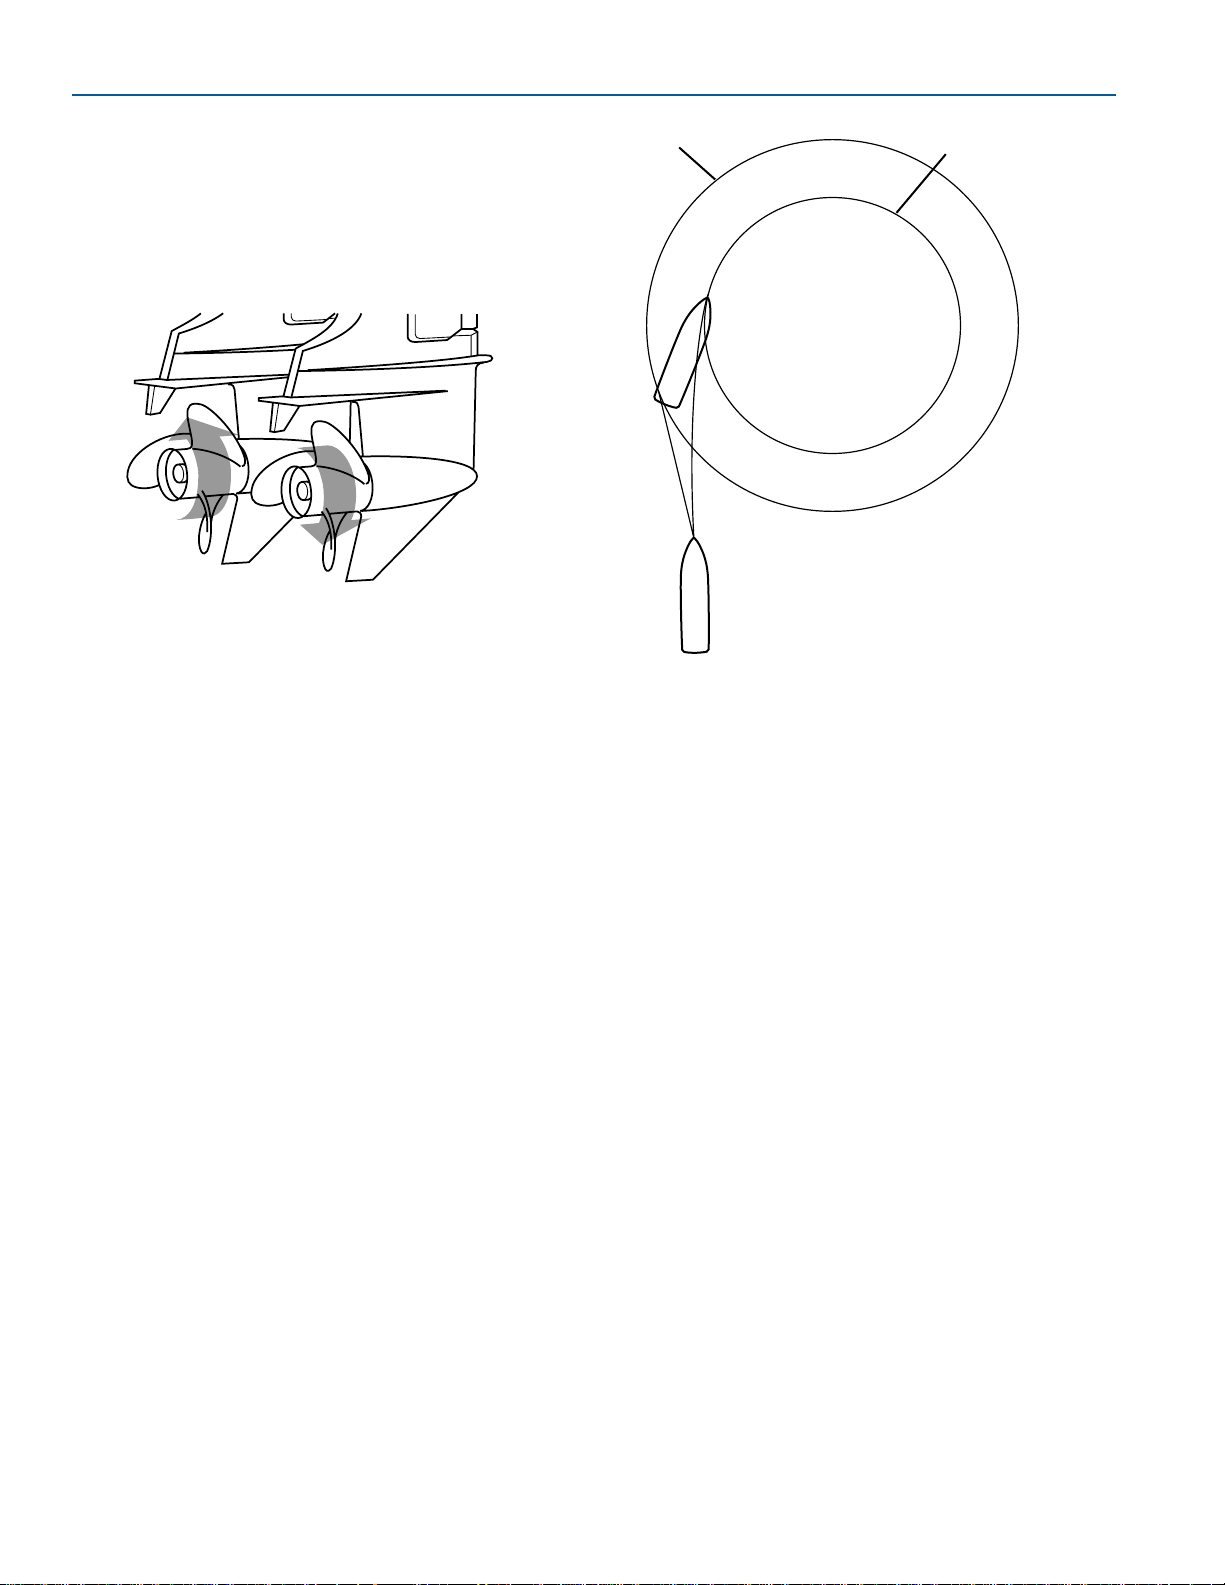
7-6
FORMULA
FASTECH
FASTECH
PROPELLER EFFECT
The effects of unequal propeller thrust, wind and
current must also be kept in mind. While wind and
current may not always be present, an
experienced boater will use them to his
advantage.
Twin-engine craft with counter-rotating drive units
operate with less propeller-torque-induced drifting
as compared to the same craft with like-rotating
drives or, for that matter, single-engine boats with
one propeller. This helps maintain an even keel,
as the torque of the counter-rotating propellers is
effectively a “wash.”
MANEUVERING
TECHNIQUES
Steering response depends on drive unit position,
trim tab position, motion and throttle.
Propeller Effect
Figure 7-3
1. Stern Circle
2. Bow Circle
Wandering is a characteristic of all deep vee hulls
at slow speed. There is no cure for wandering,
however, a very basic operational technique can
be applied which will minimize this characteristic.
If the steering wheel is moved back and forth to
compensate for wandering, invariably, the
situation will be magnified. If the steering wheel
remains in a centered position, the boat will
wander back and forth slightly, however, the
overall course of the boat will be a straight one.
When operating your Formula boat at low speeds,
use propeller thrust to maneuver the boat, do not
just turn the drive units. This enables you to
maneuver in a smaller area and have more
control of the boat. This technique is a
combination of propeller direction, engine thrust
and steering wheel maneuvers.
Maneuvering
Figure 7-4
1
2
KC-2340
FOR173
Page 73
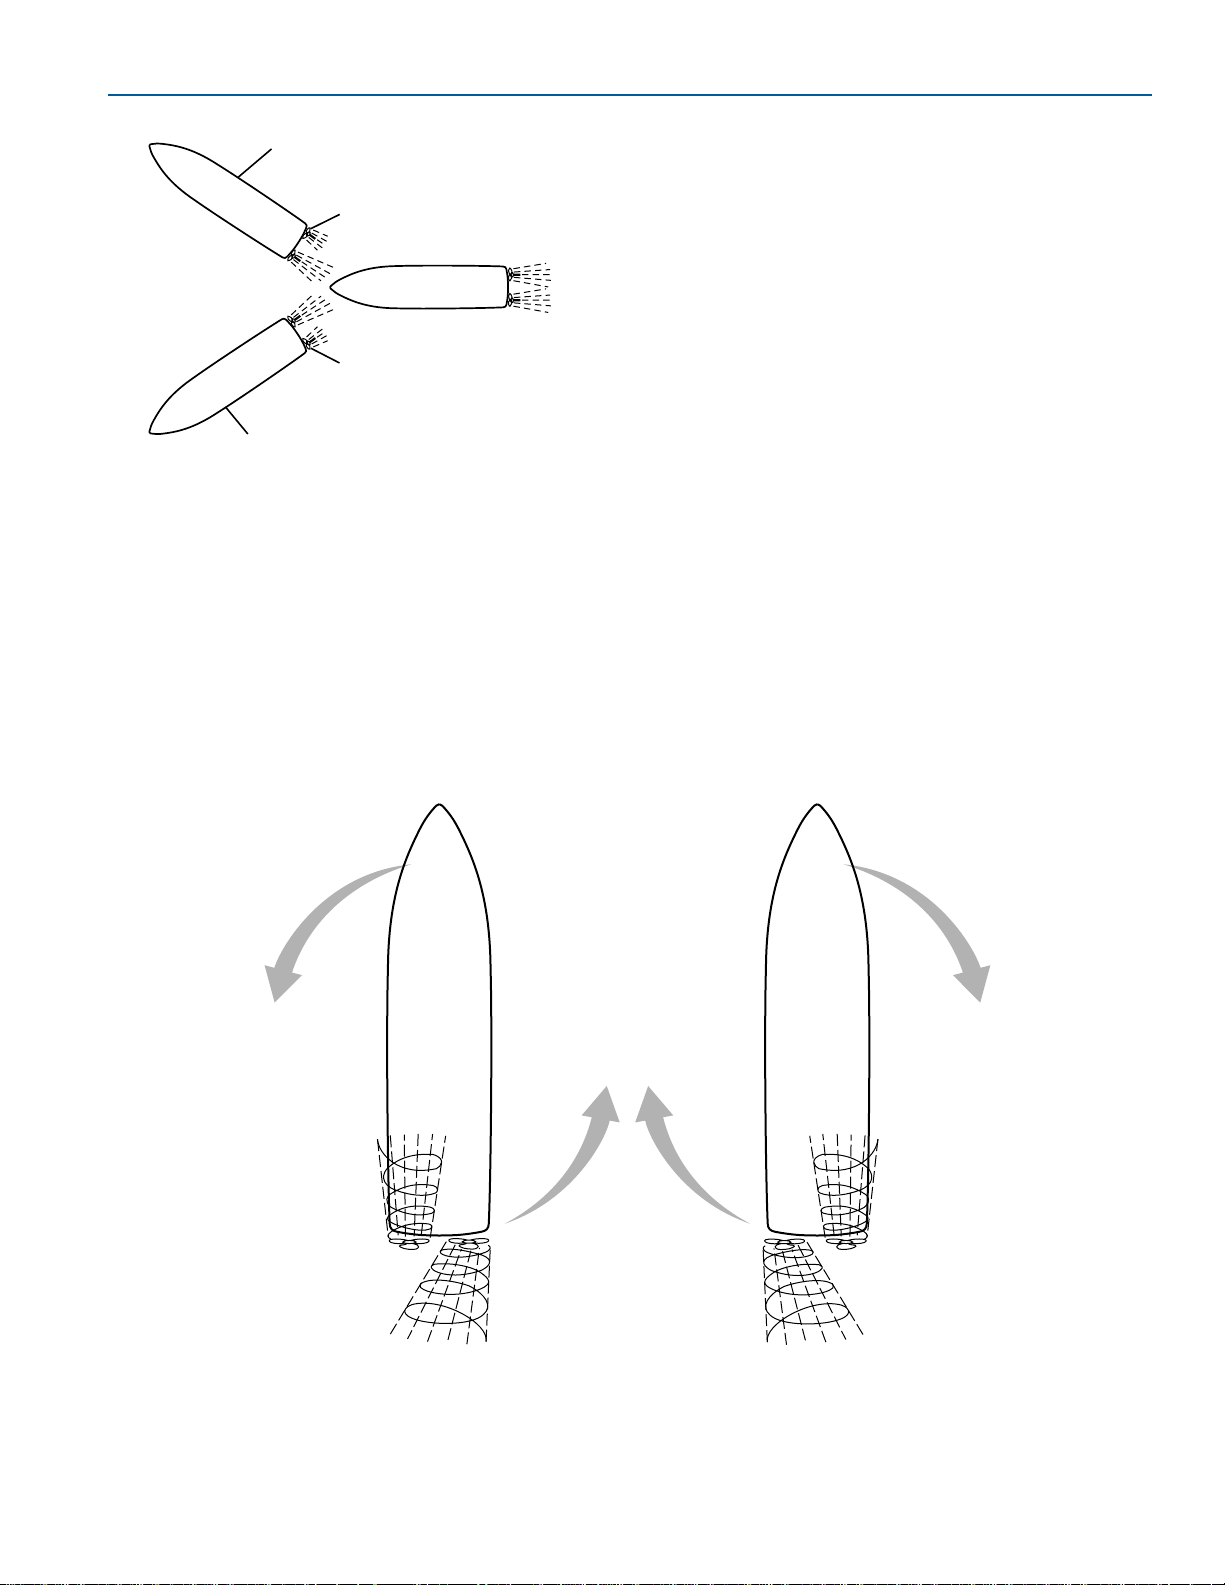
7-7
FORMULA
OPERATION
FASTECH
1. Starboard Turn
2. Slower Propeller
3. Port Turn
When making tight maneuvers, it is important to
understand the effects of turning. Since both
thrust and steering are at the stern of the boat,
the stern will push away from the direction of the
turn. The bow follows a smaller turning circle than
the stern.
Slow Speed Maneuvering
Figure 7-5
1
2
2
3
To Make Sharp and Close Quarter Turns:
1. Slow engine speed to an idle, shift to
NEUTRAL and pause, then shift to
REVERSE. This practice will help prevent
damage to your drive units.
2. Reverse the direction of the propeller on the
side you want to turn. For example, if you
want to turn starboard, shift the starboard
engine into REVERSE. The forward speed of
the port engine, along with the reverse
rotation of the starboard propeller, will pivot
your boat into a starboard turn.
3. Practice using the shift lever(s) to control the
boat. Try maneuvers in open water before
attempting them near docks or other boats.
4. Use a quick “burst” of your shifters to control
the boat. Keep in mind that once the boat
starts to move, momentum will carry through.
Close Quarter Turns
Figure 7-6
FOR175
FOR174
Page 74

7-8
FORMULA
FASTECH
FASTECH
It is best to learn maneuvering skills in open water
away from traffic. Adequate practice is the only
way to develop your boating skills.
BOATING AT NIGHT
NOTICE
Operate the boat between sunset and
sunrise using your navigational lights.
Navigational lights are legally required to
indicate direction and right-of-way at night.
Boats operating between sunset and sunrise
(hours vary by state) must use navigational lights.
Nighttime operation, especially during bad
weather or fog can be dangerous. All Rules of the
Road apply at night; it is best to slow down and
stay clear of all boats, regardless of who has
right-of-way.
Protect your night vision by avoiding bright lights.
Have a passenger, if possible, help keep watch
for other boats, water hazards, and aids to
navigation.
The size, speed, and direction of the other
vessels are determined at night from the running
lights. Agreen light indicates the starboard side of
the boat, and a red light indicates the port side.
Generally, if you see a green light, you have the
right-of-way; if you see a red light, give-way to
that vessel.
Navigational Lights
You must use your navigational lights (running
lights) when operating your Formula boat between
sunset and sunrise, and when day time visibility is
limited. Also, check with the local authorities
before operating your boat for other requirements
concerning the use of navigational lights.
The navigational lights are identified by a red light
on the port side of the vessel, and a green light
on the starboard side.
Anchor Light
All boats at anchor must display a proper white
anchor light. The anchor light (all around light) is
the white light located on top of the radar tower.
The anchor light must be visible 360 degrees and
remain on anytime the boat is moored.
Docking lights are to be used for docking only. It is
illegal to use your docking lights while cruising.
SPECIAL OPERATING
CONDITIONS
Using your boat in different environments requires
special operating considerations.
Salt Water
During long periods of mooring, if possible, tilt the
propulsion units drives out of the water—except in
freezing temperatures.
Fresh water flushing of the engines is
recommended after operating in salt, polluted or
brackish water. On non-closed water cooling
engines, Formula may provide a fresh water
flushing port. Refer to Engine Flushing, in this
section, for additional flushing information.
Refer to the propulsion unit operator’s manual for
that manufacturer’s salt water operating
recommendations.
Freezing Temperatures
When boating in temperatures below freezing,
keep the propulsion unit’s drives tilted down
(submerged) at all times. This will prevent
damage from freezing.
Upon removing your Formula boat from the water,
leave the drive units in the vertical position until
the cooling system has drained. Refer to your
propulsion unit operator’s manual for additional
information.
Use caution when handling clear vinyl canvas in
low temperatures to prevent damage from
cracking.
HOLDING POSITION
Wind and/or current will affect the boat’s speed,
course and time to reach your destination. When
traveling to your destination, wind and/or current
will cause the boat to deviate from the intended
course. The amount of difference between the
intended course and the course the boat must
travel to reach your destination is called leeway.
The wind or current pushes sideways on the boat
causing it to travel at an angle to the intended
course. The speed of the boat determines the
amount of leeway between the intended course
and the traveled course.
Page 75
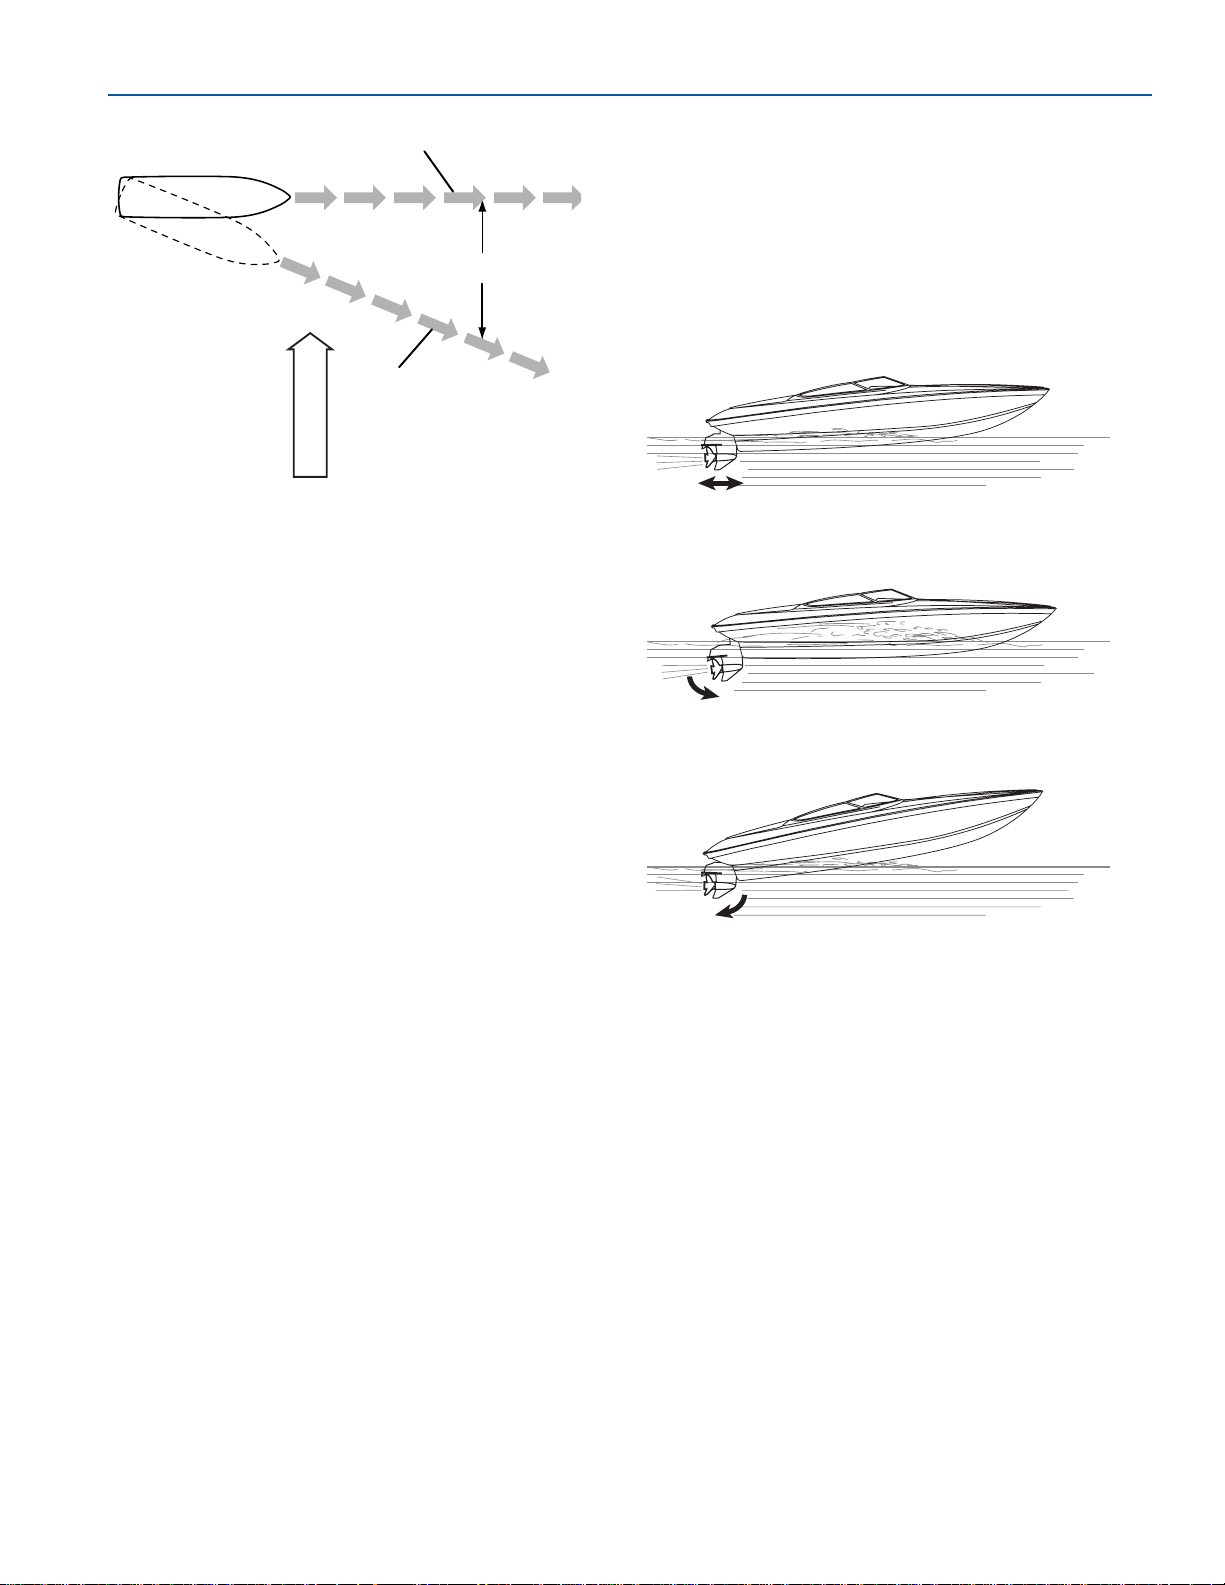
7-9
FORMULA
OPERATION
FASTECH
1. Intended Course
2. Traveled Course
3. Wind/Current
4. Leeway
TRIMMING-DRIVE UNITS
AND TRIM TABS
Boat trim while on plane is influenced by load
distribution, drive unit trim and trim tab trim.
Determining the best boat trim while underway
takes time. It is best to experiment with different
drive and tab trim combinations while taking note
of the condition.
Drive Unit
Trim angle is the angular relationship between the
drive unit and the transom of the boat. Boat trim
while underway greatly affects the performance
and efficiency of your boat. For best results, the
boat should be on plane and trimmed to reduce
the amount of the boat’s hull in the water (known
as wetted surface). With less boat in the water,
both speed and fuel economy increase.
Continuous trim adjustment is required when
operating your boat to maintain maximum
performance and efficiency.
Effects of Wind/Current
Figure 7-7
3
4
1
2
If the drive units are trimmed in too far (closer to
the boat bottom), speed drops, fuel economy
decreases and the boat may not handle correctly.
However, it does provide better acceleration from
a stand still; and because it forces the bow down,
visibility is improved. If the drive units are trimmed
out too far (away from the boat bottom), steering
torque may increase, the boat may be difficult to
get on plane, and may bounce.
To use power trim effectively, start with the drive
units trimmed in. As the boat planes, increase the
angle out. Experience is the best teacher for
understanding proper drive trim.
FOR193
MODERATE TRIM OUT
FULL IN
EXTREME TRIM OUT
Drive Angle Trim
Figure 7-8
FOR216
Page 76
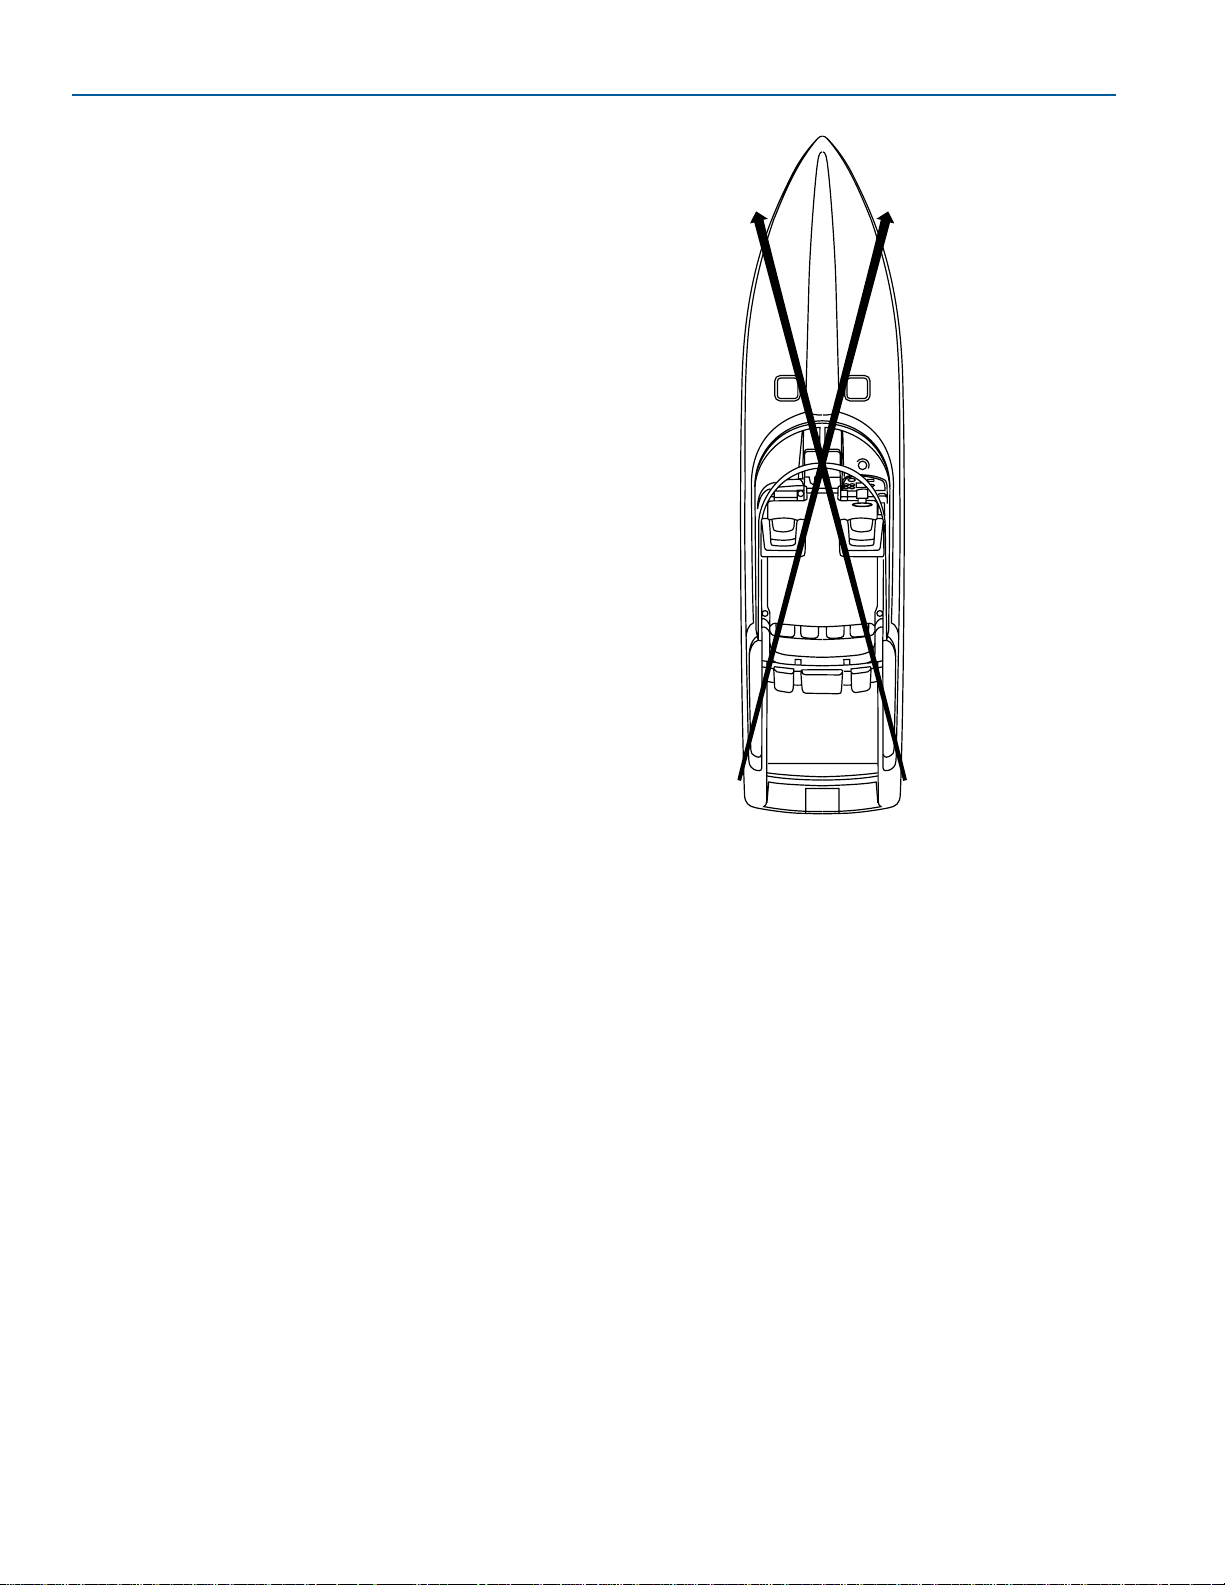
7-10
FORMULA
FASTECH
FASTECH
Trim Tabs
The trim tabs are a separate system in
themselves and are not to be used in lieu of the
drive unit power trim system. Water is deflected
and redirected as the trim tabs are raised and
lowered. This change in the water flow creates
upward pressure under the tabs and raises the
stern. When the stern raises, the bow is lowered.
Likewise, lowering the port tab will cause the port
stern to raise, making the starboard bow lower.
1. Port Trim Tab Lowered
●
Port Stern Rises
●
Starboard Bow Lowers
2. Starboard Trim Tab Lowered
●
Starboard Stern Rises
●
Port Bow Lowers
Trim Tabs
Figure 7-9
12
FOR177
Page 77
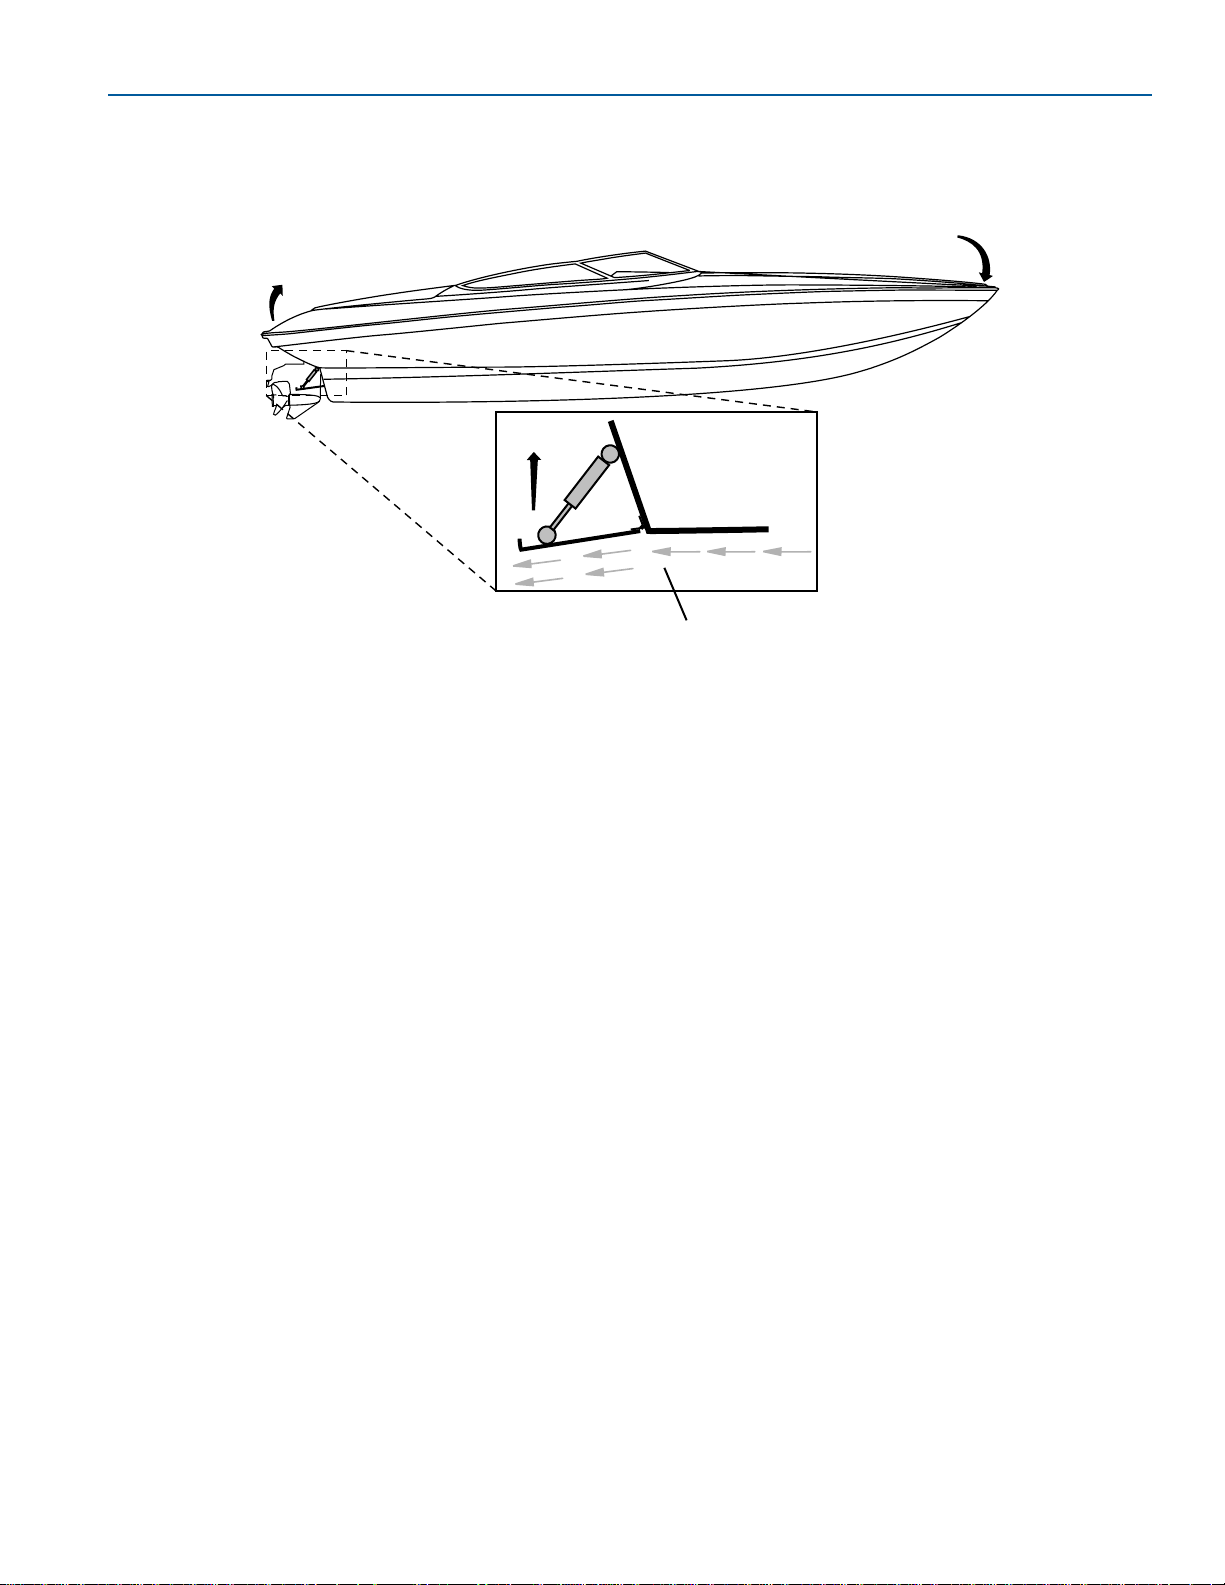
7-11
FORMULA
OPERATION
FASTECH
Using trim tabs in conjunction with the drive trim
will compensate for uneven weight distribution,
listing, water conditions and other factors that
cause inefficient operation. Remember that trim
tabs are trimming the hull while the power trim is
trimming the drive unit.
1
2
3
Trim Tab Operation
Figure 7-10
FOR178
1. Stern Rises
2. Bow Lowers
3. Water Is Redirected Creating Upward Force At Stern
Page 78
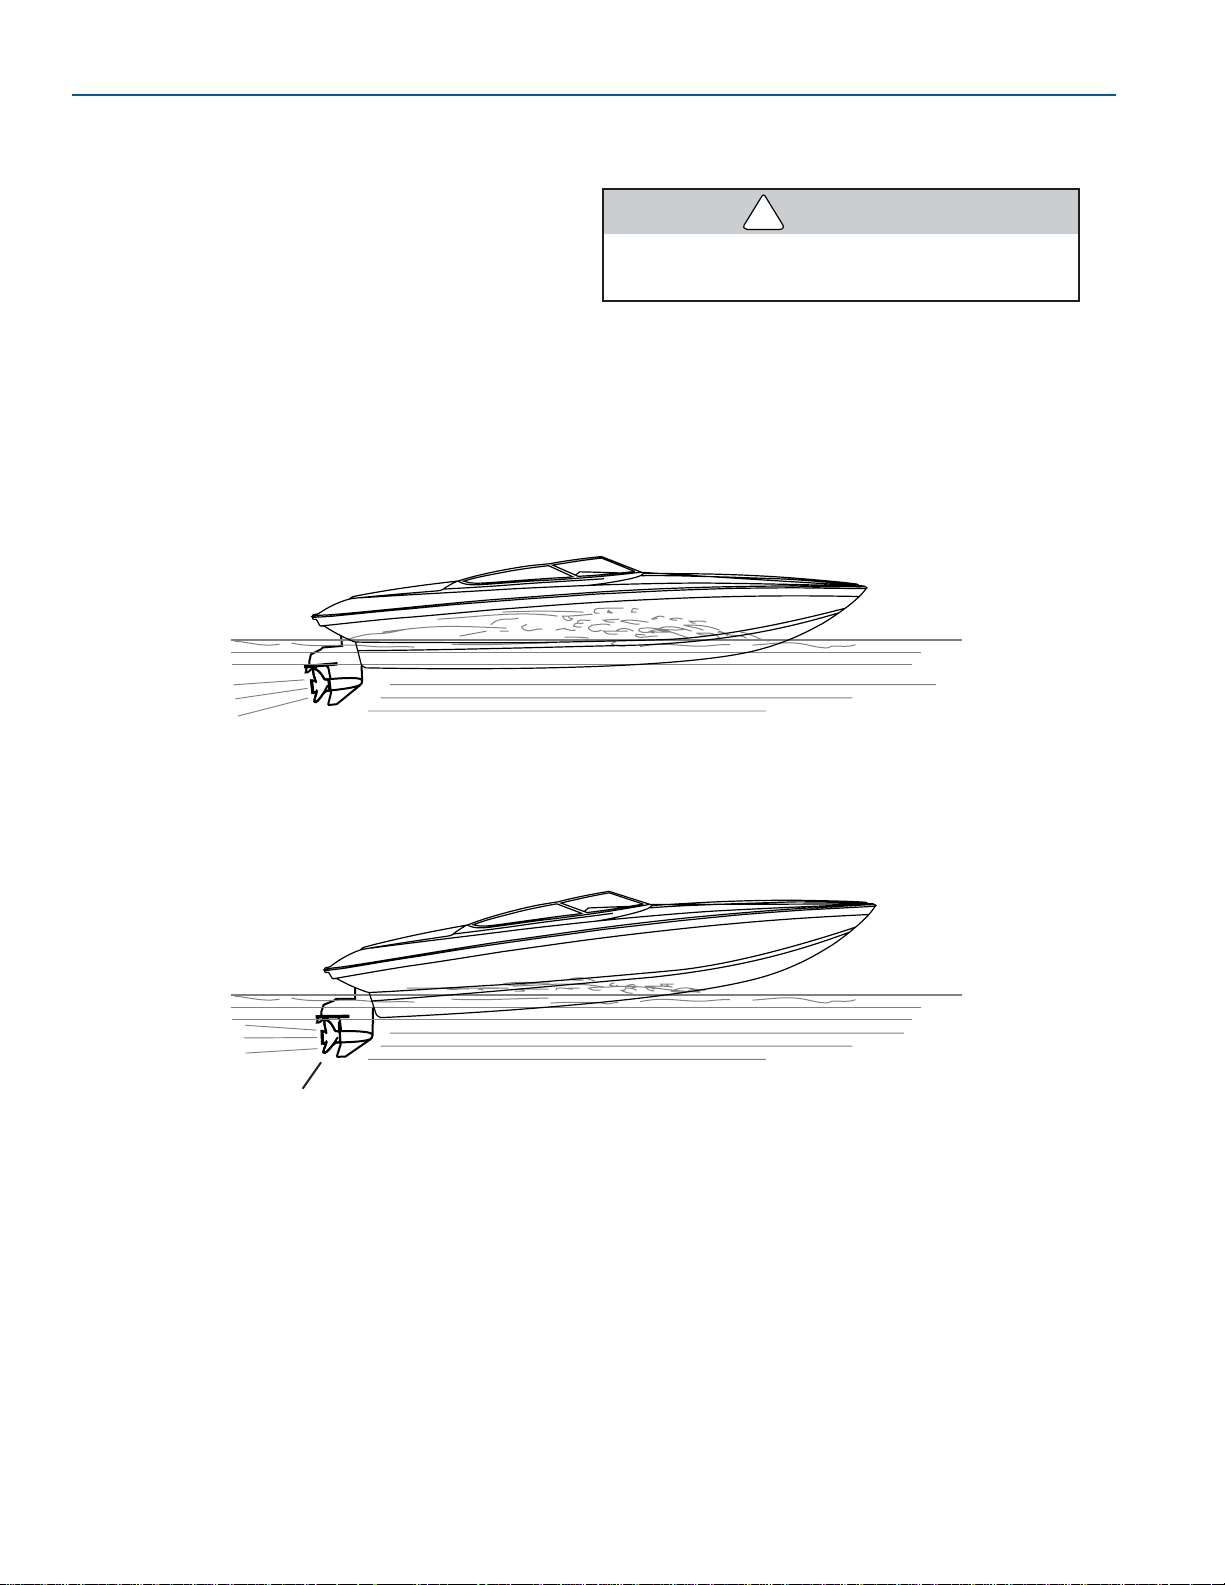
7-12
FORMULA
FASTECH
FASTECH
To adjust boat trim while underway:
1. Before accelerating, make sure both trim tabs
are fully raised.
2. Adjust the trim tabs to achieve a planing
attitude.
3. Use the drive trim to position the propeller
path parallel to the water flow.
4. Readjust the trim tabs to fine tune attitude.
Operate only one tab at a time and in small
increments. As the tab takes effect, you will
notice it causes the boat to veer off course
slightly. Correct for this as it happens.
5. To prevent the boat from listing, do not have
one tab further down than the other tab.
Improper use of the trim tabs at high
speeds can cause an accident or injury.
Trim Tab/Power Trim Operation
Figure 7-11
FOR179
1. Untrimmed
2. Planing Altitude
3. Propeller Parallel To Water Flow
WARNING
!
1
3
2
Page 79
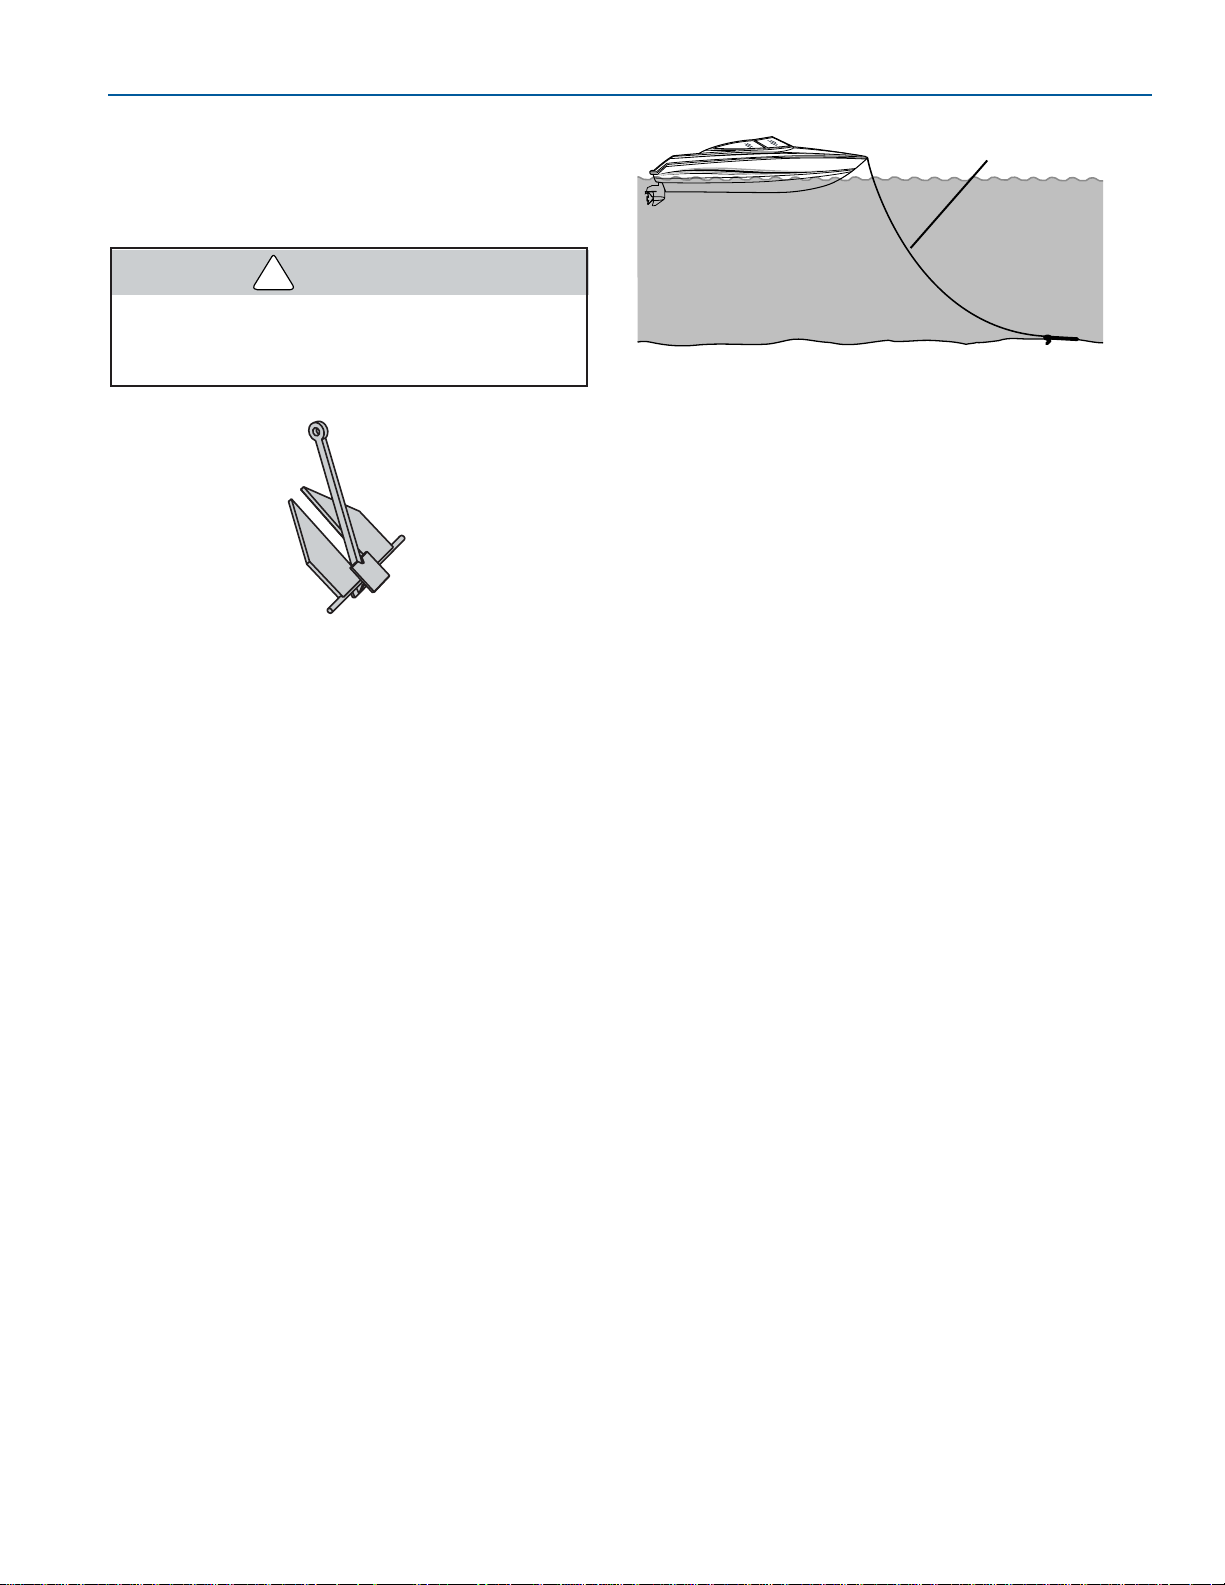
7-13
FORMULA
OPERATION
FASTECH
ANCHORING AND SEA
ANCHORS
Conventional Anchor
Anchor from the bow, not from the stern. A
strong current can pull a boat, anchored
by the stern, underwater and keep it there.
There are many types of anchors available on the
market. The choice of one anchor over another
depends on many factors. An anchor will usually
hold best in a mixture of mud and clay or in hard
sand. ADanforth anchor is recommended for
general boating. For more information on anchors,
contact your Formula dealer.
Lowering—Make sure the line is tied to the
anchor and tie the other end to the forward cleat
or bow eye.
Head the boat into the wind or current over the
spot where you want to lower the anchor. Spot the
boat before lowering the anchor.
Setting—When the anchor hits bottom, slowly
back up the boat, keeping tension on the line. Let
out an anchor line that is 4 to 6 times the depth of
the water. For example, if you are in 10 feet of
water, let out 40 to 60 feet of line.
Danforth Anchor
Figure 7-12
1. Length of Line — 4 to 6 Times Depth of Water
Occasionally, check your position against the
shoreline. If the anchor is dragging and you are
drifting, reset the anchor.
Weighing—Start the engine(s) and move forward
until the anchor line is straight up and down. Pull
hard to lift the anchor from the bottom material.
If the anchor is caught on the bottom, attach a line
to the bow cleat so that it is taut. The up and
down motion of the bow from wave action may lift
the anchor from the bottom. If the anchor remains
caught, let out a few more feet of line and attach it
to the bow cleat. Slowly maneuver the boat
around the anchor until the anchor pulls loose. Be
sure to keep the line tight during this procedure.
Anchoring
Figure 7-13
1
KC-1571
FOR148
WARNING
!
Page 80
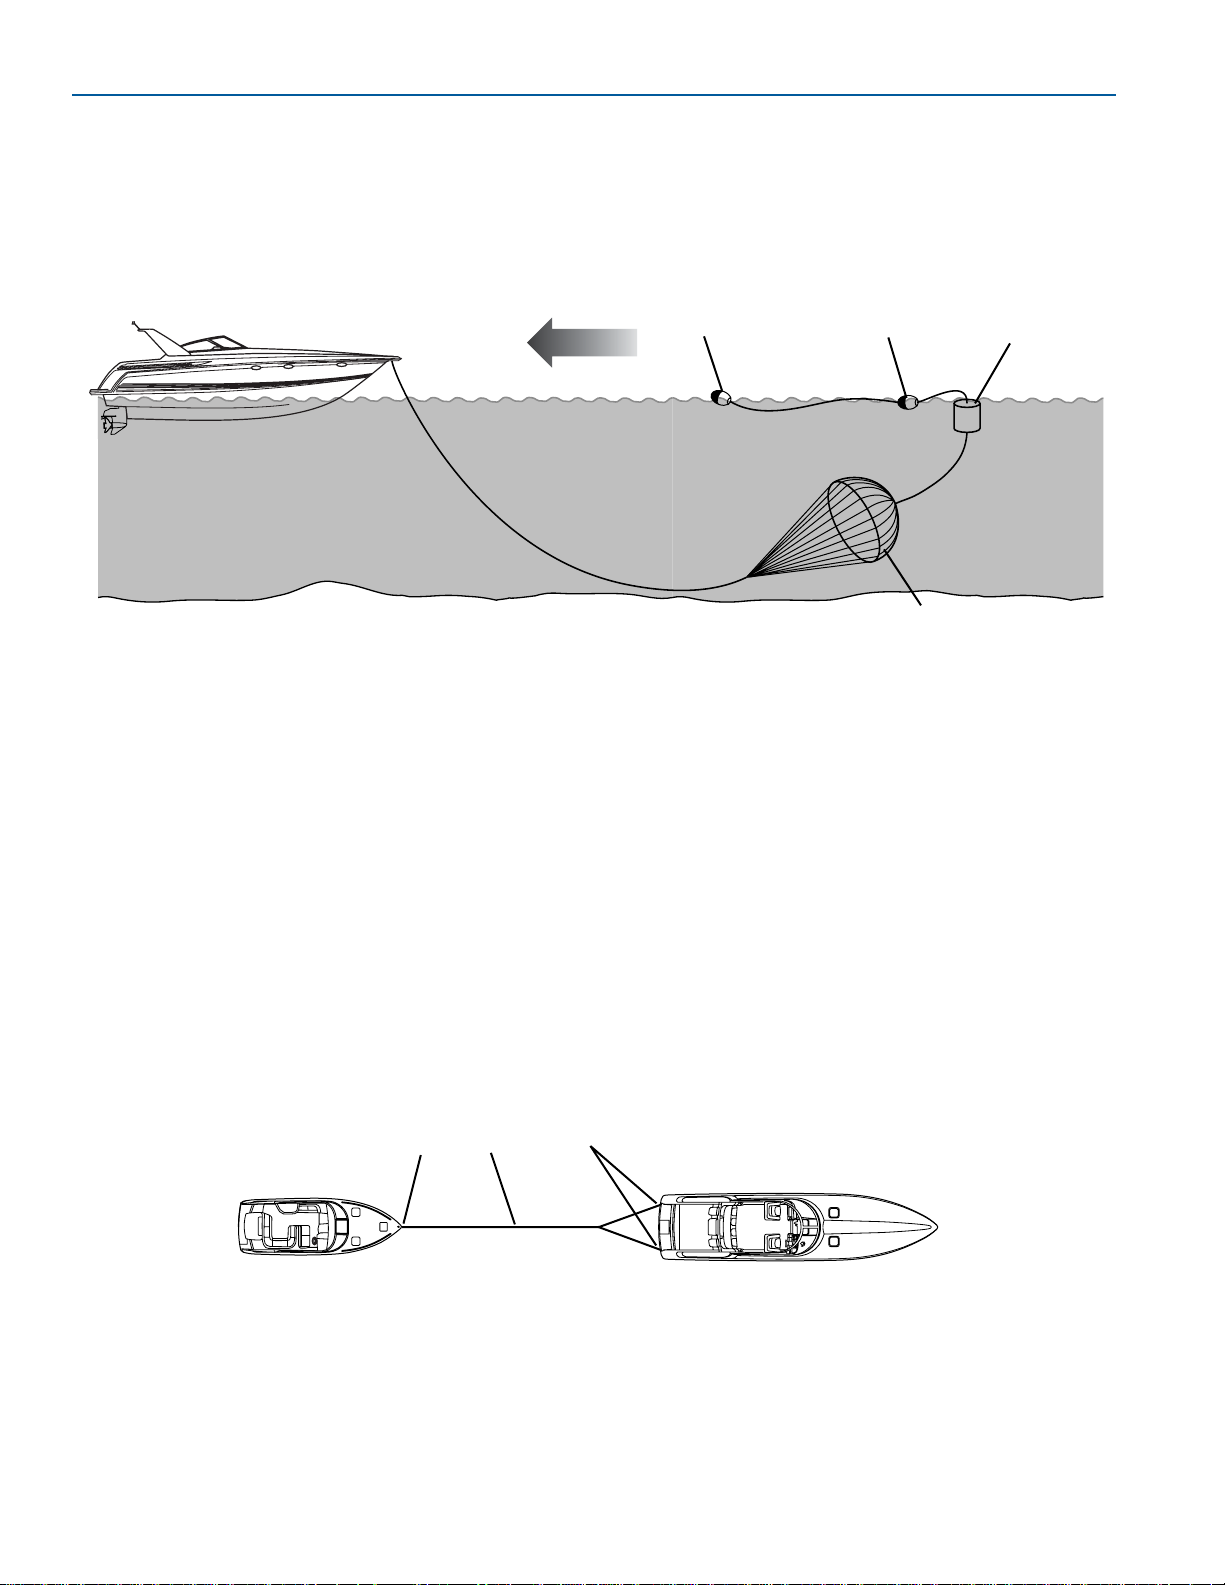
7-14
FORMULA
FASTECH
FASTECH
TOWING AND BEING TOWED
If seas are rough, it may not be easy to extend
the tow line from one boat to another. In these
cases, use a light throwing line with a weight on
one end and with the heavier towing line secured
to it.
Do not attempt to tow a much larger or grounded
vessel. Because of the tremendous stress caused
by towing, use a tow line that is rated at least four
times the gross weight of the boat being towed.
Tow ropes must be in good condition, free of any
cuts or abrasions.
Attach the tow line to the bow eye on the disabled
boat. Attach the opposite end of the bridle only to
the stern eyes of the tow boat. Wrap the bridle
with chafing gear where it rubs against the boat.
Leave at least two boat lengths between the
boats for adequate movement.
Sea Anchor
A sea anchor is used to hold the boat’s bow into
the wind and waves in heavy seas when the boat
has lost its power. This will reduce the drifting of
the boat.
A sea anchor has a general shape of a parachute.
A sea anchor construction can be like a parachute
canopy or a lattice web design. Arope attaches
the sea anchor to the boat. Floats with trip lines
allow the sea anchor to be pulled back into the
boat.
1
2
3
4
1. Recovery Float
2. Float
3. Stowage bag
4. Sea Anchor
Sea Anchor
Figure 7-14
FOR103
1. Bow Eye
2. Tow Line
3. Stern Eyes
Towing
Figure 7-15
12
3
FOR180
Page 81

7-15
FORMULA
OPERATION
FASTECH
When towing, use only the bow and stern
eyes; do not use cleats, handrails, etc. Do
not allow anyone to be in line with the tow
rope. If the rope should break or pull free,
a dangerous recoil could occur resulting in
severe injury or death to anyone in its
path.
Adjust the tow line to match wave action. Keep
the boats on the crest or in the trough of the
waves at the same time. In protected, calm
waters, shorten the line for better handling. Tow at
moderate speed, allowing for adverse wind and
wave conditions. Have the operator of the towed
boat steer with you, if possible.
If you need a tow, or wish to tow another boat,
use great care. The boat structure can be
damaged by excessive pulling strain. You should
offer help to a boat in trouble. However, towing a
capsized, grounded or hull damaged boat is
dangerous. Give assistance to the occupants;
then call the proper authorities.
HEAVY WEATHER
Getting caught in severe weather is hazardous.
Check with local weather stations, the USCG, or
Weather Service Broadcasts for the latest
conditions. It is recommended to check the
weather, sea and wind conditions not only before
you leave, but, periodically while you are boating.
A change in wave height, wind direction and
speed indicates deteriorating weather. Take
common sense precautions if you are forced to
operate you boat in stormy conditions:
●
Wear PFDs.
●
Stow gear below deck and batten down
equipment on deck.
●
Reduce speed and head for a safe place that
you can easily reach.
●
If you lose power, keep the boat headed into
the waves by using the anchor.
WARNING
!
Page 82
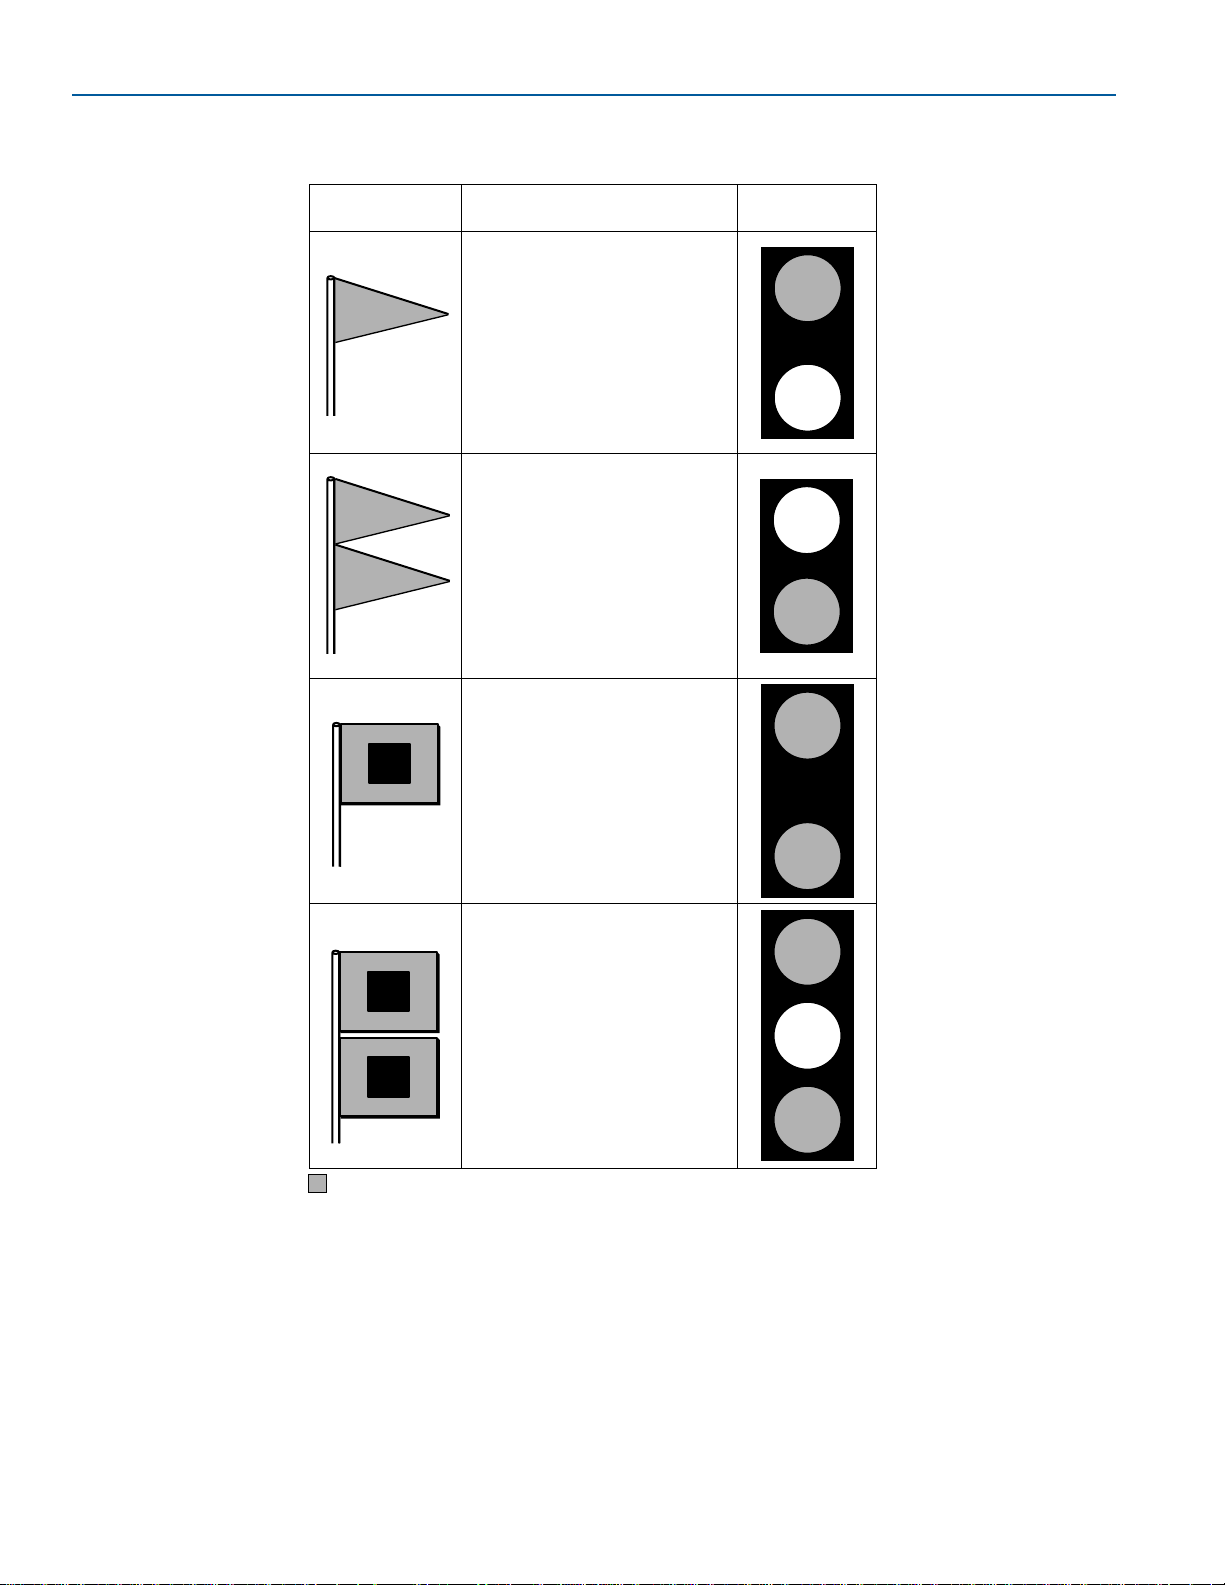
7-16
FORMULA
FASTECH
FASTECH
Learn the storm signals.
five-second blast from your horn or whistle once
every minute. Additionally, have passengers wear
PFDs and watch for oncoming vessels.
It is best to avoid operating your boat in foggy
weather. When fog sets in take bearings and log
courses and speeds. You are required to emit a
Storm Signals
Figure 7-16
DAYTIME
WARNING
NIGHTIME
WARNING
DESCRIPTION
Actual Signal in red
Small Craft Advisory - Winds
greater than 18 knots,
sustained for two hours or more
or hazardous wave conditions.
Following a storm, hazardous
wave conditions can persist
long after the high winds have
subsided.
Gale Warning - Sustained
winds (2 or more hours), of 34-
47 knots.
Storm Warning - Sustained
winds of 48 knots or greater.
Hurricane Warning - Forecast
winds of 64 knots and above.
Displayed only in connection
with a hurricane.
KC-0371
Page 83
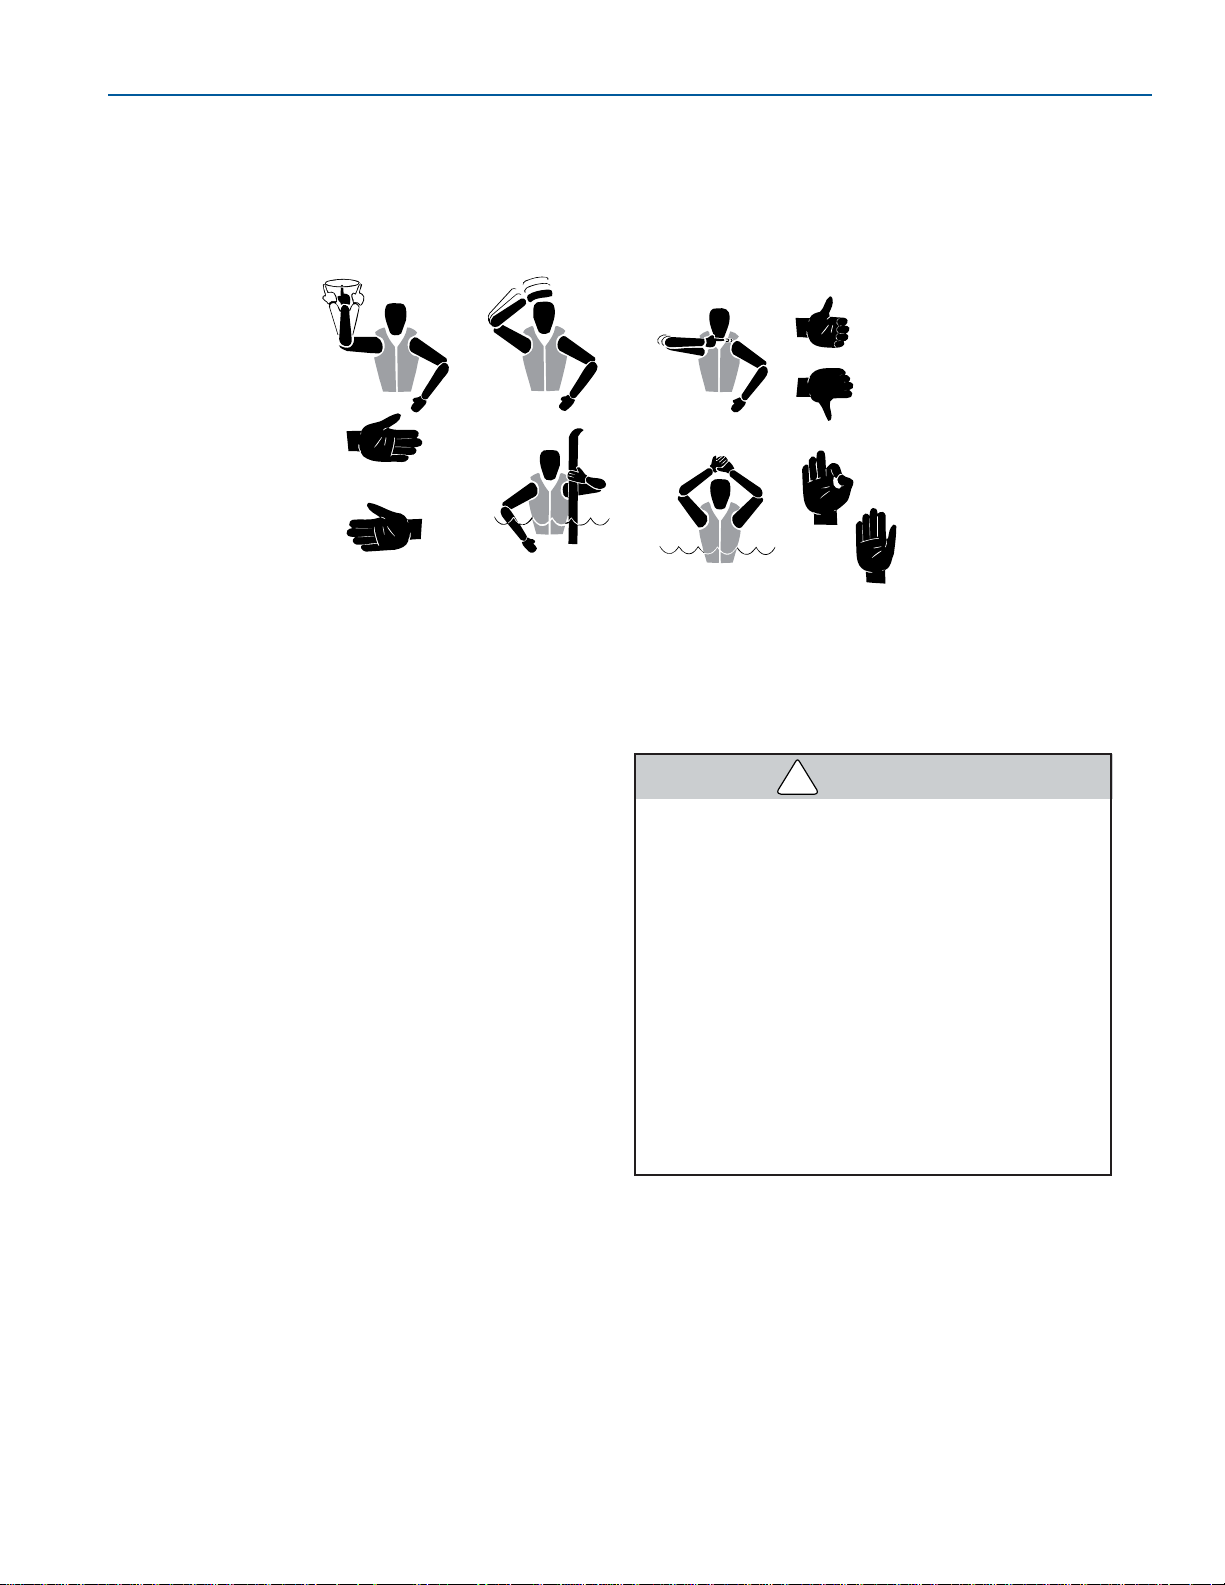
7-17
FORMULA
OPERATION
FASTECH
SWIMMING AND DIVING
Larger boats produce a wake too big for skiers.
Only boats equipped with a ski-tow eye should be
used to pull water skiers. It is unlikely that anyone
would ski behind your Formula boat, but you
should be familiar with water sport safety and
hand signals.
●
Water sport participants must wear a
USCG approved flotation device. A Type
III water ski vest is an approved and
practical PFD.
●
Keep at least 100 ft away from all other
objects.
●
When water sporting, have an
experienced driver and aft facing
observer the boat.
●
Do not water sport in shallow water or
at night.
●
Do not jump from a moving boat.
●
Keep a downed water sporter in sight.
●
Turn the engines OFF before you get
close to someone in the water.
NOTICE
It is unlawful to participate in water sports
while under the influence of alcohol or
other drugs.
When participating in water sports, be safe and
courteous and follow these guidelines:
●
Be considerate to fishermen and others you
share the water with.
●
Do not perform water sports in congested
areas.
●
Stay away from navigation markers.
●
Stay away from other boats and water sports
participants.
●
Return immediately to a fallen water sport
participant.
●
Regularly inspect water sport equipment to
ensure it is safe.
●
Do not use any fuel burning appliances with
a transom exhaust port when swimming from
the stern swim platform.
Water Sport Hand Signals
Figure 7-17
CIRCLE
SPEED OK
TURN LEFT
TURN RIGHT
BACK
TO DOCK
STOP
SKIER IN WATER
WATER SPORT HAND SIGNALS
SPEED FASTER
CUT ENGINE
SPEED SLOWER
SKIERS O.K.
KC-0271
WARNING
!
Page 84
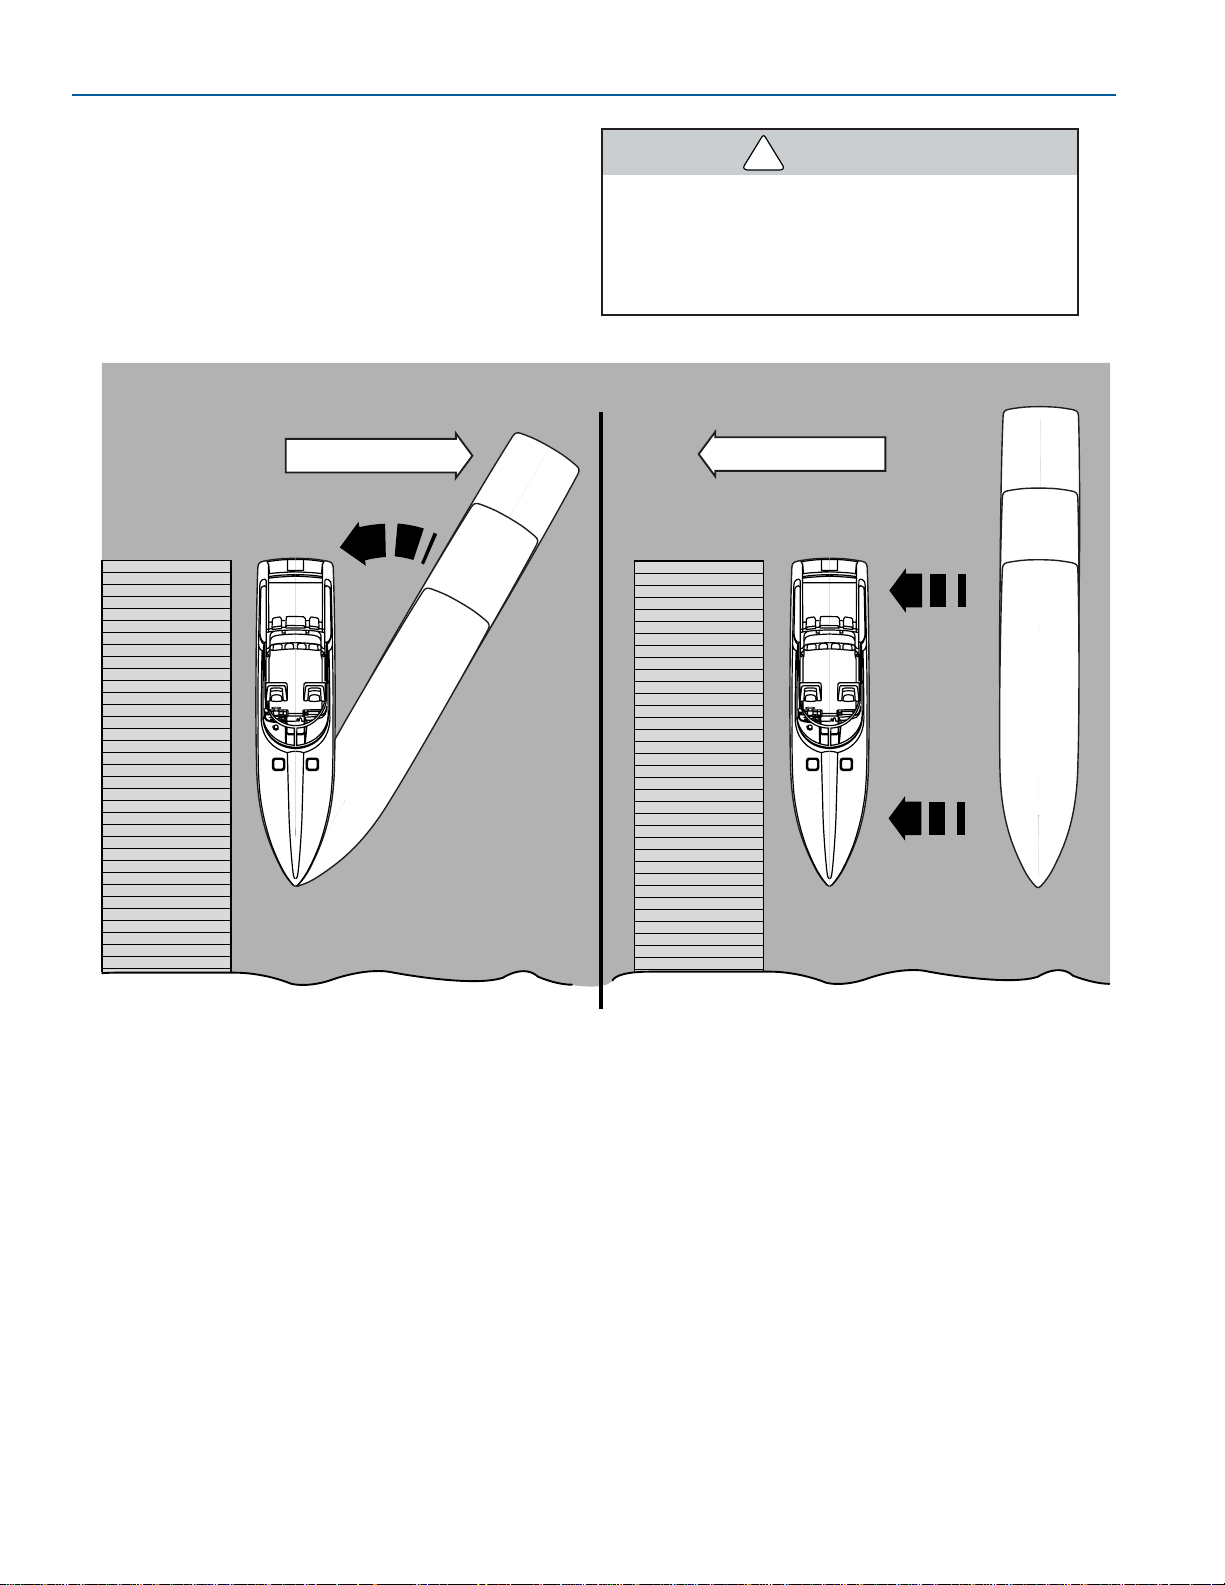
7-18
FORMULA
FASTECH
FASTECH
DOCKING
Approach a dock slowly and use caution. Plan
your maneuvers ahead of time. Allow wind and
current movement to help maneuver your boat.
Do not use your hands, arms or another
part of your body to attempt to keep the
boat from hitting the dock. The boat could
push against the dock, causing severe
injury.
Follow these guidelines when docking:
●
Come to a stop a short distance from the
dock, then proceed slowly.
●
Have your fenders, mooring lines and the
crew ready.
●
Observe how the wind and current are
moving your boat. Approach the dock with
the boat pointed into the wind, if possible. If
the wind or current is pushing you away from
the dock, use a sharper angle of approach. If
you must approach the dock downwind or
down current, use a slow speed and shallow
angle. Be ready to reverse to stop and
maintain position.
●
If there is no wind or current, approach the
dock at a 10° to 20° angle.
●
If possible, throw a line to a person on the
dock and have that person secure a bow line.
If no one is on the dock, maneuver as close
as you can, then secure any line to a piling or
dock cleat.
●
With the bow secure, swing the stern in using
engine thrust, or pull it in with a boat hook.
1. Wind or Current
Docking
Figure 7-18
1
1
FOR181
WARNING
!
Page 85
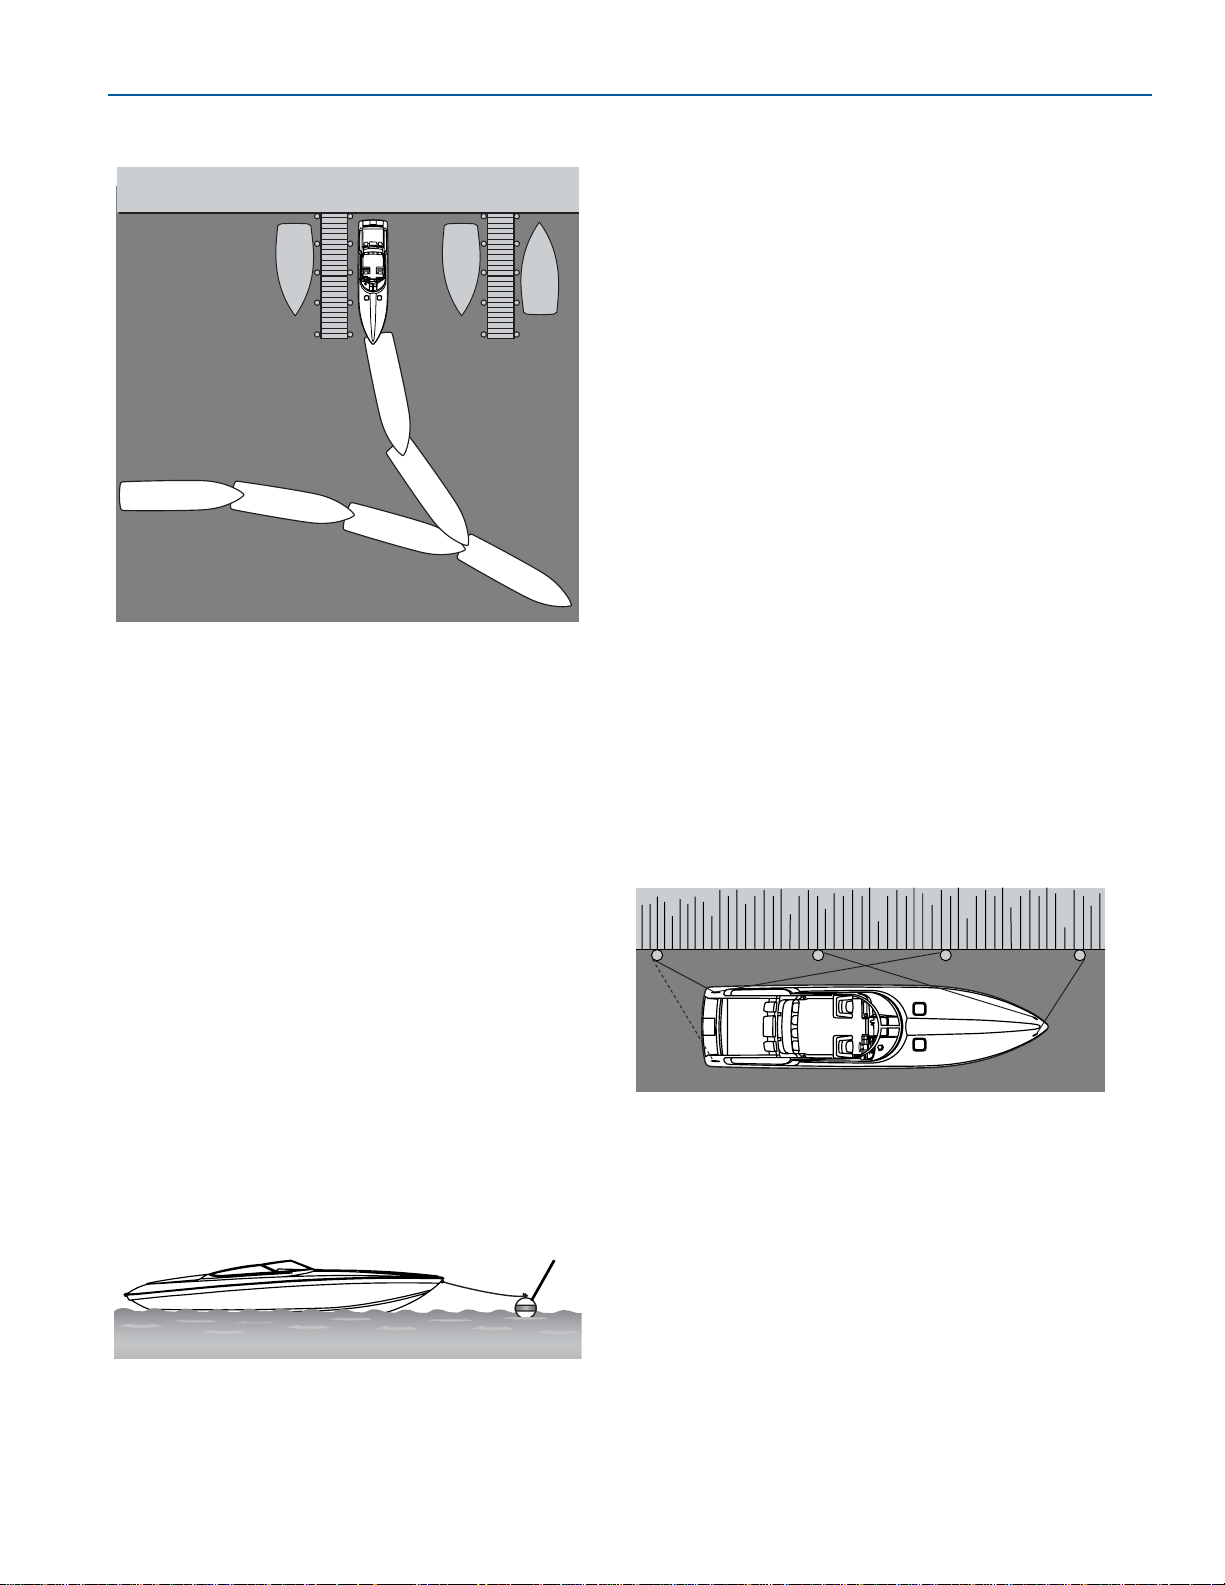
7-19
FORMULA
OPERATION
FASTECH
Approaching a Slip
This maneuver is similar to backing an automobile
into a garage or parking space. When
approaching a slip:
●
Have fenders, mooring lines and the crew
ready.
●
Turn the boat’s stern toward the slip.
●
Shift to REVERSE.
●
Maneuver slowly into the slip then shift to
forward. Use your steering wheel and
throttles to align the boat with the slip.
●
Once aligned, shift to reverse and continue to
back in slowly. Shift to FORWARD when
completely in to stop the movement of the
boat.
●
Shift to NEUTRAL, secure the mooring lines
and stop the engines.
Approaching a Mooring
1. Mooring Buoy
Mooring to a Mooring Buoy
Figure 7-20
1
Approaching a Slip
Figure 7-19
1
2
3
4
5
6
The only buoys you are permitted to moor to are
mooring buoys. Mooring to a navigation buoy or
other navigational aids or regulatory marker is
illegal.
Approach a mooring buoy by heading into the
wind or current. Observe the direction of other
boats that already lie at mooring buoys. Since
they are heading into the wind or current,
approach your buoy at the same heading.
●
When you think you can move enough
forward without using your engines, shift to
NEUTRAL.
●
Have a crew member positioned on the bow
with a hook to retrieve the mooring line. At
that point, the crew member should be
guiding your maneuvers toward the buoy.
●
Turn OFF the engines after the mooring line
is attached to the boat.
MOORING LINES
Only use good quality double-braided nylon line.
Use chafing protectors on the lines to protect your
boat’s finish. Only use the cleats, bow eye and
stern eyes to secure your boat. Do not use the
hand rails or windshield. If possible, tie up your
boat with the bow toward the waves and leave a
little slack in the lines to allow for some wave
movement or tidal action.
1. Stern Line
2. Forward Quarter Spring
3. After Bow Spring
4. Bow Line
Use your dock lines to help maneuver the boat
near the pier and to secure it. Use the following
information to secure your boat to a pile or dock
cleat:
The bow line is fastened to the bow cleat and is
pulled forward at about a 45° angle. This line
keeps the boat from moving astern.
Mooring Lines
Figure 7-21
2
1
3 4
FOR182
FOR183
FOR184
Page 86

7-20
FORMULA
FASTECH
FASTECH
The stern line is fastened to an after cleat and
pulled astern at about a 45° angle. This line keeps
the boat from moving forward.
The spring lines can help you control the boat
when leaving a dock. Be sure to use spring lines
when boating in waters where the tide movement
is significant. The forward quarter spring line is
fastened to a forward cleat and heads aft. The
after bow spring is fastened to a stern cleat and
heads forward.
USING FENDERS
Be sure to use enough fenders to protect your
boat from damage when docking or tying it along
side another boat. Fenders protect your boat from
scarring the finish and cushion it from striking a
solid object.
Using different sized and shaped fenders will
increase the protection of your boat. An average
size cruiser can use six fenders to protect it from
damage.
NAVIGATIONAL HINTS
Learn to recognize the different buoys and day
markers; they are the signposts of the waterways.
There are two primary marking systems in use in
the U.S.; the Uniform State Waterway Marking
System (USWMS) used on inland waters and
maintained by each state, and the Federal
Waterway Marking System (FWMS) used on
coastal waters and rivers and maintained by the
USCG. In addition, the FWMS has two modified
systems; the Western River Buoyage, and the
Intercoastal Waterway Buoyage. Be sure to check
with local authorities on the buoyage system in
use.
The only buoys you are permitted to moor to are
mooring buoys. Mooring to a navigation buoy or
other navigational aid or regulatory marker is
illegal.
1. White with Blue Band—May Show White
Reflector or Light
The type of hazard/warning buoys and markers
depend on the area of jurisdiction. Check with
local boating authorities.
The USWMS Cardinal System is used when there
is no well-defined channel or where an obstruction
may be approached from more than one direction.
With the cardinal system:
●
Pass north or east of BLACK-TOPPED
WHITE buoys.
●
Pass south or west of RED-TOPPED WHITE
buoys.
●
RED and WHITE VERTICALLY STRIPED
buoys indicate boat should pass outside of
the buoy (away from shore).
Mooring Buoy
Figure 7-22
1
FOR115
Page 87
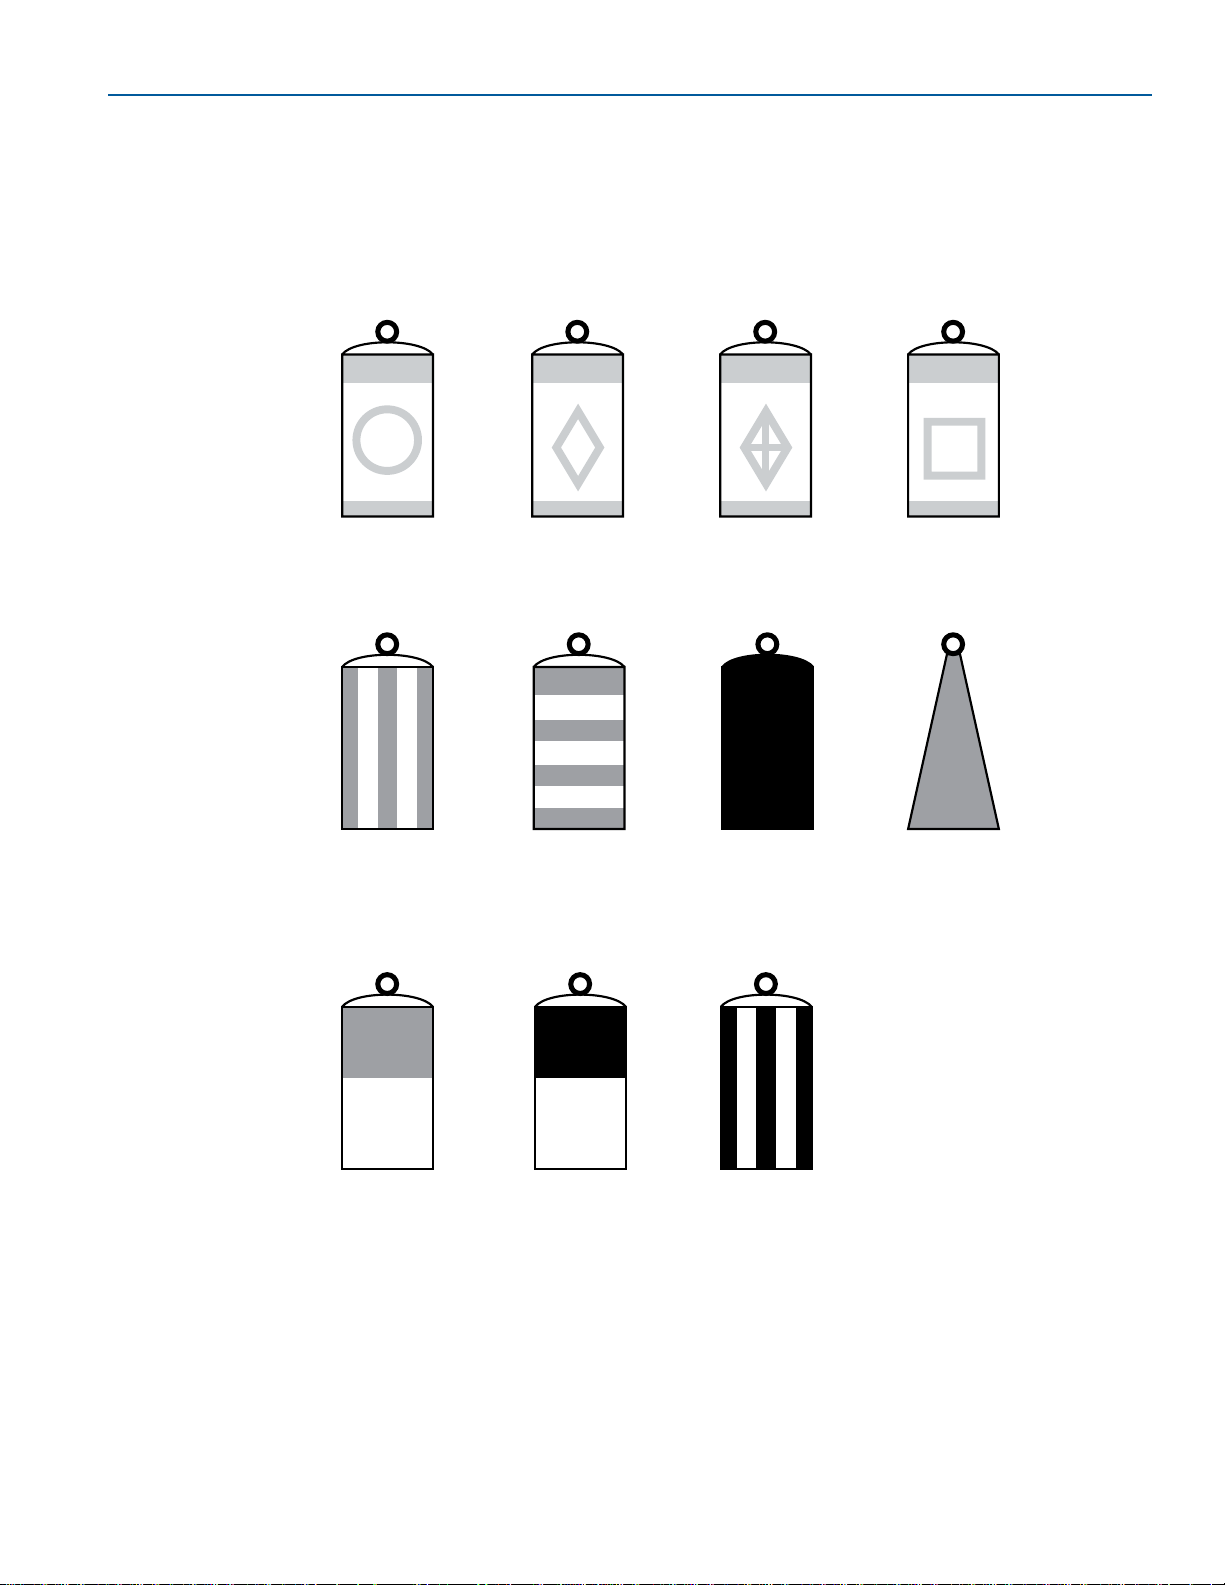
7-21
FORMULA
OPERATION
FASTECH
Uniform State Regulatory Markers
USWMS regulatory markers are white with
international orange geometric shapes; you must
obey regulatory markers.
Uniform State Waterway Marking System (USWMS)
Figure 7-23
CONTROLLED
AREA
DANGER BOATS
KEEP OUT
INFORMATION
DO NOT PASS
BETWEEN SHORE
AND BUOY
SPECIAL
PURPOSE
NAVIGATE TO
STARBOARD
FACING UPSTREAM
NAVIGATE TO
PORT FACING
UPSTREAM
NAVIGATE TO
SOUTH OR WEST
NAVIGATE TO
NORTH OR EAST
MID-CHANNEL
UNIFORM STATE WATERWAY MARKING SYSTEM (USWMS)
KC-0411
KC-0411
Page 88
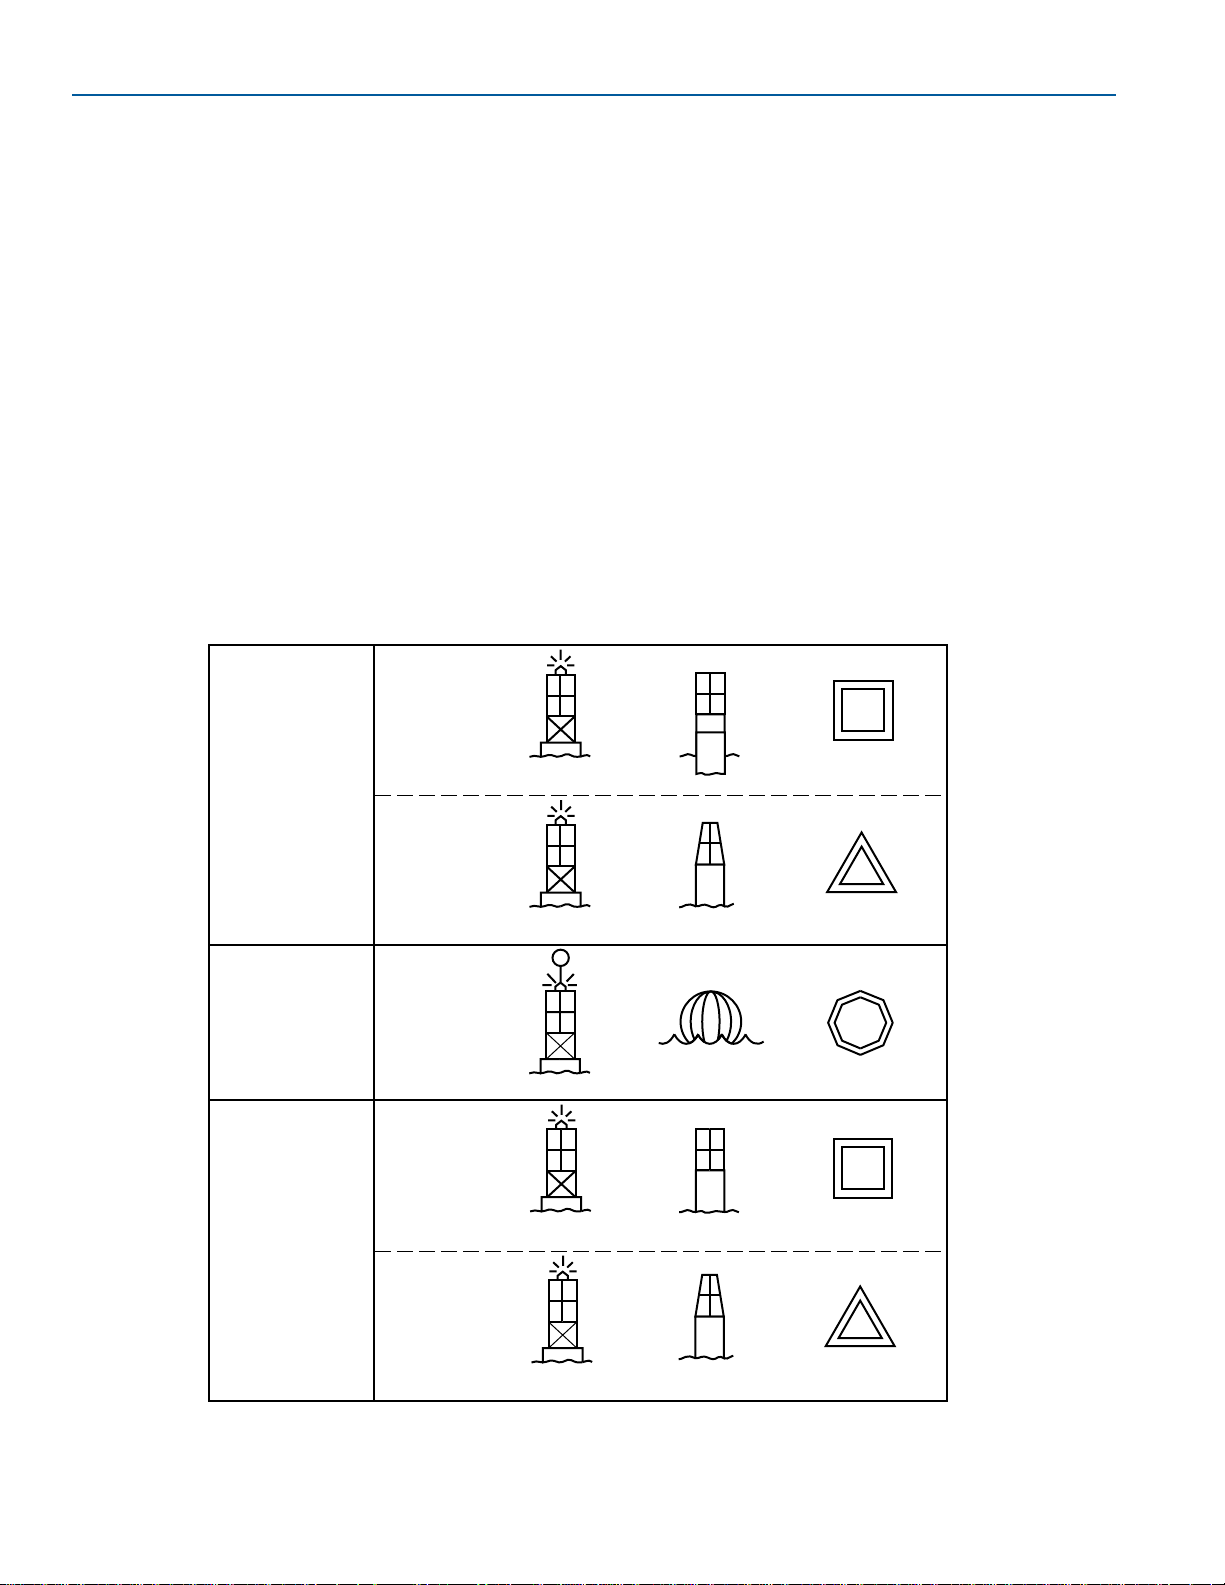
7-22
FORMULA
FASTECH
FASTECH
FWMS
The FWMS Lateral System is for use on
navigable waters except Western Rivers and
Intercoastal Waterways.
The markings on these buoys are oriented from
the perspective of being entered from seaward
(the boater is going toward the port). This means
that red buoys are passed on the starboard (right)
side of the vessel when proceeding from open
water into port, and green buoys to the port (left)
side.
The right side (starboard) of the channel is
marked with RED, even numbered buoys. The left
(port) side of the channel is marked with GREEN,
odd numbered buoys.
The middle of the channel is marked with RED
and WHITE vertically striped buoys; pass close to
these buoys.
Obstructions, channel junctions, etc. are marked
with RED and GREEN horizontally striped buoys.
A RED band at the top means the preferred
channel is to the left of the buoy; a GREEN top
band means the preferred channel is to the right
of the buoy.
Day markers are colored and numbered the same
as buoys. RED, triangular day markers with even
numbers mark the starboard side of the channel.
GREEN, square day markers with odd numbers
mark the port side of the channel.
Lights, bells and horns are used on buoys for
night or poor visibility conditions. Buoys with
unique light flashing characteristics are identified
on nautical charts with the specific flashing
pattern.
Federal Waterways Marking System (FWMS)
Figure 7-24
5
4
3
2
L
B
C
6
1
Lateral Aids Marking
the Sides of Channels
as seen When Entering
From Seaward
Safe Water Aids
Marking MId-Channels
and Fairways
(No Numbers–May be
Lettered)
Port Side
Odd Numbers
(Green)
Starboard Side
Even Numbers
(Red)
Lighted Buoy
(Red Light)
Lighted Buoy
(Green Light)
Can Buoy
Nun Buoy
Daymark
Daymark
G
(Red)
Lighted (White Light)
E
Spherical Buoy
C
Daymark
Preferred Channel Aids
(No Numbers–May be
Lettered)
Preferred
Channel
to Starboard
(Green and
Red)
Lighted Buoy
(Green Light)
H
D
A
Preferred
Channel
to Port
(Green
and Red)
Lighted Buoy
(Red Light)
Nun Buoy
Daymark
Daymark
Can Buoy
KC-0441
Page 89
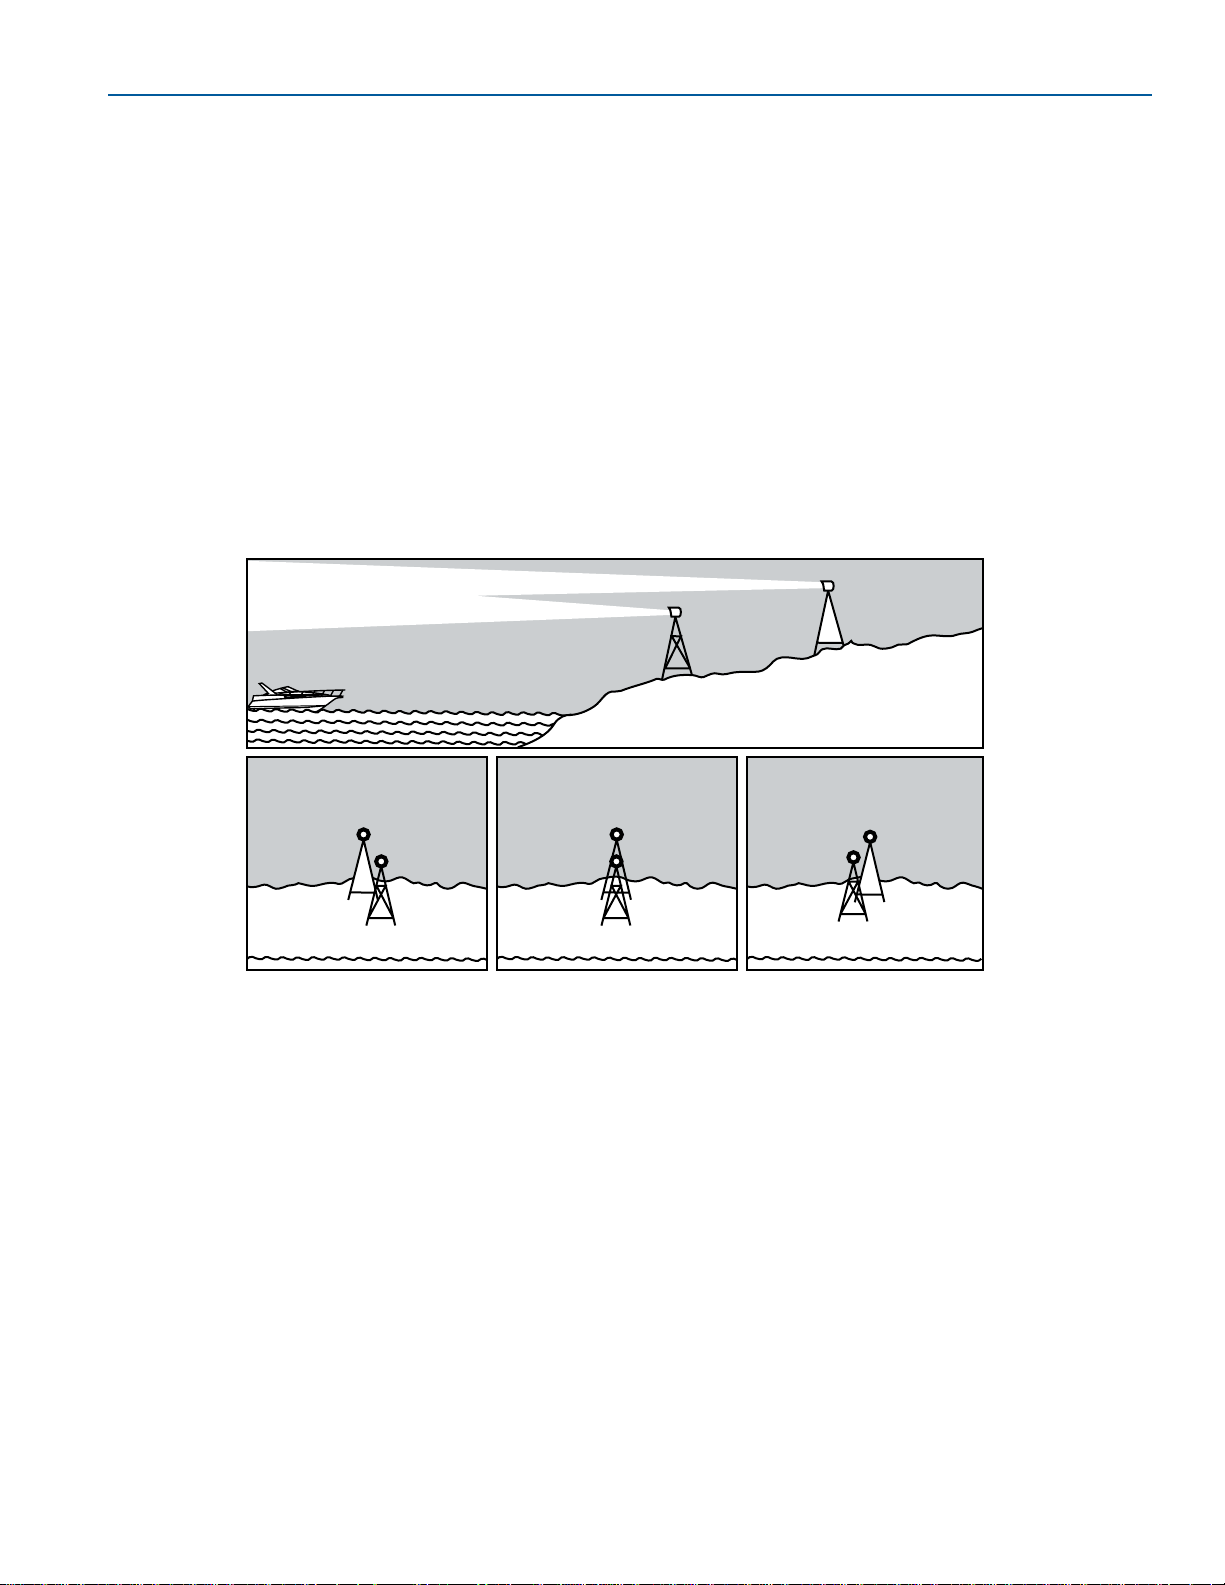
7-23
FORMULA
OPERATION
FASTECH
Light Structures
Maneuvering a boat at night can be dangerous
and confusing. To aid boaters with navigation and
to warn of hazards, the USCG and the state and
local authorities maintain a variety of light
structures. Some light structures may be
equipped with radio beacons, radar reflectors,
and/or signals.
Minor Lights
Minor lights are colored according to the buoyage
marking system in use. They are similar to lighted
buoys, except they are usually higher and on
more stable platforms to increase visibility. Most
minor lights are part of a series to mark a
channel, river or harbor.
Range Lights
Range lights are usually visible in one direction
and help a boat operator navigate in a generally
safe direction. Steering a course to keep range
lights arranged in a line (one on top of the other)
will help guide a boat through a channel.
Range Lights
Figure 7-25
FRONT
MARKER
REAR
MARKER
ON RANGE LINE
LEFT OF RANGE LINE RIGHT OF RANGE LINE
RANGE LIGHTS
KC-0442
Page 90
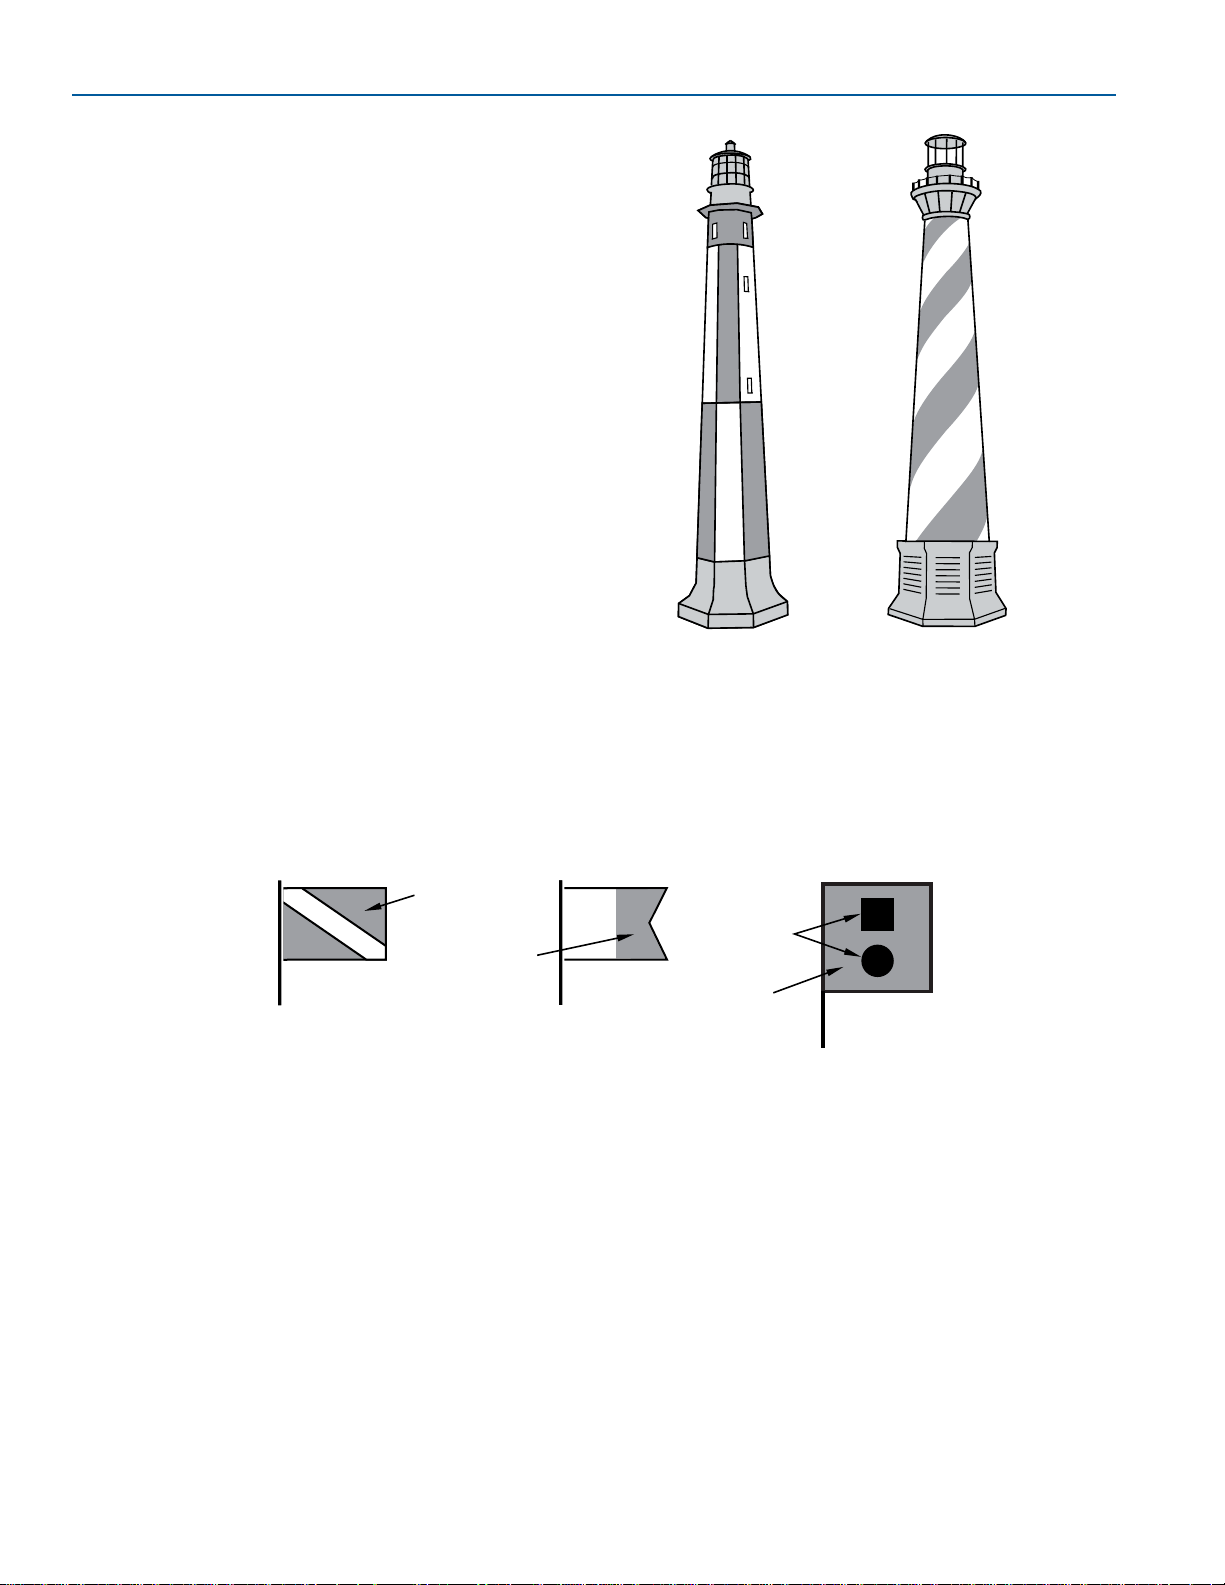
7-24
FORMULA
FASTECH
FASTECH
Warning Markers
Warning Markers
Figure 7-27
USED BY
RECREATIONAL
DIVERS -
INDICATES
DIVER'S
POSITION
WORLDWIDE VESSELS
ENGAGED IN DIVING
OPERATIONS - DOES
NOT INDICATE
DIVER'S POSITION
INDICATES
FELLOW
BOATER IS IN
NEED OF
ASSISTANCE
RED
BLUE
ORANGE
DIVERS FLAG
ALPHA FLAG
DISTRESS FLAG
BLACK
Lighthouses
Lighthouses can be found at harbor entrances,
prominent headlands, isolated danger areas, and
along the coast. These striped or patterned
structures have unique flashing characteristics to
help identify them.
Lighthouses
Figure 7-26
KC-0443
KC-0352
Page 91
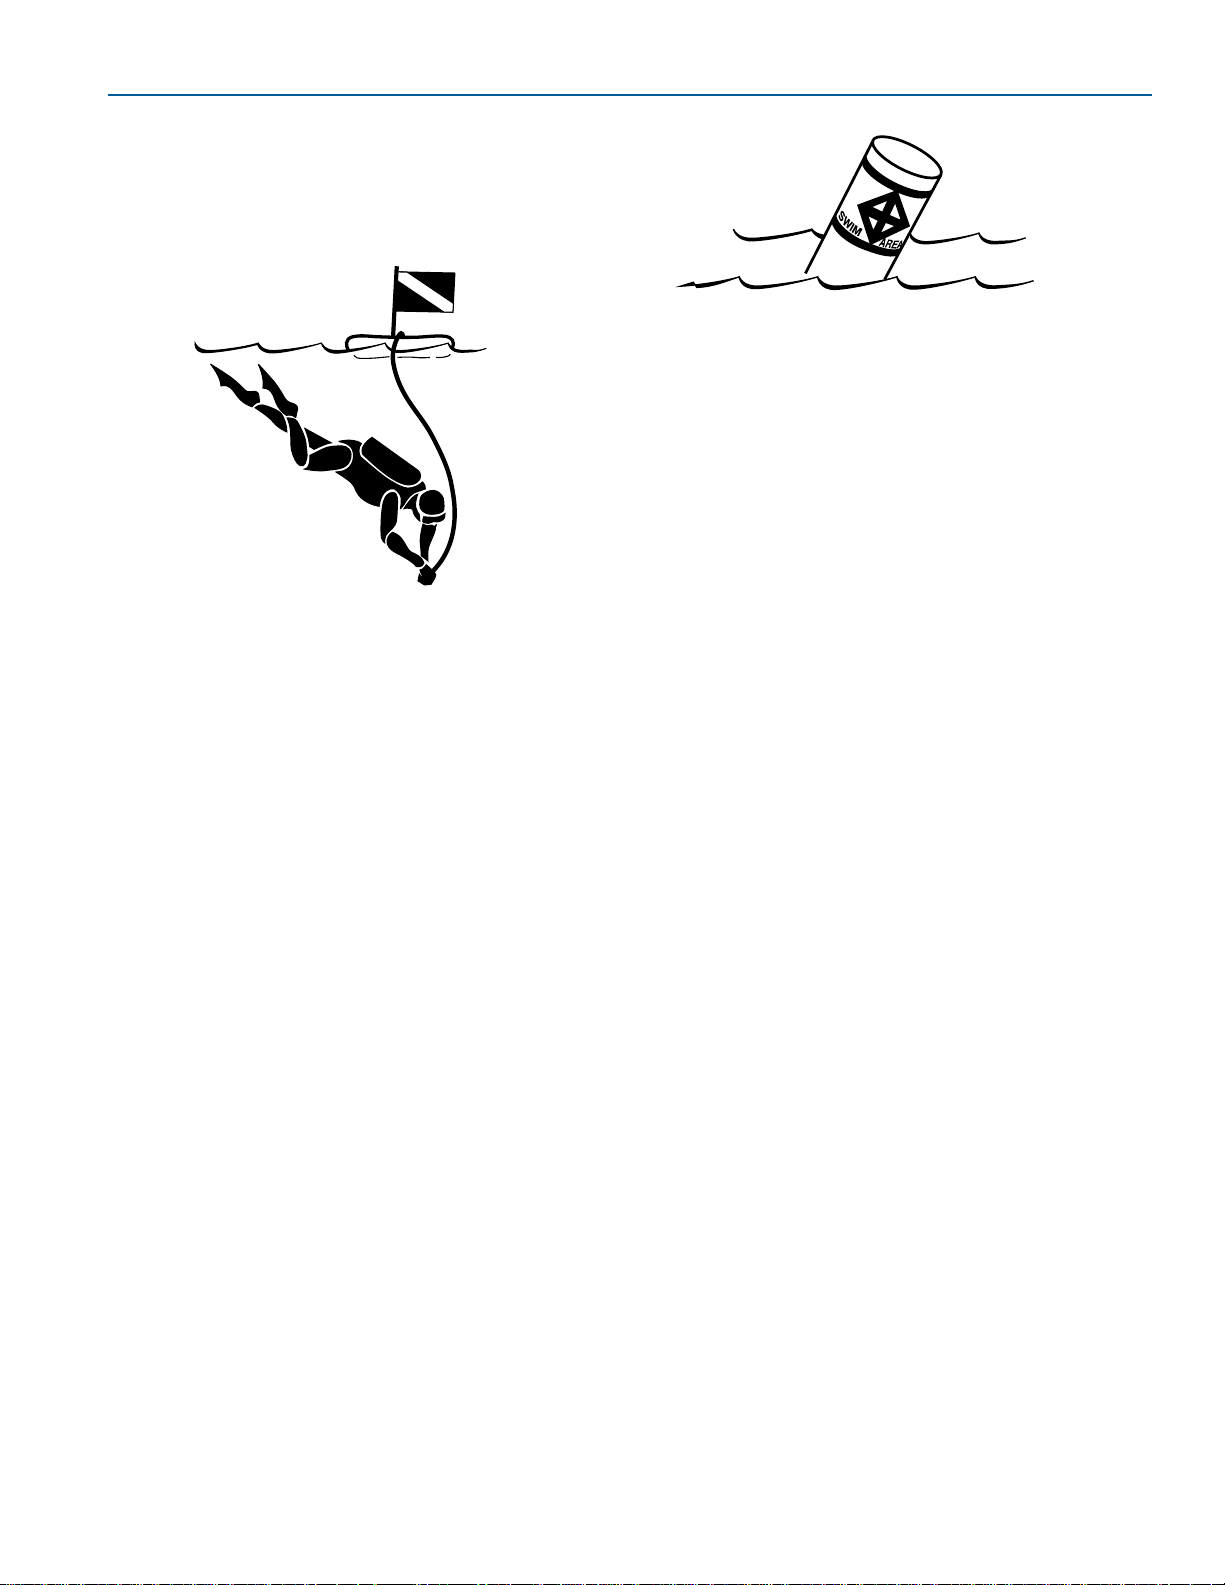
7-25
FORMULA
OPERATION
FASTECH
It is a good idea to ask local authorities if there
are hazardous areas and how they are marked.
Boaters must also recognize the flag designs
which indicate that skin divers are present and
keep well clear of the area.
Watch for swimmers. Swimming areas may not be
marked. Steer clear from the area and remain
alert.
Skin Diver Warning Flag
Figure 7-28
KC-0250
Navigation markers serve as a means of
identifying navigable routes, and indicate water
hazards. Boaters should become familiar with
navigation markers and stay within marked
boundaries and clear of hazards.
Swim Area Warning Buoy
Figure 7-29
KC-0260
Page 92

7-26
FORMULA
FASTECH
FASTECH
Page 93
FASTECH
8-1
FORMULA
Use the checks and maintenance information
outlined in this section along with service
information contained within the individual
component operator’s manuals supplied in your
Owner Information Binder. It is extremely
important that you read and understand the
periodic maintenance tasks outlined in your
operator’s manuals (propulsion unit, generator
and other accessories) because those
maintenance tasks are not repeated in this
manual.
AFTER EACH RUN
Perform the following tasks after each run.
●
Fill fuel tanks to prevent moisture due to
condensation.
●
To prevent marine growth from accumulating
on the hydraulic cylinder shafts, make sure
trim tabs are UP and propulsion unit drives
are in the full IN position.
●
Stow and secure all equipment.
●
Pump bilge dry with manual control switch.
●
Close all water inlet seacocks.
●
If possible, inspect the hull and propellers for
damage.
●
Check for fuel, oil and water leakage.
●
Clean any spills, stains or moisture from the
boat. Inspect sea strainers.
●
Turn battery switches OFF.
●
Secure lockers, hatches and canvas as
equipped.
SCHEDULED MAINTENANCE
CHECKS
This chart is based on average operating
conditions. Shorten the intervals if operating in
salt water or other severe operating conditions.
Frequency Task
Break-in Refer to propulsion unit
operator’s manual.
Refer to generator operator’s
manual.
Before Test operation of carbon
Every Use monoxide detector(s).
Test operation of fume detector.
Check remote control for proper
operation.
Check seacocks for leaks and
ensure handles are secure.
Check seawater strainers for
leaks and accumulation of debris.
Check generator’s fuel/water
separator.
Check exhaust system for leaks.
Check fuel system for leaks.
Check condition of batteries.
Every 50 Clean seawater strainers.
Hours Inspect propellers for damage.
Every 100 Test for proper operation of the
Hours ignition safety switches, if equipped.
Clean bilge area.
Monthly Test GFCI outlets.
Check self-sacrificing anodes.
Quarterly Have your Formula dealer
perform scheduled maintenance
as outlined in this section.
Section 8
Schedule Checks and Service
Page 94
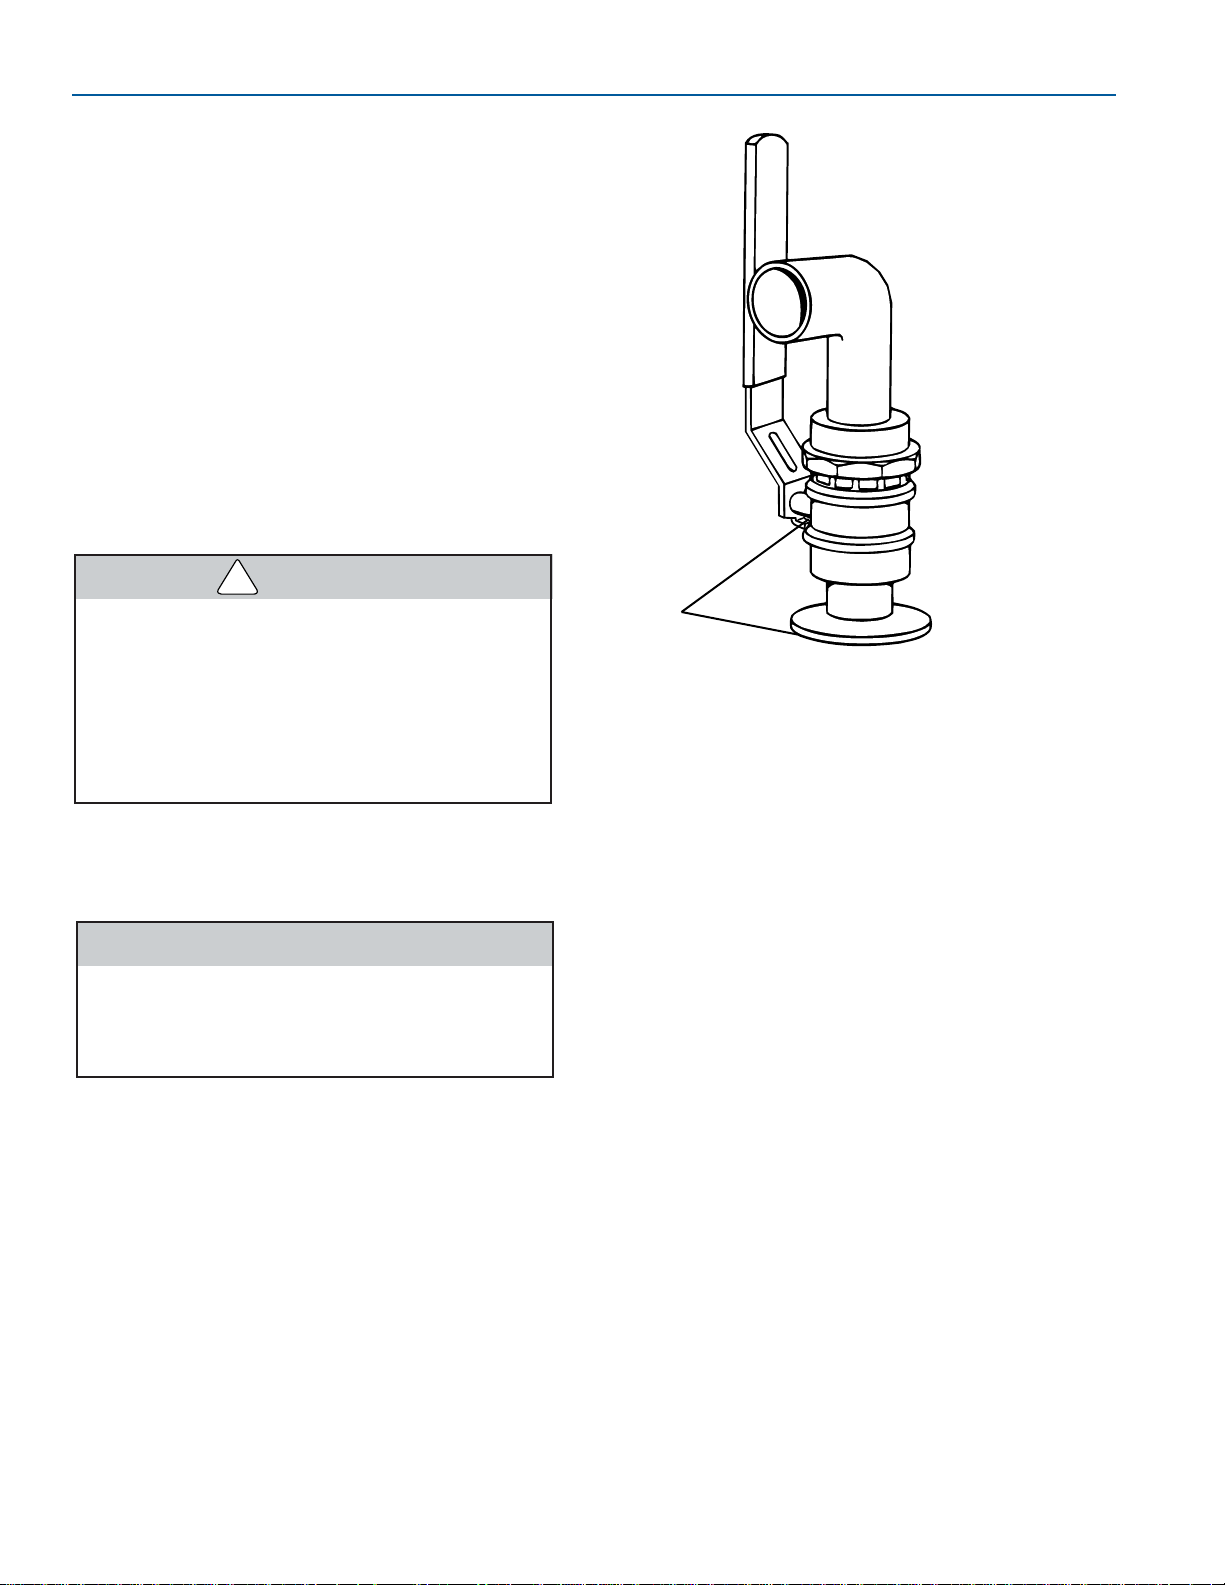
8-2
FORMULA
FASTECH
FASTECH
Break-In
Careful break-in allows internal engine
components to “seat” properly, resulting in
maximum engine life and performance. Refer to
the propulsion unit and generator operator
manuals for manufacturers’ break-in requirements.
Before Each Use
1. Test for proper operation of the carbon
monoxide detector(s). Refer to the carbon
monoxide detector operator’s manual.
2. Test for proper operation of the fume detector.
Refer to the fume detector operator’s manual.
3. Check the remote control for proper operation
and maintenance following the manufacturer’s
recommendations.
Improperly maintained remote controls are
hazardous and may cause sudden loss of
control. Make sure all shift/throttle
hardware and cables are regularly
inspected and maintained. Improper
maintenance may result in a loss of
control, resulting in serious injury or
death.
4. Check all seacocks and hoses for leakage. If
you notice a leak, contact your Formula
dealer.
● Seacocks can only be replaced when
the boat is out of the water.
● Be sure a seacock is in the closed
position before replacing a hose.
1. Check for Leaks
5. Check all seawater strainers for leaks and
accumulation of debris.
Seacock
Figure 8-1
1
FOR086
WARNING
!
CAUTION
Page 95
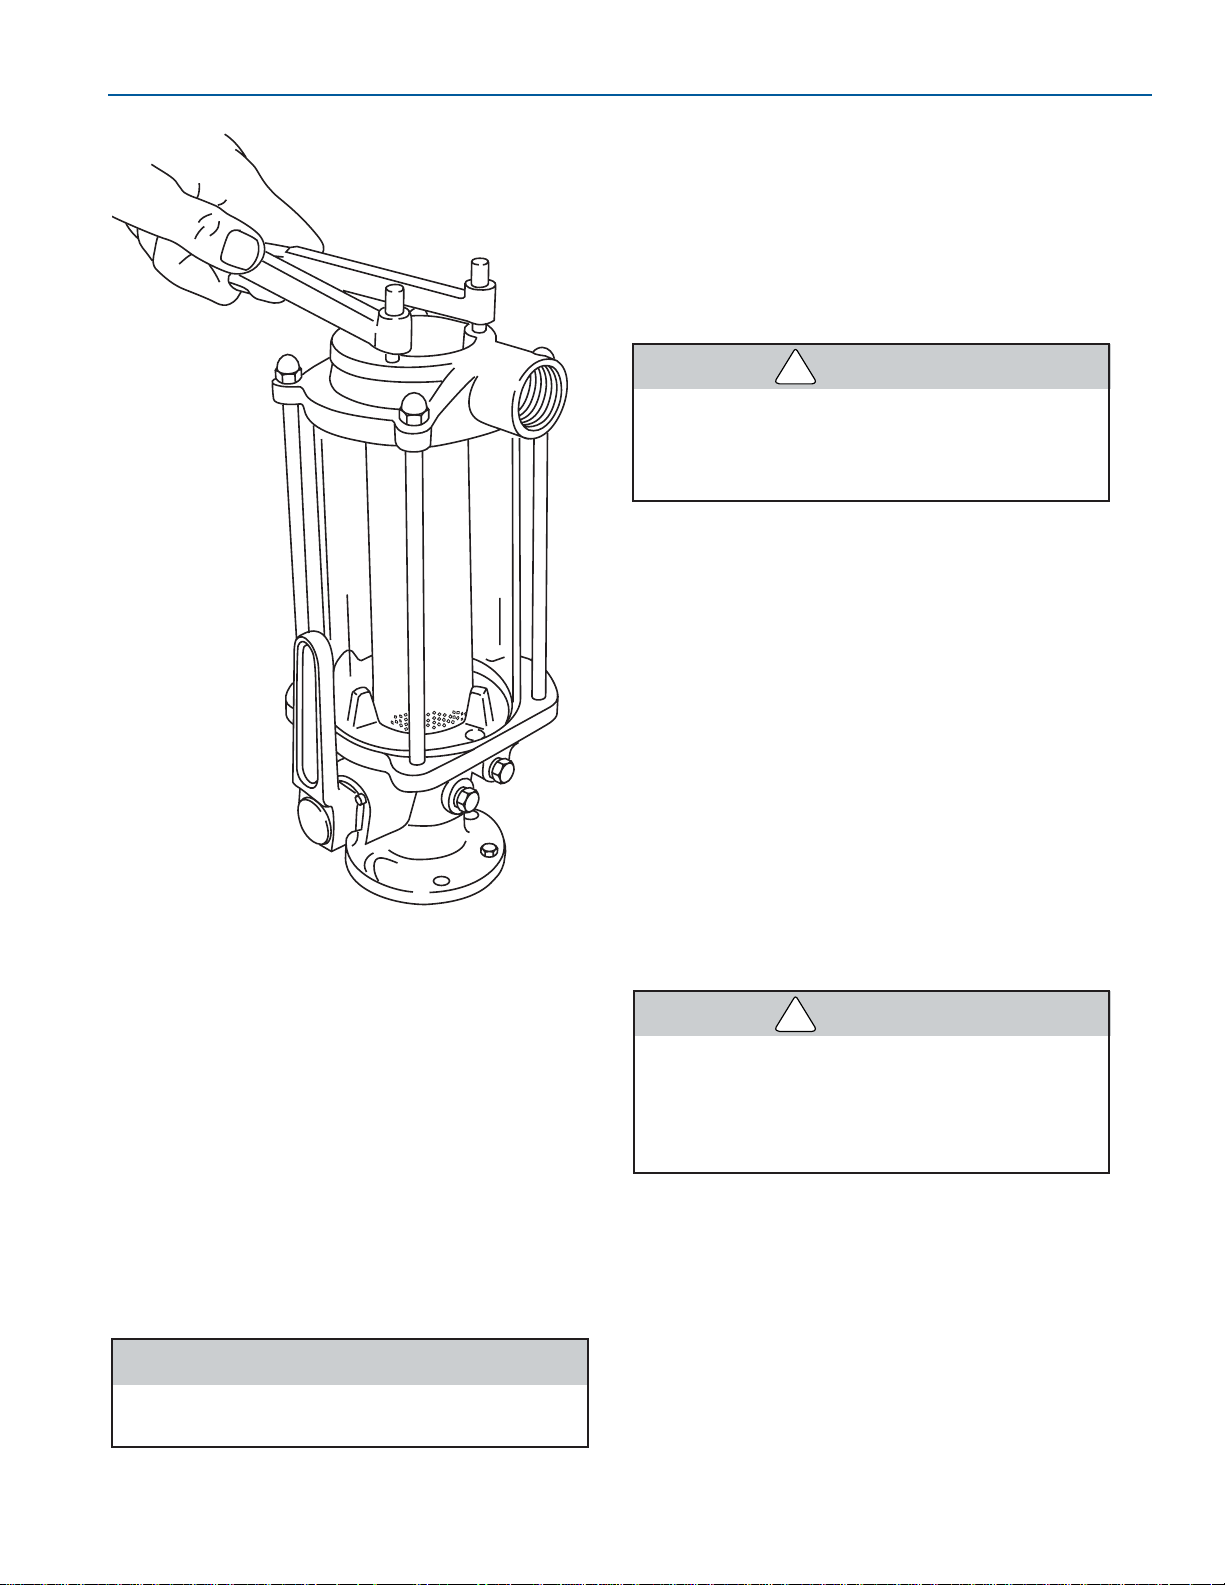
8-3
FORMULA
SCHEDULE CHECKS AND SERVICE
FASTECH
●
If a hose is leaking or damaged, close the
appropriate seacock. Contact your Formula
dealer for repairs.
●
If debris is seen within the container, close
the appropriate seacock and remove the
strainer cover. Lift strainer from container and
thoroughly clean. If the container is full of
sediment, remove the plug at the bottom of
the container and allow water to drain into
the bilge. Remove the container and clean
any sediment. Install the container and plug.
Install strainer in container and secure cover.
Open the seacock and check for leaks.
Seacock must be in the closed position
before servicing a strainer.
Seawater Strainer
Figure 8-2
6. Start the engine(s) and the generator, if
equipped. Check all exhaust systems for
leakage. If you notice a leak, contact your
Formula dealer.
7. Check all fuel lines and connections at fuel
tanks, engines and the generator for leakage.
If you detect a fuel leak, immediately contact
your Formula dealer.
Do not operate your boat when a fuel leak
is detected. All fuels are combustible. A
fuel leak must be repaired before starting
the engines or the generator.
8. Check charge of all the batteries. Be sure the
batteries can start the engines and the
generator, if equipped, before proceeding on
your cruise.
Every 50 Hours
1. Be sure to clean seawater strainers.
2. Check propellers for damage. If bends, cracks
or other damage are found, contact your
Formula dealer for service. Do not continue to
use badly damaged propellers. Using
damaged propellers may damage the drive
units.
Every 100 Hours
Clean the bilge area. Make sure all drain
passageways are clear.
Monthly
With the engines running, pull the lanyard
off the ignition safety switch. Both engines
must stop running. If neither or only one
engine stops running, immediately contact
your Formula dealer for service.
1. Test each GFCI outlet circuit breaker feature.
Push the test button on each outlet. Power
should be interrupted to all the outlets
onboard. Press the reset button to restore
power. If power is not interrupted, consult your
Formula dealer.
FOR085
WARNING
!
WARNING
!
CAUTION
Page 96
8-4
FORMULA
FASTECH
FASTECH
2. Check condition of all self-sacrificing anodes
(commonly referred to as "zincs"). If anode
shows deterioration of 50% or more, it must
be replaced. Refer to the propulsion unit
operator’s manual for additional information.
GFCI Outlet
Figure 8-3
TEST RESET
Quarterly
Have your Formula Dealer perform the following
scheduled maintenance:
The steering system is the most important
system on the entire boat from a safety
standpoint. Have the system inspected and
maintained on a quarterly basis by a
qualified service technician.
1. Clean the fresh water filter.
2. Fill, pressurize and inspect the freshwater
system for leaks and proper component
operation.
3. Inspect the steering, shift and throttle systems
for proper operation.
4. Check all batteries for proper electrolyte level.
5. Check trim tab pump fluid level.
FOR054
WARNING
!
Page 97
FASTECH
9-1
FORMULA
This section describes how to care for and
maintain your Formula Boat. As the owner of a
Formula boat, you have purchased a boat that is
easy to clean and maintain. Periodic cleaning will
make a large contribution toward your boat’s
future value as well as add to the enjoyment you
experience while using your boat. This is the best
way to maintain your Formula’s original, “like new”
condition.
Certain automotive, household and
industrial cleaners can cause further
damage and discoloration. Solvents and
dry cleaning fluids, or products that
contain dyes such as waxes, should be
used with caution. Be sure to test cleaners
in an unseen area first. The following stain
treatments should be used with discretion.
Between steps, be sure to rinse thoroughly
with clean water and allow to dry.
INTERIOR CLEANING
Most cleaners require adequate ventilation
during use. Open all hatches, windows and
doors before cleaning.
Carpet
All Formula cockpit carpet is heavy duty, all
weather indoor/outdoor type carpet resistant to
fading. Cabin carpet is high quality indoor carpet,
resistant to staining and wear. Periodic cleaning
with a vacuum will restore the original beauty. Use
household carpet stain removers and cleaners to
clean the carpet.
Cabin Upholstery
Your cabin lounge upholstery is made of
UltraLeather HP™. UltraLeather is a tough and
durable product that is easy to maintain.
For spots and spills, wipe up liquid using a clean
absorbent cloth or sponge. Spot clean with mild
soap and water. Allow the spot to air dry. If
needed, you may use a hair dryer on the warm
setting. For stubborn stains, use a mild solvent
and follow the instructions on the label.
Type of Mild Mild Cleaning
Stain Detergent Solvent
Coffee, Tea
Red Wine,
Liquor
Soft Drinks
Milk
Ketchup
Steak Sauce,
Soy Sauce
Mayonnaise,
Butter
Salad Oil
Chocolate
Cosmetic
Foundation
Lipstick
Face Cream
Suntan Lotion
Shoe Polish
Urine
Machine Oil
Section 9
Care and Maintenance
CAUTION
CAUTION
Page 98
9-2
FORMULA
FASTECH
FASTECH
Cabin Options
Refrigerators, stoves, microwaves and other
appliances have individual instruction manuals in
your Owner Information Binder. These instruction
manuals list the proper care and maintenance of
the appliance. If you have any questions after
reading the instruction manuals, contact your
Formula dealer for assistance.
EXTERIOR CLEANING
Proper care and prevention is the best way to
take care of your Formula’s finish.
Vinyl Upholstery
Suntan lotion and insect repellents can
cause rapid staining and deterioration of
the vinyl surface. Remove these products
immediately after contact. Wash the area
with mild soap solution, rinse with clean,
warm water and then towel dry.
Your cockpit upholstery is made of Nautolex
®
marine vinyl. Nautolex is a cleanable, stainresistant vinyl product designed to take the
extremes of weather and still provide years of
dependable service with normal use and care.
Even though it is designed to take punishment, it
can be damaged if a sharp object contacts it.
The Nautolex vinyl upholstery may have PreFixx
®
protective finish applied to it. Ask your Formula
dealer for additional information.
Each week, wipe Nautolex surfaces with a soft
damp cloth and towel dry. In very rainy weather,
cover or remove cushions to prevent seams from
trapping and absorbing moisture. Cushions should
be stored in a dry, well-ventilated place.
Special Cleaning Instructions—For dirt and
stains that cannot be removed with a damp cloth:
Step 1. Use mild soap and water and, if
necessary, a soft-bristle brush.
Step 2. Any stains still remaining should be
immediately cleaned with isopropyl
(rubbing) alcohol. After using mild soap
or isopropyl alcohol, rinse off any
remaining residue with a damp cloth and
towel dry.
Step 3. If a residual stain remains, and your vinyl
upholstery is protected with PreFixx, use
fingernail polish remover containing
acetone. If the stain has not become
permanent, it should be removed after
rubbing the spot 5 or 6 times. Do not
continue to rub a spot with fingernail
polish more than 6 times. Additional
rubbing could possibly damage the vinyl
finish.
Do not use abrasive powders, steel wool,
undiluted bleach, lacquer solvents,
industrial strength or solvent cleaners,
vinyl “conditioners” or “protectants” to
clean your vinyl upholstery.
Recommended cleaning solutions for Nautolex.
* Independent laboratory testing has shown that
most sunscreen lotions and oils can
permanently stain vinyl products including those
protected by PreFixx.
Type of Cleaning Steps Nautolex
Stain for Nautolex with PreFixx
Spray paint 1-2 1-2-3
Ballpoint pen 1-2 1-2-3
Lipstick 1-2 1-2-3
Yellow mustard 1-2 1-2-3
Bird droppings 1-2 1-2-3
Suntan lotion* 1-2 1-2-3
Insect repellent 1-2 1-2-3
Crayons 1-2 1-2
Eye shadow 1-2 1-2
Oily soot 1-2 1-2
Petroleum
products 1-2 1-2
Coffee, tea 1 1
Grape juice 1 1
Baby and
olive oil 1 1
Chocolate 1 1
Ketchup 1 1
Hair oil tonic 1 1
Blood 1 1
Urine 1 1
CAUTION
CAUTION
Page 99

9-3
FORMULA
CARE AND MAINTENANCE
FASTECH
Hull/Deck
The high-lustre finish on your Formula boat is
called gelcoat. Gelcoat can be easily maintained
by washing the surface with mild (non-abrasive)
detergent on a regular basis. Do not use abrasive
cleaners, solvents, ammonia or chlorine as these
will scratch and dull the gelcoat surface.
Wax the entire gelcoat surface with a good quality
marine wax at least once a year after thorough
cleaning. Use of a specially formulated marine
gelcoat wax will prevent color fade, and soil and
scum adhesion.
Your boat will actually perform better with a clean,
waxed bottom. If a heavy algae is noticed on the
bottom, your Formula dealer can recommend a
good remover for your particular area.
When taking your boat out of salt water, the entire
boat should be washed down with fresh water
immediately. This includes the deck, hardware
and any surface exposed to the salt water.
To extend the life of your gelcoat finish, cover your
boat with a mooring cover for maximum
protection. Atonneau cover will only protect the
interior, not the gelcoat finish. Your Formula dealer
can supply more information on this subject.
Canvas
In most cases, boat canvas is subjected to more
abuse than any other item on the boat. Canvas
must be maintained for long life and top
performance.
Do not place canvas in hot water or run it
through the hot drying cycle of an
automatic dryer. Fabric should be line
dried. Do not have fabric steam pressed at
a dry cleaners.
Formula canvas sets are made from the highest
quality Sunbrella
®
canvas and clear vinyl. With the
proper care, this canvas will last you many
seasons. Each canvas set is custom fit to each
boat to assure a proper fit.
The outer canvas surfaces can be cleaned with a
soft scrub brush and mild detergent. The
underside of the canvas should be sprayed
periodically with a disinfectant to prevent the
growth of mildew. Do not use cleaners on clear
vinyl curtains and windows. Wash with clean
water and a soft, clean cloth.
NOTICE
Do not use any abrasive cleaner on the
front, sides or aft curtains as it will scratch
or mar the clear vinyl surface.
Moisture, dirt, heat, ultraviolet rays, salt water and
chemicals from industrial fallout can all contribute
to the deterioration of canvas. These elements
can cause serious damage if left unattended.
Follow these guidelines to keep your canvas in
good condition.
NOTICE
Wet canvas must be allowed to dry
thoroughly before storage. Do not allow
canvas to dry loose since shrinkage can
occur. Canvas must be erected on the boat
when drying.
●
The convertible top is not designed to
withstand long periods of time exposed to the
elements and direct sunlight. It is not
designed to be a protective cockpit or
storage cover. Use a full, properly fitted
mooring cover for these purposes.
●
If the canvas gets wet during storage,
remove the side curtains and open the
windshield to allow seams to dry out. The air
circulation will allow all canvas to dry and
prevent the growth of mildew. Do not store
folded or rolled up damp canvas.
●
Occasionally set up all canvas and curtains
and hose down with fresh water to remove
accumulated soot and dirt. Sweep or brush
the underside of the canvas to prevent the
accumulation of dirt and mildew.
●
Do not store or dock your boat under trees.
Tree sap is very corrosive to canvas and can
also be harmful to gelcoat and vinyl interiors.
●
Adjust the top bows to eliminate pockets in
which rain water can accumulate. The weight
of this accumulated water can collapse the
top or sag the canvas.
●
Do not trailer your boat with the convertible
top in the mounted position. All canvas
should be dismantled, rolled and properly
stored while trailering your boat to prevent
wind damage.
When setting up the canvas, be sure to zip in the
side and aft curtains before using the snaps.
Snaps and zippers should be regularly lubricated
with Vaseline, silicone spray or paraffin.
CAUTION
Page 100
9-4
FORMULA
FASTECH
FASTECH
Do not force zippers. The most vulnerable part is
the starting point. Be careful when starting a
zipper to prevent damage.
Hardware Care
Deck fittings, cleats and bow rails are stainless
steel. Frequent washing with a mild detergent
should bring back the original shine. Remove rust
spots as soon as possible with a brass, silver or
chrome cleaner. Apply a coat of wax to protect the
finish.
NOTICE
Do not use course abrasives like
sandpaper or steel wool, or cleaning
agents like mineral acids or bleaches to
clean stainless steel. Do not allow
stainless steel components to contact iron,
steel or other metals which can cause
stainless steel to rust or corrode.
Periodically check deck fittings, cleats and bow
rails for tightness. Have your Formula dealer
tighten any loose items.
Radar Arch
Depending on your model boat, the radar arch is
constructed from either aluminum or fiberglass
and has a very durable finish. Wash the arch with
a mild detergent and a clean soft cloth. Apply a
non-abrasive wax to the finish.
Windows and Windshield
All Formula windshields, wing windows and walkthrough windows are of tempered glass
construction. They can be cleaned with a nonabrasive glass cleaner applied with a soft cloth.
Do not use a dry cloth or a harsh detergent.
These items will scratch the surface.
Marine Growth
If accelerated marine growth is a problem in your
area, an anti-fouling bottom paint may be
necessary to slow growth and prevent gelcoat
damage. Consult your Formula dealer for antifouling bottom paint recommendations.
UNSCHEDULED
MAINTENANCE
Periodically check cleats, seats, fittings,
windshield mounting hardware and other items for
tightness and proper operation. Aproblem with a
piece of equipment can occur at anytime. Have
your Formula dealer service a problem. The
safety of you and your passengers depends upon
a well maintained boat.
Immediately service any problem with an engine,
propulsion unit or generator. A minor repair could
become a major overhaul if left unchecked. Pay
close attention to the cooling system operation of
these components.
Propulsion Units and Generator
Follow the maintenance schedules outlined in
your propulsion unit and generator operator’s
manuals. Obtain the required service at the
specified interval from your Formula dealer.
Electrical System
Use extreme caution when checking for an
electrical problem.
An electrical system problem must be treated
seriously. Do not operate your boat knowing there
is a problem with the system. When a problem is
discovered, have your Formula dealer service it
immediately.
NOTICE
The electrical system is designed to
protect you from short circuits and
overloads. Any modifications to the
system, such as adding electrical
accessories should be done by a qualified
technician.
WARNING
!
 Loading...