

Page 1
Solar Powered
10-Pack Stake Lights
Product No. 052-8008-2
Model No. 16335
Operating Instructions
Toll free: 1-877-48 3-6759
IMPORTANT: Please read this manual carefully
before beginning assembly of this product.
Keep this manual for future reference.
Page 2

Prod uct No. 05 2-80 08-2 • Model No. 16 335
2
Parts List 3
Overview 4
About Your Solar Light 4
Important 5
Getting Started 5
Installation & Operation 6
Battery Replacement 7
Troubleshooting Tips 8
Care Information 9
Warranty 10
Table of Contents
Let us help you!
DO NOT RETURN YOUR PRODUCT TO THE STORE. CALL US FIRST!
1-877-483-6759
If you have questions regarding your product, require warranty assistance, or have damaged
or missing parts, please call our customer ser vice toll-free helpline. Contact us for assistance,
we’re here to help.
Page 3
3
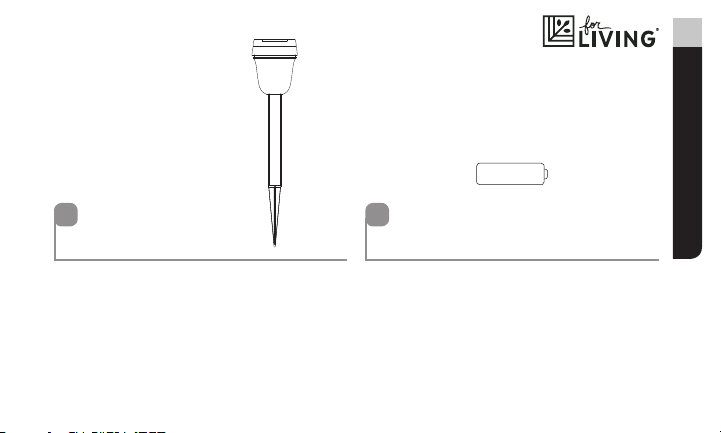
1 2
Solar Garden Light - 10 AA A Ni-CD Rechargeable Batter y - 10
IMPORTANT: Please read and understand this manual before any assembly. Before beginning assembly of
product, make sure all par ts are present. Compare parts with p ackaging contents list. If any par t is missing,
or if you have any questions, contact the ser vice centre at 1-877-483 -6759 (toll free) .
Part s List
Page 4

Prod uct No. 05 2-80 08-2 • Model No. 16 335
4
Overview
This product is designed to the highest technical specifications and standards. It will supply years of
maintenance-free use. Please read these instructions thoroughly prior to installation, then store in a safe
place for future reference.
About Your Solar Light
During the day, your solar panel will conver t the sun’s light and/or UV rays into electrical power that will
charge the rechargeable battery. When it becomes dark, the solar light will turn on using the power stored
Overview
in the rechargeable bat tery. The unit’s light-output strength and time depends on how much sunlight and/or
UV rays your panel has absorbed throughout the day.
For maximum output, place the solar panel in an area where there is direct sunlight for at least 8 hours per
day. Do not install your solar light in a shaded area. The selected location should not be near nighttime
light sources such as porch lights, street lights or pool lights, as these may cause the solar light to turn off
prematurely.
Page 5

Important
• Fully charge the battery before first use. Charge under direct sunlight for 2 days.
• For best results, locate your solar lamp in a position where it can get direct sunlight on the solar panel and
is generally free from cover and shade.
• Keep your solar lights away from other nighttime light sources, such as street lights.
• Make sure the solar panels are not covered by dust, snow and debris. Clean with a soft, damp cloth or
paper towel periodically. Avoid the use of abrasive cleaning agents.
• Use only solar rechargeable AAA batteries for your solar lights. Replace with new batteries yearly for
optimum performance.
• If there is a protective film on the solar panel, carefully remove this.
Getting Started
Please do not throw away any packing material until all par ts are verified as present.
5
Important
Page 6

Prod uct No. 05 2-80 08-2 • Model No. 16 335
6
1. Carefully twist off the Solar Cap A from the
Lens B.
2. Remove the pull tab from the battery
compartment.
3. Insert Pole C over base of Lens B until secure.
4. Remove preinstalled Ground Spike D from base
of Pole C. Insert base of Ground Spike D so that
spiked end now faces downward.
5. Assembled light should now appear as shown in
Installation & Operation
image.
6. Complete steps 1-4 for all 10 lights.
7. Stake fixture into ground in an area that receives
direct sunlight for (2) full sunny days.
8. Your solar-powered light will automatically turn on
when it becomes dark.
5
A
1
B
A
B
3
C
D
Page 7

For best results, the solar battery should be replaced every 12 months. ONLY replace the battery with a
similar solar rechargeable batter y of the same or greater mAh rating.
DO NOT use alkaline batteries.
DO NOT mix old and new batteries.
1. Carefully twist off the Solar Cap A from the Lens B.
2. Carefully remove the old battery from the battery compartment.
3. Replace battery with an equivalent new solar rechargeable battery,
ensuring the correct polarity is observed.
4. Re-assemble the unit by reversing the above procedure.
5. Allow the unit to charge for up to (2) days in an area that receives direct
sunlight.
6. Your solar-powered light will automatically turn on when it becomes dark.
Caution: Rechargeable batteries cont ain Nickel-Cadmium or Nickel-Metal Hydride and must be
recycled or disposed of properly. Do not mix old and new bat teries. Do not mix alkaline, standard
(carbon-zinc), or rechargeable batteries. Do not dispose of batteries in fire. Bat teries may explode
or leak.
1
A
B
7
Battery Replacement
Page 8

Prod uct No. 05 2-80 08-2 • Model No. 16 335
8
Troubleshooting Tips
If your solar light does not come on at dusk despite following all instructions please try the following steps:
1. Make sure that the solar light is not affected by any other light source.
2. Ensure the solar light does not stand in the shade all day.
3. Remove the pull tab from the battery compartment.
4. Check to see if the batteries are installed correctly.
5. Battery may need to be replaced.
Troubleshooting Tips
Caution! Do not mix alkaline, standard (carbon-zinc) , or rechargeable bat teries.
Do not dispose of batteries in fire. Batteries may explode or leak.
Dispose of used batteries per municipal or provincial law.
Page 9

Care Information
1. Clean any dirt and debris from the solar panel. The panel cannot recharge if the light is obstructed. Use
a soft cloth to clean the panel. Do not use abrasives or chemicals that might scratch or damage the UV
coating.
2. In a region where snow and ice are likely, and the light assembly is covered with snow for an extended
period of time, the batteries will require recharging for at least 8 hours.
9
Care Information
Page 10

Prod uct No. 05 2-80 08-2 • Model No. 16 335
10
This For Living® product carries a one (1) year warranty against defects in workmanship and materials.
Trileaf Distribution agrees to replace the defective product free of charge within the stated warranty
period, when returned by the original purchaser with proof of purchase. This product is not guaranteed
against wear or breakage due to misuse and/or abuse.
Made in China.
Impor ted by Trileaf Distribution Trifeuil Toronto, Canada M4S 2B8
Warranty
 Loading...