

Page 1

Table of Contents
Introduction 4
Instrument Cluster 10
Warning and control lights 10
Gauges 14
Entertainment Systems 18
AM/FM stereo cassette with CD 18
Rear seat controls 28
Rear seat entertainment system 33
Navigation system 45
Climate Controls 80
Manual heating and air conditioning 80
Rear passenger climate control 85
Rear window defroster 86
Lights 87
Headlamps 87
Turn signal control 90
Bulb replacement 91
Driver Controls 99
Windshield wiper/washer control 99
Power windows 106
Mirrors 107
Speed control 109
Message center 120
Locks and Security 133
Keys 133
Locks 133
Anti-theft system 134
1
Page 2

Table of Contents
Seating and Safety Restraints 146
Seating 146
Safety restraints 161
Air bags 176
Child restraints 184
Driving 198
Starting 198
Brakes 202
Air suspension 206
Transmission operation 211
Vehicle loading 229
Trailer towing 233
Recreational towing 238
Roadside Emergencies 240
Getting roadside assistance 240
Hazard flasher switch 241
Fuel pump shut-off switch 241
Fuses and relays 242
Changing tires 253
Jump starting 260
Wrecker towing 266
Customer Assistance 268
Reporting safety defects (U.S. only) 276
Cleaning 277
2
Page 3

Table of Contents
Maintenance and Specifications 283
Engine compartment 285
Engine oil 287
Battery 290
Fuel information 298
Air filter(s) 312
Tire Information 315
Part numbers 329
Refill capacities 330
Lubricant specifications 333
Accessories 341
Index 344
All rights reserved. Reproduction by any means, electronic or mechanical
including photocopying, recording or by any information storage and retrieval
system or translation in whole or part is not permitted without written
authorization from Ford Motor Company. Ford may change the contents without
notice and without incurring obligation.
Copyright © 2003 Ford Motor Company
3
Page 4

Introduction
CALIFORNIA Proposition 65 Warning
WARNING: Engine exhaust, some of its constituents, and
certain vehicle components contain or emit chemicals known to
the State of California to cause cancer and birth defects or other
reproductive harm. In addition, certain fluids contained in vehicles and
certain products of component wear contain or emit chemicals known
to the State of California to cause cancer and birth defects or other
reproductive harm.
CONGRATULATIONS
Congratulations on acquiring your new Ford. Please take the time to get
well acquainted with your vehicle by reading this handbook. The more
you know and understand about your vehicle, the greater the safety and
pleasure you will derive from driving it.
For more information on Ford Motor Company and its products visit the
following website:
• In the United States: www.ford.com
• In Canada: www.ford.ca
• In Australia: www.ford.com.au
• In Mexico: www.ford.com.mx
Additional owner information is given in separate publications.
This Owner’s Guide describes every option and model variant available
and therefore some of the items covered may not apply to your
particular vehicle. Furthermore, due to printing cycles it may describe
options before they are generally available.
Remember to pass on this Owner’s Guide when reselling the vehicle. It
is an integral part of the vehicle.
Fuel pump shut-off switch: In the event of an accident the
safety switch will automatically cut off the fuel supply to the
engine. The switch can also be activated through sudden vibration (e.g.
collision when parking). To reset the switch, refer to the Fuel pump
shut-off switch in the Roadside Emergencies chapter.
4
2004 Expedition (exd)
Owners Guide (post-2002-fmt)
USA English (fus)
Page 5
Introduction
SAFETY AND ENVIRONMENT PROTECTION
Warning symbols in this guide
How can you reduce the risk of personal injury and prevent possible
damage to others, your vehicle and its equipment? In this guide, answers
to such questions are contained in comments highlighted by the warning
triangle symbol. These comments should be read and observed.
Warning symbols on your vehicle
When you see this symbol, it is
imperative that you consult the
relevant section of this guide before
touching or attempting adjustment
of any kind.
Protecting the environment
We must all play our part in
protecting the environment. Correct
vehicle usage and the authorized
disposal of waste, cleaning and
lubrication materials are significant
steps towards this aim. Information in this respect is highlighted in this
guide with the tree symbol.
BREAKING-IN YOUR VEHICLE
Your vehicle does not need an extensive break-in. Try not to drive
continuously at the same speed for the first 1,600 km (1,000 miles) of
new vehicle operation. Vary your speed to allow parts to adjust
themselves to other parts.
Drive your new vehicle at least 800 km (500 miles) before towing a
trailer. Additionally, during the first 800 km (500 miles) that you tow a
trailer, do not drive over 80 km/h (50 mph) and do not make starts at
full throttle. This style of driving will help the engine and other parts of
your vehicle wear-in at the heavier loads.
Do not add friction modifier compounds or special break-in oils during
the first few thousand kilometers (miles) of operation, since these
additives may prevent piston ring seating. See Engine oil in the
Maintenance and Specifications chapter for more information on oil
usage.
2004 Expedition (exd)
Owners Guide (post-2002-fmt)
USA English (fus)
5
Page 6

Introduction
SPECIAL NOTICES
Emission warranty
The New Vehicle Limited Warranty includes Bumper-to-Bumper
Coverage, Safety Restraint Coverage, Corrosion Coverage, and 6.0L
Power Stroke Diesel Engine Coverage. In addition, your vehicle is eligible
for Emissions Defect and Emissions Performance Warranties. For a
detailed description of what is covered and what is not covered, refer to
the Warranty Guide that is provided to you along with your Owner’s
Guide.
Service Data Recording
Service data recorders in your vehicle are capable of collecting and
storing diagnostic information about your vehicle. This potentially
includes information about the performance or status of various systems
and modules in the vehicle, such as engine, throttle, steering or brake
systems. In order to properly diagnose and service your vehicle, Ford
Motor Company, Ford of Canada, and service and repair facilities may
access vehicle diagnostic information through a direct connection to your
vehicle when diagnosing or servicing your vehicle.
Event Data Recording
Other modules in your vehicle — event data recorders — are capable of
collecting and storing data during a crash or near crash event. The
recorded information may assist in the investigation of such an event.
The modules may record information about both the vehicle and the
occupants, potentially including information such as:
• how various systems in your vehicle were operating;
• whether or not the driver and passenger seatbelts were buckled;
• how far (if at all) the driver was depressing the accelerator and/or the
brake pedal;
• how fast the vehicle was traveling; and
• where the driver was positioning the steering wheel.
To access this information, special equipment must be directly connected
to the recording modules. Ford Motor Company and Ford of Canada do
not access event data recorder information without obtaining consent,
unless pursuant to court order or where required by law enforcement,
other government authorities or other third parties acting with lawful
authority. Other parties may seek to access the information
independently of Ford Motor Company and Ford of Canada.
6
2004 Expedition (exd)
Owners Guide (post-2002-fmt)
USA English (fus)
Page 7

Introduction
Special instructions
For your added safety, your vehicle is fitted with sophisticated electronic
controls.
Please read the section Supplemental restraint system (SRS)
in the Seating and Safety Restraints chapter. Failure to follow
the specific warnings and instructions could result in personal injury.
Front seat mounted rear-facing child or infant seats should
NEVER be placed in front of an active passenger air bag.
Using your vehicle with a snowplow
Do not use this vehicle for snowplowing.
Your vehicle is not equipped with a snowplowing package.
Notice to owners of pickup trucks and utility type vehicles
Utility vehicles have a significantly higher rollover rate than
other types of vehicles.
Before you drive your vehicle, please read this Owner’s Guide carefully.
Your vehicle is not a passenger car. As with other vehicles of this type,
failure to operate this vehicle correctly may result in loss of vehicle
control, vehicle rollover, personal injury or death.
Be sure to read Driving off road in the Driving chapter.
MIDDLE EAST/NORTH AFRICA VEHICLE SPECIFIC INFORMATION
For your particular global region, your vehicle may be equipped with
features and options that are different from the ones that are described
in this Owner’s Guide; therefore, a supplement has been supplied that
complements this book. By referring to the pages in the provided
supplement, you can properly identify those features, recommendations
and specifications that are unique to your vehicle. Refer to this
Owner’s Guide for all other required information and warnings.
2004 Expedition (exd)
Owners Guide (post-2002-fmt)
USA English (fus)
7
Page 8
Introduction
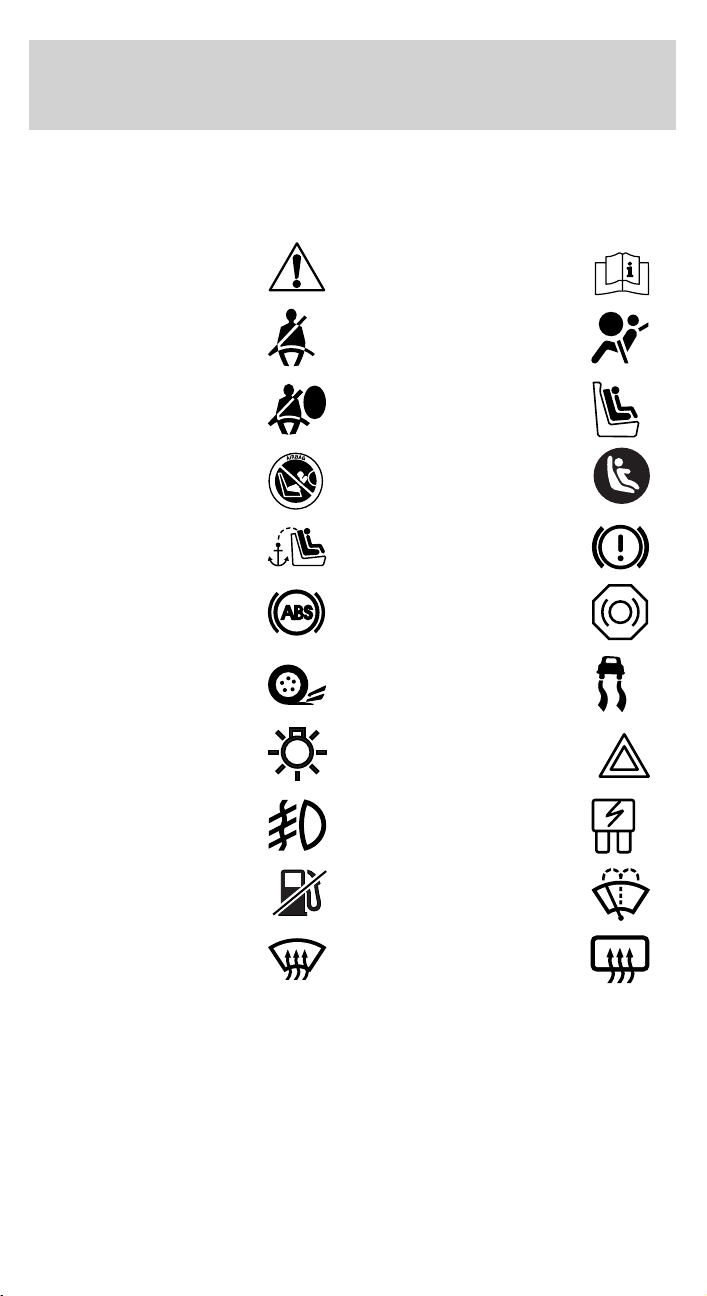
These are some of the symbols you may see on your vehicle.
Vehicle Symbol Glossary
Safety Alert
Fasten Safety Belt Air Bag-Front
Air Bag-Side Child Seat
Child Seat Installation
Warning
Child Seat Tether
Anchor
Anti-Lock Brake System
Traction Control AdvanceTrac娂
Master Lighting Switch Hazard Warning Flasher
Fog Lamps-Front Fuse Compartment
See Owner’s Guide
Child Seat Lower
Anchor
Brake System
Brake Fluid Non-Petroleum Based
Fuel Pump Reset Windshield Wash/Wipe
Windshield
Defrost/Demist
8
Rear Window
Defrost/Demist
2004 Expedition (exd)
Owners Guide (post-2002-fmt)
USA English (fus)
Page 9
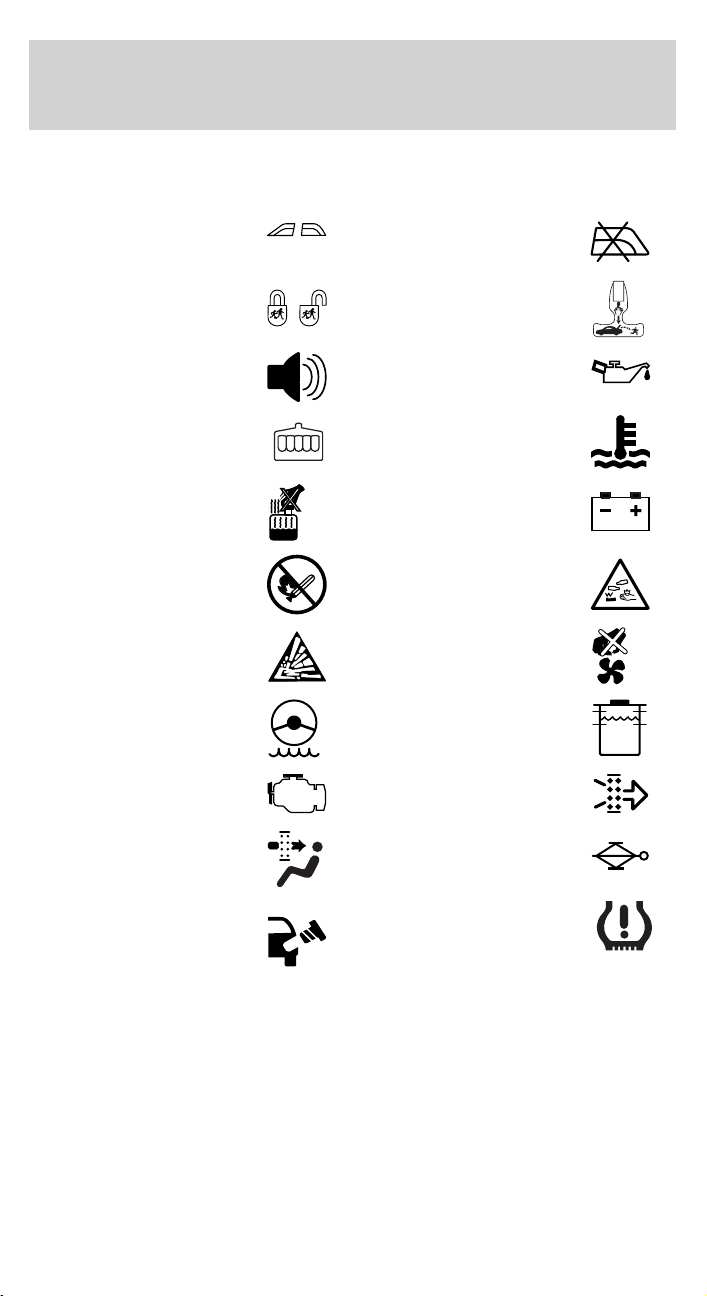
Vehicle Symbol Glossary
Introduction
Power Windows
Front/Rear
Child Safety Door
Lock/Unlock
Power Window Lockout
Interior Luggage
Compartment Release
Symbol
Panic Alarm Engine Oil
Engine Coolant
Engine Coolant
Temperature
Do Not Open When Hot Battery
Avoid Smoking, Flames,
or Sparks
Battery Acid
Explosive Gas Fan Warning
Power Steering Fluid
Maintain Correct Fluid
Level
Emission System Engine Air Filter
MAX
MIN
Passenger Compartment
Air Filter
Jack
Check fuel cap Low tire warning
2004 Expedition (exd)
Owners Guide (post-2002-fmt)
USA English (fus)
9
Page 10
Instrument Cluster
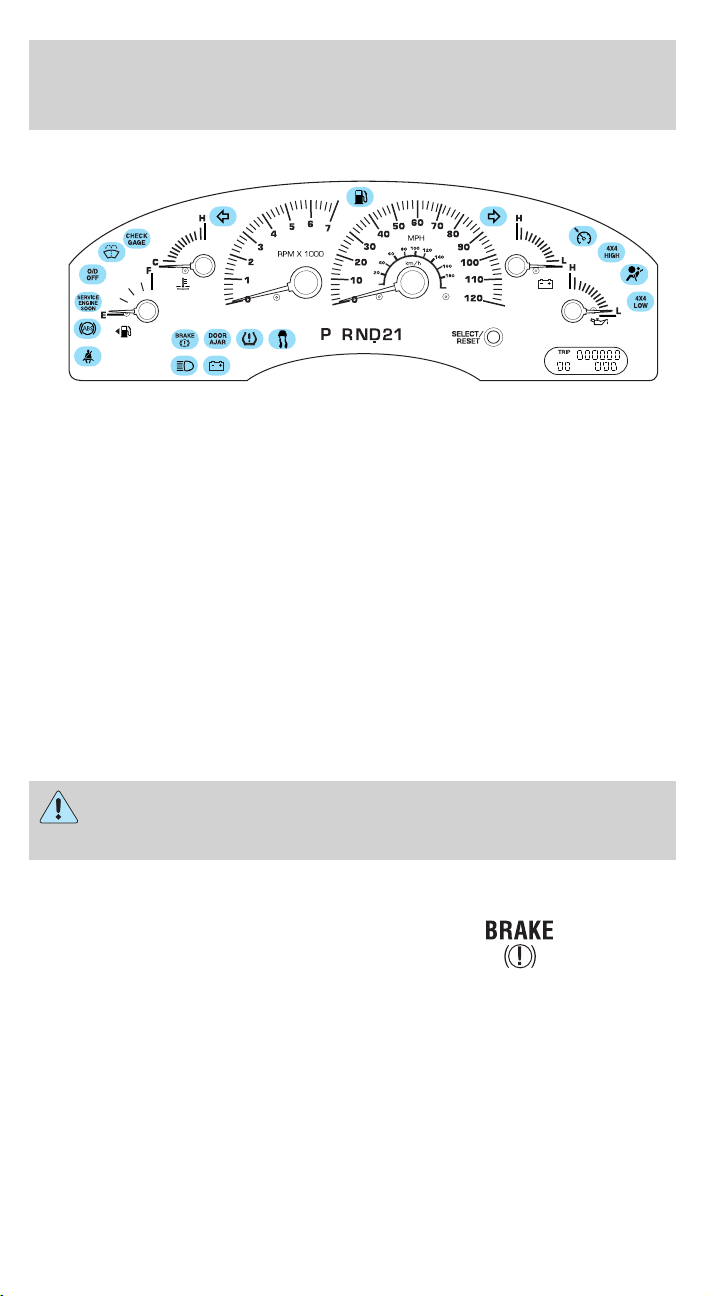
WARNING LIGHTS AND CHIMES
Warning lights and gauges can alert you to a vehicle condition that may
become serious enough to cause expensive repairs. A warning light may
illuminate when a problem exists with one of your vehicle’s functions.
Many lights will illuminate when you start your vehicle to make sure the
bulb works. If any light remains on after starting the vehicle, have the
respective system inspected immediately.
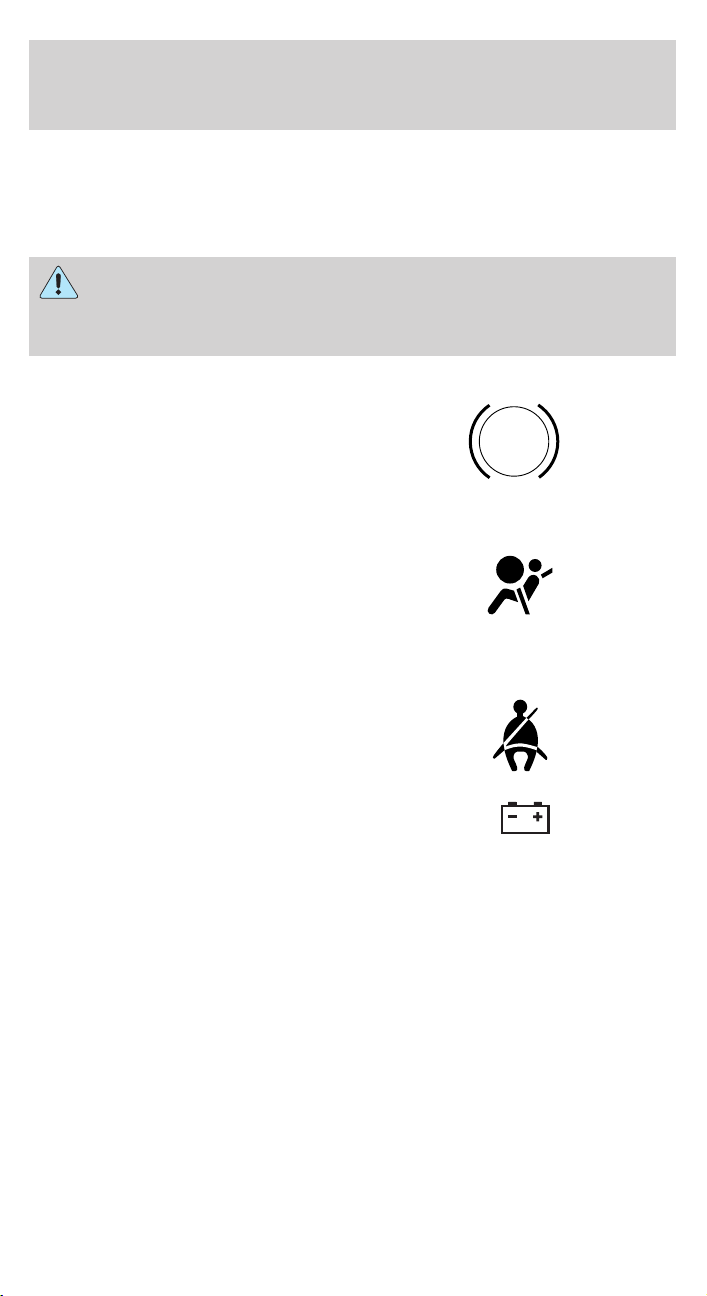
Service engine soon: The Service
engine soon indicator light
illuminates when the ignition is first
turned to the ON position to check
the bulb. Solid illumination after the engine is started indicates the On
Board Diagnostics System (OBD-II) has detected a malfunction. Refer to
On board diagnostics (OBD-II) in the Maintenance and Specifications
chapter. If the light is blinking, engine misfire is occurring which could
damage your catalytic converter. Drive in a moderate fashion (avoid
heavy acceleration and deceleration) and have your vehicle serviced
immediately.
SERVICE
ENGINE
SOON
Under engine misfire conditions, excessive exhaust temperatures
could damage the catalytic converter, the fuel system, interior
floor coverings or other vehicle components, possibly causing a fire.
Brake system warning light: To
confirm the brake system warning
light is functional, it will
momentarily illuminate when the
ignition is turned to the ON position when the engine is not running, or
in a position between ON and START, or by applying the parking brake
10
2004 Expedition (exd)
Owners Guide (post-2002-fmt)
USA English (fus)
Page 11
Instrument Cluster
when the ignition is turned to the ON position. If the brake system
warning light does not illuminate at this time, seek service immediately
from your dealership. Illumination after releasing the parking brake
indicates low brake fluid level and the brake system should be inspected
immediately by your servicing dealership.
Driving a vehicle with the brake system warning light on is
dangerous. A significant decrease in braking performance may
occur. It will take you longer to stop the vehicle. Have the vehicle
checked by your dealer immediately.
Anti-lock brake system: If the
ABS light stays illuminated or
continues to flash, a malfunction has
been detected, have the system
serviced immediately. Normal
braking is still functional unless the brake warning light also is
illuminated.
Air bag readiness: If this light fails
to illuminate when ignition is turned
to ON, continues to flash or remains
on, have the system serviced
immediately. A chime will also sound when a malfunction in the
supplemental restraint system has been detected.
Safety belt: Reminds you to fasten
your safety belt. A chime will also
sound to remind you to fasten your
safety belt.
ABS
Charging system: Illuminates when
the battery is not charging properly.
Check gage: Illuminates when any
of the following conditions has
occurred:
• The engine coolant temperature
is high.
• The engine oil pressure is low.
• The fuel gauge is at or near empty.
2004 Expedition (exd)
Owners Guide (post-2002-fmt)
USA English (fus)
CHECK
GAGE
11
Page 12
Instrument Cluster
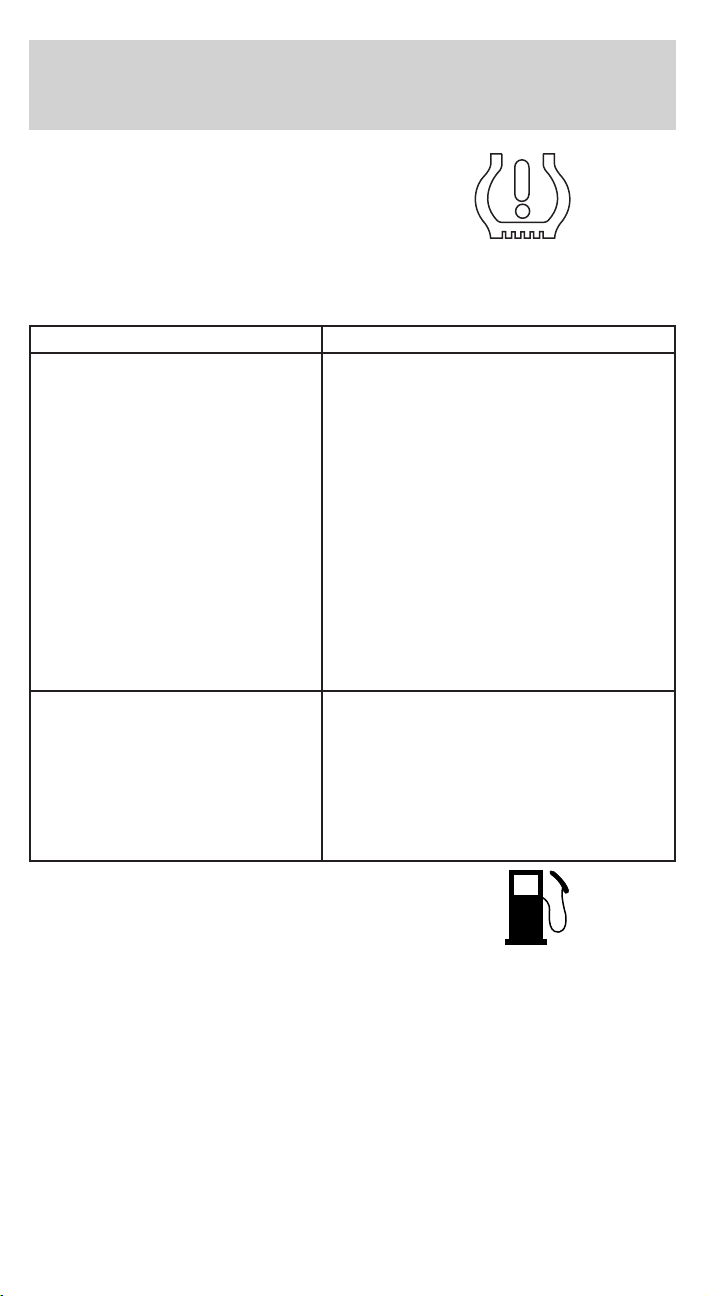
Low tire warning: Illuminates
when the low tire warning system is
enabled. If the light remains on
while driving, the tire pressure
should be checked, refer to Low
tire warning in the Maintenance and Specifications chapter. If this
light fails to illuminate when ignition is turned to ON, continues to flash
or remains on, have the system serviced immediately.
Warning Light display Customer Action
Warning light remains on • Check your tire pressure and
ensure your tires are properly
inflated, refer to Tire inflation
pressure under Tires in the
Maintenance and Specifications
chapter.
• After inflating tires to the
manufacturers recommended air
pressure the vehicle must be driven
for two minutes at 32 kp/h (20 mph)
to guarantee that the light will turn
off. If the light remains on, have the
system inspected immediately by your
servicing dealership.
Warning light flashing (flashes
for 20 seconds either at start
up or while driving)
Low fuel: Illuminates when the fuel
level in the fuel tank is at or near
empty (refer to Fuel gauge in this
chapter).
• Your spare tire is in use. Repair the
road wheel to restore system function.
• If your tires are inflated to the
recommended air pressure, and your
spare tire is not in use, please have
the system inspected immediately by
your servicing dealership.
12
2004 Expedition (exd)
Owners Guide (post-2002-fmt)
USA English (fus)
Page 13
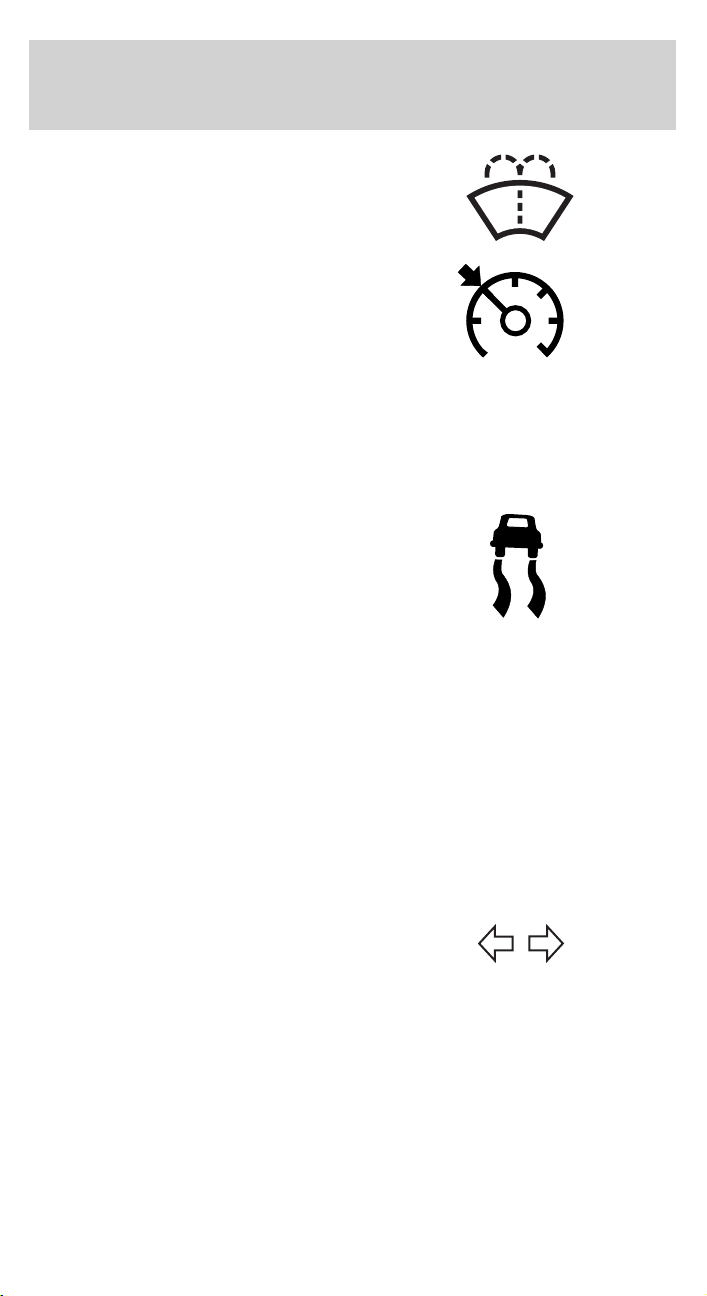
Low washer fluid (if equipped):
Illuminates when the windshield
washer fluid is low.
Speed control: Illuminates when
the speed control is activated. Turns
off when the speed control system
is deactivated.
Instrument Cluster
O/D off: Illuminates when the
overdrive function of the
transmission has been turned off,
refer to the Driving chapter. If the
light flashes steadily or does not illuminate, have the transmission
serviced soon, or damage may occur.
AdvanceTrac娂 (if equipped):
Illuminates when the AdvanceTrac娂
system is active. If the light remains
on, have the system serviced
immediately, refer to the Driving
chapter for more information..
Four wheel drive low (if
equipped): Illuminates when
four-wheel drive low is engaged.
Four wheel drive high (if
equipped): Illuminates when
four-wheel drive is engaged.
Door ajar (if equipped):
Illuminates when the ignition is in
the ON position and any door is
open.
Turn signal: Illuminates when the
left or right turn signal or the
hazard lights are turned on. If the
indicators stay on or flash faster, check for a burned out bulb.
O/D
OFF
4x4
LOW
4x4
HIGH
DOOR
AJAR
2004 Expedition (exd)
Owners Guide (post-2002-fmt)
USA English (fus)
13
Page 14
Instrument Cluster
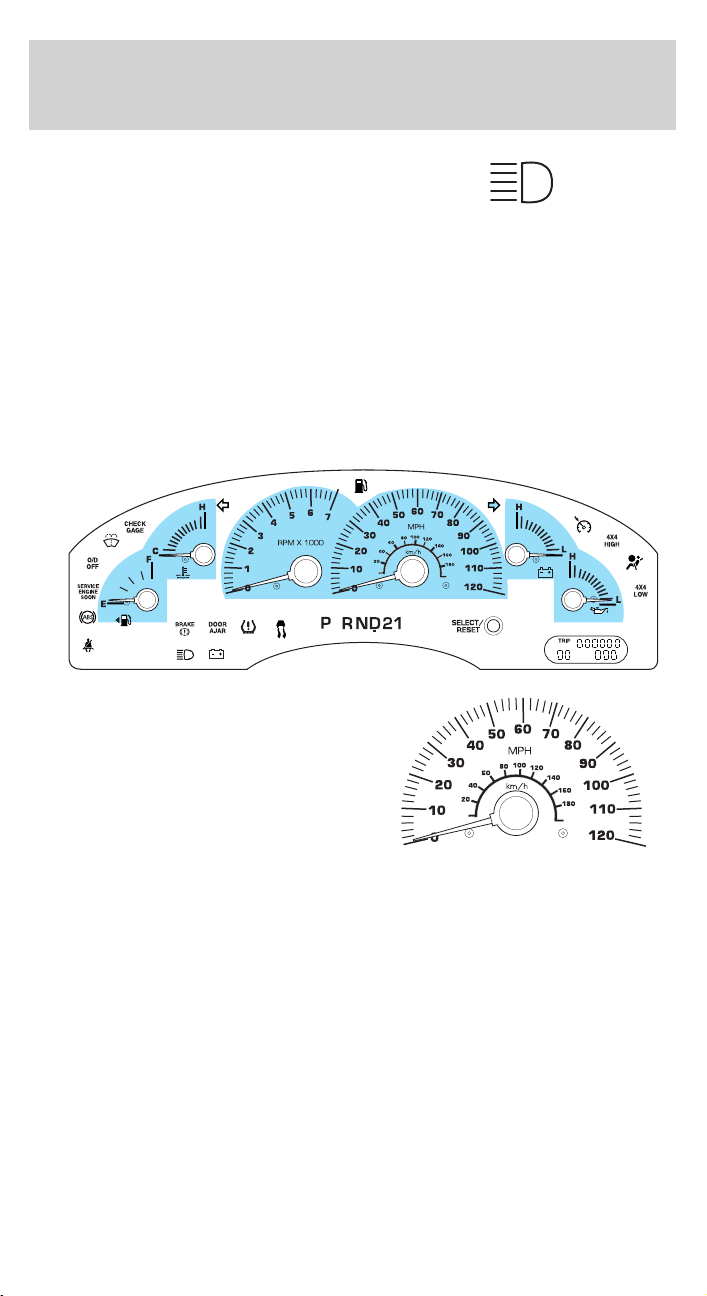
High beams: Illuminates when the
high beam headlamps are turned on.
Key-in-ignition warning chime: Sounds when the key is left in the
ignition in the OFF/LOCK or ACCESSORY position and the driver’s door
is opened.
Headlamps on warning chime: Sounds when the headlamps or parking
lamps are on, the ignition is off (the key is not in the ignition) and the
driver’s door is opened.
Door ajar warning chime: Sounds when any door, liftgate or the
liftgate glass is opened (or not fully closed).
GAUGES
Speedometer: Indicates the
current vehicle speed.
14
2004 Expedition (exd)
Owners Guide (post-2002-fmt)
USA English (fus)
Page 15
Instrument Cluster
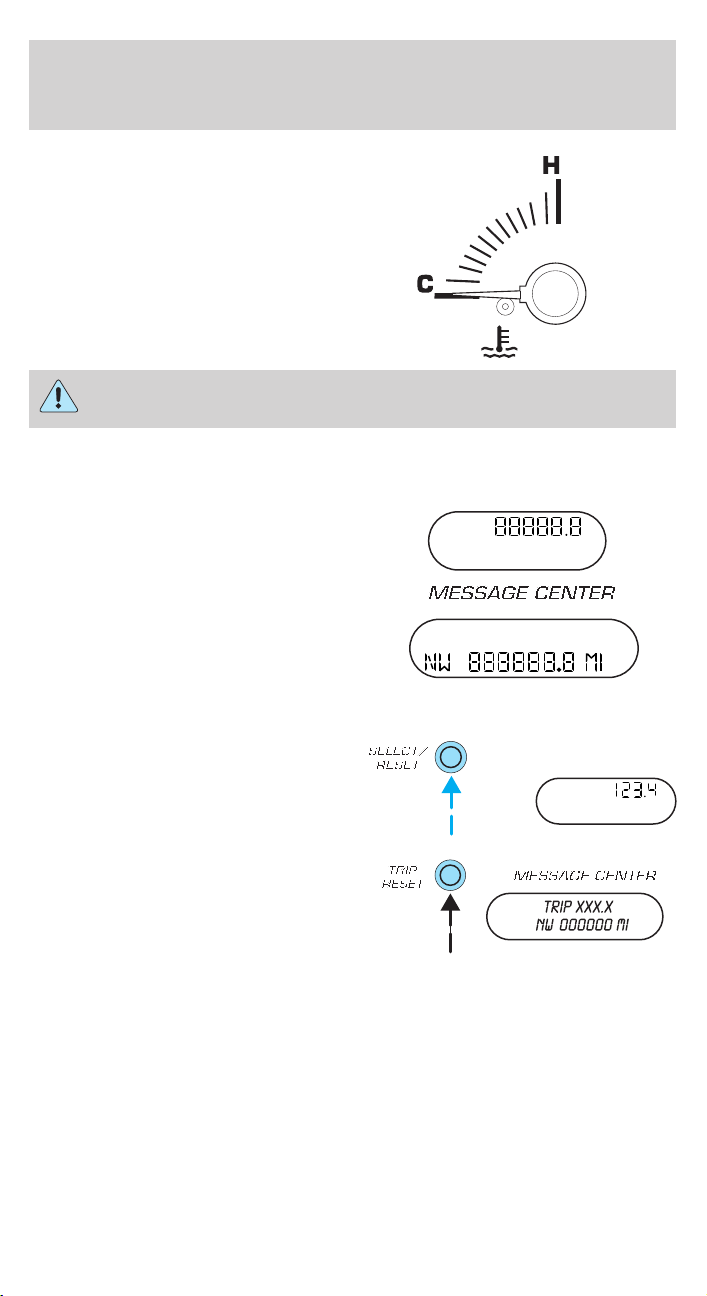
Engine coolant temperature
gauge: Indicates engine coolant
temperature. At normal operating
temperature, the needle will be in
the normal range (between “H” and
“C”). If it enters the red section, the
engine is overheating. Stop the
vehicle as soon as safely possible,
switch off the engine and let the
engine cool.
Never remove the coolant reservoir cap while the engine is
running or hot.
Odometer: Registers the total kilometers (miles) of the vehicle.
• Standard instrument cluster
• Optional instrument cluster
Refer to Message Center in the
Drivers Controls chapter on how to
switch the display from Metric to
English.
Trip odometer: Registers the kilometers (miles) of individual journeys.
• Standard instrument cluster
Press and release the
SELECT/RESET button to toggle
between odometer and trip
odometer display.
• Optional instrument cluster
Press and release the TRIP/RESET
button to toggle between odometer
and trip odometer display. Press and
hold the button to reset.
TRIP
TRIP
2004 Expedition (exd)
Owners Guide (post-2002-fmt)
USA English (fus)
15
Page 16
Instrument Cluster
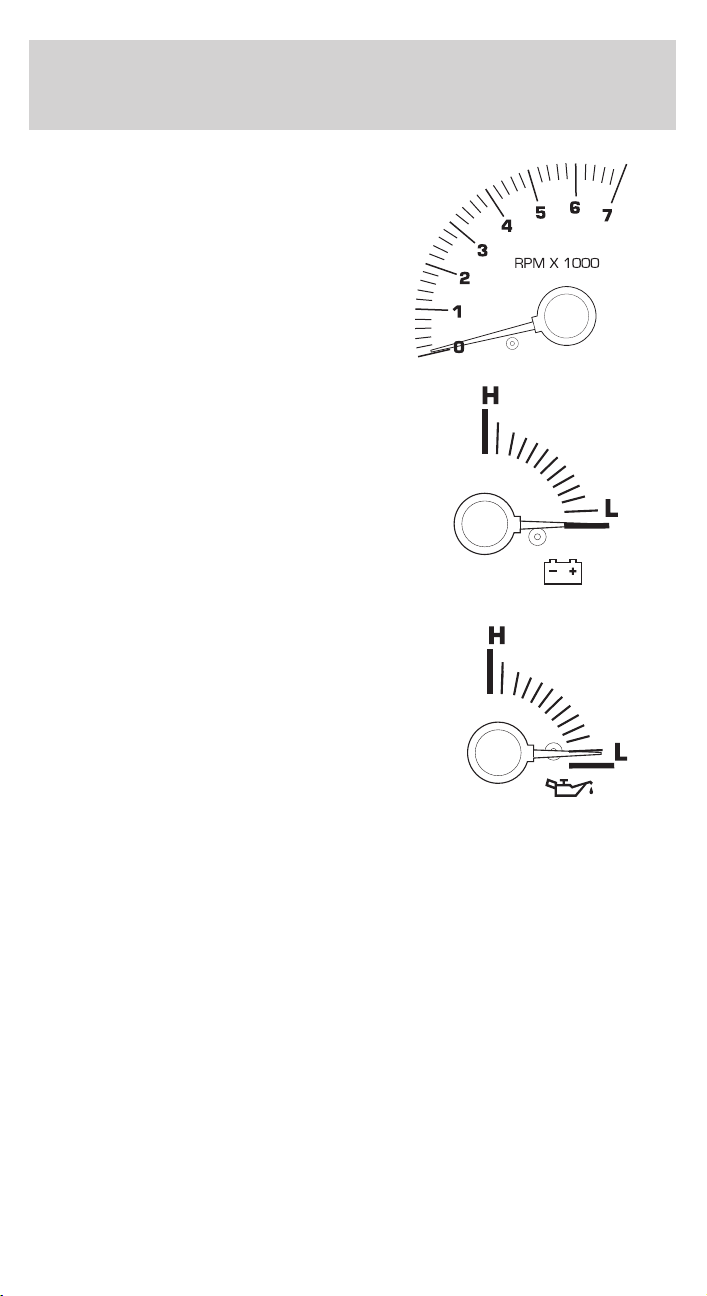
Tachometer: Indicates the engine
speed in revolutions per minute.
Driving with your tachometer
pointer continuously at the top of
the scale may damage the engine.
Battery voltage gauge: Indicates
the battery voltage when the
ignition is in the ON position. If the
pointer moves and stays outside the
normal operating range (as
indicated by arrows), have the
vehicle’s electrical system checked
as soon as possible.
Engine oil pressure gauge:
Indicates engine oil pressure. The
needle should stay in the normal
operating range (between “L” and
“H”). If the needle falls below the
normal range, stop the vehicle, turn
off the engine and check the engine
oil level. Add oil if needed. If the oil
level is correct, have your vehicle
checked at your dealership or by a
qualified technician.
16
2004 Expedition (exd)
Owners Guide (post-2002-fmt)
USA English (fus)
Page 17
Instrument Cluster
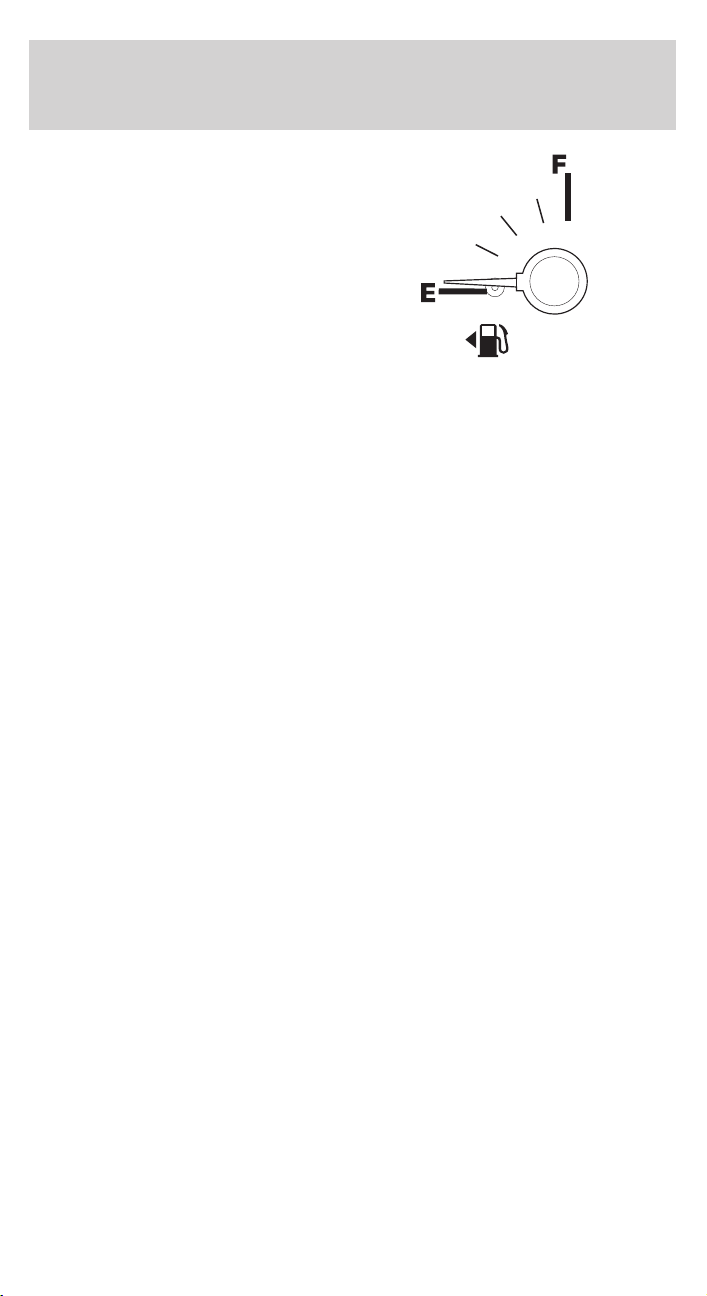
Fuel gauge: Indicates
approximately how much fuel is left
in the fuel tank (when the ignition
is in the ON position). The fuel
gauge may vary slightly when the
vehicle is in motion or on a grade.
Refer to Filling the tank in the
Maintenance and Specifications
chapter for more information.
The FUEL icon and arrow indicates
which side of the vehicle the fuel door is located.
2004 Expedition (exd)
Owners Guide (post-2002-fmt)
USA English (fus)
17
Page 18
Entertainment Systems
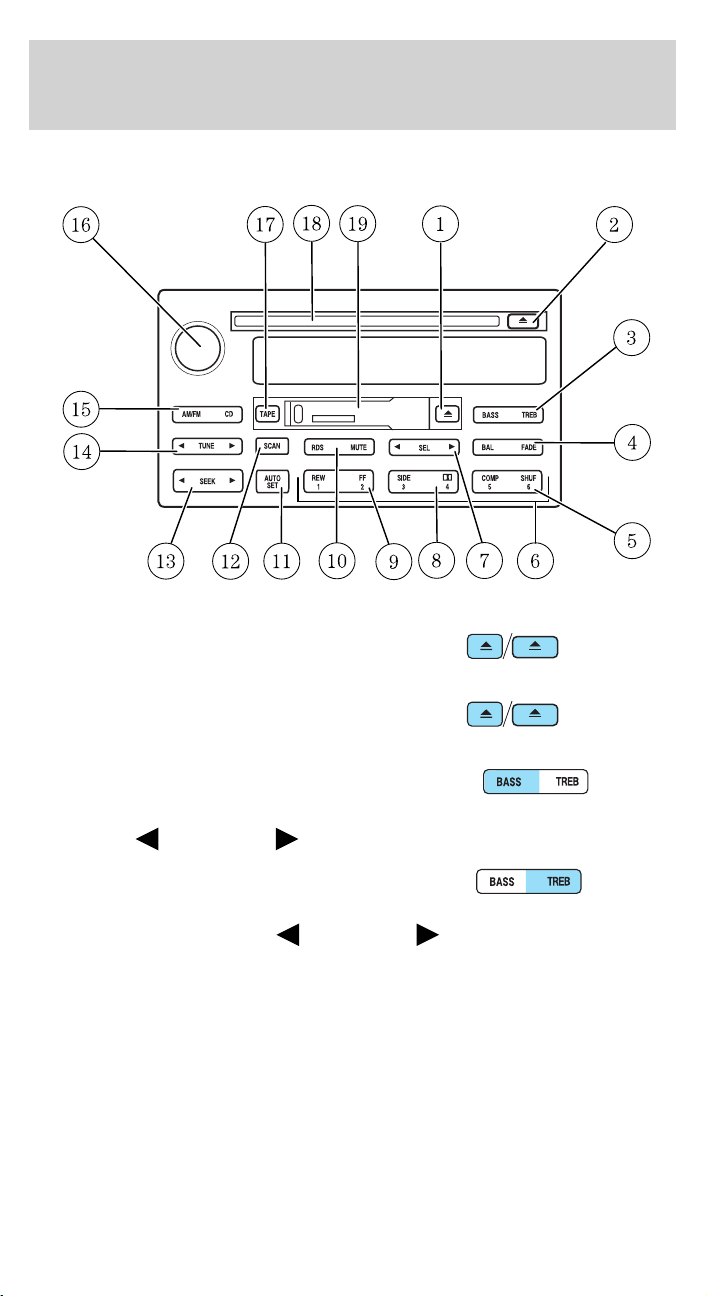
PREMIUM AM/FM STEREO/CASSETTE/SINGLE CD (IF EQUIPPED)
1. EJ (Eject): Press to stop and
eject a tape.
2. EJ (Eject): Press to stop and
eject a CD.
3. BASS: Allows you to increase or
decrease the audio system’s bass
output. Press BASS then press SEL
to decrease
TREB (Treble): Allows you to
increase or decrease the audio
system’s treble output. Press TREB
then press SEL to decrease
18
or increase the bass levels.
or increase the treble levels.
2004 Expedition (exd)
Owners Guide (post-2002-fmt)
USA English (fus)
Page 19
Entertainment Systems
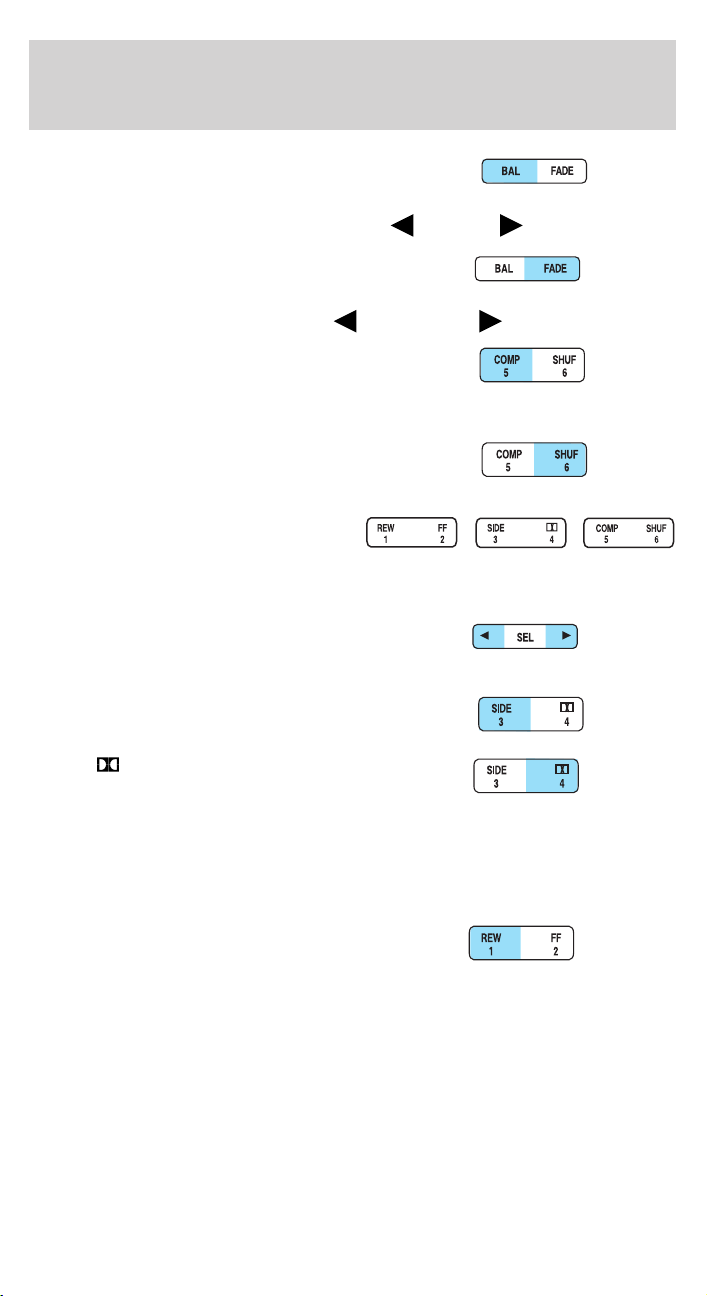
4. BAL (Balance): Allows you to
shift speaker sound between the
right and left speakers. Press BAL
then press SEL to shift sound to the left
FADE: Allows you to shift speaker
sound between the front and rear
speakers. Press FADE then press
SEL to shift the sound to the rear
5. COMP (Compression): In CD
mode, press to bring soft and loud
passages together for a more
consistent listening level. Press again to deactivate.
SHUF (Shuffle): Press to play CD
tracks in random order. Press again
to deactivate random play.
6. Memory preset stations: To set
a memory preset station, tune the
radio to the desired station, then
press and hold the memory preset
control until the sound returns.
7. SEL (Select): Use to adjust
bass, treble, balance and fade levels.
or right .
or the front .
8. Side: Press to play the alternate
side of the tape.
Dolby:
reduction: Reduces tape noise and
hiss; press to activate/deactivate.
The Dolby威 noise reduction system is manufactured under license from
Dolby Laboratories Licensing Corporation. Dolby威 and the double-D
symbol are registered trademarks of Dolby威 Laboratories Licensing
Corporation.
9. REW (Rewind): Works in tape
and CD modes.
In tape mode, radio play continues
until rewind is stopped (with the TAPE control) or the beginning of the
tape is reached.
Dolby威 noise
2004 Expedition (exd)
Owners Guide (post-2002-fmt)
USA English (fus)
19
Page 20
Entertainment Systems
In CD mode, REW control reverses the CD within the current track.
FF (Fast Forward): Works in tape
and CD modes.
In the tape mode, tape direction
automatically reverses when the end of the tape is reached.
In CD mode, FF advances the CD within the current track.
10. MUTE: Press to mute the
playing media. Press again to return
to playing media.
Note: If your vehicle is equipped with the Reverse Sensing System, the
audio volume (if set above a certain level) will be lowered to a preset
value when the Reverse Sensing tone is sounded.
RDS: (Radio Data System): Press RDS to access the clock mode and the
RDS features.
RDS must be turned ON to activate the Traffic, Find Program Type and
Show functions. To turn RDS ON, put the radio in FM mode then press
the RDS button until RDS OFF appears then press SEL control to toggle
function ON.
• Traffic: Allows you to hear traffic broadcasts. With the feature ON,
press SEEK or SCAN to find a station broadcasting a traffic report (if
it is broadcasting RDS data). Traffic information is not available in
most U.S. markets. To activate, press RDS until TRAFFIC OFF
appears in the display then use SEL control to toggle function ON.
• FIND Program type: Allows you to search RDS-equipped stations for
a certain category of music format: Classic, Country, Info, Jazz, Oldies,
R&B, Religious, Rock, Soft, Top 40. Press RDS until FIND appears in
the display then use SEL control to scroll through the desired music
types. Press SEEK or SCAN to find program type.
• Show TYPE: Allows you to display radio station call sign or format.
To activate, press RDS until SHOW appears in the display, then use
the SEL to select NAME or TYPE.
The Federal Communications Commission (FCC) and the Canadian Radio
and Telecommunications Commission (CRTC) recommend that FM radio
broadcasters use RDS technology to transmit information. FM radio
stations are independently operated and individually elect to use RDS
technology to transmit station ID and program type as desired.
• Setting the clock: Press RDS until SELECT HOUR or SELECT MINS
is displayed. Press SEL to increase (
RDS again to disengage the clock mode.
) or decrease ( ). Press
20
2004 Expedition (exd)
Owners Guide (post-2002-fmt)
USA English (fus)
Page 21
Entertainment Systems
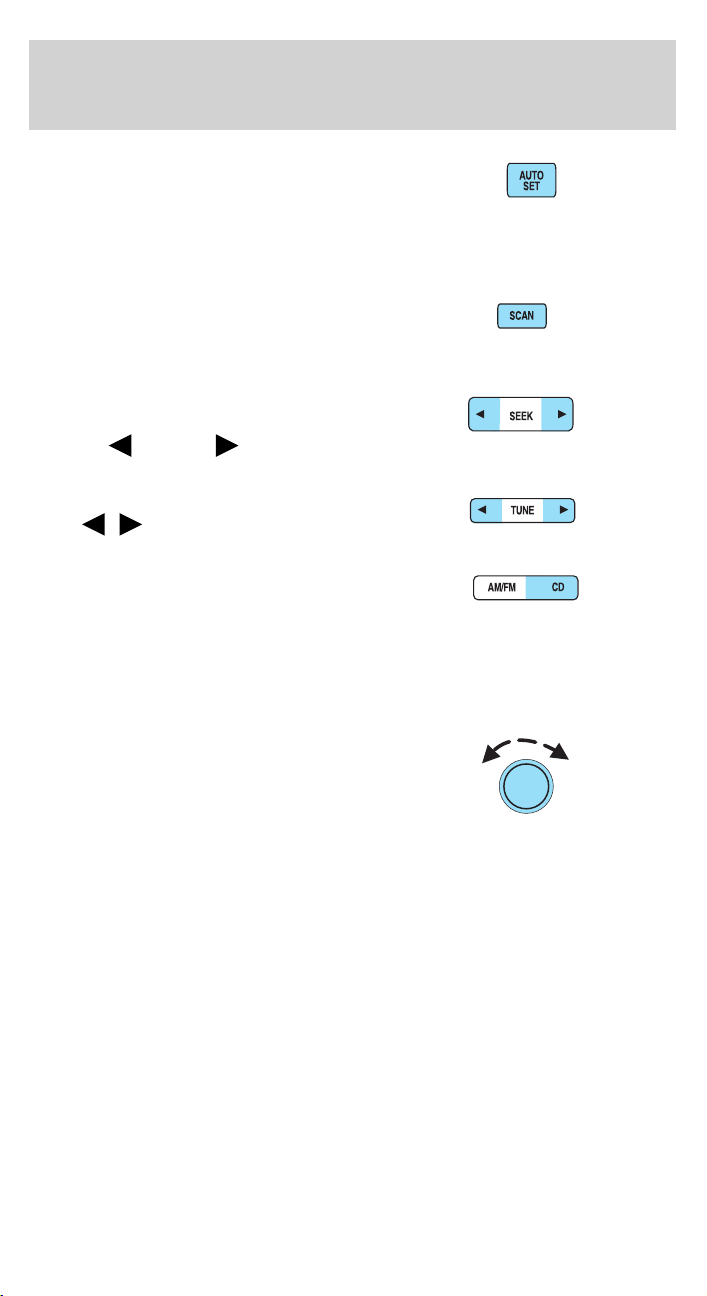
11. AUTOSET: Press to set first six
strong stations into AM, FM1 or
FM2 memory buttons; press again to
return to the original preset
stations. If there are less than six strong stations available on the
frequency band, the remaining memory preset controls will all store the
last strong station available.
12. SCAN: Works in radio, tape and
CD modes. Press SCAN for a brief
sampling of radio stations, tape
selections or CD tracks. Press again to deactivate scan mode.
13. SEEK: Works in radio, tape and
CD modes. Press to access the
previous
radio station, tape selection or CD track.
14. TUNE: Works in radio mode.
Press
down/up the frequency band.
15. AM/FM/CD: Press AM/FM to
select a radio frequency. Press while
in tape or CD mode to return to
radio mode. Press CD to enter CD mode and to play a CD already in the
system. Press AM/FM to switch between AM, FM1, or FM2 memory
preset stations. Press the CD control to toggle between CD and DVD (if
equipped).
16. Power/volume: Press to turn
the system on/off. Turn to
raise/lower the volume.
If the volume is set above a certain
level and the ignition is turned off,
the volume will come back on at a
“nominal” listening level when the ignition switch is turned back on.
Audio power can also be turned on by pressing the AM/FM select control
or the TAPE/CD select control.
Speed sensitive volume (if equipped): Automatically changes the
volume with vehicle speed to compensate for road and wind noise. The
recommended level is 1–3. Level 0 turns the speed sensitive volume off
and level 7 is the maximum setting.
or next listenable
/ to manually advance
2004 Expedition (exd)
Owners Guide (post-2002-fmt)
USA English (fus)
21
Page 22

Entertainment Systems
To engage the speed sensitive volume feature, press and hold the volume
control for five seconds (with the radio on). Press SEL to
increase
will appear in the display.
17. TAPE: Press to begin tape play.
Press during fast forward or rewind
to stop fast forward or rewind
function.
18. CD door: Insert the disc with the playing side down and printed side
up.
CD units are designed to play commercially pressed 12 cm (4.75 in)
audio compact discs only. Due to technical incompatibility, certain
recordable and re-recordable compact discs may not function
correctly when used in Ford CD players. Irregular shaped CDs,
CDs with a scratch protection film attached, and CDs with
homemade paper (adhesive) labels should not be inserted into
the CD player. The label may peel and cause the CD to become
jammed. It is recommended that homemade CDs be identified
with permanent felt tip marker rather than adhesive labels. Ball
point pens may damage CDs. Please contact your dealer for
further information.
19. Tape door: Insert the tape facing the right.
/decrease volume compensation levels. The selected level
22
2004 Expedition (exd)
Owners Guide (post-2002-fmt)
USA English (fus)
Page 23
Entertainment Systems
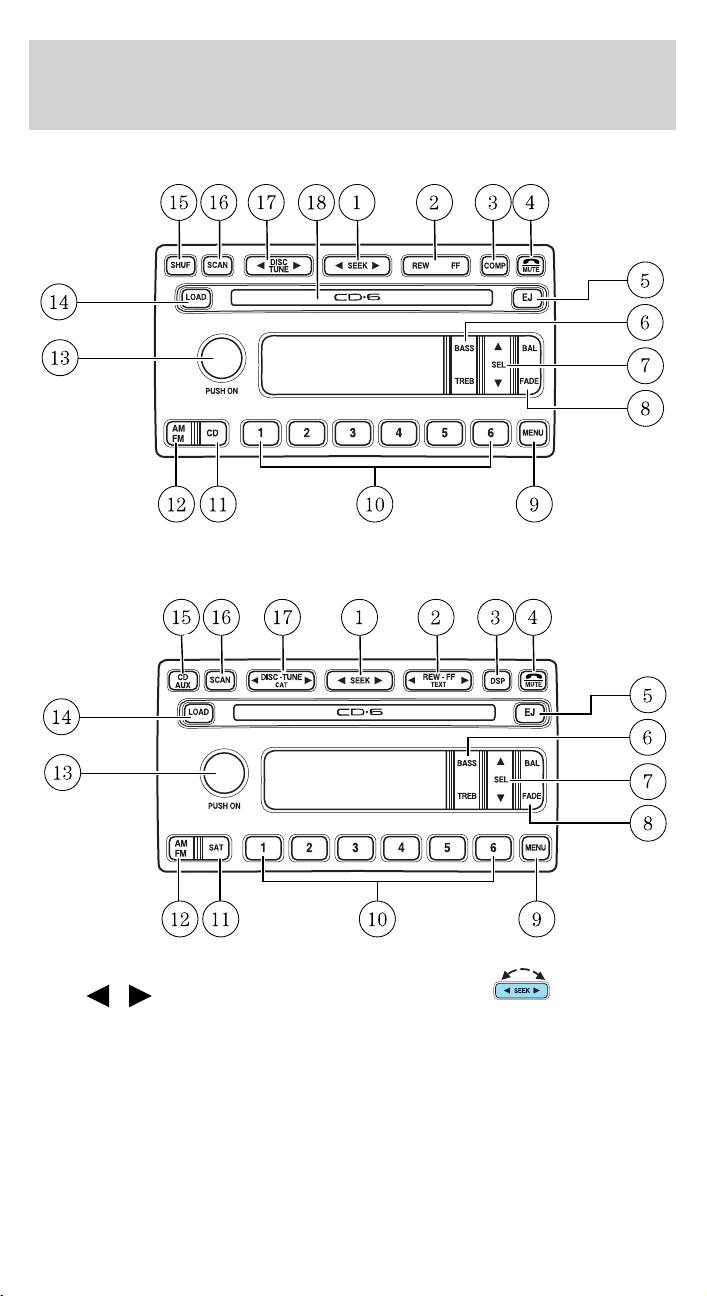
PREMIUM IN-DASH SIX CD SOUND SYSTEM (IF EQUIPPED)
AUDIOPHILE SATELLITE READY AM/FM STEREO IN-DASH SIX CD
RADIO (IF EQUIPPED)
1. Seek: Press and release
SEEK
strong station, selection or track.
/ for previous/next
2004 Expedition (exd)
Owners Guide (post-2002-fmt)
USA English (fus)
23
Page 24
Entertainment Systems
2. REW (Rewind): In CD mode,
press to reverse within the current
track.
Fast forward: In CD mode, press until desired selection is reached.
TEXT: TEXT is only available when
equipped with Satellite radio. Your
Audiophile radio comes equipped
with Satellite ready capability. The kit to enable Satellite reception is
available through your Ford dealer. Detailed Satellite instructions are
included with the dealer installed kit.
Press
3. DSP (Digital Signal
Processing): Press DSP to access
the Ambiance menu. Ambiance gives
the feeling of “being there” to your
music, creating increased clarity as well as an open and spacious feel to
the music. Press SEL to engage/disengage. Turn the volume control to
increase/decrease the level of ambiance.
Occupancy: Press DSP again to change the occupancy mode to optimize
sound for ALL SEATS, DRIVER SEAT or REAR SEATS. Press SEL to
scroll through settings.
COMP (Compression): The compression feature operates in CD mode
and brings soft and loud CD passages together for a more consistent
listening level. Press the COMP control until COMP ON is displayed.
4. Mute: Press to MUTE playing
media; press again return to playing
media
Note: If your vehicle is equipped with the Reverse Sensing System, the
audio volume (if set above a certain level) will be lowered to a preset
value when the Reverse Sensing tone is sounded.
5. Eject: Press to eject a CD. Press
and hold to eject all loaded discs.
to view current song and to view current artist.
6. Bass: Press BASS; then press
SEL
the bass output.
24
/ to decrease/increase
2004 Expedition (exd)
Owners Guide (post-2002-fmt)
USA English (fus)
Page 25
Entertainment Systems
Treble: Press TREB; then press
SEL
the treble output.
7. Select: Use with Bass, Treble,
Balance and Fade controls to adjust
levels and set the clock.
8. Balance: Press BAL; then press
SEL
right/left speakers.
Fade: Press FADE; then press
SEL
rear/front speakers.
9. Menu: Press MENU and SEL to
access clock mode, RDS on/off,
Traffic announcement mode,
Program type mode, and Shuffle
mode.
The Federal Communications Commission (FCC) and the Canadian Radio
and Telecommunications Commission (CRTC) recommend that FM radio
broadcasters use RDS technology to transmit information. FM radio
stations are independently operated and individually elect to use RDS
technology to transmit station ID and program type as desired.
Traffic: Allows you to hear traffic broadcasts. With the feature ON, press
SEEK or SCAN to find a station broadcasting a traffic report (if it is
broadcasting RDS data).Traffic information is not available in most
U.S. markets.
FIND Program type: Allows you to search RDS-equipped stations for a
certain category of music format: Classic, Country, Info, Jazz, Oldies,
R&B, Religious, Rock, Soft, Top 40.
Show TYPE: Displays the station’s call letters and format.
Shuffle: If equipped with an Audiophile system, press to play tracks in a
random order when in CD mode. Press MENU until SHUF appears in the
display. Use SEL to select SHUF DISC, SHUF TRAC or SHUF OFF.
Compression: Brings soft and loud CD passages together for a more
consistent listening level when in CD model. Press MENU until
compression status is displayed. Press the SEL control to enable the
/ to decrease/increase
/ to shift sound to the
/ to shift sound to the
2004 Expedition (exd)
Owners Guide (post-2002-fmt)
USA English (fus)
25
Page 26
Entertainment Systems
compression feature when COMP OFF is displayed. Press the SEL
control again to disable the feature when COMP ON is displayed.
Setting the clock: Press MENU until SELECT HOUR or SELECT MINS
is displayed. Use SEL to manually increase (
hours/minutes. Press MENU again to disengage clock mode.
10. Memory presets: To set a
station: Select frequency band
AM/FM; tune to a station, press and
hold a preset button until sound
returns.
11. SAT (if equipped): Your
Audiophile radio comes equipped
with Satellite Ready capability. The
kit to enable the Satellite reception is available through your Ford dealer.
Detailed satellite instructions are included with the dealer installed kit.
If equipped with Satellite Radio, press to select from SAT1/SAT2/SAT3.
CD: Press to select CD mode. Press
the CD control to toggle between
CD and DVD (if equipped).
12. AM/FM: Press to select AM/FM
frequency band.
Autoset: Allows you to set the
strongest local radio stations without losing your original manually set
preset stations for AM/FM1/FM2 . Press and momentarily hold AM/FM.
AUTOSET will flash on the display. When the six strongest stations are
filled, the station stored in preset 1 will begin playing. If there are less
than six strong stations, the system will store the last one in the
remaining presets. Press again to disengage.
13. Power/volume: Press to turn
ON/OFF; turn to increase or
decrease volume levels.
Speed sensitive volume: Radio
volume changes automatically and
slightly with vehicle speed to
compensate for road and wind noise. Recommended level is 1–3. Level 0
turns the feature off and level 7 is the maximum setting.
Press and hold the volume control for five seconds. Then press SEL to
increase (
appear in the display.
) or decrease ( ) the volume setting. The level will
) or decrease ( ) the
26
2004 Expedition (exd)
Owners Guide (post-2002-fmt)
USA English (fus)
Page 27
Entertainment Systems
14. Load: Press to load a CD. Press
and hold to load up to six discs.
15. CD AUX: Press to access CD or
AUX mode.
CD units are designed to play
commercially pressed 12 cm (4.75 in) audio compact discs only.
Due to technical incompatibility, certain recordable and
re-recordable compact discs may not function correctly when
used in Ford CD players. Irregular shaped CDs, CDs with a
scratch protection film attached, and CDs with homemade paper
(adhesive) labels should not be inserted into the CD player. The
label may peel and cause the CD to become jammed. It is
recommended that homemade CDs be identified with permanent
felt tip marker rather than adhesive labels. Ballpoint pens may
damage CDs. Please contact your dealer for further information.
SHUF (Shuffle): If equipped with
a Premium system, press to play
tracks in random order. Press again
to deactivate random play.
16. Scan: Press SCAN to hear a
brief sampling of radio stations, SAT
channels or CD tracks. Press again
to stop.
17. Disc/Tune: Press
manually tune down/up the radio
frequency band, or to listen to the
previous/next track on the CD.
CAT: CAT is only available when equipped with Satellite Radio. Your
Audiophile radio comes equipped with Satellite ready capability. The kit
to enable Satellite reception is available through your Ford dealer.
Detailed Satellite instructions are included with the dealer installed kit.
Press to scroll through a list of categories, (i.e., Pop, Rock, Country, Hip
Hop, R&B, Dance, Jazz/Standards, Classical, Variety, News, Sports and
Entertainment).
For information regarding SIRIUS Satellite Radio, please call toll-free
888-539-SIRIUS (888-539-7474) or visit the SIRIUS website at
www.siriusradio.com
or to
2004 Expedition (exd)
Owners Guide (post-2002-fmt)
USA English (fus)
27
Page 28
Entertainment Systems
REAR SEAT RADIO CONTROLS (IF EQUIPPED)
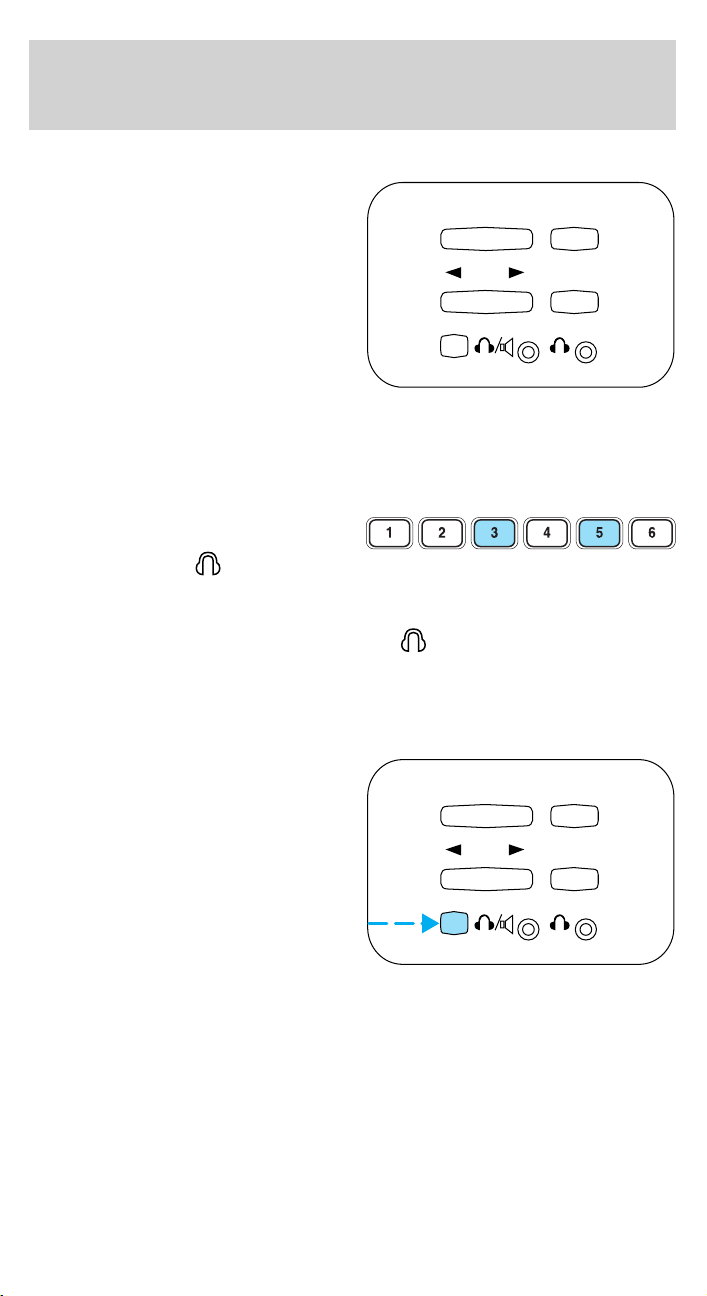
If your vehicle is equipped with a
front row console, then it is also
equipped with rear seat radio
controls. This feature allows front
and middle seat passengers to listen
to different media sources (radio,
cassette, CD or DVD)
simultaneously. (However, the front
and middle-seat passengers cannot
listen to two different radio stations
at the same time.)
When the rear seat controls are activated, rear seat passengers can use
the controls to change the playing media for all passengers (Single Play
mode). In this mode, all speakers will play audio from the same media
source for all passengers to hear. To activate the rear seat radio controls:
• Press the memory preset controls
3 and 5 at the same time. A
headphone icon
will illuminate
in the radio display, indicating the rear seat radio controls are active.
• Press memory preset controls 3 and 5 a second time to deactivate the
rear seat controls. The headphone icon
display.
If there is a discrepancy between the rear seat controls and the front
audio controls (such as both trying to listen to the same playing media),
the front audio system will receive the desired selection.
To activate Dual Play mode (rear
seat passengers listen to a different
playing media than the front seat
passengers):
• Press the speaker/headphone
control.
• Press the MODE control to
change audio sources (for
headphone mode only)
• Use the SEEK, VOLUME and
MEMORY controls to make adjustments to the playing media.
-
VOLUME +MODE
SEEK MEMORY
will turn off in the radio
-
VOLUME +MODE
SEEK MEMORY
28
2004 Expedition (exd)
Owners Guide (post-2002-fmt)
USA English (fus)
Page 29
Entertainment Systems
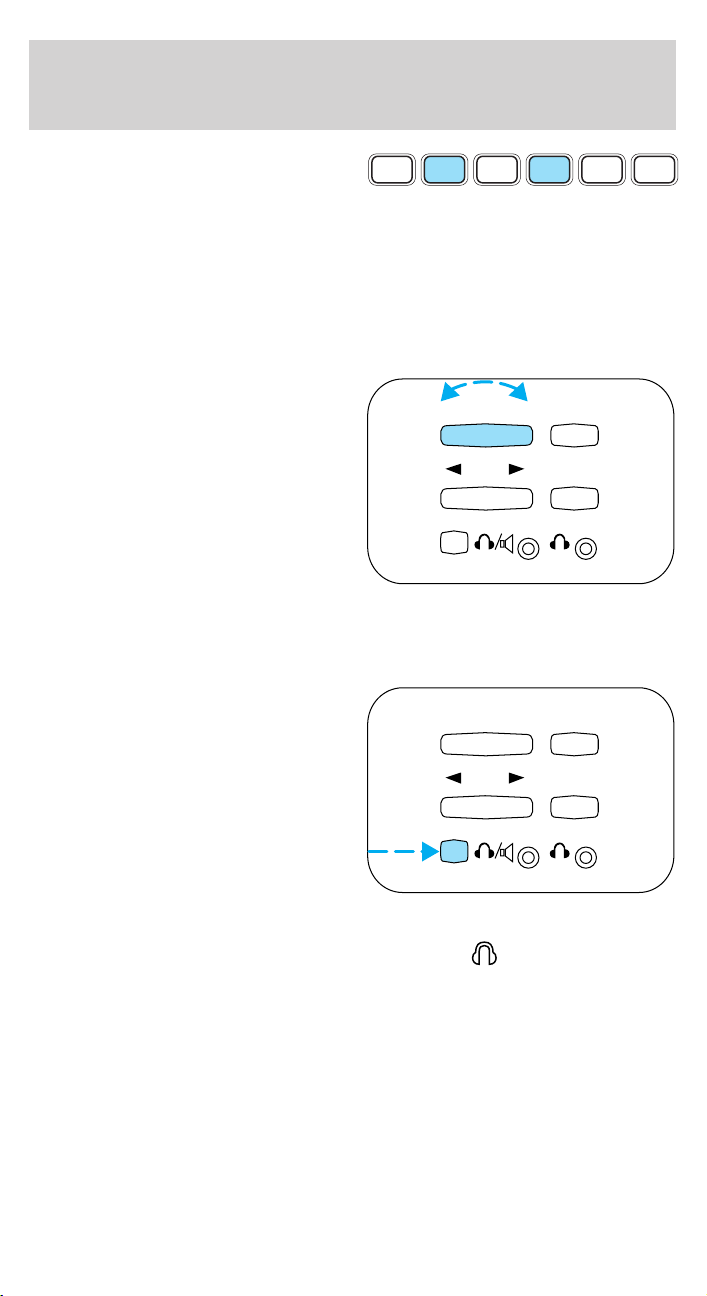
• Dual Play mode may also be
activated by pressing memory
1 2 3 4 5 6
presets 2 and 4 simultaneously on
the front audio controls.
The rear speakers mute and rear seat passengers have audio (for their
selected media) available through their headphones.
To adjust the volume
The volume control allows the rear seat passengers to adjust the volume
level of the audio system.
Press the + control to increase
-
volume.
VOLUME +MODE
Press the - control to decrease
volume.
SEEK MEMORY
From the rear seat controls, volume control can be set no higher than
the current radio setting unless the speakers are turned off.
Turning the rear speakers on and off
Press the headphone/speaker
-
control to turn the rear speakers on
VOLUME +MODE
(Single Play mode) or off (Dual Play
mode).
SEEK MEMORY
Using headphones/Dual Play mode
Plug a 3.5 mm headphone (not included) into the
jack. Press the
speaker on/off control to operate the headphones. DUAL PLAY
illuminates in the radio display and the fade control is disabled, signaling
that Dual Play has been activated.
2004 Expedition (exd)
Owners Guide (post-2002-fmt)
USA English (fus)
29
Page 30
Entertainment Systems
The rear speakers will cut out once the speaker on/off control is pressed.
The front speaker will remain playing for the front passengers. Press the
control again to deactivate the headphones. SINGLE PLAY illuminates in
the radio display and the fade control is enabled, signaling that Dual Play
mode has been deactivated.
To enable Dual Play, the rear seat controls must be active
and
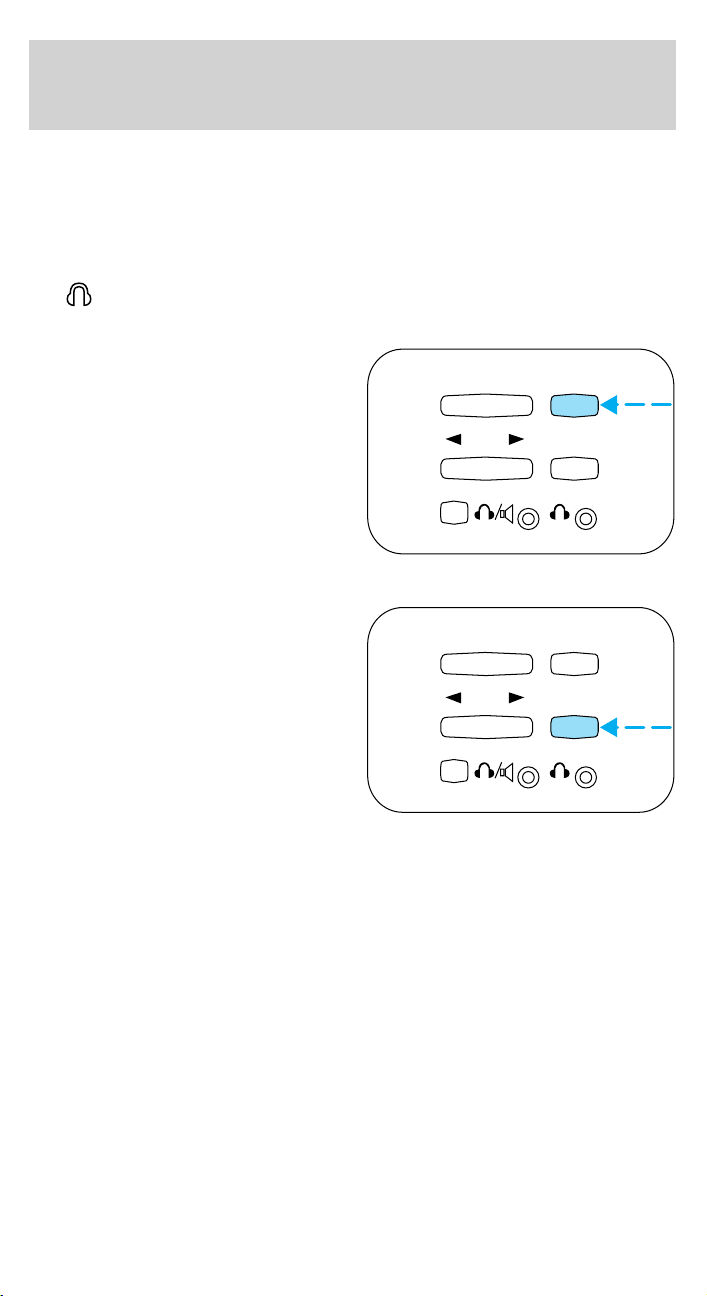
Mode select
Push the MODE control to toggle
between AM, FM1, FM2, tape (if
equipped), CD, CD changer (if
equipped) or DVD (if equipped). If
in Dual Play mode, SHARED
illuminates in the radio display when
the front and rear modes are set to
the same media.
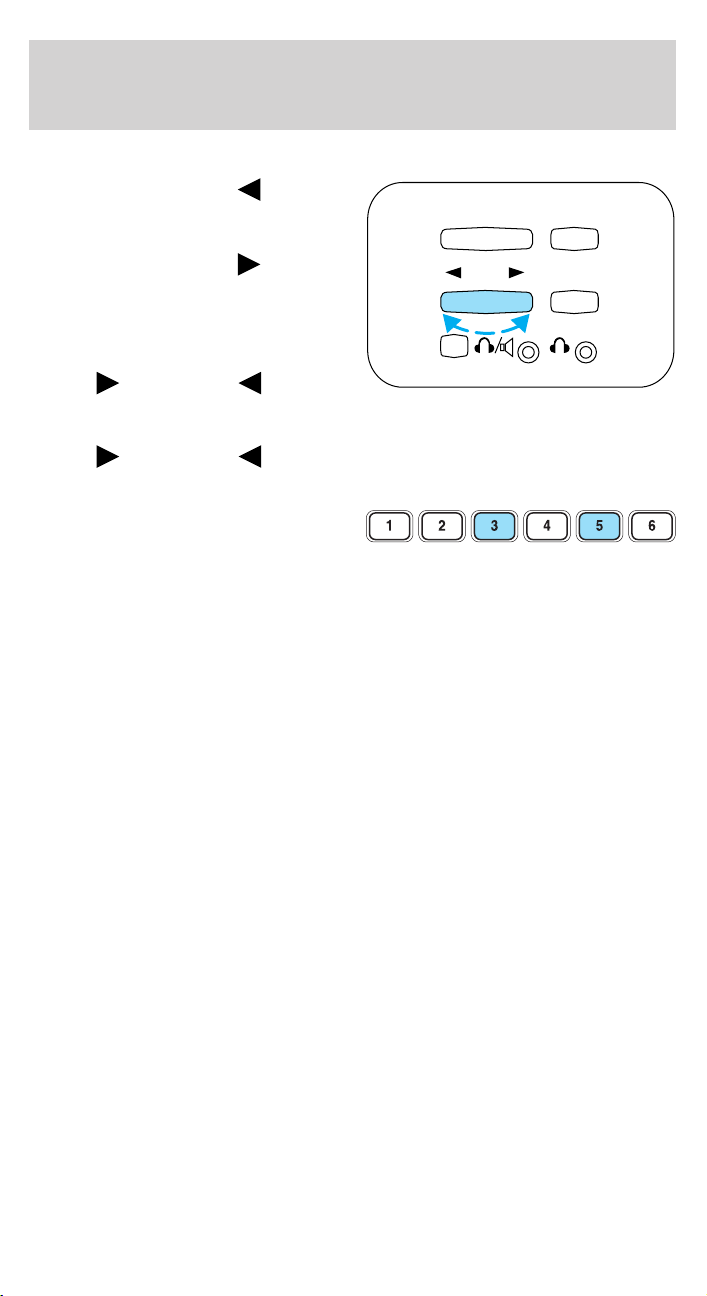
Memory preset control
Push the MEMORY control
successively to allow rear seat
passengers to scroll through the 6
memory presets in AM, FM1 or
FM2.
Push the MEMORY control in CD
mode (if equipped) to advance to
the next disc.
illuminated in the radio display.
-
VOLUME +MODE
SEEK MEMORY
-
VOLUME +MODE
SEEK MEMORY
30
2004 Expedition (exd)
Owners Guide (post-2002-fmt)
USA English (fus)
Page 31
Entertainment Systems
Seek function
• In radio mode, press
the next listenable station down
the frequency band.
• In radio mode, press
the next listenable station up the
frequency band.
• In tape mode (if equipped), use
the SEEK function to access the
next
selection.
• In CD mode (if equipped), use the SEEK function to access the
next
Parental control
Press the memory preset controls 3
and 5 simultaneously on the front
audio controls to disable the rear
seat controls. They will remain disabled until the front seat passengers
“enable” them again by simultaneously pressing the 3 and 5 preset
controls. The settings of the front seat controls will always override
those of the rear seat controls.
RADIO FREQUENCIES
AM and FM frequencies are established by the Federal Communications
Commission (FCC) and the Canadian Radio and Telecommunications
Commission (CRTC). Those frequencies are:
AM - 530, 540–1700, 1710 kHz
FM- 87.7, 87.9–107.7, 107.9 MHz
or previous
or previous selection.
to find
to find
-
VOLUME +MODE
SEEK MEMORY
RADIO RECEPTION FACTORS
There are three factors that can affect radio reception:
• Distance/strength: The further you travel from an FM station, the
weaker the signal and the weaker the reception.
• Terrain: Hills, mountains, tall buildings, power lines, electric fences,
traffic lights and thunderstorms can interfere with your reception.
• Station overload: When you pass a broadcast tower, a stronger signal
may overtake a weaker one and play while the weak station frequency
is displayed.
2004 Expedition (exd)
Owners Guide (post-2002-fmt)
USA English (fus)
31
Page 32

Entertainment Systems
CASSETTE/PLAYER CARE
Do:
• Use only cassettes that are 90 minutes long or less.
• Tighten very loose tapes by inserting a finger or pencil into the hole
and turning the hub.
• Remove loose labels before inserting tapes.
• Allow tapes which have been subjected to extreme heat, humidity or
cold to reach a moderate temperature before playing.
• Clean the cassette player head with a cassette cleaning cartridge after
10–12 hours of play to maintain good sound/operation.
Don’t:
• Expose tapes to direct sunlight, extreme humidity, heat or cold.
• Leave tapes in the cassette player for a long time when not being
played.
CD/CD PLAYER CARE
Do:
• Handle discs by their edges only. Never touch the playing surface.
• Inspect discs before playing. Clean only with an approved CD cleaner
and wipe from the center out.
Don’t:
• Expose discs to direct sunlight or heat sources for extended periods
of time.
• Insert more than one disc into each slot of the CD changer magazine.
• Clean using a circular motion.
CD units are designed to play commercially pressed 12 cm (4.75 in)
audio compact discs only. Due to technical incompatibility, certain
recordable and re-recordable compact discs may not function
correctly when used in Ford CD players. Irregular shaped CDs,
CDs with a scratch protection film attached, and CDs with
homemade paper (adhesive) labels should not be inserted into
the CD player. The label may peel and cause the CD to become
jammed. It is recommended that homemade CDs be identified
with permanent felt tip marker rather than adhesive labels. Ball
point pens may damage CDs. Please contact your dealer for
further information.
32
2004 Expedition (exd)
Owners Guide (post-2002-fmt)
USA English (fus)
Page 33
Entertainment Systems
AUDIO SYSTEM WARRANTY AND SERVICE
Refer to the Warranty Guide for audio system warranty information. If
service is necessary, see your dealer or qualified technician.
Whenever a warning is received, the radio volume will be lowered
to a volume that will allow the tones to be heard. The radio
volume will return to the previous level after the warning goes
away.
REAR SEAT ENTERTAINMENT DVD SYSTEM (IF EQUIPPED)
Your vehicle may be equipped with a Rear Seat Entertainment DVD
System which allows you to watch DVDs, play music CDs and to plug in
and play video game systems. Please review this material to become
familiar with the system features and safety information.
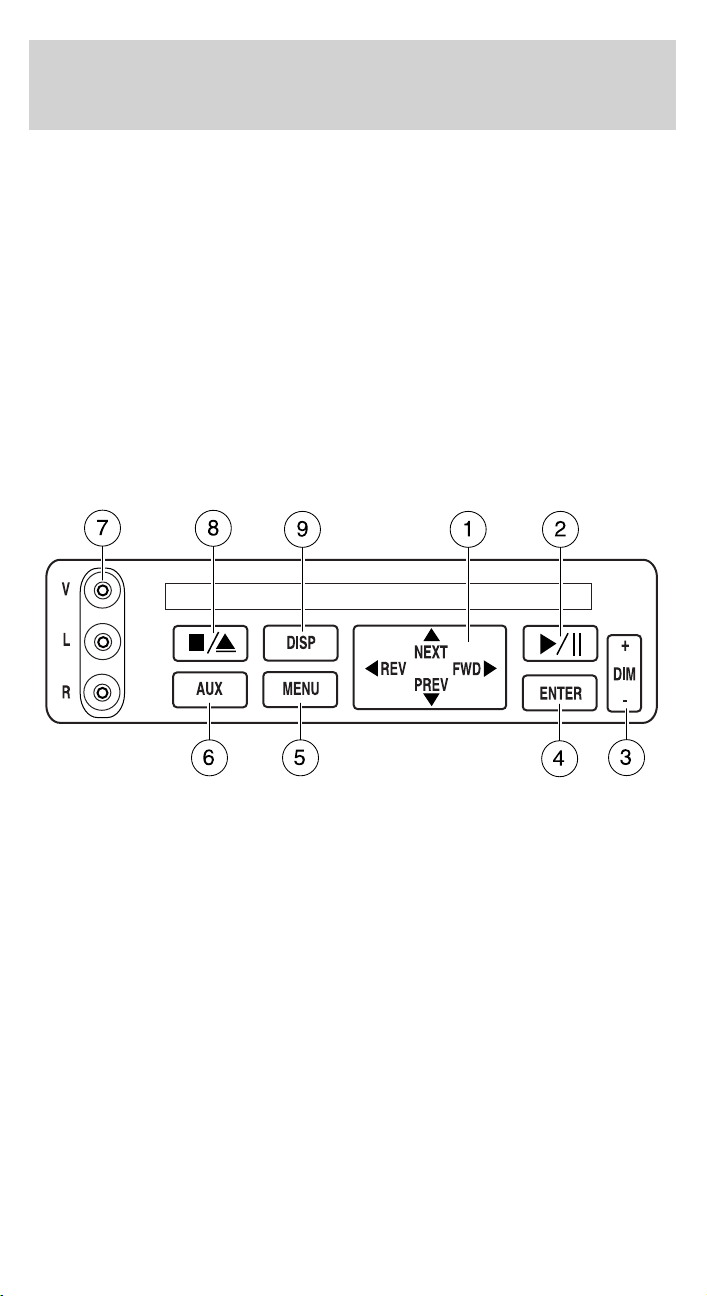
DVD player controls
1. MAIN control
• NEXT — Press to access the next track on the CD, the next chapter
on the DVD, or to go up in cursor mode.
• PREV — Press to access the previous track on the CD, the previous
chapter on the DVD, or to go down in cursor mode.
• REV — Press to reverse in CD and DVD play modes or to move the
cursor left in the menu active mode.
• FWD —Press to advance in CD and DVD play modes or to move the
cursor right in the menu active mode.
2004 Expedition (exd)
Owners Guide (post-2002-fmt)
USA English (fus)
33
Page 34
Entertainment Systems
2. PLAY/PAUSE control
Press to playback or pause the DVD.
3. DIM control
Adjust to increase (+) or decrease (-) the amount of brightness on the
screen.
4. ENTER control
Press to select the function pointed to within the active menu. May also
be used by some user interactive discs during movie play.
5. MENU control
Press to bring up the disc menu.
6. AUX control
Press to switch DVD player from play mode to auxiliary mode.
7. Auxiliary jacks
Insert lines for standard video game players.
8. STOP/EJECT control
Press once to stop DVD play. Press again to eject the DVD.
9. DISPLAY (DISP) control
Press to enable on screen display of player menu and user display
adjustments.
DVD control features
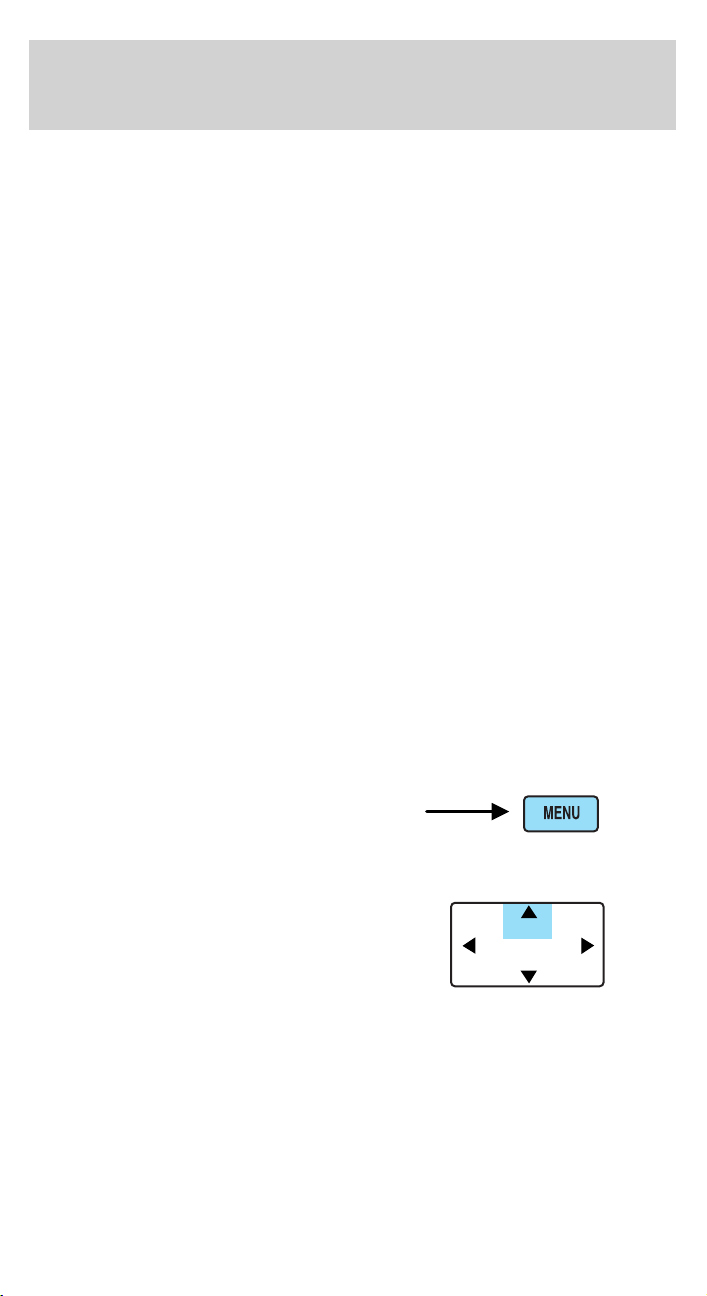
Menu control
Press the MENU control to enter
into MENU mode. This allows you to
move and choose within the DVD
generated menu structure. Once in
MENU mode:
• Press the NEXT control to move
the cursor one position upward
34
2004 Expedition (exd)
Owners Guide (post-2002-fmt)
USA English (fus)
REV
NEXT
PREV
FWD
Page 35
Entertainment Systems
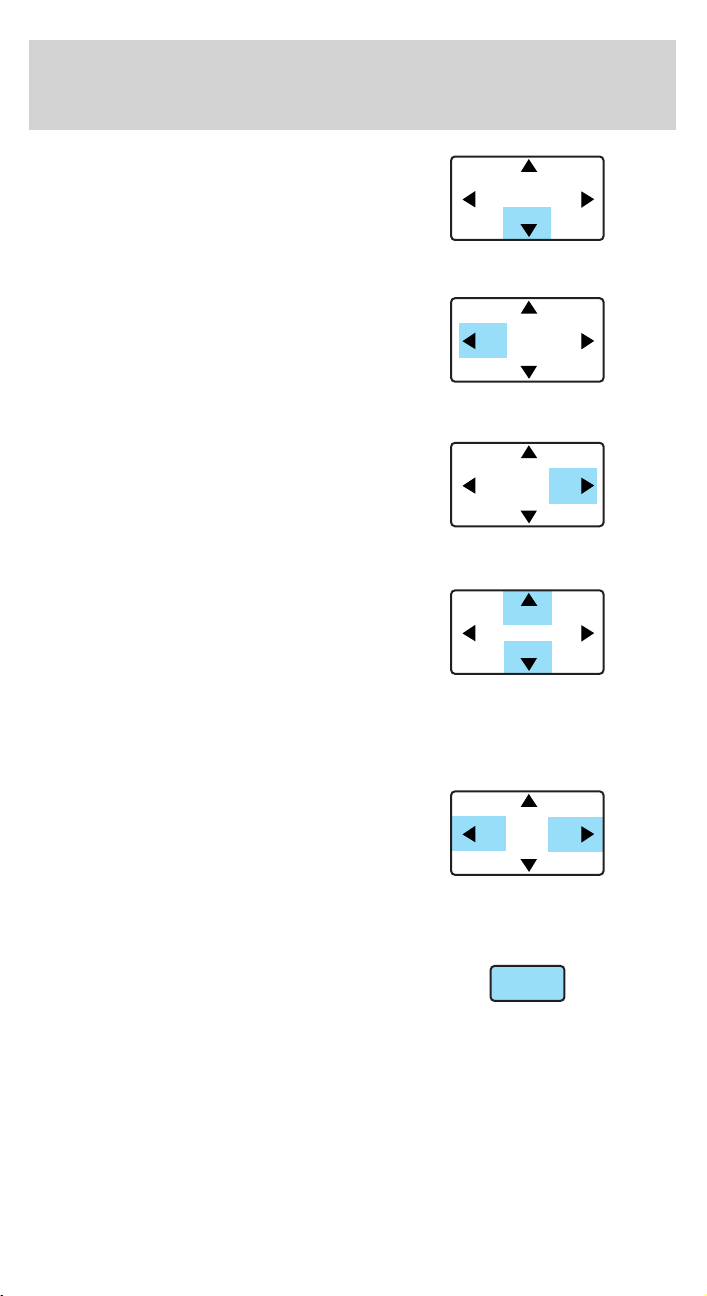
• Press the PREV control to move
the cursor one position downward
• Press the REV control to move
the cursor left one position
• Press the FWD control to move
the cursor right one position
Next/Previous control
The NEXT (up) and PREV (down)
controls allow you to access the
next or previous track on a CD or
chapter on a DVD. When pressed,
the playing audio will mute
momentarily while the next chapter
is accessed. Press and hold to advance or reverse multiple tracks or
chapters.
REV/FWD control
Press the REV/FWD control during
playback mode to reverse or
advance at a normal speed. Press
the REV/FWD control again to
disengage the reverse/advance
action and return to normal
playback mode
Enter control
The ENTER control allows you to
select items when in MENU mode.
Press the ENTER control to select the desired highlighted item.
REV
REV
REV
REV
REV
NEXT
FWD
PREV
NEXT
FWD
PREV
NEXT
FWD
PREV
NEXT
FWD
PREV
NEXT
FWD
PREV
ENTER
2004 Expedition (exd)
Owners Guide (post-2002-fmt)
USA English (fus)
35
Page 36
Entertainment Systems
CD play mode
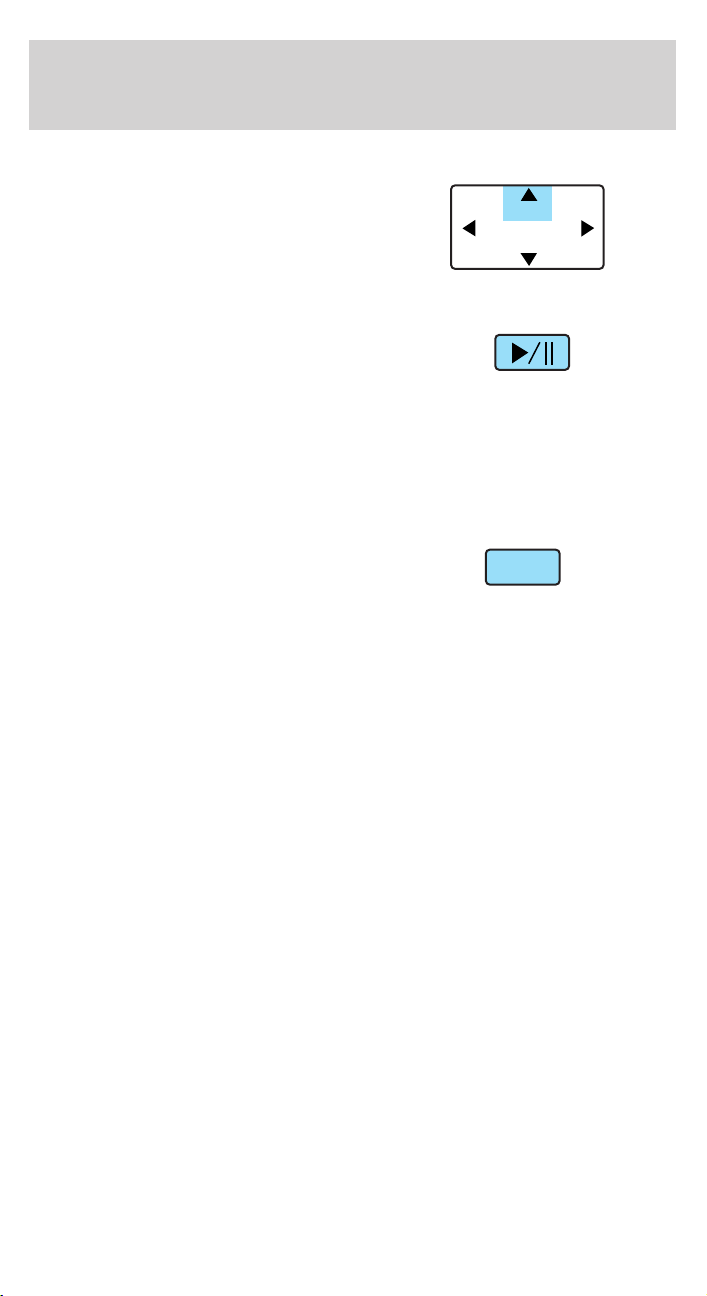
Press NEXT during CD play to
advance to the next track. If you
press NEXT during the last track,
the system will wrap around to the
first track and begin play.
Slow play mode
To enter slow play mode, press the
PLAY/PAUSE control. Once the
system is in pause mode, press the
FWD or REV control for slow motion playback. Three different speeds
are available depending on how long the control is held. Press the
control once for slow motion playback. Press the control again to
disengage slow motion playback. Press the PLAY/PAUSE control to
return to normal playback mode.
User menu mode
To adjust the display setting, press
DISP once and the player menu will
appear. Press DISP again to adjust
the display setting. Use the arrow controls and the ENTER controls to
select the various screen settings. (Available screen selections are 16x9,
Normal, 4x3 and Zoom).
The DVD player will read the disc type and configure the display
accordingly. Some movies have a wide screen movie format to fit a
normal 4x3 screen. In this case, the movie will have black bars on the
top and bottom. When shown on the screen, it may appear as a small
screen within the wide screen. It may be desirable to view this type of
movie in zoom mode. To enter zoom mode, press DISP once for the
player menu and again to adjust the display setting. Select zoom from
the screen settings by using the arrow and ENTER controls.
REV
NEXT
PREV
DISP
FWD
36
2004 Expedition (exd)
Owners Guide (post-2002-fmt)
USA English (fus)
Page 37
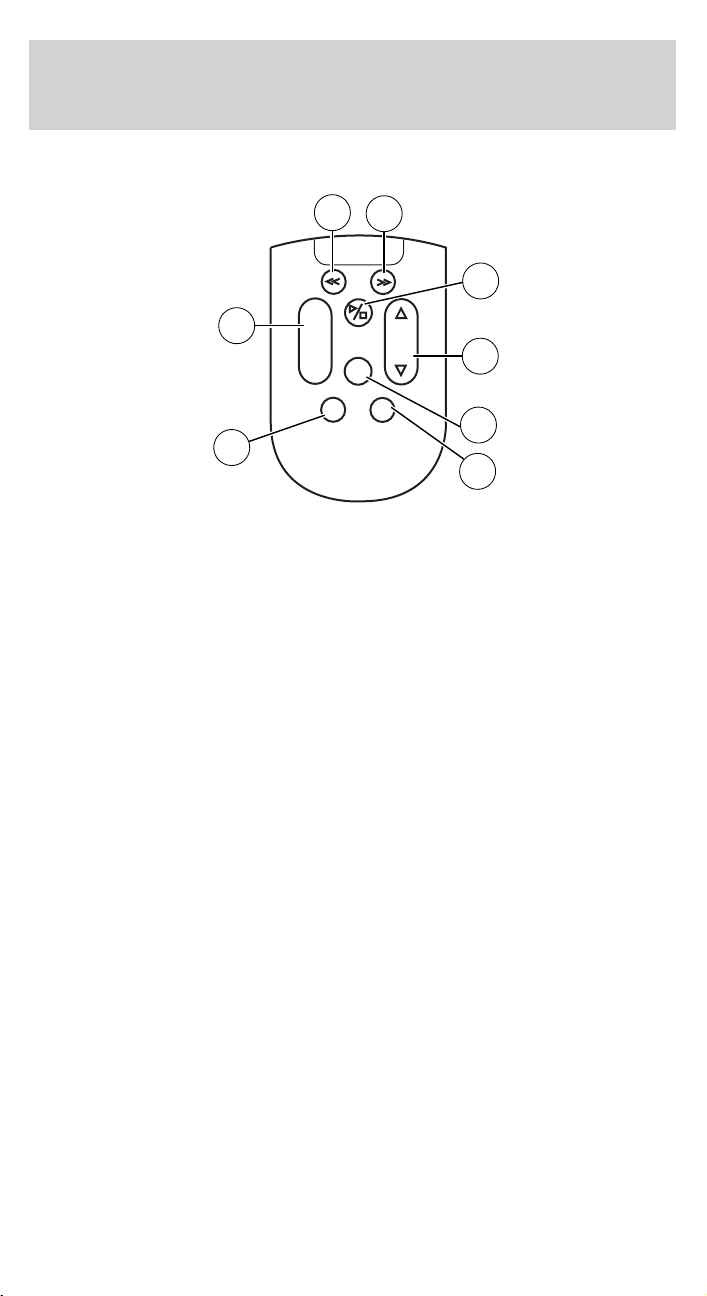
Remote control
Entertainment Systems
1
2
REV
+
8
-
MNU
MODE
DISP
MEMORY
FWD
SEEKVOL
3
4
ENT
5
7
6
1. REWIND control
Press to reverse the direction of the DVD movie.
2. FAST FORWARD control
Press to advance the direction of the DVD movie.
3. PLAY/STOP control
Press to play or stop the DVD movie.
4. SEEK control
Press to reverse or advance the chapter of the DVD or the track of the
CD.
5. DISPLAY (DISP) control
Press to enable on screen display of player menu and user display
adjustments. Once the display is on, use SEEK to choose the desired
screen setting.
6. ENTER (ENT) MEMORY control
In DVD playback mode, press the control to select a designated item in
menu mode.
In stop mode, press the control to select the next radio memory preset.
7. MNU/MODE control
In DVD playback mode, press to access the disc menu.
2004 Expedition (exd)
Owners Guide (post-2002-fmt)
USA English (fus)
37
Page 38
Entertainment Systems
In stop mode, press to change to a different playing media (e.g. AM, FM,
CD...)
8. VOLUME control
Press to increase (+) or decrease (-) volume level.
Battery replacement
Batteries are supplied with the
remote control unit. Since all
batteries have a limited shelf life,
replace them when the unit fails to
control the DVD player. There is a
LED indicator light on the remote
control that will illuminate when any
control is pressed.
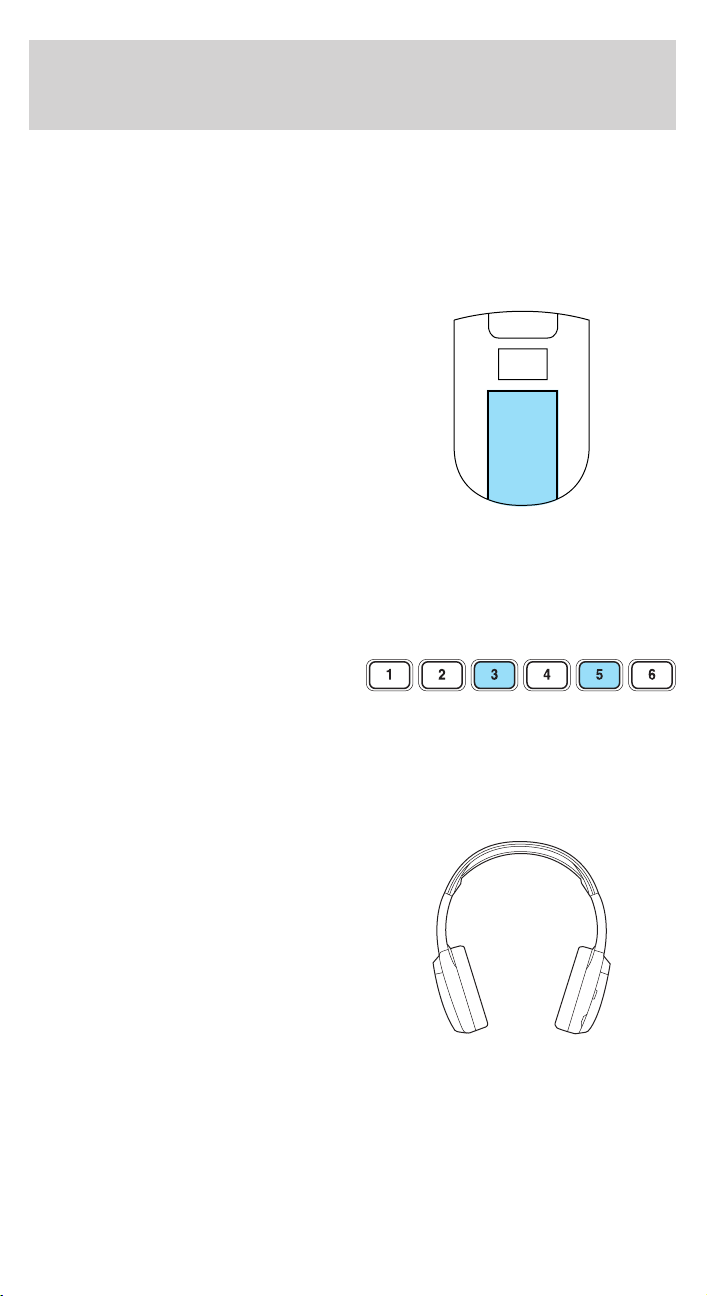
Slide the battery cover off as shown on the remote control to access the
batteries.
The remote control unit uses two AAA batteries.
Parental control
To enable or disable your Rear Seat
Entertainment DVD System,
simultaneously press the memory
preset controls 3 and 5 on the radio face.
For further information about the Rear Seat Controls, refer to Rear Seat
Controls section in this chapter.
Wireless headphones
Your system is equipped with 2 sets
of wireless headphones. (Two AAA
batteries are needed to operate the
headphones.) Batteries are included.
38
2004 Expedition (exd)
Owners Guide (post-2002-fmt)
USA English (fus)
Page 39
Entertainment Systems
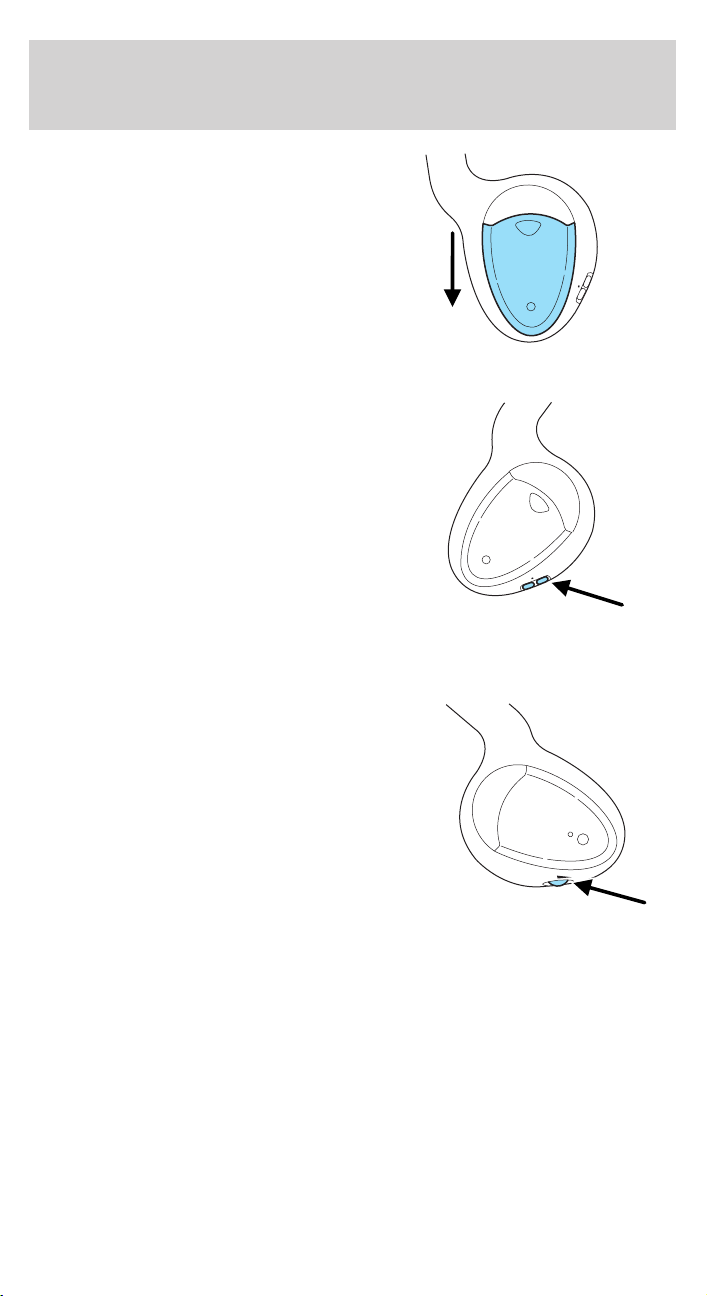
To install the batteries, lightly press
down on the top of the left earpiece
and slide the cover off.
When replacing the batteries, use
two new batteries (alkaline
recommended) and install them
with the correct (+) and (-)
orientation.
Wireless headphone operation
To operate the headphones:
• Press the ON/OFF button on the
left-hand earpiece. The LED light
on the right-hand earpiece will
illuminate. Press again to turn off.
• Adjust the headphones to
comfortably fit your head.
• Adjust the volume control to a
comfortable listening level.
Note: The volume level of the wireless headphones can only be
controlled by the thumbwheel. Neither the remote control nor the rear
seat controls will affect the volume output of the wireless headphones.
When not using the headphones,
shut them off to preserve battery
power. The headphones will
automatically turn off after five
minutes if they have not received an
infrared audio signal from the
overhead pod.
Ensure that the line of sight
between the headphone and
infrared transmitter (mounted on
the DVD housing) is not obstructed.
ON OFF
ON OFF
POWER
L
VO
2004 Expedition (exd)
Owners Guide (post-2002-fmt)
USA English (fus)
39
Page 40
Entertainment Systems
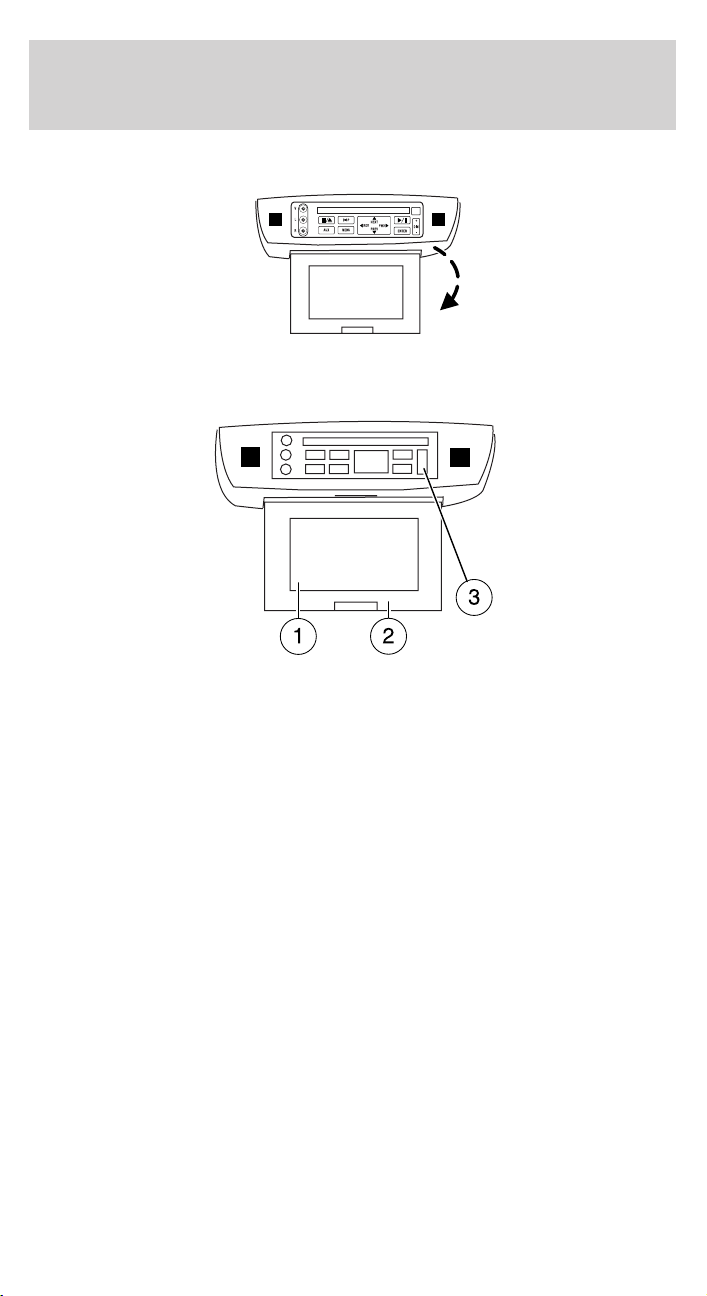
Liquid Crystal Display (LCD) flip-down screen
The screen rotates down to view and into the housing to store when not
in use. Be sure the screen is latched into the housing when being stored.
1. 7.0” (diagonal) active matrix liquid crystal display (LCD) screen.
2. Screen housing.
3. Dimmer switch. Press +/- to increase/decrease the brightness of the
screen.
Playback and format
• The DVD player of your Rear Seat Entertainment DVD System can
only be used in the “playback” mode. (The DVD player does not offer
a record feature.)
• The system plays standard CDs or DVDs.
• The DVD player is only capable of playback of DVDs and CDs. The
player is not compatible with CDR/RW media.
Rear Seat Entertainment DVD System protection circuits
High temperature sensor circuit
• Excessively high temperatures may cause damage to the DVD player.
40
2004 Expedition (exd)
Owners Guide (post-2002-fmt)
USA English (fus)
Page 41

Entertainment Systems
• When the temperature of the DVD player becomes too hot, the high
temperature sensor circuit stops machine operation. DVD/CD HOT will
illuminate in the radio display.
• The DVD player will remain inactive until it cools to a normal
operating temperature. Length of time to cool will vary depending on
conditions.
General operating tips
• When the engine is not running, use the system sparingly. Otherwise,
it will run the battery down.
• When the ignition is turned to OFF, the Rear Seat Entertainment DVD
System is also turned OFF. When the ignition is turned ON, the
system will begin playback from the last selected media source when
the play control is pressed.
• To disable the DVD player, simultaneously press the 3 and 5 memory
presets on the radio face. To enable the DVD player again, press the 3
and 5 presets simultaneously.
• The DVD player is only capable of reading the bottom side of a disc.
When inserting a single sided disc, the label should be up. For a
multi-sided disc, the desired play side should be down when the disc
is inserted into the player.
• The DVD player is only capable of playback of DVDs and CDs. The
player is not compatible with CDR/RW media.
• DVDs are formatted by regions. This DVD system can only play region
1 DVDs (DVDs manufactured for U.S. and Canada).
This unit is designed to play commercially pressed 12 cm (4.75
in) audio compact discs and DVDs only. Due to technical
incompatibility, certain recordable and re-recordable compact
discs may not function correctly when used in Ford DVD/CD
players. Irregular shaped discs, discs with a scratch protection
film attached, and discs with homemade paper (adhesive) labels
should not be inserted into the player. The label may peel and
cause the disc to become jammed. It is recommended that
homemade discs be identified with permanent felt tip marker
rather than adhesive labels. Ball point pens may damage discs.
Please contact your dealer for further information.
Inserting a CD/DVD
Inserting a CD/DVD into the DVD player automatically turns the power
ON and playback should begin.
2004 Expedition (exd)
Owners Guide (post-2002-fmt)
USA English (fus)
41
Page 42
Entertainment Systems
The counter is automatically reset to 0:00:00.
Removing a CD/DVD
1. Press the STOP/EJECT control to stop playback.
2. Press the STOP/EJECT control again to eject the CD/DVD.
If the CD/DVD is not removed within the allotted time, the system will
pull the CD/DVD back into the system for safety purposes. If the
CD/DVD will not eject from the system, press and hold the EJECT
control for approximately 2 seconds. The disc should eject whether the
vehicle ignition is ON or OFF.
Playing a video game/auxiliary device
1. Connect the video line from your video game device to the YELLOW
auxiliary input jack.
2. Connect the left and right audio lines to the WHITE and RED auxiliary
input jacks respectively.
3. Press the MODE control until DVD/CD AUX (no disc in player) or
DVD/CD play (disc in player) illuminates in the radio display. If a disc is
in the system, playback should begin. To enable the aux inputs, press the
STOP control or press the AUX control on the DVD player.
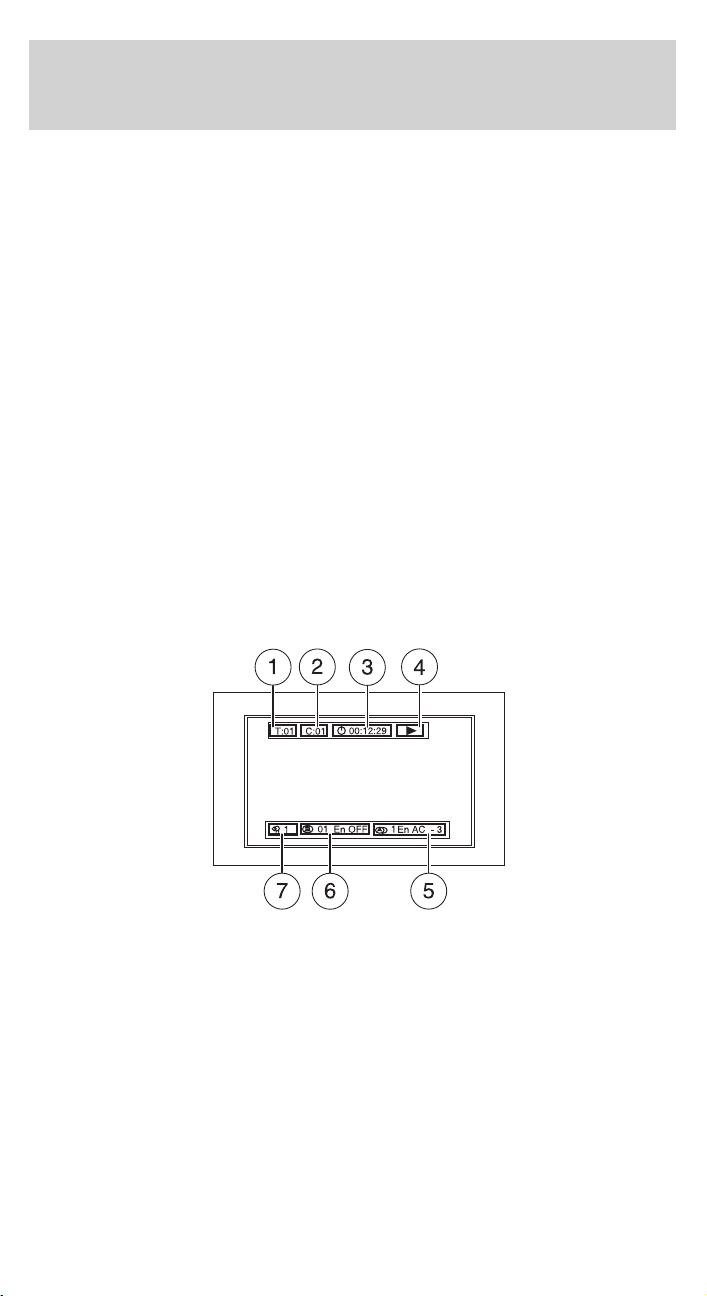
On-screen indicators
Each time a control is pressed, the operational status of the DVD player
is shown on the screen. The following are some possible indicators:
1. CD track
2. DVD chapter
42
2004 Expedition (exd)
Owners Guide (post-2002-fmt)
USA English (fus)
Page 43

Entertainment Systems
3. SYSTEM COUNTER — displays current viewing time of desired media.
(HOURS:MINUTES:SECONDS)
4. DVD/ CD STATUS (PLAY/FF/REW/PAUSE)
5. AUDIO OUTPUT (not changeable)
6. Subtitles (specific language type - English or Spanish, dependent on
disc capability and ON/OFF selection.)
7. Camera angle (of picture) - Adjustable with cursor controls and
ENTER control.
Safety information
Read all of the safety and operating instructions before operating the
system and retain for future reference.
Do not attempt to service, repair or modify the Rear Seat Entertainment
DVD System. See your Ford or Lincoln Mercury dealer.
Do not insert foreign objects into the DVD compartment.
The front glass on the liquid crystal display (LCD) flip-down
screen may break when hit with a hard surface. If the glass
breaks, do not touch the liquid crystalline material. In case of contact
with skin, wash immediately with soap and water.
Do not expose the liquid crystal display (LCD) flip-down screen
to direct sunlight or intensive ultraviolet rays for extensive
periods of time. Ultraviolet rays deteriorate the liquid crystal.
Be sure to review User Manuals for video games and video game
equipment when used as auxiliary inputs for your Rear Seat
Entertainment DVD System.
Do not operate video games or video equipment if the power cords
and/or cables are broken, split or damaged. Carefully place cords and/or
cables where they will not be stepped on or interfere with the operation
of seats and/or compartments.
Disconnect video games and video equipment power cords and/or cables
when not in use.
Avoid touching auxiliary input jacks with your fingers. Do not blow on
them or allow them to get wet or dirty.
Do not clean any part of the DVD player with benzene, paint thinner or
any other solvent.
Whenever a warning is received, the radio volume will be lowered
to a volume that will allow the tones to be heard. The radio
volume will return to the previous level after the warning goes
away.
2004 Expedition (exd)
Owners Guide (post-2002-fmt)
USA English (fus)
43
Page 44

Entertainment Systems
Federal Communication Commission (FCC) Compliance
Changes or modifications not approved by Ford Motor Company could
void user’s authority to operate the equipment. This equipment has been
tested and found to comply with the limits for a Class B digital device,
pursuant to Part 15 of the FCC Rules. These limits are designed to
provide reasonable protection against harmful interference in a
residential installation. This equipment generates, uses and can radiate
radio frequency energy and, if not installed and used in accordance with
the instructions, may cause harmful interference with radio
communications.
However, there is no guarantee that interference will not occur in a
particular installation. If this equipment does cause harmful interference
to radio or television reception, which can be determined by turning the
equipment off and on, the user is encouraged to consult the dealer or an
experienced radio/TV technician for help.
Care and service of the DVD player
Environmental extremes
DVD players that are subjected to harsh environmental conditions may
be damaged or perform at less than maximum capability. To avoid these
outcomes, whenever possible avoid exposing your DVD player to:
• extremely hot or cold temperatures.
• direct sunlight.
• high humidity.
• a dusty environment.
• locations where strong magnetic fields are generated.
Temperature extremes
When the vehicle is parked under direct sunlight or in an extremely cold
place for a long period of time, wait until the cabin temperature of the
vehicle is at normal temperature before operating the system.
Humidity and moisture condensation
Moisture in the air will condense in the DVD player under extremely
humid conditions or when moving from a cold place to a warm one. If
moisture condensation occurs, do not insert a CD or DVD into the
player. If one is already in the player, remove it. Turn the DVD player ON
to dry the moisture before inserting a DVD. This could take an hour or
more.
44
2004 Expedition (exd)
Owners Guide (post-2002-fmt)
USA English (fus)
Page 45

Entertainment Systems
Cleaning the liquid crystal display (LCD) flip-down screen
Clean the display screen by applying a small amount of water or any
ammonia-based household glass cleaner directly to a soft cloth. Rub the
screen gently until the dust, dirt or fingerprints are removed. Do not
spray the screen directly with water or glass cleaning solvents. Overspray
from these fluids could drip down into the internal electronics of the
screen and cause damage. Do not apply excessive pressure while
cleaning the screen.
Foreign substances
Exercise care to prevent dirt and foreign objects from entering the DVD
player compartment. If liquid is accidentally spilled onto the system,
immediately turn the system OFF and consult a qualified service
technician.
Cleaning compact discs
Inspect all discs for contamination before playing. If necessary, clean
discs only with an approved CD cleaner and wipe from the center out to
the edge. Do not use circular motion.
Cleaning the DVD player
Clean the exterior of the DVD player with a damp cloth. Do not use CD
cleaning kits or CDs intended to clean the interior of your DVD player.
Use of these products may damage your system.
VEHICLE NAVIGATION RADIO (VNR IF EQUIPPED)
Your vehicle may be equipped with a Vehicle Navigation Radio (VNR)
which allows you to listen to the radio, play CDs and also navigate the
vehicle using navigation CDs.
Your Vehicle Navigation Radio is equipped with many different features
and controls. The labeled controls on the front face of the system (which
are called out below) are known as hard keys. The five blank controls
located under the MENU control are called soft keys. These controls are
labeled on the screen and can change functionality depending on which
screen is activated in the display. The hard keys will be explained further
below and the soft keys will be described as needed.
Safety information
Please read and follow all stated safety precautions. Failure to do
so may increase your risk of collision and personal injury.
2004 Expedition (exd)
Owners Guide (post-2002-fmt)
USA English (fus)
45
Page 46
Entertainment Systems
Ford Motor Company shall not be liable for any damages of any
type arising from failure to follow these guidelines.
Do not attempt to service, repair or modify the system. See your Ford or
Lincoln Mercury dealer.
The driver must not attempt to operate any detailed operation of
the navigation system while the vehicle is in motion. Give full
attention to driving and to the road. Pull off the road and park in a
safe place before performing detailed operations.
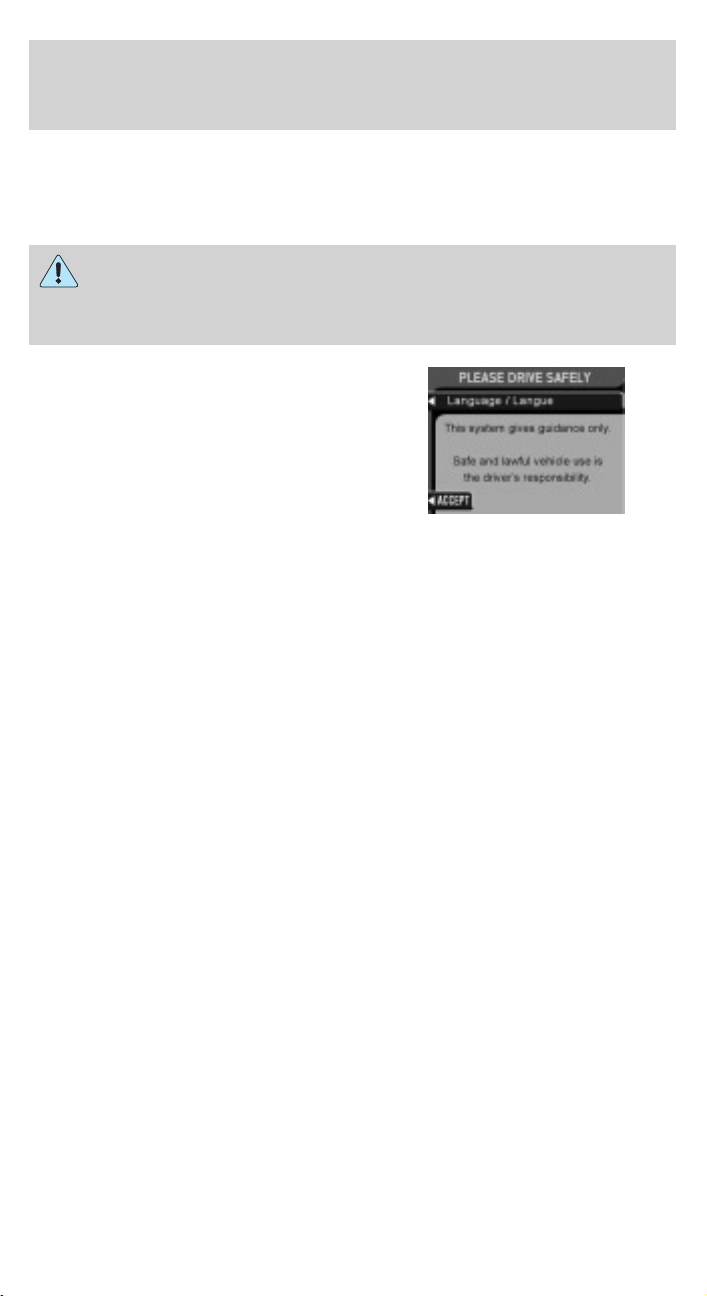
A safety screen will be displayed
each time the navigation system is
turned on as a reminder. Ensure
that you are familiar with the
system’s features and functionality,
including the following:
• Do not turn the ignition key or start the engine while the software is
updating.
• Do not apply pressure to the display screen.
• The navigation system is not a substitute for your personal judgement.
• Route suggestions should not supersede local traffic regulations or
safe driving practices.
• Do not follow route suggestions if they direct you to perform an
unsafe or illegal maneuver, would place you in an unsafe situation, or
would route you into an area that you consider unsafe.
• Drivers should not rely on screen displays while their vehicle is in
motion. Let the voice guide you. If viewing is necessary, pull off the
road to a safe location.
• Do not use the navigation system to locate emergency services.
• For road safety reasons, the driver should program the system only
when the vehicle is stationary. Certain functions will therefore not
operate while the vehicle is in motion.
• The navigation CD does not reflect road detours, closures or
construction, road characteristics such as rough road surface, slope or
grade, weight or height restrictions, traffic congestion, weather or
similar conditions.
• To use the system as effectively and safely as possible, obtain
up-to-date navigation CD’s whenever they become available.
46
2004 Expedition (exd)
Owners Guide (post-2002-fmt)
USA English (fus)
Page 47
Entertainment Systems
• Set the volume level so that you can hear directions clearly.
• Do not disassemble or modify the system as this may lead to damage
and void your warranty. If a problem occurs, stop using the system
immediately and contact your Ford or Lincoln Mercury Dealer.
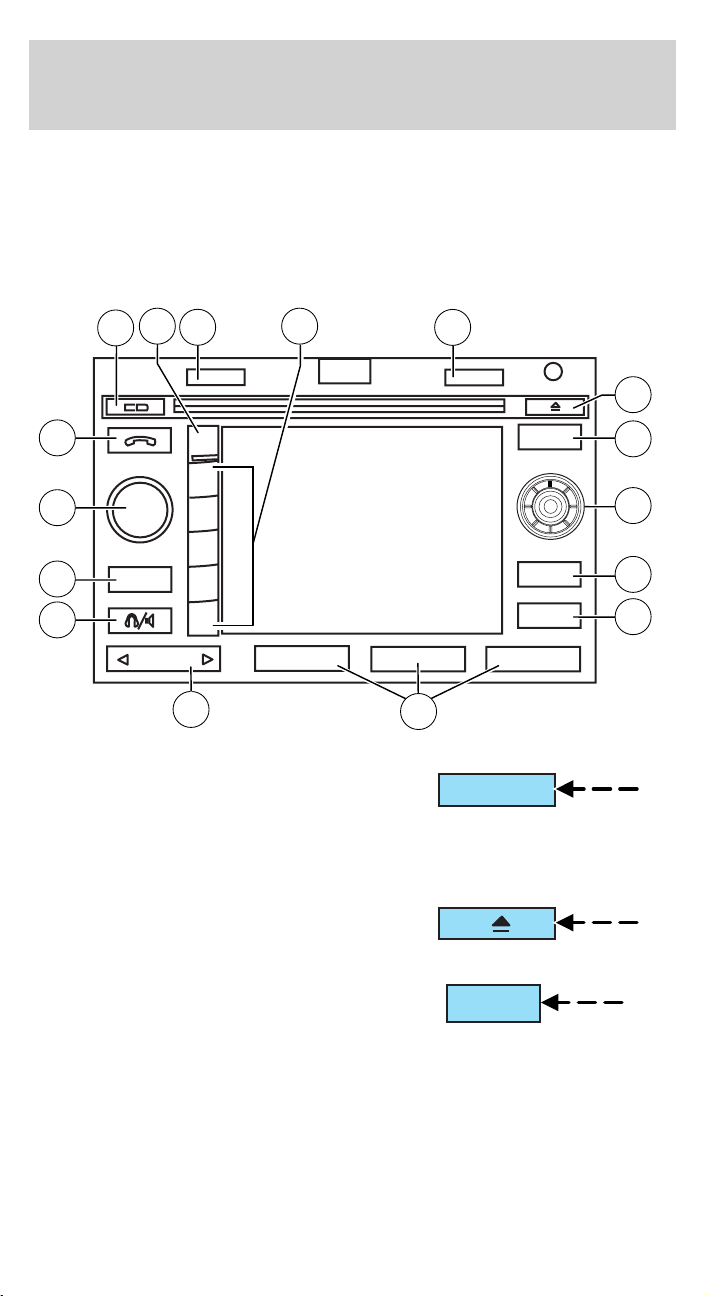
System overview
13
14
15
HERE
16
1
HOME
2
12
11
10
MENU
PUSH
ON
AM/FM
9
SEEK 1
8
2
3
4
7
NAV
3
4
BACK
MAP
5
6
5
6
1. HOME: When the home location
is empty, pressing and holding this
HOME
key will store the vehicle’s current
location as home. Pressing the home
key after the home location has been set will calculate a route to that set
home location.
2. Eject: Press this control to eject
an audio CD or a navigation CD.
3. Navigation (NAV): Press the
NAV control to access the navigation
system menu.
2004 Expedition (exd)
Owners Guide (post-2002-fmt)
USA English (fus)
NAV
47
Page 48
Entertainment Systems
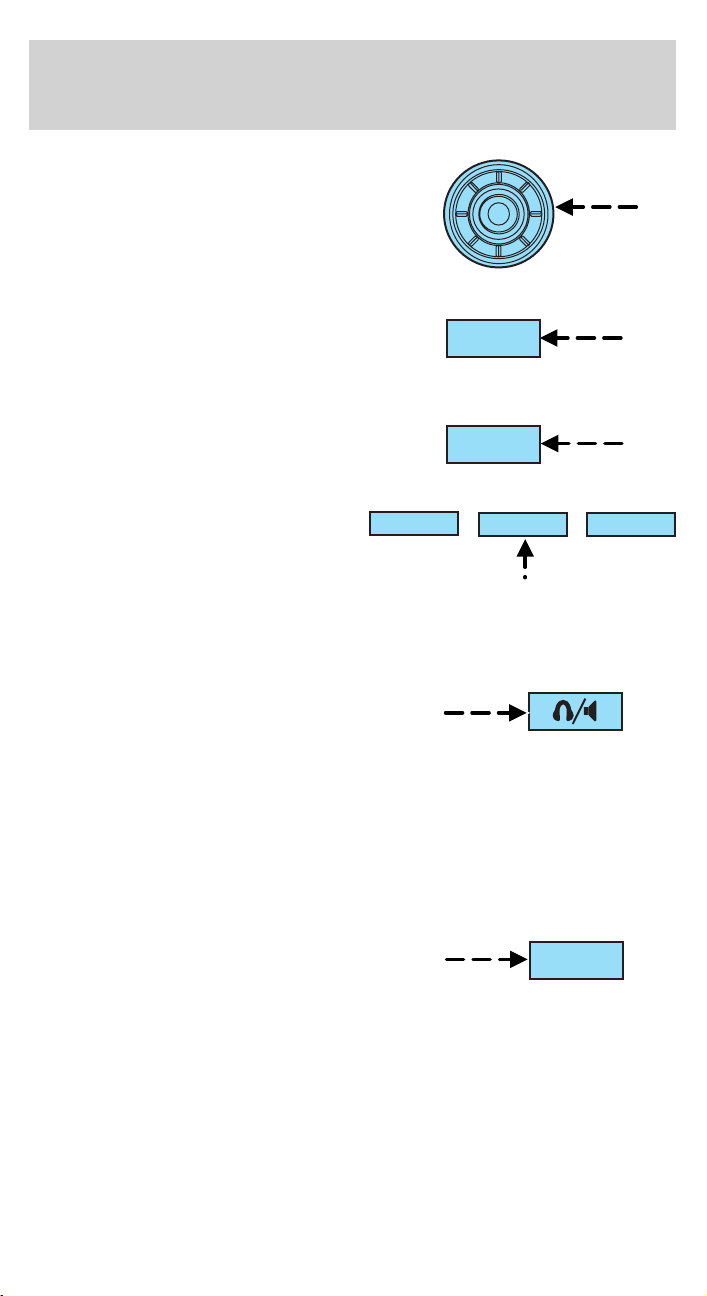
4. Cursor control: Use this control
when viewing a menu in the
navigation system. Press the control
up or down, left or right to highlight
an item in the display. Press the
center of the control to make your
selection.
5. BACK: Use this control in the
navigation system. Press to return
to the previous screen or you can
press MENU to return to the main
navigation menu.
6. MAP: The MAP control works in
all modes. Press to show current
location.
7. Memory presets: The memory
presets store favorite AM/FM
1
stations and allow you to access
various discs when in CD DJ mode.
Press and hold a preset control until
PRESET SAVED appears in the display.
8. SEEK: Use this control to find the next listenable radio station or
advancing tracks in CD mode.
9. Headphone/speaker: Press the
control to enable Rear Seat Control
(RSC) mode. The
headphone/speaker or headphone
icon will appear in the display. Press the control again to disable RSC
control mode (the icon will appear with a red slash through it).
When in RSC mode, Dual Play mode can be enabled and disabled by the
RSC, or by pressing Preset 2 and 4 simultaneously on the Navigation
radio system. The system is in Dual Play mode if both the Headphone
and Speaker icons are present, and in just RSC mode if only the
Headphone icon is present.
10. AM/FM: Press to listen to the
AM or FM frequency band (AM,
FM1, FM2). Pressing AM/FM in
Navigation mode will return you to
the audio screen.
BACK
2
MAP
3
5
4
AM/FM
6
48
2004 Expedition (exd)
Owners Guide (post-2002-fmt)
USA English (fus)
Page 49
Entertainment Systems
11. On/volume: Press the ON
control to turn on the VNR system.
PUSH
ON
Press again to turn the system off.
Turn the control to adjust the audio
volume levels. To adjust the voice
output levels from the navigation
PUSH
ON
system, adjust the volume levels
only during voice output.
12. Phone (if equipped): If the
phone button is pressed, the display
will read NO PHONE. This button is
non-functional (the radio will not
mute). Cellular connectivity is not currently available for this radio.
13. CD: Press to enter CD mode or
to begin play of a CD that is already
loaded in the system. Press the CD
control again to toggle CD, CD DJ
and DVD (if equipped).
NOTE: Navigation CD’s are not operational in the CD DJ.
NOTE: To use the navigation system and listen to an audio CD, the
navigation CD must be loaded into the VNR and the audio CD must be
loaded into the CD DJ.
14. MENU: The MENU control
works in both the audio and
navigation mode. Press to access
MENU
various menus in both modes.
15. HERE: The HERE control works
in the navigation mode. Press the
control to identify the current
HERE
location of the vehicle.
Quick start – how to get going
To play a radio station:
1. Ensure that the ignition and the Vehicle Navigation Radio (VNR)
system are ON.
2004 Expedition (exd)
Owners Guide (post-2002-fmt)
USA English (fus)
49
Page 50
Entertainment Systems
2. Press the AM/FM control to select
the desired frequency band.
AM/FM
3. Press the SEEK control to locate
a station.
SEEK
To play a CD in the VNR:
1. Ensure that the ignition and the
VNR system are ON.
2. Insert a CD into the single slot of
the VNR and the CD will automatically begin play. If a CD is already
loaded into the system, press the CD control.
To play a CD in the CD DJ:
1. Ensure that the ignition and the
VNR system are ON.
2. Insert CD(s) into the CD DJ
magazine. Insert magazine into CD DJ. If the CD DJ magazine is already
loaded, press the CD control to toggle through CD, CD DJ and DVD (if
equipped).
3. Press the memory presets to
choose the desired disc in the CD
1
2
3
5
4
DJ.
6
Note: Navigation CD’s are not operational in the CD DJ.
To use the Navigation system:
1. Ensure that the ignition and the VNR system are ON, and a map data
disc is inserted into the VNR CD slot.
Note: To use the navigation system and listen to an audio CD, the
navigation CD must be loaded into the VNR and the audio CD must be
loaded into the CD DJ.
50
2004 Expedition (exd)
Owners Guide (post-2002-fmt)
USA English (fus)
Page 51
Entertainment Systems
2. Press the NAV control to enter
into Navigation mode.
3. To enter a destination, ensure
that the vehicle is in the PARK position.
4. To navigate to home from the
current location, press HOME. If a
home location has not previously
been stored, pressing and holding
HOME will store the home location.
Audio features
Your Vehicle Navigation Radio has many features including a full range of
audio functions.
Audio screen display
When in audio mode, there are various indicators which will appear on
the display.
1. Station name
2. Station frequency
3. Stereo indicator
4. Preset selected
5. Band selected
NAV
HOME
If the navigation system is activated during radio or CD playback (CD
DJ), audio output continues but route guidance screens will appear in
the display.
Volume/power control
Press the control to turn the
audio/navigation system on or off.
PUSH
ON
2004 Expedition (exd)
Owners Guide (post-2002-fmt)
USA English (fus)
51
Page 52
Entertainment Systems
Turn the control to raise or lower
volume. The levels will be displayed
on the screen.
To adjust the navigation voice
output level, adjust the volume
control only when the navigation
system is speaking. Otherwise, it will adjust the radio levels.
Automatic volume control (AVC)
With this feature, radio volume changes automatically with vehicle speed
to compensate for road and wind noise. To engage the AVC feature:
1. Press the MENU control.
2. Select AUDIO OPTIONS.
3. Select AVC, TRAFFIC, DSP.
4. Select AVC.
PUSH
ON
MENU
5. Use the cursor control to increase
or decrease the levels. The higher
the level selected, the greater the
compensation. The levels will be
shown in the display. Decrease all
the way to the left to turn AVC off.
52
2004 Expedition (exd)
Owners Guide (post-2002-fmt)
USA English (fus)
Page 53
Entertainment Systems
AM/FM select
The AM/FM control works in radio,
CD and navigation modes.
AM/FM select in radio mode
This control allows you to select AM or FM frequency bands. Press the
control to switch between AM, FM1 or FM2 memory preset stations.
AM/FM select in CD mode
Press to stop CD play and begin radio play.
Radio reception factors:
• Distance/strength. The further an FM signal travels, the weaker it is.
The listenable range of the average FM station is approximately 40 km
(24 miles). This range can be affected by “signal modulation.” Signal
modulation is a process radio stations use to increase their
strength/volume relative to other stations.
• Terrain. Hills, mountains and tall buildings between your vehicle’s
antenna and the radio station signal can cause FM reception problems.
Static can be caused on AM stations by power lines, electric fences,
traffic lights and thunderstorms. Moving away from an interfering
structure (out of its “shadow”) returns your reception to normal.
• Station overload. Weak signals are sometimes captured by stronger
signals when you pass a broadcast tower. A stronger signal may
temporarily overtake a weaker signal and play while the weak station
frequency is displayed.
AM/FM select in navigation mode
Press once when in navigation mode to return to the audio screen (while
the navigation function continues to work in the background). Press
again to enter AM/FM mode where you are able to make frequency band
adjustments.
CD select
To begin CD play (if a CD is already
loaded), press the CD control. The
first track of the disc will begin
playing. After that, CD play will
begin where it stopped last. Press the CD control again to toggle
between CD, CD DJ, DVD/Video (or DVD/Aux Mode), if equipped with
DVD Rear seat entertainment system.
AM/FM
2004 Expedition (exd)
Owners Guide (post-2002-fmt)
USA English (fus)
53
Page 54
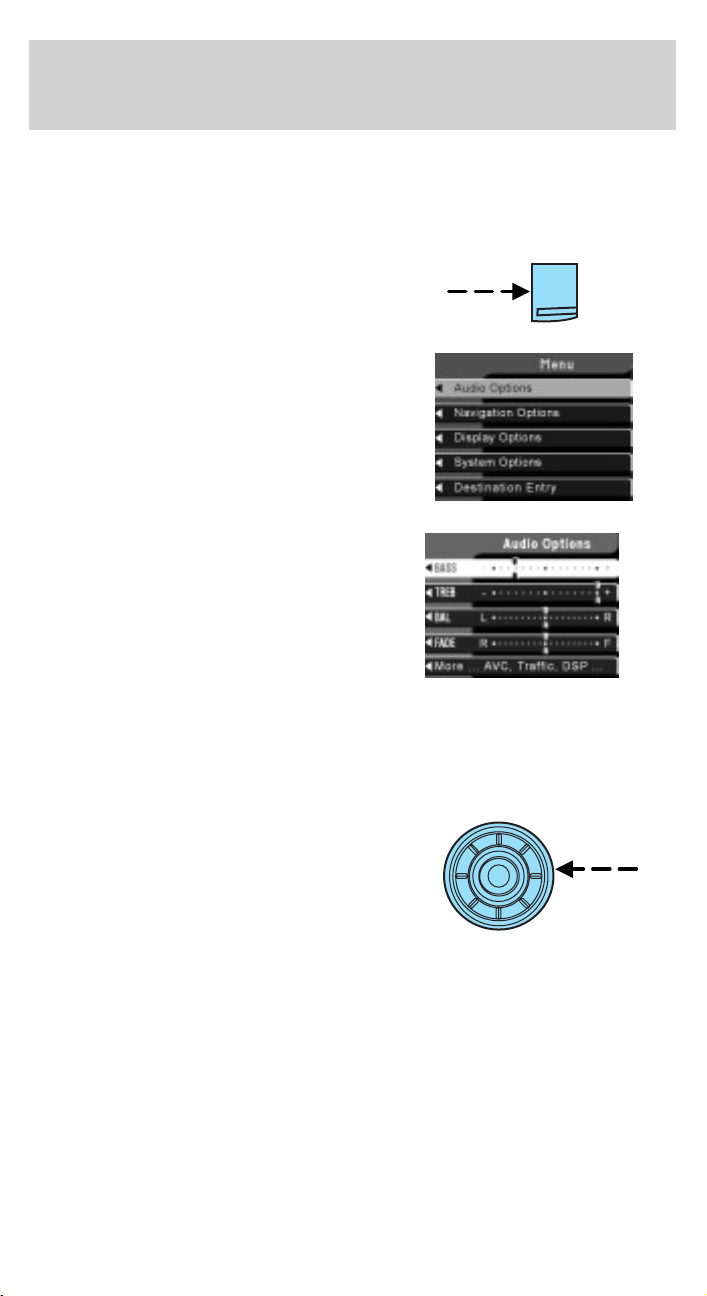
Entertainment Systems
If a navigation CD is in the head unit and you press CD, the system will
automatically search for an audio CD in the CD DJ and begin play if it is
present.
Adjusting the levels
1. Press the MENU control.
MENU
2. Select the AUDIO OPTIONS soft
key.
3. Select BASS, TREB, BAL or
FADE.
The bass adjust allows you to
increase or decrease the audio
system’s bass output.
The treble adjust control allows you
to raise or lower the audio system’s
treble output.
Speaker sound can be adjusted between the front and rear speakers
using the fade feature.
The balance feature allows sound distribution to be adjusted between the
right and left speakers.
4. Use the cursor control to increase
or lower the bass and treble levels
or to adjust the sound between the
front and rear or between the left
and right speakers.
DSP (Digital Signal Processing)
The Digital Signal Processing (DSP) feature allows you to change the
signal mode to suit your listening tastes.
54
2004 Expedition (exd)
Owners Guide (post-2002-fmt)
USA English (fus)
Page 55
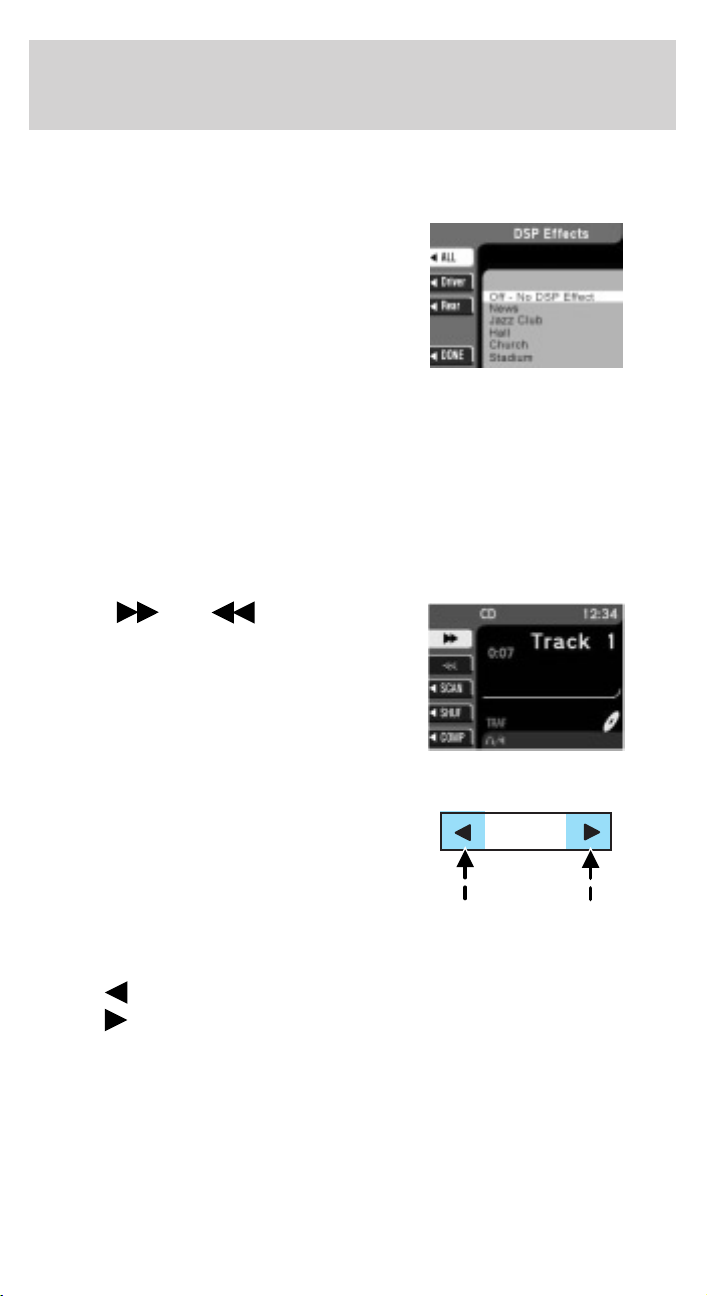
Entertainment Systems
Press the soft key to turn the feature on or off.
This feature can be accessed by selecting the menu option “More, AVC,
Traffic, DSP..” within the “Audio Options” menu.
You can then select the following
signal modes:
• JAZZ CLUB — jazz club with
clearly reflected sounds
• HALL — rectangular concert hall
capacity of about 2,000
• CHURCH — church with a high
vault
• STADIUM — outdoor stadium with a capacity of about 30,000
• NEWS —”voice-only” type of sound with a limited audio band
This system has three “occupancy modes” of listening:
• Driver — Optimizes audio playback for the drivers seat position.
• All — Optimizes audio playback to be similar for ALL seating
positions.
• Rear — Optimizes the audio playback for rear seat passengers.
Rewind/fast forward
Press the
to fast forward or rewind a CD
track.
and controls
Seek function
The SEEK control works in all
modes.
Seek in radio mode
• Press
• Press
to find the next listenable station down the frequency band.
to find the next listenable station up the frequency band.
2004 Expedition (exd)
Owners Guide (post-2002-fmt)
USA English (fus)
SEEK
55
Page 56
Entertainment Systems
Seek in CD or CD DJ mode
• Press
selection has been playing for three seconds or more and you
press
beginning.
• Press
the last track has been completed, the first track of the current disc
will automatically replay.
Seek in navigation mode
to seek to the previous track of the current disc. If a
, the CD changer will replay that selection from the
to seek forward to the next track of the current disc. After
• Press
or to access the next audio station if in radio mode, and
next track if in CD mode.
Radio station memory preset
The radio is equipped with six station memory preset controls. These
controls can be used to select up to six preset AM stations and twelve
FM stations (six in FM1 and six in FM2).
The presets will also allow you to access CDs which are loaded in the CD
DJ. When in CD mode, simply press the preset number which
corresponds to the desired disc.
Setting memory preset stations
1. Select the frequency band with the AM/FM select control.
2. Select a station. Refer to Tune adjust or Seek function for more
information on selecting a station.
3. Press and hold a memory preset
control until PRESET SAVED
1
2
3
5
4
appears on the display.
Autoset memory preset
Autoset allows you to set strong radio stations without losing your
original manually set preset stations. This feature is helpful on trips
when you travel between cities with different radio stations.
6
56
2004 Expedition (exd)
Owners Guide (post-2002-fmt)
USA English (fus)
Page 57
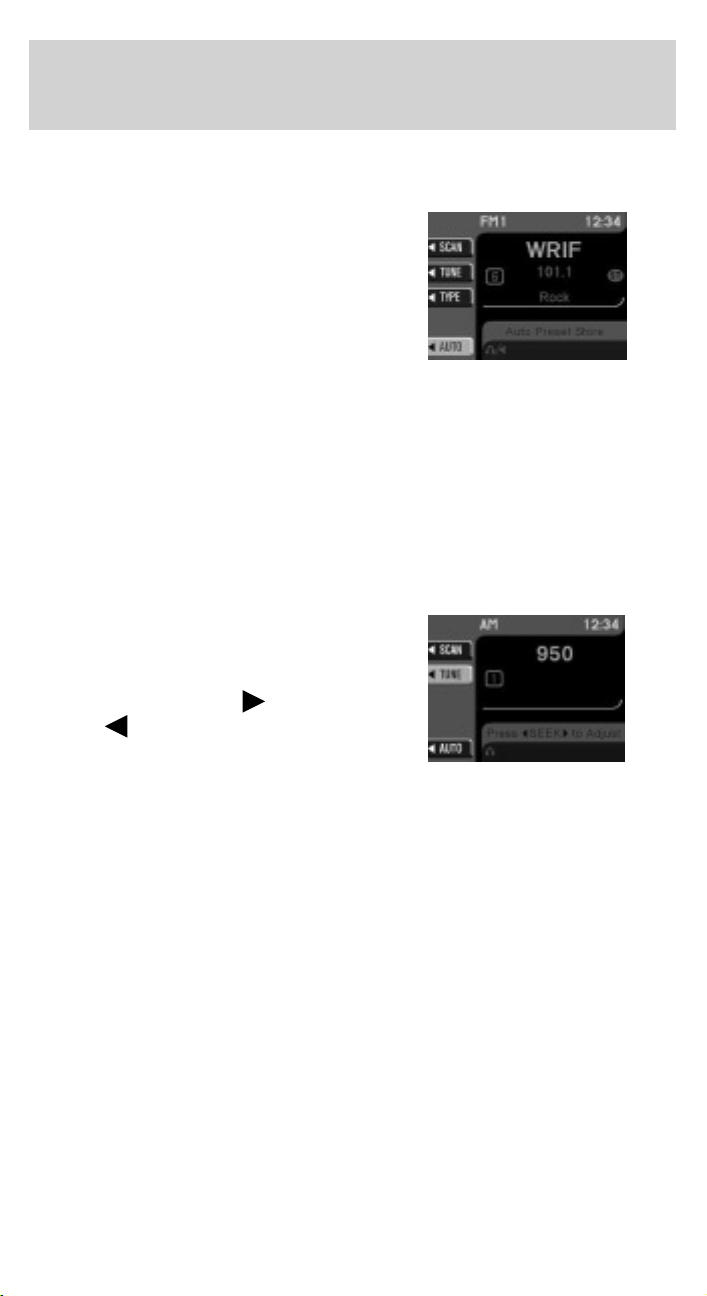
Entertainment Systems
Starting autoset memory preset
1. Select a frequency band using the AM/FM select controls.
2. Press the AUTO control.
3. When the first six strong stations
are filled, the station stored in
memory preset control 1 will start
playing.
If there are less than six strong
stations available on the frequency
band, the remaining memory preset
controls will all store the last strong station available.
Any preset stored via the presets directly (pressing and holding) in this
mode are temporary.
A message will indicate whenever a temporary preset is stored or
recalled. This mode is active while the AUTO soft key is highlighted.
To deactivate autoset and return to your audio system’s manually set
memory stations, press the AUTO control again.
Tune adjust
The tune feature works in radio
mode.
• Select the TUNE soft key.
• Press SEEK to go up
down
manually.
the frequency band
or
Stereo indicator
Whenever a stereo signal is received in radio mode, the stereo indicator
(ST) will appear in the display.
2004 Expedition (exd)
Owners Guide (post-2002-fmt)
USA English (fus)
57
Page 58
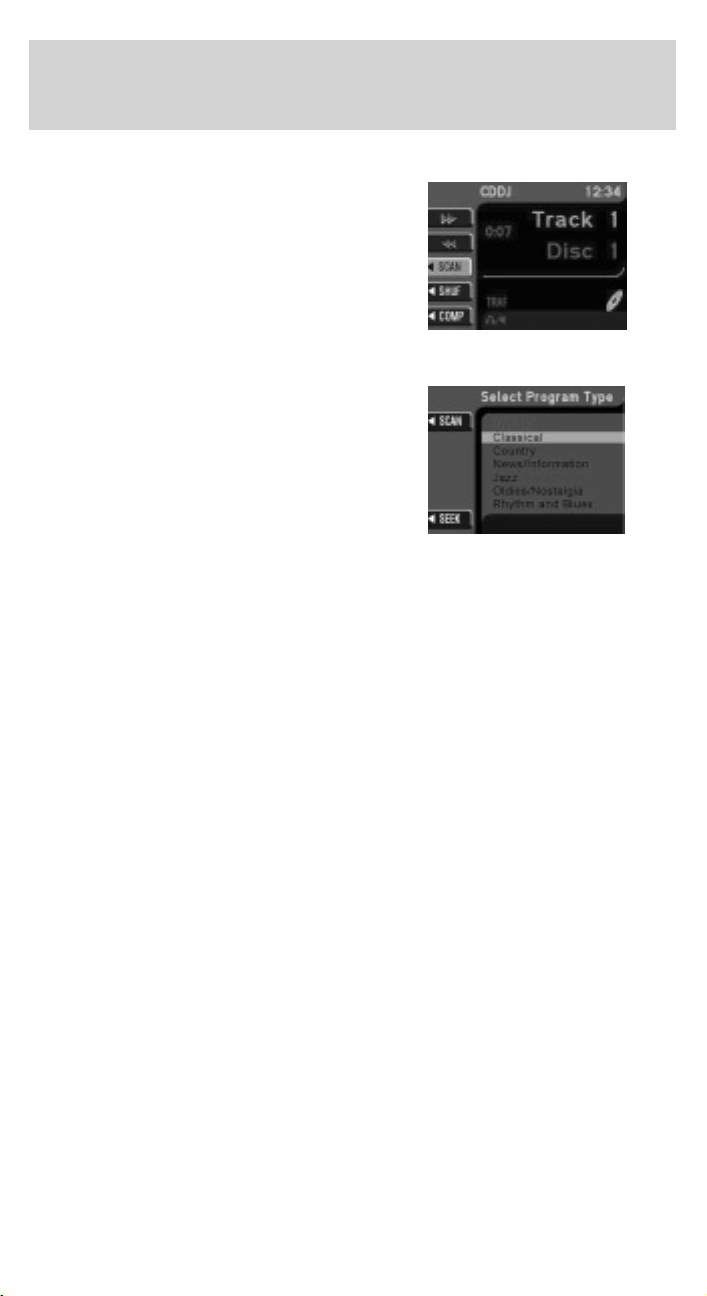
Entertainment Systems
Scan function
Press the soft key next to SCAN for
a brief sampling of all listenable
stations on the selected frequency.
Press again to disable scan and
remain on the current station.
Program type (PTY) selections
Some FM stations transmit program
type codes which can be used to
locate different stations transmitting
programs of a certain type.
Press the soft key next to TYPE to
access a list of available program
types.
Use the cursor control to select the
desired program type. The system will search for and begin playing that
program type if available. During a seek or scan and for 10 seconds after
a station is found, pressing the seek up/down or scan will initiate another
search. If the desired type cannot be found, ’Not Found’ appears in the
display and the audio system returns to the original station.
Traffic information
The Traffic information soft key can be accessed under menu option
“MORE, AVC, TRAFFIC, DSP...” within the “AUDIO OPTIONS” menu.
Select the TRAF soft key to select traffic information broadcast from
certain stations which will automatically interrupt radio or CD playback
at a preset volume level. The default Traffic volume can be adjusted with
the slider bar using the cursor input. Moving the position to the left most
position will turn this feature off.
The display TRAF will appear in Orange if the feature is enabled, but
there is no broadcast traffic program available.
Traffic information is not available in most U.S. markets.
58
2004 Expedition (exd)
Owners Guide (post-2002-fmt)
USA English (fus)
Page 59
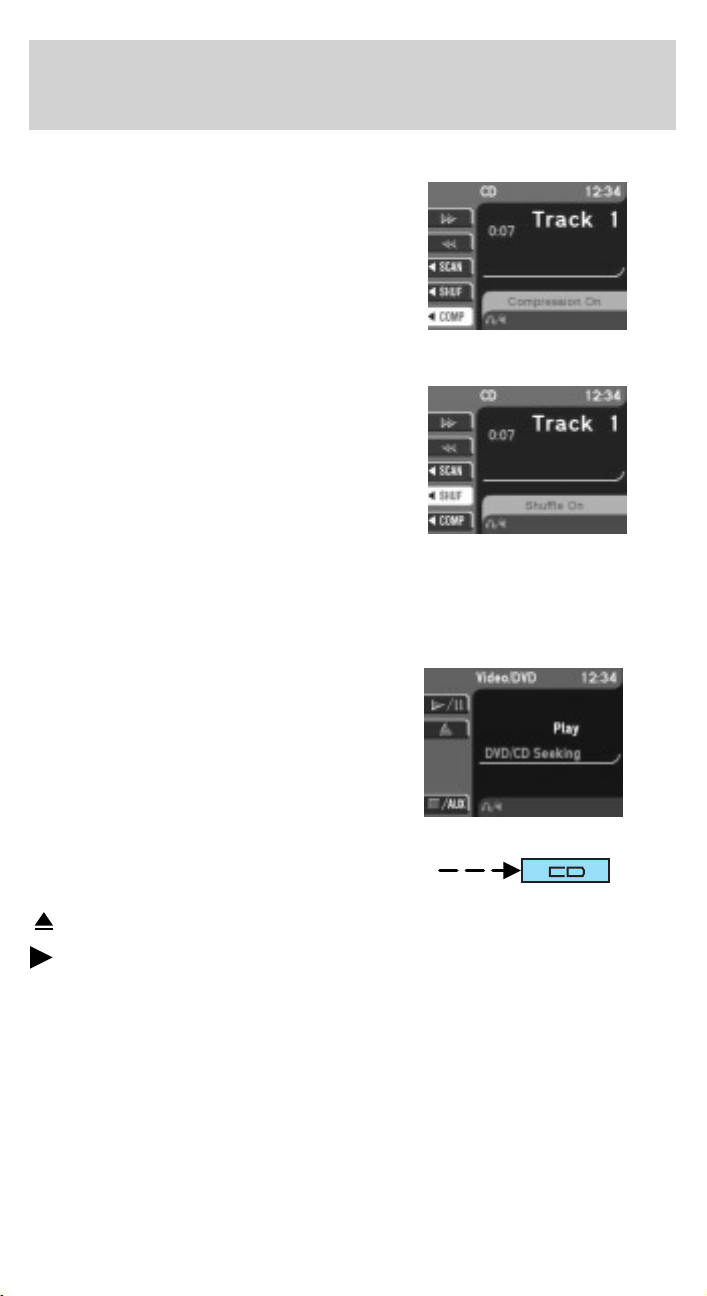
Entertainment Systems
Compression
The compression feature will boost
quieter music and lower louder
music to minimize the need for
volume adjustments.
When in CD or CD DJ mode, press
COMP to engage or disengage the
compression feature.
Shuffle
When in CD or CD DJ mode, press
SHUF to engage and disengage the
shuffle feature. All tracks on the
current disc will be played in
random order.
DVD functionality (if equipped)
Your vehicle may be equipped with a DVD Rear Seat Entertainment
system. Your Vehicle Navigation Radio (VNR) System allows you to have
control over the DVD player as well.
The VNR system will display DVD
status messages in the radio display.
The soft keys are PLAY/PAUSE,
EJECT and STOP/AUX.
Press the CD control until DVD
appears in the display.
(EJECT) — Press to stop DVD and eject the DVD disc.
(PLAY) / II (PAUSE) — Press to play/pause the DVD. If in play
mode, the DVD will pause when pressed. If in pause mode, the DVD will
play when pressed.
2004 Expedition (exd)
Owners Guide (post-2002-fmt)
USA English (fus)
59
Page 60
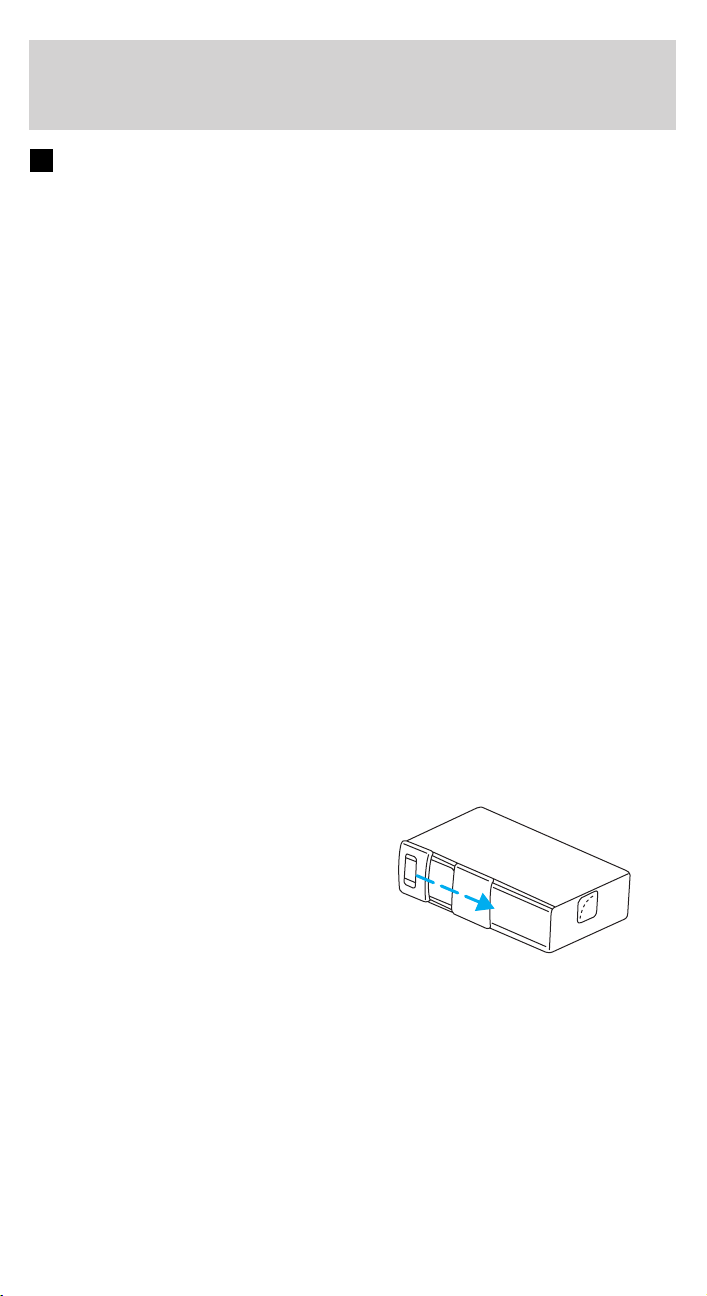
Entertainment Systems
(STOP) / AUX — If a DVD movie is playing, press to stop. If a movie
is not playing, press to activate AUX mode.
CD DJ
Your vehicle is equipped with a CD DJ (CD changer). It is located in the
center console.
Radio power must be turned on to play the CDs in the CD DJ. The
magazine may be stored in the glove box when not being used.
The CD magazine may be inserted or ejected with the radio power off.
ONLY use the magazine supplied with the CD DJ, other types will
damage the unit.
Keep the CD DJ door closed. Coins and foreign objects will damage the
CD player and void your audio system warranty.
The CD magazine does not have to be full (all 6 disks) for the CD DJ to
function.
CD units are designed to play commercially pressed 12 cm (4.75
in) audio compact discs only. Due to technical incompatibility,
certain recordable and re-recordable compact discs may not
function correctly when used in Ford CD players. Irregular
shaped CDs, CDs with a scratch protection film attached, and CDs
with homemade paper (adhesive) labels should not be inserted
into the CD player. The label may peel and cause the CD to
become jammed. It is recommended that homemade CDs be
identified with permanent felt tip marker rather than adhesive
labels. Ball point pens may damage CDs. Please contact your
dealer for further information.
To access the CD DJ:
Slide the door to access the CD DJ
magazine.
60
2004 Expedition (exd)
Owners Guide (post-2002-fmt)
USA English (fus)
Page 61
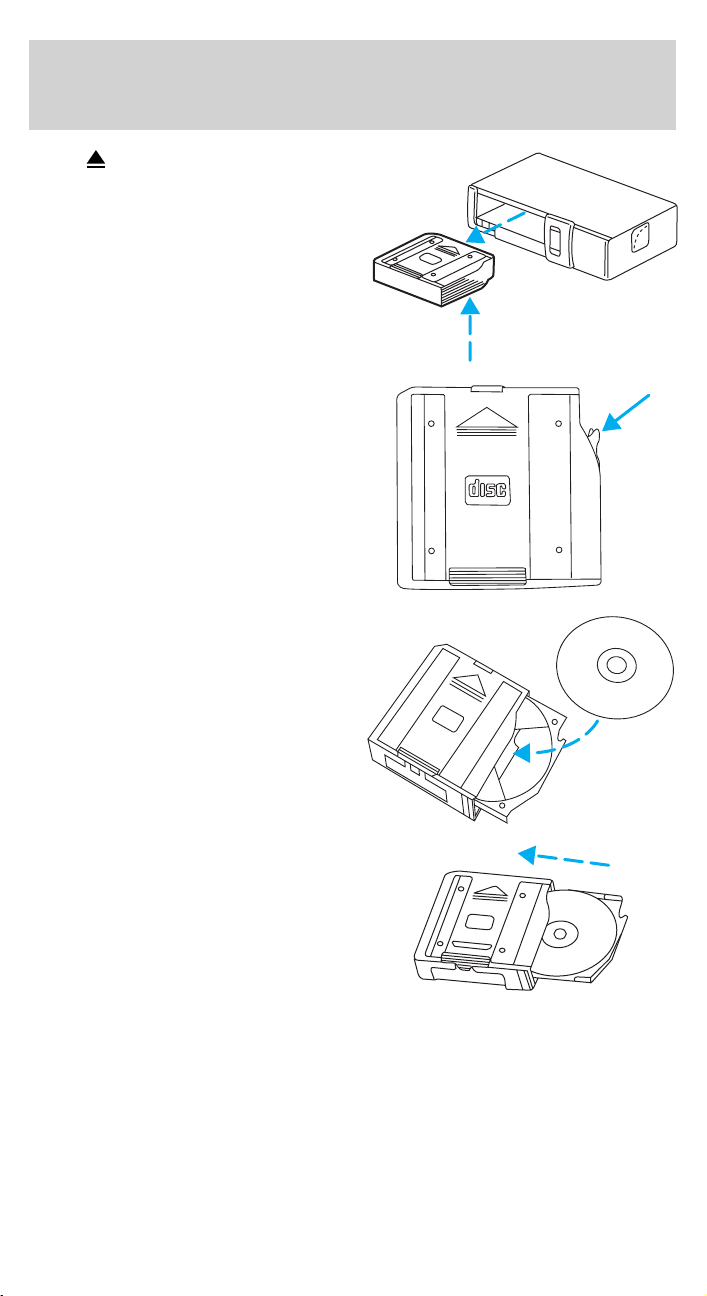
Press to eject the magazine.
1. Pull the lever to remove a CD
tray from the magazine.
2. Insert one disc into each CD tray
of the magazine (up to 6 discs).
Ensure that the label side is facing
up.
If you pull too hard on the disc
holder, the disc holder may come
completely out of the magazine. If
this happens, reinsert the disc
holder back into the magazine.
Entertainment Systems
3. Insert each CD tray, with the disc
loaded, all the way into the CD
magazine.
2004 Expedition (exd)
Owners Guide (post-2002-fmt)
USA English (fus)
61
Page 62
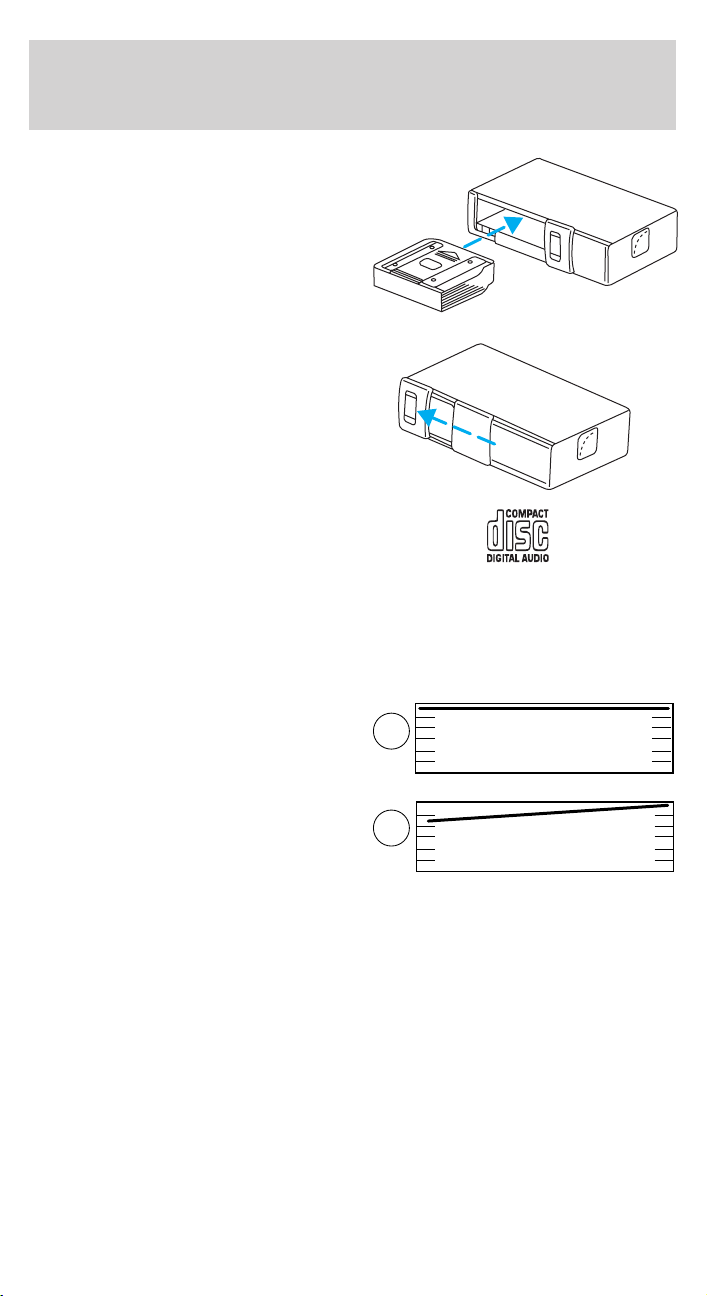
Entertainment Systems
4. Insert the CD magazine into the
CD DJ.
5. Slide the door to the left to close.
Use only compact discs containing
this mark.
The magazine does not need to be full for the CD DJ to operate.
Radio power must be turned on to play the CDs in the CD DJ. The
magazine may be stored in the glove compartment when not being used.
The CD magazine may be inserted or ejected with the radio power off.
Ensure that the disc holder is
evenly inserted and at the same
level as the magazine (A). The unit
will not operate if the disc holder is
not inserted at the same level (B).
A
62
2004 Expedition (exd)
Owners Guide (post-2002-fmt)
USA English (fus)
B
Page 63
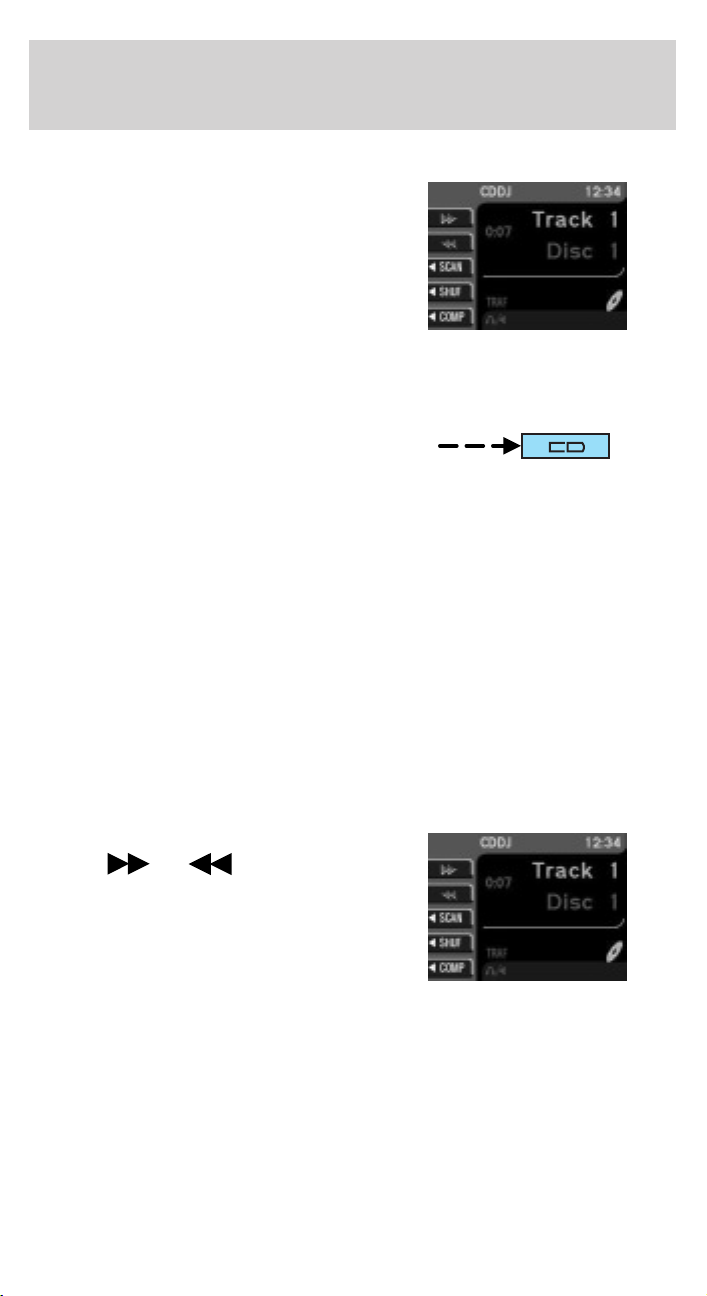
Entertainment Systems
CD DJ information screen
The CD DJ screen will display
various information such as:
• Track selected
• Elapsed time
• Selected disc
• Volume level
• On-screen selections
CD DJ playback
With a navigation CD inserted into
the audio unit, press CD for CD DJ
playback. Without a navigation CD
inserted into the audio unit, press
CD until CD DJ appears in the display.
If playback is selected and the CD DJ is empty or the magazine is
missing or incorrectly inserted, NO DISC (S) will appear in the display.
If the selected CD is missing, NO DISC is displayed and the unit selects
the next available disc. The audio unit remembers which discs are
available, so it will not select a disc that it knows is missing. Instead, NO
DISC appears in the display and the current disc remains selected.
If the selected CD is damaged or upside down, CHECK DISCS and the
disc number are displayed. The unit then selects the next available disc.
During normal operations, CDs and tracks are played sequentially in
ascending order. Playback continues at track one if the end of a disc is
reached and with CD DJ playback, disc one will follow disc six.
Rewind/fast forward feature
When in CD DJ mode, press and
hold the
search forward or in reverse on the
current disc.
or control to
2004 Expedition (exd)
Owners Guide (post-2002-fmt)
USA English (fus)
63
Page 64
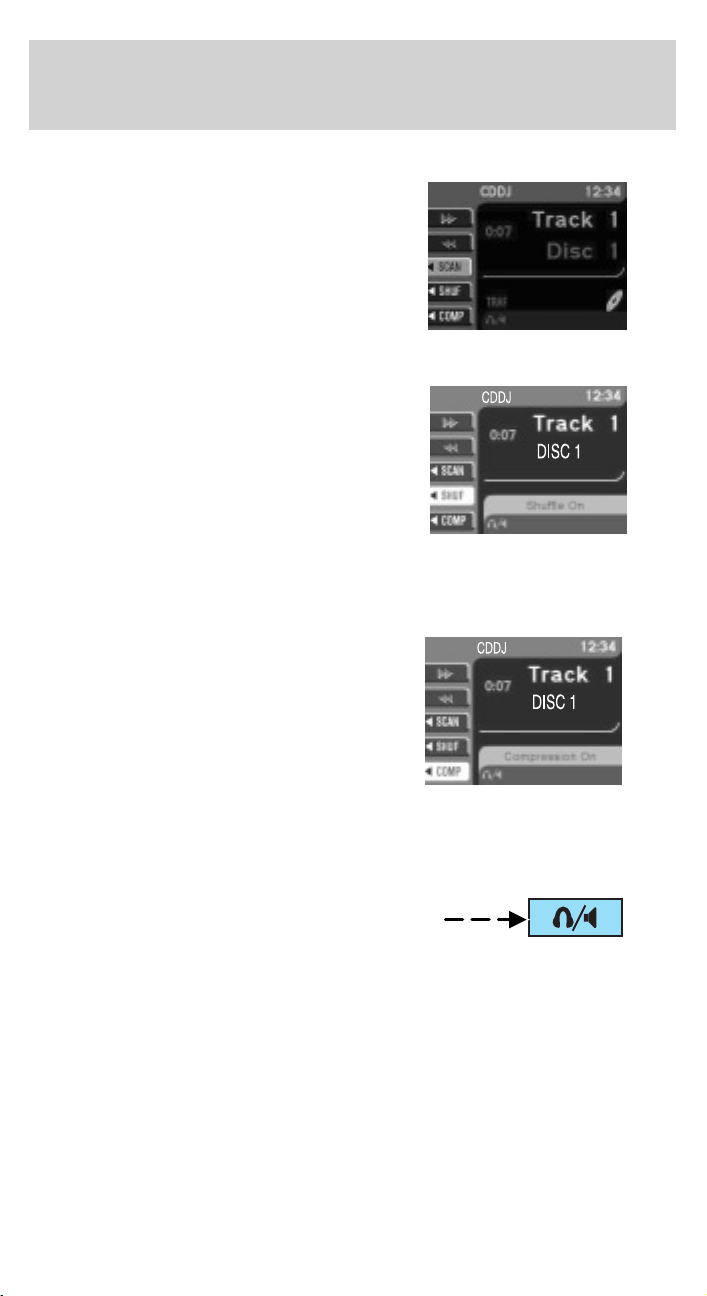
Entertainment Systems
Scan feature
When in CD DJ mode, press SCAN
for a brief sampling of all tracks on
the current CD. Press again to
disengage the feature and listen to
the selected song.
Shuffle mode
When in CD DJ mode, press SHUF
to engage and disengage the shuffle
feature. The tracks will be played in
random order. The unit will play all
the tracks on the selected disc and
then move onto the other discs and
play the tracks in random order.
Compression
The compression feature will boost quieter music and lower louder music
to minimize the need for volume adjustments.
When in CD DJ mode, press COMP
to engage or disengage the
compression feature.
Rear seat controls (RSC)
Your vehicle is equipped with rear
seat controls, which allow the rear seat passengers to operate and listen
to a different playing media than the front seat passengers. To engage
the rear seat controls from the VNR system:
• Press the headphone/speaker icon
on the VNR system. The
headphone icon illuminates in the
display indicating the system has
enabled Rear Seat Control mode. A subsequent press of this button
will disable rear seat control (headphone/speaker icon on display will
appear with a red slash through it).
64
2004 Expedition (exd)
Owners Guide (post-2002-fmt)
USA English (fus)
Page 65
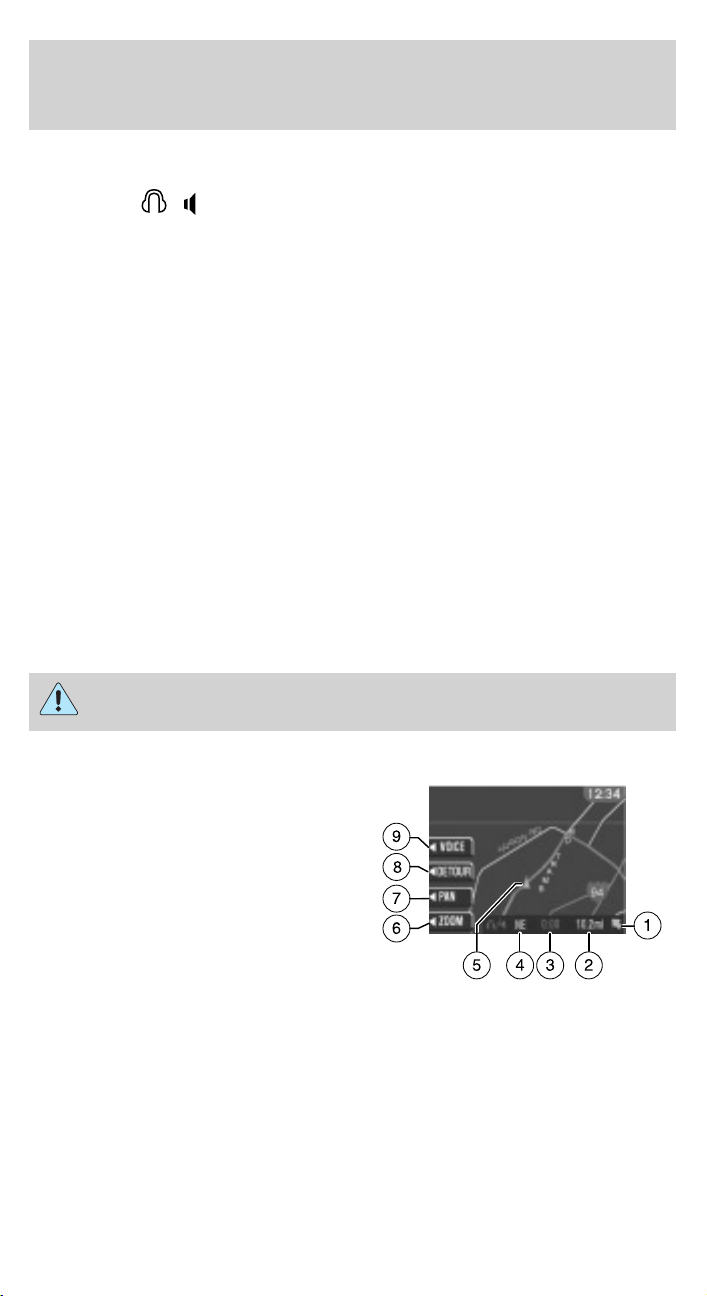
Entertainment Systems
When RSC is active, pressing presets 2 and 4 simultaneously on the radio
will enable Dual Play mode (or the RSC can enable Dual Play mode by
pressing the
and the rear speakers mute. In this mode, the rear passengers may
adjust the volume and other levels using the rear seat control.
Additionally in Dual Play mode, the front and rear seat passengers can
listen to the same playing media. However, rear seat passengers listen to
the media over their headphones (thereby being able to adjust the
volume) and the front seat passengers listen via the front seat speakers.
Press the headphone/speaker control again to disengage the rear seat
controls (and Dual Play mode). The system returns to Single Play mode.
Front and rear speakers will play the selected media.
For further information on the rear seat controls, refer to Rear Seat
Controls section found earlier in this chapter.
Navigation features
The route guidance navigation system in your audio unit will not function
unless a navigation CD is inserted.
Ensure that you follow highway code restrictions and do not take
any risks. For example, if you are unable to make a U-turn,
continue on your journey. The navigation system will recalculate
your route to get you back to an appropriate road to your
destination.
For road safety reasons, information should only be entered
when the vehicle is stationary.
/ button). The front speakers play the selected media
Navigation screen display
When in navigation mode, there will
be various indicators on the screen
to help you in operating your
system.
1. Direction to destination
2. Distance to final destination
3. Estimated time to destination
4. Current directional heading and
GPS signal strength (color)
5. Vehicle icon (current vehicle position)
2004 Expedition (exd)
Owners Guide (post-2002-fmt)
USA English (fus)
65
Page 66

Entertainment Systems
6. ZOOM
7. PAN
8. DETOUR
9. VOICE
Please drive safely
This screen may appear on your
VNR display. Press the soft key next
to the display to select the desired
language. Press the control next to
ACCEPT to confirm your selection.
Principles of GPS (Global Positioning System) operation
Your Vehicle Navigation System directs you based on information derived
from satellites, road maps stored on the CD, sensors in your vehicle and
the desired destination. The system compiles all necessary information to
guide you to your selected destination. Space satellites determine the
vehicle’s current location and transmit position and time signals to your
car.
If the vehicle has been parked for a long period of time, the navigation
function may be temporarily unresponsive. The navigation system will
operate reliably again once GPS reception is available in a few minutes.
Limited GPS reception
System performance may be adversely affected if GPS reception is
interrupted or interference occurs over a distance of several miles. The
following are possible causes for GPS reception being interrupted. If the
vehicle is:
• in multi-story parking garages
• in tunnels and under bridges
• in between high buildings
• by forests or tree-lined avenues
• in heavy rain showers and thunderstorms
• in valleys and in mountainous regions
The GPS signal strength may vary. The directional heading indicator at
the bottom of the screen might change color to indicate this signal
strength. The colors are as follows:
66
2004 Expedition (exd)
Owners Guide (post-2002-fmt)
USA English (fus)
Page 67
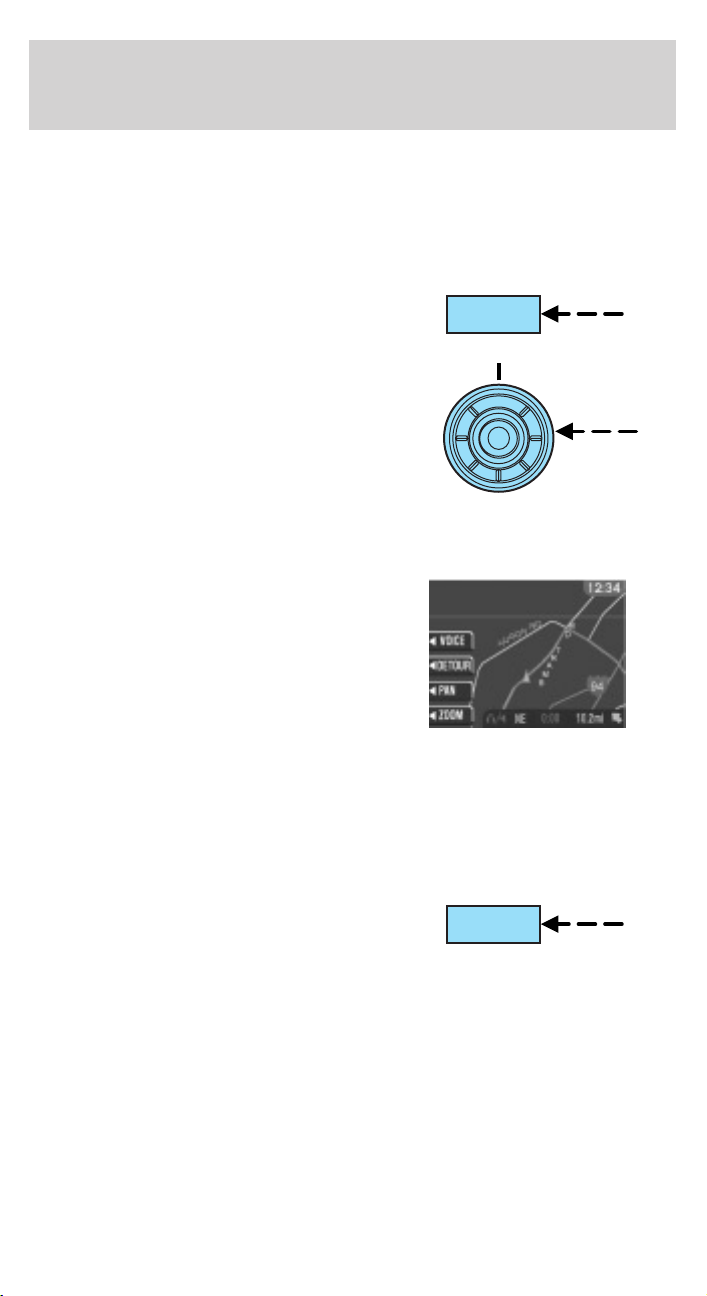
Entertainment Systems
• Green — A clear GPS signal is being received.
• Yellow — The GPS signal is partially blocked.
• Red — The GPS signal is unavailable and may be temporarily blocked.
To enter navigation mode
Press NAV to access the navigation
system menu.
Use the cursor control, or the
corresponding soft key to confirm
your selection.
If you select the wrong item, press
the BACK control to return to the
previous screen. Or, press NAV to
return to the main Destination
Entry menu and start again.
Map display information
When using the navigation system,
the map display screen will appear
to guide you to your location. On
the screen, you are able to make the
following choices:
• VOICE — Press to repeat the last
voice prompt.
• DETOUR — Press to select a
detour from your current navigation route.
• PA N — Press to move the current view of the map.
• ZOOM — Press to adjust the area covered on the map display.
NAV
Selecting a destination
Press NAV to access the destination
entry menu.
2004 Expedition (exd)
Owners Guide (post-2002-fmt)
USA English (fus)
NAV
67
Page 68
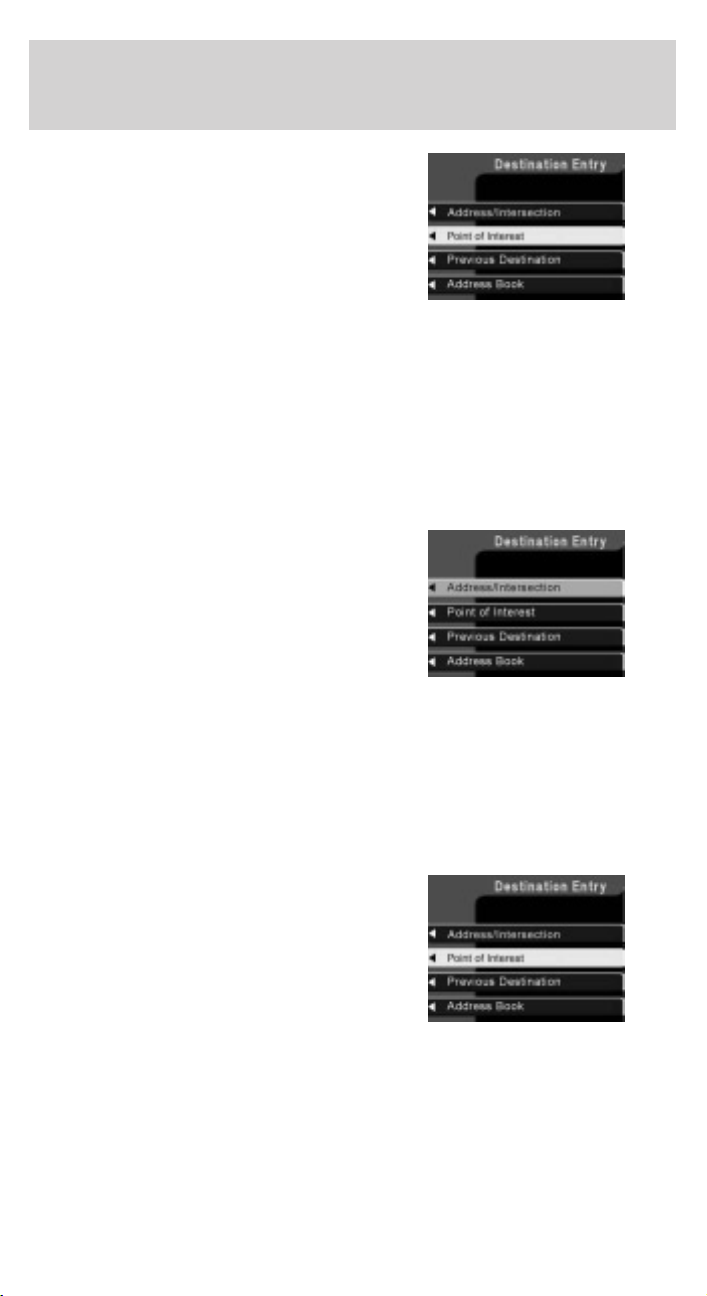
Entertainment Systems
From this menu, you may select
from the following options:
• Address/Intersection – Use to
select a destination based on a
known street address or
intersection. Not available
when the vehicle is moving.
• Point of Interest – Use to select
a destination that is a point of interest location (i.e., airport,
restaurant, hospital). Not available when the vehicle is moving.
• Previous Destination – Use to select a destination from the last 50
destinations entered.
• Address Book – Use to select a destination from previously stored
entries.
Address/Intersection
Use the soft keys to select
Address/Intersection from the
Destination Entry menu. The next
two options available are:
• Town/City Name – Select this
option if you know the town or
city name.
• Street Name – Select if you
know the street address but are uncertain of the city.
The next two options are:
• Address range – Select the numerical address of the destination.
• Intersection – Select the intersection closest to the destination.
Points of Interest (POI)
This destination option enables you
to specify a particular place, such as
an airport or gas station. Use the
soft keys to select Points of Interest.
In the next menu, you will have the
following options:
68
2004 Expedition (exd)
Owners Guide (post-2002-fmt)
USA English (fus)
Page 69
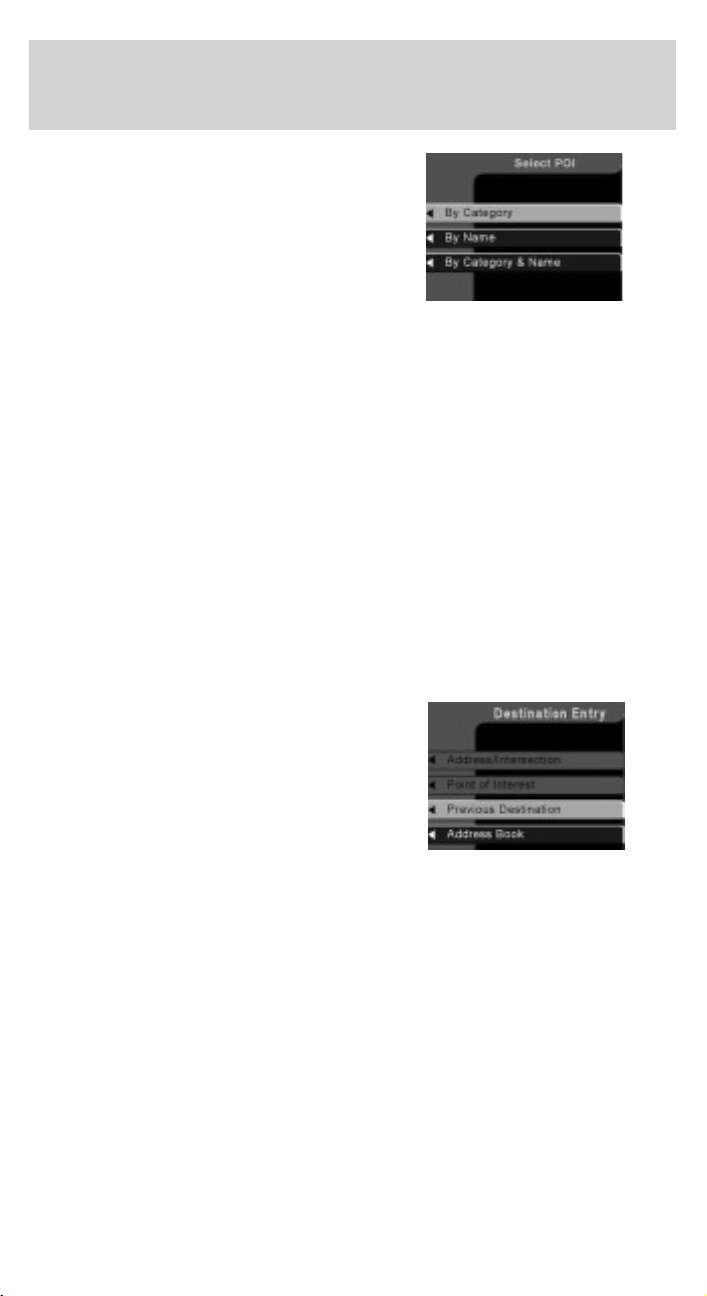
Entertainment Systems
• By Category – Lists POIs by
categories, such as airports, gas
stations, etc. Use the cursor
control to select and confirm
choice.
• By Name – A keyboard display
enables you to spell out the first
four letters of the desired POI. A
slight time delay will occur if large numbers of letter options are
available.
• By Category & Name – Lists categories, then allows you to spell out
the first four letters of your destination.
After making these selections, three further options are displayed:
• Show All – Lists entries in alphabetical order.
• Sort by Distance – Lists the closest POI entries to the vehicle’s
current location.
• Within a Town/City – Lists entries for a specific city in alphabetical
order.
Certain categories may not be available in some areas and POIs may not
all be listed. Up to date information also depends upon using the latest
navigation CD available.
Previous destination
The last 50 destinations entered into
the navigation system are
automatically stored in the system’s
memory.
Use the soft key to select Previous
Destination. The address of each
stored destination will appear.
The previous origin information is
also stored in this location. This stores the location where the vehicle
last started off from and is updated each time the vehicle completes a
journey.
2004 Expedition (exd)
Owners Guide (post-2002-fmt)
USA English (fus)
69
Page 70
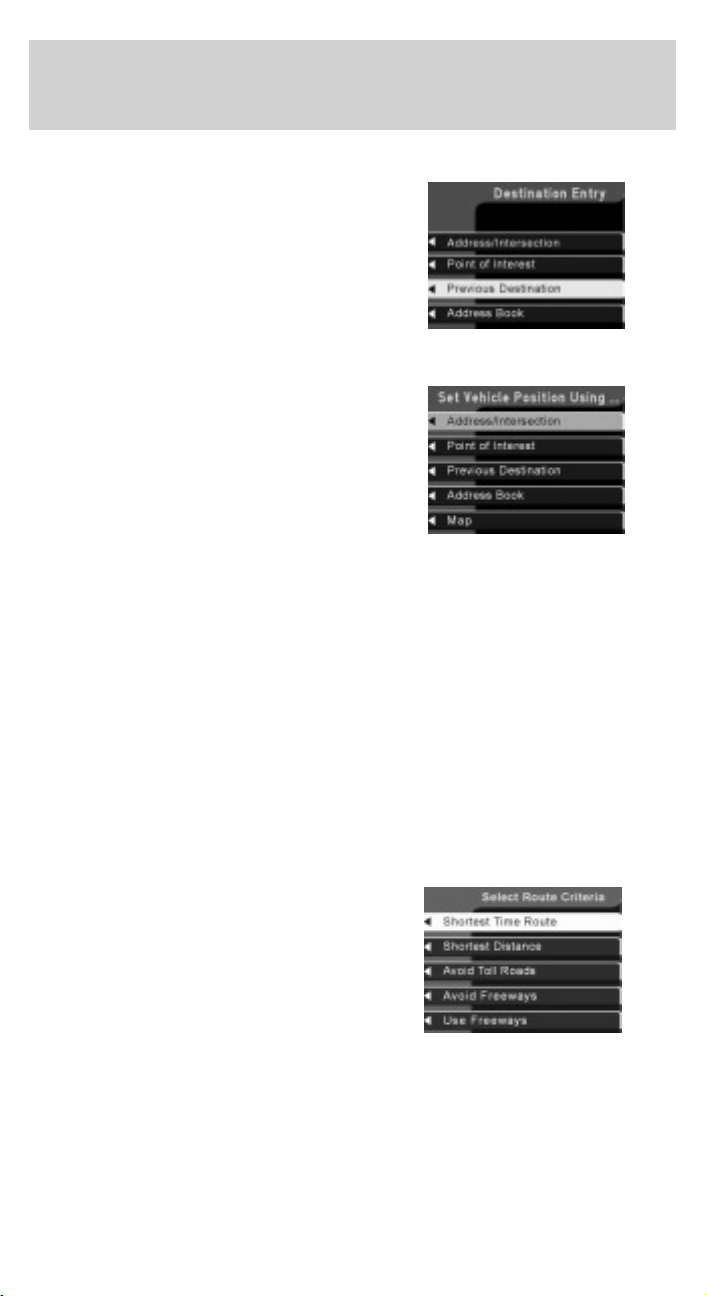
Entertainment Systems
Deleting a previous destination
• Use the cursor control to select
the destination to be deleted.
• Press DELETE.
A confirmation screen will appear
before the deletion is complete.
Entering a destination using the keyboard of lists
After selecting the desired choice
from the Destination Entry menu,
there are two main ways to enter
your destination in the VNR system:
Keyboard – the keyboard display
enables you to spell out a town, city,
street or point of interest.
• Use the cursor control to
highlight the desired character(s).
• Push in the control to confirm the selection. A highlight bar will
automatically begin searching the current files for the listing.
• To move back to previously selected characters, press DELETE.
List – Your VNR system shows a list of town/cities, streets or points of
interest and a highlight bar indicates the line selected. You may choose
any of these for a destination.
• Press LIST to enter list mode.
• Use the cursor control to scroll through the selections.
• Press in the cursor control to confirm the selection.
Selecting Route Criteria
Once you have selected a
destination, select from the
following route criteria:
70
2004 Expedition (exd)
Owners Guide (post-2002-fmt)
USA English (fus)
Page 71
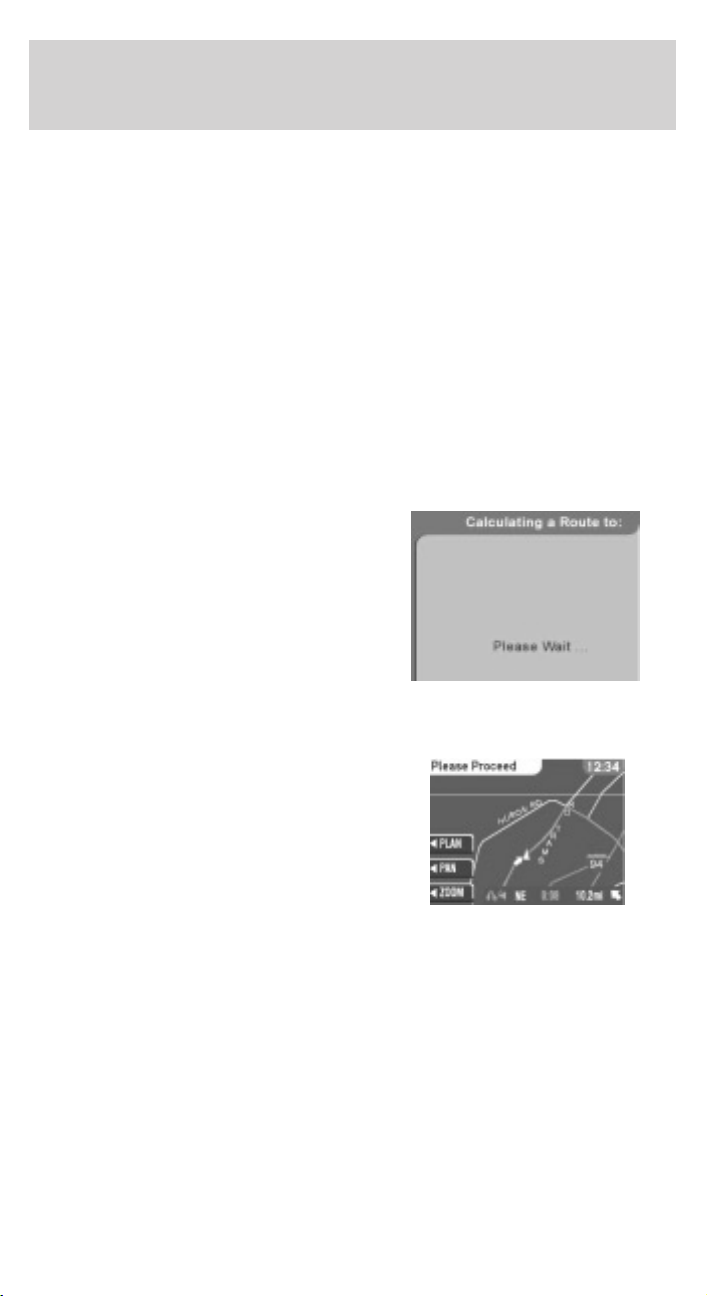
Entertainment Systems
1. Shortest time route — Creates a driving route which minimizes
driving time taking into consideration things such as speed limits,
number of turns, etc.
2. Shortest distance — Creates a driving route the shortest distance
from the current location.
3. Avoid toll roads — Creates a driving route which avoids toll roads
where possible.
4. Avoid freeways — Creates a driving route which avoids major
freeways where possible.
5. Use freeways — Creates a route which uses freeways where possible.
Route calculation
Once the route criteria is selected, the navigation system automatically
calculates a route to the selected destination. The route appears on the
display screen and a voice prompt provides instructions.
This screen will appear for a few
seconds while the navigation system
is calculating your route.
Please proceed
Once the route is calculated, ’Please
Proceed’ is displayed with a map on
the display. Also included in the
display:
• the planned route is shown in
pink
• major roadways are shown in blue
• other streets are shown in white
• your vehicle location is shown as a pink/yellow triangle
• the arrow at the foot of the screen points to your destination
You are able to choose from three viewing options in this display:
2004 Expedition (exd)
Owners Guide (post-2002-fmt)
USA English (fus)
71
Page 72
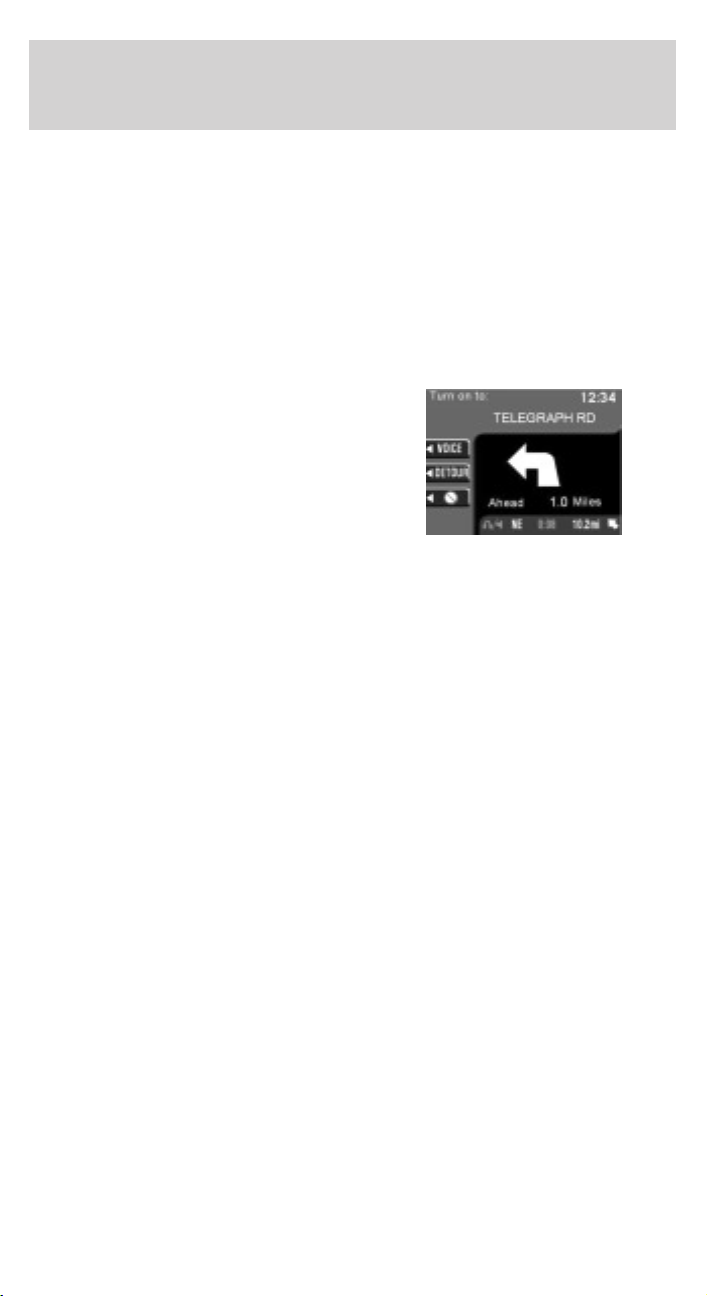
Entertainment Systems
• PLAN — Press this soft key to scroll through your entire route. This
option is only available prior to beginning the journey.
• PA N — Press this soft key, then use the cursor control to pan up,
down, left or right on the map. This option is only available when the
vehicle is not in motion.
• ZOOM — Press this soft key multiple times (or use the cursor input)
to select the desired zoom level on the map. The zoom level is shown
at the bottom of the screen.
Guide display
Once your vehicle is moving along
the highlighted route, the Guide
display screen will automatically
appear. This screen shows your next
turn as voice prompts direct you on
the route. The screens and voice
prompts are continually updated to
correspond with your vehicle
location. To disengage the voice prompts, refer to Navigation
preferences in the System Options Chapter.
The voice volume level may be adjusted by turning the volume control
during a voice prompt only.
On the Guide display screen, there are two display functions which are
available if needed:
• VOICE — Press to repeat the current voice prompt.
• DETOUR — Press to select a detour. For more information on
detours, refer to Detours, interruptions and route changes in this
chapter.
• CANCEL — Press to cancel the guide display.
While in the Guide display screen, the cursor input can be used to
preview future/up coming maneuvers. This can be done by pressing
down on the cursor input to go to the ’next’ maneuver instruction, and
pressing up to go to the ’previous’ maneuver. Pressing the NAV control at
any time will set you back to the current maneuver/turn instruction.
72
2004 Expedition (exd)
Owners Guide (post-2002-fmt)
USA English (fus)
Page 73
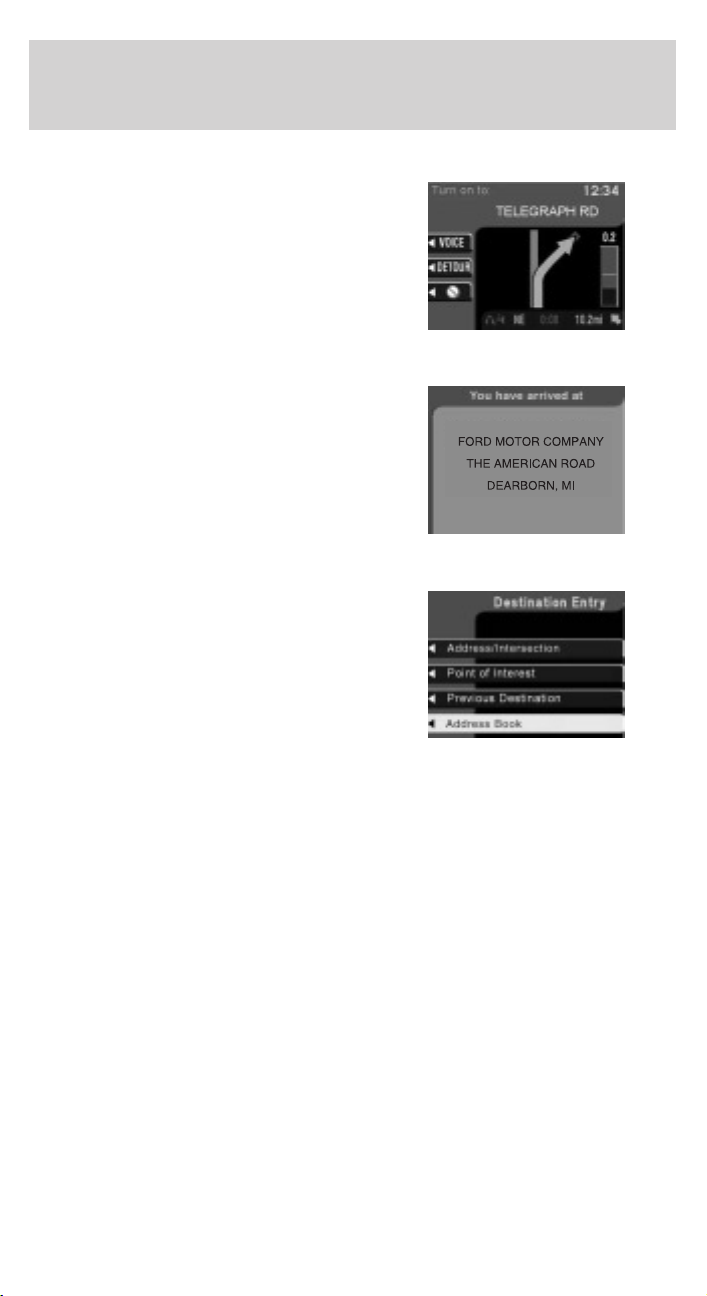
Entertainment Systems
True view
As you approach an intersection, the
Guide display screen will
automatically change to a close-up
view (True view) of the junction.
The close-up view will automatically
return to the Guide display screen
once a turn has been completed.
Arrival
When you approach your
destination, the destination indicator
will appear on the map display
screen as a circular icon. When you
arrive, the name and address of
your destination will be displayed.
Navigation screen display
The address book feature allows you
to store up to 50 alphabetical
destinations. To store an address:
1. Once in navigation mode, select
’Address book’.
2. Confirm the selection.
Stored addresses will appear in the
display. If no entries exist, an empty address book screen is shown.
Use the cursor control to select the desired entry.
2004 Expedition (exd)
Owners Guide (post-2002-fmt)
USA English (fus)
73
Page 74
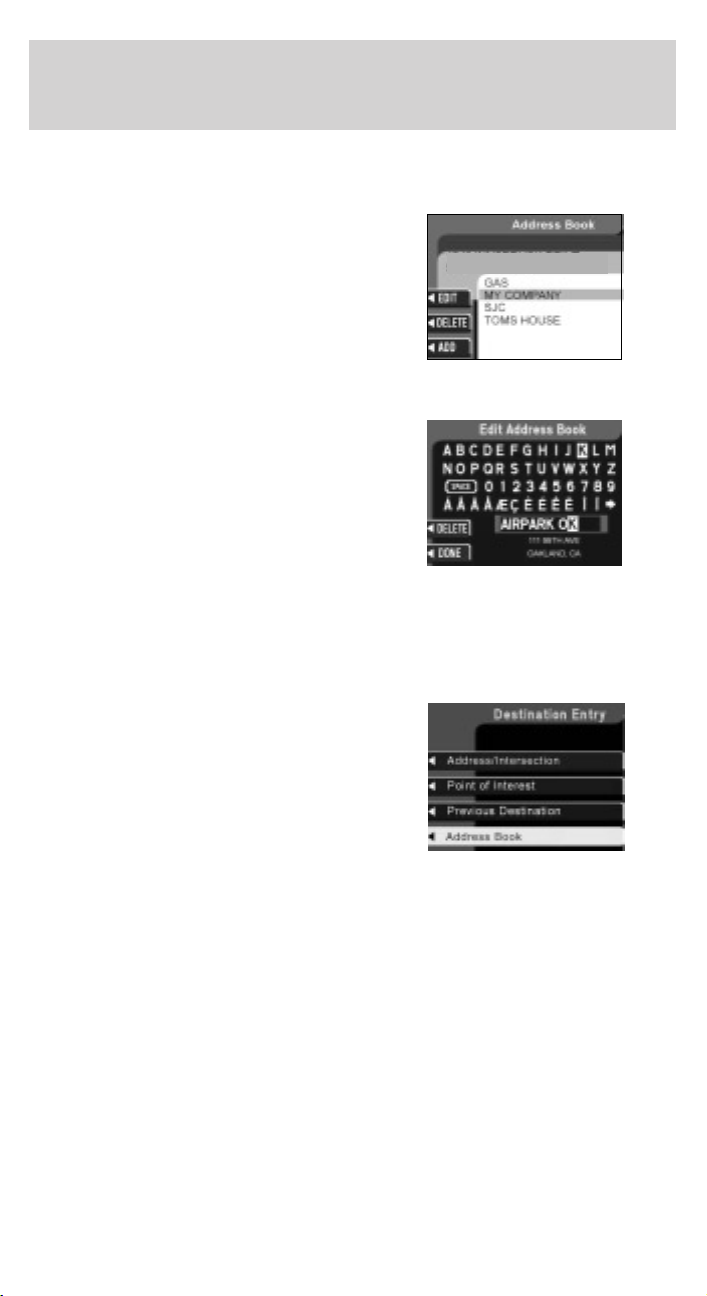
Entertainment Systems
Adding, deleting or editing the address book
Note: These features are not available when the vehicle is in motion.
1. Ensure that you are in navigation
mode.
2. Select Address book.
3. Confirm selection.
4. Press the DELETE soft key to
delete the current entry.
5. Press the ADD soft key to add an
additional entry.
6. Press the EDIT soft key to edit
the current entry.
• Use the cursor control to select a
letter.
• Push the control to add a letter
to the name. If you make a
mistake, you can press the
DELETE soft key.
• Press the DONE soft key to save your entry under the name you
spelled.
Storing the current car position in the address book
If you are at a location you would
like to store in the address book,
such as a new restaurant:
• Select ADDRESS BOOK from the
Destination Entry menu.
• Press the ADD soft key.
• Press the CURRENT LOCATION
soft key.
• Assign a name to the entry as described in Adding, deleting or
editing the address book above.
• Press the DONE soft key to save your entry under the name you
chose.
74
2004 Expedition (exd)
Owners Guide (post-2002-fmt)
USA English (fus)
Page 75
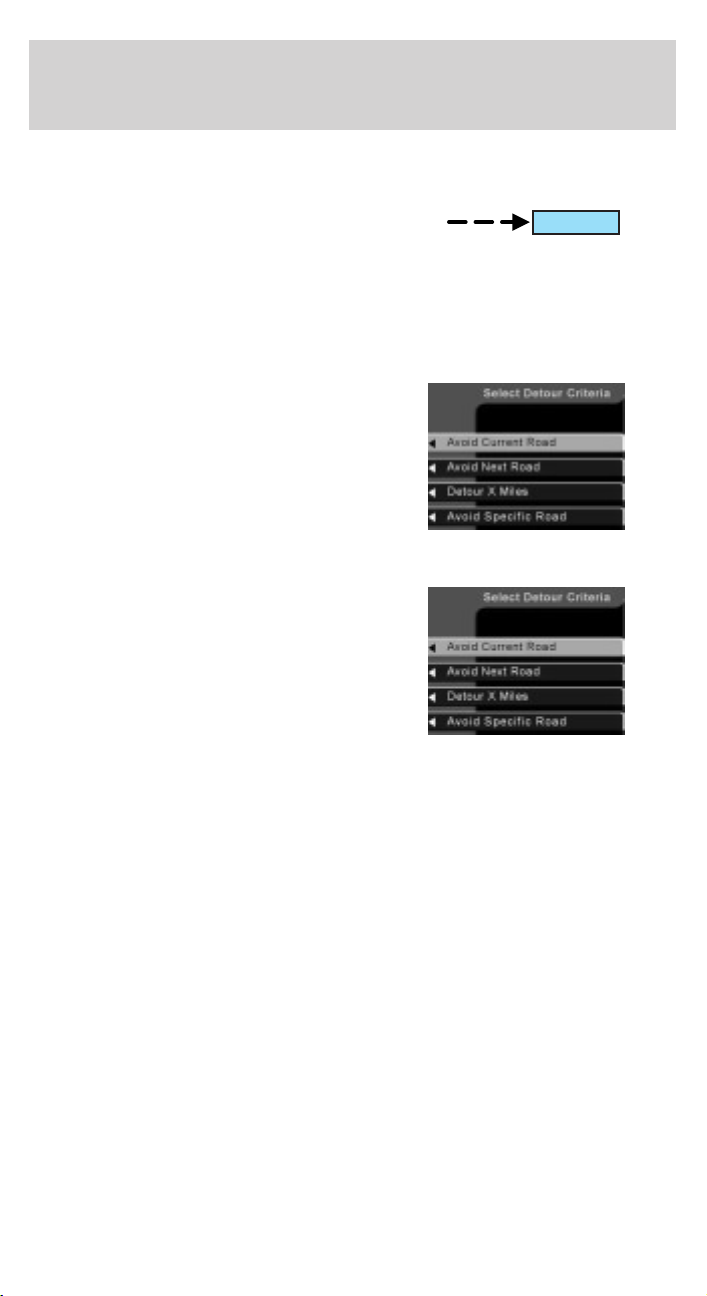
Entertainment Systems
Current location
To access your current location,
press HERE when in navigation
mode. Your current location and the
name/distance to the next/last
intersection are displayed.
Press NAV to return to a guidance display. Press MAP to return to a map
display.
Detours, route interruptions and changes
If need be, your navigation system
can easily and quickly find the most
efficient detour around road
construction, unexpected traffic or
undesirable roads.
Detour options
You may engage the detour option
when in the Guide display, True
view or Map display screens.
Press the control next to DETOUR
to activate.
Use the soft keys to select and enter
your new route criteria. Press the
key to confirm selection. The
following options are available:
• AVOID CURRENT ROAD — Updates your route to avoid the road
which you are on currently.
• AVOID NEXT ROAD — Updates your route to avoid the next road
planned on your journey.
• DETOUR (X) MILES — Provides a detour from the current route for
the noted distance. Use the cursor control to indicate the distance
which needs to be avoided. The range available is based on the length
of your original route.
• AVOID SPECIFIC ROAD — Avoids a specific road on your planned
route.
HERE
2004 Expedition (exd)
Owners Guide (post-2002-fmt)
USA English (fus)
75
Page 76
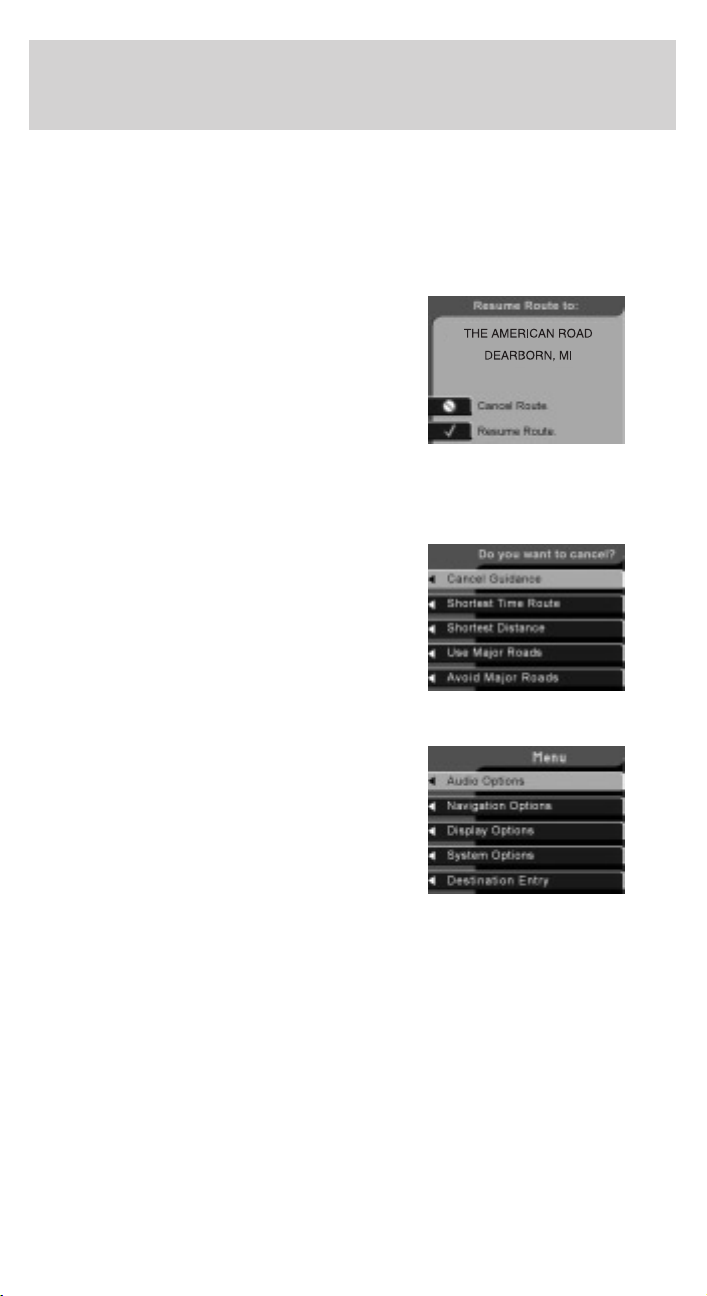
Entertainment Systems
Route interruptions
In the course of your destination, you may decide to temporarily leave
your planned route for gas, food, etc. If you turn off the ignition, the
option to continue the route guidance will be displayed when the ignition
is turned on again. Use the cursor control to select from one of the
following options:
• Resume route - The navigation
system displays the Select Route
Criteria screen. Refer to
Selecting Route Criteria earlier
in this chapter.
• Cancel route - Press to return to
the main menu.
If the ignition is not turned off,
simply continue along your highlighted route.
Route changes or cancellations
To cancel or change your current
route:
• Press BACK, then select ’Cancel
Guidance’ or
• Press the CANCEL soft key.
Navigation Menu
You are able to make various
adjustments in navigation mode. To
view the options, press the control
next to ’Option Menu’ to select from
the following options:
76
2004 Expedition (exd)
Owners Guide (post-2002-fmt)
USA English (fus)
Page 77
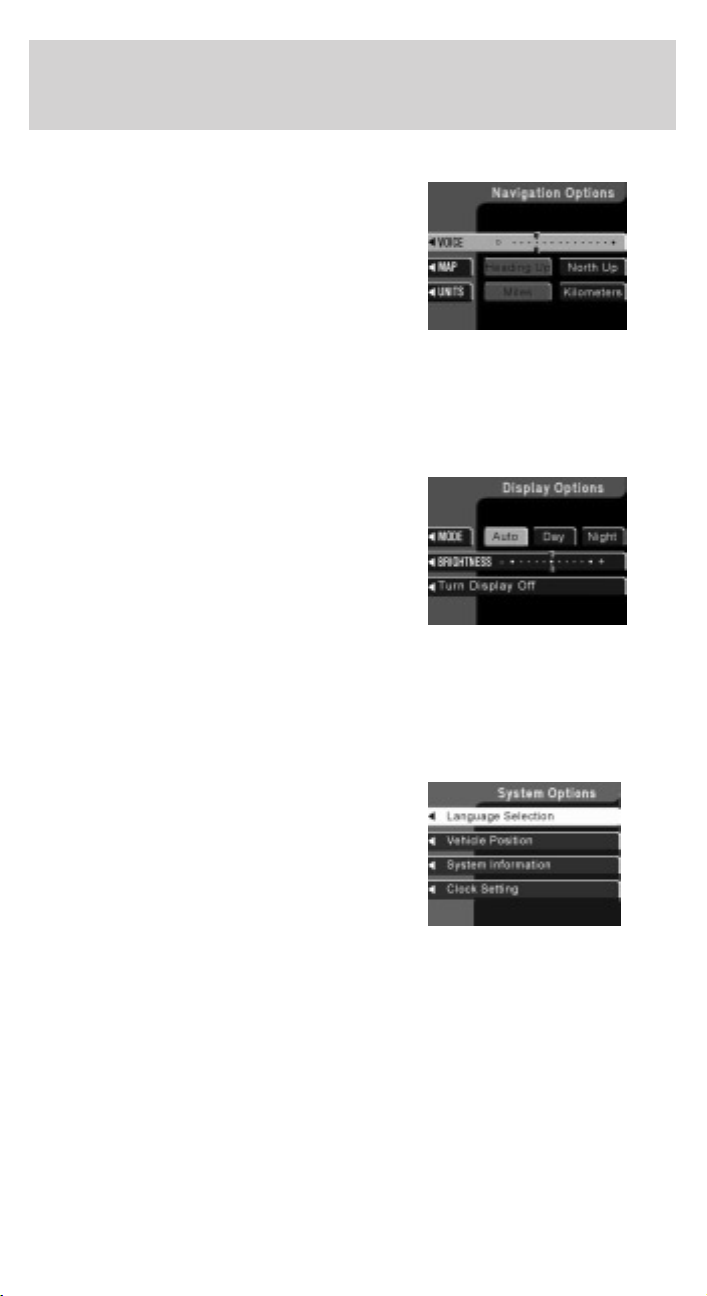
Entertainment Systems
Navigation options
Once in the navigation preference
menu, you may select from the
following options:
• VOICE — Select to turn the voice
output on or off and to adjust the
volume level.
• MAP — Choose between ’Heading
up’ to put your direction of travel
toward the top of the screen, or ’North up’ to ensure that North is
always at the top of the screen.
• UNITS — Press to select from miles or kilometers.
Display options
Use this feature to change the
display setting. This feature can be
accessed by selecting “Display
Options” within the Main Menu.
Use the cursor control to select one
of the following options:
• ’Mode’—auto (automatic), day
or night display settings.
• ’Brightness’—provides manual adjustment for screen brightness.
• ’Turn display off’—Select turn the display off. Press any button to
turn the display back on again.
System options
• Language Selection: Use the
cursor control to select and enter
the desired voice and text
language.
2004 Expedition (exd)
Owners Guide (post-2002-fmt)
USA English (fus)
77
Page 78
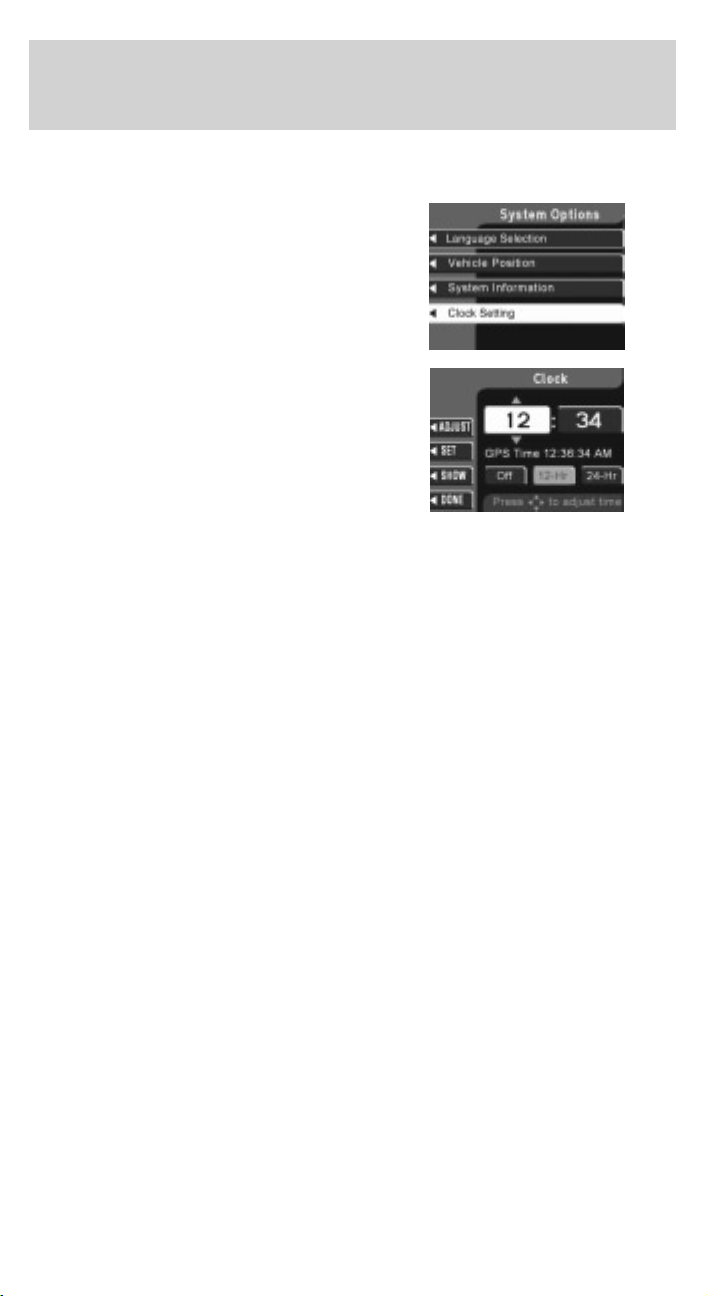
Entertainment Systems
• Clock Setting: Your vehicle is equipped with your clock in the VNR
system. To set the clock:
1. Access the CLOCK screen.
2. Press the ADJUST control to
select the hours or minutes to set.
3. Use the cursor control to increase
or decrease the hours or minutes.
4. Press DONE to set the time.
5. Select the SET soft key to
synchronize/set the minutes and
seconds to GPS time. The hours will remain at the user set value.
You may choose to set the clock to a 12 or 24 hour display.
General information
Federal Communication Commission (FCC) Compliance
Changes or modifications not approved by Ford or Lincoln Mercury could
void user’s authority to operate the equipment. This equipment has been
tested and found to comply with the limits for a Class B digital device,
pursuant to Part 15 of the FCC Rules. These limits are designed to
provide reasonable protection against harmful interference in a
residential installation. This equipment generates, uses and can radiate
radio frequency energy and, if not installed and used in accordance with
the instructions, may cause harmful interference to radio
communications.
However, there is no guarantee that interference will not occur in a
particular installation. If this equipment does cause harmful interference
to radio or television reception, which can be determined by turning the
equipment off and on, the user is encouraged to consult the dealer or an
experienced radio/TV technician for help.
78
2004 Expedition (exd)
Owners Guide (post-2002-fmt)
USA English (fus)
Page 79

Entertainment Systems
Cleaning the display
Do not spray cleaning fluid directly onto the unit. Instead, spray onto a
soft cloth and gently wipe the unit. Only recommended products should
be used.
Do not clean any part of the system with benzene, paint thinner or any
other solvent.
Do not spill liquids of any kind onto the unit.
The navigation system utilizes a database stored in a special format on a
CD. It is recommended always to use the latest update of this map CD.
• The navigation system will only work with CDs specifically intended
for your navigation system.
• Always store the map CDs in their protective cases when not in use.
Ordering additional map CDs
If you wish to order additional maps, or report possible problems with
your current map CD, please call Navigation Technologies at (888)
NAV-MAPS, (888–628–6277) toll-free or write
Navigation Technologies
P.O. Box 543442
Chicago, IL 60654–0442
Website — www.navtech.com
Latest map CDs
The traffic network is constantly changing due to new roads, traffic
restrictions, etc. Therefore, it is not always possible to exactly match the
digital CD map with the current roadways. To help with accuracy, always
use the latest version of the map CD for navigation.
2004 Expedition (exd)
Owners Guide (post-2002-fmt)
USA English (fus)
79
Page 80
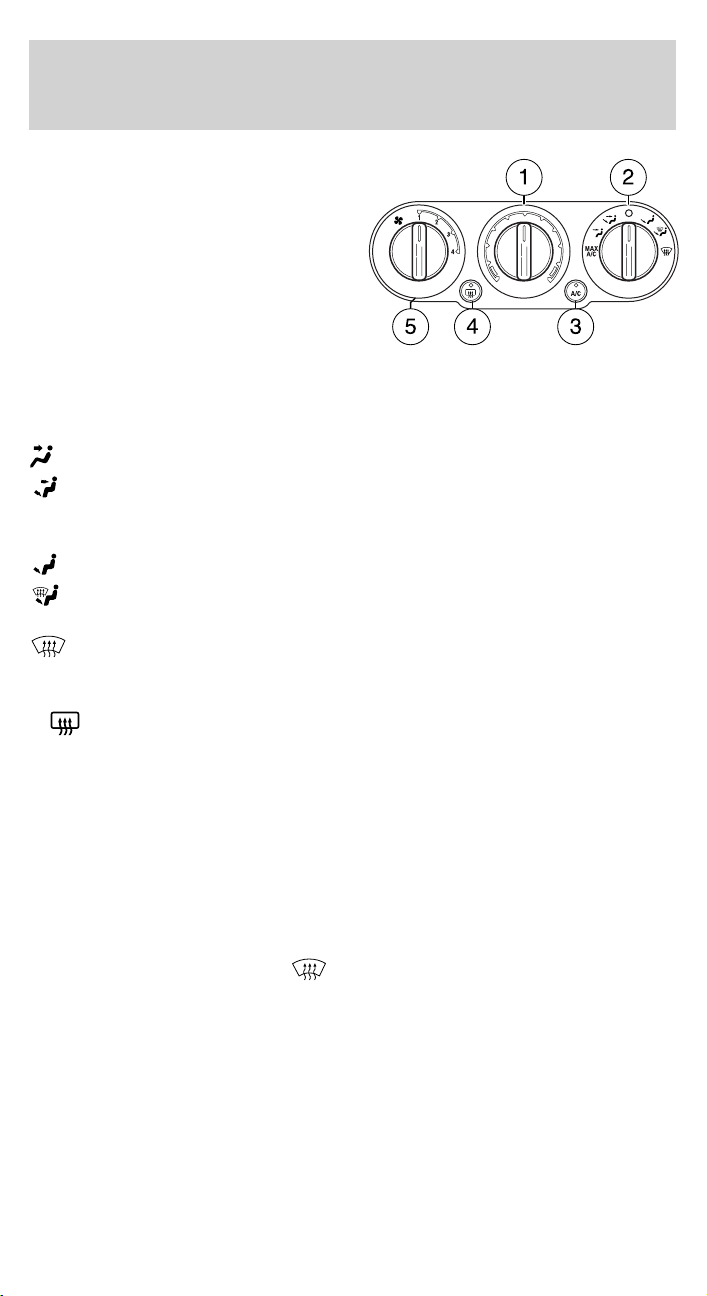
Climate Controls
MANUAL HEATING AND AIR
CONDITIONING SYSTEM
1. Temperature selection:
Controls the temperature of the
airflow in the vehicle.
2. Air flow selections: Controls
the direction of the airflow in the
vehicle. See the following for a brief
description on each control.
MAX A/C: Uses recirculated air through the instrument panel registers
to cool the vehicle. This mode is more noisy than A/C, but is more
economical and efficient and may help prevent undesirable odors from
entering the vehicle.
: Distributes outside air through the instrument panel vents.
: Distributes outside air through the instrument panel vents and
floor ducts.
O (OFF): Outside air is shut out and the fan will not operate.
: Distributes outside air through the floor vents.
: Distributes outside air through the windshield defroster vents and
floor vents.
: Distributes outside air through the windshield defroster vents.
3. A/C: Used to manually enable or disable the operation of the air
conditioning in all modes except Floor & Defrost, Defrost and MAX A/C.
4.
: Clears ice and fog from the rear windshield.
5. Fan speed adjustment: Controls the volume of air circulated in the
vehicle.
Since the air conditioner removes moisture from the air, it is considered
normal operation if water drips on the ground under the air conditioner
drain.
The A/C compressor will only function if the outside temperature is
above approximately 2°C (35°F).
OPERATING TIPS
• To reduce fog build up on the windshield during humid weather, place
the air flow selector in the
• To reduce humidity build up inside the vehicle: do not drive with the
air flow selector in the OFF or (in cold weather) MAX A/C position.
80
position.
2004 Expedition (exd)
Owners Guide (post-2002-fmt)
USA English (fus)
Page 81
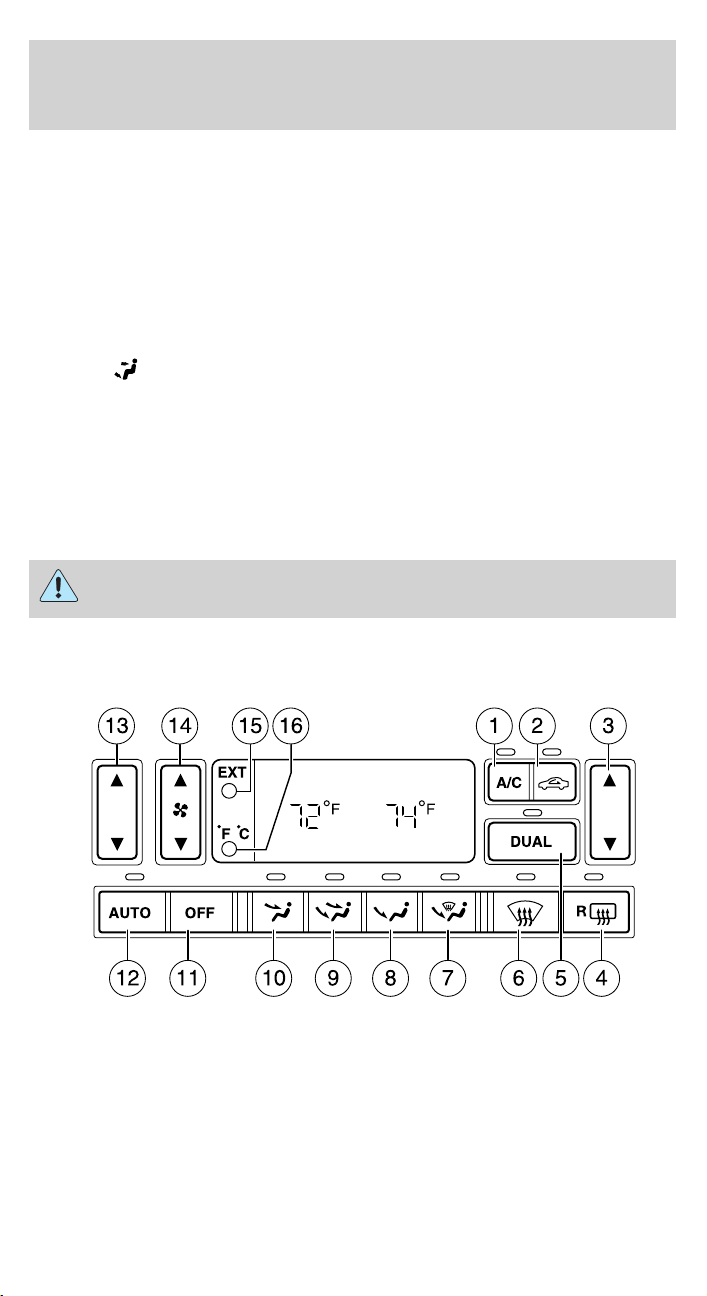
Climate Controls
• Under normal weather conditions, do not leave the air flow selector in
MAX A/C or OFF when the vehicle is parked. This allows the vehicle
to “breathe” using the outside air inlet vents.
• Do not put objects under the front seats that will interfere with the
airflow to the back seats.
• Remove any snow, ice or leaves from the air intake area at the base of
the windshield.
To aid in side window defogging/demisting in cold weather:
1. Select
2. Select A/C
3. Modulate the temperature control to maintain comfort.
4. Set the fan speed to HI
5. Direct the outer instrument panel vents towards the side windows
To increase airflow to the outer instrument panel vents, close the vents
located in the middle of the instrument panel.
Do not place objects on top of the instrument panel as these
objects may become projectiles in a collision or sudden stop.
DUAL ELECTRONIC AUTOMATIC TEMPERATURE CONTROL
(DEATC) SYSTEM
2004 Expedition (exd)
Owners Guide (post-2002-fmt)
USA English (fus)
81
Page 82
Climate Controls
1. A/C control: Uses outside air to
A/C
cool the vehicle. Press to turn on/off
in all modes except
or .
2. Recirculation control: Used to
manually enable or disable the
operation of recirculated air in all
modes except Defrost. Cools the vehicle more quickly by recirculating
the cabin air instead of using outside air and helps prevent unpleasant
outside odors or fumes from entering the vehicle. In automatic operation,
the recirculated air operates automatically as necessary to achieve the
selected temperature.
3. Passenger side temperature
control: Controls the temperature
on the passenger side of the vehicle
when in dual zone mode. To enter
dual zone, press the passenger temperature control or DUAL. The
passenger temperature will appear in the display.
4. Rear defrost control: Removes
ice and fog from the rear window.
R
Press to turn on/off.
5. DUAL (Single/dual electric
DUAL
temperature control): Allows the
driver to have full control of the
cabin temperature settings (single zone) or allows the passenger to have
control of their individual temperature settings (dual zone control). Press
to enable dual zone mode, press again to return to single zone.
6.
: Distributes outside air through the windshield defroster vents.
7.
: Distributes outside air through the windshield defroster vents
and floor vents.
: Distributes outside air through the floor vents.
8.
9.
: Distributes outside air through the instrument panel vents and
the floor vents.
10.
: Distributes outside air through the instrument panel vents.
11. OFF: Outside air is shut out and
the fan will not operate.
82
2004 Expedition (exd)
Owners Guide (post-2002-fmt)
USA English (fus)
OFF
Page 83
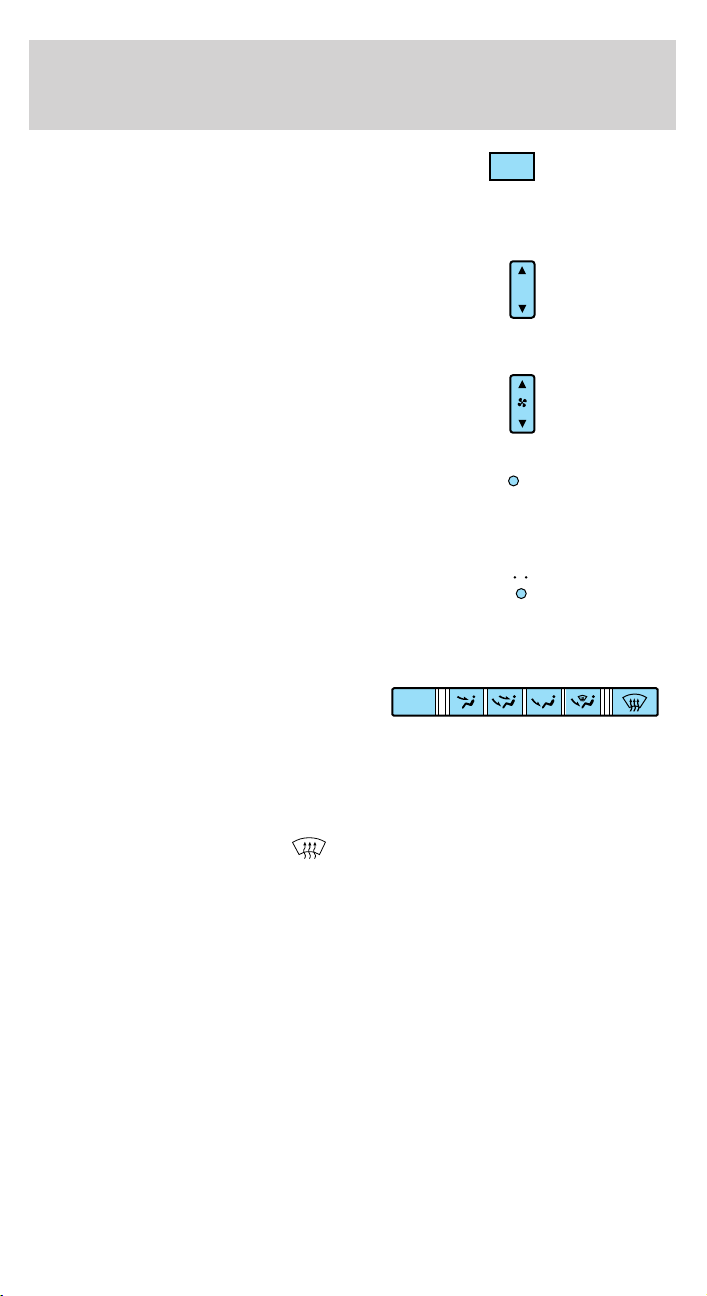
Climate Controls
12. AUTO: Press AUTO and then
AUTO
select the desired temperature. The
system will automatically determine
fan speed, airflow location and outside or recirculated air to heat or cool
the vehicle to achieve the selected temperature.
13. Driver’s side temperature
control: Controls the temperature
for both driver and passenger.
Controls only the driver’s side of the
vehicle if operating in DUAL mode.
14. Fan Speed: Used to manually
enable or disable the fan speed.
15. EXT: Displays the outside air
EXT
temperature. It will remain
displayed until the EXT control is
pressed again. The external temperature will be most accurate when the
vehicle has been moving for a period of time.
16. Temperature conversion:
F C
Press to toggle between Fahrenheit
and Celsius temperature on the
DEATC display only. The set point temperatures in Celsius will be
displayed in half-degree increments.
Manual override controls: Allows
OFF
you to manually determine where
airflow is directed. To return to fully
automatic control, press AUTO.
OPERATING TIPS
• To reduce fog build up on the windshield during humid weather, place
the air flow selector in the
position.
• To reduce humidity build up inside the vehicle: do not drive with the
air flow selector in the OFF or (in cold weather) MAX A/C position.
• Under normal weather conditions, do not leave the air flow selector in
MAX A/C or OFF when the vehicle is parked. This allows the vehicle
to “breathe” using the outside air inlet vents.
• Do not put objects under the front seats that will interfere with the
airflow to the back seats.
2004 Expedition (exd)
Owners Guide (post-2002-fmt)
USA English (fus)
83
Page 84

Climate Controls
• Remove any snow, ice or leaves from the air intake area at the base of
the windshield.
To aid in side window defogging/demisting in cold weather:
1. Select
2. Select A/C
3. Modulate the temperature control to maintain comfort.
4. Set the fan speed to HI
5. Direct the outer instrument panel vents towards the side windows
To increase airflow to the outer instrument panel vents, close the vents
located in the middle of the instrument panel.
Do not place objects on top of the instrument panel as these
objects may become projectiles in a collision or sudden stop.
84
2004 Expedition (exd)
Owners Guide (post-2002-fmt)
USA English (fus)
Page 85
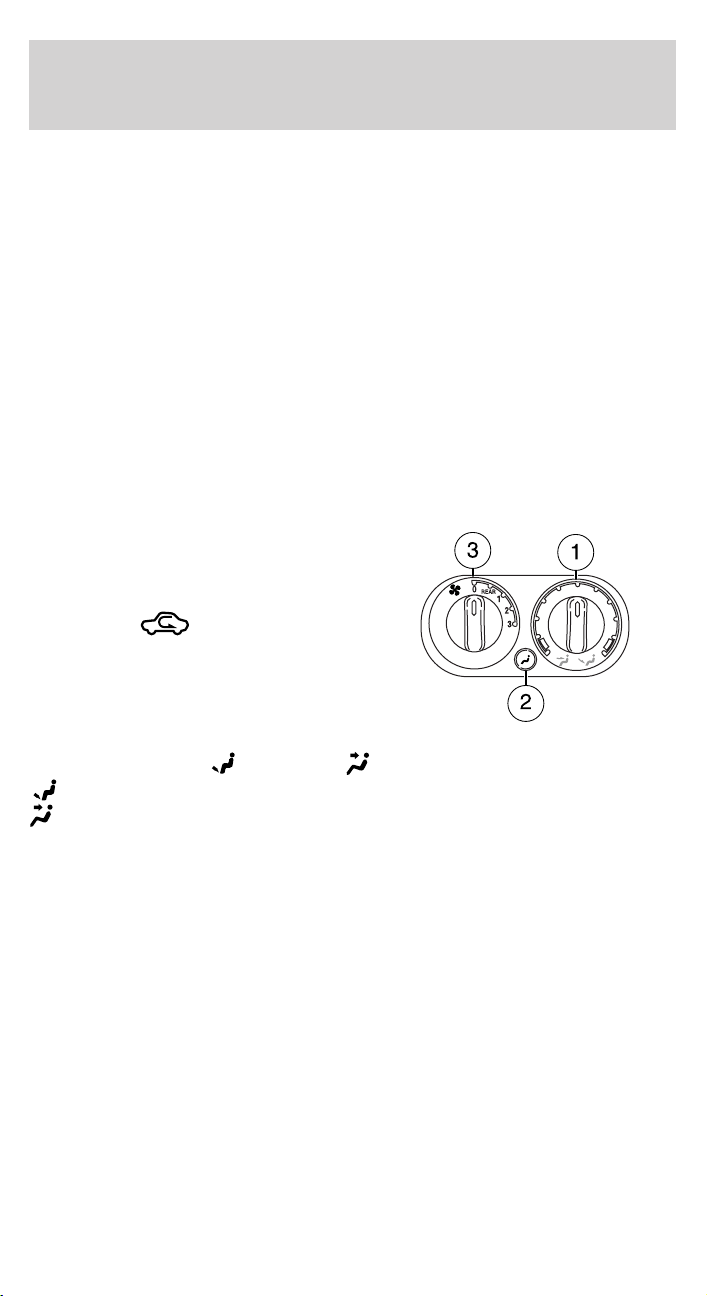
Climate Controls
AUXILIARY A/C-HEATER CONTROLS (IF EQUIPPED)
Your vehicle may be equipped with auxiliary climate controls. These
allow the front or rear seat passengers to control airflow direction,
temperature and fan level of the rear compartment to quickly heat or
cool the vehicle.
Auxiliary climate controls are located in the first row overhead console
and in the floor console on the back of the front row console.
If the main climate control system is in the OFF position, the auxiliary
climate control will not operate.
The auxiliary unit can be controlled either by the front seat occupant(s)
using the front auxiliary control or by the rear seat passenger(s) using
the rear auxiliary control but not both. To control the auxiliary unit using
the rear control, the front auxiliary blower control must be in the REAR
position.
Front auxiliary controls:
1. Temperature control:
Determines airflow temperature in
the rear of the vehicle. If the main
climate control system is cooling in
MAX A/C or
auxiliary temperature control will
not function as the entire vehicle
will operate at a full cool
temperature.
2. Mode selector: Press to select
air flow direction to
Directs air to the floor of the third row seating.
directs air to the overhead registers of the second and third row
seating. The selected mode will illuminate on the temperature control.
3. Fan control: Determines fan speed in the auxiliary system. Turn to
REAR to give rear seat passengers control of the rear auxiliary controls.
Otherwise, the front auxiliary control will determine the settings for the
auxiliary A/C-heater. If set to O (OFF), the rear auxiliary controls will
not function.
mode, the
(Floor) or (Panel).
2004 Expedition (exd)
Owners Guide (post-2002-fmt)
USA English (fus)
85
Page 86
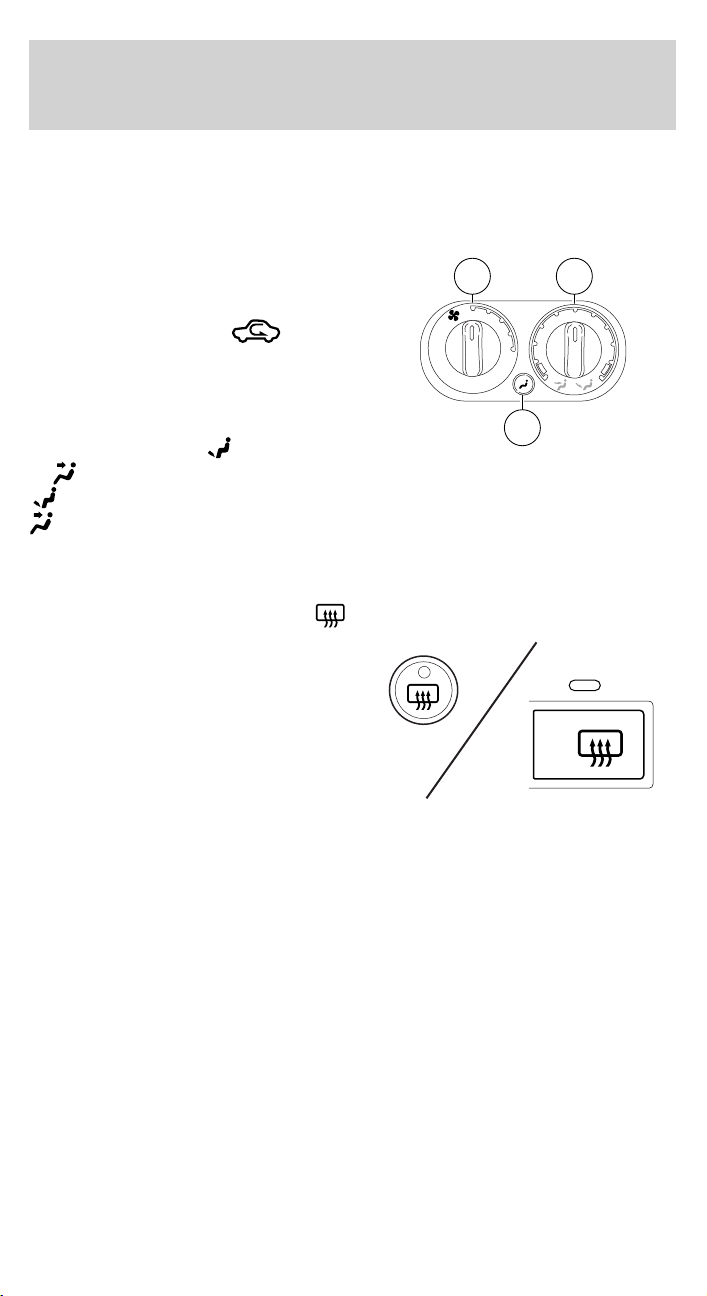
Climate Controls
Rear auxiliary controls (if equipped):
Once the front auxiliary control is set to REAR, the rear seat passengers
may use the rear auxiliary controls in the floor console to make the
desired adjustments.
1. Temperature control:
Determines temperature levels. If
the main climate control system is
cooling in MAX A/C or
mode,
the auxiliary controls will not
3 1
0
1
2
3
4
function as the entire vehicle will
operate at a full cool temperature.
2. Mode selector: Press to select
between air flow to
or
(Panel).
(Floor)
2
Directs air to the floor of the third row seating.
directs air to the overhead registers of the second and third row
seating. The selected mode will illuminate on the temperature control.
3. Fan control: Determines fan speed levels.
REAR WINDOW DEFROSTER
Used to manually enable or disable
rear window defrost in all modes.
After approximately 10 minutes of
rear defrost operation, the climate
control system will automatically
disable the rear defrost operation. If
R
desired, the rear defrost can be
manually disabled through the use
of the rear defrost button. When
operating, the rear defrost indicator will be lit. The rear window
defroster switch also activates the standard exterior mirror defrost
feature.
Do not use razor blades or other sharp objects to clean the inside
of the rear window or to remove decals from the inside of the
rear window. This may cause damage to the heated grid lines and
will not be covered by your warranty.
86
2004 Expedition (exd)
Owners Guide (post-2002-fmt)
USA English (fus)
Page 87
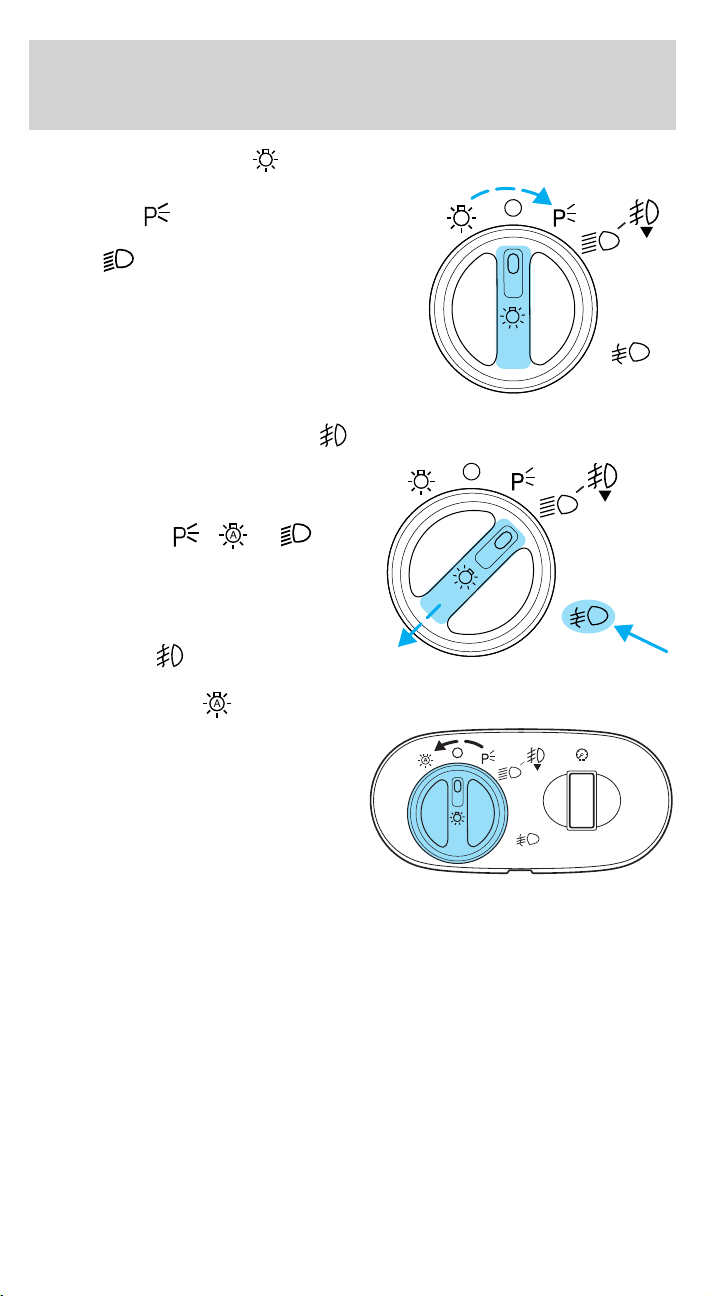
HEADLAMP CONTROL
Rotate the headlamp control to the
first position
parking lamps. Rotate to the second
position
headlamps.
Foglamp control (if equipped)
The headlamp control also operates
the foglamps. The foglamps can be
turned on when the headlamp
control is in the
positions and the high beams are
not turned on.
Pull headlamp control towards you
to turn foglamps on. The foglamp
indicator light
to turn on the
to turn on the
, or
will illuminate.
Lights
A
A
Autolamp control
The autolamp system provides light
sensitive automatic on-off control of
the exterior lights normally
controlled by the headlamp control.
The autolamp system also keeps the
lights on for approximately 20
seconds or on vehicles equipped
with a message center, you can
select a delay from 0–180 seconds, after the ignition switch is turned to
OFF.
• To turn autolamps on, rotate the control counterclockwise.
• To turn autolamps off, rotate the control clockwise to OFF.
2004 Expedition (exd)
Owners Guide (post-2002-fmt)
USA English (fus)
87
Page 88
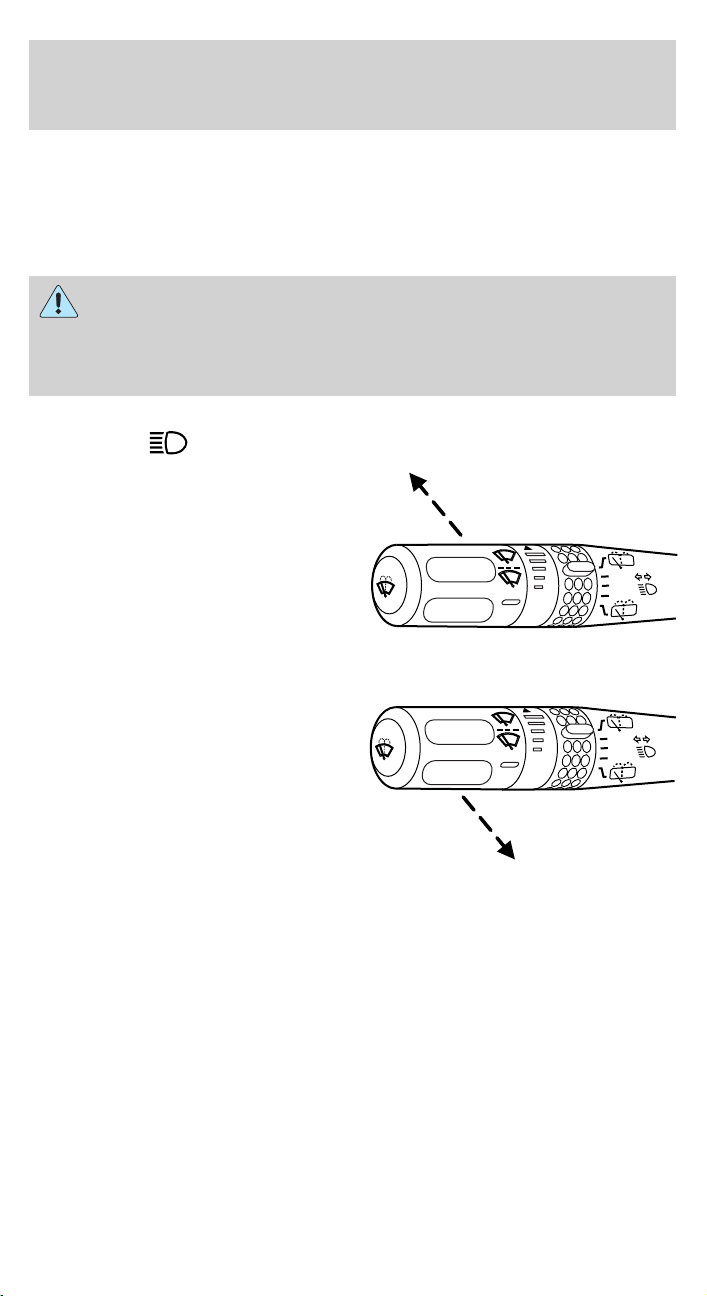
Lights
Daytime running lamps (DRL) (if equipped)
Turns the foglamps on at full intensity output. To activate:
• the ignition must be in the ON position and
• the headlamp control must be in the OFF or Parking lamps position.
Always remember to turn on your headlamps at dusk or during
inclement weather. The Daytime Running Lamp (DRL) system
does not activate with your tail lamps and generally may not provide
adequate lighting during these conditions. Failure to activate your
headlamps under these conditions may result in a collision.
High beams
Push the lever toward the
instrument panel to activate. Pull
the lever towards you to deactivate.
INT2
INT1
OFF
Flash to pass
Pull toward you slightly to activate
and release to deactivate.
OFF
OFF
INT2
INT1
OFF
88
2004 Expedition (exd)
Owners Guide (post-2002-fmt)
USA English (fus)
Page 89
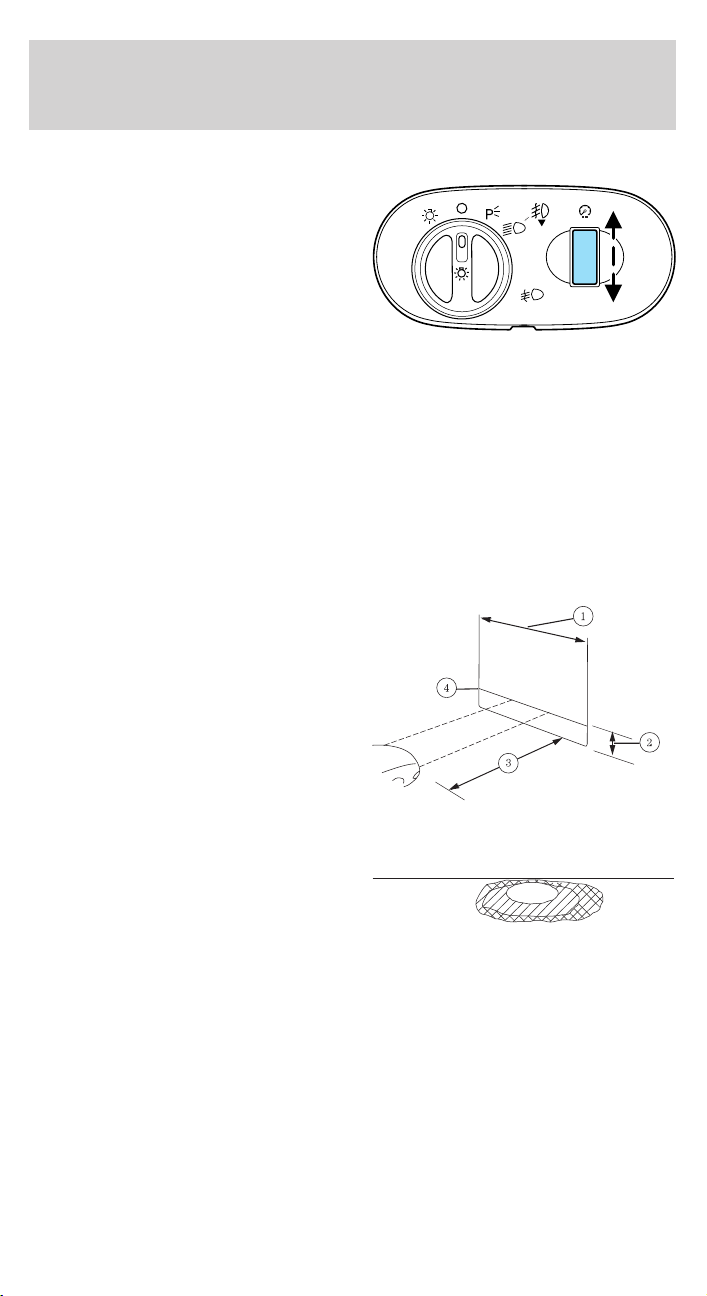
Lights
PANEL DIMMER CONTROL
Use to adjust the brightness of the
instrument panel and all applicable
switches in the vehicle during
headlamp and parklamp operation.
Move the control to the full upright
position, past detent, to turn on the
interior lamps.
Move the control to the full down
position, past detent, to prevent the interior lights from illuminating
when the doors are opened.
VERTICAL AIM ADJUSTMENT
1. Park the vehicle on a level surface approximately 7.6 meters (25 feet)
from a vertical wall or screen directly in front of it.
• (1) Eight feet
• (2) Center height of lamp to ground
• (3) Twenty-five feet
• (4) Horizontal reference line
2. Measure the height from the
center of your headlamp (indicated
by a 3.0 mm circle on the lens) to
the ground and mark a 2.4 meter (8
foot) horizontal reference line on
the vertical wall or screen at this
height (a piece of masking tape
works well).
3. Turn on the low beam headlamps
to illuminate the wall or screen and open the hood. Cover one of the
headlamps so no light hits the wall.
4. On the wall or screen you will
observe a light pattern with a
distinct horizontal edge towards the
right. If this edge is not at the
horizontal reference line, the beam will need to be adjusted so the edge
is at the same height as the horizontal reference line.
A
2004 Expedition (exd)
Owners Guide (post-2002-fmt)
USA English (fus)
89
Page 90
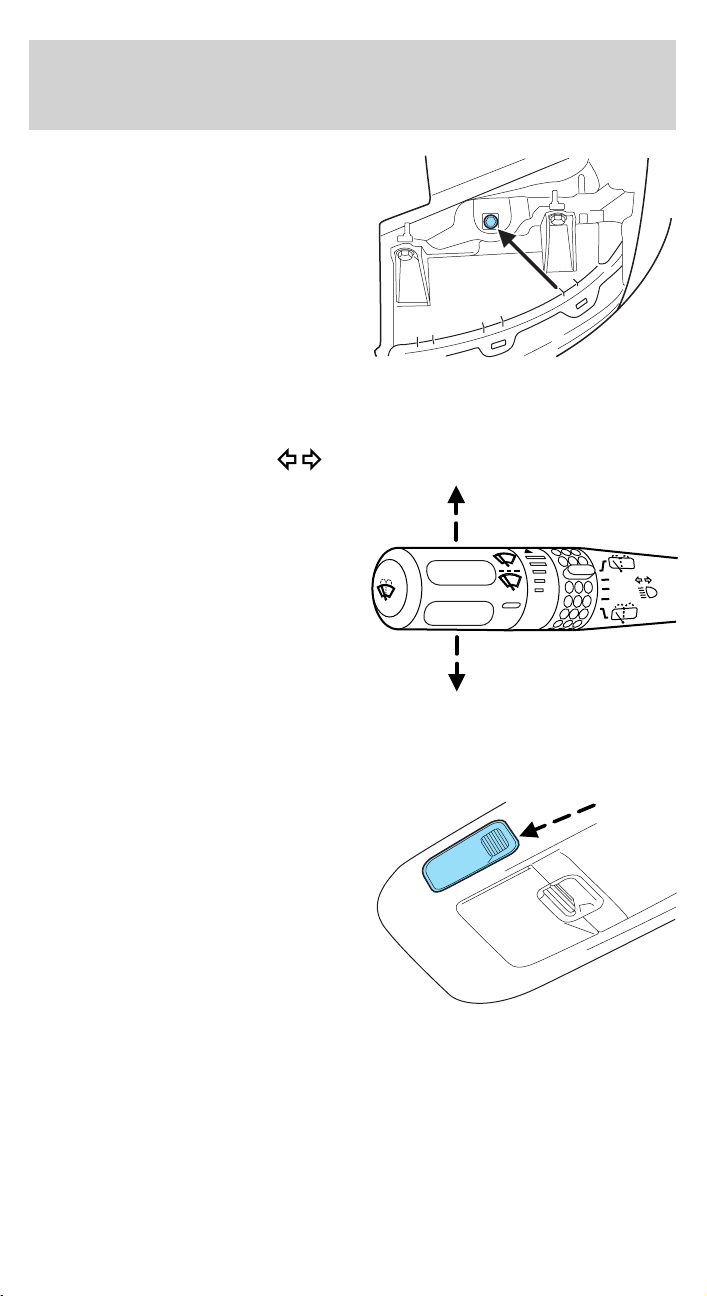
Lights
5. Locate the vertical adjuster on
each headlamp, then use a 10 mm
socket/wrench to turn the adjuster
either counterclockwise (to adjust
down) or clockwise (to adjust up)
aligning the upper edge of the light
pattern up to the horizontal line.
6. HORIZONTAL AIM IS NOT
REQUIRED FOR THIS VEHICLE
AND IS NON-ADJUSTABLE.
7. Repeat step 3–5 for the other headlamp.
8. Close the hood and turn off the lamps.
TURN SIGNAL CONTROL
• Push down to activate the left
turn signal.
• Push up to activate the right turn
signal.
OFF
OFF
INT2
INT1
INTERIOR LAMPS
Front row map lights (if equipped)
To turn on the map lights, press the
rear edge of the light.
90
2004 Expedition (exd)
Owners Guide (post-2002-fmt)
USA English (fus)
Page 91
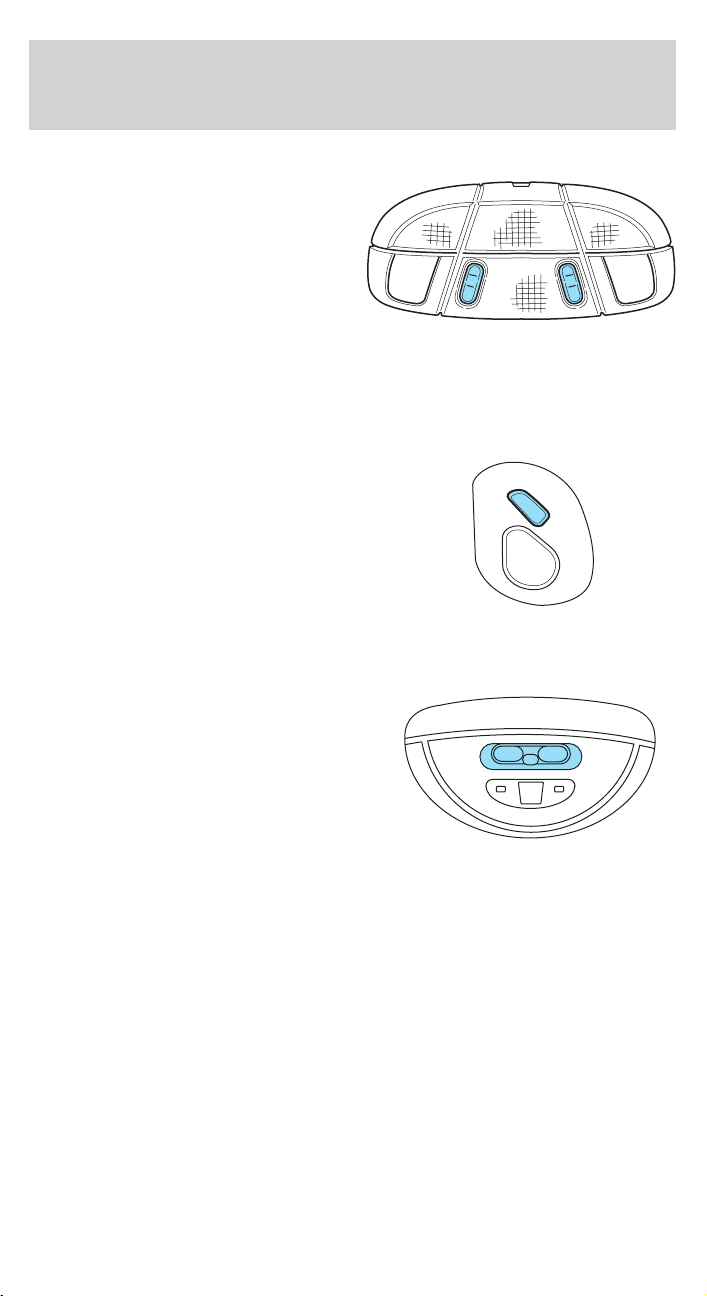
Lights
Front row dome lamp/ map light (if equipped)
The dome lamp lights when:
• any door is opened,
• the instrument panel dimmer
switch is rotated up until the
courtesy lamps come on, and
• any of the remote entry controls
are pressed and the ignition is
OFF.
The map lights are activated by pressing the controls on either side of
the lens.
Second row map lights (if equipped)
The second row map lights are
located in the headliner above the
second row seats.
• Press the controls to activate the
lights.
Rear cargo lamp
The dome lamp lights when:
• any door is opened, and the
switch is in the middle position.
• the instrument panel dimmer
switch is rotated up until the
courtesy lamps come on.
• any of the remote entry controls
are pressed and ignition is OFF
(and switch is in the middle
position).
With the ignition key in the ACC or ON position, the rear dome lamp can
be turned ON or OFF by sliding the control.
BULBS
Replacing exterior bulbs
Check the operation of all the bulbs frequently.
2004 Expedition (exd)
Owners Guide (post-2002-fmt)
USA English (fus)
91
Page 92
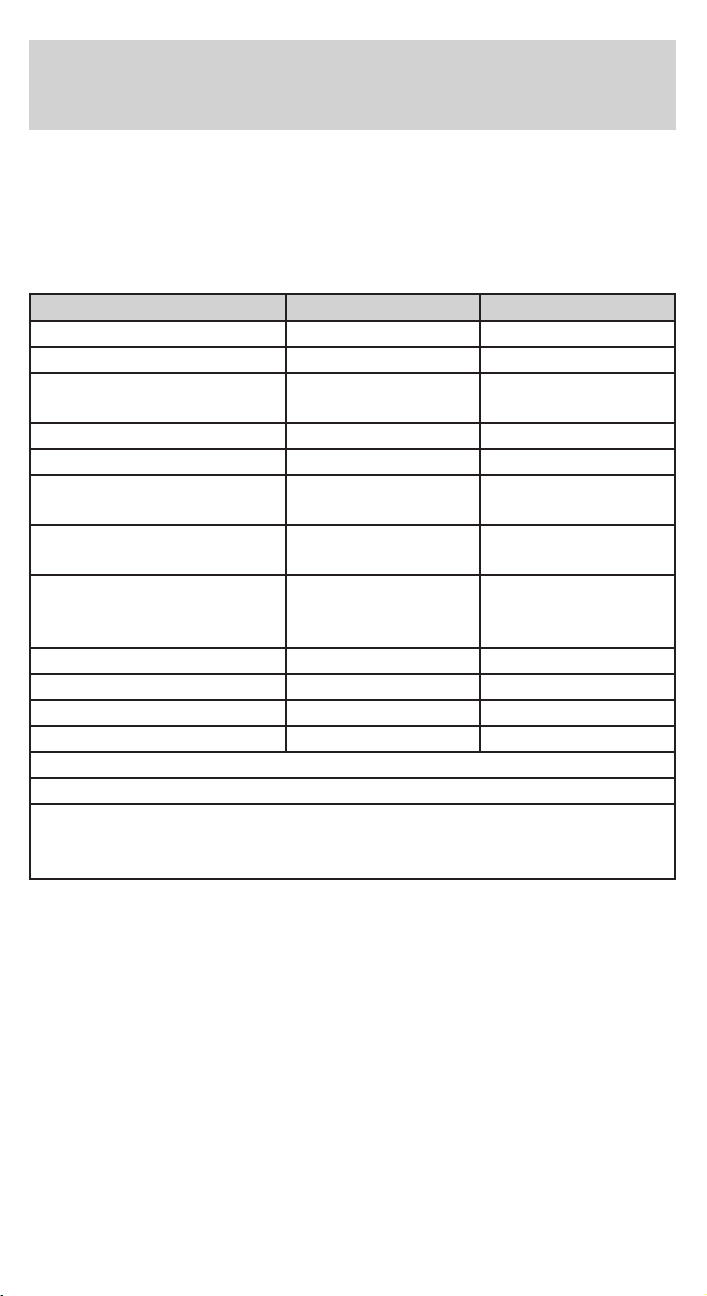
Lights
Using the right bulbs
Replacement bulbs are specified in the chart below. Headlamp bulbs
must be marked with an authorized “D.O.T.” for North America to ensure
lamp performance, light brightness and pattern and safe visibility. The
correct bulbs will not damage the lamp assembly or void the lamp
assembly warranty and will provide quality bulb burn time.
Function Number of bulbs Trade number
Headlamps (low-beam) 2 9006
Headlamps (high-beam) 2 9005
Front park/turn/sidemarker
lamps
Foglamps 2 899
Dome/map lamps 2 579
Turn/tail/brake/sidemarker
lamps
Approach/mirror turn
signal lamps (if equipped)
Mirror approach lamps –
non turn signal (if
equipped)
Liftgate bulb 2 916
Backup lamp 2 3156
License lamp 2 168
High-mount brake lamp 5 W5W
All replacement bulbs are clear in color except where noted.
To replace all instrument panel lights - see your dealer
* To obtain replacement approach lamp assembly bulbs, see your
dealer and reference Ford part no. 2L1Z–13B374–BB for the passenger
side mirror and 2L1Z–13B375–BB for the driver side mirror.
2 3457 K
2 3157
2 906
2 *See your dealer
Replacing the interior bulbs
Check the operation of all bulbs frequently.
92
2004 Expedition (exd)
Owners Guide (post-2002-fmt)
USA English (fus)
Page 93
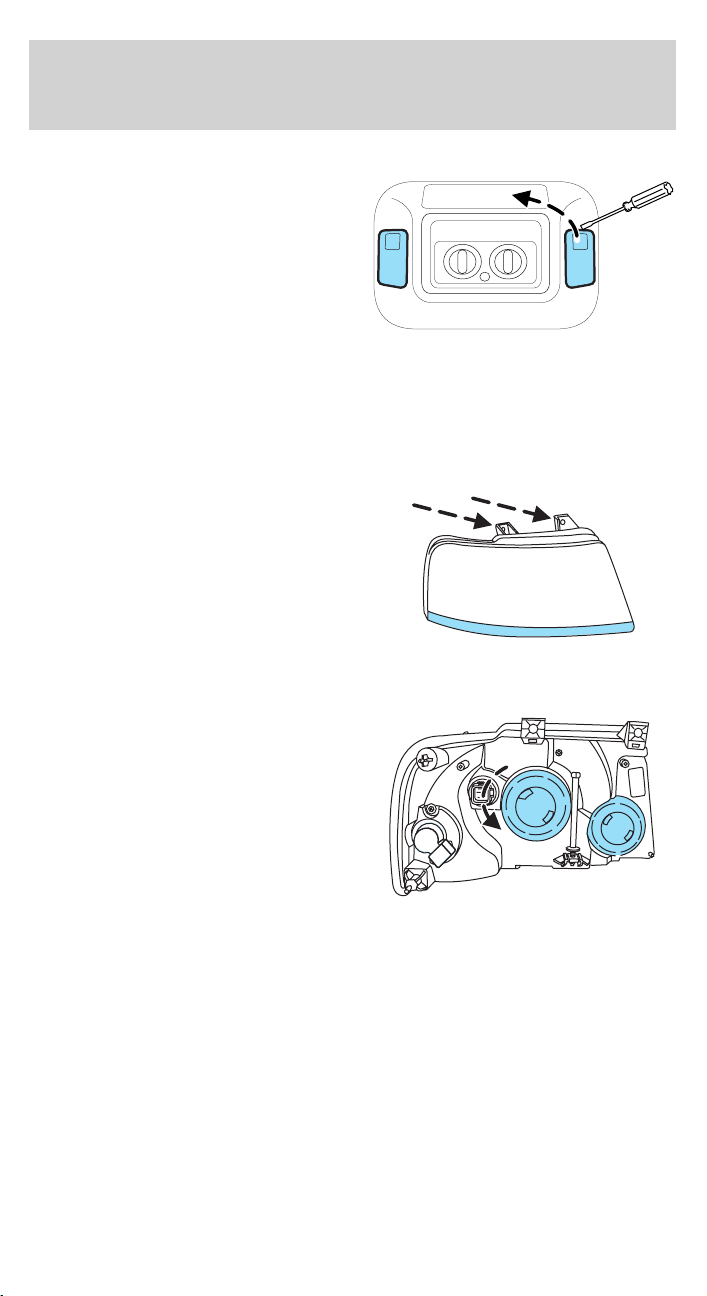
Map lamps
To change the map lamp bulbs:
1. Use a small screwdriver to
remove the map lamp lens.
1
⁄
2. To remove the old bulb, twist
turn and pull it out.
3. Twist in a new bulb.
4. Align and press the map lamp
lens back on and test the lamp operation.
Replacing headlamp bulbs
1. Make sure that the headlamp control is in the OFF position.
2. Open the hood.
3. At the back of the headlamp,
remove the two headlamp assembly
retainer bolts.
4. Loosen the vertical bolt on the
backside of the headlamp assembly.
Do not remove it.
5. Slide headlamp assembly forward
and off of guide ribs to expose the
back of the bulb and wiring connector.
6. Pull off the bulb covers.
4
Lights
2004 Expedition (exd)
Owners Guide (post-2002-fmt)
USA English (fus)
93
Page 94
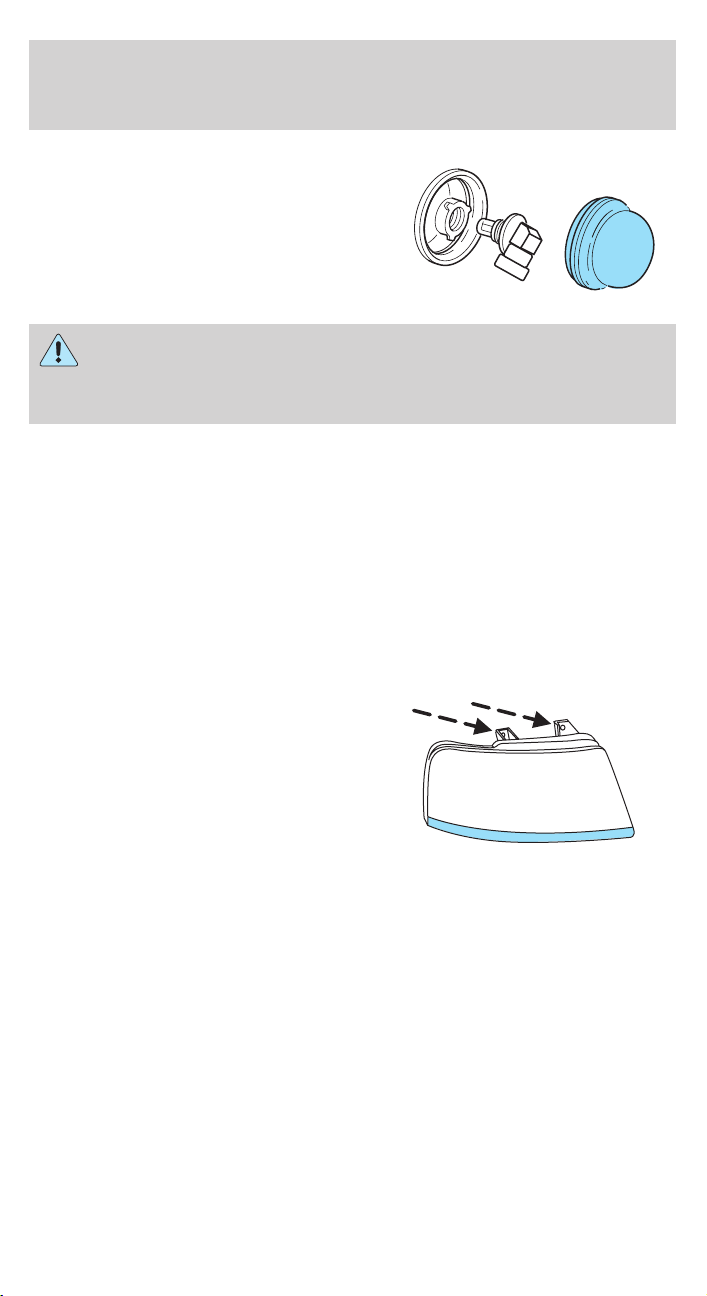
Lights
7. Once the bulb covers are
removed, the bulbs can be removed
by turning them counterclockwise
and then pulling the bulbs straight
out.
Handle a halogen headlamp bulb carefully and keep out of
children’s reach. Grasp the bulb only by its plastic base and do
not touch the glass. The oil from your hand could cause the bulb to
break the next time the headlamps are operated.
8. Insert the glass end of the new bulb into the headlamp assembly.
When the grooves in the plastic base are aligned, turn the new bulb
clockwise to install.
9. Reinstall the bulb covers.
10. Replace the headlamp assembly and tighten all three retainer bolts to
secure.
Replacing front parking lamp/turn/sidemarker signal bulbs
1. Make sure that the headlamp control is in the OFF position.
2. Open the hood.
3. Remove the two headlamp
assembly retainer bolts and lamp
assembly from the vehicle.
4. Loosen the vertical bolt on the
backside of the headlamp assembly.
Do not remove it.
5. Slide headlamp assembly forward
and off of guide ribs to expose the
back of the bulb and wiring connector.
94
2004 Expedition (exd)
Owners Guide (post-2002-fmt)
USA English (fus)
Page 95
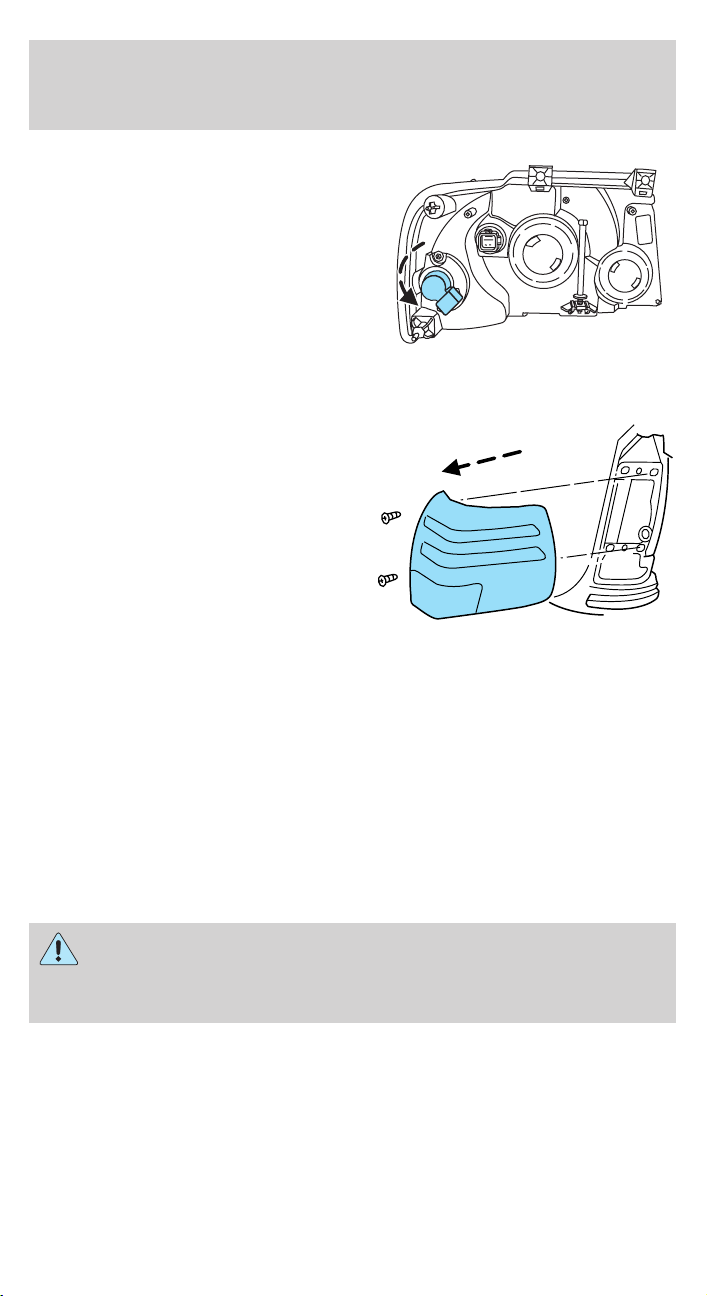
Lights
6. Rotate the bulb socket
counterclockwise and remove from
the lamp assembly.
7. Carefully pull the bulb out of the
socket and push in the new bulb.
8. Install the bulb socket into the
lamp assembly and rotate clockwise.
9. Replace the lamp assembly and
install all three retainer bolts on the
lamp assembly.
Replacing tail/stop/turn/sidemarker/backup lamp bulbs
The tail/stop/turn/sidemarker/backup
lamp bulbs are located in the same
portion of the tail lamp assembly,
one just below the other. Follow the
same steps to replace either bulb:
1. Make sure the headlamp switch is
in the OFF position and then open
the liftgate to expose the lamp
assembly screws.
2. Remove the two screws from the
lamp assembly.
3. Carefully remove the lamp assembly away from the vehicle by pulling
the assembly straight out to expose the bulb socket. DO NOT TIP THE
LAMP ASSEMBLY SIDEWAYS.
4. Rotate the bulb socket counterclockwise and remove from lamp
assembly.
5. Pull bulb straight out of socket and snap in the new bulb.
6. Install the bulb socket into the lamp assembly and rotate clockwise.
7. Carefully install the tail lamp assembly on the vehicle by securing the
lamp assembly with two screws.
Replacing foglamp bulbs
Handle a halogen headlamp bulb carefully and keep out of
children’s reach. Grasp the bulb only by its plastic base and do
not touch the glass. The oil from your hand could cause the bulb to
break the next time the headlamps are operated.
2004 Expedition (exd)
Owners Guide (post-2002-fmt)
USA English (fus)
95
Page 96
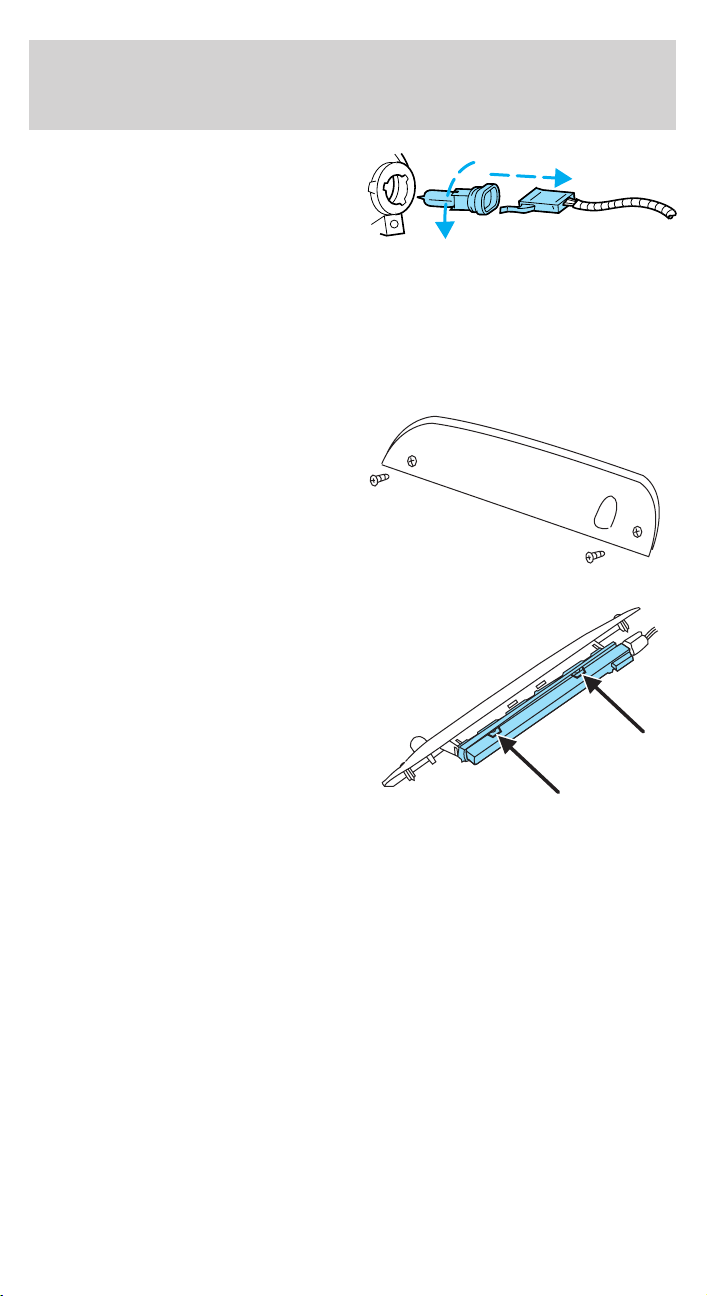
Lights
1. Remove the bulb socket from the
foglamp by turning
counterclockwise.
2. Disconnect the electrical
connector from the foglamp bulb.
3. Connect the new foglamp bulb to the electrical connector.
4. Install the bulb socket in the foglamp turning clockwise.
High-mount brakelamp
To change the high-mount
brakelamp bulbs:
1. Remove the two screws holding
the lamp assembly in place.
2. Pull the lamp assembly straight
out.
3. Remove the wire harness.
4. Depress the four tabs that hold
the light assembly on, one at a time,
and pull the black bulb carrier away
from the lamp.
5. Pull the old bulb out and replace
with the new bulb.
6. Snap the black bulb carrier into
the lamp assembly.
7. Replace the wire harness.
8. Replace the lamp assembly.
96
2004 Expedition (exd)
Owners Guide (post-2002-fmt)
USA English (fus)
Page 97
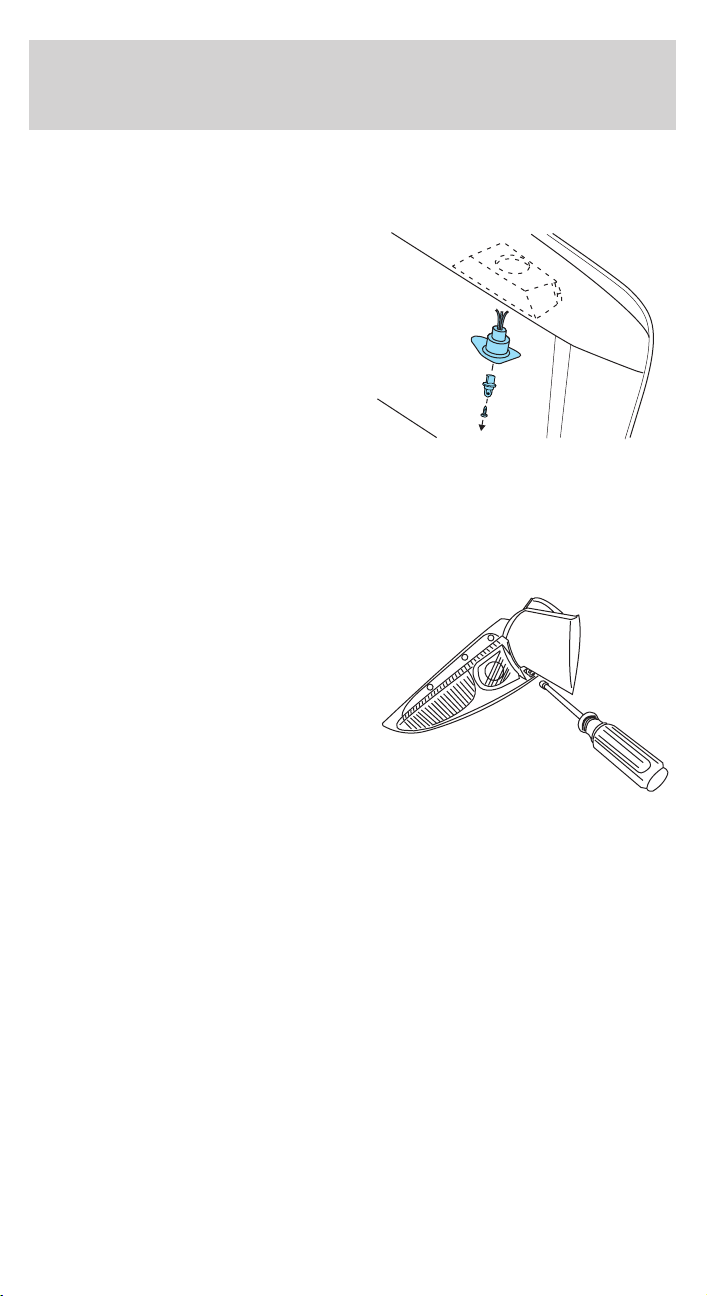
Lights
Replacing license plate lamp bulb
The license plate bulbs are located in the license plate housing assembly
on the liftgate. To change the license plate bulbs:
1. Make sure the headlamp switch is
in the OFF position.
2. Remove the license lamp screw
from the assembly.
3. Pull the lamp down and twist the
bulb socket counterclockwise.
Remove the bulb socket from the
lamp.
4. Pull out the old bulb and push in
the new bulb.
5. Install the bulb socket in the lamp assembly by turning it clockwise.
6. Install the lamp assembly and secure it with the retaining screw.
Approach lamp/mirror turn signal bulb removal (if equipped)
To change the bulbs:
1. Make sure the headlamp switch is
in the OFF position and then fold
the mirror forward.
2. Remove the torx screw on the
bottom of the turn signal lens using
a T-10 torx driver.
3. Pull the turn signal lens down to
remove it from the mirror assembly
4. Disconnect the bulb assembly
from the lens.
5. Remove and replace the bulb.
6. Reverse the order to reassemble lamp and lens.
2004 Expedition (exd)
Owners Guide (post-2002-fmt)
USA English (fus)
97
Page 98
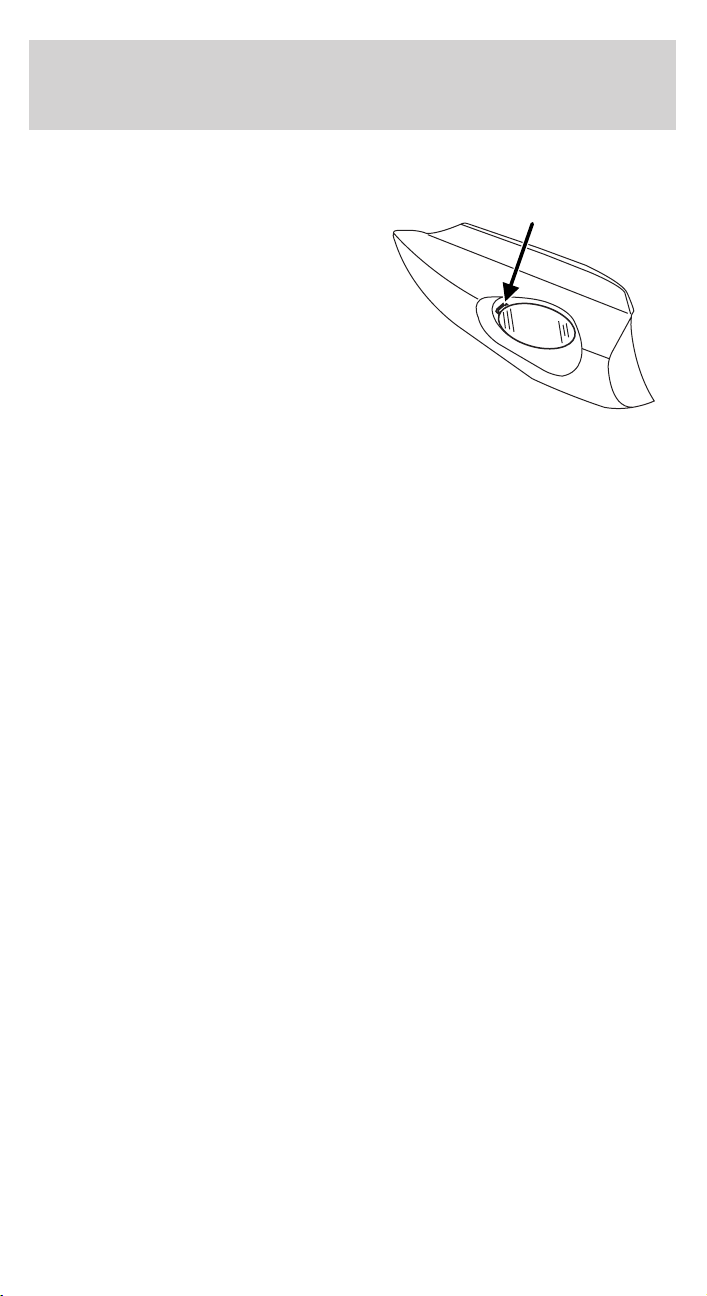
Lights
Approach lamp bulb removal (if equipped)
To change the bulbs:
1. Make sure that all the doors are
closed and the interior lights have
automatically turned off or the
opposite mirror approach lamp has
turned off.
2. With a small flat tipped
screwdriver, insert the tip into the
approach light module slot located
on the outboard corner of the lens
to release the clip.
3. While holding the clip in the release position, pull the approach light
module down.
4. Remove the two wires from the module and replace the module with a
new one.
5. Reverse the order to reassemble the approach light module.
98
2004 Expedition (exd)
Owners Guide (post-2002-fmt)
USA English (fus)
Page 99
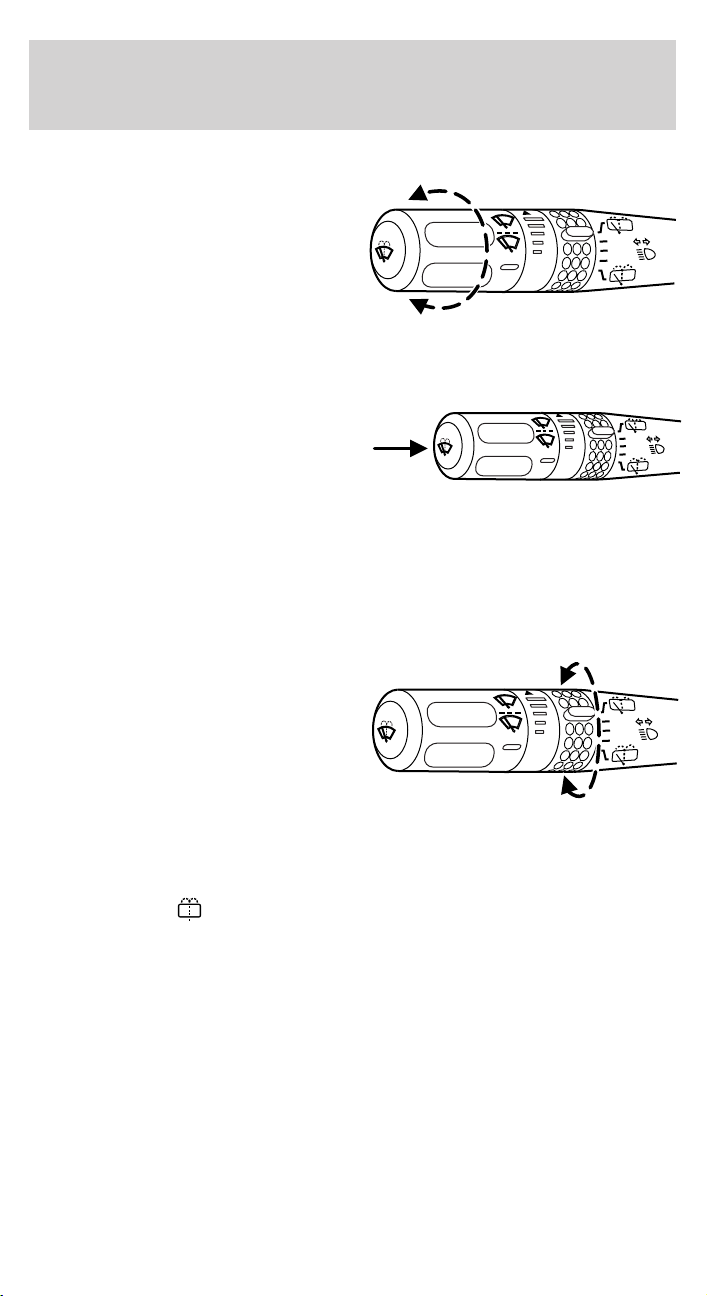
Driver Controls
MULTI-FUNCTION LEVER
Windshield wiper: Rotate the end
of the control away from you to
increase the speed of the wipers;
rotate towards you to decrease the
speed of the wipers.
OFF
Speed dependent wipers: When
the wiper control is on, the speed of
the wipers will automatically adjust
with the vehicle speed. The faster your vehicle is travelling the faster the
wipers will go.
Windshield washer: Push the end
of the stalk:
• briefly: causes a single swipe of
the wipers without washer fluid.
• a quick push and hold: the wipers will swipe three times with washer
fluid.
• a long push and hold: the wipers and washer fluid will be activated for
up to ten seconds.
Rear window wiper/washer controls
For rear wiper operation, rotate the
rear window wiper and washer
control to the desired position.
Select:
INT 2 — Normal speed operation of
OFF
rear wiper.
INT 1 — Intermittent operation of
rear wiper.
OFF — Rear wiper and washer off.
For rear wash cycle, rotate (and hold as desired) the rear wiper/washer
control to either
position.
From either position, the control will automatically return to the INT 2
or OFF position.
INT2
INT1
OFF
INT2
INT1
INT2
INT1
OFF
OFF
OFF
2004 Expedition (exd)
Owners Guide (post-2002-fmt)
USA English (fus)
99
Page 100
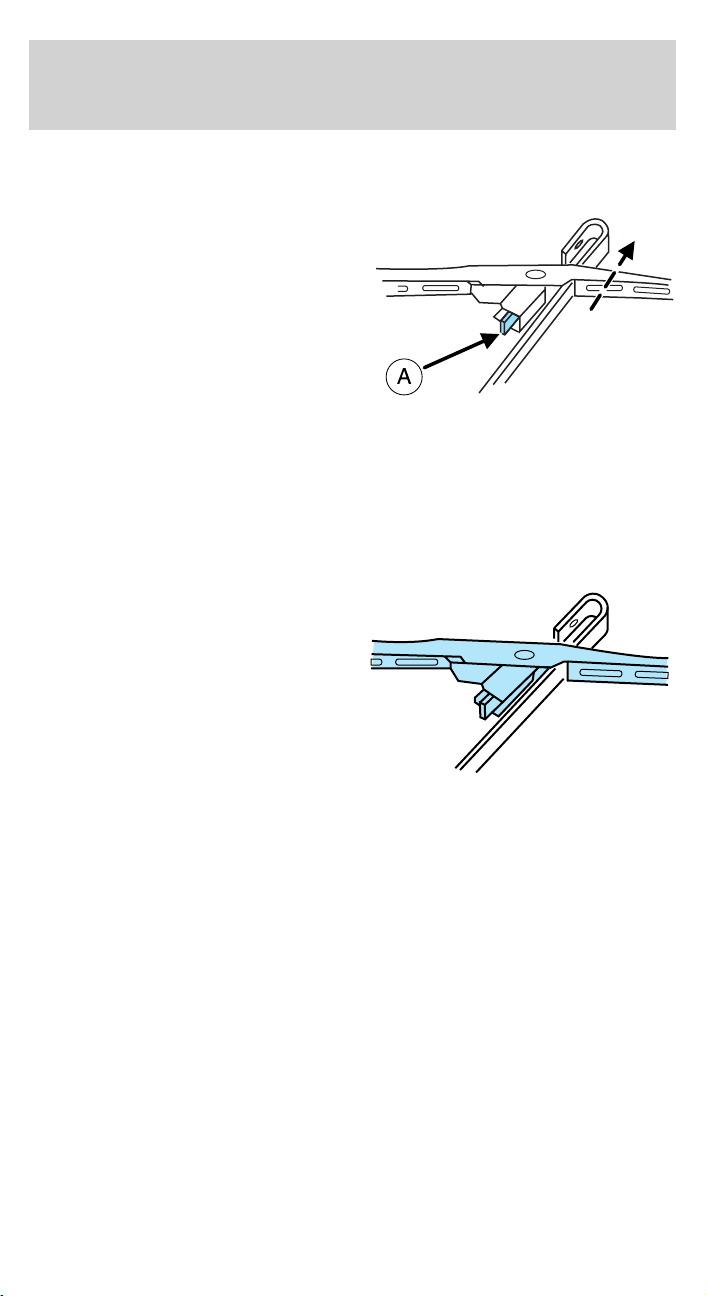
Driver Controls
Changing the wiper blades
It is recommended that wiper blades are renewed before winter.
To replace the wiper blades:
1. Fold back the wiper arm and
position the wiper blade at right
angles to the wiper arm.
2. To remove, press the retaining
clip (A) to disengage the wiper
blade, then pull the blade down
toward the windshield to remove it
from the arm.
3. Install the new wiper blade on the
arm and press it into place until a click is heard.
Changing rear window wiper blade
The rear wiper arm is designed without a service position. This reduces
the risk of damage to the blade in an automatic car wash.
To replace the wiper blade:
1. Lift and hold the wiper blade off
the glass.
2. Press the release tab to unlock
wiper blade from wiper arm.
3. Pull the wiper blade toward the
base of the wiper arm and remove it
from the arm.
4. Attach the new wiper to the
wiper arm and press it into place
until a click is heard.
100
2004 Expedition (exd)
Owners Guide (post-2002-fmt)
USA English (fus)
 Loading...