

Ford 2010 Milan Owner's Manual

Table of Contents
Introduction 4
Instrument Cluster 12
Warning lights and chimes 12
Gauges 16
Message center 18
Entertainment Systems 28
AM/FM stereo with CD/MP3 28
Auxiliary input jack (Line in) 36
USB port 38
Satellite radio information 41
Navigation system 44
SYNC威 44
Climate Controls 45
Manual heating and air conditioning 45
Dual automatic temperature control 48
Navigation system based climate control 50
Rear window defroster 54
Lights 55
Headlamps 55
Turn signal control 59
Bulb replacement 60
Driver Controls 69
Windshield wiper/washer control 69
Steering wheel adjustment 70
Power windows 75
Mirrors 77
Speed control 78
Moon roof 83
2010 Milan (mln)
Owners Guide, 1st Printing
USA (fus)
1

Table of Contents
Locks and Security 86
Keys 86
Locks 88
Anti-theft system 100
Seating and Safety Restraints 106
Seating 106
Safety restraints 119
Airbags 133
Child restraints 148
Tires, Wheels and Loading 167
Tire information 167
Tire inflation 169
Tire Pressure Monitoring System (TPMS) 182
Vehicle loading 186
Trailer towing 191
Recreational towing 191
Driving 193
Starting 193
Brakes 198
AdvanceTrac威 200
Transmission operation 207
Reverse sensing system 215
Rear-view camera system 217
Roadside Emergencies 232
Getting roadside assistance 232
Hazard flasher control 233
Fuses and relays 234
Changing tires 241
Wheel lug nut torque 247
Jump starting 249
Wrecker towing 254
2
2010 Milan (mln)
Owners Guide, 1st Printing
USA (fus)

Table of Contents
Customer Assistance 256
Reporting safety defects (U.S. only) 262
Reporting safety defects (Canada only) 262
Cleaning 263
Maintenance and Specifications 271
Engine compartment 273
Engine oil 276
Battery 281
Engine coolant 283
Fuel information 289
Air filter(s) 306
Part numbers 308
Maintenance product specifications and capacities 309
Engine data 312
Accessories 315
Ford Extended Service Plan 317
Index 320
All rights reserved. Reproduction by any means, electronic or mechanical
including photocopying, recording or by any information storage and retrieval
system or translation in whole or part is not permitted without written
authorization from Ford Motor Company. Ford may change the contents without
notice and without incurring obligation.
Copyright © 2008 Ford Motor Company
2010 Milan (mln)
Owners Guide, 1st Printing
USA (fus)
3

Introduction
CONGRATULATIONS
Congratulations on acquiring your new Mercury. Please take the time to
get well acquainted with your vehicle by reading this handbook. The
more you know and understand about your vehicle, the greater the
safety and pleasure you will derive from driving it.
For more information on Ford Motor Company and its products visit the
following website:
• In the United States: www.ford.com
• In Canada: www.ford.ca
• In Mexico: www.ford.com.mx
• In Australia: www.ford.com.au
Additional owner information is given in separate publications.
This Owner’s Guide describes every option and model variant available
and therefore some of the items covered may not apply to your
particular vehicle. Furthermore, due to printing cycles it may describe
options before they are generally available.
Remember to pass on the Owner’s Guide when reselling the vehicle. It
is an integral part of the vehicle.
WARNING: Fuel pump shut-off switch: In the event of an
accident the safety switch will automatically cut off the fuel
supply to the engine. The switch can also be activated through sudden
vibration (e.g. collision when parking). To reset the switch, refer to the
Fuel pump shut-off switch in the Roadside Emergencies chapter.
4
2010 Milan (mln)
Owners Guide, 1st Printing
USA (fus)
Introduction
SAFETY AND ENVIRONMENT PROTECTION
Warning symbols in this guide
How can you reduce the risk of personal injury to yourself or others? In
this guide, answers to such questions are contained in comments
highlighted by the warning triangle symbol. These comments should be
read and observed.
Warning symbols on your vehicle
When you see this symbol, it is
imperative that you consult the
relevant section of this guide before
touching or attempting adjustment
of any kind.
Protecting the environment
We must all play our part in
protecting the environment. Correct
vehicle usage and the authorized
disposal of waste, cleaning and
lubrication materials are significant
steps towards this aim. Information in this respect is highlighted in this
guide with the tree symbol.
CALIFORNIA Proposition 65 Warning
WARNING: Engine exhaust, some of its constituents, and
certain vehicle components contain or emit chemicals known to
the State of California to cause cancer and birth defects or other
reproductive harm. In addition, certain fluids contained in vehicles and
certain products of component wear contain or emit chemicals known
to the State of California to cause cancer and birth defects or other
reproductive harm.
2010 Milan (mln)
Owners Guide, 1st Printing
USA (fus)
5
Introduction
PERCHLORATE MATERIAL
Certain components of this vehicle such as airbag modules, seat belt
pretensioners, and button cell batteries may contain Perchlorate Material
– Special handling may apply for service or vehicle end of life disposal.
See www.dtsc.ca.gov/hazardouswaste/perchlorate.
BREAKING-IN YOUR VEHICLE
Your vehicle does not need an extensive break-in. Try not to drive
continuously at the same speed for the first 1,000 miles (1,600 km) of
new vehicle operation. Vary your speed frequently in order to give the
moving parts a chance to break in.
Do not add friction modifier compounds or special break-in oils since
these additives may prevent piston ring seating. See Engine oil in the
Maintenance and Specifications chapter for more information on oil
usage.
SPECIAL NOTICES
New Vehicle Limited Warranty
For a detailed description of what is covered and what is not covered by
your vehicle’s New Vehicle Limited Warranty, refer to the Warranty
Guide/Customer Information Guide that is provided to you along with
your Owner’s Guide.
Special instructions
For your added safety, your vehicle is fitted with sophisticated electronic
controls.
WARNING: Please read the section Airbag Supplemental
Restraint System (SRS) in the Seating and Safety Restraints
chapter. Failure to follow the specific warnings and instructions could
result in personal injury.
WARNING: Front seat mounted rear-facing child or infant seats
should NEVER be placed in front of an active passenger airbag.
6
2010 Milan (mln)
Owners Guide, 1st Printing
USA (fus)

Introduction
Service Data Recording
Service data recorders in your vehicle are capable of collecting and
storing diagnostic information about your vehicle. This potentially
includes information about the performance or status of various systems
and modules in the vehicle, such as engine, throttle, steering or brake
systems. In order to properly diagnose and service your vehicle, Ford
Motor Company, Ford of Canada, and service and repair facilities may
access vehicle diagnostic information through a direct connection to your
vehicle when diagnosing or servicing your vehicle. For U.S. only (if
equipped), if you choose to use the SYNC威 Vehicle Health Report, you
consent that certain diagnostic information may also be accessed
electronically by Ford Motor Company and Ford authorized service
facilities, and that the diagnostic information may be used for any
purpose. See your SYNC威 supplement for more information.
Event Data Recording
Other modules in your vehicle — event data recorders — are capable of
collecting and storing data during a crash or near crash event. The
recorded information may assist in the investigation of such an event.
The modules may record information about both the vehicle and the
occupants, potentially including information such as:
• how various systems in your vehicle were operating;
• whether or not the driver and passenger seatbelts were buckled;
• how far (if at all) the driver was depressing the accelerator and/or the
brake pedal;
• how fast the vehicle was traveling; and
• where the driver was positioning the steering wheel.
2010 Milan (mln)
Owners Guide, 1st Printing
USA (fus)
7

Introduction
To access this information, special equipment must be directly connected
to the recording modules. Ford Motor Company and Ford of Canada do
not access event data recorder information without obtaining consent,
unless pursuant to court order or where required by law enforcement,
other government authorities or other third parties acting with lawful
authority. Other parties may seek to access the information
independently of Ford Motor Company and Ford of Canada. Please note
that once 911 Assist (if equipped) is enabled (set ON), 911 Assist may,
through any paired and connected cell phone, disclose to emergency
services that the vehicle has been in a crash involving the deployment of
an airbag or, in certain vehicles, the activation of the fuel pump shut-off.
Certain versions or updates to 911 Assist may also be capable of
electronically or verbally disclosing to 911 operators the vehicle location,
and/or other details about the vehicle or crash to assist 911 operators to
provide the most appropriate emergency services. If you do not want to
disclose this information, do not activate the feature. See your SYNC威
supplement for more information.
Cell phone use
The use of Mobile Communications Equipment has become increasingly
important in the conduct of business and personal affairs. However,
drivers must not compromise their own or others’ safety when using
such equipment. Mobile Communications can enhance personal safety
and security when appropriately used, particularly in emergency
situations. Safety must be paramount when using mobile communications
equipment to avoid negating these benefits.
Mobile Communication Equipment includes, but is not limited to cellular
phones, pagers, portable email devices, in-vehicle communications
systems, telematics devices and portable two-way radios.
8
2010 Milan (mln)
Owners Guide, 1st Printing
USA (fus)

Introduction
WARNING: Driving while distracted can result in loss of vehicle
control, accident and injury. Ford strongly recommends that
drivers use extreme caution when using any device that may take their
focus off the road. The driver’s primary responsibility is the safe
operation of their vehicle. Only use cell phones and other devices not
essential to the driving task when it is safe to do so.
Export unique (Non–United States/Canada) vehicle specific
information
For your particular global region, your vehicle may be equipped with
features and options that are different from the features and options that
are described in this Owner’s Guide. A market unique supplement may
be supplied that complements this book. By referring to the market
unique supplement, if provided, you can properly identify those features,
recommendations and specifications that are unique to your vehicle. This
Owner’s Guide is written primarily for the U.S. and Canadian Markets.
Features or equipment listed as standard may be different on units built
for Export. Refer to this Owner’s Guide for all other required
information and warnings.
2010 Milan (mln)
Owners Guide, 1st Printing
USA (fus)
9
Introduction
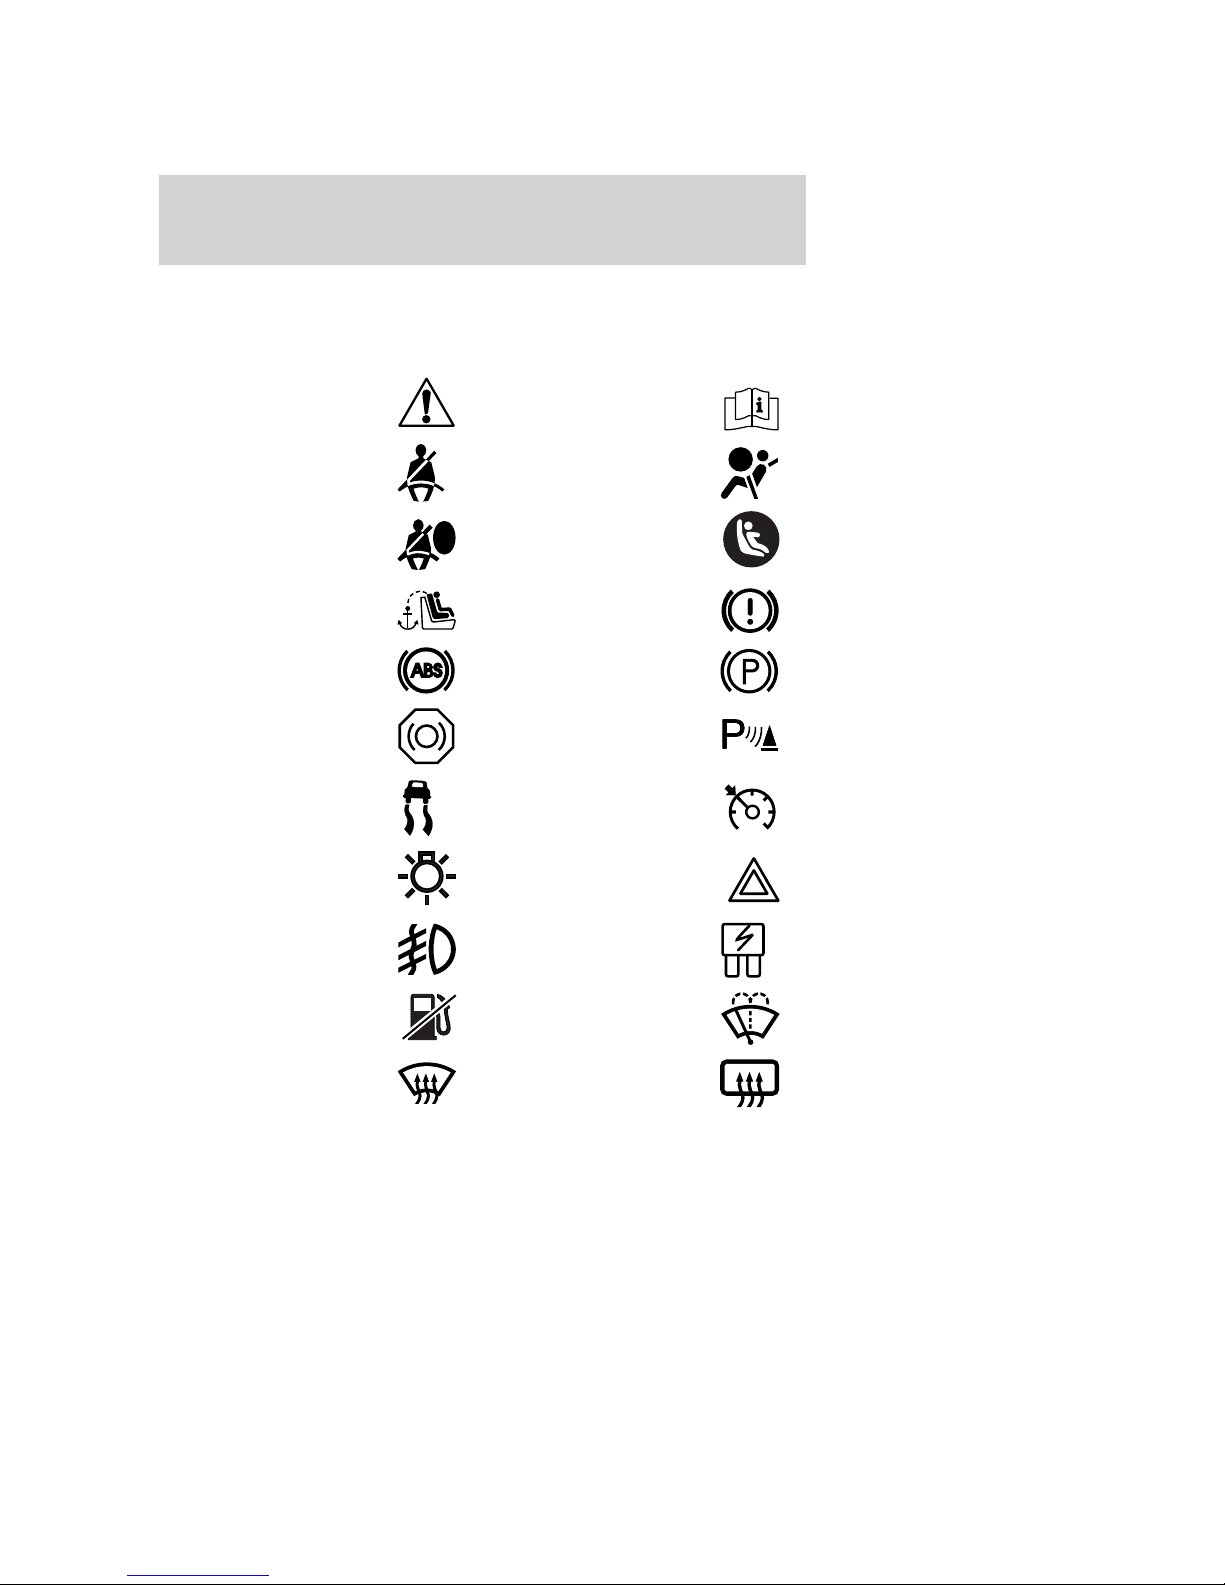
These are some of the symbols you may see on your vehicle.
Vehicle Symbol Glossary
Safety Alert
Fasten Safety Belt Airbag - Front
Airbag - Side
Child Seat Tether
Anchor
Anti-Lock Brake System Parking Brake System
Brake Fluid Non-Petroleum Based
Stability Control System Speed Control
Master Lighting Switch Hazard Warning Flasher
Fog Lamps-Front Fuse Compartment
See Owner’s Guide
Child Seat Lower
Anchor
Brake System
Parking Aid System
Fuel Pump Reset Windshield Wash/Wipe
Windshield
Defrost/Demist
10
2010 Milan (mln)
Owners Guide, 1st Printing
USA (fus)
Rear Window
Defrost/Demist

Vehicle Symbol Glossary
Introduction
Power Windows
Front/Rear
Child Safety Door
Lock/Unlock
Power Window Lockout
Interior Luggage
Compartment Release
Panic Alarm Engine Oil
Engine Coolant
Engine Coolant
Temperature
Do Not Open When Hot Battery
Avoid Smoking, Flames,
or Sparks
Battery Acid
Explosive Gas Fan Warning
Power Steering Fluid
Maintain Correct Fluid
Level
Service Engine Soon Engine Air Filter
MAX
MIN
Passenger Compartment
Air Filter
Check Fuel Cap
2010 Milan (mln)
Owners Guide, 1st Printing
USA (fus)
Jack
Low Tire Pressure
Warning
11

Instrument Cluster
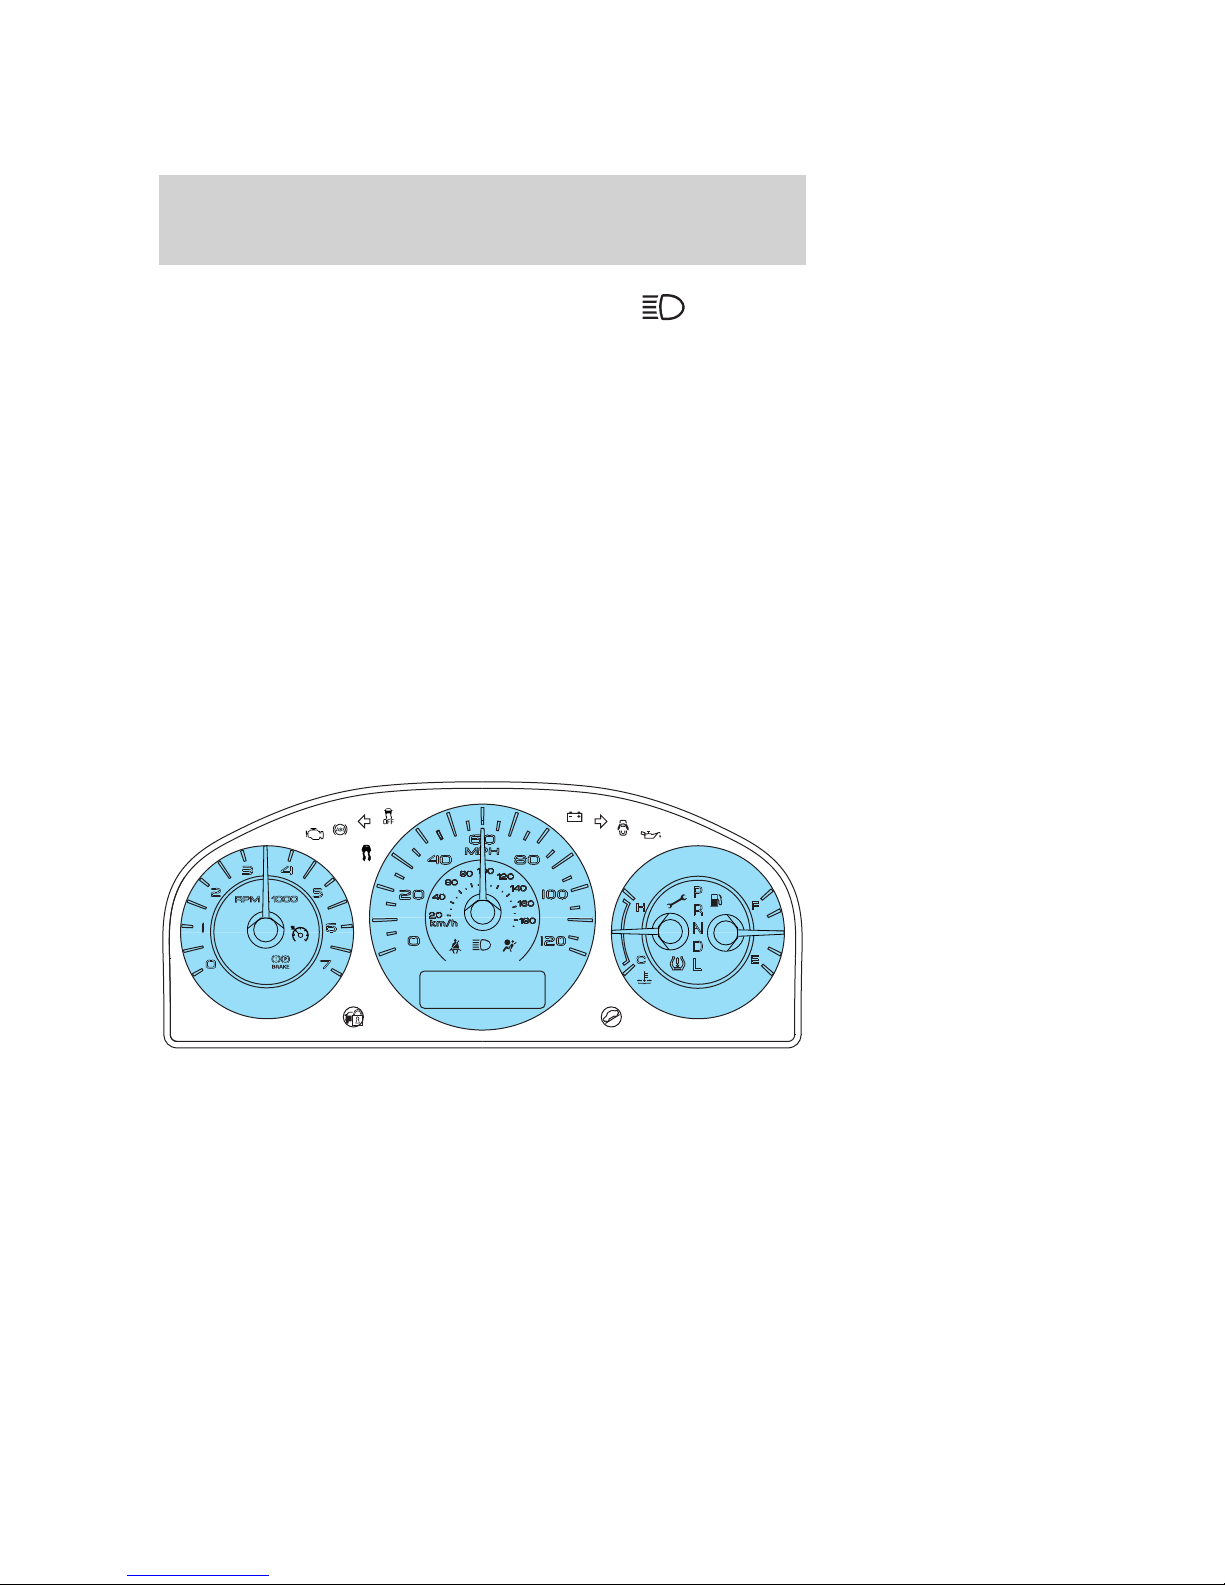
WARNING LIGHTS AND CHIMES
Standard instrument cluster shown, optional similar
Warning lights and gauges can alert you to a vehicle condition that may
become serious enough to cause extensive repairs. A warning light may
illuminate when a problem exists with one of your vehicle’s functions.
Many lights will illuminate when you start your vehicle to make sure the
bulbs work. If any light remains on after starting the vehicle, refer to the
respective system warning light for additional information.
Service engine soon: The service
engine soon indicator light
illuminates when the ignition is first
turned to the on position to check
the bulb and to indicate whether the vehicle is ready for
Inspection/Maintenance (I/M) testing. Normally, the service engine soon
light will stay on until the engine is cranked, then turn itself off if no
malfunctions are present. However, if after 15 seconds the service engine
soon light blinks eight times, it means that the vehicle is not ready for
I/M testing. See the Readiness for Inspection/Maintenance (I/M)
testing in the Maintenance and Specifications chapter.
Solid illumination after the engine is started indicates the On Board
Diagnostics System (OBD-II) has detected a malfunction. Refer to On
board diagnostics (OBD-II) in the Maintenance and Specifications
chapter. If the light is blinking, engine misfire is occurring which could
damage your catalytic converter. Drive in a moderate fashion (avoid
heavy acceleration and deceleration) and contact your authorized dealer
as soon as possible.
12
2010 Milan (mln)
Owners Guide, 1st Printing
USA (fus)
Instrument Cluster
WARNING: Under engine misfire conditions, excessive exhaust
temperatures could damage the catalytic converter, the fuel
system, interior floor coverings or other vehicle components, possibly
causing a fire.
Brake system warning light: To
confirm the brake system warning
light is functional, it will
momentarily illuminate when the
ignition is turned to the on position
when the engine is not running, or in a position between on and start, or
by applying the parking brake when the ignition is turned to the on
position. If the brake system warning light does not illuminate at this
time, contact your authorized dealer as soon as possible. Illumination
after releasing the parking brake indicates low brake fluid level or a
brake system malfunction. Contact your authorized dealer as soon as
possible.
WARNING: Driving a vehicle with the brake system warning
light on is dangerous. A significant decrease in braking
performance may occur. It will take you longer to stop the vehicle.
Contact your authorized dealer as soon as possible. Driving extended
distances with the parking brake engaged can cause brake failure and
the risk of personal injury.
Anti-lock brake system: If the
ABS light stays illuminated or
continues to flash, a malfunction has
been detected. Contact your
authorized dealer as soon as
possible. Normal braking is still functional unless the brake warning light
also is illuminated.
Airbag readiness: If this light fails
to illuminate when the ignition is
turned to on, continues to flash or
remains on, contact your authorized
dealer as soon as possible. A chime will sound when there is a
malfunction in the indicator light.
BRAKE
P!
ABS
2010 Milan (mln)
Owners Guide, 1st Printing
USA (fus)
13
Instrument Cluster
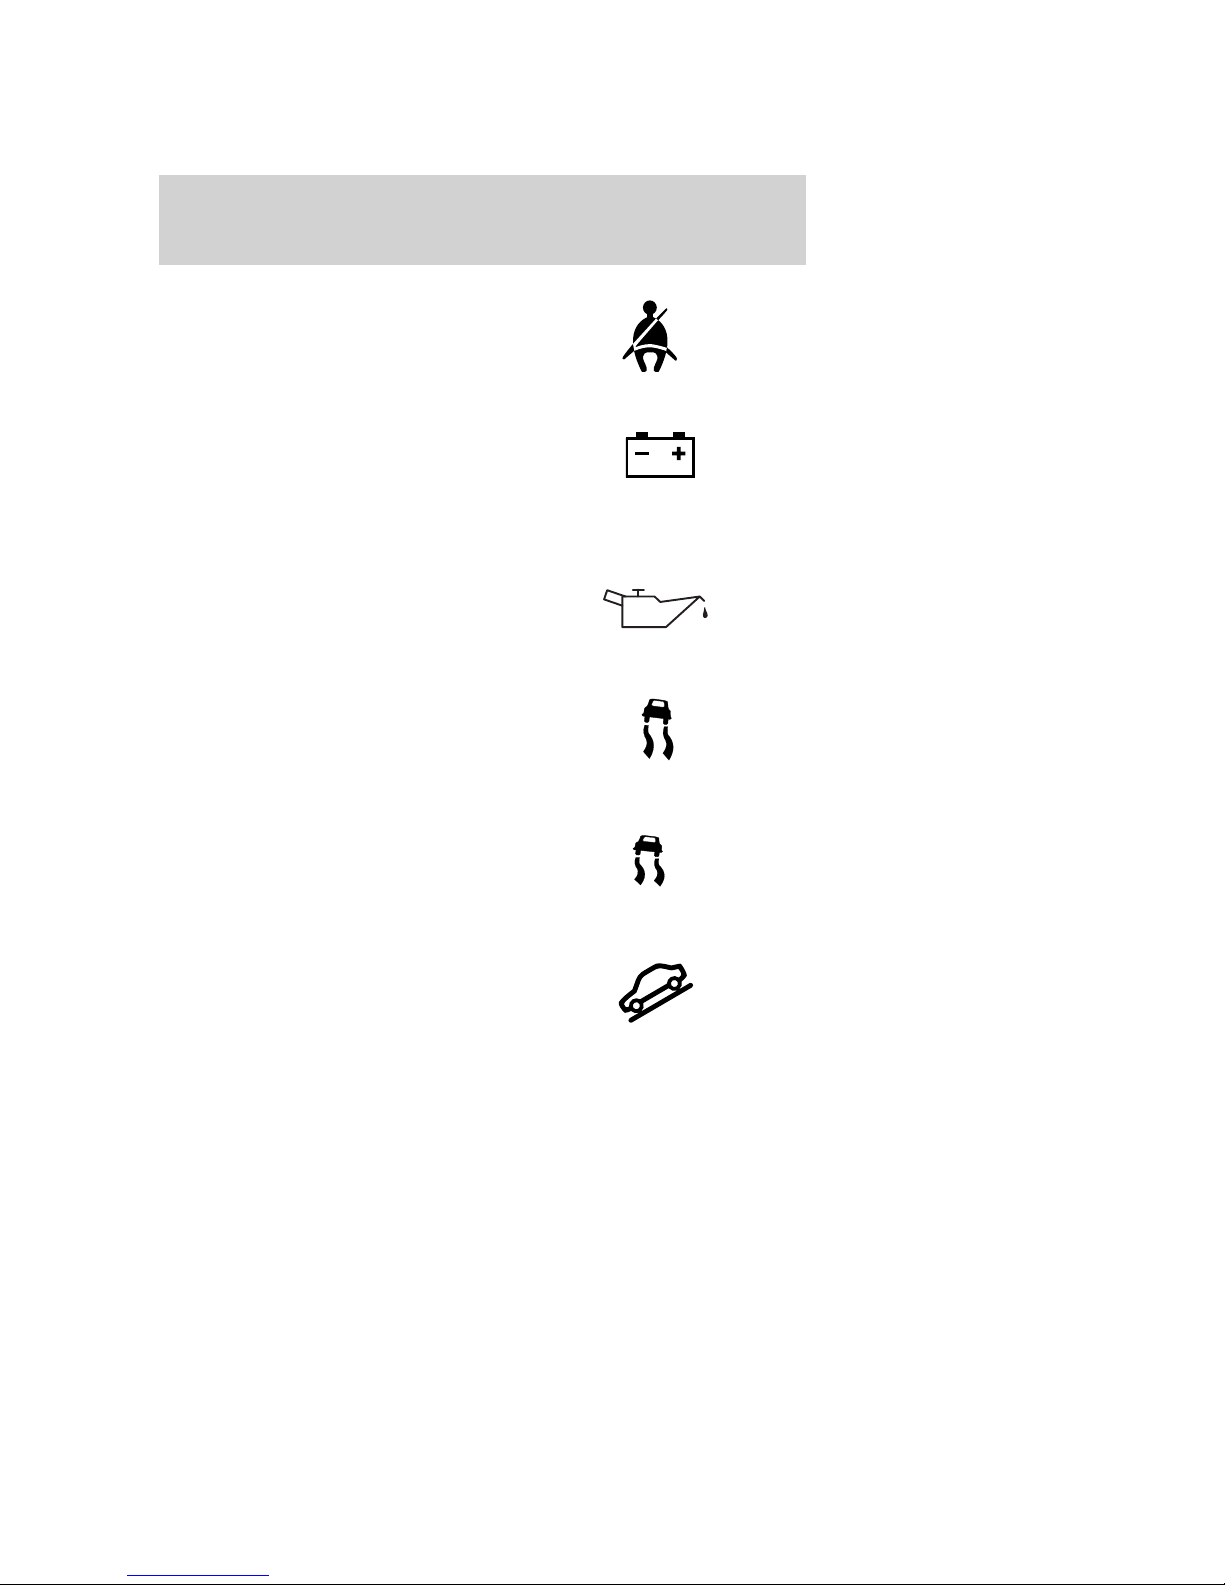
Safety belt: Reminds you to fasten
your safety belt. A Belt-Minder威
chime will also sound to remind you
to fasten your safety belt. Refer to
the Seating and Safety Restraints
chapter to activate/deactivate the Belt-Minder威 chime feature.
Charging system: Illuminates when
the battery is not charging properly.
If it stays on while the engine is
running, there may be a malfunction
with the charging system. Contact your authorized dealer as soon as
possible. This indicates a problem with the electrical system or a related
component.
Engine oil pressure: Illuminates
when the oil pressure falls below the
normal range, refer to Engine oil in
the Maintenance and
Specifications chapter.
AdvanceTrac威/Traction
Control™: Illuminates when the
AdvanceTrac威/Traction Control™ is
active. If the light remains on,
contact your authorized dealer as
soon as possible. Refer to the Driving chapter for more information.
AdvanceTrac威/Traction
Control™ off light: Illuminates
when AdvanceTrac威/Traction
Control™ has been disabled by the
driver. Refer to the Driving chapter
for more information.
Overdrive cancel and grade
assist: Illuminates when the
overdrive function of the
transmission has been turned off
and the grade assist function has
been turned on, refer to the Driving chapter.
OFF
14
2010 Milan (mln)
Owners Guide, 1st Printing
USA (fus)
Instrument Cluster
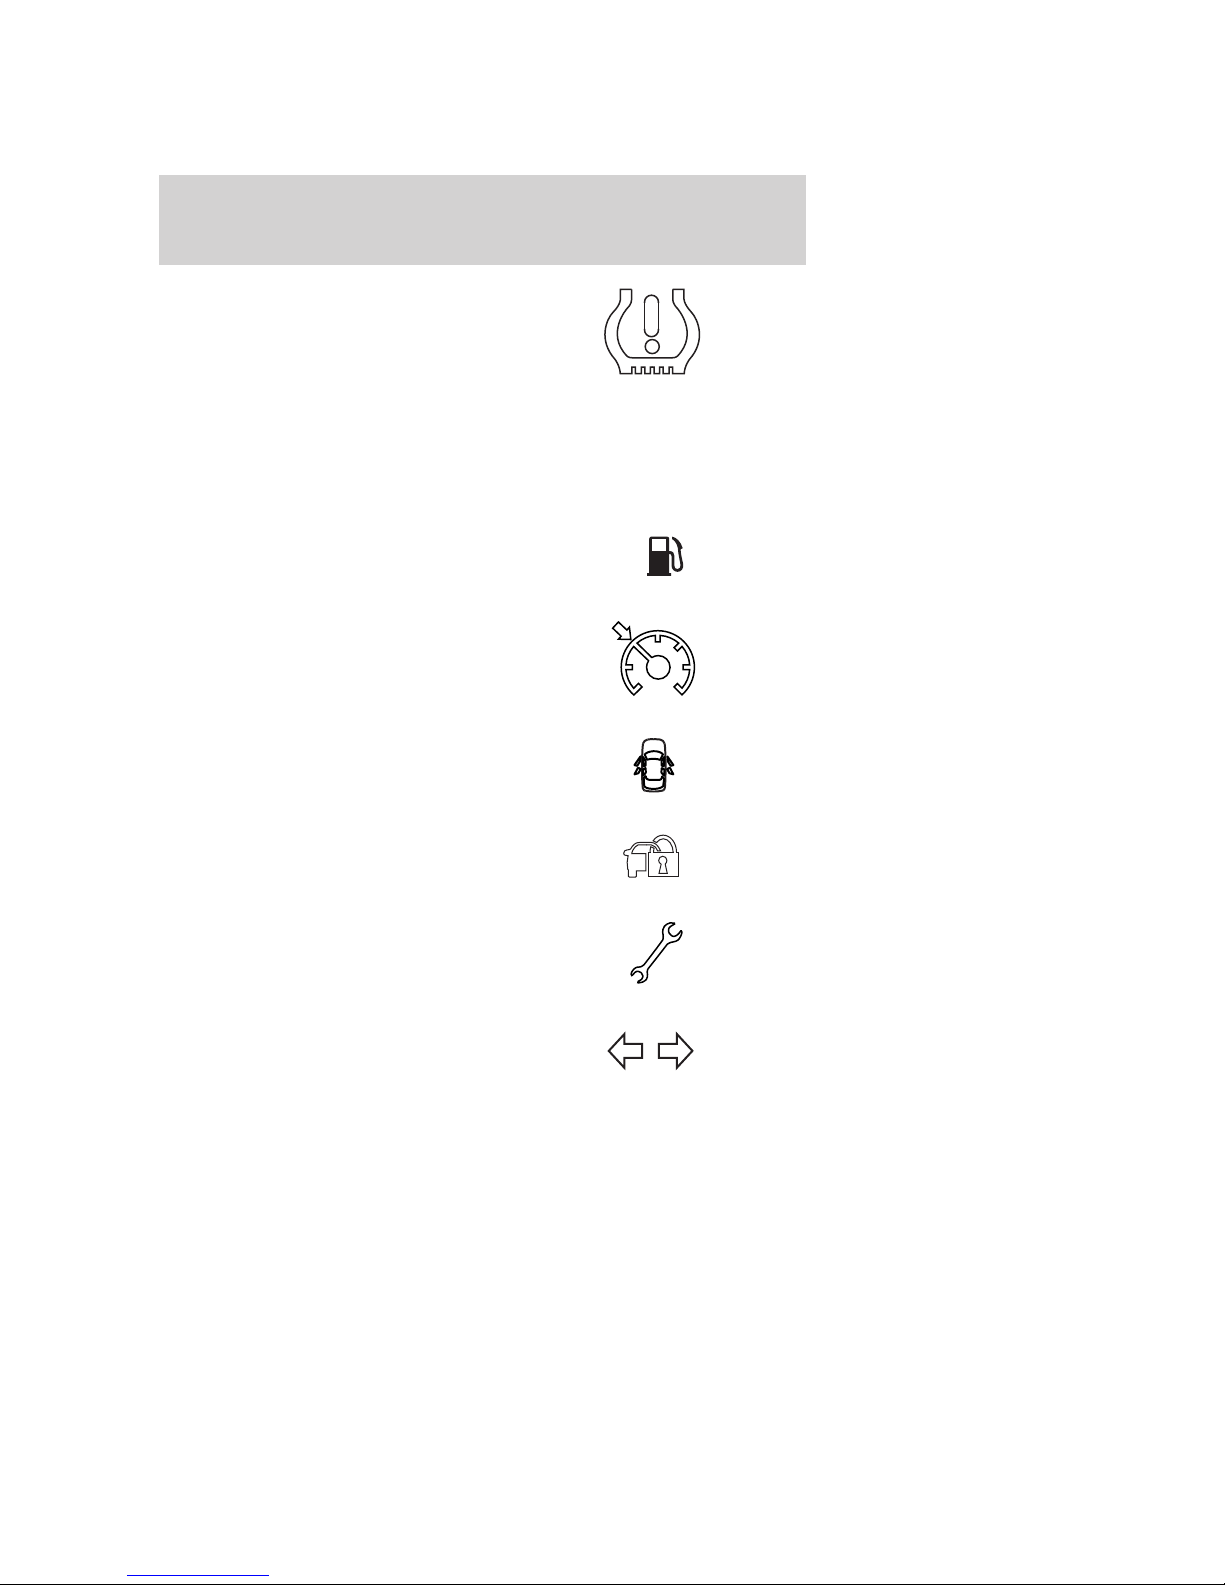
Low tire pressure warning:
Illuminates when your tire pressure
is low. If the light remains on at
start up or while driving, the tire
pressure should be checked. Refer
to Inflating your tires in the Tires, Wheels and Loading chapter. When
the ignition is first turned to on, the light will illuminate for three
seconds to ensure the bulb is working. If the light does not turn on or
begins to flash, contact your authorized dealer as soon as possible. For
more information on this system, refer to Tire pressure monitoring
system (TPMS) in the Tires, Wheels and Loading chapter.
Low fuel: Illuminates when the fuel
level in the fuel tank is at or near
empty (refer to Fuel gauge in this
chapter).
Speed control: Illuminates when
the speed control is engaged. Turns
off when the speed control system
is disengaged.
Door ajar: Illuminates when the
ignition is in the on position and any
door or decklid is open.
Anti-theft system: Flashes when
the SecuriLock™ Passive Anti-theft
System has been activated.
Throttle Control/Transmission:
Illuminates when a powertrain or a
AWD fault has been detected.
Contact your authorized dealer as
soon as possible.
Turn signal: Illuminates when the
left or right turn signal or the
hazard lights are turned on. If the
indicators flash faster, check for a burned out bulb.
2010 Milan (mln)
Owners Guide, 1st Printing
USA (fus)
15
Instrument Cluster
High beams: Illuminates when the
high beam headlamps are turned on.
Key-in-ignition warning chime: Sounds when the key is left in the
ignition in the off or accessory position and the driver’s door is opened.
Headlamps on warning chime: Sounds when the headlamps or parking
lamps are on, the ignition is off (the key is not in the ignition) and the
driver’s door is opened.
Parking brake on warning chime: Sounds when the parking brake is
engaged and the vehicle is driven. If the warning remains after the
parking brake is disengaged, contact your authorized dealer as soon as
possible.
Message center activation chime: Sounds when some messages
appear in the message center display for the first time.
Turn signal on warning chime: Sounds when the turn signal has been
left on for an extended period of time.
Perimeter alarm warning chime: Sounds when using a key to unlock
the driver’s doors and the perimeter alarm is armed.
GAUGES
16
2010 Milan (mln)
Owners Guide, 1st Printing
USA (fus)
Instrument Cluster
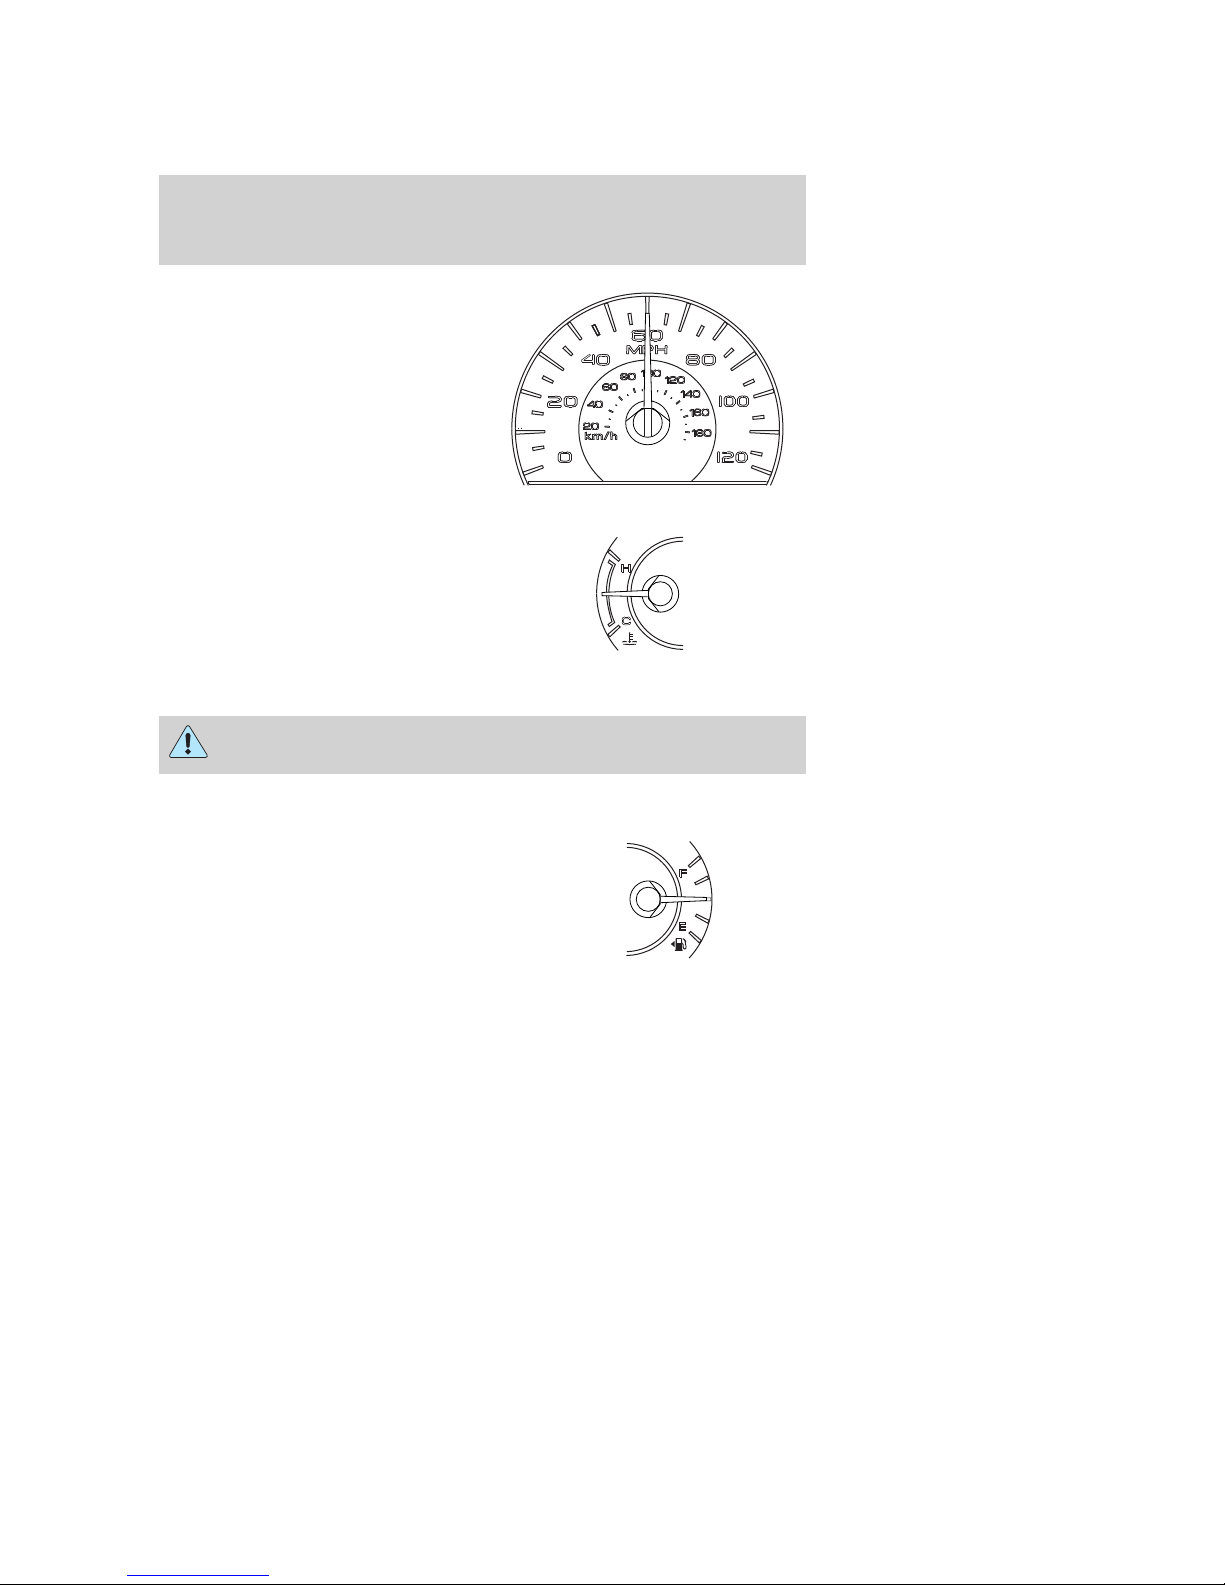
Speedometer: Indicates the
current vehicle speed.
Engine coolant temperature
gauge: Indicates engine coolant
temperature. At normal operating
temperature, the needle will be in
the normal range (between “H” and
“C”). If it enters the red section,
the engine is overheating. Stop
the vehicle as soon as safely
possible, switch off the engine and let the engine cool.
WARNING: Never remove the coolant reservoir cap while the
engine is running or hot.
Fuel gauge: Indicates
approximately how much fuel is left
in the fuel tank (when the ignition
is in the on position). The fuel
gauge may vary slightly when the
vehicle is in motion or on a grade.
The fuel icon and arrow indicates
which side of the vehicle the fuel
filler door is located.
Refer to Filling the tank in the Maintenance and Specifications
chapter for more information.
2010 Milan (mln)
Owners Guide, 1st Printing
USA (fus)
17
Instrument Cluster
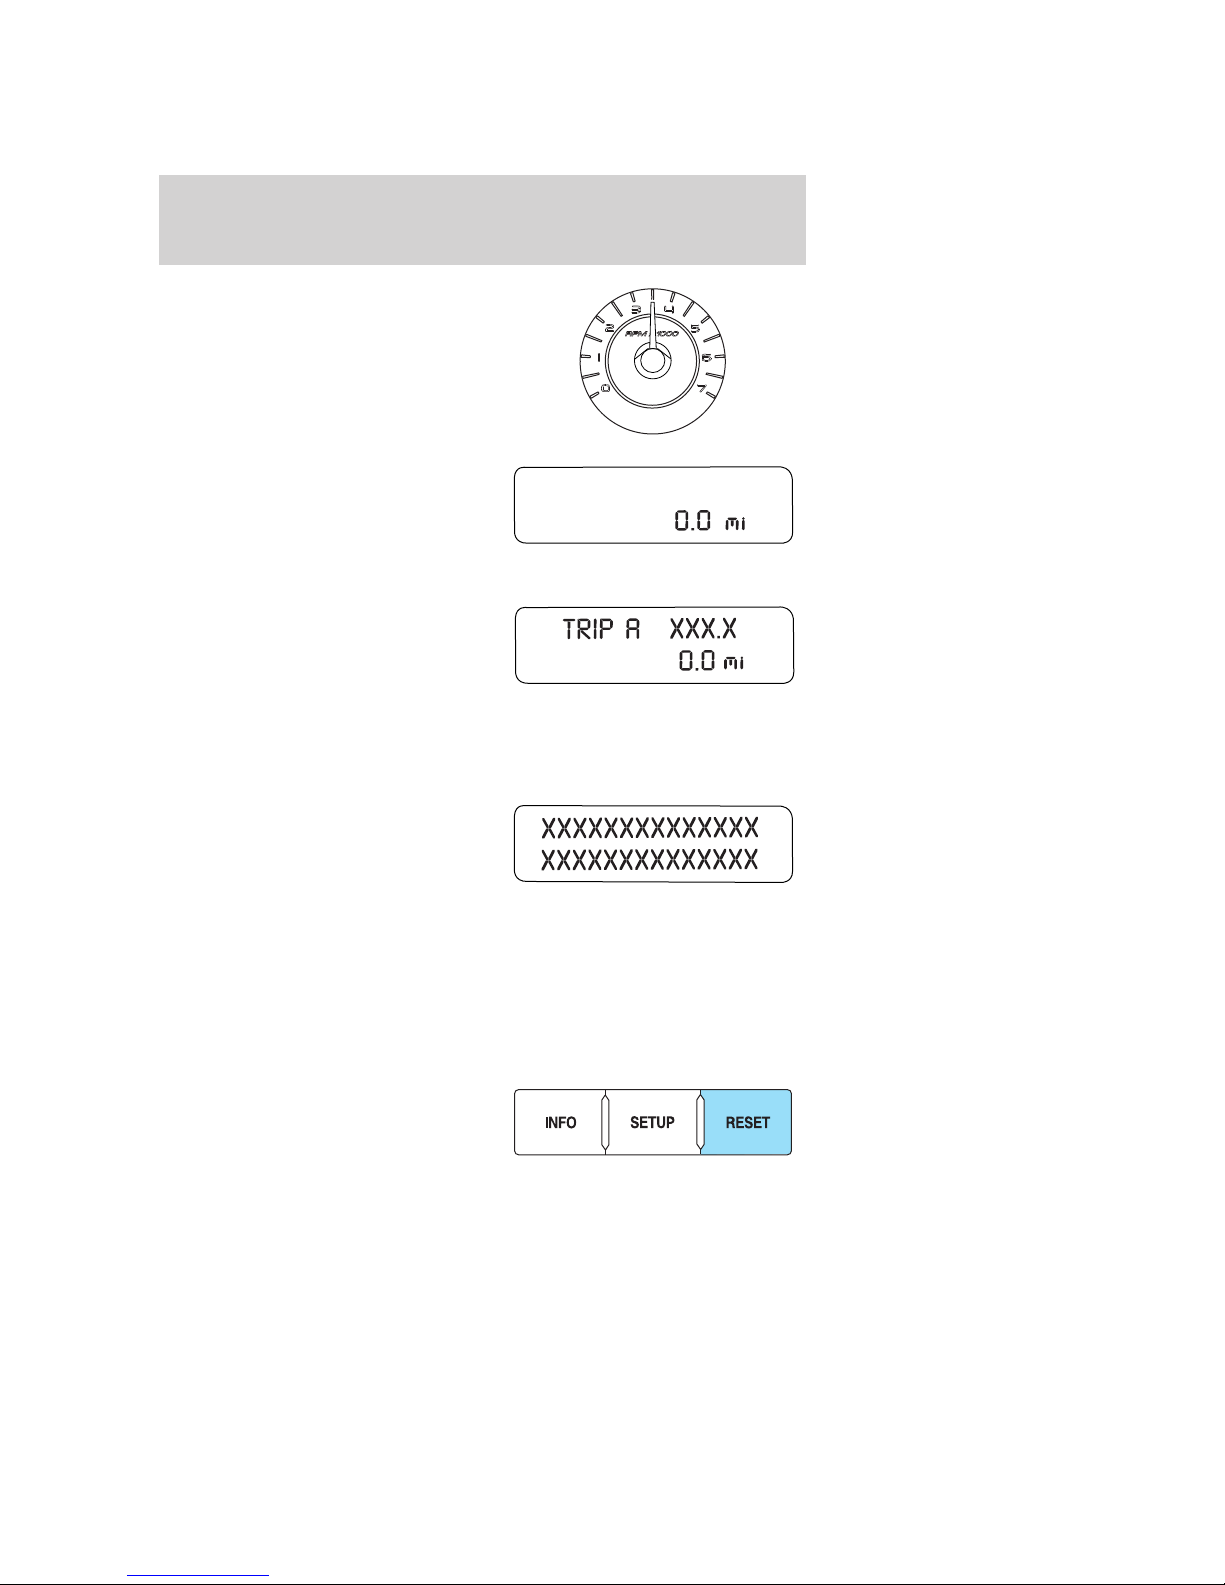
Tachometer: Indicates the engine
speed in revolutions per minute.
Driving with your tachometer
pointer continuously at the top of
the scale may damage the engine.
Odometer: Registers the total miles
(kilometers) of the vehicle.
Refer to Message center in the
Instrument cluster chapter on how
to switch the display from Metric to
English.
Trip odometer: Registers the miles
(kilometers) of individual journeys.
Press and release the message
center INFO button until TRIP A or
TRIP B appears in the display (this
represents the trip mode). Press
and hold the RESET button for two seconds to reset.
MESSAGE CENTER
With the ignition in the on position,
the message center, located on your
instrument cluster, displays
important vehicle information
through a constant monitor of
vehicle systems. You may select
display features on the message center for a display of status. The
system will also notify you of potential vehicle problems with a display of
system warnings followed by a long indicator chime.
Selectable features
Reset
Press this to select and reset
functions shown in the INFO menu
and SETUP menu.
18
2010 Milan (mln)
Owners Guide, 1st Printing
USA (fus)
Instrument Cluster
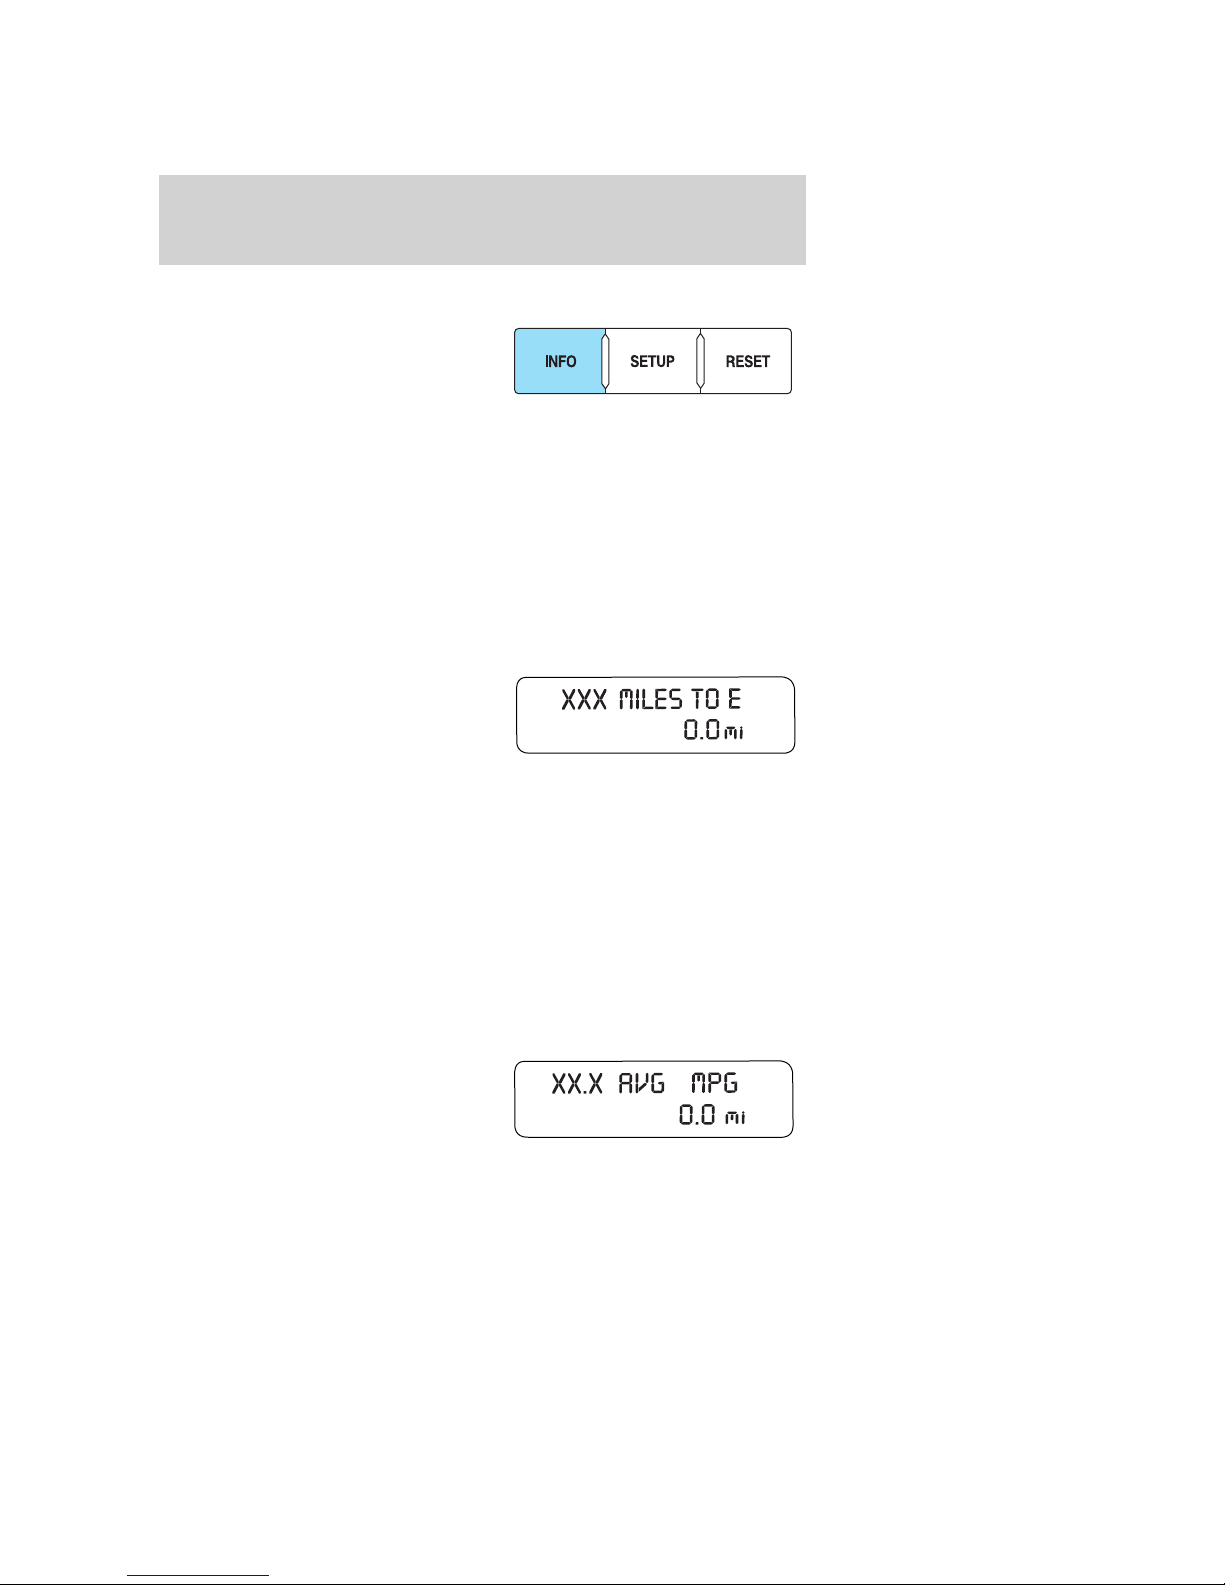
Info menu
This control displays the following
control displays:
• Odometer
• Trip Odometer A or B
• Distance to Empty
• Average Fuel Economy
• Instantaneous Fuel Economy
• Trip Elapsed Drive Time
• Blank
Odometer/Trip odometer
Refer to Gauges in the Instrument Cluster chapter.
Distance to empty (DTE)
Selecting this function from the
INFO menu estimates approximately
how far you can drive with the fuel
remaining in your tank under
normal driving conditions.
Remember to turn the ignition off
when refueling to allow this feature to correctly detect the added fuel.
The DTE function will display LOW FUEL LEVEL when you have
approximately 50 miles (80 km), to empty. If you reset this warning
message, it will return at approximately 25 miles (40 km), 10 miles
(16 km) and 0 miles (0 km) miles to empty.
DTE is calculated using a running average fuel economy, which is based
on your recent driving history of 500 miles (800 km). This value is not
the same as the average fuel economy display. The running average fuel
economy is reinitialized to a factory default value if the battery is
disconnected.
Average fuel economy (AFE)
Select this function from the INFO
menu to display your average fuel
economy in miles/gallon or
liters/100 km.
2010 Milan (mln)
Owners Guide, 1st Printing
USA (fus)
19
Instrument Cluster
If you calculate your average fuel economy by dividing distance traveled
by gallons of fuel used (liters of fuel used by 100 kilometers traveled),
your figure may be different than displayed for the following reasons:
• Your vehicle was not perfectly level during fill-up
• Differences in the automatic shut-off points on the fuel pumps at
service stations
• Variations in top-off procedure from one fill-up to another
• Rounding of the displayed values to the nearest 0.1 gallon (liter)
1. Drive the vehicle at least 5 miles (8 km) with the speed control
system engaged to display a stabilized average.
2. Record the highway fuel economy for future reference.
It is important to press RESET (press and hold RESET for two seconds
in order to reset the function) after setting the speed control to get
accurate highway fuel economy readings.
For more information refer to Essentials of good fuel economy in the
Maintenance and Specifications chapter.
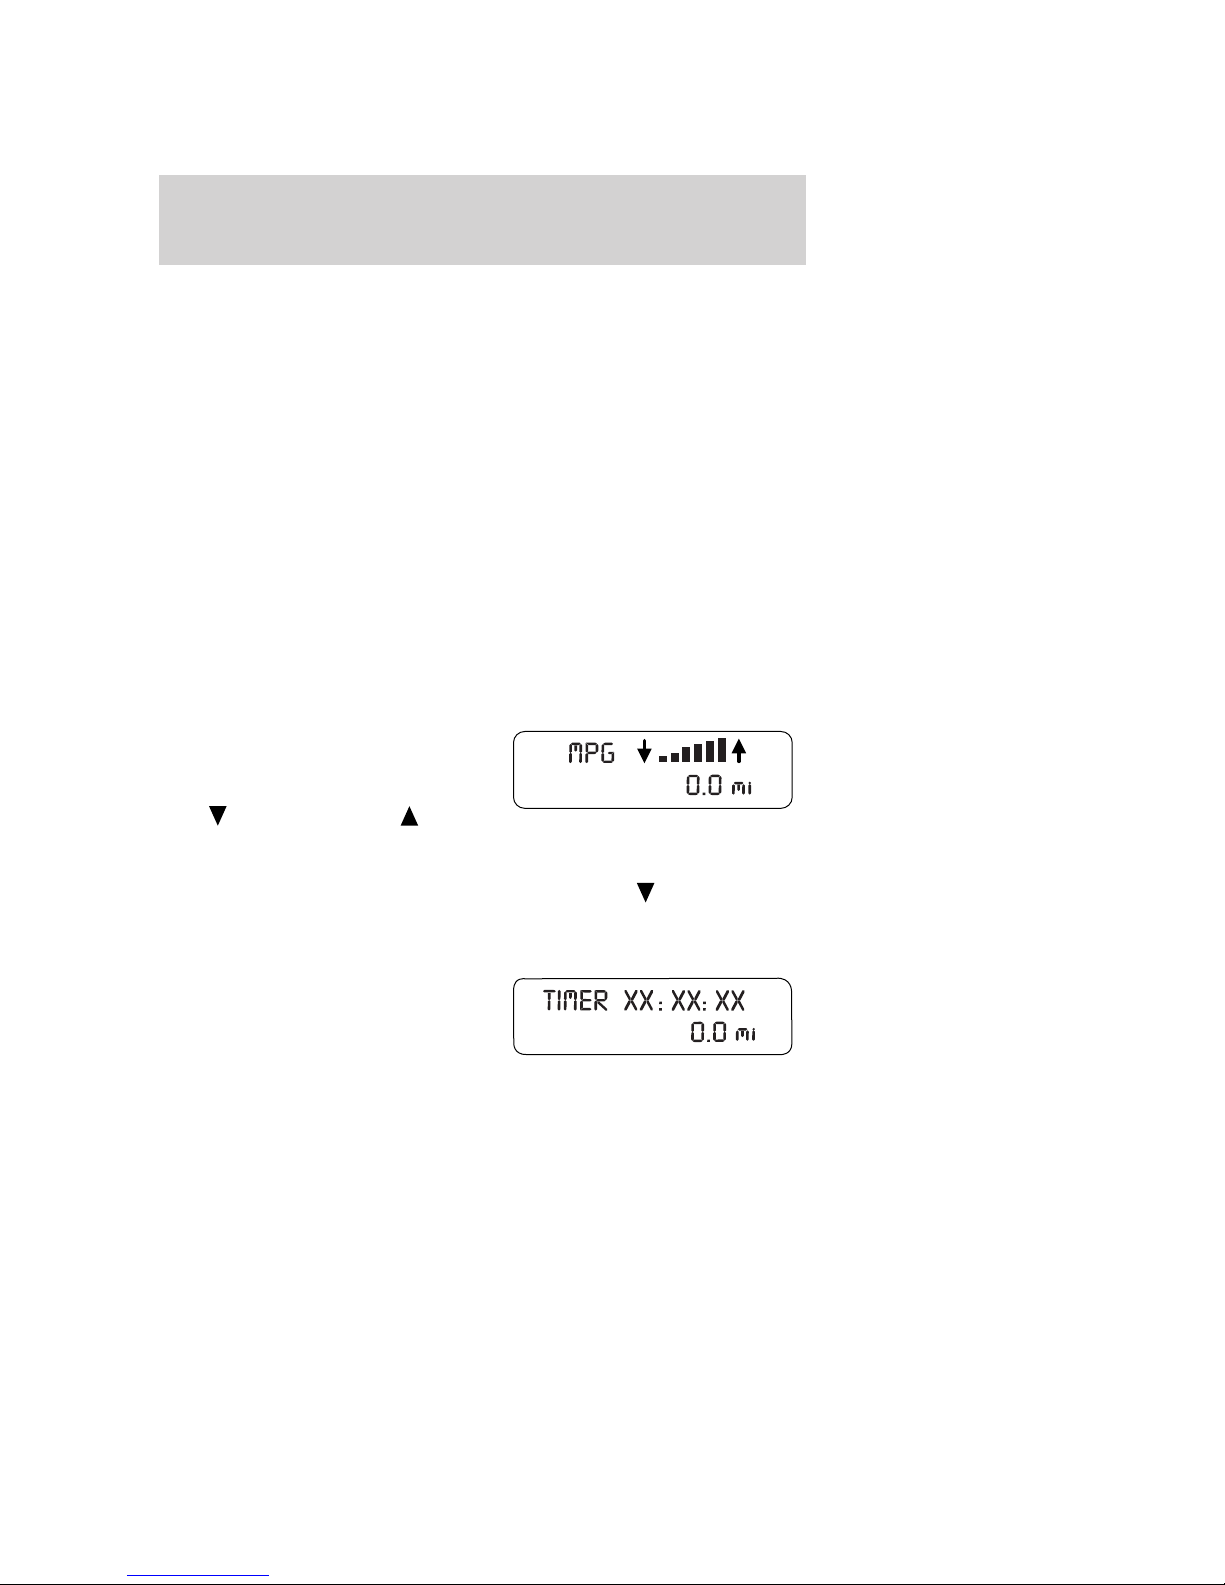
Instantaneous fuel economy (IFE)
Select this function from the INFO
menu to display your instantaneous
fuel economy. This will display your
fuel economy as a bar graph ranging
from
excellent economy.
Your vehicle must be moving to calculate instantaneous fuel economy.
When your vehicle is not moving, this function shows
illuminated. Instantaneous fuel economy cannot be reset.
Trip elapsed drive time
Select this function from the INFO
menu to display a timer.
To operate the Trip Elapsed Drive
Time perform the following:
1. Press and release RESET in order
to start the timer.
2. Press and release RESET to pause the timer.
3. Press and hold RESET for two seconds in order to reset the timer.
poor economy to
, one or no bars
20
2010 Milan (mln)
Owners Guide, 1st Printing
USA (fus)

Instrument Cluster
Setup menu
Press this control for the following
displays:
• System Check
• Oil Life
• Units (English/Metric)
• Autolamp (if equipped)
• Autolock
• Autounlock
• Blind spot monitoring system (if equipped)
• Cross traffic alert system (if equipped)
• Reverse sensing system (if equipped)
• Language
System check
Selecting this function from the
SETUP menu causes the message
center to cycle through each of the
systems being monitored.
Pressing RESET cycles the message
center through each of the systems being monitored.
Some monitored systems show a message only if a warning is present.
The sequence of the system check report is as follows:
1. XXX% OIL LIFE
2. All DOORS CLOSED
3. TRUNK CLOSED
4. BLIND SPOT SYSTEM (if equipped)
5. CROSS TRAFFIC SYSTEM (if equipped)
6. BRAKE SYSTEM
7. FUEL LEVEL
Oil Life XXX%
An oil change is required whenever indicated by the message center and
according to the recommended maintenance schedule. USE ONLY
RECOMMENDED ENGINE OILS.
2010 Milan (mln)
Owners Guide, 1st Printing
USA (fus)
21
Instrument Cluster
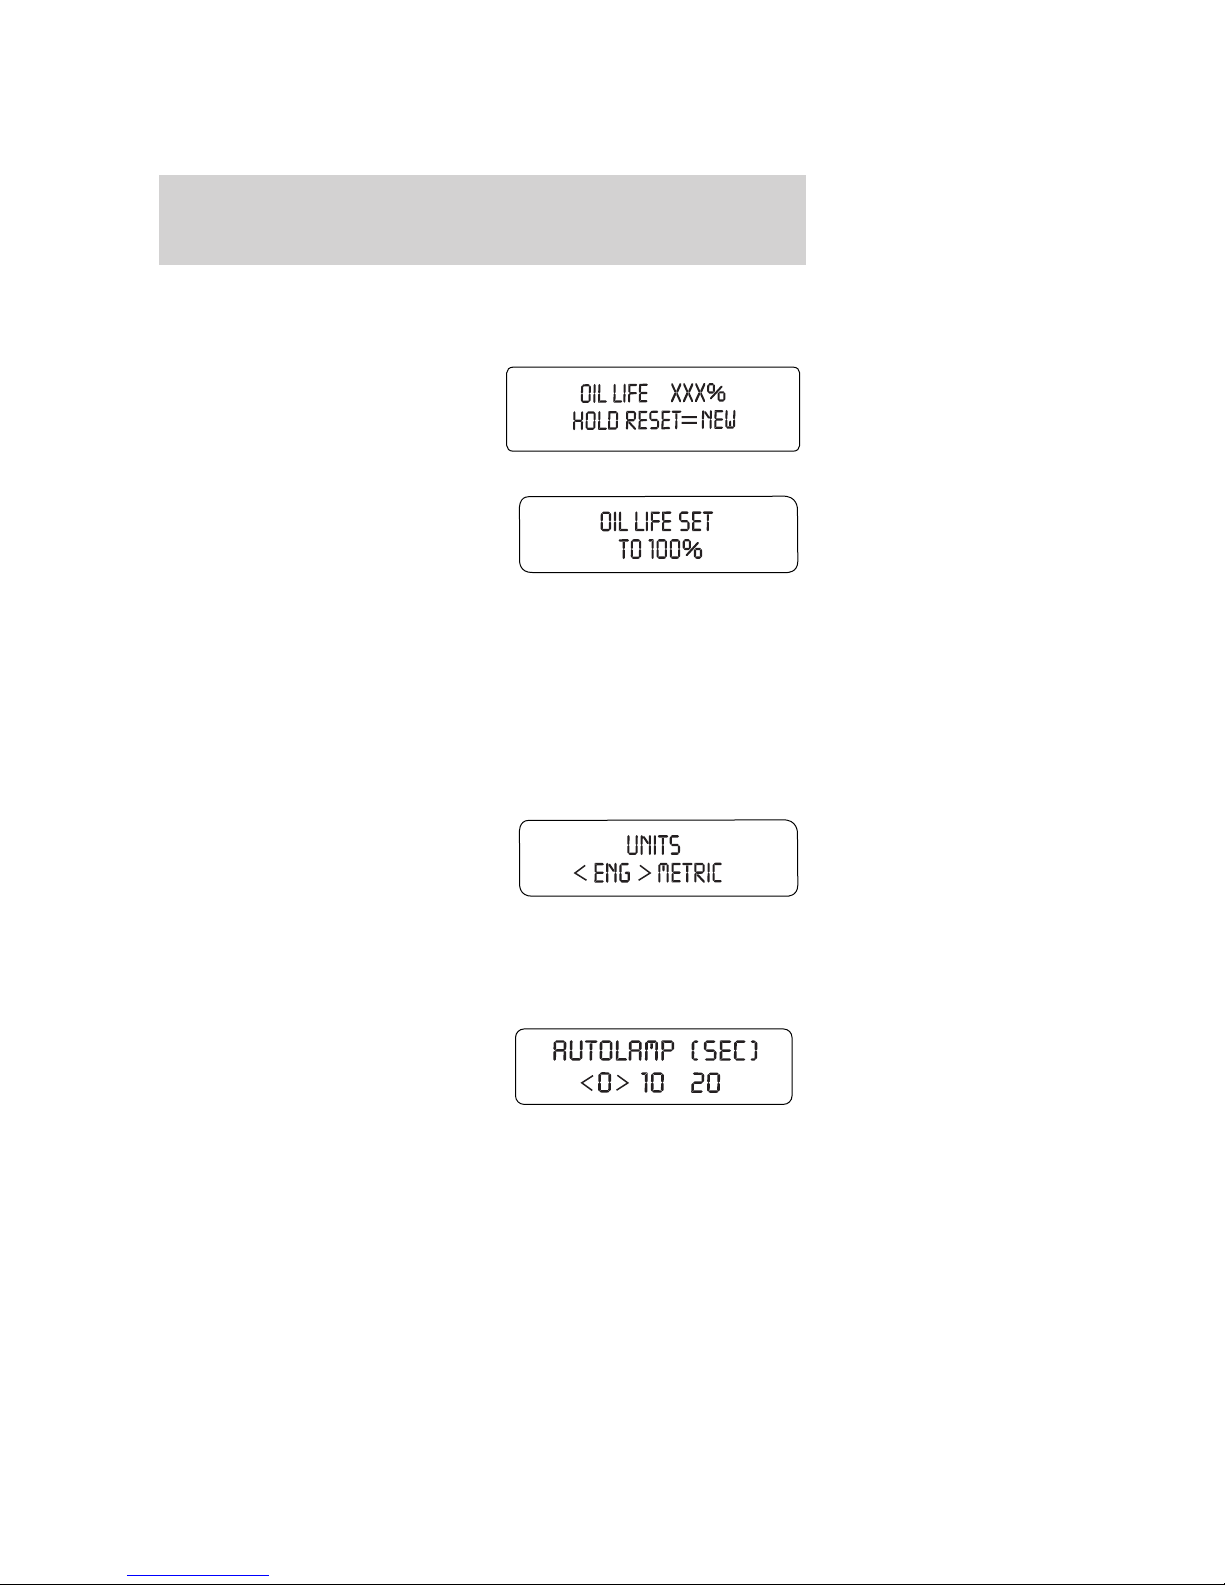
To reset the oil monitoring system to 100% after each oil change
(approximately 7,500 miles [12,000 km] or 12 months) perform the
following:
1. Press and release SETUP to
display “OIL LIFE XXX% HOLD
RESET = NEW”.
2. Press and hold RESET for two
seconds and release. Oil life is set to
100% and “OIL LIFE SET TO 100%”
is displayed.
Note: To change oil life 100% miles value from 7,500 miles (12,000 km)
or 12 months to another value, proceed to Step 3.
3. Once “OIL LIFE SET TO XXX%” is displayed, release and press
RESET switch to change the Oil Life Start Value. Each release and press
will reduce the value by 10%.
Note: Oil life start value of 100% equals 7,500 miles (12,000 km) or
12 months. For example, setting oil life start value to 60% sets the oil
life start value to 4,500 miles (7,200 km) and 219 days.
Units (English/Metric)
1. Select this function from the
SETUP menu for the current units
to be displayed.
2. Press RESET to change from
English to Metric.
Autolamp delay (if equipped)
This feature keeps your headlights on for up to three minutes after the
ignition is switched off.
1. To disable/enable the autolamp
delay feature, select this function
from the SETUP control for the
current display mode.
2. Press RESET to select the new
autolamp delay values of 0, 10, 20,
30, 60, 90, 120 or 180 seconds.
22
2010 Milan (mln)
Owners Guide, 1st Printing
USA (fus)

Instrument Cluster
Autolock
This feature automatically locks all vehicle doors when the vehicle is
shifted into any gear, putting the vehicle in motion.
1. To disable/enable the autolock
feature, select this function from the
SETUP control for the current
display mode.
2. Press the RESET button to turn
autolock on or off.
Autounlock
This feature automatically unlocks all vehicle doors when the driver’s
door is opened within 10 minutes of the ignition being turned off.
1. To disable/enable autounlock
feature, select this function from the
SETUP control for the current
display mode.
2. Press RESET to turn autounlock
on or off.
Blind spot system (if equipped)
The blind spot information system is designed to assist the driver by
monitoring the side areas on both sides of the vehicle.
1. Select this function from the
SETUP menu to disable the system.
2. Press RESET to turn blind spot
off or on.
Cross traffic alert system (if equipped)
The cross traffic alert system is designed to assist the driver by
monitoring the areas toward the rear of the vehicle.
1. Select this function from the
SETUP menu to disable/enable the
system.
2. Press RESET to cross traffic off
or on.
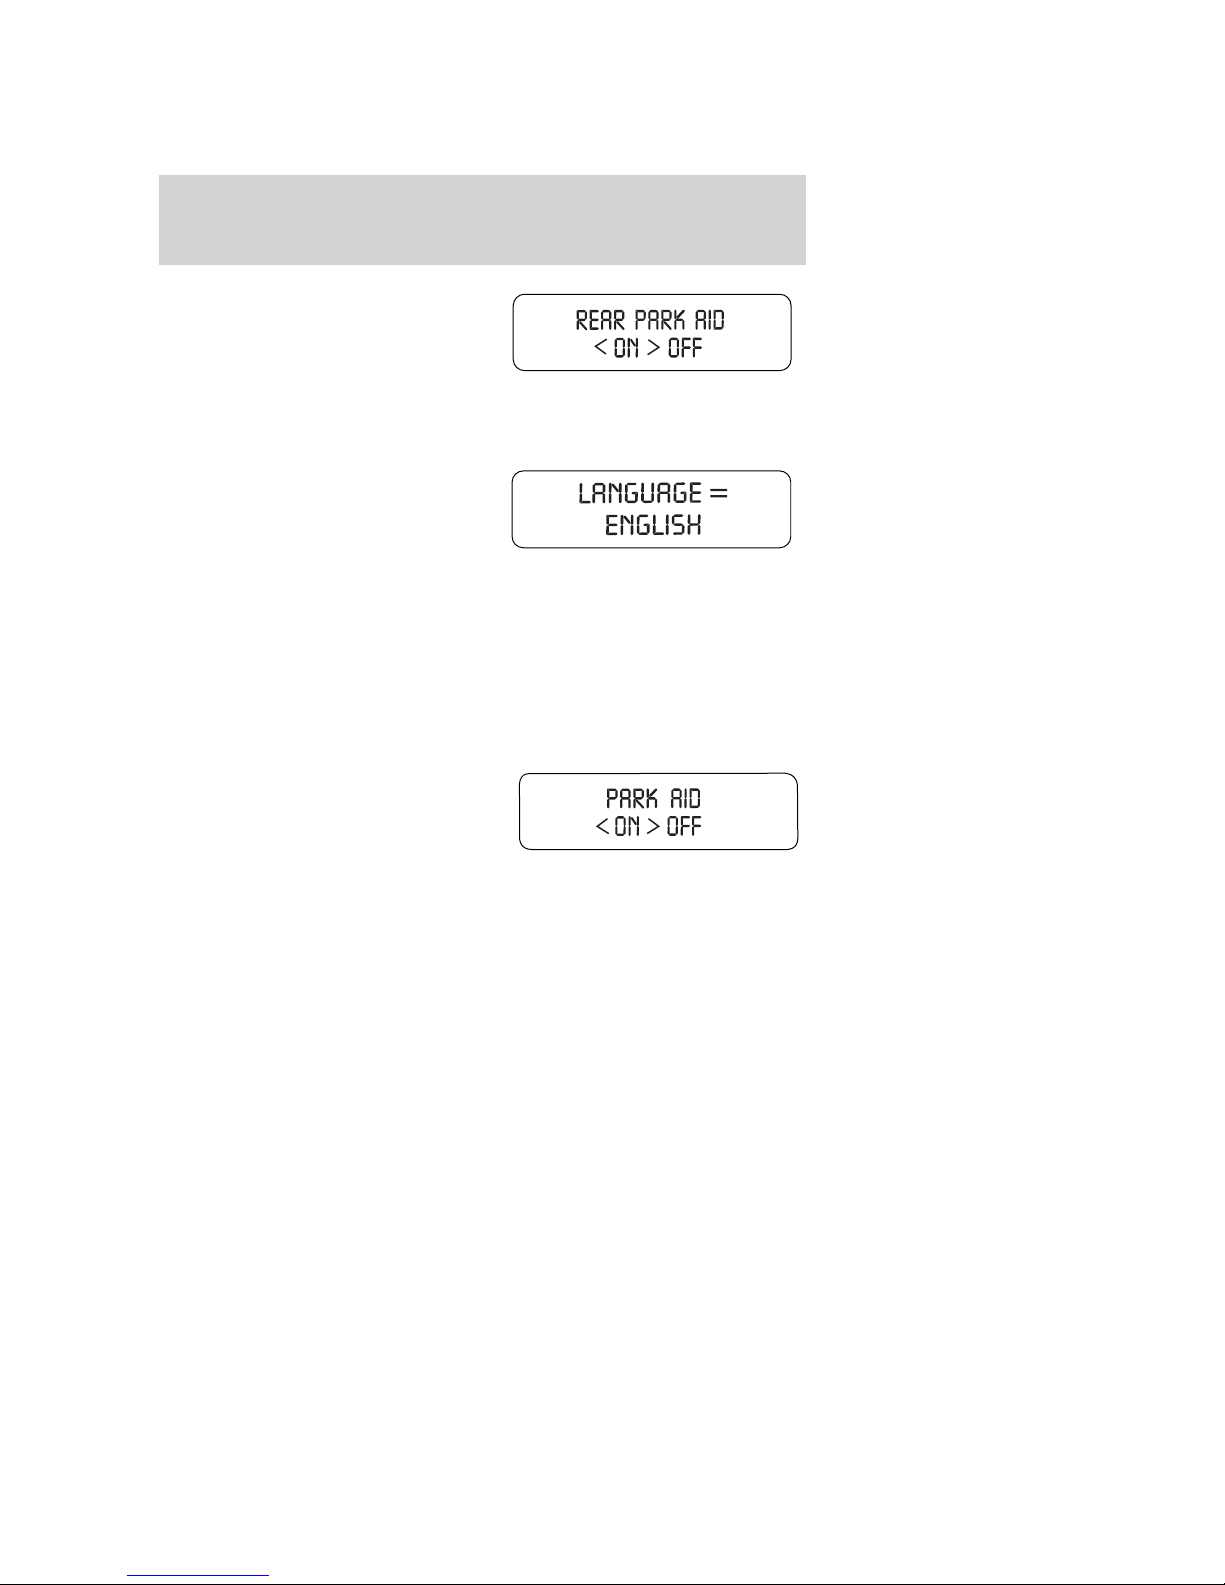
Reverse park aid (Reverse sensing system) (if equipped)
This feature sounds a warning tone to warn the driver of obstacles near
the rear bumper, and functions only when R (Reverse) gear is selected.
2010 Milan (mln)
Owners Guide, 1st Printing
USA (fus)
23
Instrument Cluster
1. Select this function from the
SETUP menu to disable the reverse
sensing system feature.
2. Press RESET to turn the rear
park assist off. When R (Reverse)
gear is selected, PARK AID OFF will be displayed.
Language
1. Select this function from the
SETUP menu for the current
language to be displayed.
2. Waiting four seconds or pressing
RESET cycles the message center
through each of the language choices.
Selectable languages are English, Spanish, or French.
3. Press and hold the RESET control for two seconds to set the language
choice.
Park aid (Reverse sensing system) (if equipped)
This feature sounds a warning tone to warn the driver of obstacles near
the rear bumper, and functions only when R (Reverse) gear is selected.
1. Select this function from the
SETUP menu to disable the reverse
sensing system feature.
2. Press RESET to turn the rear
park assist off. When R (Reverse)
gear is selected, PARK AID OFF will be displayed.
System warnings
System warnings alert you to possible problems or malfunctions in your
vehicle’s operating systems.
In the event of a multiple warning situation, the message center will
cycle the display to show all warnings by displaying each one for several
seconds.
The message center will display the last selected feature if there are no
more warning messages. This allows you to use the full functionality of
the message center after you acknowledge the warning by pressing the
RESET and clearing the warning message.
24
2010 Milan (mln)
Owners Guide, 1st Printing
USA (fus)

Instrument Cluster
Warning messages that have been reset are divided into three categories:
• They will not disappear until a condition is changed.
• They will reappear on the display 10 minutes from the reset.
• They will not reappear until an ignition off/on cycle has been
completed.
This acts as a reminder that these warning conditions still exist within
the vehicle.
Warnings that return after 10 minutes:
PARK BRAKE ENGAGED — Displayed when the park brake is
engaged. If the warning stays on after the park brake is off, contact your
authorized dealer as soon as possible.
CHECK BRAKE SYSTEM — Displayed when the brake system needs
servicing. If the warning stays on or continues to come on, contact your
authorized dealer as soon as possible.
Warnings that return after the ignition key is turned from off to
on:
DRIVER DOOR AJAR — Displayed when the driver’s door is not
completely closed.
PASSENGER DOOR AJAR — Displayed when the passenger side door
is not completely closed.
REAR LEFT DOOR AJAR — Displayed when the rear left door is not
completely closed.
REAR RIGHT DOOR AJAR — Displayed when the rear right door is
not completely closed.
FUEL LEVEL LOW — Displayed as an early reminder of a low fuel
condition.
CHECK FUEL FILL INLET — Displayed when the fuel fill inlet may
not be properly closed. Refer to Easy Fuel™ “no cap” fuel system in
the Maintenance and Specifications chapter.
BRAKE FLUID LEVEL LOW — Indicates the brake fluid level is low
and the brake system should be inspected immediately. Refer to Brake
fluid in the Maintenance and Specifications chapter.
CHECK PARK AID (if equipped) — Displayed when the transmission
is in R (Reverse) and the Reverse Sensing System (Park Aid) is disabled.
Refer to Reverse Sensing System (Park Aid) in this section to enable.
LOW TIRE PRESSURE — Displayed when one or more tires on your
vehicle have low tire pressure. Refer to Inflating your tires in the Tires,
Wheels and Loading chapter.
2010 Milan (mln)
Owners Guide, 1st Printing
USA (fus)
25

Instrument Cluster
TIRE PRESSURE MONITOR FAULT — Displayed when the Tire
Pressure Monitoring System is malfunctioning. If the warning stays on or
continues to come on, contact your authorized dealer as soon as
possible.
TIRE PRESSURE SENSOR FAULT — Displayed when a tire pressure
sensor is malfunctioning, or your spare tire is in use. For more
information on how the system operates under these conditions, refer to
Tire Pressure Monitoring System (TPMS) in the Tires, Wheels and
Loading chapter. If the warning stays on or continues to come on,
contact your authorized dealer as soon as possible.
POWER STEERING ASSIST FAULT — The power steering system
has disabled power steering assist due to a system error, service is
required.
SERVICE POWER STEERING — The power steering system has
detected a condition that requires service.
SERVICE POWER STEERING NOW — The power steering system
has detected a condition within the power steering system that requires
service immediately.
SERVICE ADVANCETRAC — Displayed when the AdvanceTrac威
system has detected a condition that requires service.
TRUNK AJAR — Displayed when the trunk is not completely closed.
REMOVE OBJECTS NEAR PASS SEAT — Displayed when objects
are by the passenger seat. After the objects are moved away from the
seat, if the warning stays on or continues to come on, contact your
authorized dealer as soon as possible.
OIL LIFE CHANGE SOON — Displayed when the engine oil life
remaining is 10% or less. When oil life left is between 10% and 0%, the
XX% OIL LIFE CHANGE SOON message will be displayed.
OIL CHANGE REQUIRED — Displayed when the oil life left reaches
0%, the OIL CHANGE REQUIRED message will be displayed.
BLIND SPOT SYSTEM FAULT (if equipped) — Displayed when a
fault with the blind spot information system has a fault. Contact your
authorized dealer as soon as possible.
CROSS TRAFFIC SYSTEM FAULT (if equipped) — Displayed when
a fault with the cross traffic alert system has a fault. Contact your
authorized dealer as soon as possible.
BLIND SPOT NOT AVAILABLE (if equipped) — Displayed when
blind spot information system is not available. See Blind spot
information system in the Driver controls chapter.
26
2010 Milan (mln)
Owners Guide, 1st Printing
USA (fus)

Instrument Cluster
CROSS TRAFFIC NOT AVAILABLE (if equipped) — Displayed
when cross traffic alert is not available. See Blind spot information
system in the Driver controls chapter.
SENSOR BLOCKED SEE MANUAL (if equipped) — Displayed when
the blind spot information system/cross traffic alert system sensors are
blocked. See Blind spot information system in the Driver controls
chapter.
VEHICLE COMING FROM LEFT (if equipped) — Displayed when
the blind spot information system with cross traffic alert (CTA) system is
operating and senses a vehicle. See Blind spot information system in
the Driver controls chapter.
VEHICLE COMING FROM RIGHT (if equipped) — Displayed when
the blind spot information system with cross traffic alert (CTA) system is
operating and senses a vehicle. See Blind spot information system in
the Driver controls chapter.
TO STOP ALARM START VEHICLE — Displayed when the perimeter
alarm system is armed and the vehicle is entered using the key on the
driver’s side door. In order to prevent the perimeter alarm system from
triggering, the ignition must be turned to Start before the 12 second
chime expires. See Perimeter alarm system in the Locks and security
chapter.
CHECK AWD (if equipped) — Displayed when a problem exists with
the AWD system. Contact your authorized dealer as soon as possible.
Temporary messages:
INTKEY COULD NOT PROGRAM — Displayed when an attempt is
made to program an invalid key or more than the maximum number of
integrated keys allowed. For more information on integrated key, refer to
the Locks and Security chapter.
2010 Milan (mln)
Owners Guide, 1st Printing
USA (fus)
27
Entertainment Systems
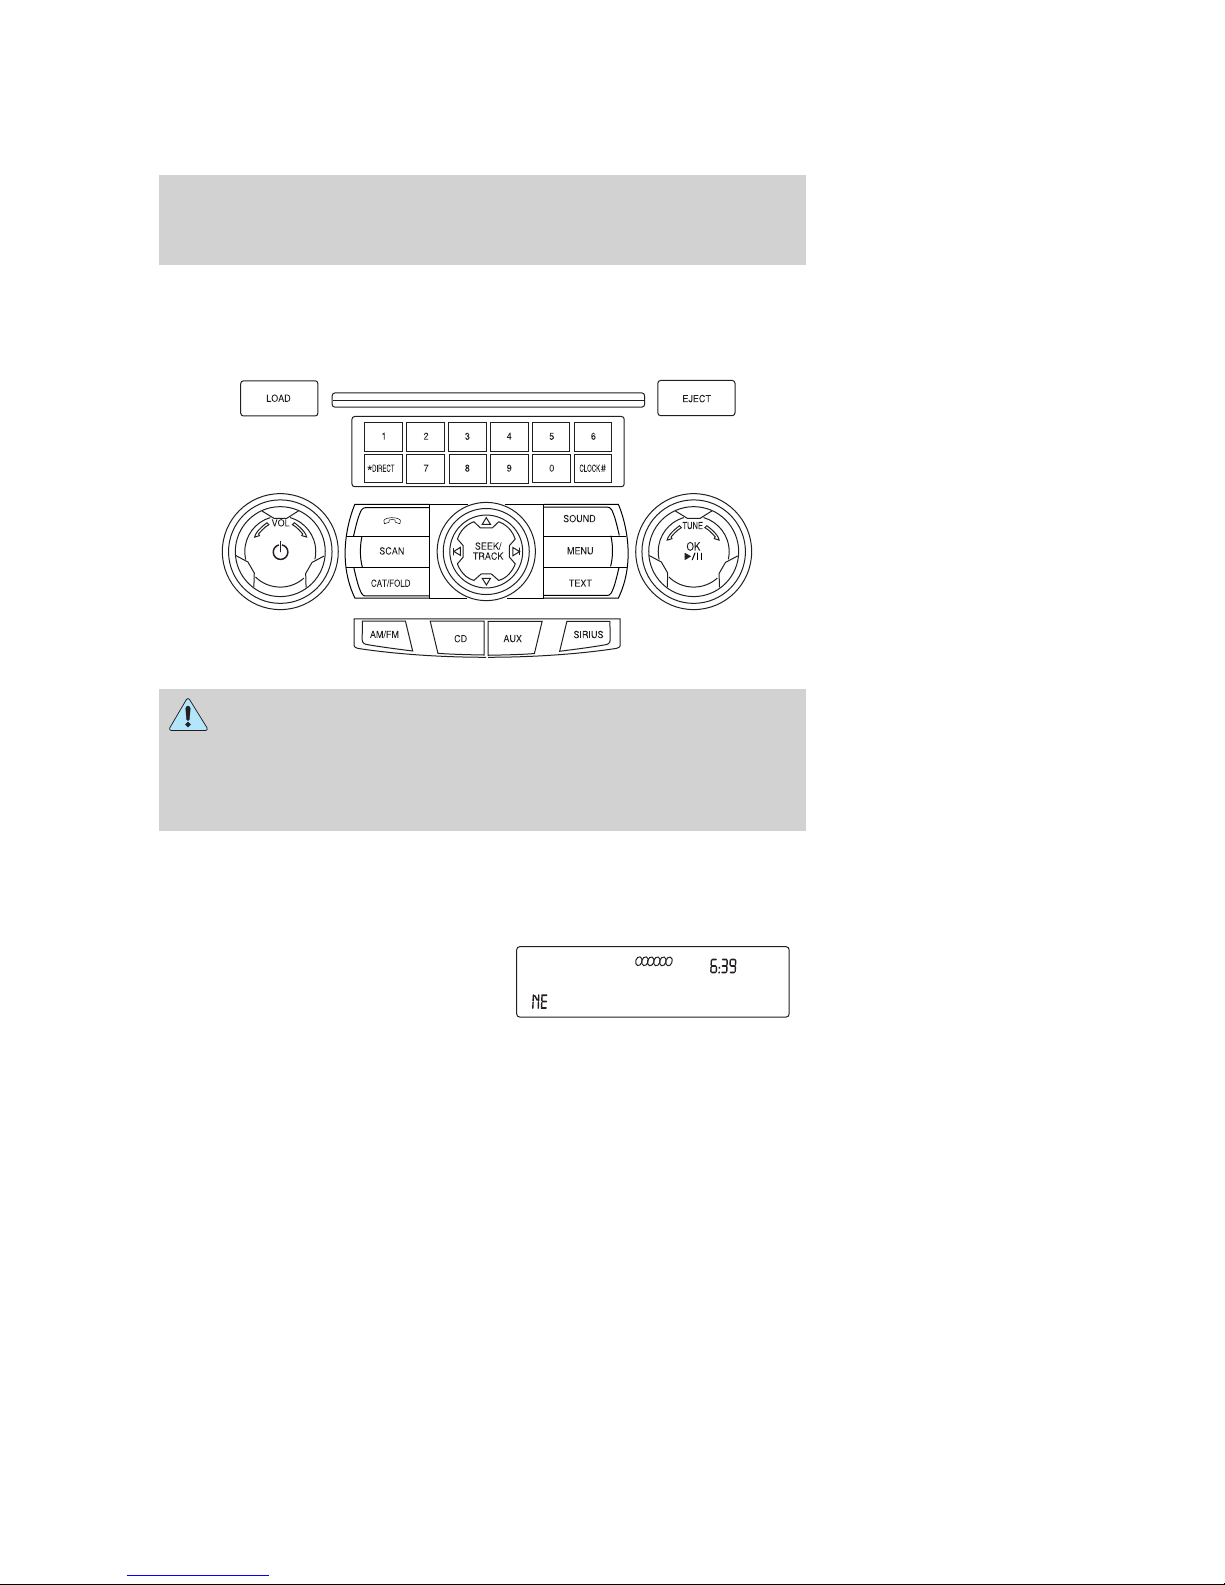
AUDIO SYSTEMS
AM/FM/single CD or in-dash CD6/MP3 satellite compatible sound
system
WARNING: Driving while distracted can result in loss of vehicle
control, accident and injury. Ford strongly recommends that
drivers use extreme caution when using any device that may take their
focus off the road. The driver’s primary responsibility is the safe
operation of their vehicle. Only use cell phones and other devices not
essential to the driving task when it is safe to do so.
Accessory delay: Your vehicle is equipped with accessory delay. With
this feature, the radio and other electrical accessories may be used for
up to ten minutes after the ignition is turned off or until either front
door is opened.
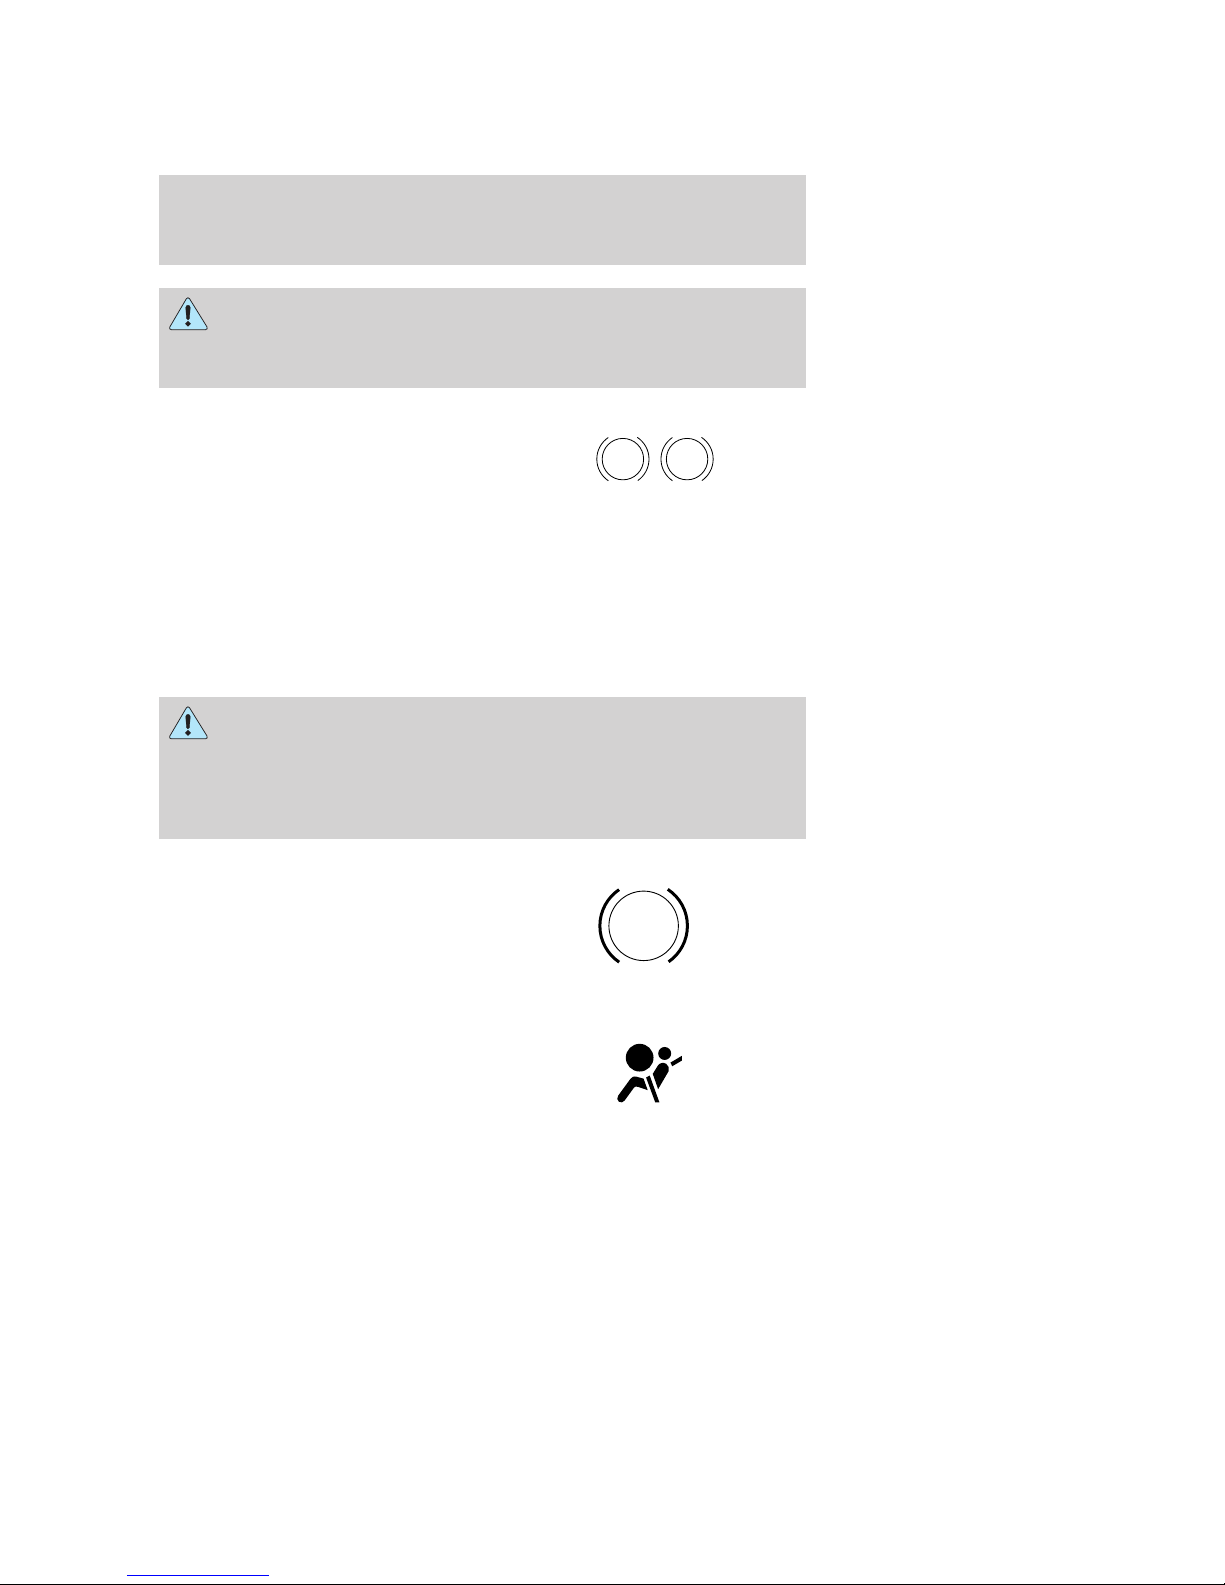
Note: Your vehicle is equipped with
a unique audio system. If your
display shows six small circles in the
display, your audio system is a CD6
system. If not, your system is a
Single CD system.
Setting the clock
To set the time, press CLOCK#. The display will read SET TIME. Use the
memory preset numbers (0–9) to enter in the desired time–hours and
minutes. The clock will then begin from that time.
28
2010 Milan (mln)
Owners Guide, 1st Printing
USA (fus)

Entertainment Systems
AM/FM Radio
/ VOL (Power/Volume): Press to turn the radio on/off. Turn the
knob to increase/decrease volume.
If the volume is set above a certain level and the ignition is turned off,
the volume will come back on at a nominal listening level when the
ignition switch is turned back on.
AM/FM: Press repeatedly to select AM/FM1/FM2 frequency band.
TUNE: Turn the knob to go up/down the frequency band in individual
increments.
DIRECT: Press DIRECT and then select the desired radio frequency
(i.e. 93.9) using the memory preset numbers (0–9).
SEEK/TRACK: Press
previous/next strong radio station.
SCAN: Press for a brief sampling of all strong radio stations.
MEMORY PRESETS (0–9): When tuned to any station, press and hold
a preset button until sound returns and PRESET # SAVED appears in
the display. You can save up to 30 stations, 10 in AM, 10 in FM1 and
FM2.
Saving presets automatically– Autoset allows you to set the strongest
local radio stations without losing your original manually set preset
stations for AM/FM1/FM2.
To activate the autoset feature: Press MENU repeatedly until AUTO
PRESET ON/OFF appears in the display. Use
toggle AUTO PRESET to ON, and either wait five seconds for the search
to initiate or press OK to immediately initiate the search. If you press
another control within those five seconds, the search will not initiate.
The 10 strongest stations will be filled and the station stored in preset 1
will begin playing.
If there are fewer then 10 strong stations, the system will store the last
one in the remaining presets.
RDS (Radio Data System) Radio
Available only in FM mode. This feature allows you to search
RDS-equipped stations for a certain category of music format: CLASSIC,
COUNTRY, JAZZ/RB, ROCK, etc.
To activate: Press MENU repeatedly until RDS (ON/OFF) appears in the
display. Use
OFF, you will not be able to search for RDS equipped stations or view
the station name or type.
SEEK/TRACK to toggle RDS ON/OFF. When RDS is
SEEK/TRACK to access the
SEEK/TRACK to
2010 Milan (mln)
Owners Guide, 1st Printing
USA (fus)
29

Entertainment Systems
CAT/FOLD (Category/Folder): This feature allows you to select from
various music categories.
To change RDS categories: Press MENU repeatedly until RDS ON/OFF
appears in the display. Use
PRESS UP OR DOWN TO CHANGE RDS CATEGORY will appear in the
display. Press
desired category appears in the display, press
find the next station playing that selection or press SCAN for a brief
sampling of all stations playing that category of music.
CD/MP3 Player
CD: Press to enter CD/MP3 mode. If a disc is already loaded into the
system, CD/MP3 play will begin where it ended last. If no CD is loaded,
NO DISC will appear in the display.
LOAD:
For a single CD system– This control is not operational. To load a CD,
simply insert the disc, label side up, into the CD slot.
For a CD6 system– Press LOAD. When the display reads SELECT
SLOT, choose the desired slot number using memory presets 1–6. When
the display reads LOAD CD#, load the desired disc, label side up. If you
do not choose a slot within five seconds, the system will choose for you.
Once loaded, the first track will begin to play.
To auto load up to six discs– Press and hold LOAD until the display
reads AUTOLOAD#. Load the desired disc, label side up. The system will
prompt you to load discs for the remaining available slots. Insert the
discs, one at a time, label side up, when prompted. Once loaded, the disc
in preset #1 will begin to play.
Press the number preset buttons (1–6) to choose the disc you want to
play.
EJECT:
For a single CD system– press EJECT to eject the CD.
For a CD6 system– press EJECT and select the desired CD slot by
pressing the corresponding memory preset #. The display will read
EJECTING #. When the system has ejected the CD, the display will read
REMOVE CD #. Remove the CD. If you do not remove the CD, the
system will reload the disc.
To auto eject all loaded discs– Press and hold EJECT. The system will
eject all discs and prompt you when to remove them.
/ to scroll through all possible categories. When the
/ to toggle RDS to ON. Press CAT.
SEEK/TRACK to
30
2010 Milan (mln)
Owners Guide, 1st Printing
USA (fus)
 Loading...