

Page 1

SECTION 307-01B: A utomatic Transaxle/Tra nsmission — 4F50N 2002 Taurus/Sable Wo rkshop Manual
10
2002 Taurus/Sable Workshop Manual
12/26/2010
http://www.fordtechservice.dealerconnection.com/pubs/content/~WS2H/~MUS~LEN/20/
...
REMOVAL
Procedure revision date: 06/20/2001
Transaxle — 3.0L 4V
Special Tool(s)
Remover, Halfshaft
205-241 (T86P-3514-A) or equivalent
Lifting Bracket, Engine (3.0L 4V -V6)
134-00243 or equivalent
Support, Bar Engine
303-290A
Adapters for 303-290A
303-290A-01
Adapter for 303-290A (Support Leg)
303-290A-03A
Slide Hammer
100-001 (T50T-100-A)
Removal
1. Remove the battery. For additional information, refer to Section 414-01.
2. Disconnect the mass air flow (M AF) sensor.
3. Disconnect the breather tubes .
4. Remove the engine air cleaner.
Page 2
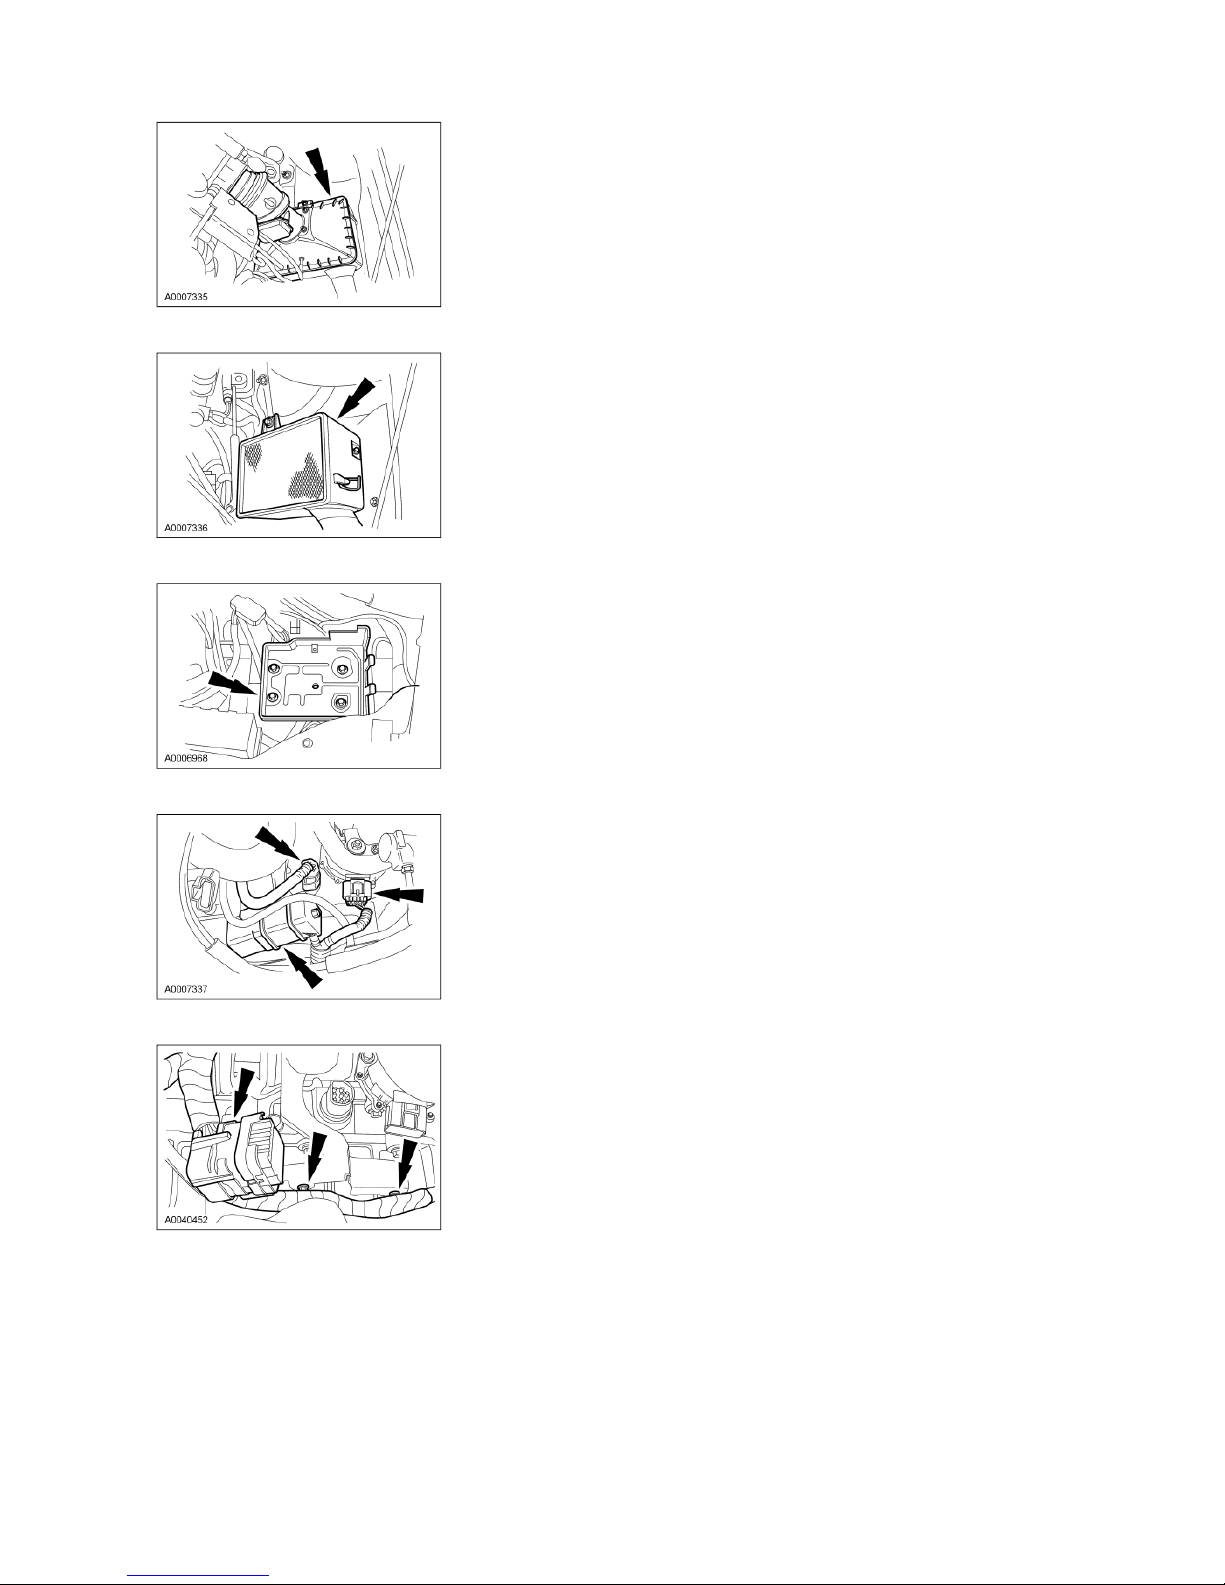
5. Remove the air filter assembly.
10
2002 Taurus/Sable Workshop Manual
12/26/2010
http://www.fordtechservice.dealerconnection.com/pubs/content/~WS2H/~MUS~LEN/20/
...
6. Remove the battery tray.
7. Disconnect the connectors.
8. Remove the electrical connector and the wiring harness from the bracket.
9. Remove the manual control lever cable.
1. Remove the nut.
2. Remove the shift actuator cable fitting from the shift cable and bracket.
Page 3

10
2002 Taurus/Sable Workshop Manual
12/26/2010
http://www.fordtechservice.dealerconnection.com/pubs/content/~WS2H/~MUS~LEN/20/
...
10. Disconnect the power steering sensor connector.
11. Disconnect the power steering harness and output shaft sp eed (OSS) sensor connector.
12. Disconnect the wiring harness from the shift cable bracket.
13. Disconnect the turbine shaf t speed (TSS) sensor.
14. Remove the bolt from the coolant pipe bracket.
Page 4

15. Remove the nut from the coolant pipe bracket.
10
2002 Taurus/Sable Workshop Manual
12/26/2010
http://www.fordtechservice.dealerconnection.com/pubs/content/~WS2H/~MUS~LEN/20/
...
16. Remove the bolts.
17. Remove the nut for the cool ing tube.
18. Install the engine lifting bracket.
19. Remove the upper cowl assembly.
1. Remove the wiper.
2. Remove the clips.
3. Remove the upper cowl assemb ly.
Page 5

10
2002 Taurus/Sable Workshop Manual
12/26/2010
http://www.fordtechservice.dealerconnection.com/pubs/content/~WS2H/~MUS~LEN/20/
...
20. Remove the lower cowl assembly.
Remove the three screws.
Remove the clip.
21. Remove the rear support brace.
1. Remove the bolt.
2. Remove the nut.
3. Remove the rear support brace.
22. Install the rear engine lifting bracket in the same location where the top bolt was removed from the rear support brace.
23. Install the 3 Bar Engine Supp ort.
24. NOTE: It may be easier to access the nuts for the exhaust flange from the engine compart ment.
Remove the front nuts from the front catalytic converter assembly.
Page 6

10
2002 Taurus/Sable Workshop Manual
12/26/2010
http://www.fordtechservice.dealerconnection.com/pubs/content/~WS2H/~MUS~LEN/20/
...
25. Raise the vehicle. For additional information, refer to Section 100-02.
26. Drain the transmission fluid by lowering the transaxle pan.
27. Disconnect the front HO2S sensor connector.
28. Disconnect the rear HO2S s ensor connector.
29. Remove the rear bolts from the front catalytic converter ass embly.
30. Remove the nut from the rear catalytic converter assembly.
31. Remove the rear catalytic converter and cross over pipe asse mbly.
Page 7

10
2002 Taurus/Sable Workshop Manual
12/26/2010
http://www.fordtechservice.dealerconnection.com/pubs/content/~WS2H/~MUS~LEN/20/
...
32. CAUTION: If the steering gear is removed with the subframe, do not allow the steering wheel to rotate while the steering column intermediate i s disconnected or
damage to the clockspring can result. If there is evidence that the shaft has rotated, the clockspring must be recen tered before the vehicle is d riven. For additional
information, refer to Sectio n 501-20B.
Remove the sub frame assem bly. For additional information, refer to Section 502-00.
33. NOTE: The use of mechanic's wire will aid in positioning the halfshaft out of the way.
Using the special tools, remov e the LH halfshaft from the transaxle and position out of the way.
34. NOTE: The use of mechanic's wire will aid in positioning the halfshaft out of the way.
Using the special tools, remov e the RH halfshaft from the transaxle and position out of the way.
35. Remove the nut and the batt ery ground cable.
36. Remove the starter motor. For additional information, refer t o Section 303-06.
37. Remove the cooler line retaining clips.
38. Depress the tabs on the plastic insert retainer and remove the cooler lines from the fitting.
Page 8

10
2002 Taurus/Sable Workshop Manual
12/26/2010
http://www.fordtechservice.dealerconnection.com/pubs/content/~WS2H/~MUS~LEN/20/
...
39. Remove the transmission housing cover.
40. Remove and discard the four torque converter to flexplate nuts.
41. Position the high lift transmission jack under the transaxle.
42. Remove the transaxle retaining bolts.
43. Remove the transaxle retaining bolt.
Page 9

10
2002 Taurus/Sable Workshop Manual
12/26/2010
http://www.fordtechservice.dealerconnection.com/pubs/content/~WS2H/~MUS~LEN/20/
...
44. Remove the support bracket.
1. Remove the nuts.
2. Remove the bolts.
3. Remove the bracket.
45. Lower the transaxle assembly from the engine compartment.
46. Remove the rear engine support mount.
47. Remove the bracket.
48. Remove the wiring harness bracket from the transmission .
49. Carry out transmission fluid cooler backflushing and cleaning. For additional information, refer toTransmission Fluid Cooler — Backflushing and Cleaning in this section.
Page 10

10
2002 Taurus/Sable Workshop Manual
12/26/2010
http://www.fordtechservice.dealerconnection.com/pubs/content/~WS2H/~MUS~LEN/20/
...
 Loading...