

Page 1

C-Series FlexMedia Card: 36 Ports 10/100/1000 Base-T
Ethernet (PoE and non-PoE), 8 Ports 1G, 2 Ports 10G
Feature Highlights and Installation Instructions
Feature Highlights
• There are two versions of the FlexMedia card, differing only in Power over Ethernet (PoE) support:
• Catalog # LC-CB-10G-1G-36V (c
• Catalog # LC-CB-10G-1G-36T (ca
• 36 ports with RJ-45 connectors support auto-negotiat
• 8 ports use approved 1G Small-form F
• 2 ports use approved 10G Small-form Factor Pl
• SFP+ ports support SR and LR media modules (only Force
Note: FTOS 7.7.1.0 does not allow non-qualified SFP+ modules, which can cause board damage.
• The CB series line cards support th
• 12K Layer 3 IP forward information base (FIB)
• 16K Layer 2 FIB
• 768 Layer 2 access control list (ACL) entries
• 768 Layer 3 access control list (ACL) entries
• Support for online insertion and removal (OIR) of line card.
• Support for ingress Layer 2 and Layer 3 ACL processing across all ports.
Installation Notes:
• The chassis into which this line card is installed
and boot code 2.6.0.2 or later.
• Only the non-PoE version of the card works in a DC-powered chassis.
ard type E36VB): PoE support to 15.4 Watts/port on 10/100/1000 ports
rd type E36TB): non-PoE
ion or 10/100/1000 Base-T speed, full and half duplex.
actor Pluggable (SFP) optical transceivers.
uggable (SFP+) optical transceivers.
10-specific modules are recognized by the card.).
e following CAM configurations:
must be running FTOS version 7.7.1.0 or later
LED Description
Port Type Link Status (Left Side LED) Speed (Right Side LED)
10/100/1000Base-T Green blinking: Link detected/activity
Green solid: Link detected/no activity
Off: No link/card offline
1000Base-X Green: Operational/no activity
Green blinking: activity
Off: No link/card offline
100Base-FX Green: Operational/no activity
Green blinking: activity
Off: No link/card offline
Card Status LED Green: operational
Green blinking: booting/ diagnostics
Red: card problem
Unlit: in standby mode or power is off
101-00310-02
Amber solid: 1G speed
Amber blinking: 100M speed
Off: 10M speed
Green: On
Yellow: On
Page 2
Installing the Line Card
• The C-Series chassis requires at least one line card to operate.
• You can add, replace, or remove C-Series line cards without
operations (hot-swappable). Any line card can be inserted into any line card slot. Line card slots are labeled 0
to 7; these labels can be seen when the fan tray is installed.
• Blanks are required in empty slots to control a
containment during operation.
• The blank panels do not have board components or connector pi
slide toward the backplane.
• Use fiber optic cables and connectors in compliance with
11801 (2nd Edition) elsewhere.
irflow for adequate system cooling, personal safety, and EMI
interrupting the system power or system
ns. Align the blank with the guides, and gently
EIA/TIA 568 Standard in the US, and ISO/IEC
Caution: All cha
cards and blank panels immediately.
Installation Notes: The fan tray face panel has slot number markings for the RPMs and line
cards. Insert the fan tray before the line cards to simplify RPM and line card installation.
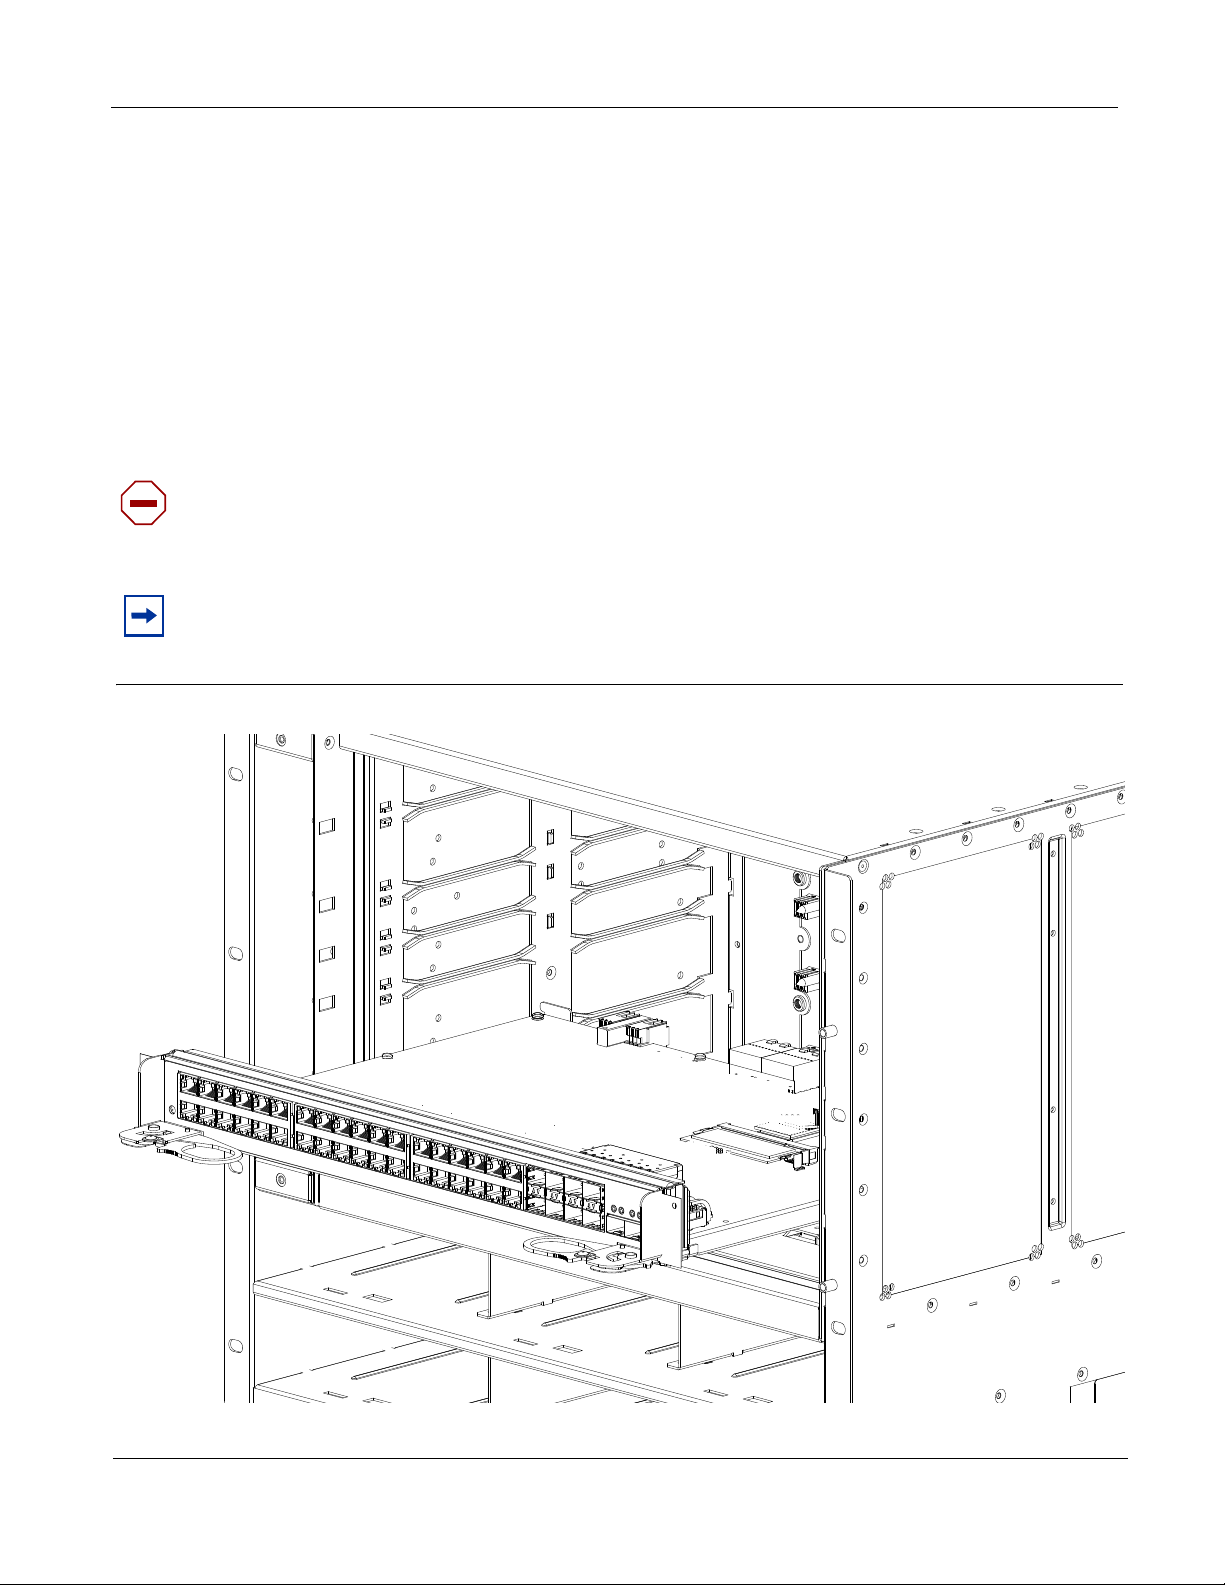
Figure 1 Installing a Line Card
ssis slots must be installed with operational modules or blanks. Always replace
2 101-00310-01
Page 3

Warning: Elect
rostatic discharge (ESD) damage can occur when components are mishandled.
Always wear an ESD-preventive wrist or foot-heel ground strap when handling line cards. Place
line cards on an antistatic surface when they are not installed.
Caution: Unlock the levers before inserting the line card into the chassis. Fully engage the
locking mechanism once the card has been inserted; not doing so will cause damage to the card
below when that card is inserted.
Step Task
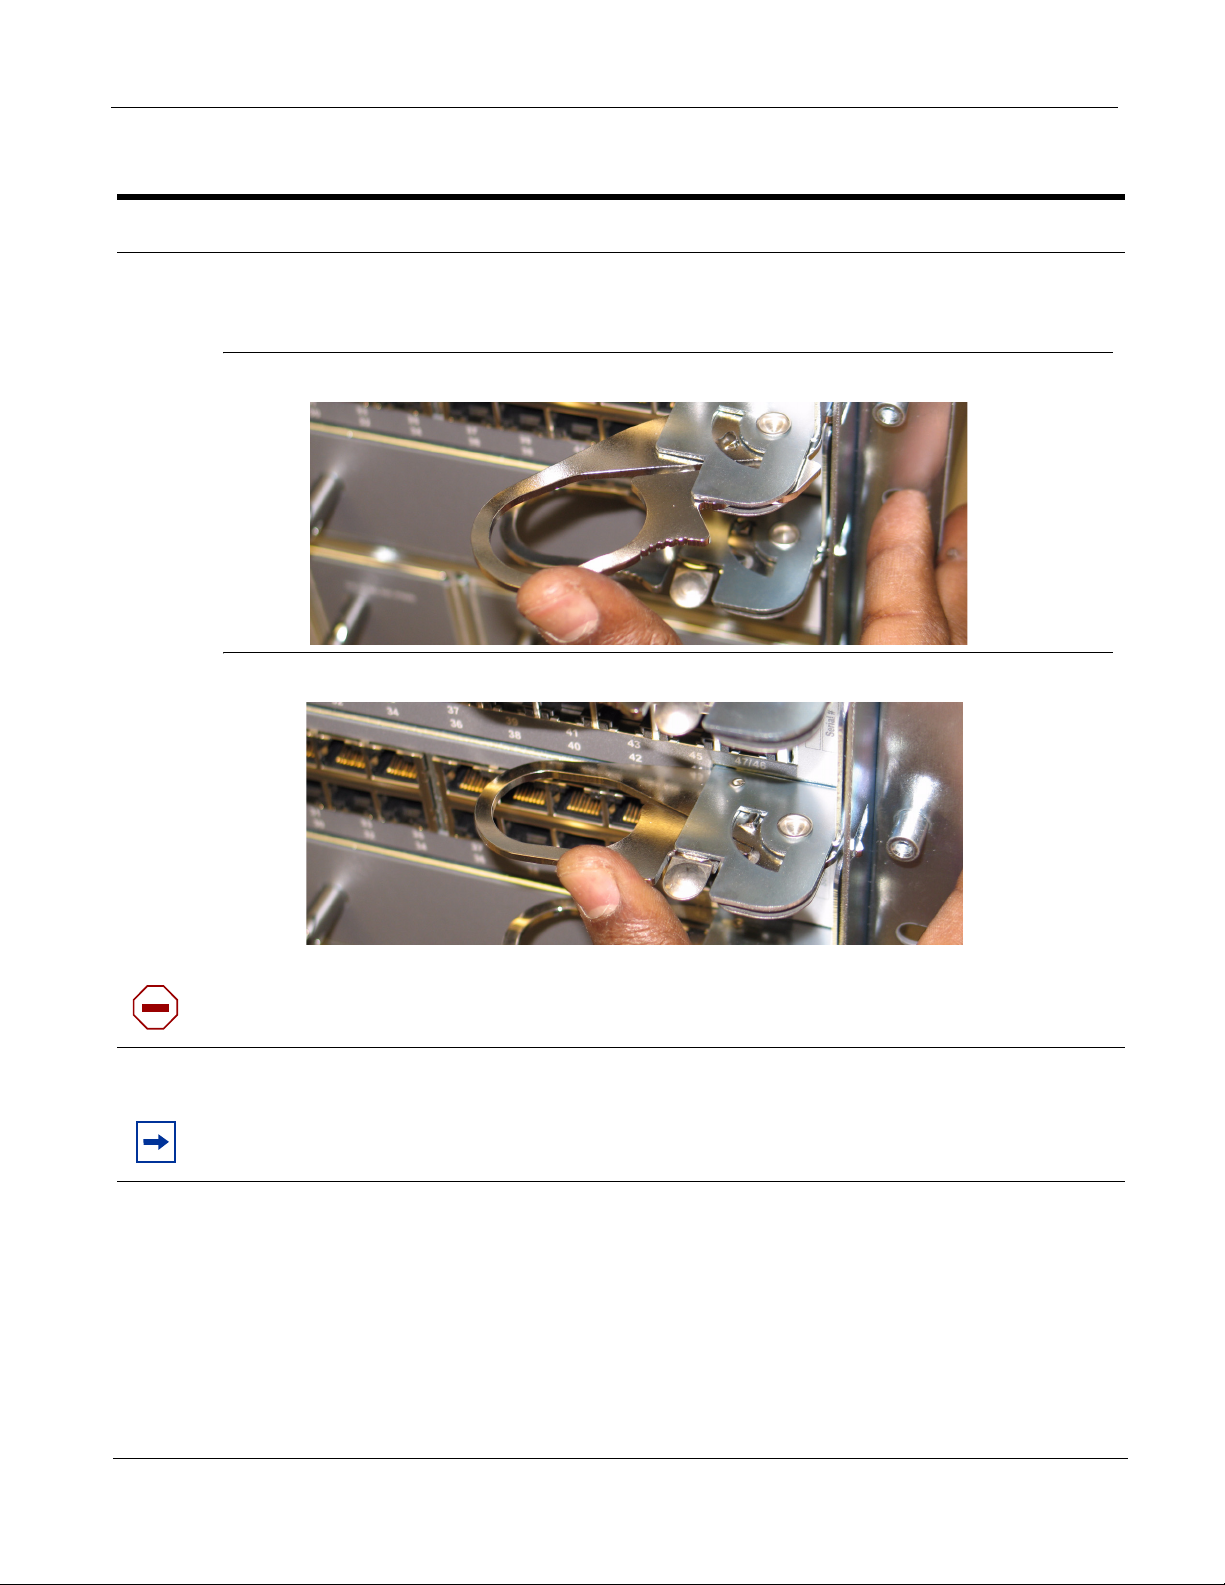
1 Extend the left and right card levers by first pressing gently down on the thumb tabs (see Figure 2) in
the ejector levers and then pulling the ejector
position. See Figure 3.
Figure 2 Depress the thumb tabs
levers simultaneously until they are in the open
Figure 3 Extend the levers
2 Hold the card assembly by the metal carrier edges. Avoid touching the printed circuit board and
connector pins.
3 Align the card with the guide, and gently
into the slot.
slide it into any line card slot until the card is about halfway
Installation Notes: Use the markings on the fan tray to determine which slots are for the
RPMs and which are for the line cards.
101-00310-01 3
Page 4
Step Task
4 Continue sliding the line card until you feel the connectors engage with the chassis backplane.
5 Rotate the levers towards the card to seat the backplane connectors and line card in place. Push on
the
knurled section of the levers until the thumb tabs pop up and lock the unit in place. See Figure 4
and Figure 5.
Figure 4 Close the levers.
Figure 5 Press the knurled section of the lever.
Caution: Installing a card without fully engaging the locking mechanism will damage the
EMI seal on the card below it when that card is inserted.
6 Install a blank panel in all slots that do not have a line card and secure it with the screws provided.
Installation Notes: The blank panels for RPMs and line cards are different sizes (RPM
blanks are smaller); be sure that blank panels are installed in the correct slots.
4 101-00310-01
Page 5

Removing Line Cards
Warning: Do not remove a panel blank unless you are ready to install a line card into that slot.
After removing a line card, immediately place a panel blank in the empty slot. Blanks are required
to control airflow and electromagnetic interference.
Step Task
1 Unplug the network interface cables connected to the line card.
2 Extend the left and right card levers by first pressing gently down on the thumb tabs (see Figure 6) in
the ejector levers and then pulling the ejector levers simult
See Figure 7.
Figure 6 Depress the thumb tabs.
aneously until they are in the open position.
Figure 7 Extend the levers.
3 Pull the card by the card levers until it is out of the slot. Avoid touching the printed circuit board and
connector pins.
4 If you are not replacing the card imme
diately, install a blank panel.
101-00310-01 5
 Loading...