

Page 1
UNDER SINK RO
Concealed Reverse Osmosis Water Purifier
Fresh & Safe Water
User Guide
Page 2

Dear Customer,
Congratulations! By choosing a Forbes Water
Purification System for your family, you've given them
the most precious gift of all, the gift of good health. As
many as 80% of all human diseases are waterborne
and Forbes water keeps your family safe from them.
Forbes is the only water purification system that has
been tried and tested by over 105 laboratories in the
USA, UK, India and South Africa. More importantly, it
has the complete trust of 40 million people, who drink
only Forbes Water.
Your new Forbes Under Sink RO is equipped to not
only give you pure drinking water, but also revive the
original taste of water. What's more, it is designed to fit
under the kitchen sink and be invisible.
For more information on your new Forbes Under Sink
RO please go through this manual.
Page 3

Contents
Why Forbes Under Sink RO? 3
Enjoy pure water and pure space in your kitchen 5
Know your Forbes Under Sink RO 6
The unique RO (Reverse Osmosis) process 7
Here's how your Forbes Under Sink RO works 8
Here's what makes your Forbes Under Sink RO truly unique 9
Installing your Forbes Under Sink RO 10
Installation of Water Supply Connector 11
Installation of RO Membrane 12
Maintaining your Forbes Under Sink RO 13
Service Instructions 14
Sanitising Instructions 15
Troubleshooting Guide For Your Forbes Under Sink RO 16
Recommended Maintenance 18
Automatic control system with low and high pressure 19
Special Safety Valve in RO 20
Recommended Filter Change Schedule 20
Recycling water flushed by your Forbes Under Sink RO 21
The Forbes Total Advantage 22
Technical Specifications 23
Questions you may have about RO technology 24
Page 4

Why Forbes Under
Sink RO?
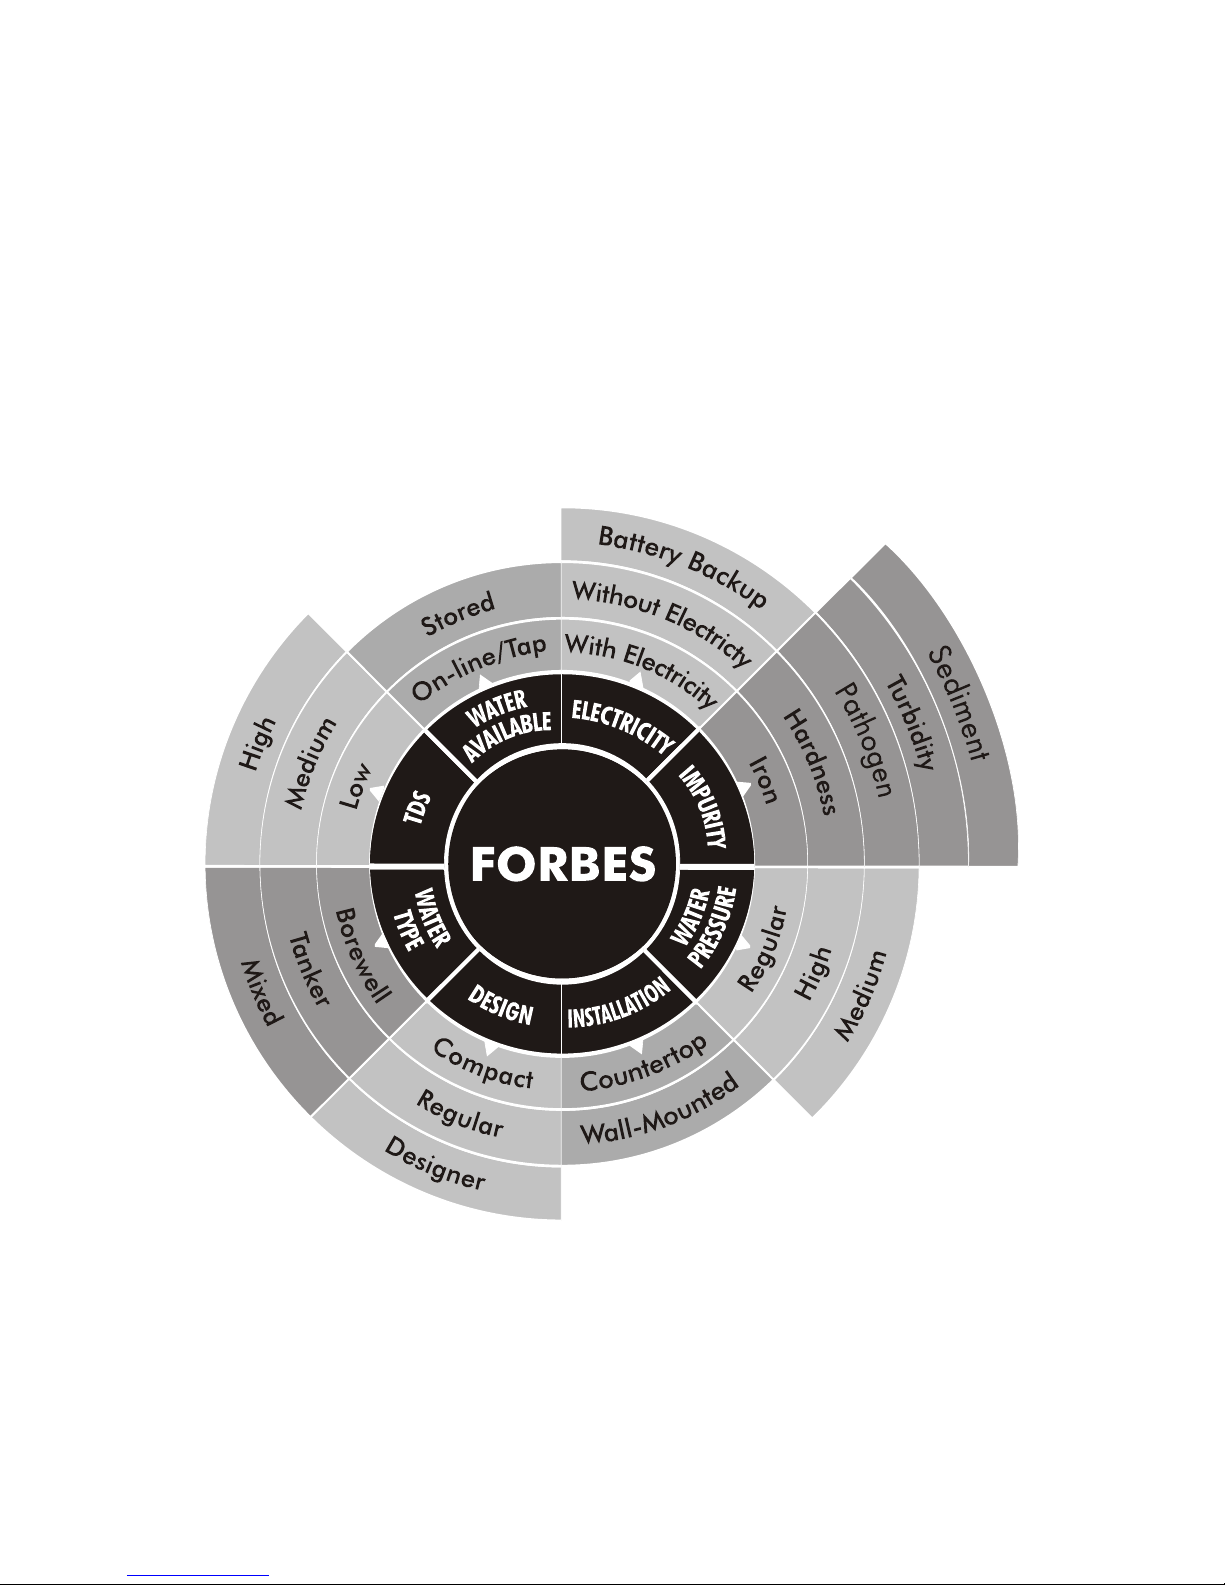
Only Forbes has,
- 7 technologies that cure 17 water problems
- Over 29 years of experience
- Backing of 105 water testing labs worldwide
- Technology equipped to purify borewell, mixed, tanker, stored
and tap water
- The trust of 8 million families across the world
- Guaranteed purity in every drop
3
Page 5
4
Why Forbes Under
Sink RO?
Page 6

5
Enjoy pure water and
pure space in your
kitchen.
Forbes brings you the revolutionary Under Sink RO. A state-of-the-art
RO purifier, designed to fit under your kitchen sink! Which means
that apart from giving you pure, sweet water, it doesn’t occupy
space on your counter or wall.
Equipped with Reverse Osmosis technology, Under Sink RO
removes pesticides, chemicals, bacteria, viruses and the excess
TDS from your water, and stores the purified water in a 12 litres highpressure tank. Ensuring that you get purified water, without your
purifier even being seen. After all, it’s invisible!
Page 7
6
Know your
Forbes Under Sink RO
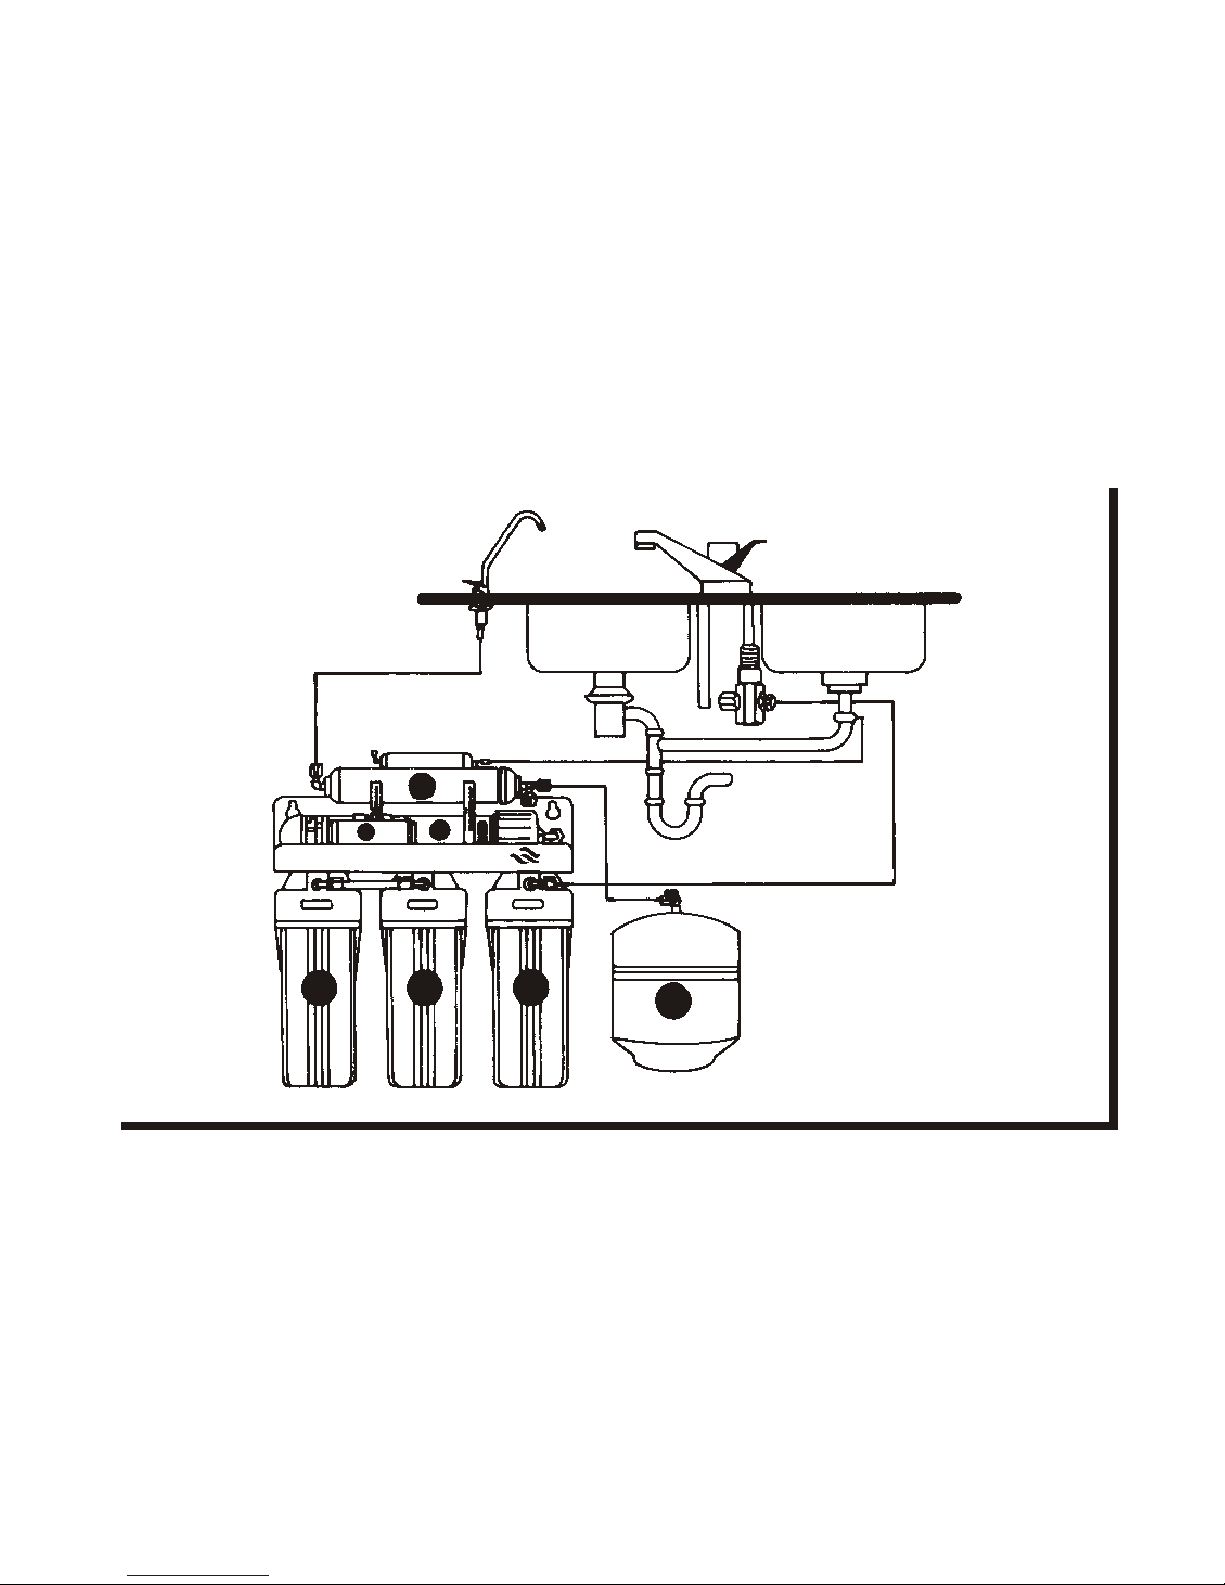
1) Pre-Filter
2) GAC or Pre-Filter – Granule Carbon Filter
3) ACB Filter – Activated Carbon Filter
4) Booster Pump
5) Membrane
6) Tank
7) Post-Carbon Filter
a) Connect the tube from water supply valve to 1st housing
b) Connect the tubing from post-carbon filter to faucet
c) Drain tubing to drainage
123
6
7
4 5
Page 8

7
The unique RO
(Reverse Osmosis)
process
Your Forbes Under Sink RO is equipped with a multi-stage unique
RO (Reverse Osmosis) purification process, to give you pure, fresh
water. Reverse Osmosis is a membrane filtration process in which
the water is passed under high pressure through an advanced Thin
Film Composite (TFC) Membrane with a 0.0001 micron pore size.
The output of the membrane is purified water, free from microorganisms and with reduced Total Dissolved Solids.
Page 9

8
Here’s how your
Forbes Under Sink RO
works
Your Forbes Under Sink RO has a multi-stage filtration and purification process
for water that’s pure, with improved quality and taste.
1. First, the water passes through a 5 micron polypropylene sediment pre-filter which
removes suspended material such as sediments, insects, asbestos, fibre, rust and
dust particles bigger than 5 microns in size (Replace every 1 year).
2. Then the Granular Activated Carbon (GAC) filter absorbs heavy chlorine and chlorine
by-products such as chloramines, THM and TCE (Replace every 1 year).
3. After this, the Carbon block filter removes any additional chlorine and organic matter
from water without release of carbon fines. This prepares the water to enter the reverse
osmosis element (Replace every 1 year).
4. Post this, a thin film composite (TFC) Reverse Osmosis (RO) Semi-permeable
membrane with booster pump pressure separates the purified water from the rejected
impurities like arsenic, lead, fluoride and dissolved solids, bacteria and viruses down
to 0.0001 micron. The water is stored in the storage tank, while the reject water is
automatically flushed down the drain.
5. In the final stage, a 6 inch post-carbon one-micron removes any dissolved gases, bad
taste and odour from the water. Now, you have drinking water that is pure and
absolutely safe.
Page 10
9
Here’s what makes your
Forbes Under Sink RO
truly unique
Invisible
The unit is designed to fit under the sink, thereby it is not seen.
Saves Space
The unit can be stored under the sink, thereby saving kitchen space.
High Storage Capacity
12-14 litres storage capacity.
Self-cleaning System
Ensures superior and effective membrane performance
by auto-cleaning regularly.
High Pressure Switch
Automatically shuts off the pump and stops the flow of water when the
storage tank is full.
Page 11

Installing your
Forbes Under Sink RO
Preparation:
Before you install, check the following list of components to ensure that all parts are
packed with your Forbes Under Sink RO unit.
1) Storage Tank
2) RO System
3) Faucet and Faucet mounting bracket
4) Installation Kit
After this:
• Determine the location for the faucet. Check to see that drilling the faucet hole will not
damage pipes or wires running underneath the sink.
• For upper sink fitting, use the faucet mounting bracket.
• Determine the location for the storage tank. A maximum distance from the tank to the
faucet is 15 feet. The system will produce a faster flow at the faucet with the shortest
tubing run from tank to faucet.
• Do not place the unit where it will be exposed to freezing and/or direct sunlight. Mount
the unit on the side of the cabinet using bracket (attached to the unit) and two screws
(provided in the kit).
10
Page 12
11
Installation of
Water Supply Connector
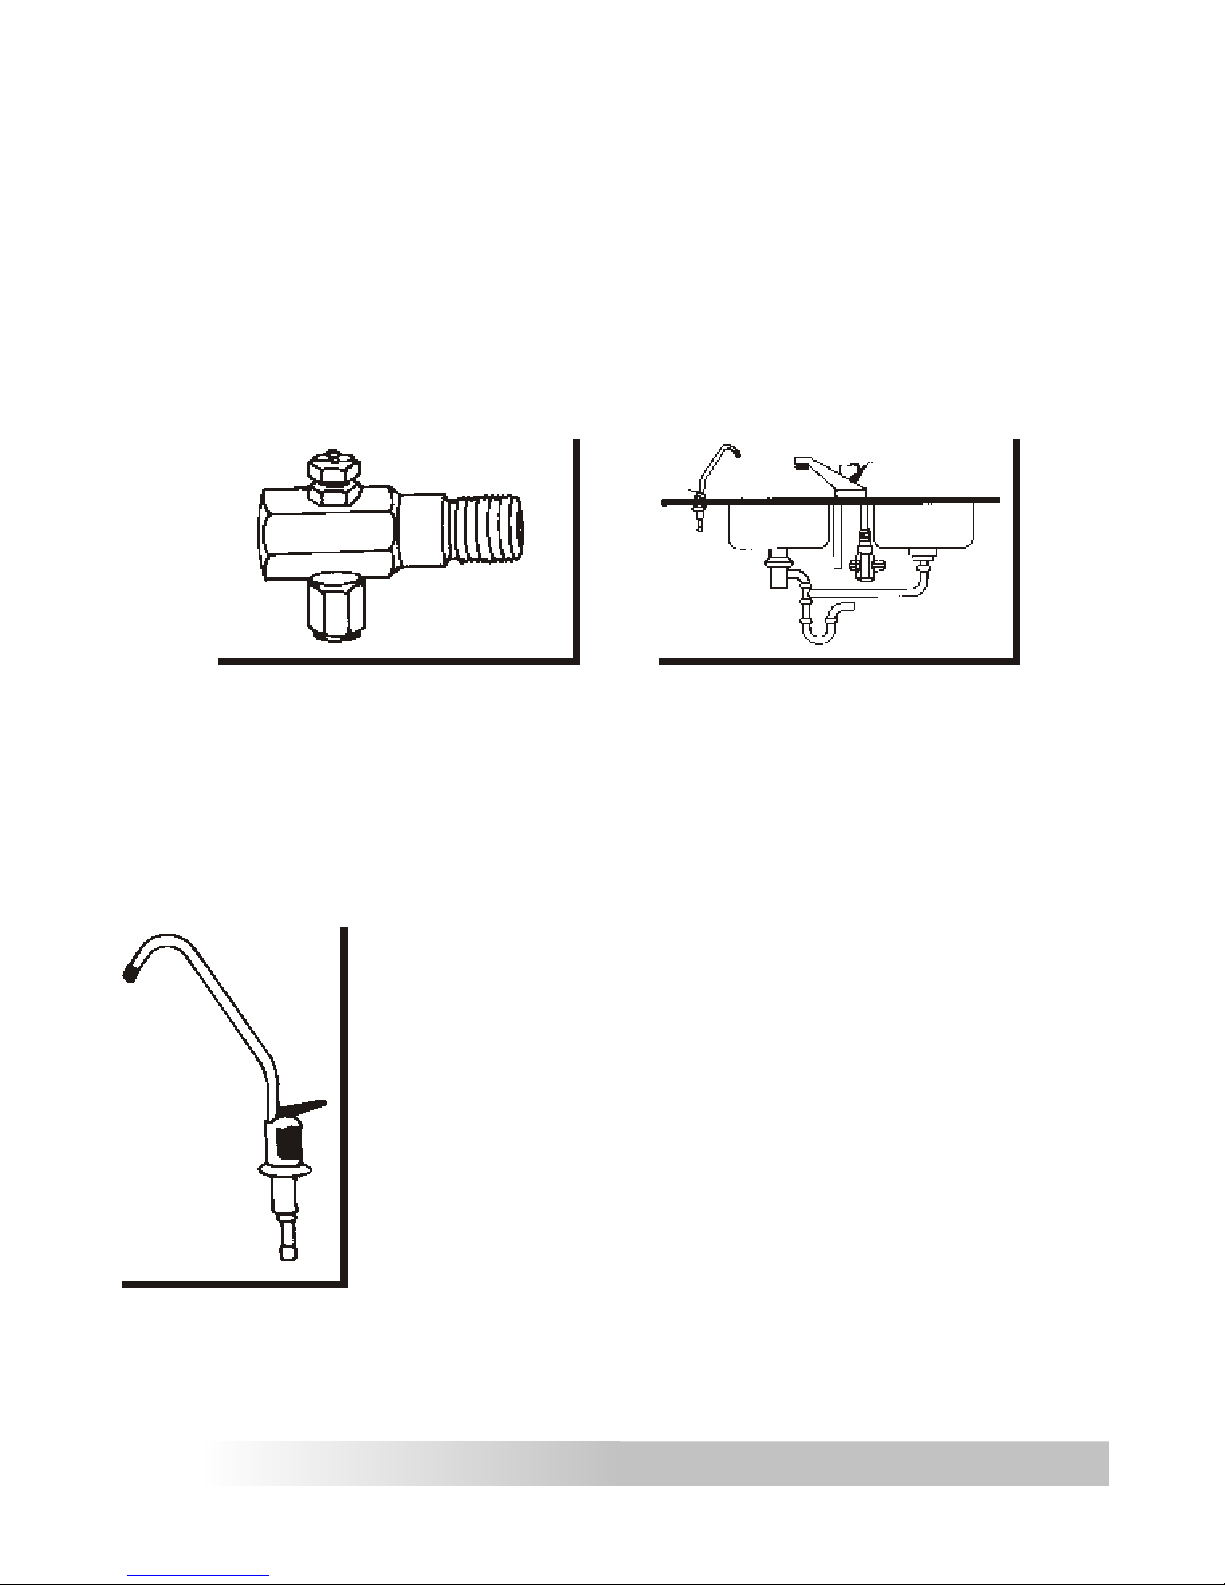
Make sure that you hook up to the cold water tap. Determine the location for the installation of
the RO system. Avoid locations where the system might come in contact with hot water pipes
or other hazards like sunlight.
The water supply connector comes with the Forbes Under Sink RO unit in the installation kit.
1) Disconnect the water supply
line from the cold water tap,
attach and tighten water supply
connector assembly.
2) If you install above the sink,
then remove your existing
overhead water tank top, attach
and ti g hte n water supply
connector assembly.
NOTE: Use an insert when connecting the tube to the faucet.
Mounting the Product Water Faucet
Your Forbes Under Sink RO unit comes complete with a long reach faucet.
The product water faucet may be installed on any flat surface at least 2
inches in diameter. Check the inside of the location for interference.
Faucet mounting bracket is provided in the installation kit. This can be
mounted on any wall. Install the mounting bracket on wall, then mount the
faucet.
1) Slide the chrome cover plate and rubber gasket on to the stem of the
faucet and place faucet on to the sink/mounting bracket on wall, then
mount the faucet. For mounting on sink, you may need to drill a hole.
2) Place metal washer and lock washer over threaded stem of faucet and
tighten nut from under the counter surface to lock the faucet into place. DO
NOT OVERTIGHTEN.
3) Connect the tube to the faucet stem under the count/faucet bracket.
Page 13
12
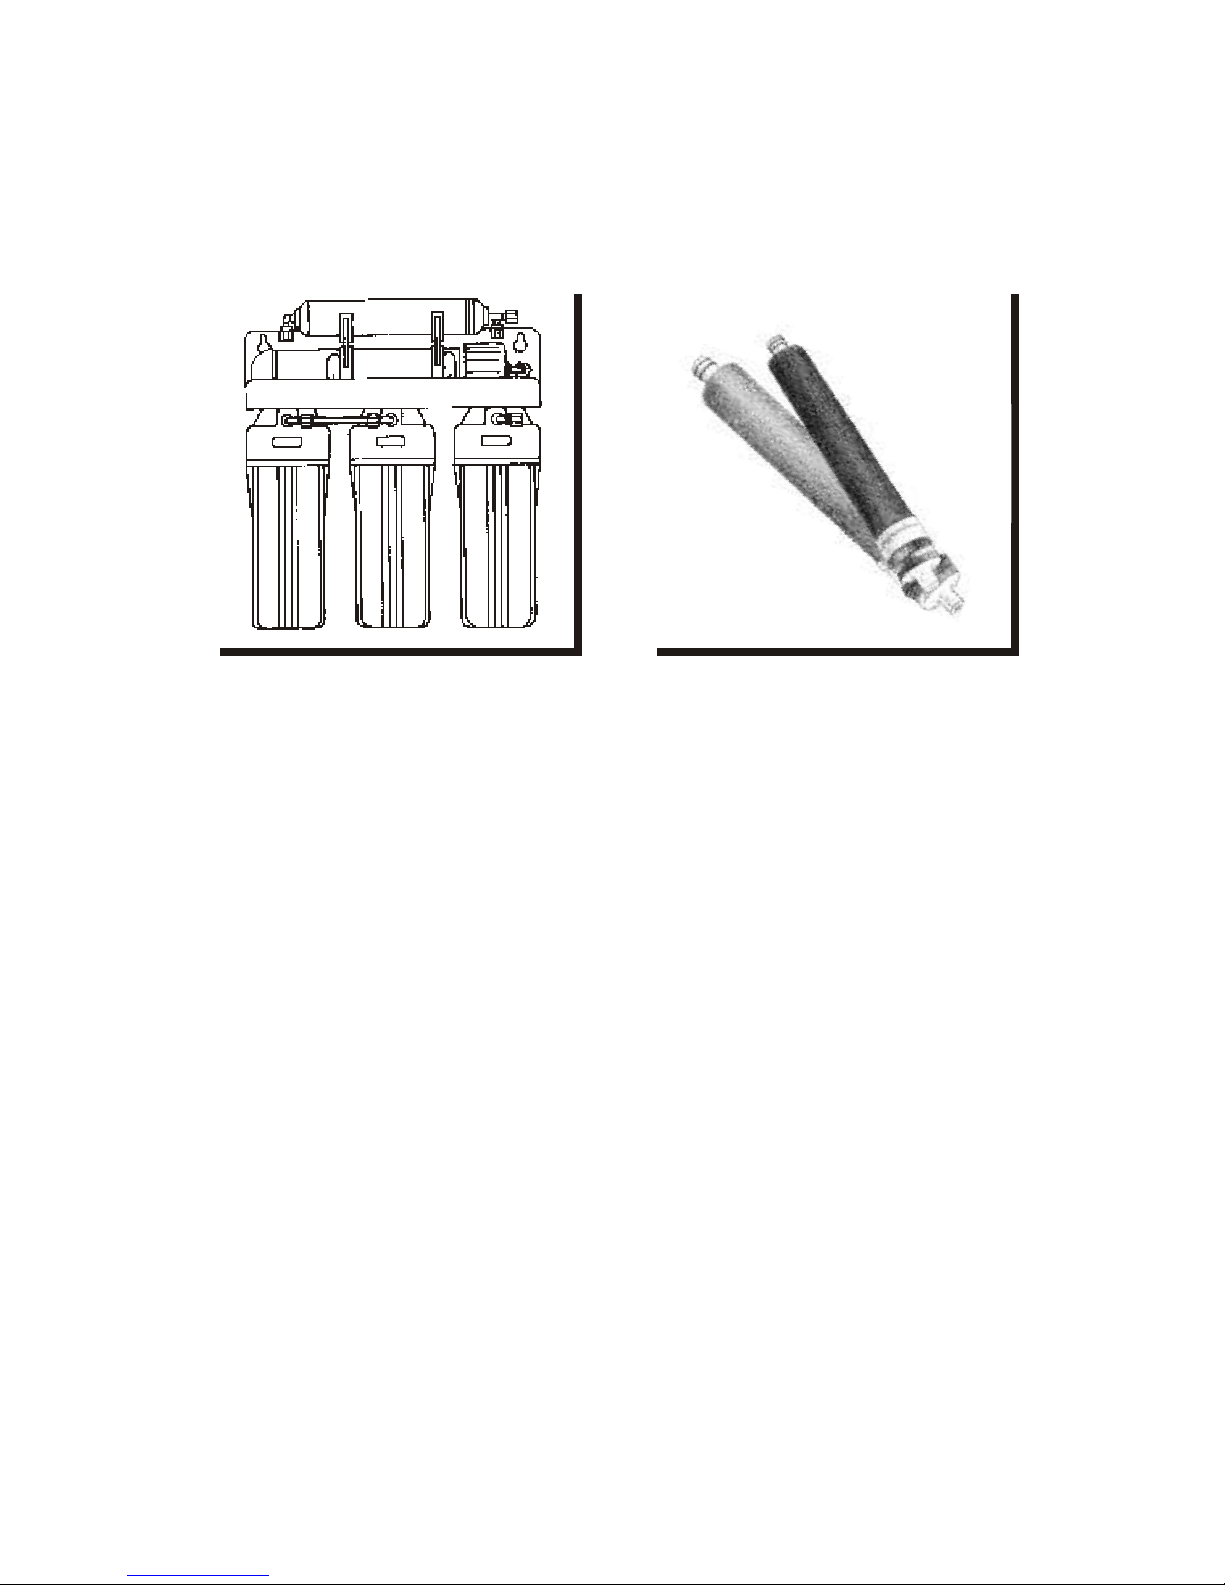
CAUTION: Original packing is to prevent membrane damage during transit.
1) Remove the membrane housing cap.
2) Install the membrane by carefully pushing the spigot end into the socket at the far end
of the housing until completely in. BLACK ‘O’ ring end should be on cap side.
3) Replace housing cap.
MOUNTING THE PURIFICATION ASSEMBLY
1) Mark screw location at the desired positions with the use of provided label of
marker guides.
2) Screw wood/plastic screws supplied with the unit into marked positions. Leave screw
head out a little.
3) Adjust the plant cover on the screw with hole on cover, then mount the RO plant
assembly onto screws.
Installation of
RO Membrane
Page 14

13
Maintaining your
Forbes Under
Sink RO
1) With everything connected, turn on the water to
check for any leakage.
2) Make sure the storage tank shut-off valve is OFF.
Open the sink top faucet.
3) Within a few minutes (up to 15 minutes) the water
will start to run from the faucet slowly.
4) Let the water run for at least 30 minutes. This
flushes the carbon filters on first-time use.
5) After the initial flushing, open the shut-off valve of
the tank and close the sink top faucet.
6) Tank will not get filled (it takes usually 1 to 2 hours).
After the tank has filled, open the sink top faucet
and drain all the water until the storage tank is
empty and there is only a small flow from the sink
top faucet. DO NOT USE FIRST TANK WATER.
7) Close the sink top faucet. The system is now
ready for use.
Page 15

14
Service Instructions
Pre-filter replacement
1) Turn off water supply and open flush valve.
2) Unscrew the WHITE pre-filter with wrench.
3) Replace pre-filter.
4) Clean housing, if necessary with a mild chlorine/soap solution. Rinse away all
chlorine/soap before reassembly. Use a soft cloth, do not use abrasive material.
5) Before reinstalling pre-filter, make certain ‘O’ ring is seated in housing.
RO Membrane element replacement
1) Turn off water supply.
2) Determine type of membrane needed.
3) Disconnect tubing and unscrew RO housing end cap.
4) With a pair of pliers, grip membrane end and pull out. A small amount of twisting may
be needed.
5) Clean housing, if necessary with a mild chlorine solution. Rinse away all chlorine
before re-assembly.
6) Insert membrane in housing and firmly push while also rotating slightly. When pushing
in you will feel the membrane has stopped. With a little more pressure and turning
action the membrane will go in further about ‘3/8’ of an inch. When this occurs the ‘O’
ring has been properly seated.
7) Wet and install the ‘O’ ring on the housing end-cap. Glycerine, if available, may be
used as a lubricant if necessary.
Post-filter replacement
1) Turn off water supply.
2) Close ball valve on holding tank and then open RO faucet.
3) Disconnect tubing to filter.
4) Lift plastic retainer clamps on post-filter and rotate clamp clear.
5) Remove end fitting.
6) Remove all Teflon tapes from inlet/outlet post-filter fittings.
7) Replace post-carbon filter.
8) Re-wrap with new Teflon tape.
9) Re-install end fitting.
10) Reconnect faucet line.
11) Secure clamp.
12) Turn on raw water and open storage tank ball valve.
13) Open and close faucet rapidly to discharge all traces of carbon.
Page 16

15
Sanitising
Instructions
1) Make a mild cleaning solution of chlorine bleach
and potable water in the plastic bowl.
2) Turn off RO system, drain storage tank and
remove membrane element and pre-filter and
post-filter.
3) Membrane element must remain wet. Put
membrane element in a plastic bag.
4) Fill empty pre-filter housing with sanitising solution
and turn on raw water. After the tank is full, let the
system stand idle for approximately 10 minutes
5) Turn off water.
6) Drain storage tank via the RO Faucet.
7) Re-install new pre-filters and membrane element.
8) Replace post-filter.
9) Disconnect lines to faucet and put approximately
10 drops of sanitising solution in these lines and
reconnect.
10) Flush carbon fines and bleach from lines after the
system has started purifying water again.
Page 17

16
Troubleshooting Guide For Your
Forbes Under Sink RO
No. Symptom Probable Cause Solution
No water production, low
production
1. Tank Air Pressure too high
2. Water supply turned off
3. Low water pressure
a. Pre-filter clogged
b. RO Element damaged
or fouled
4. Plugged post-filter
5. Increased raw water
TDS level
6. Low raw water temperature
7. System undersized for
application
8. Flow restrictor clogged
1. Set tank at 5-7 psl (empty)
2. Turn on water supply
3. a. Change pre-filter
b. Change or replace
RO element
4. Change post-filter
5. Increase raw water
pressure
6. Increase raw water
pressure or install 10 feet
coil or ¼” tubing prior to
pre-filter in heated space
7. Replace element with
large capacity unit and/or
add second storage tank
8. Clean or replace flow
restrictor check for
biological or iron fouling
1.
Low or poor water quality
Bad Taste
1. All of the above with
particular emphasis on
flow restrictor, TDS, water
temperature and pressure
2. RO Water stood too long
in tank
3. Bacteriological fouling
4. Membrane fouling
a. Brine seal linking
b. Product water ‘O’ ring
leaking
c. Product water check
valve failure
1. Post-carbon filter
exhausted
2. System fouled by
micro-organisms
3. Storage tank bladder
ruptured
1. See number 1 solution
2. Open faucet to drain tank
3. Sanitise system
4. Requires further
pre-treatment and/or new
membrane
a. Check membrane
Brine seal
b. Check product water
‘O’ ring
c. Replace check valve
1. Change post-carbon
filter
2. Change post-carbon
filter/sanitize system
3. Replace bladder and
sanitise
2.
3.
Page 18

17
No. Symptom Probable Cause Solution
Flow restrictor clogging
1. Bacteria fouled
2. Raw water excessively
turbid
1. Sanitise system
2. One or more additional
micron
4.
Bad odour in production
water
1. System biologically
contaminated
2. Post-filter exhausted
3. Raw water excessively
turbid
1. Sanitise system
2. Replace post-filters
6.
Low product water pressure
1. Final filter clogged
2. Low air charge in storage
tank
a. Water temperature has
dropped
1. Change final filter
2. Increase tank air charge
a. Same as above
7.
External leaks 1. Tubing not cut square
before inserting into
parker fast and title fitting
2. ‘O’ rings need more
lubricant
a. ‘O’ rings need more
lubricant
3. Fitting loose
1. Cut off 3/8” of tubing and
assemble
2. Replace ‘O’ rings
a. Use silicon based
lubricant on all
‘O’ rings except flush
valve. It requires
Vaseline, Petroleum
Jelly as Lubricant
3. Tighten fitting
8.
Carbon fines in production
water
1. Coming from post-carbon
filter
1. Cycle faucet on/off until
carbon is flushed clean
5.
HELPFUL INFORMATION
RO production is based on water TDS of 1000 ppm NaCL, 80 psl, 77 F. When checking water
quality, ALWAYS check it directly for the membrane element, NOT the RO faucet. To do this, turn off
ball valve on storage tank. Keep RO faucet closed. Disconnect line on storage tank. Wait for 5-10
minutes and check product quality.
Waste water to product ratio should run approximately 3:1. This ratio can vary and is dependant on
TDS, water temperature, raw pressure and membrane performance.
Page 19

18
Recommended
Maintenance
1. MEMBRANE FLUSHING
The manual flushing valve system enhances a membrane’s life. Daily, switch on the
membrane flushing valve for 2 to 5 minutes to flush the membrane.
WARNING: Shut the membrane flushing valve immediately, after flushing, to get the best
result, otherwise the unit may fail in giving its utmost performance.
2. SEDIMENT PRE-FILTER
The pre-filter protects the system and should be maintained regularly. A clear housing has
been provided for your convenience. The snow-white pre-filter should be changed when
the outside discolours. The life of the pre-filter will depend upon the condition of your water
supply and should be checked at a 6 months’ interval until the filter’s life is established.
3. GAC AND CARBON BLOCK
Designed to remove chlorine from the water supply, as well as organic and inorganic
substances before entering the TFC membrane (average life - 12 months).
4. POST-CARBON
The post-filter should be changed when you experience unusual taste and/or odour to the
water. It has a normal life of 12 months.
5. MEMBRANE
The high quality thin film composite membrane should last for 12 months depending on
the quality of your local water.
6. STORAGE TANK
Drain your storage tank twice each month to extend the membrane life and have the
freshest water in the storage tank. To drain, lift the faucet handle into the parallel position
with the spigot until the water flow stops from the tank. Return the faucet handle to the
closed position and the tank will refill in 2 hours. It is best to drain the system before retiring
for the night.
Page 20

Automatic control
system with
low and high
pressure
When the storage tank has reached capacity,
the automatic shut-off valve stops the flow of
water entering the system thereby conserving water.
As the water is drained from the storage tank,
the flow is allowed to resume through the system. The
cycling procedure works automatically by the water
pressure difference.
Stores up to 12-14 litres of purified water
Produces enough purified water
19
Page 21
20
Special Safety Valve in RO
The safety valve is a multi-functional element which can carry out all the functions to
regulate the flow rate. So, if a safety valve is fitted in a system, it eliminates the need of
a check valve, a 4-way shut off valve as well as a flow restrictor. The flow restrictor’s
function is to regulate the flow rate.
A 4-way shut-off valve is not required as the high pressure switch gets operated at 35/40
psi at the tank and will switch off the booster pump so the waste flow gets stopped. This
avoids unnecessary wastage of water because the safety valve allows water to come out
only at 55/60 psi which will never happen as it enhances the life of the filter.
Check valves work as non-return valves, to avoid final water from entering again in the
membrane as the maximum pressure at tank is 35/40 psi, and the safety valve gets
operated 55/60 psi so the function of N.R.V. is done by the safety valve itself.
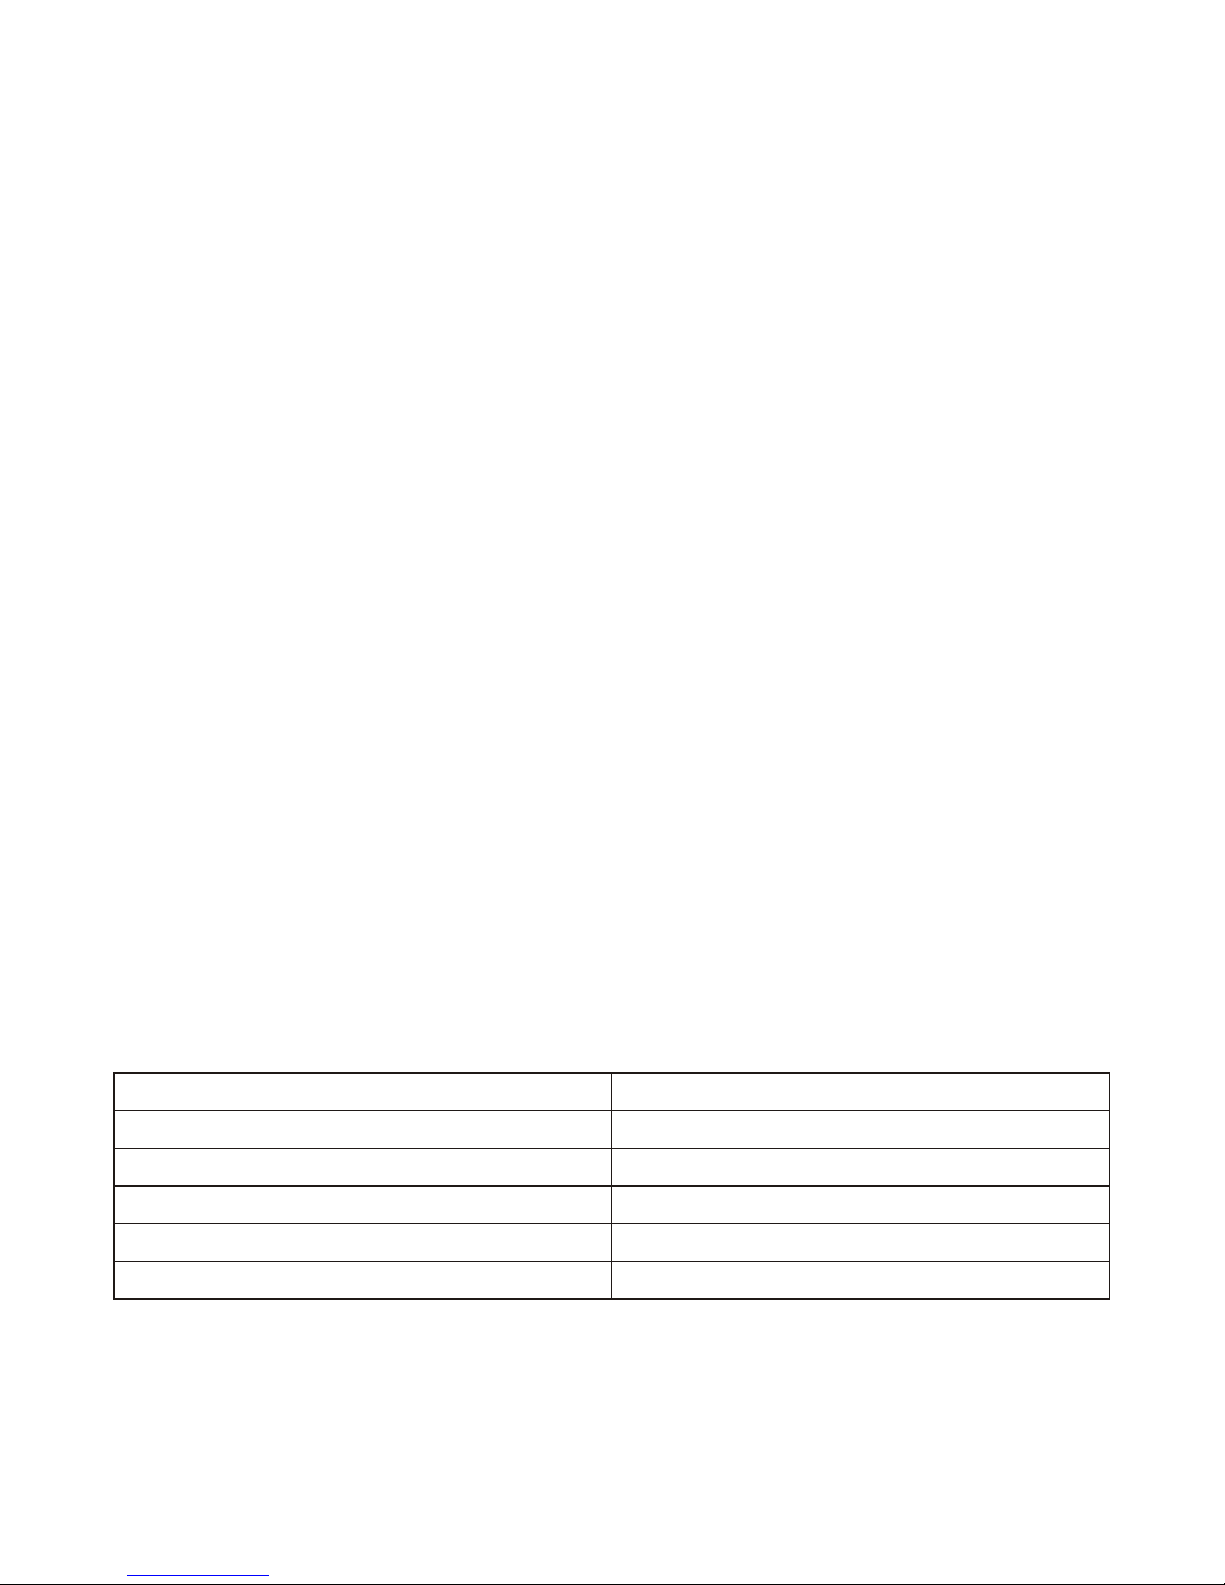
Recommended Filter
Change Schedule
FILTER FREQUENCY
1st stage 5 micron sediment pre-filter 12 months
2nd stage GAC filter 12 months
3rd stage Carbon pre-filter 12 months
4th TFM membrane 12 months
5th stage Final carbon 12 months
Page 22
21
Recycling water
flushed by your
Forbes Under
Sink RO
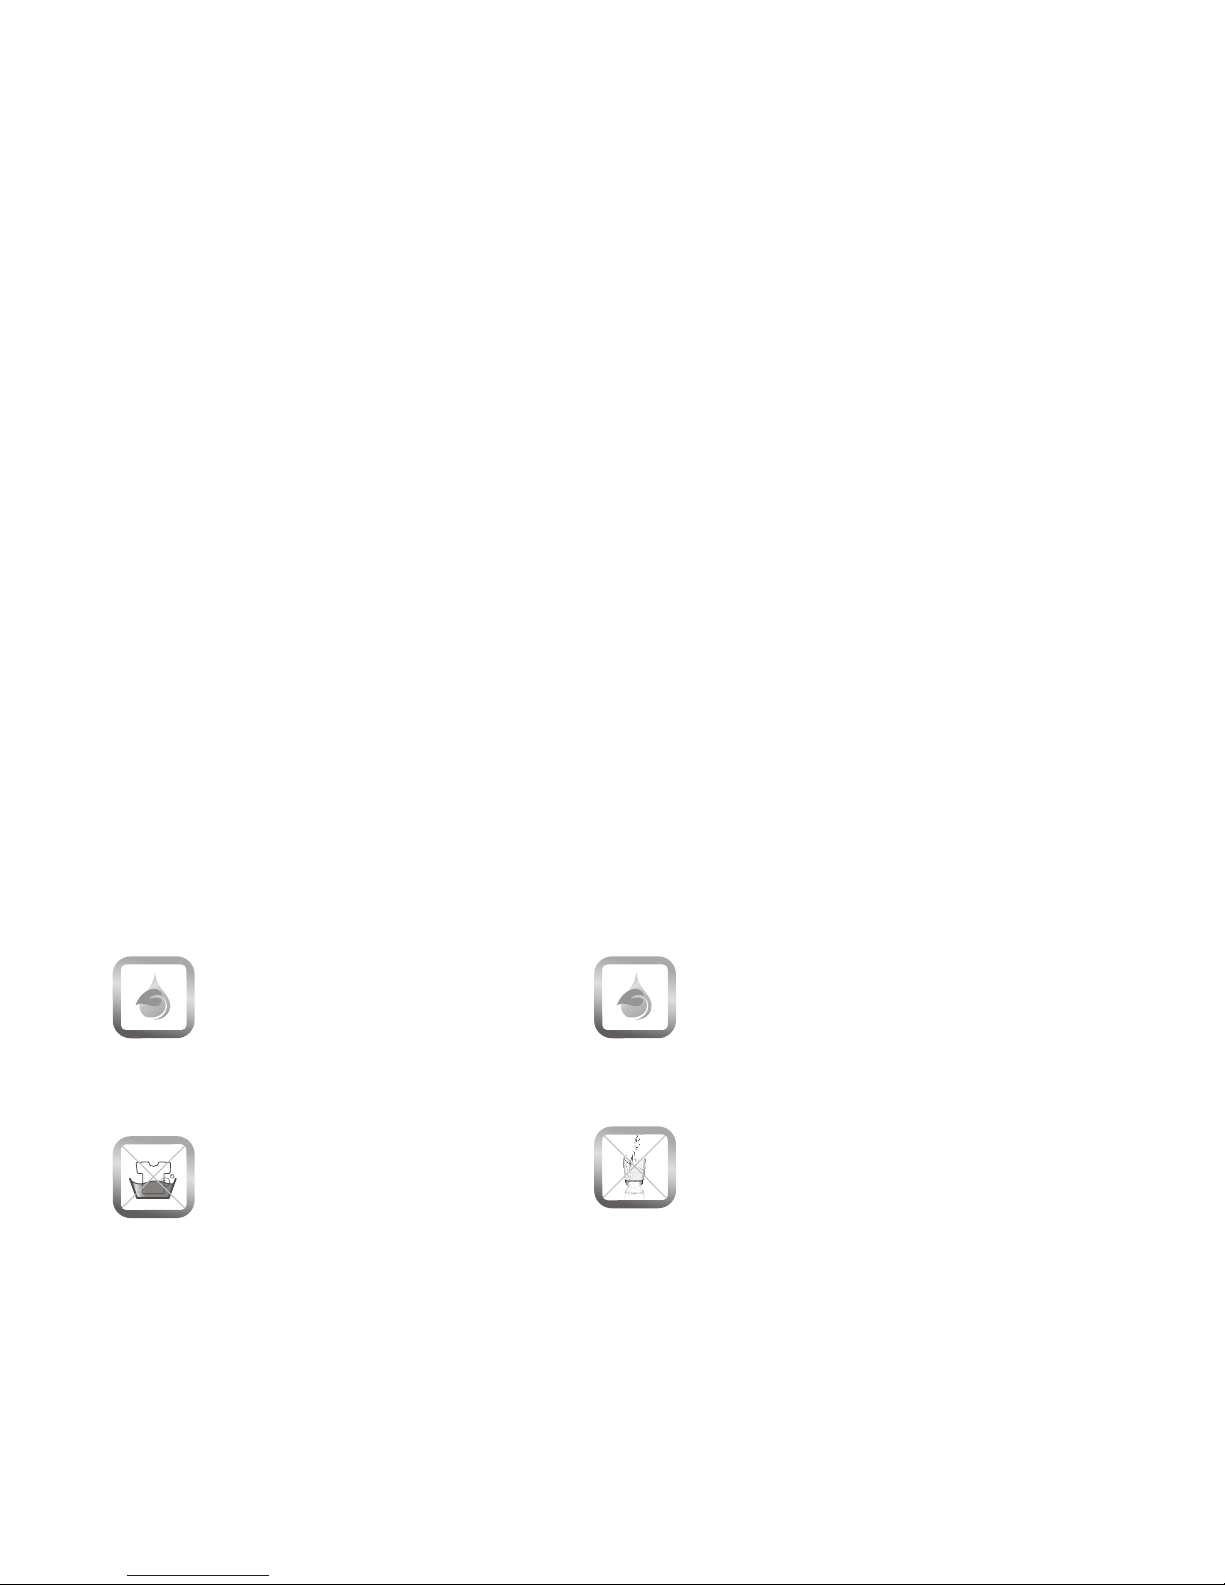
Water is a rapidly depleting resource. It is our moral
responsibility to ensure that water is recycled as much
as possible. The water flushed by your Forbes Under
Sink RO can be used for several purposes
Watering plants
Washing clothes
Daily ho usehold cleanin g, like
mopping floors, cleaning bathrooms,
kitchen sinks etc.
Drinking
Flushed water can be used for
Flushed water cannot be used for
Page 23
22
The Forbes
Advantage
Certified by over 105 labs internationally.
Selected as Reader's Digest Most
Trusted Brand - Platinum Category.
Manufactured at ISO 9001 certified
manufacturing facilities.
Recipient of UNESCO-Water Digest
Award for Best RO.
Page 24

S. No. Parameter Specification
1 Dimensions (W x D x H) in mm 370 x 190 x 470
2 Net Weight 14.5 kg
3 Tank Capacity 12 litres
4 Purifying Technology Reverse Osmosis
5 Stages of Purification Particulate Filter
Pre-active Silver Carbon Cartridge
Clarity Cartridge
RO Membrane
Post-active Silver Carbon Cartridge
6 RO Membrane TFC Spiral
7 Power Rating 36 watts
8 Input Water Pressure 0.6 - 2 kg/sq.cm
9 Input Voltage 230 V AC / 50 Hz
0 0
10 Input Water Temperature Min. 5 C and Max. 45 C
Notes: *Technical Specifications are subject to change without prior notice
Technical Specifications*
23
Page 25

24
Questions you may have
about RO technology
What is Reverse Osmosis?
Reverse Osmosis (RO) is the reversal of the natural flow of osmosis. In water purification
systems, Reverse Osmosis is used to separate the salts and other heavy metals from pure
water.
What is Forbes Under Sink RO?
Forbes Under Sink RO is a domestic RO system that uses Reverse Osmosis to remove
TDS, lead, microbiological contaminants, heavy metals, etc. dissolved in water. The result
is pure, safe water that tastes good and is healthy to drink.
How do I know which purifier I need for my home/office?
Water treatment is like any other treatment of your health - you first need to know what's
wrong with your water, before you treat it. Forbes, the leader in water purification for 29
years, has a range of products using different technologies - ranging from RO, NF to UV
to UF.
Is RO better technology compared to Ultraviolet (UV)?
Different water quality needs different treatment technology. So if your water has microbial,
organic and physical contamination, a UV purifier is ideal. However, if your water, in
addition to the above, also contains TDS, heavy metals and other pollutants, you will
need to install a RO purifier. Both technologies are good and they each serve a
different purpose.
Why does the Forbes Under Sink RO need frequent cleaning/service?
The Forbes Under Sink RO is your family's protection against waterborne diseases. Its
various filters and the membrane cartridge inside your water purifier are constantly working
to remove/trap physical impurities, organic and inorganic contaminants, bacteria, viruses
and heavy metals, TDS, lead, arsenic, etc. and keep your family healthy. This is why your
purifier needs to be routinely cleaned and serviced.
How is Forbes Under Sink RO different from other RO purifiers in the market?
The Under Sink RO uses a multi-stage Reverse Osmosis+ process to provide pure,
sweet tasting water. Its Unique Membrane Cleaning System ensures superior and effective
membrane performance. The purifier also has a powerful pump that delivers a high flow
rate, providing 8 litres of purified water in approx. 60 minutes with a storage capacity of
8 litres.
Page 26

Produced for Forbes Lux Grou p,
Switzerland
Dubai Office:
Forbes Lux FZE, # 207, LOB Building 17, P.O. Box 261698,
Jebel Ali Free Zone, Dubai, UAE, Tel: +9714-8810115
For more information visit us at www.forbeslux.com
 Loading...