

Page 1
• If you press during measurement, the monitor will be turned off.
• If the pulse rate symbol is shown as “ ” instead of “ ”, this
indicates that the monitor has detected an irregular heart beat.
Quick Start User Guide
Thank you for choosing FORA P20 Blood Pressure
Monitoring System. Please read this guide carefully
before use. For complete information on system use and
features, please refer to the Owner’s Manual.
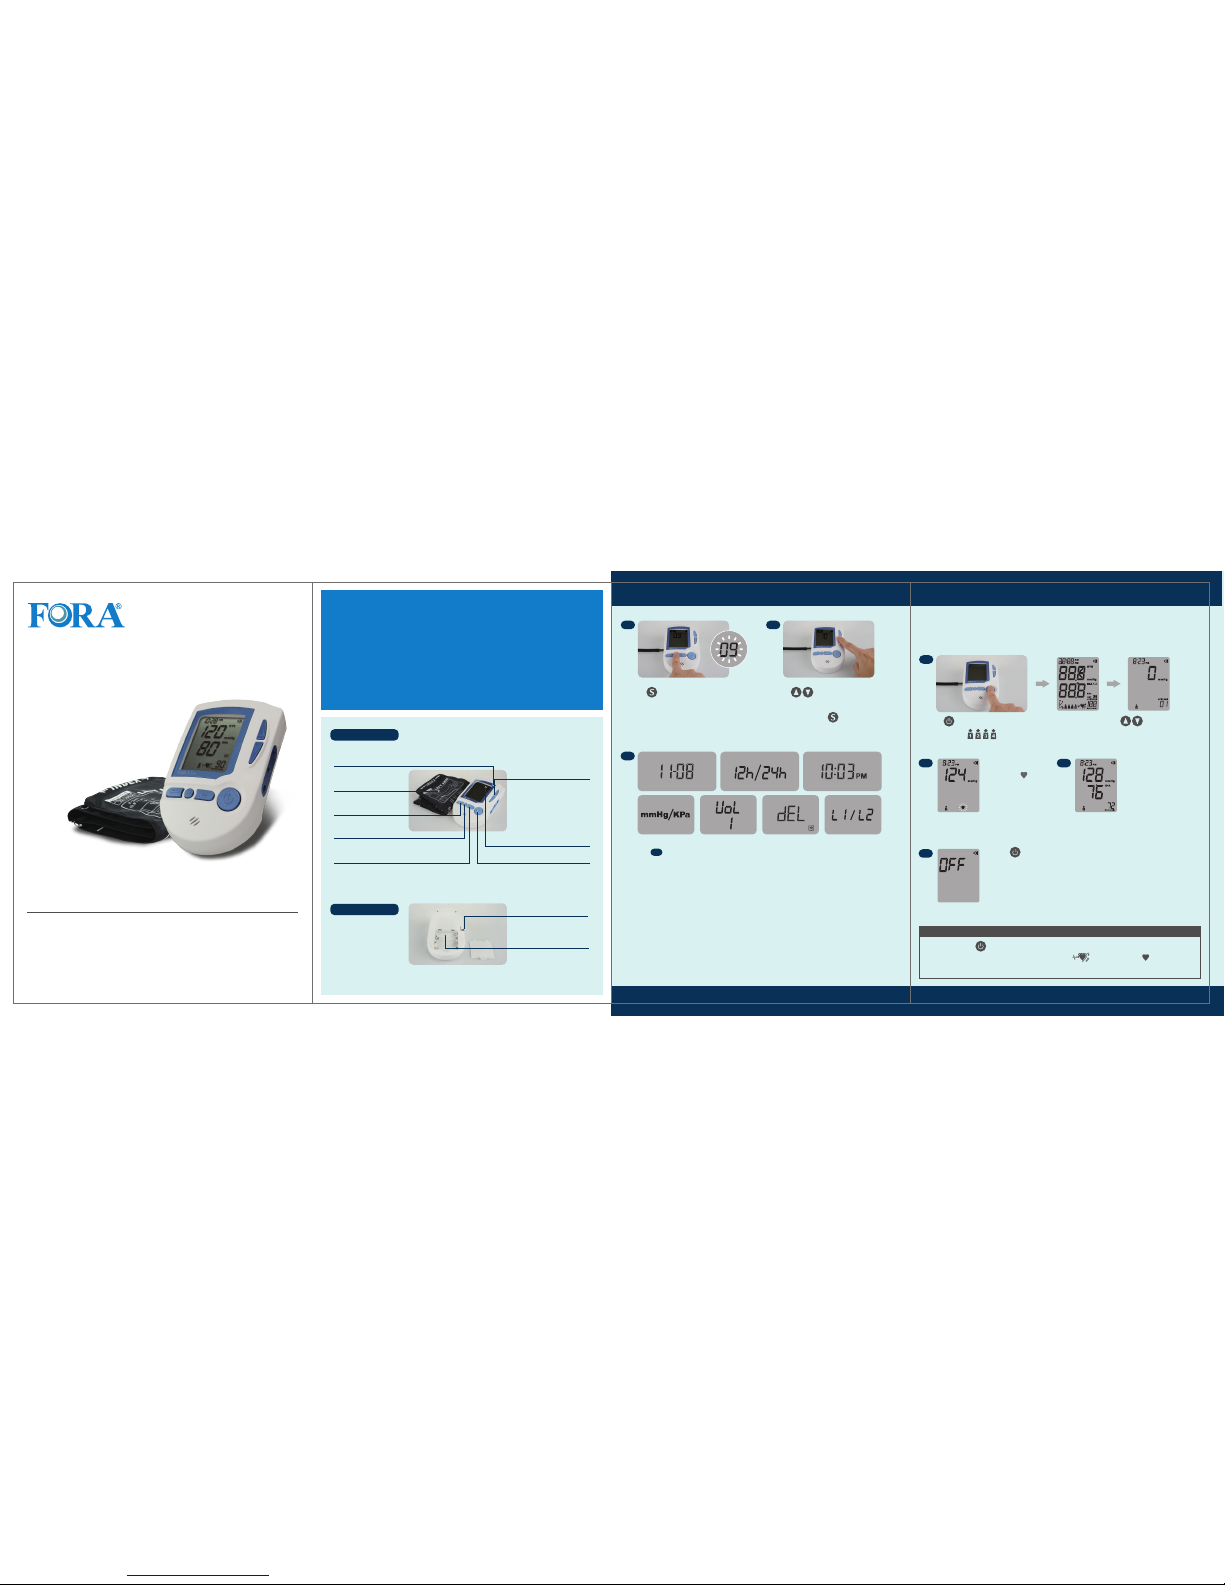
1. Set The Monitor 2. Take a Single Measurement
Press to start setting the
monitor. First, set the last two
digits of the current year (e.g.,
"09" for 2009).
Press to make changes.
When the correct value is
reached, press S to proceed.
1.1 1.2
Strap on the pressure cuff before turning on the monitor. The red
indicator mark should be 2 to 3 cm from the inner elbow. Consult the
manual for the complete instructions.
After the
measurement, the
monitor displays
the systolic
pressure, diastolic
pressure, and
2.3
pulse rate.
Press to switch off. The monitor will switch off
automatically if left idle for 3 minutes.
Bluetooth transmission light flashes after each
measurement. Indicator light turns solid blue when
paired with a smartphone and switches off when
transmission is complete.
2.4
2.1
2.2
The heart
symbol “ ” will
flash when a
pulse is
detected during
the inflation.
Press . All the LCD symbols will appear. Press button to
select user “
” (numbers from1 to 4) whose test reading will be
stored in memory. The cuff will begin to inflate automatically.
NOTE
Battery
Compartment
Up/Down Button
Bluetooth Light
LCD Screen
On/Off Button
Air jack
Memory (M) Button
Repeat/
Pairing Button
Set (S) Button
Pressure Cuff
Rear View of Monitor
Front View of Monitor
Repeat to make changes to the following. Remember to press the
S button to commit a change and move on to the next setting.
(1) the date
(2) time format
(3) time
(4) unit of measurement
(5) voice volume
(6) memory deletion
(7) language (L1 = English, L2 = French)
1. 3.
2.
4. 5. 6. 7.
1.3
1.2
P20b
BLOOD PRESSURE
MONITORING SYSTEM
ForaCare Canada
2013-11871 Horseshoe Way,
Richmond, B.C. V7A 5H5
(604)358-5601
www.foracarecanada.com
315-3132000-001
Page 2
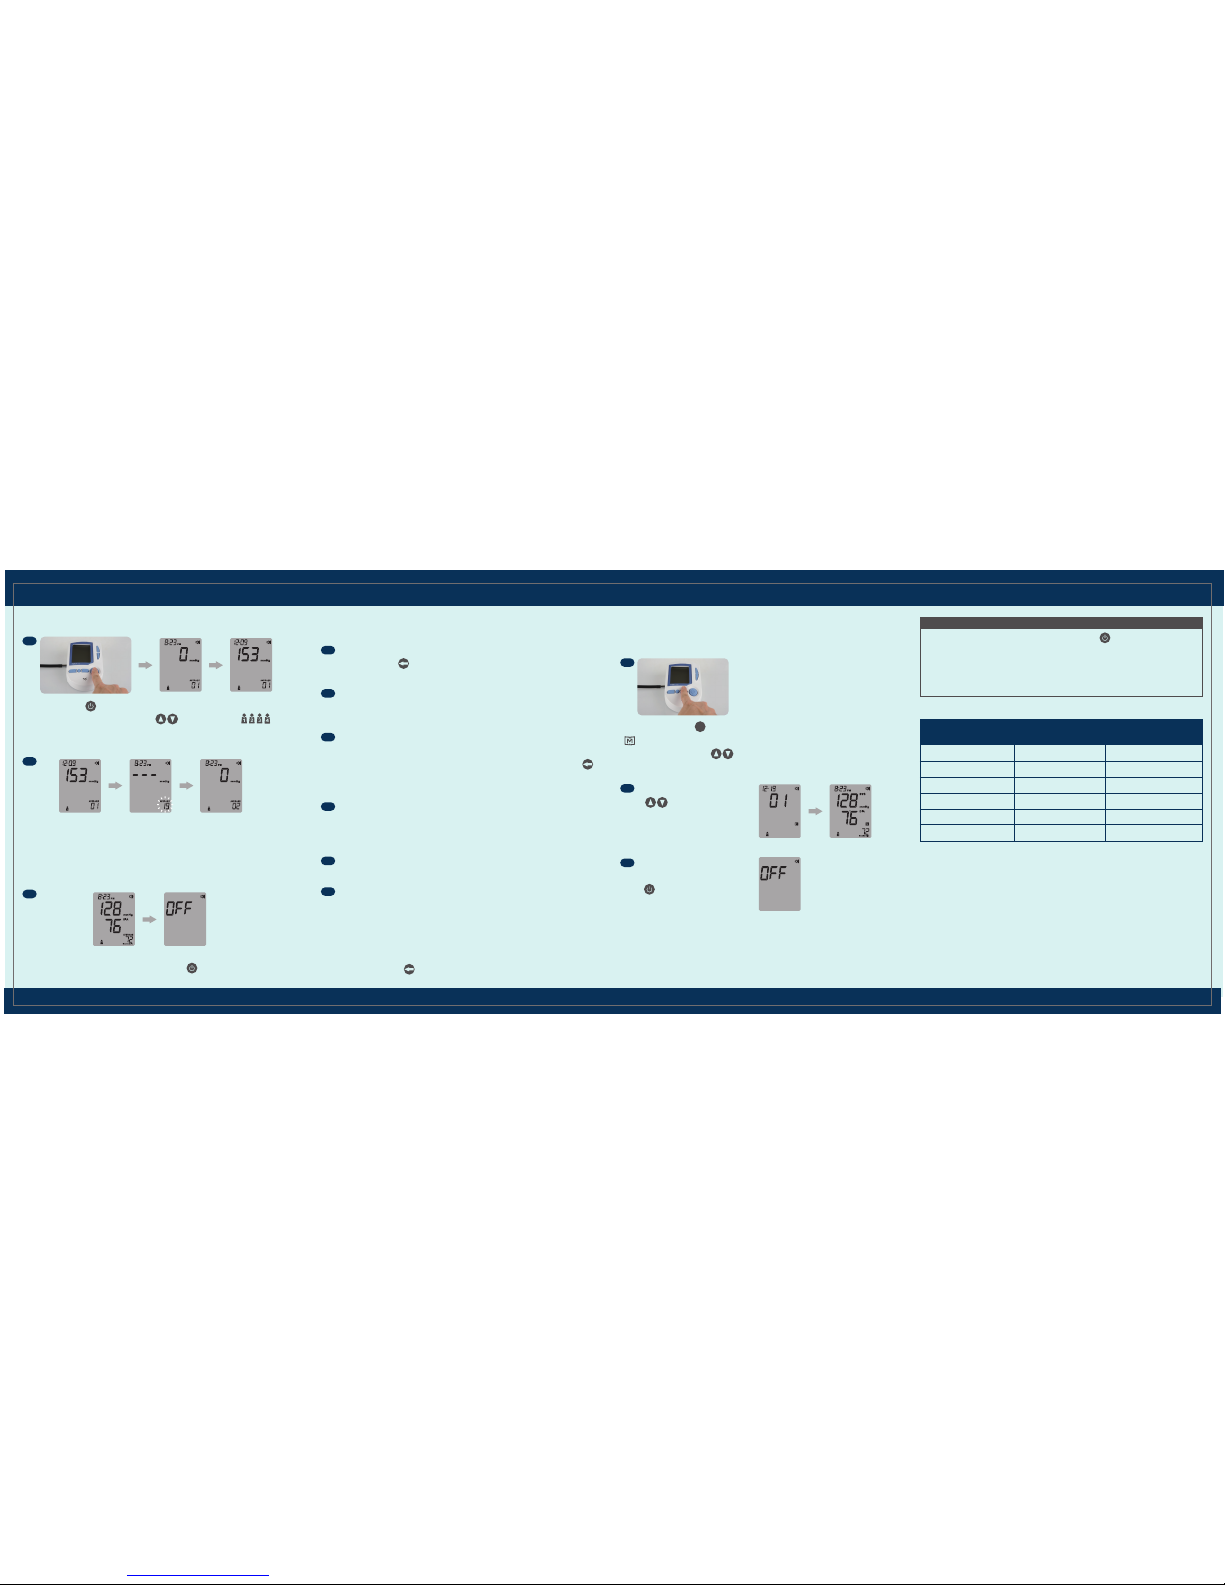
3. Measurement Average Mode 4. Bluetooth Transmission Mode 5. Reviewing Test Results
Your monitor stores the 400 most recent test results along with
respective dates and times in its memory. To recall the memory,
start with the monitor off.
Always apply the pressure cuff before turning on the monitor.
Press and hold for three seconds. The monitor will turn on and
enter the averaging mode. Press to select user “ ”
(numbers from1 to 4) whose test reading will be stored in memory.
Then the cuff will begin to inflate automatically.
3.1
After the first measurement is completed, the monitor will start
counting down before the second measurement begins. The number
on the right represents the remaining countdown between each
measurement. The monitor will take three (3) measurements
consecutively with an interval of 20 seconds.
3.2
After taking three measurements, the results are averaged to produce
the blood pressure measurement. Press to turn off the monitor.
3.3
*1
: National Heart, Lung, and Blood Institute, Diseases and Conditions
*2
: The Seventh Report of the Joint National Committee on Prevention, Detection, Evaluation,
and Treatment of High Blood Pressure. NIH Publication. 2003. No. 03-5233
*3
: New ACC (American College of Cardiology) and AHA (American Heart Association)
guidelines for the detection, prevention, management and treatment of high blood pressure
(2017)
Reference values:
Shop online at
shop.foracarecanada.com/collections/telehealth-devices
Hypotension
*2
Normal
*3
Elevated
*3
Stage 1 Hypertension
*3
Stage 2 Hypertension
*3
Hypertensive Crisis
*3
< 90
< 120
120 -129
130 -139
≥ 140
>180
< 60
< 80
< 80
80–89
≥ 90
>120
Classification
Systolic Pressure
(mmHg)
Diastolic Pressure
(mmHg)
The following procedure enters the device in data transmission
mode without having to take a measurement.
4.1
Press and hold the
Repeat/Pair button until the Bluetooth
indicator light begins to flash.
4.2
Make sure on your smartphone the Bluetooth is turned on. Tap into
iFORA MP app.
4.3
If you have not paired the monitor with your smartphone, go to the
App's "Setting" tap into Bluetooth Smart Meter. Add P20. Tap the <-
icon on the App to save the setting. This procedure of pairing the
monitor with your smartphone only needs to be completed once.
4.4
Once paired, the Bluetooth indicator light turns solid blue. Any
readings that have not been uploaded will be transmitted to the
iFORA MP app.
4.5
Meter switches off when data transmission is complete.
4.6
If your caregiver uses a TeleHealth platform that supports FORA's
products, you may have your readings upload to the TeleHealth's
server automatically. On iFORA MP App, go to "Setting", tap into
"TeleHealth Service". Select the platform's name (e.g., ForaCare
Canada) and press "Done". Enable the function to upload data
automatically. Press <- button to exit and save the setting.
“ ”will appear on the display. The user symbol (numbers from 1 to
M
• Any time you wish to exit the memory, press or leave it idle for 3
minutes. The monitor will turn off automatically.
• If using the monitor for the first time, “---” displays when you recall the
test results or review the average result. This indicates that there is
no test result in the memory.
NOTE
Press and release .
5.1
4) appears first, press to select which user profile you have
used to store in the memory.
5.2
Press
.
Review all test results stored
in the monitor.
5.3
Exit the memory.
Press and the monitor will
turn off.
 Loading...