

FoodSaver FM3900 Series, FM3600 Series Owner's Manual
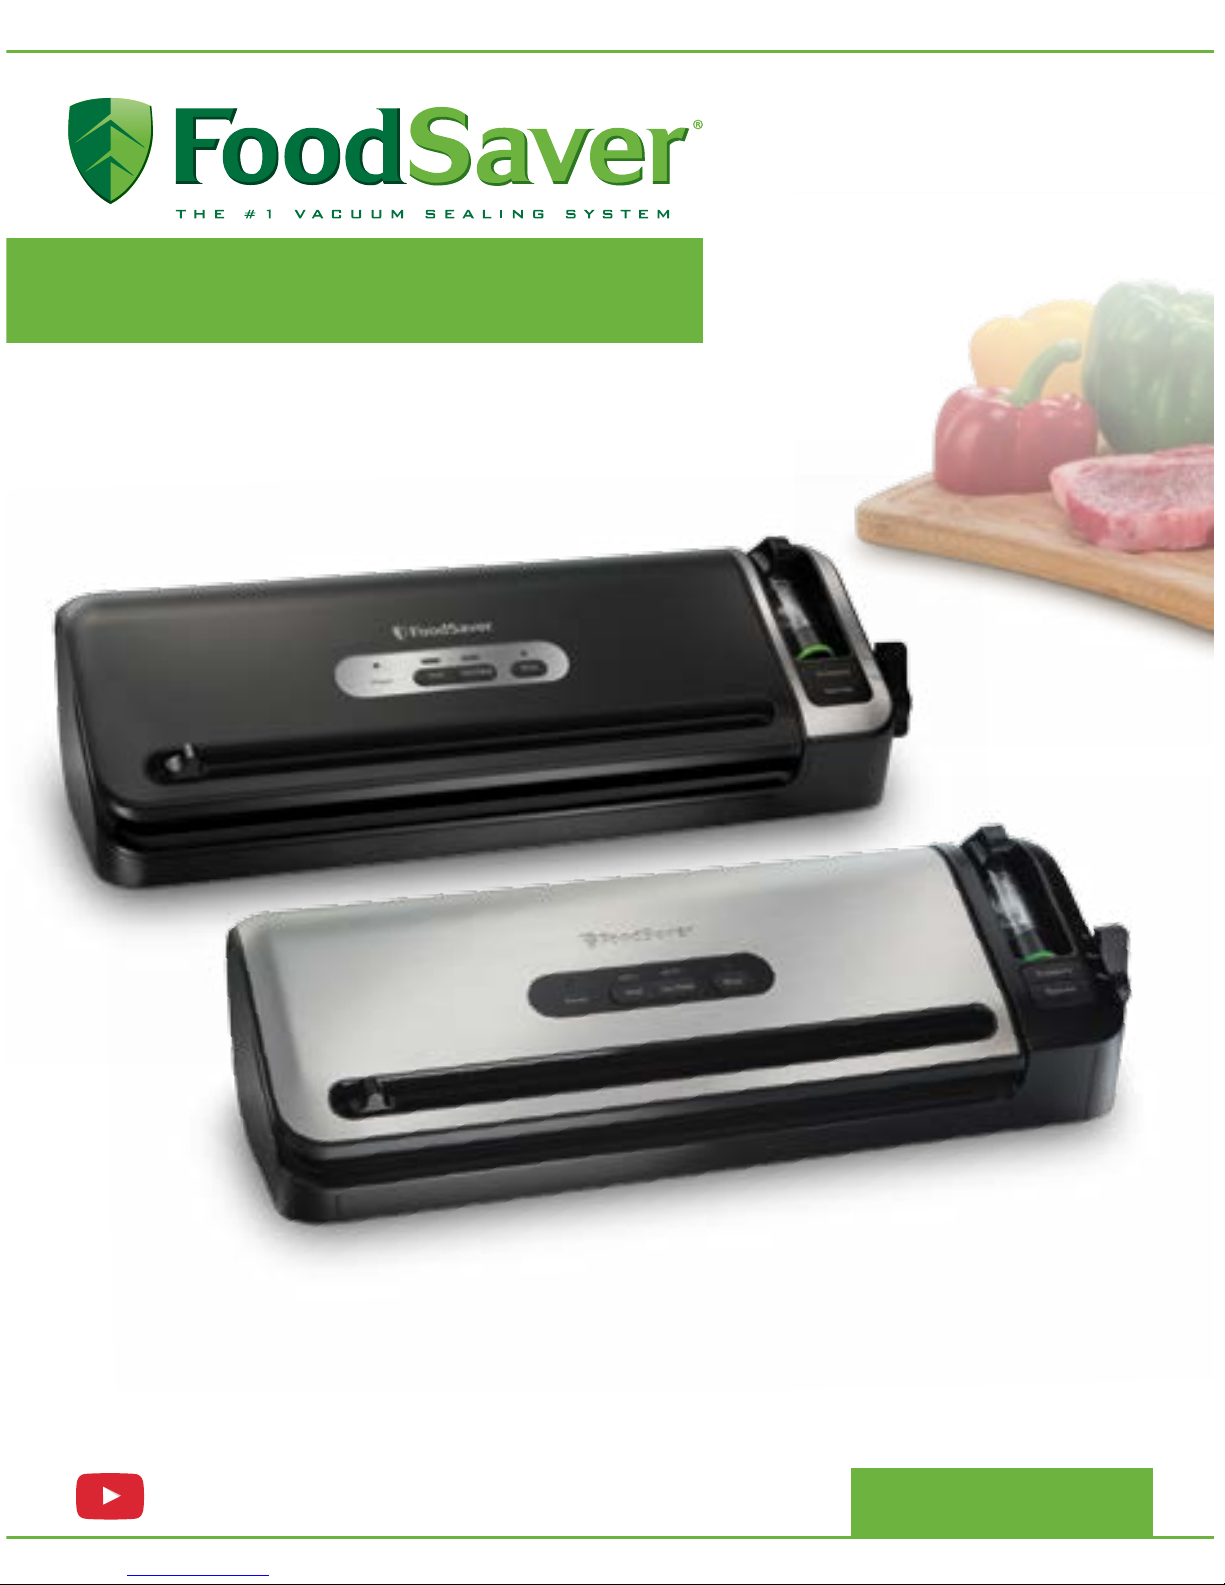
FM3900 Series
Owner’s Manual
For more information, watch our “How To” videos on our Youtube channel.
www.youtube.com/foodsaver

Customer Service: 1-877-777-8042
Important Safeguards
Product Features
“H o w To”
Make a FoodSaver® Bag
Vacuum Seal a FoodSaver® Bag
Vacuum Seal with FoodSaver® Accessories
Care & Cleaning
Storage Guide
Guidelines
Vacuum Sealing and Food Safety
Food Preparation and Reheating Tips
Sealing Non-Food Items
Troubleshooting
Replacement Parts
Warranty
2
4
6
10
11
12
18
20
21
www.FoodSaver.com
®

32
www.FoodSaver.com Customer Service: 1-877-777-8042
NORTH AMERICAN MODELS WITH POLARIZED PLUGS:
This appliance has a polarized plug, (one blade is wider than the
other). As a safety feature to reduce the risk of electrical shock, this
plug is intended to fit in a polarized outlet only one way. If the plug
does not fit fully in the outlet, reverse the plug. If it still done not fit,
contact a qualified electrician. Do not attempt to defeat this safety
feature or modify the plug in any way. If the plug fits loosely into
the AC outlet or if the AC outlet feels warm do not use that outlet.
When using electrical appliances, basic
safety precautions should always be
followed to reduce the risk of fire, electric
shock, and/or injury to persons including
the following:
1. Read all instructions before using this
product.
2. For bag sealers: To reduce the risk of
burns, do not touch the sealing strip
while using the appliance.
3. To protect against electric shock, do
not place or immerse cord, plugs, or
appliance in water or other liquid.
4. This appliance is not to be used
by children or by persons with
reduced physical, sensory or
mental capabilities.
5. Close supervision is necessary
when any appliance is used near
children. Children should not play
with the appliance.
6. Unplug from outlet when not in use,
before putting on or taking off parts
and before cleaning. Allow to cool
before putting on or taking off parts,
and before cleaning. To disconnect,
unplug power cord from outlet. Do
not disconnect by pulling on cord.
7. Do not operate any appliance with
a damaged cord or plug or after
the appliance malfunctions, or has
been damaged in any manner. Do
not attempt to replace or splice a
damaged cord. Contact Customer
Service (see warranty) for examination,
repair or adjustment.
8. The use of an accessory not
recommended by the appliance
manufacturer for use with this
appliance may result in fire, electric
shock or injury to persons.
9. Do not use in wet locations or
leave outdoors. Do not use for
commercial purposes.
10. Do not let cord hang over edge of
table or counter, or touch hot surfaces.
11. Place cord where it cannot be
tripped over, pulled on, cause user to
become entangled with, especially
by children, or cause the appliance
to be overturned.
12. Do not place on or near wet surfaces,
or heat sources such as a hot gas
or electric burner, or heated oven.
Always use appliance on a dry, stable,
level surface.
13. Extreme caution must be used when
sealing bags or moving an appliance
containing hot liquids.
14. Always attach plug to appliance
first, then plug cord into outlet (for
appliances with detachable cords).
15. Use appliance only for its intended use.
16. Vacuum packaging is not a
substitute for the heat process of
canning. Perishables still need to be
refrigerated or frozen.
For appliances with automated vacuum
chamber lids:
17. Lid closes down automatically with
force. Do not obstruct the lid from
closing. Do not manually force the lid
to close.
18.
Do not put fingers or any foreign
objects inside vacuum sealing
chamber while in use.
Important Safeguards
SAVE THESE INSTRUCTIONS
HOUSEHOLD USE ONLY
For appliances with 12V DC Adapter Port:
19. Ensure vehicle has a 12V DC power
outlet and fuse has a rating of 10
amps or higher. Refer to your vehicle’s
owner manual to confirm.
20. Plug 12V DC adaptor into the
appliance first, then plug into the
12V DC power outlet.
21. When appliance is powered by 12V
DC, make sure vehicle is running and
all electrical items in vehicle are off
(air conditioning, lights, radio, etc.).
22. Appliance should be placed on a
flat surface and have enough room
that the bag and its contents have
surface support.
23. Do not plug unit into 12V DC and
120V AC outlets at the same time.
Do not use any power adapter not
provided with this appliance.
24. If green light on 12V DC adapter is not
on, check the fuse on the appliance
adapter and in your vehicle.
25. Do not use the 12V DC adapter with the
vehicle running in an enclosed space.
POWER CORD INSTRUCTIONS:
A short power-supply cord or detachable power-supply cord (shorter than 4 ½
feet or 1.4m) is provided on some models to reduce risks resulting from becoming
entangled in or tripping over a longer cord. Longer detachable power-supply cords
or extension cords are available and may be used if care is exercised in their use.
Models provided with cords longer than 4 ½ feet (1.4m), or if a long detachable
power-supply cord or extension cord is used on short-cord models:
a. The marked electrical rating of the detachable power-supply cord or extension
cord should be no less than the marked electrical rating of the product;
b. When the product is of the grounded type, the extension cord shall be a
grounding type 3-wire cord.
c. The longer cord shall be arranged so that it does not drape over the counter-
top or tabletop where it is capable of being tripped over, snagged, or pulled on
unintentionally, especially by children.
54
www.FoodSaver.com Customer Service: 1-877-777-8042
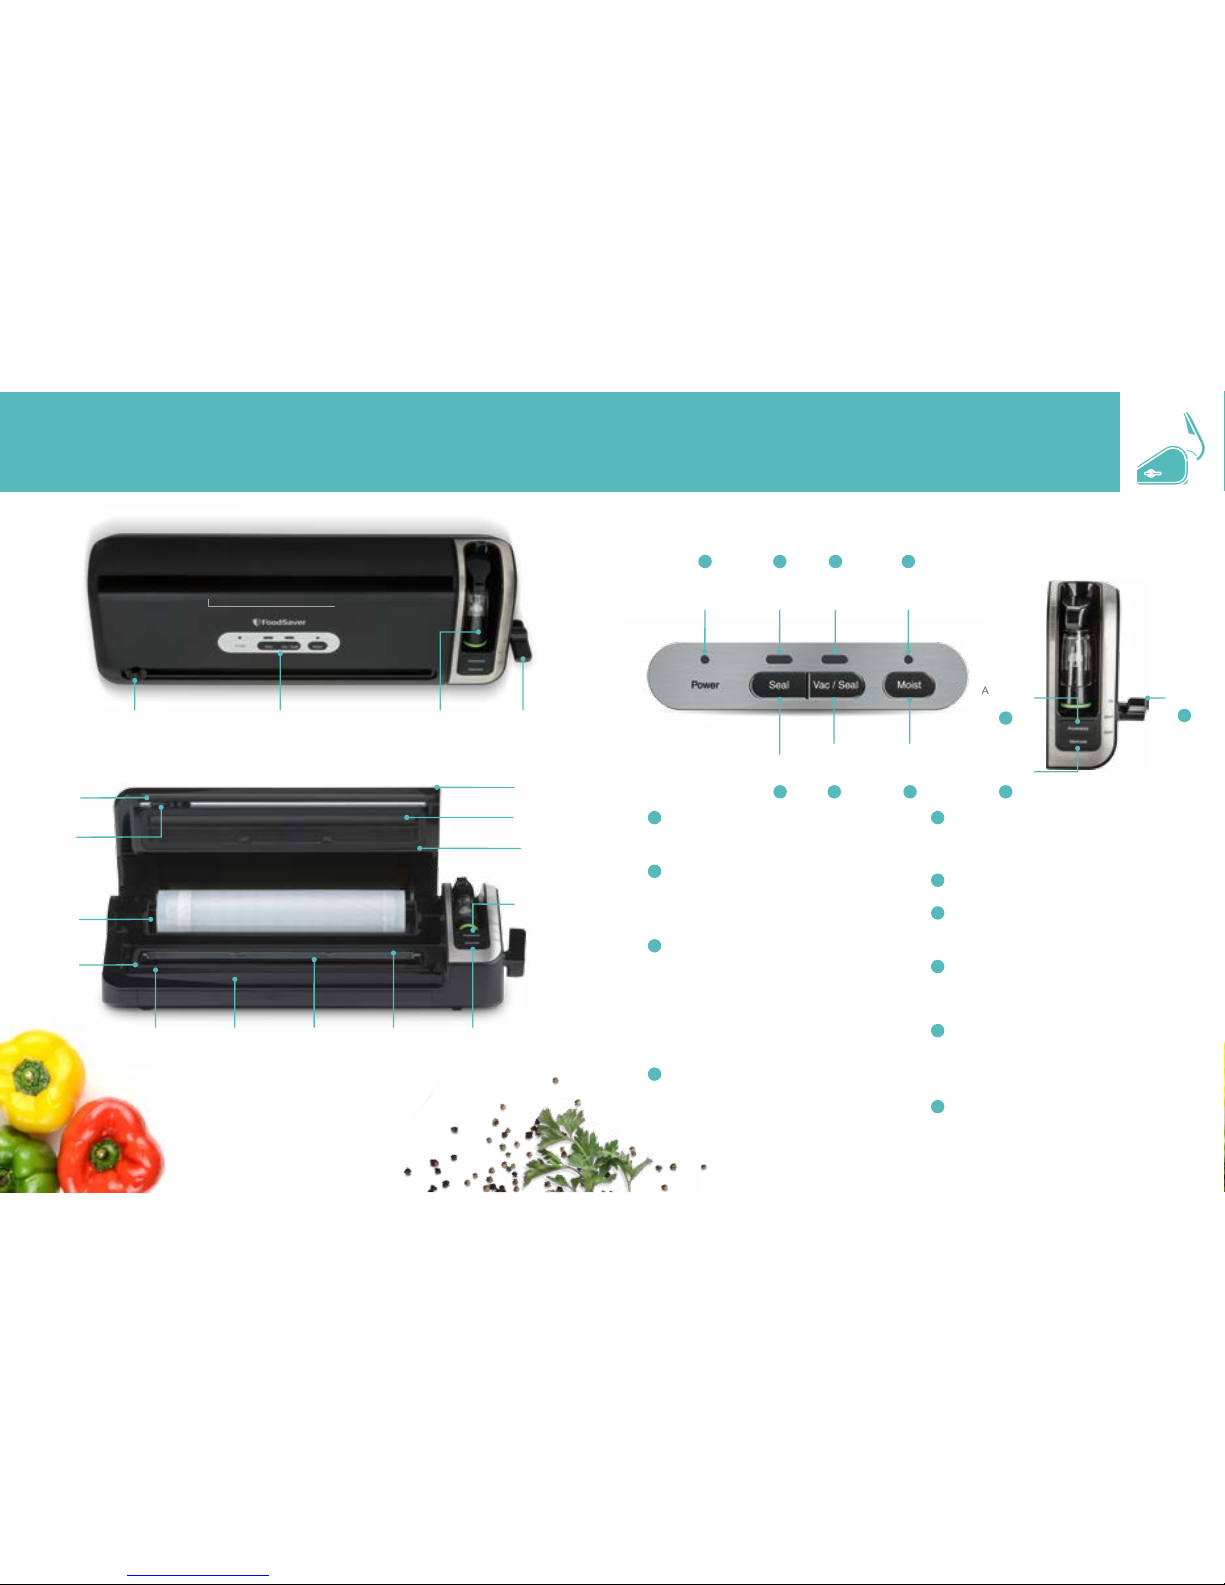
Accessory
Button
Latch
Moist Food
Setting
Button
7
Marinate
Button
9
8
10
Vacuum &
Seal
Button
5
Seal
Button
3
Seal
Indicator
Light
2
Power
Indicator
Light
1
Vacuum/Seal
Indicator
Light
4
Moist Food
Indicator
Light
6
1
Power Light
Illuminates when Latch is in On p osition. Shut s
off automa tically when L atch is not in
On position.
2
Seal Indicator Light
This light has t wo uses:
1. Constan t light indicate s that sealing
process is engaged.
2. Flashing light indicate s an error in
sealing process.
3
Seal Button
This but ton has three use s:
1. Press to create a seal w hen making bags
using a FoodSaver
®
Roll.
2. Press to imme diately stop vac uum
process and begin sealing bag.
Thi s prevents crushing delicate items such
as bread, cookies and pastries.
3. Press to crea te a seal on multilayer f ilm
bag s (such as a potato c hip bag) to keep
food sealed airtight.
4
Vacuum Indicator Light
Shows Vacuum and Seal process i s engaged.
Shuts off when full process is finished.
5
Vacuum & Seal Button
This but ton has two use s:
1. Press to vacuum seal food airtig ht.
Ap pliance shut s off automati cally.
2. Press to pause vacu um process at any point.
6
Moist Food Setting Indicator Light
Shows whether Moist Food Setting is selected.
7
Moist Food Setting Button
For optimal vac uuming and sealing of moist or
juicy food s, press Mois t Food Settin gs Button.
Moist Indic ator Light will illuminate.
8
Accessory Button
Press for us e with FoodSaver® accessories using
Retract able Handheld Sealer. Push Acce ssory
Button to be gin vacuum process. Mo tor will run
until Vacuum Seal ing Process is complete.
9
Marinate Button
Press for use with FoodSaver® Marinator
Container using Retractable Handheld Sealer.
Vacuum pulse se quence takes 12 minutes or les s.
It allows for optimum flavor infusion in less time.
Appliance w ill vacuum and release thre e times.
10
Latch
On - Adjust Back to pu t unit in On Mode.
This turns unit on for vacuuming and sealing.
Store - Adjus t Center to Store
Open - Adjust For ward to Open
The user-friendly, intuitive control panel makes it easy for
you to get the most out of your FoodSaver® System:
Product Features
LatchControl PanelBag Cutter Retractable
Handheld
Sealer
Accessory
Button
Upper
Foam
Gasket
Roll
Cutter Bar
Extra-Wide
Sealing Strip
Removable
Drip Tray
Vacuum
Channel
Marinate
Button
Roll
Storage
Lower
Foam
Gasket
Appliance
Lid
Upper Seal
Profile
Bag
Cutter
Cutter
Stabilizer
Prole
 Loading...