

FONESTAR RDS-584WHD Instruction Manual
RDS-584WHD
HD SATELLITE RECEIVER WITH USB 2.0 PORT,
SMART CARD READER, Wi-Fi AND ETHERNET
INSTRUCTION MANUAL

W
e take this opportunity to thank you for buying this product.
We recommend you read the instruction manual before switching on the machine and follow the instructions
t
hat are given. Keep the manual for future reference.
SECURITY AND THE ENVIRONMENT
ELECTRICAL SECURITY
Check that the current in the mains connection where the machine is to be installed corresponds to the
power supply of the machine.
To avoid damaging the equipment, electrical shocks, fire or physical injury when you connect or disconnect
the equipment from the power supply, pull the plug firmly out of the mains socket holding the plug, never the
cable.
Always do this with dry hands.
Keep the power supply cable far from sources of heat. Do not put heavy objects on top of it or change it.
Clean dust and dirt off the power supply cable regularly.
Do not open the machine; you could get an electric shock.
CAUTION
While installing the machine, make sure it is switched off and unplugged.
Do not open the machine. Touching the internal parts is dangerous and you could receive an electric shock.
The machine must not be splashed or dripped on. Never place recipients with liquid inside on the machine.
Do not place anything inside the machine.
LOCATION
Place the equipment on a horizontal surface with enough space around it to allow ventilation.
Avoid direct sunlight, heat sources and excessive dust.
Do not place the machine near magnetic fields or static electricity.
Do not use surfaces which vibrate or receive impact.
Do not pile machines on top of one another.
VENTILATION
Never block or cover the ventilation slits on the machine.
Do not expose it to direct sunlight or place it near sources of heat.
PERIODS OF INACTIVITY
When the machine is not going to be used for a long period of time, disconnect it from the mains.
If you are using an adapter, take into account that it will continue using electricity even if the machine is
switched off. If it is not going to be used for a long period of time, disconnect it from the mains.
THE ENVIRONMENT
To save energy, switch the machine off when you are not going to use it for a long time. The machine could
contain substances that are harmful to the environment or human health. To minimize the effect of these
substances the machine must be correctly managed and recycled when you decide to dispose of it.
When you dispose of it remember: it cannot be thrown into a conventional rubbish bin.
If it contains or uses batteries, these must be disposed of separately.
The machine (without batteries) must be disposed of correctly. Put it in a container specially intended for the
collection of electronic and electrical appliances, at the dump or hand it over to the dealer when you purchase
similar equipment, so that the dealer can dispose of it correctly (at no added cost).
- 2-
EN
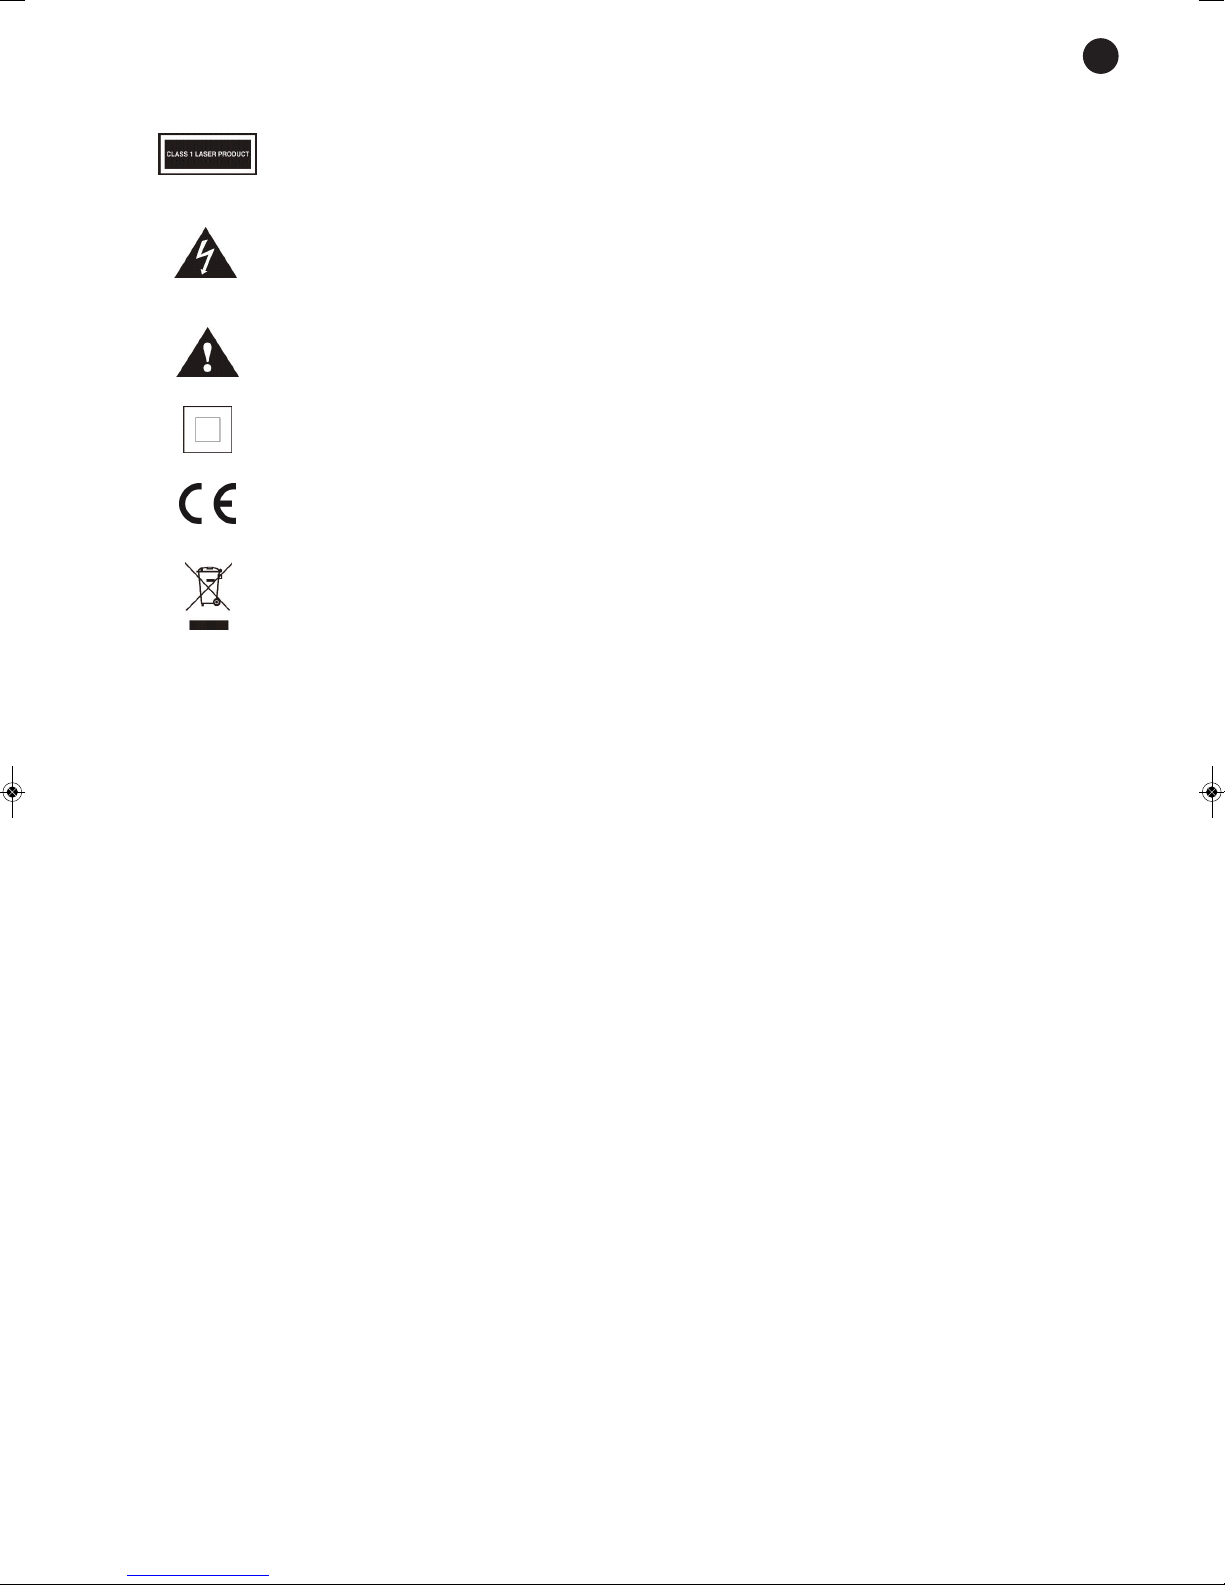
SIGNIFICANCE OF THE SYMBOLS ON THE MACHINE*
The symbol formed by the expression “Class 1 laser product” written in a rectangle
indicates that visible or invisible laser radiation could be produced. Avoid direct expose to
the laser.
The symbol formed by a ray of lightening inside a triangle shows that the machine has
connection terminals or a circuit with areas with a current which could cause an electric
s
hock, even in normal working conditions.
The symbol formed by an exclamation mark in a triangle shows that the instruction manual
must be referred to for information on how the machine works and its use.
The symbol formed by one square inside another square shows that the machine has
double electrical insulation.
The European Community symbol shows that the machine complies with the current
European Union legislation, as well as its transposition to local legislation.
The symbol of a rubbish bin crossed out and over a horizontal line shows that when the
product is disposed of it must be done properly, placing it in a special selective electronic
and electrical equipment container or through a dealer when purchasing a similar product,
at no additional cost. It also shows that the machine was put on the market after 13th
August 2005 (European Community Directive 2002/96/CE of Electrical and Electronic
recycling, and its Spanish equivalent R.D.208/2005).
In accordance with what is set out in the aforementioned decree, FONESTAR is registered
in the RAEE (Registro de Aparatos Eléctricos y Electrónicos) in a special section REI
(Registro de establecimientos Industriales), with the entry number 001851.
*It is possible that some of these symbols do not appear on the machine.
EXEMPTION OF LIABILITY
The characteristics of the equipment and the content of the manual can change without forewarning.
FONESTAR, S.A. does not assume responsibilities regarding the inappropriate use of the equipment or the
information supplied in this instruction manual, and specifically disclaims any implied liability for marketability
or fitness for any other use.
All rights reserved by FONESTAR, S.A.
- 3-
EN
EN
- 4-
DESCRIPTION
- Receptor satélite HD.
-
DVB-S2/MPEG-4/MPEG-2.
- Formatos de salida HD: 1080p, 1080i, 720p, 576p y 480p.
- Videograbador personal (PVR con función time shift).
-
Reproductor multimedia.
- Puerto USB 2.0.
-
Lector de tarjetas smart card de acceso condicional (CA).
- Wi-Fi y ethernet.
- Aplicaciones web.
- DiSeqC 1.0/1.1/1.2/1.3 (USALS).
- Mando a distancia.
- Menú multilenguaje.
- Búsqueda automática y manual.
- Actualización de software mediante USB.
- Guía electrónica de programas (EPG).
- Pantalla 4:3 y 16:9.
CONTROLS AND FUNCTIONS
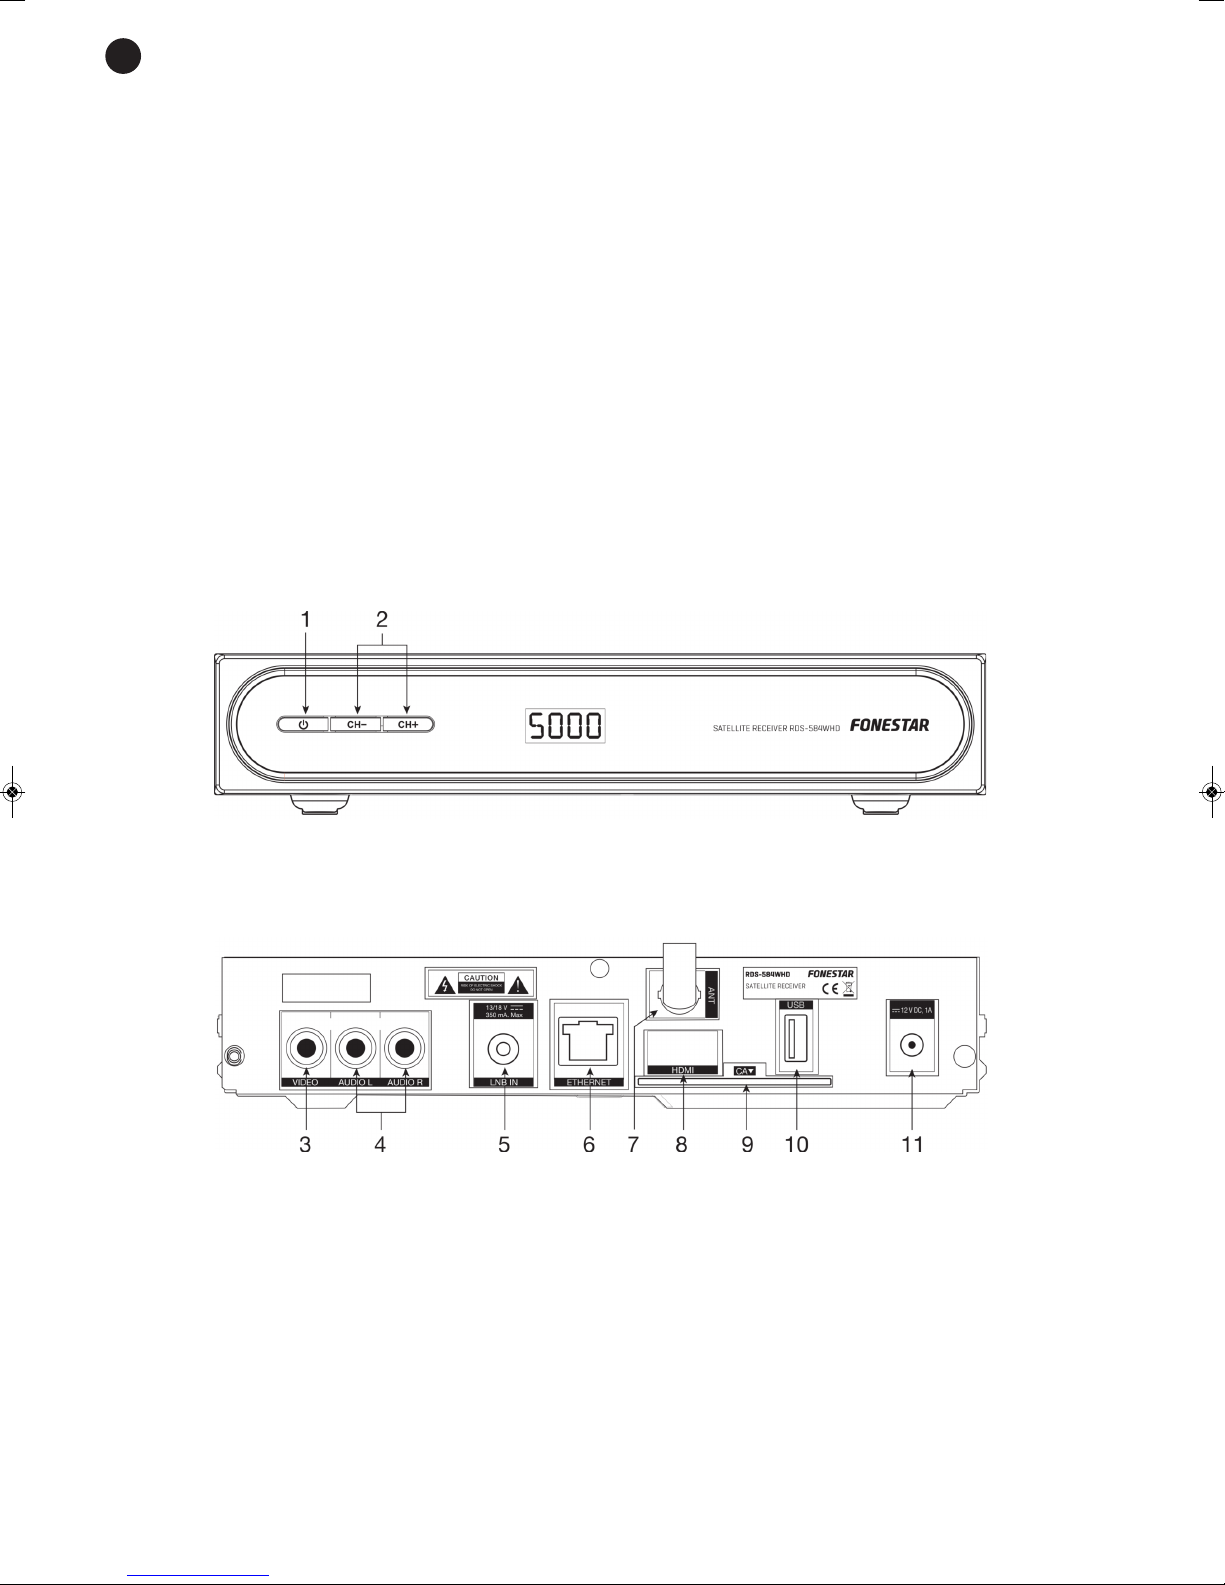
FRONT PANEL
1.- q: on/off button.
2.- CH-/CH+: buttons to change channel.
REAR PANEL
3.- VIDEO: composite video output, RCA connector.
4.- AUDIO L/R: stereo audio output, 2 x RCA connectors.
5.- LNB IN: parabolic aerial signal tuner input (LNB). Female F connector.
6.- ETHERNET: local area network connection, RJ-45 connector.
7.- ANT: Wi-Fi aerial.
8.- HDMI: high definition audio and video output (HD) to connect to a television with digital input.Output
resolution selectable by menu.
9.- CA: conditional access smart card reader (CA).
10.- USB: USB port for connection of USB storage devices and for updating of software.
11.- Power supply for mains adapter provided.
NOTE: disconnect and put away the mains adapter when the device is not going to be used for a prolonged
period of time.
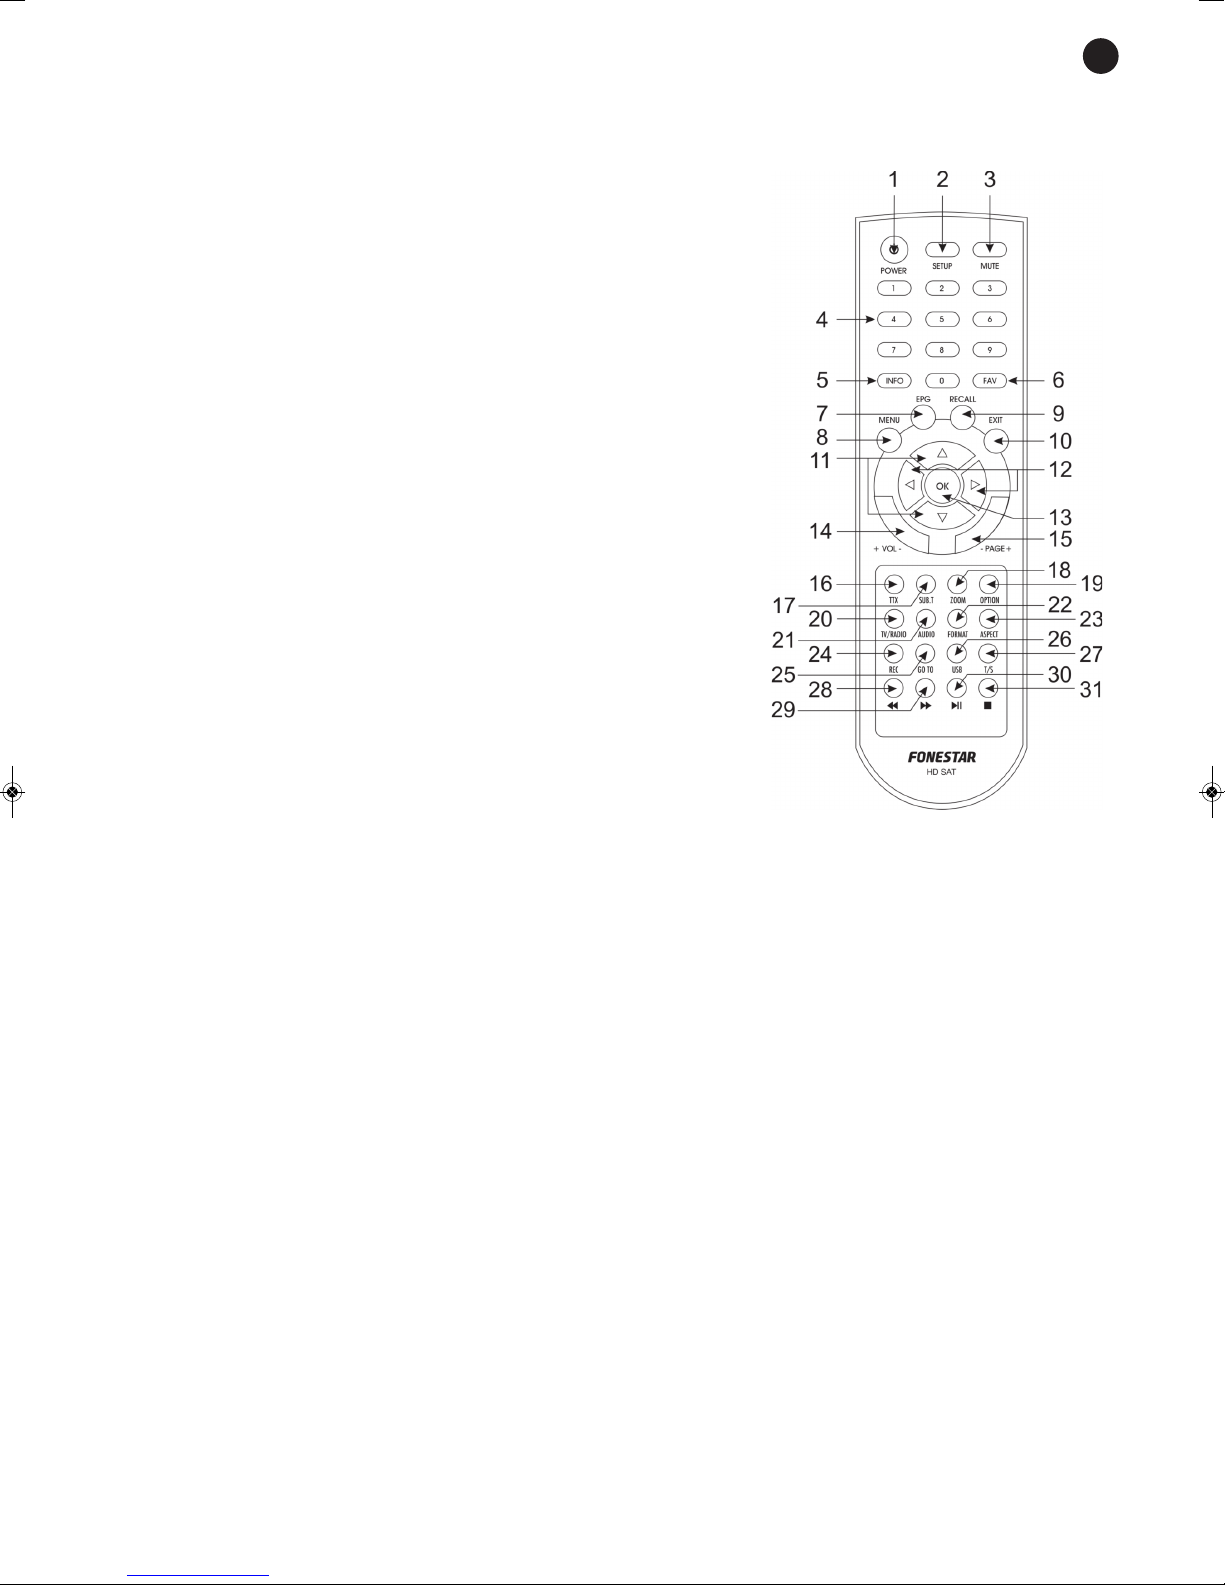
REMOTE CONTROL
1.- POWER: on/standby mode.
2
.- SETUP: accesses the configuration menu.
3.- MUTE: activates/deactivates the audio output.
4
.- 0-9: number buttons.
5.- INFO: displays current channel information.
6
.- FAV: displays favourite channel list.
7.- EPG: displays the Electronic Programme Guide.
8.- MENU: displays the main menu on the screen.
9.- RECALL: returns to the last seen channel.
10.- EXIT: exits the menu on the screen saving the configuration.
11.- w s : changes to the next or previous channel, move up and
down the menu options
12.- a d : volume control, move left and right in the menu options.
13.- OK: confirms the action selected in the menus. When a TV
channel is being watched, it displays a window with a list of
channels to select a channel.
14.- +VOL-: adjusts the volume.
15.- -PAGE+: forwards/rewinds pages when the list of channels
is displayed on the screen.
16.- TTX: displays teletext. Red selection button in menu options.
17.- SUB.T: displays the subtitlres(when they are available).
Green selection button in menu options.
18.- ZOOM: increases/decreases the zoom of the selected
image. Yellow selection button in menu options.
19.- OPTION: accesses the options menu. Blue selection button
in menu options.
20.- TV/RADIO: allows selection between tuned TV or radio
channels.
21.- AUDIO: allows audio language to be selected among those available in the channel.
22.- FORMAT: function not available.
23.- ASPECT: allows the aspect relationship to be changed.
24.- REC: allows recording to start of the channel being watched at that moment.
25.- GOTO: to go to an exact point in playback. Use the number buttons to enter the exact time.
26.- USB: allows the USB storage device to be removed safely.
27.- T/S: activates the time shift function.
28.- 5: rewinds playback.
29.- 6: forwards playback.
30.- 12: starts and pauses playback.
31.- 3: stops playback or recording.
ACCESSORIES:
- Batteries for the remote control.
EN
- 5-
EN
- 6-
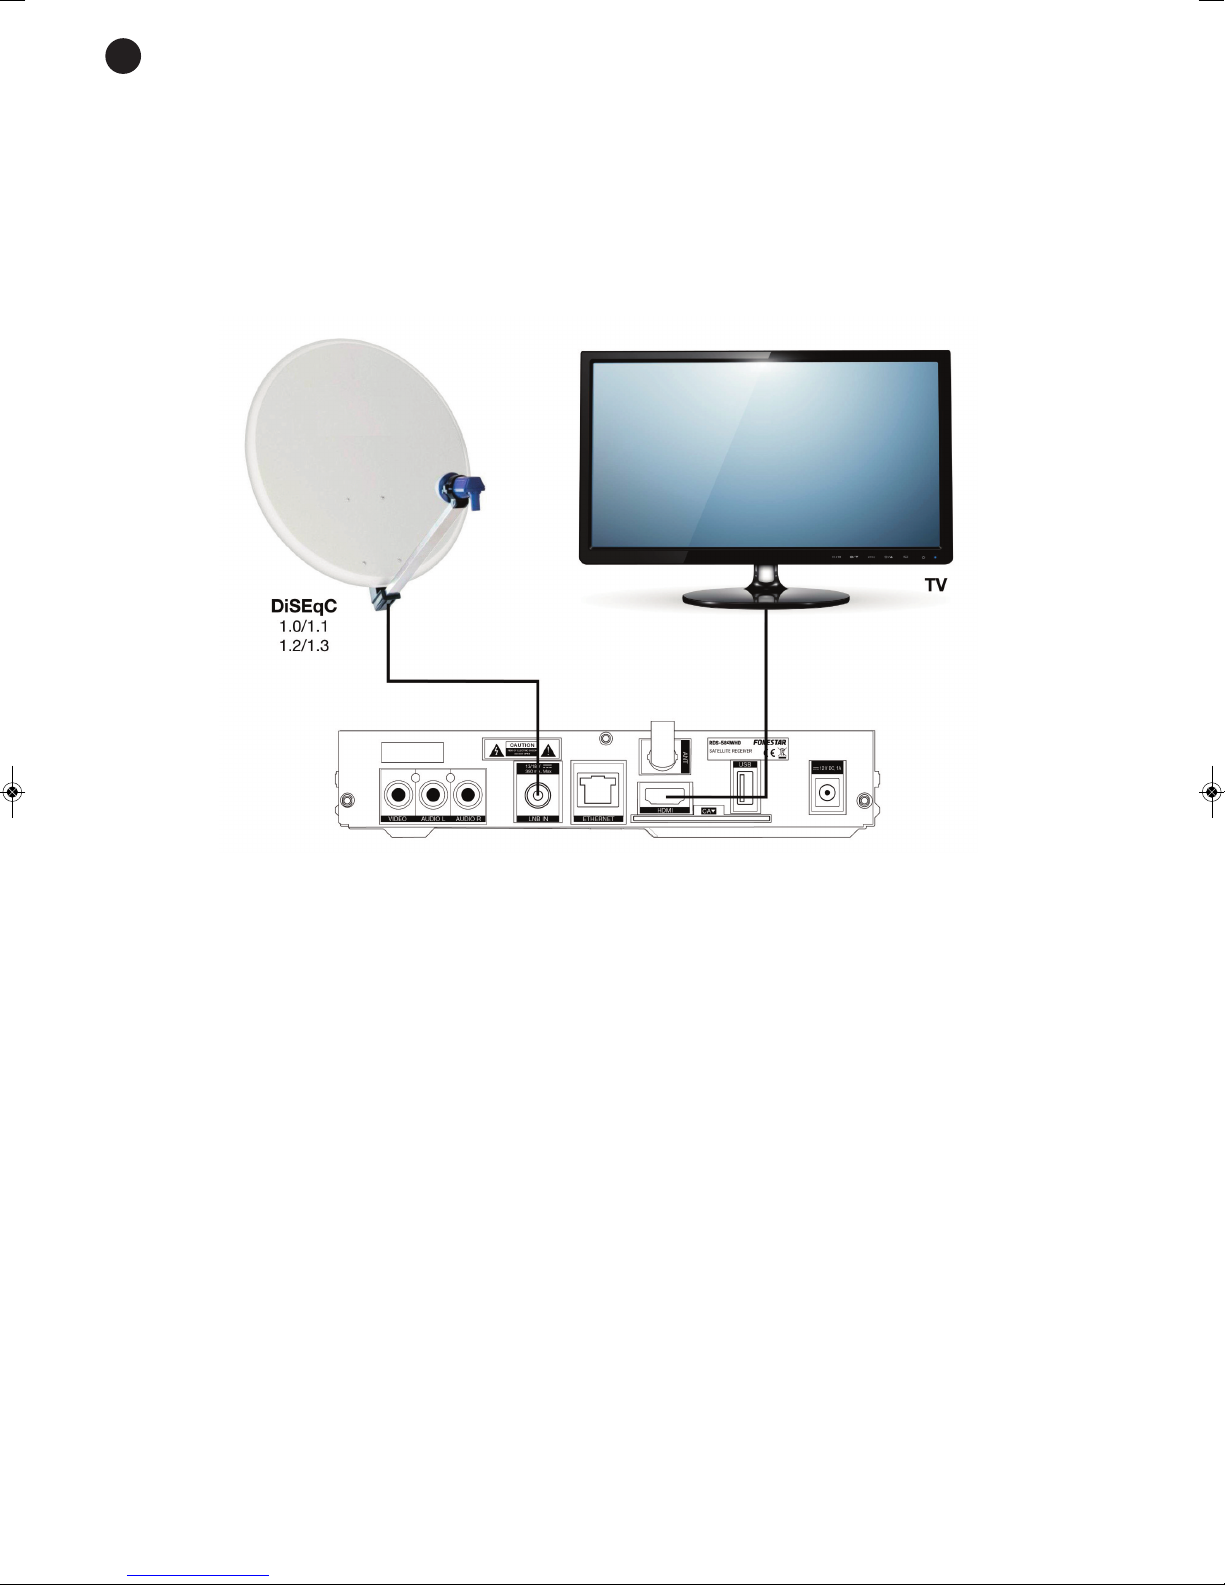
CONNECTION
Before making any connection, switch off all the devices and disconnect them from the mains.
I
t is recommendable that you read the whole manual before connecting the devices.
1
.- Install the parabollic aerial and point it towards the satellite.
2.- Connect the aerial to the receiver.
3.- Connect the receiver to the TV according to the connection which best suits your needs.
4
.- Once the connections have been made according to your needs, connect the devices to the mains and
switch them on.
INSTRUCTIONS FOR USE
START UP
When switching on the receiver for the first time a quick start menu will be shown on the screen which is used
to set up the receiver and tune the channels.
1.- Use the up and down buttons to select the parameter you wish to configurate. Press the OK button so
that the configuration options of each parameter are displayed (language, date and time, network
configuration via cable, DHCP, DNS, etc).
2.- Select the Search option (Config.menu. Satellite > Automatic search) and press the OK button to start
tuning. The TV and radio programmes that are tuned are shown in the TV and radio column respectively.
The search could take several minutes.
3.- To cancel the installation process select the Cancel option. In this case or if no channel has been tuned,
the message “No channel found” will appear on the screen. If no channel has been tuned check the aerial
connection.
MAIN MENU
By accessing the main menu, adjustments can be made to the receiver configuration, adjustments to channel
installation, play the contents of a USB memory drive, program recordings, etc.
1.- Press the MENU button and the main menu will appear on the screen.
2.- Press the arrow buttons to choose the required option and press OK to select.
 Loading...