

Page 1
FS-2905GU, FS-2905GURK
USB/SD/MP3 RECORDER/PLAYER
INSTRUCTION MANUAL
Page 2

- 2-
W
e take this opportunity to thank you for buying this product.
We recommend you read the instruction manual before switching on the machine and follow the instructions
t
hat are given. Keep the manual for future reference.
SECURITY AND THE ENVIRONMENT
ELECTRICAL SECURITY
Check that the current in the mains connection where the machine is to be installed corresponds to the
power supply of the machine.
To avoid damaging the equipment, electrical shocks, fire or physical injury when you connect or disconnect
the equipment from the power supply, pull the plug firmly out of the mains socket holding the plug, never the
cable.
Always do this with dry hands.
Keep the power supply cable far from sources of heat. Do not put heavy objects on top of it or change it.
Clean dust and dirt off the power supply cable regularly.
Do not open the machine; you could get an electric shock.
CAUTION
While installing the machine, make sure it is switched off and unplugged.
Do not open the machine. Touching the internal parts is dangerous and you could receive an electric shock.
The machine must not be splashed or dripped on. Never place recipients with liquid inside on the machine.
Do not place anything inside the machine.
LOCATION
Place the equipment on a horizontal surface with enough space around it to allow ventilation.
Avoid direct sunlight, heat sources and excessive dust.
Do not place the machine near magnetic fields or static electricity.
Do not use surfaces which vibrate or receive impact.
Do not pile machines on top of one another.
VENTILATION
Never block or cover the ventilation slits on the machine.
Do not expose it to direct sunlight or place it near sources of heat.
PERIODS OF INACTIVITY
When the machine is not going to be used for a long period of time, disconnect it from the mains.
If you are using an adapter, take into account that it will continue using electricity even if the machine is
switched off. If it is not going to be used for a long period of time, disconnect it from the mains.
THE ENVIRONMENT
To save energy, switch the machine off when you are not going to use it for a long time. The machine could
contain substances that are harmful to the environment or human health. To minimize the effect of these
substances the machine must be correctly managed and recycled when you decide to dispose of it.
When you dispose of it remember: it cannot be thrown into a conventional rubbish bin.
If it contains or uses batteries, these must be disposed of separately.
The machine (without batteries) must be disposed of correctly. Put it in a container specially intended for the
collection of electronic and electrical appliances, at the dump or hand it over to the dealer when you purchase
similar equipment, so that the dealer can dispose of it correctly (at no added cost).
EN
Page 3
- 3-
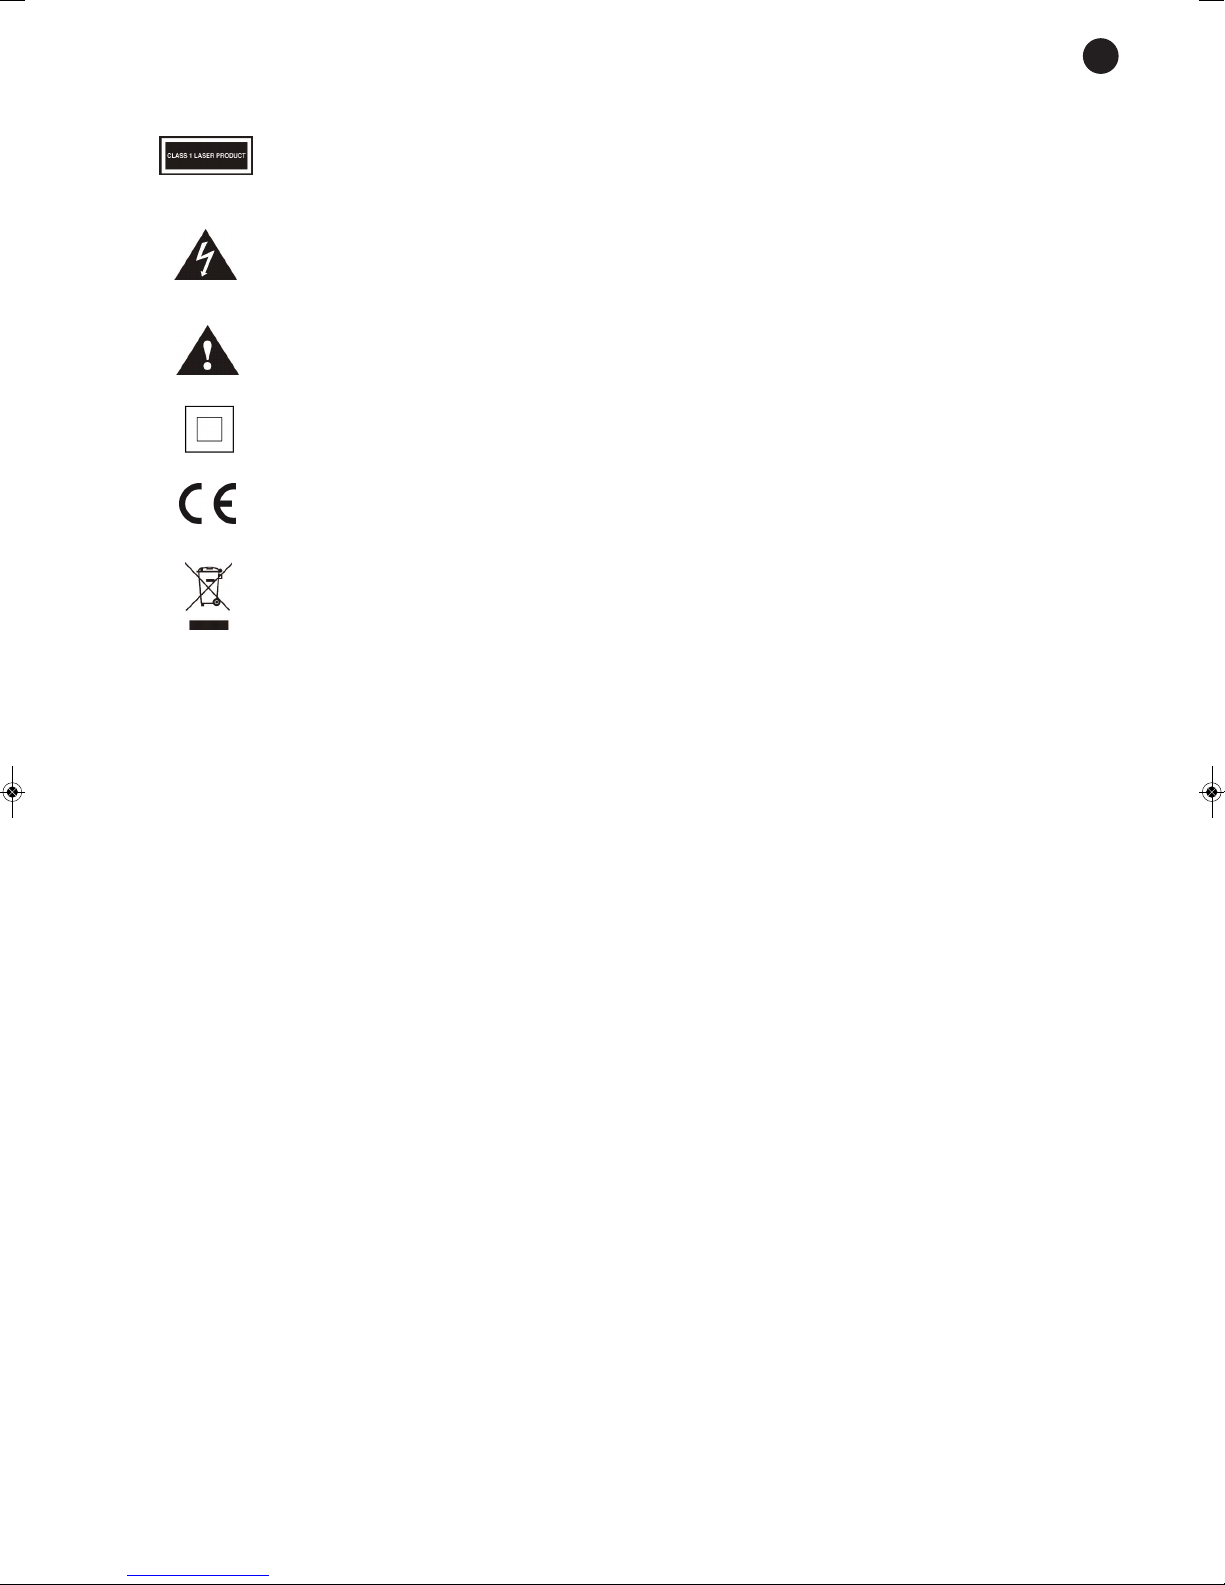
SIGNIFICANCE OF THE SYMBOLS ON THE MACHINE*
The symbol formed by the expression “Class 1 laser product” written in a rectangle
indicates that visible or invisible laser radiation could be produced. Avoid direct exposure
to the laser.
The symbol formed by a ray of lightening inside a triangle shows that the machine has
connection terminals or a circuit with areas with a current which could cause an electric
s
hock, even in normal working conditions.
The symbol formed by an exclamation mark in a triangle shows that the instruction manual
must be referred to for information on how the machine works and its use.
The symbol formed by one square inside another square shows that the machine has
double electrical insulation.
The European Community symbol shows that the machine complies with the current
European Union legislation, as well as its transposition to local legislation.
The symbol of a rubbish bin crossed out and over a horizontal line shows that when the
product is disposed of it must be done properly, placing it in a special selective electronic
and electrical equipment container or through a dealer when purchasing a similar product,
at no additional cost. It also shows that the machine was put on the market after 13th
August 2005 (European Community Directive 2002/96/CE of Electrical and Electronic
recycling, and its Spanish equivalent R.D.208/2005).
In accordance with what is set out in the aforementioned decree, FONESTAR is registered
in the RAEE (Registro de Aparatos Eléctricos y Electrónicos) in a special section REI
(Registro de establecimientos Industriales), with the entry number 001851.
*It is possible that some of these symbols do not appear on the machine.
EXEMPTION OF LIABILITY
The characteristics of the equipment and the content of the manual can change without forewarning.
FONESTAR, S.A. does not assume responsibilities regarding the inappropriate use of the equipment or the
information supplied in this instruction manual, and specifically disclaims any implied liability for marketability
or fitness for any other use.
All rights reserved by FONESTAR, S.A.
EN
Page 4

- 4-
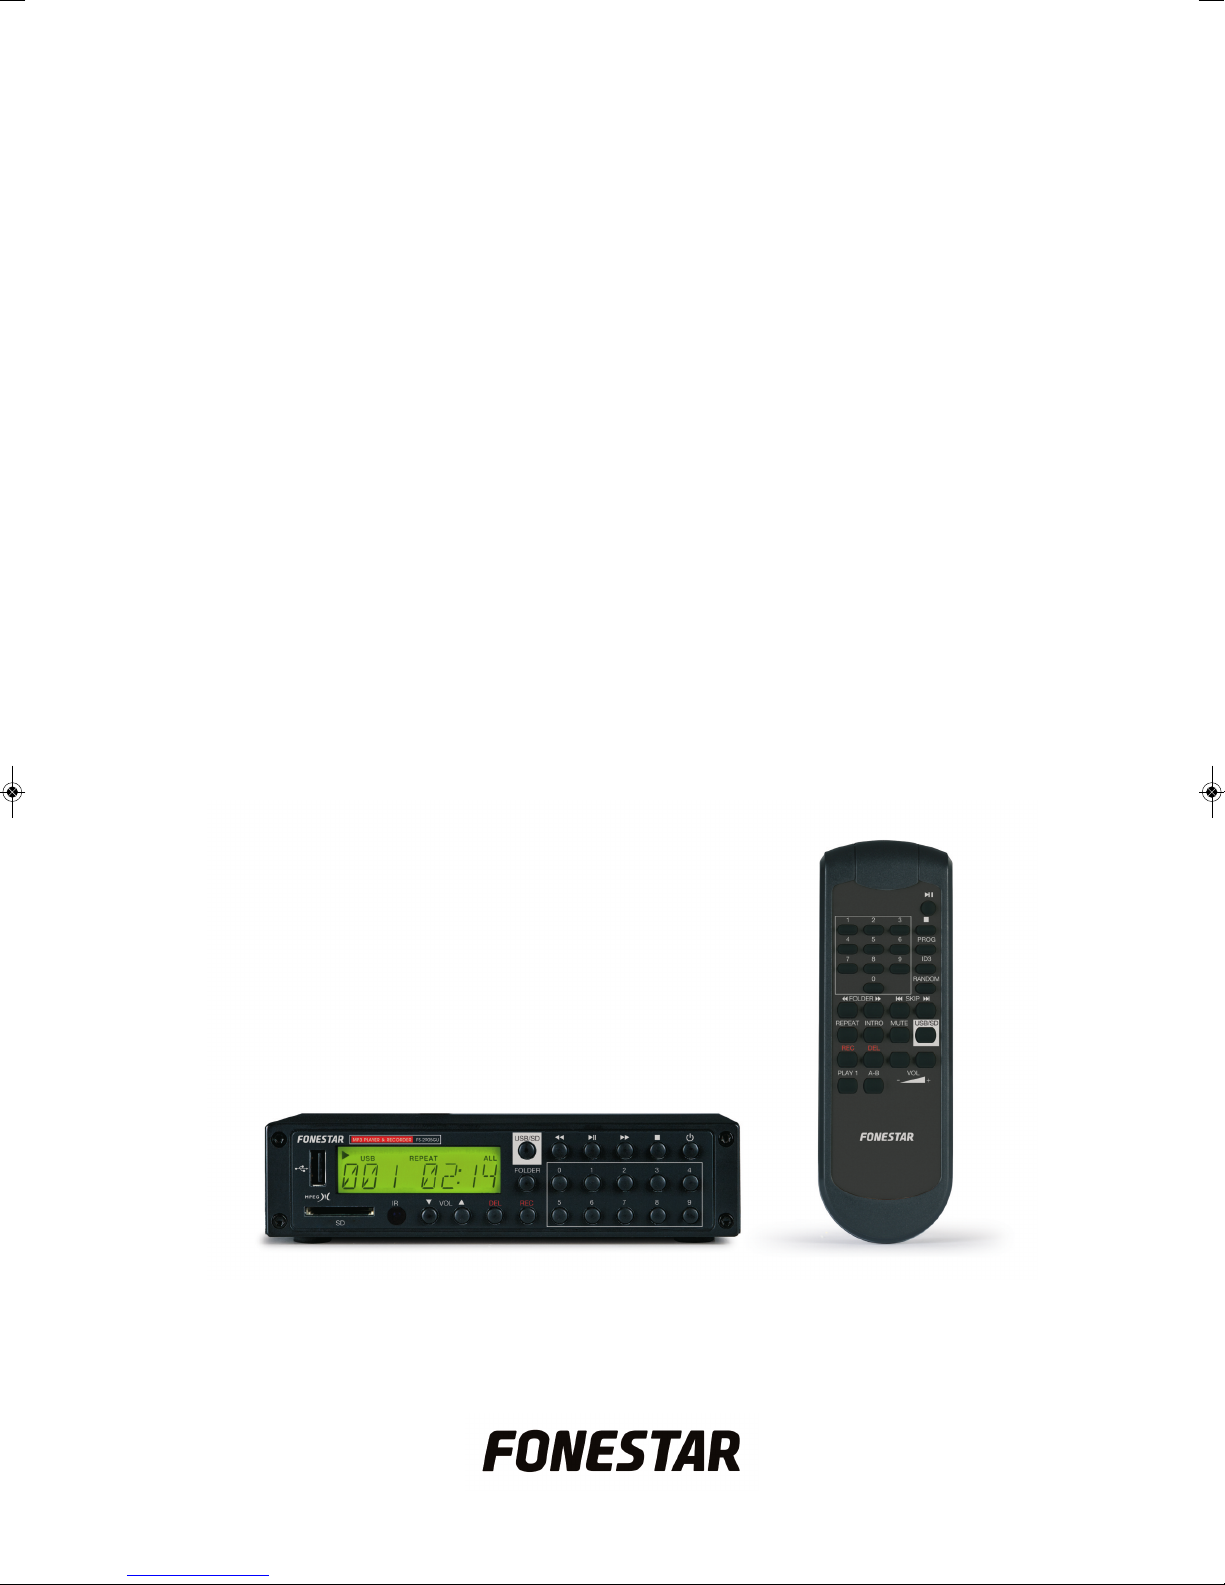
DESCRIPTION
- USB/SD/MP3 recorder/player.
- USB port for connecting drives and hard discs with FAT32 format.
- Recording of the aux input in MP3 format in the storage device connected to the USB port and in SD
memory cards.
- SD card reader.
- ID3 tag in MP3 files.
- Remote control.
CONTROLS AND FUNCTIONS
FRONT PANEL
1.- USB: USB port for connecting memories and USB hard discs with FAT32 file systems up to 32 GB. If
the storage device contains MP3 files, they can be played.
2.- SD: SD card reader of up to 32 GB. If the storage device contains MP3 files, they can be played.
3.- Information display.
4.- USB/SD: pressing this button selects the storage device from which the MP3 files are going to be read
(and where the recordings are going to be stored) between the USB storage device and the SD memory
card.
5.- 5/6: with one press, you select the following or previous track. With one long press, you fast forward
or rewind the song.
6.- 12: starts and pauses playback. If the button is pressed and held for approximately 3 seconds the
RANDOM mode can be activated/deactivated.
7.- 3: stops playback.
8.-
q
: on/off switch in standby mode.
9.- IR: remote control infrared receiver.
10.- VOL: output volume controls. The volume is controlled in steps of 1. Minimum volume is 0 and maximum
is 30.
11.- DEL: to delete an audio track from the USB storage device or from the SD memory card.
In order to delete the audio track that is being played at a certain moment, press the DEL button (DEL
FILE will appear on the screen). Then press the DEL button again and keep it down until DEL - appears
on the screen. The file will have been deleted.
An audio track can also be deleted in STOP mode. Select the file that you want to delete using the
FOLDER buttons (to choose the folder that the track is in) and REV/CUE (5/6) to select the audio track.
Then press the DEL button and the message DEL FILE will appear. Press it again and hold it down until
DEL – appears. The file will have been deleted.
EN
Page 5

12.- REC: in STOP mode or in PLAY mode press the REC button to start recording from the aux input. The
t
ext DEV INIT will appear on the display and the recording will start and will show the amount of time
taken. If you want to stop the recording, press the STOP (3). button. The message REC OK will appear
o
n the display and the recording will have finished. The recorded files will be stored in a folder called
RECORD/EXREC with consecutive numbering (001.mp3, 002.mp3, etc.) in the storage device selected.
W
hen the recording process has finished, playback will go back to the previously selected device and
i
t will start being played again from the first track onwards.
13.- FOLDER: folder selection.
14.- 0-9: direct selection number buttons.
REAR PANEL
1.- 12 V DC power supply input.
2.- AUX INPUT: aux input, 2 x RCA connectors.
3.- OUTPUT: audio output, 2 x RCA connectors.
REMOTE CONTROL
1.- 0-9: direct selection number buttons.
2.- 5 FOLDER 6: folder selection.
3.- REPEAT: in playback mode this button allows selection of the
repetition mode among: repeat deactivated, REPEAT (a track or
file), REPEAT ALBUM and REPEAT ALL. By default, the device
always switches on in REPEAT ALL mode.
4.- INTRO: one press of this button activates or deactivates playback
of the first 10 seconds of each track in standard order.
5.- REC: recording button. See FRONT PANEL for more information.
6.- DEL: allows an audio track to be deleted from the USB storage
device or SD memory card. See FRONT PANEL for more
information.
7.- PLAY 1: pressing this button once selects the PLAY 1 playback
mode (1 STOP appears on the display). In this mode, the selected
track is played once and then playback stops. Press this button
again to deactivate this option (1 STOP OFF appears on the
display).
8.- A-B: allows part of a track to be played in a loop. In playback
mode, pressing this button once marks the beginning of the
segment to be repeated (A—appears on the screen). Pressing it
again sets the end of the segment and A—B appears on the
display. The loop will be played until this button is played again.
9.- 12: starts and pauses playback.
10.- 3: stops playback.
- 5-
EN
Page 6

1
1.- PROG: allows MP3 files to be added to a playlist. In STOP mode, press the PROG button (the word
PROGRAM will appear on the display). Then use the number buttons to insert the number of the folder
where the MP3 file you want to add to the playlist can be found, and press the PROG button. Insert the
track number with the number buttons and press the PROG button again.
R
epeat the previous steps as many times as songs you want to add to the list. To start playing the list
press the PLAY/PAUSE button. If you wish to stop programmed playback, press the STOP button. To
exit PROG mode, press the STOP button again.
12.- ID3: activates or deactivates the display of ID3 tag information.
13.- RANDOM: track playback in random order (the word RANDOM appears on the display).
14.- 7 SKIP 8: one press selects the following or previous track. A long press fast forwards or rewinds the
track.
15.- USB/SD: pressing this button selects the storage device from which the MP3 files are going to be read
(and where the recordings are going to be stored) between the USB storage device and the SD memory
card.
16.- MUTE: pressing this button activates the MUTE mode, silencing the audio output. Press this button
again to deactivate it.
17.- VOL-/VOL+: output volume control. The volume is controlled in steps of 1. Minimum volume is 0 and
maximum is 30.
CONNECTION
Switch off the equipment and disconnect it from the mains before connecting it.
Make the system connection according to your needs (see example).
Connect the equipment to the mains. Switch on the equipment.
INSTRUCTIONS FOR USE
AUTOPLAY FUNCTION
The recorders/players FS-2905GU and FS-2905GURK have an AUTOPLAY function so that they start
playback automatically when switched on. To do so, they must have a USB storage device or a SD memory
card with MP3 files connected to the corresponding port when the player is switched on.
The playback mode by default is REPEAT ALL.
If both storage devices are connected, the USB storage device has priority.
- 6-
EN
Page 7

TECHNICAL SPECIFICATIONS
FS-2905GU FS-2905GURK
C
HARACTERISTICS
U
SB/SD/MP3 recorder/player.
USB port for flash drive and FAT 32 format hard disc connection.
SD card reader.
Recording of aux input in MP3 format in the storage device connected to the
U
SB port and in SD memory cards.
ID3 information tag in MP3 files.
Indexes up to 1999 songs.
Remote control.
RESPONSE 20-20,000 Hz
DISTORTION Harmonic: < 0.5% at 1 kHz
S/N RATIO > 80 dB at 1 kHz
INPUTS 1 aux, 2 x RCA 500 mV
OUTPUTS 1 aux, 2 x RCA 1 V
FUNCTIONS USB/SD/MP3 player/recorder for memories of up to 32 GB
POWER SUPPLY 12 V DC, 0.5 A with adapter included
DIMENSIONS 174 x 42 x 129 mm depth 483 x 42 x 129 mm depth (with rack
mounts)
1 U 19” rack”
ACCESSORIES 2 connection cables, 2 x RCA
Batteries for the remote control
2 connection cables, 2 x RCA
Mounts for assembly in 19” rack
Batteries for the remote control
- 7-
EN
Page 8

WARRANTY
This product has been tested and has passed the corresponding quality control prior to being put on the market.
FONESTAR guarantees the suitability of the product for its specified use during a period of 2 years from the
delivery date and commits itself to repair or substitute the goods as expressed in the Spanish law ‘La Ley General
para la Defensa de los Consumidores y Usuarios, Real Decreto Legislativo 1/2007 16 Noviembre.
The lack of conformity in the first six months after purchase, due to a manufacturing defect, will be rectified with
no more than showing the proof of purchase. After six months FONESTAR reserves the right to demand proof of
the product being sold with that problem.
This warranty does not include damage produced by: inappropriate use or negligence, accidents, worn out parts
due to use, breakages, burns, spilt liquids or other substances, excessive humidity, battery deterioration and
internal manipulation of the device, the software or its components by unauthorized persons, and in general any
use that is unrelated to the nature and purpose of the product.
If any service is needed during the warranty period because of lack of conformity, please contact the business or
distributor where the product was purchased in no more than 2 months after being conscious of the problem. It
is only necessary to contact FONESTAR if it is impossible or imposes an undue burden for them to solve it.
To benefit from this warranty it is necessary to show the proof of purchase with the date clearly visible, with no
corrections or crossing out.
This document adds information, and never decreases the consumers’ rights, which in all cases are protected by
the Spanish law ‘La Ley General para la Defensa de los Consumidores y Usuarios, Real Decreto Legislativo 1/2007
16 Noviembre.
FONESTAR is a member of ECOEMBALAJES ESPAÑA, S.A. “ECOEMBES”, with number 03497 and all our products carry the
symbol, backed by our membership and subscription to the above mentioned organization with the recycling and subsequent
management of our packaging.
FONESTAR S.A. - NIF A28780443 - Poligono Trascueto - 39600 Revilla de Camargo, Cantabria (Spain)
www.fonestar.com
 Loading...