

1
User Manual
Please read the user manual carefully before use

2
Content
1. Notice ........................................................................................................
2. Projector structure ...................................................................................
2.1. Interface.................................................................................................
2.2. Integral drawing....................................................................................
2.3. Remote control.....................................................................................
3. Power On/Off.............................................................................................
4. Operation...................................................................................................
4.1. Desktop.................................................................................................
4.2. Android button......................................................................................
4.3. Menu......................................................................................................
4.4. System...................................................................................................
4.5. Date & time........................................................................................
4.6. Brightness..............................................................................................
4.7. Application............................................................................................
4.8. Internet..................................................................................................
4.9. Music.....................................................................................................
4.10. Video....................................................................................................
4.11. Photo...................................................................................................
4.12. Wallpaper............................................................................................
4.13. External devices................................................................................
4.14. 3D........................................................................................................
4.15. Sleep...................................................................................................
4.16. Multi-screen sync...............................................................................
4.17. External ports.....................................................................................
5. Troubleshooting........................................................................................
6. Accessories...............................................................................................

3
1. Notice:
* This product is a high-precision electronic product, do not disassemble by yourself.
* Don’t strongly hit and impact the product.
* Don’t use this product in the following environments: high and low temperature, humidity,
dusty, strong magnetic field and long-term exposure in the sun.
* Please use a wet cotton cloth to wipe the projector shell gently, do not use other chemical
to clean it. Don’t drip or splash water to the projector, don’t place water cup or other
container filled with liquid near the projector.
* Long time using or too loud volume used headphone, it’s will be caused permanent
hearing damage.
* Please do not use the projector when go across the road, drive a motor vehicle or bicycle,
prevent from traffic accidents.
* Please only use the permitted batteries, chargers and accessories, use any other product
will violate the warranty regulations and may be dangerous.
* Please deal with abandoned machine and accessories as the local relevant environmental
regulations.
* Any questions during use the projector, please contact your local distributor or direct
contact our company’s customer service center.
* About the memory loss caused by projector damage, repair or other reason, our company
assumes no responsibility, the user should obey user manual to do standard operation, and
timely backup.

4
2. Projector structure
2.1 Interface
1 Project on/off 8 Optical
2 Focus 9 HDMI-IN
3 Power 10 LAN
4 Micro SD 11 IR remote control
5 USB 12 DC-12V
6 AV-IN
7 Earphone
2.2 Integral drawing

5
2.3 Remote control

6
1 Power 2 Mute
3 VOL - 4 Play
5 Previous 6 Home
7 Direction key- up/down/left/right 8 Menu
9 Web 10 Number key: 0
11 Delete 12 Number keys: 1-9
13 Screen switch(4:3/16:9) 14 OK
15 Back 16 Next

7
17 HDMI 18 Vol+
19 3D 20 Brightness
3 Power On/Off:
﹡Power on: press the power button to turn on the projector.
Power on Logo is starting…
﹡Power off: long press the power button to pop up the options menu, select the power off :
Click power off to safe turn off the projector.
Force to power off: long press power button about 10 seconds, projector is forced to power
8
off.
4. Operation
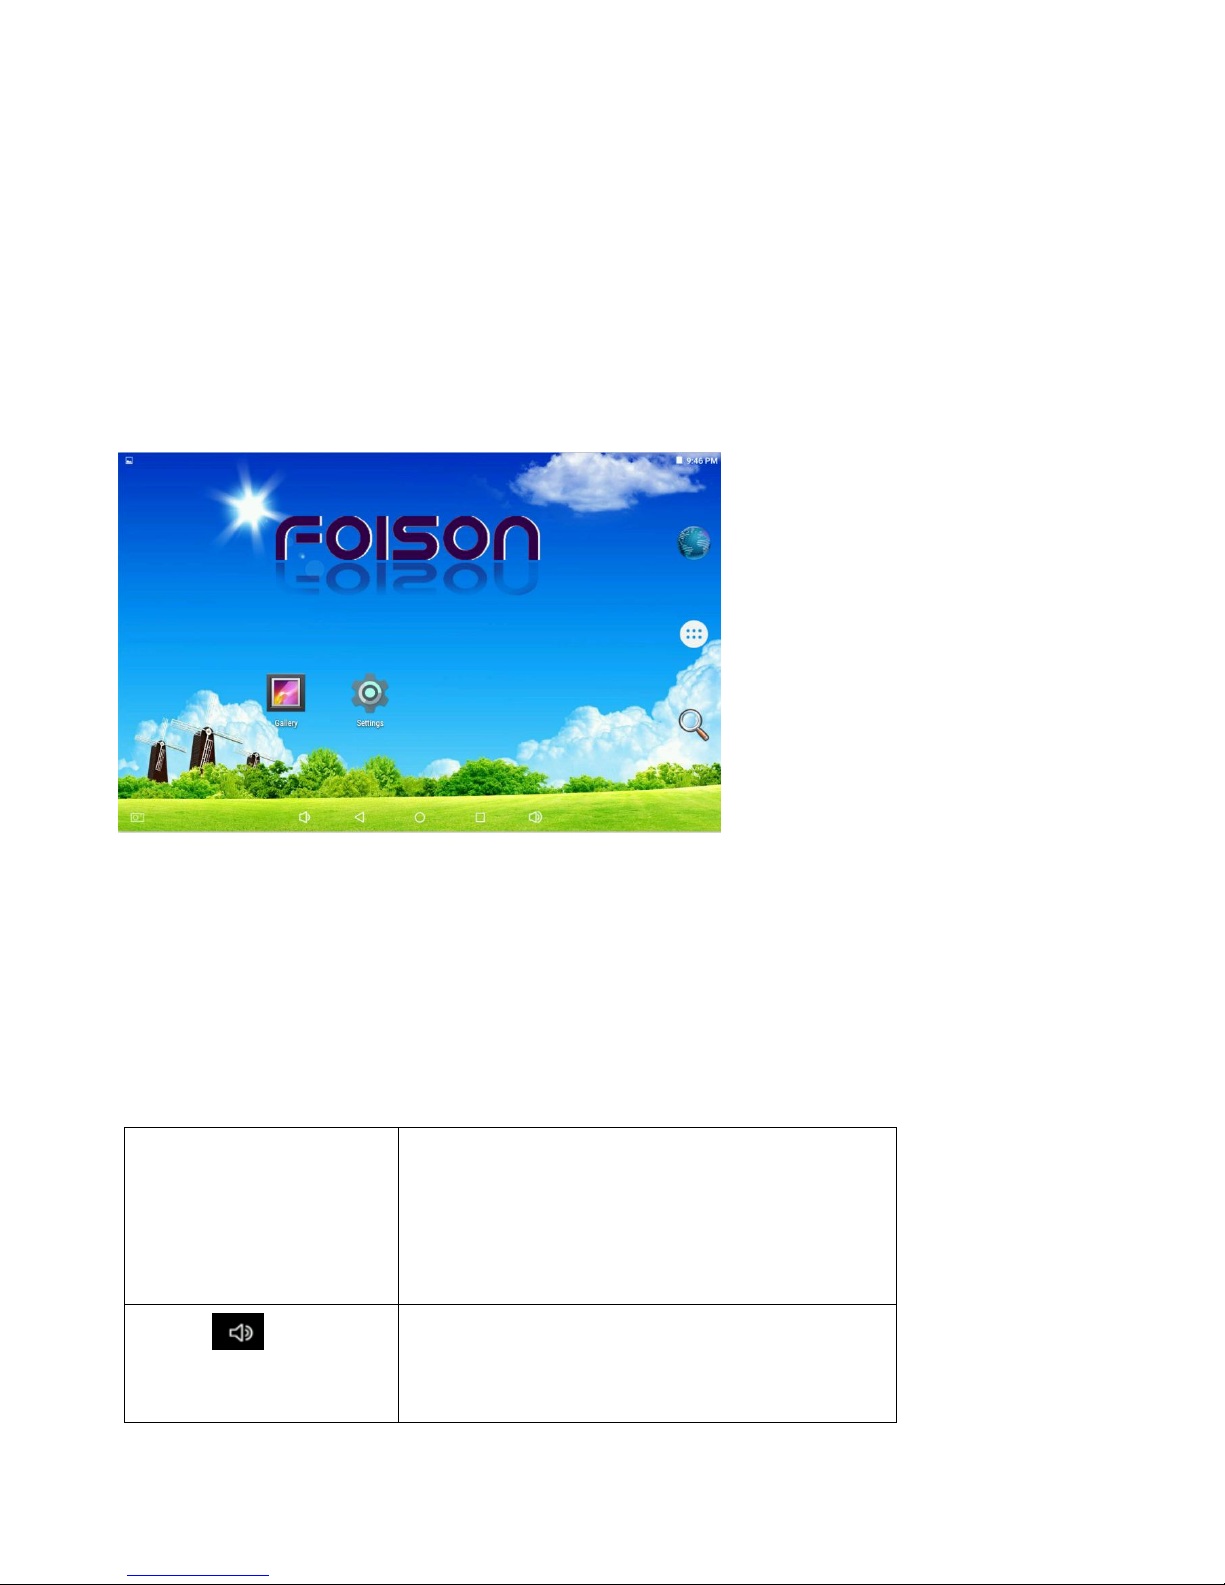
4.1 Desktop
After system start up normally, Android 5.1 system desktop will be show.
Defaulted system desktop icons: status bar, quick search bar, main menu tabs etc.
The status bar display the network state of current system, battery power, time and other
information.
4.2 Android button:
Android system used the buttons:
Power
Long press 3-5 seconds to power on,
Long press 10 seconds to force it power
off.
Vol+
Lightly touch once to add one volume,
long press to maximum volume
9
Vol-
Lightly touch once to reduce one volume,
long press to mute volume
HOME
Lightly touch back to homepage, long
press to select the operation
system(Android 5.1 tablet system & TV
Box system)
Return
Lightly touch back to previous menu
Function
Lightly touch to enter APP interface in
Android tablet system
Menu
Long press to open all applications
running in the background
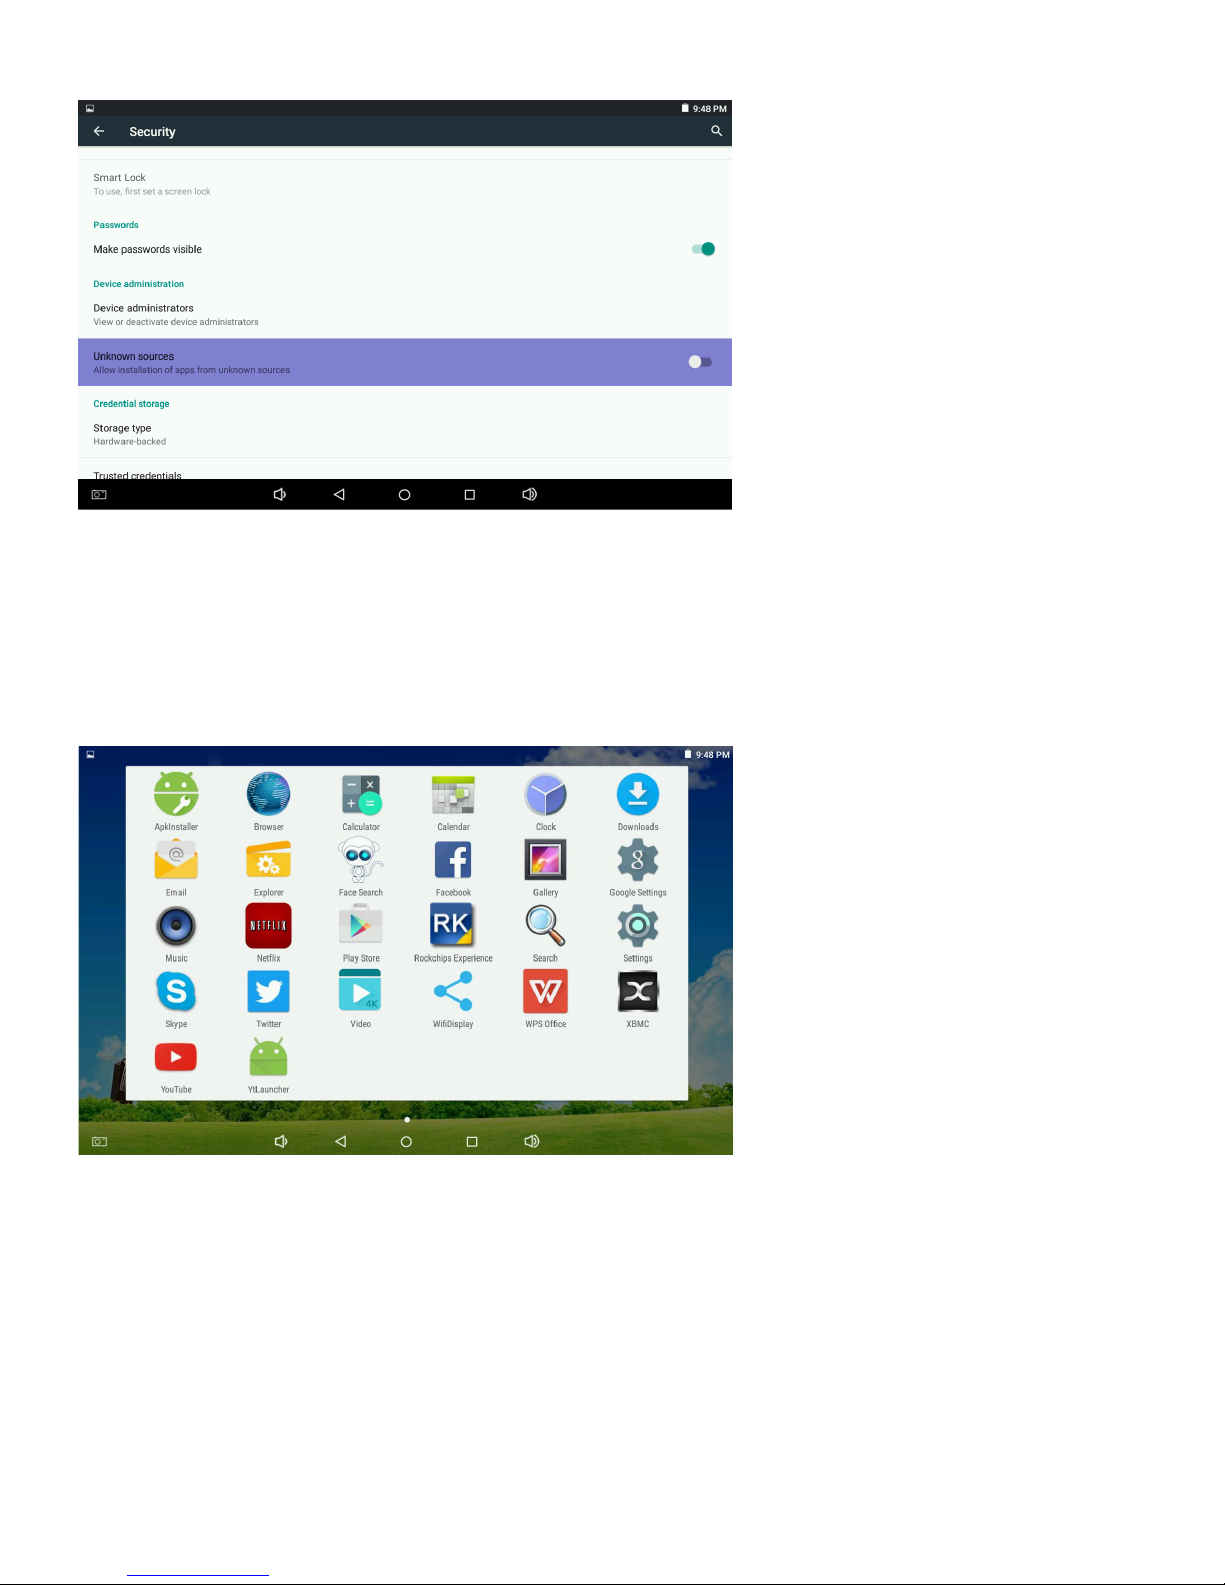
4.3 Menu
Click home screen’s main menu tabs:
Tablet system

10
TV Box system
You can do the system settings、 running existed applications、 installing new applications、
playing music、 playing video、 web browsing etc in the main menu.
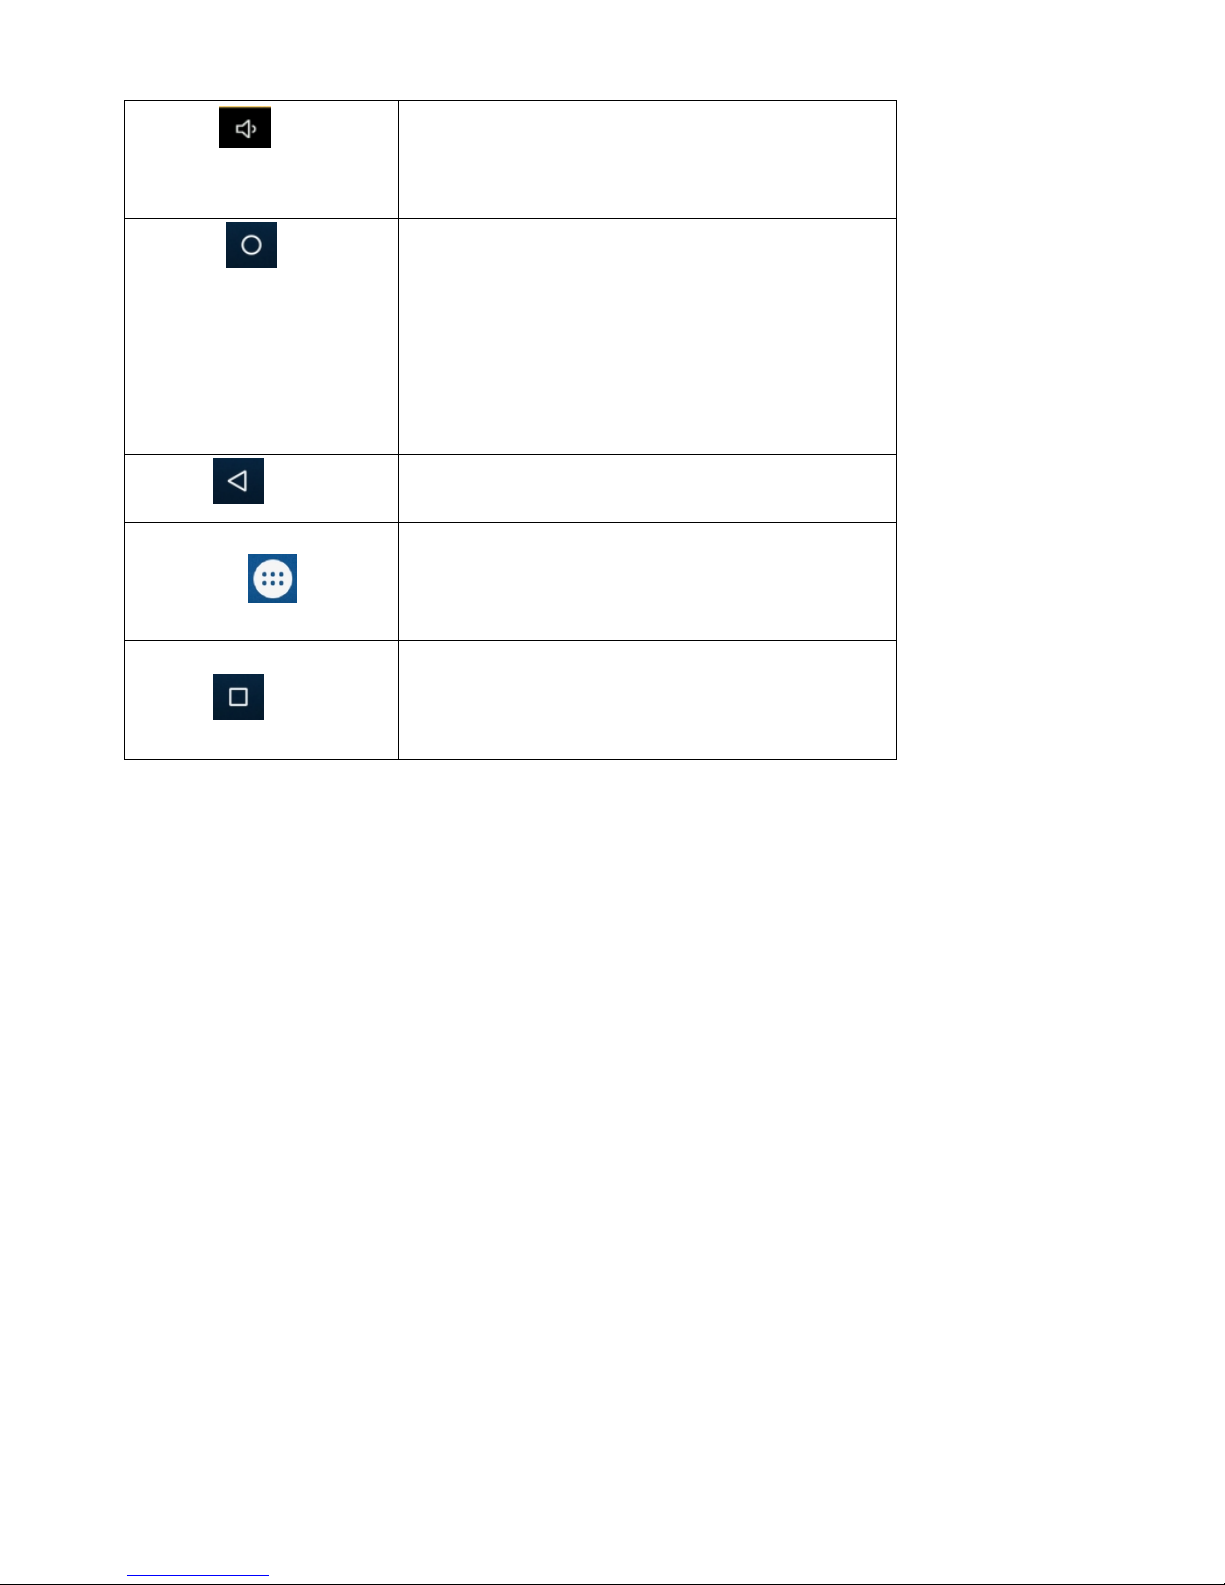
Install applications:
The first time download the APP application, click the application, the security window will be
pop up, click OK to enter the setting interface:
11
Open unknown source button and exit, then click the downloaded application to install it.
4.4 System setting:
Click the “settings” icon to open the system setting interface in main menu interface:
Tablet system
TV Box system

12
Click settings button to see the following:
Select the relevant items to do the corresponding operation, for example:
*WLAN:

13
*Volume setting:
*Display setting:
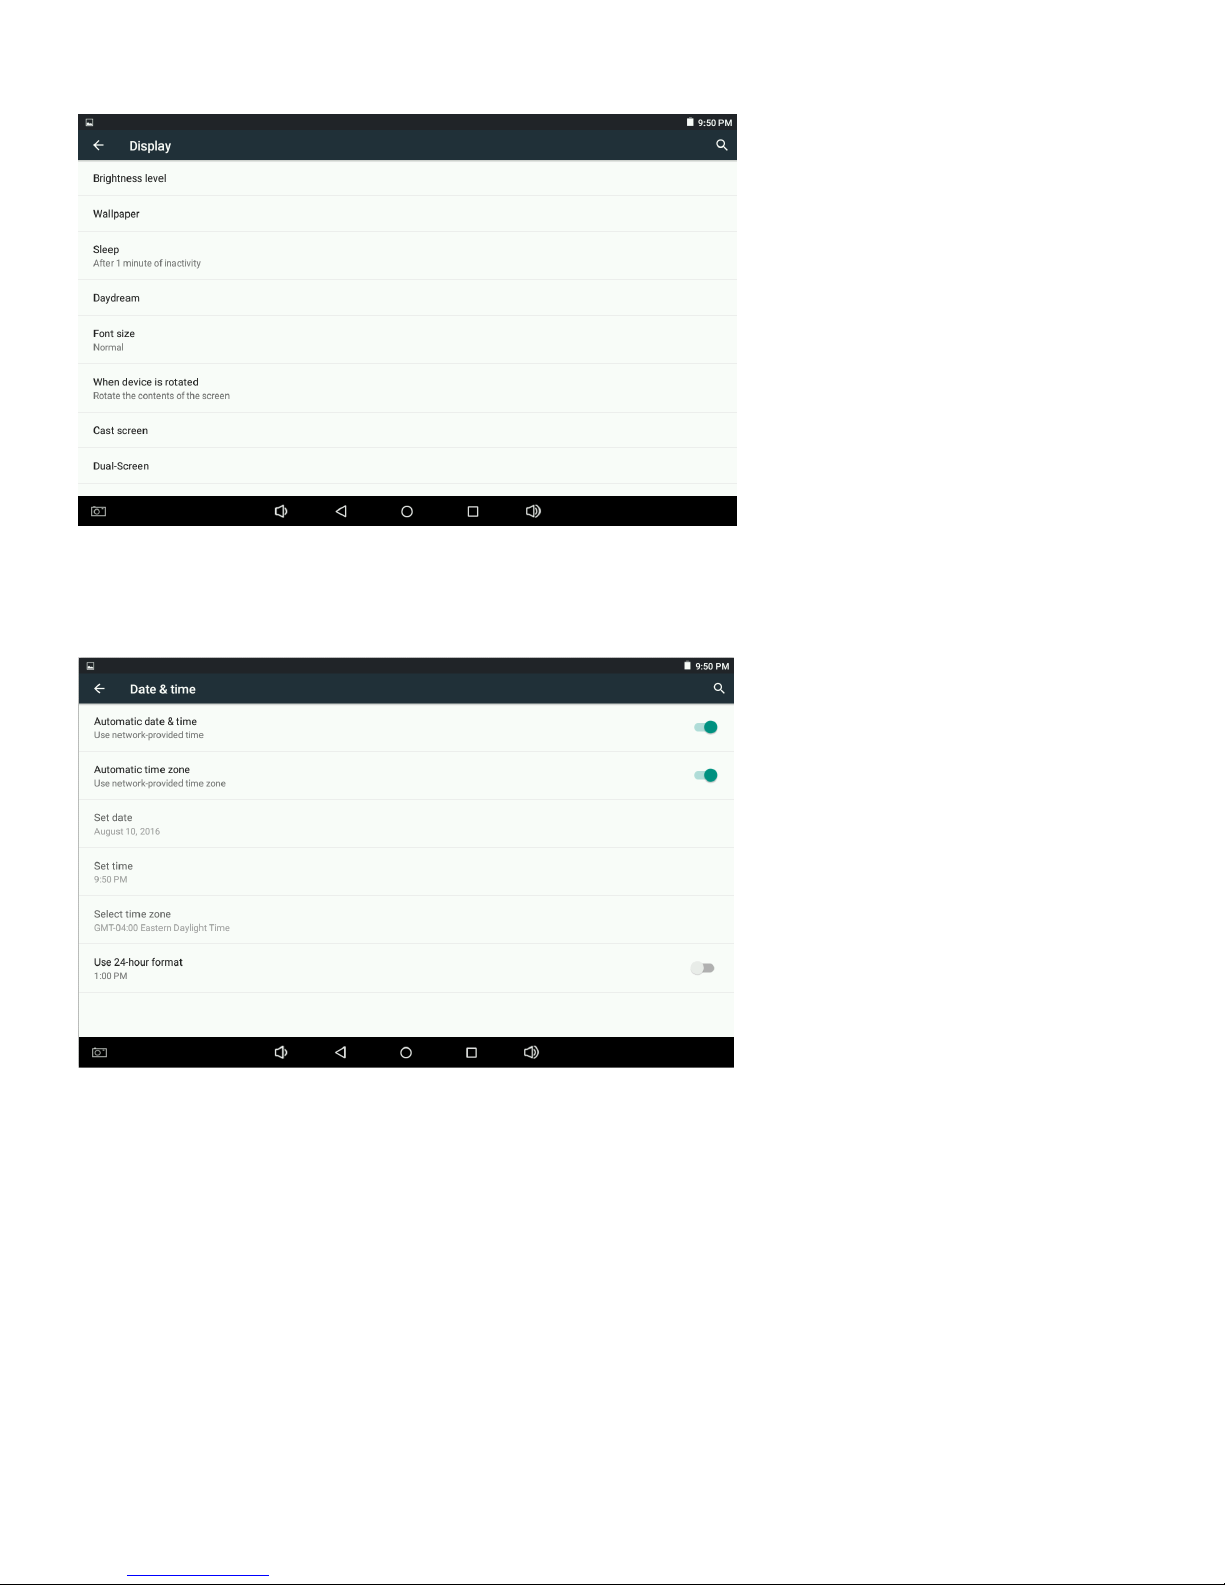
14
*Date & time setting:
*Device:

15
*Developer options
Open the about device option, continuous touch 8 times in the last column version number,
then back and exit the current page to enter the setting interface, display the developer
options to do the relevant developer operations, in general, it is not recommended to use:

16
4.5 Date & time setting:
Select the "Date & time setting option" in the settings interface to enter the date & time
setting interface:
You can select auto data: use the network provided time.
You also can select the date setting, time zone, time setting, time format, date format etc.
Date setting:
Time setting:

17
Select "Settings". Scroll bar can select morning or afternoon, click “Hour” to set the hour,
click “Minute” to set the minute.
Notes: you need to select your wanted date and time by yourself under first turn off the
auto time from network condition.
4.6 Brightness setting:
Select "Display setting” in setting interface to enter the display setting interface, scroll the
pull-down menu bar to select the "Brightness" as below show:
Projector brightness and trapezium correction:
18
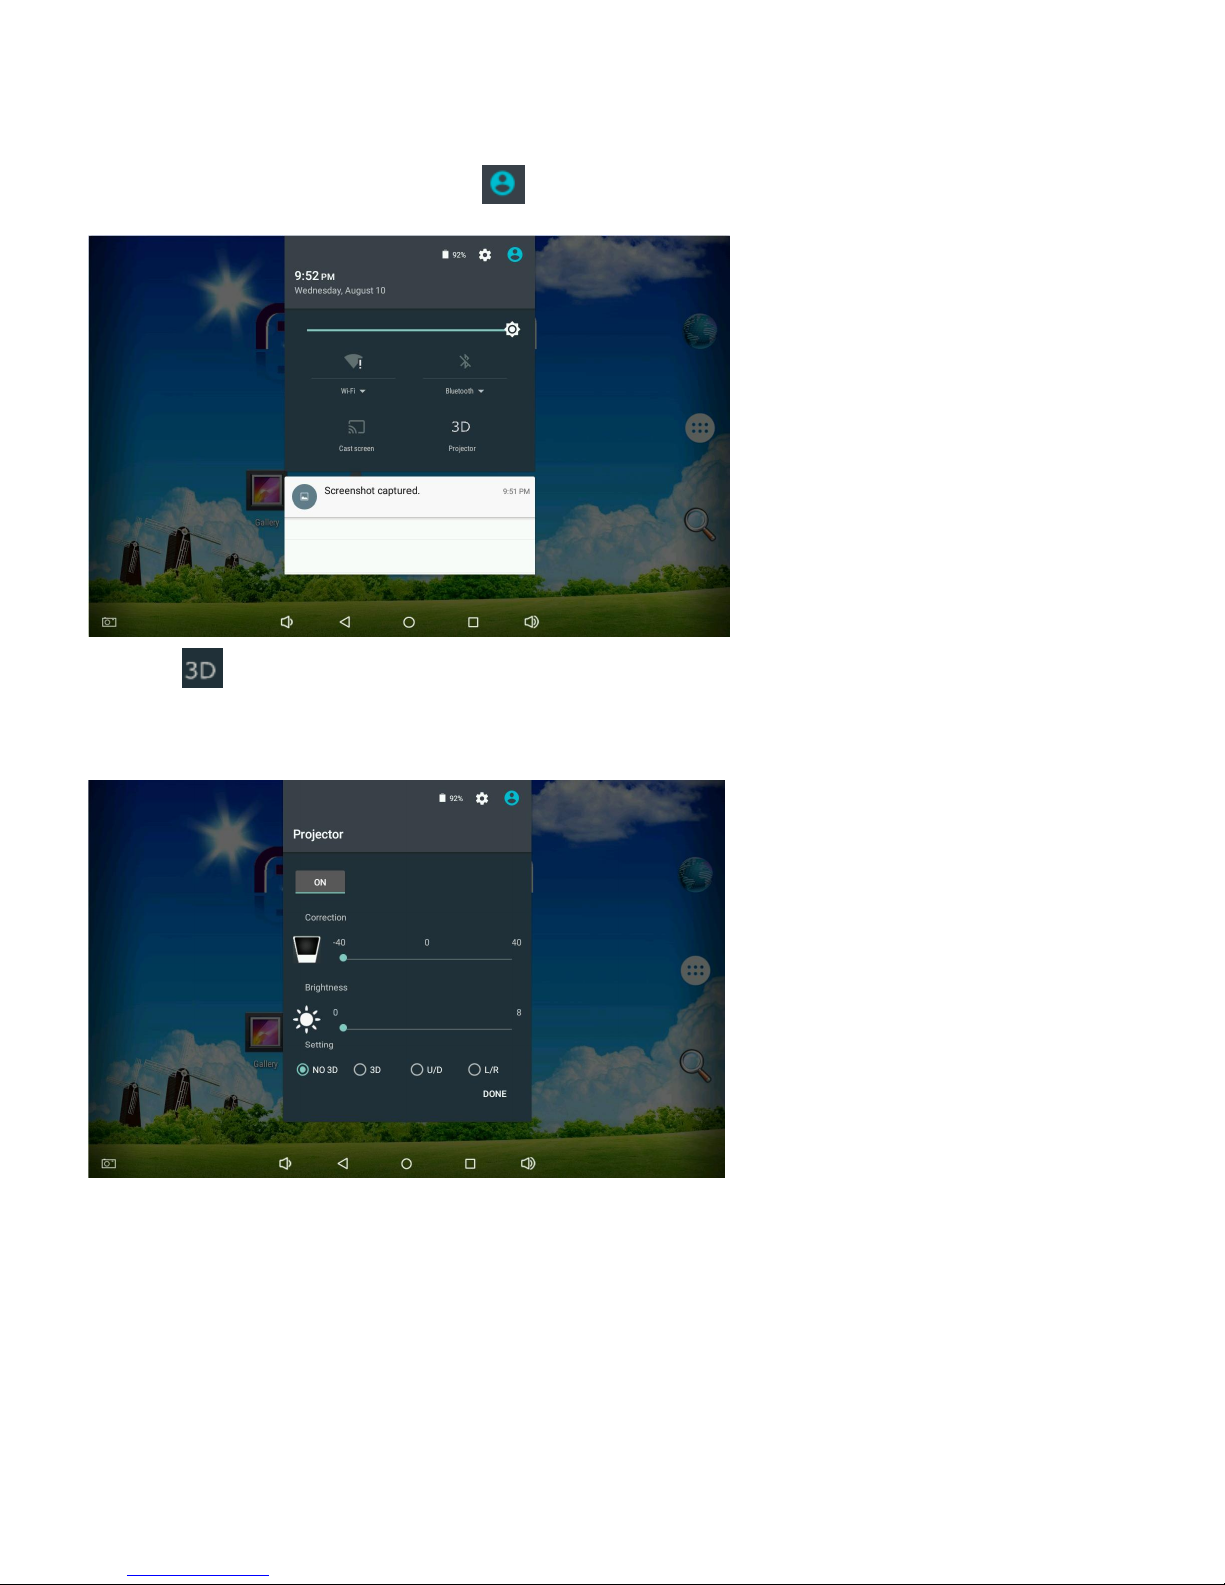
Lightly touch the upper right corner in any interface, after showed the battery symbol,
drop-down upper right corner, click to show the menu:
Click the icon again, appear the following picture to set the projection brightness and
trapezium correction.
4.7 Application
* Wi-Fi connection
Click the “settings” icon in main menu to enter the “system settings” interface, click “Wi-Fi

19
and Ethernet” to enter the “Wi-Fi and Ethernet” interface, Click the "Wi-Fi" column can
quick open the Wi-Fi function, click the "Wi-Fi setting" column can enter the "Wi-Fi setting
interface”:
Use keyboard to input the Wi-Fi password, click and connect Wi-Fi:
Remark: this projector support 2.4G & 5G Wi-Fi.
*HDMI
This projector support HDMI input.
Connect the signal source(signal source is in work condition), then click the remote control

20
button to project signal source picture in projector.
1.Click management application in settings to list all system applications:
2.Click unloading the Apk :
3.Click unloading button to finish:

21
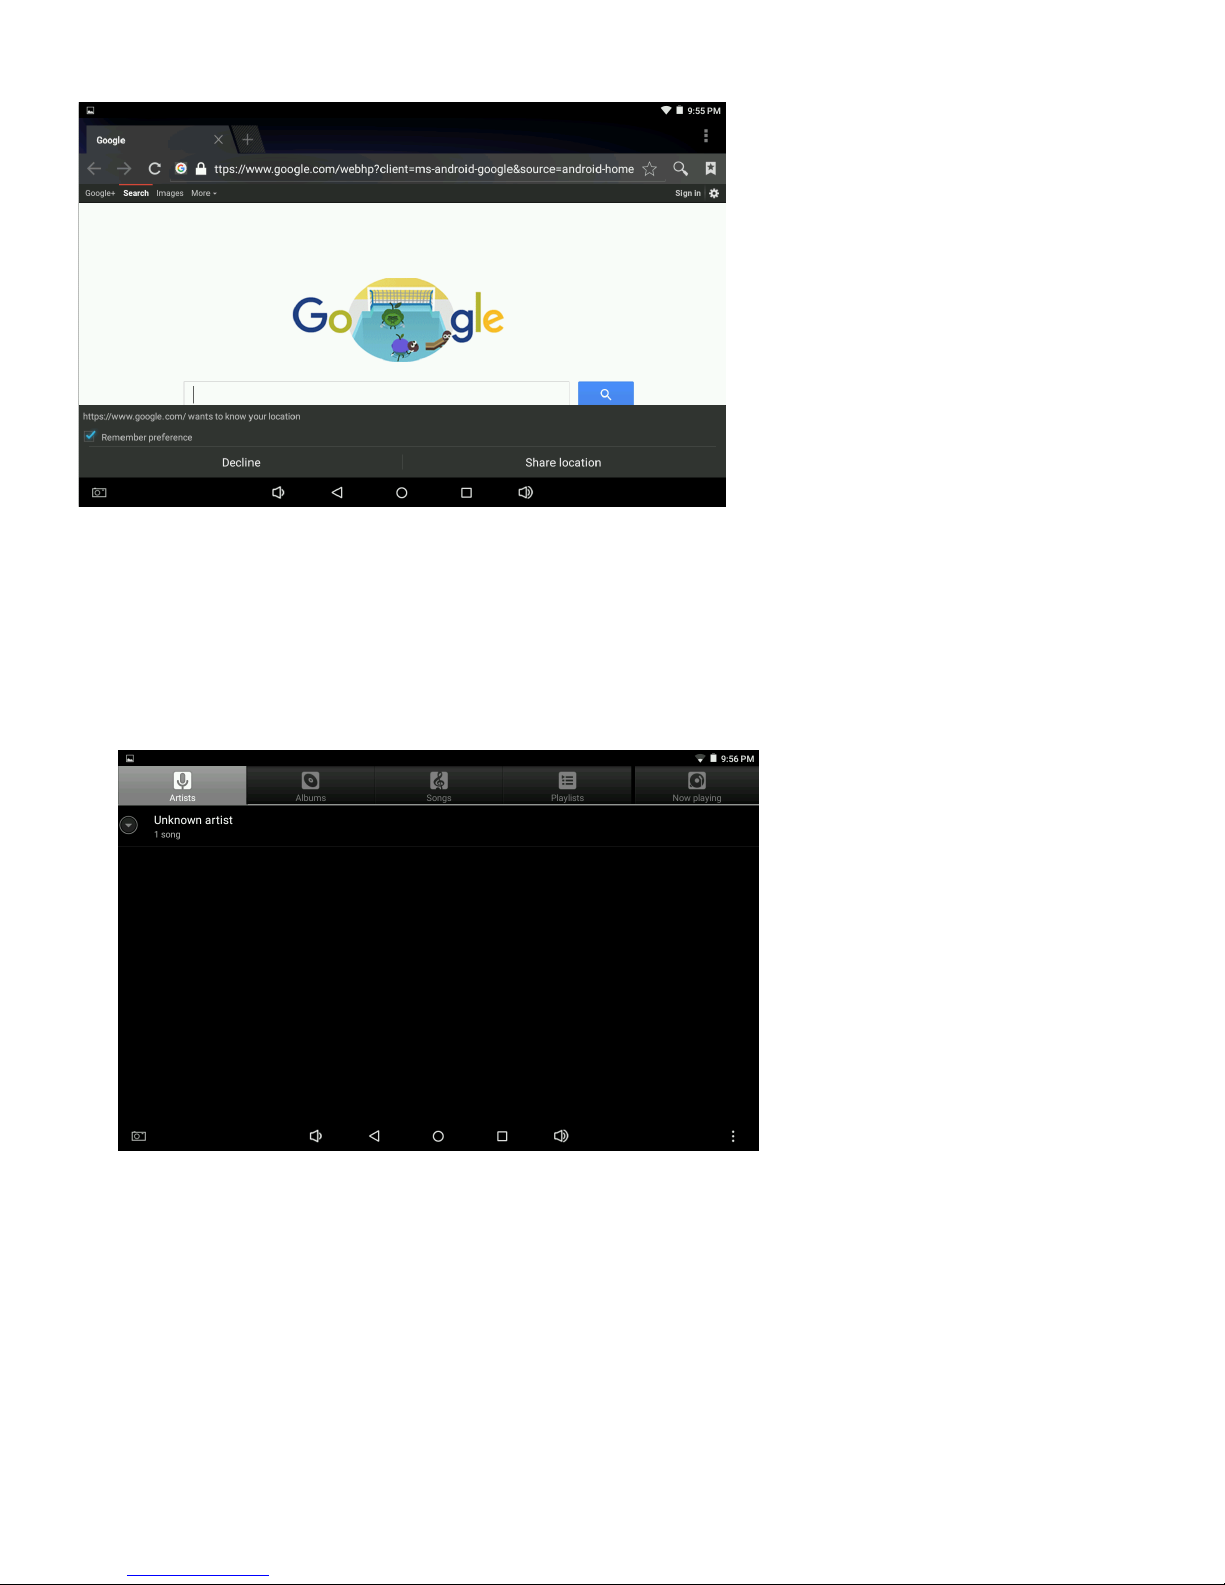
4.8 Internet
Web browsing:
After connected the internet, open home page or menu page internet icon as below:
Appear internet page, you can input website to browse it.
22
4.9 Music play
Click “music” icon in main menu to enter the music play interface, here default will list all
audio files in the user data area of the system:

23
You can sync transfer audio files by USB/SD card/internet downloading.
Select the corresponding tab to view: “musician”、”album”、 “song” etc interface. Select
songs to play.
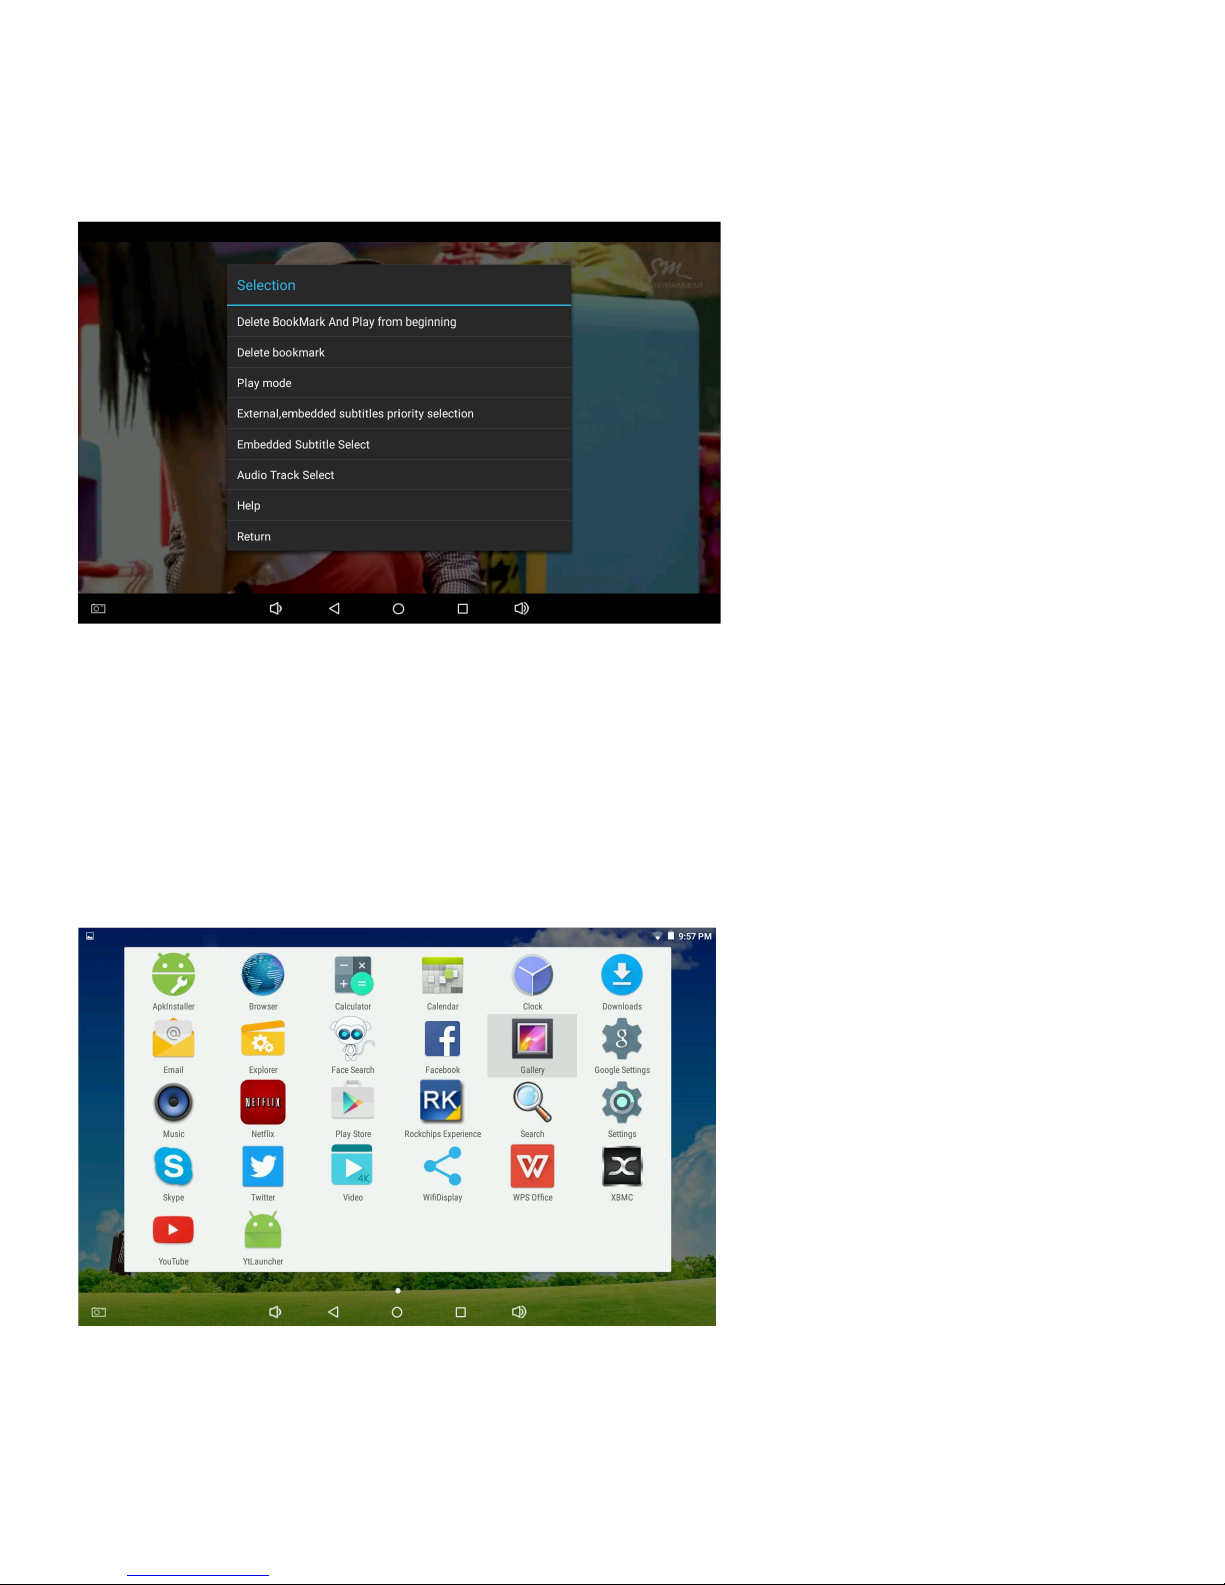
4.10 Video play:
Click “video player” in main menu to enter “video player” interface, here list all video files and
pictures files:
Select video files to enter video play interface as below.
24
Select “play” “stop” “fast-forward” “fast-backward” “progress bar” etc button to control the
play progress. Also can set the play condition in play interface:
Remark: the virtual button will be hid in video playing, put your finger on the edge of touch
panel, upward slide can reset virtual button.
4.11 Photo browsing
Click “photo gallery” in the main menu to enter the “photo gallery” interface, here list all
photo files and video files:

25
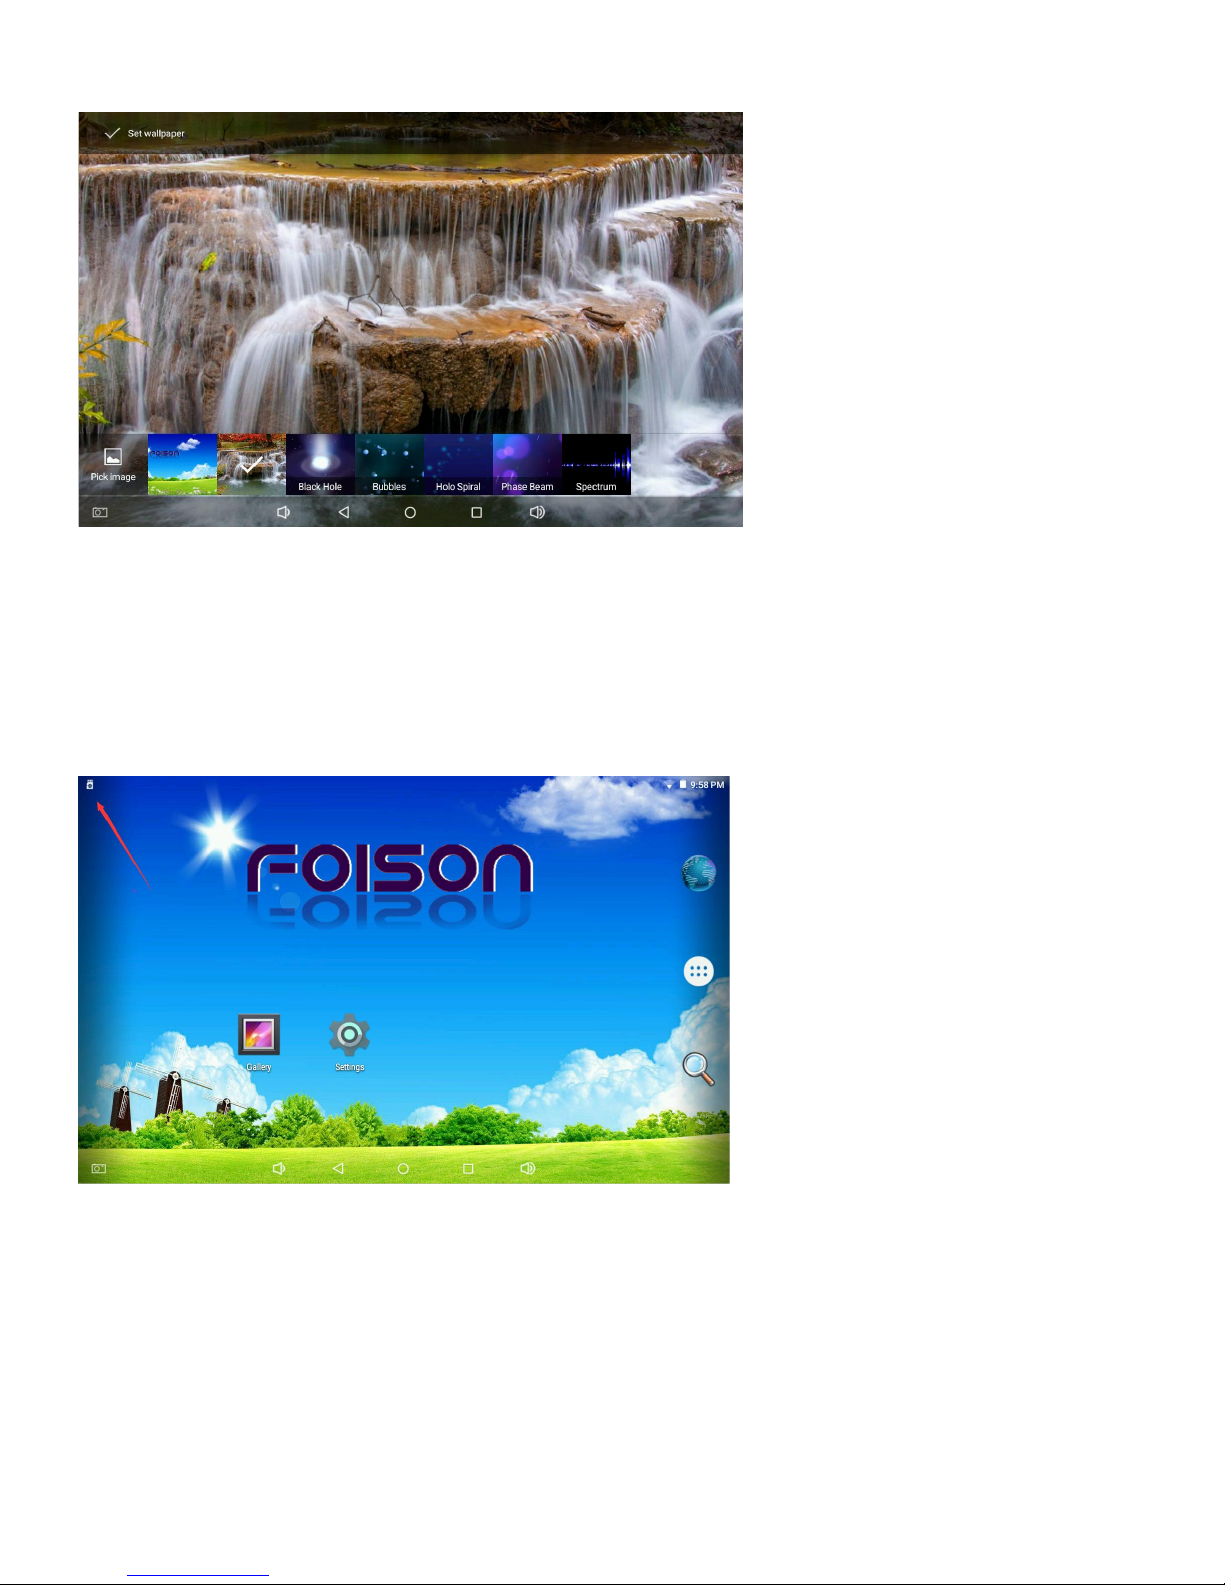
4.12 Wallpaper(Tablet system):
Tablet system support static photo and 3D wallpaper.
Long press the screen to pop up dialogue in the desktop interface:
Select as below:
Select “wallpaper”: can customize photo as wallpaper.
Select “dynamic wallpaper”: can select 3D wallpaper by the system offered.
Select “photo gallery”: can select the static wallpaper by the system offered.
Click “wallpaper” setting to select wallpaper, then click ok to finish setting.
26
4.13 External Devices
* USB Connection
When use USB to connect with U Disk, or when insert TF card, the upper left corner will
show the following interface:
"USB connected": indicate the external memory (SD card) to check and operate in the
following menus at this moment:

27
Attention: direct connecting to the computer is not supported by this device, please use USB
devices to transfer and save files.
4.14 3D Function:
The projector get 3D video sources from network or external USB, and play it with
the built-in player, press remote control “3D button” to switch the mode, this device
support format is double image mode, please wear active 3D glasses(long press power
button about 3 seconds) to enjoy 3D movies.
Note: 3D function support depends on the software version, such as FSP6 top luxury
version support 3D function, FSP6-S version does not support 3D function with standard
version.
4.15 Screen sleep mode:
When the project screen and touch screen are display at the same time, you can turn off the
touch screen to save battery power, system default time is 30S, the users can adjust the
time.

28
When touch screen keep into sleep mode, if the user need to turn on the touch screen, only
need to slightly touch it once; after 30S no operation, the touch screen will sleep again.
4.16 Multi-screen sync:
The user can click the built-in third-party application , it can realize smartphone and
projector multi-screen sync interation play mobile phone’s content through WIFI connected:
4.17 External ports
The projector has six external ports (see 2.2 Integral drawing)

29
* 1. USB*2, can external connect keyboard, mouse, and USB devices.
* 2. AV-IN*1, can connect AV-OUT devices to project.
* 3. HDMI-IN*1, can connect HDMI-OUT devices to project.
* 4. Optical output*1, can use optical connection cable to realize the lossless connection
between the projector and optical speaker.
*5.LAN-IN*1, use common network cable input to perfect enjoy internet experience.
The picture is only for reference, product appearance and function make the object as
the standard, product rules and design are subject to change without prior notice.
5. Troubleshooting
* 1. First start slow
After upgraded the system firmware, the first start need to install pre-installed application
software, the startup time is about 3-5 minutes, it will be much faster run after started, it also
the same after resetted.
* 2. Can not connect the wireless network
First ensure your internet wireless router is normal working.
The distance between projector and routers is within standard value (15M range), and no
metal walls or other barriers between them.
Internet user name and password are correct.
*3. Get hot
Many applications use at the same time;
The brightness of screen& projector normal work open the maximum value;
Low power charging;

30
Long time use the projector or projector around environment is too high temperature;
Above these factors will make the projector get too hot, this is normal phenomenon.
*4. System can not normally work
When installing some third-party applications, it may lead to abnormal work, you can press
the reset key(R key near power port DC) to reset the system.
*5. Web page can not be open
Please keep the distance between the projector and WiFi source, and the projector is within
the valid range.
Please restart WiFi to try once again.
*6. Sometimes work very slow
This is a normal phenomenon. Please close some background programs, or unload some
third-party applications to release more system resources.
*7. Don’t power on
In overcharge and power supply protection condition, the battery will appear protection
state, please use a needle object to insert the R hole, reset the projector, then press the
power button to turn on.
6. Accessories
Name
Quantity
Remark
Projector
1
Standard
Stand
1
Standard
Adapter
1
Standard

31
Remote control
1
Standard
Warranty card
1
Standard
User manual
1
Standard
HDMI cable
1
Optional
One 3 AV-IN cable
1
Optional
3D glasses
1
Optional
7.FCC NOTE
This device complies with part 15 of the FCC Rules. Operation is subject to the condition that this device does not cause
harmful interference (1) this device may not cause harmful interference, and (2) this device must accept any interference
received, including interference that may cause undesired operation.
Any changes or modifications not expressly approved by the party responsible for compliance
could void the user's authority to operate the equipment.
NOTE: This equipment has been tested and found to comply with the limits for a Class B digital device, pursuant to Part 15 of
the FCC Rules. These limits are designed to provide reasonable protection against harmful interference in a residential
installation. This equipment generates, uses and can radiate radio frequency energy and, if not installed and used in accordance
with the instructions, may cause harmful interference to radio communications. However, there is no guarantee that interference
will not occur in a particular installation.
If this equipment does cause harmful interference to radio or television reception,
which can be determined by turning the equipment off and on, the user is encouraged to try to correct the interference by one or
more of the following measures:
-- Reorient or relocate the receiving antenna.
-- Increase the separation between the equipment and receiver.
-- Connect the equipment into an outlet on a circuit different
from that to which the receiver is connected.
-- Consult the dealer or an experienced radio/TV technician for help.
To maintain compliance with FCC’s RF Exposure guidelines, This equipment should be installed and operated with minimum
distance between 20cm the radiator your body: Use only the supplied antenna.
FCC ID: 2AJRK-FSP6
 Loading...