

Page 1
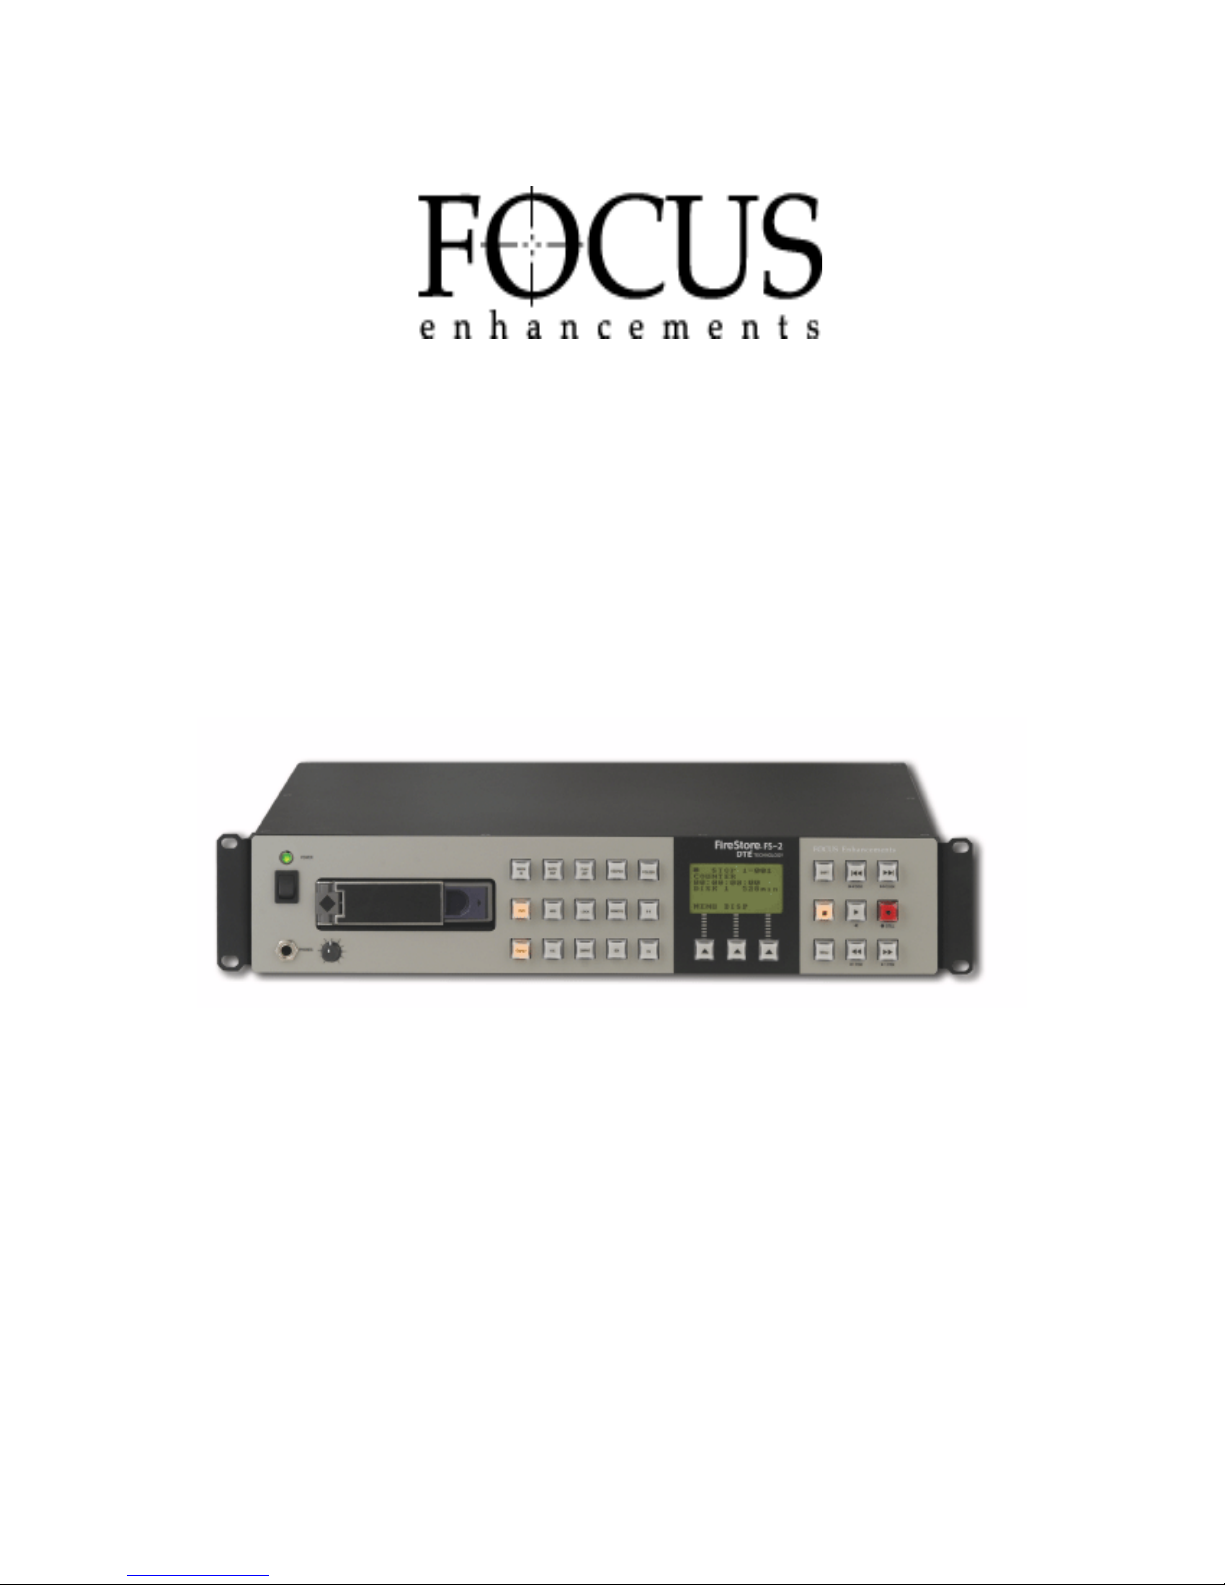
FS-2 STUDIO DTE DISK
ECORDER
R
RELEASE 1.0
USER GUIDE
Part Number: MANL-0927-02
October 1, 2004
Part Number: MANL-0927-02
Page 2

LEGAL NOTICES
THIS DOCUMENT CONTAINS CONFIDENTIAL AND TRADE SECRET INFORMATION OF FOCUS
ENHANCEMENTS AND ITS RECEIPT OR POSSESSION DOES NOT CONVEY ANY RIGHTS TO
REPRODUCE OR DISCLOSE ITS CONTENTS, OR TO MANUFACTURE, USE, OR SELL ANYTHING
THAT IT MAY DESCRIBE. REPRODUCTION, DISCLOSURE, OR USE IN WHOLE OR IN PART
WITHOUT THE SPECIFIC WRITTEN AUTHORIZATION OF FOCUS ENHANCEMENTS IS STRICTLY
FORBIDDEN.
EVERY EFFORT HAS BEEN MADE TO ENSURE THAT THE INFORMATION IN THIS DOCUMENT IS
COMPLETE AND ACCURATE AT THE TIME OF PRINTING; HOWEVER, THE INFORMATION
CONTAINED IN THIS DOCUMENT IS SUBJECT TO CHANGE.
Copyright 2004 Focus Enhancements
Unpublished All Rights Reserved
The material contained in this document is also protected by copyright laws of the United States of America
and other countries. It may not be reproduced or distributed in any form by any means, altered in any
fashion, or stored in a data base or retrieval system, without express written permission of FOCUS
ENHANCEMENTS.
FOCUS ENHANCEMENTS cannot be responsible for unauthorized use of equipment and will not make
allowance or credit for unauthorized use or access.
Contacting FOCUS ENHANCEMENTS:
Email: support@FOCUSinfo. com
Telephone: 408-370-9963 8AM - Noon
and 1PM - 5PM (PST), Monday to Friday (Hint: Mondays tend to
be the busiest)
Fax: 408-866-4859
Address: FOCUS ENHANCEMENTS, Inc.
1370 Dell Ave.
Campbell, CA. 95008
WARNING: TO PREVENT FIRE OR SHOCK HAZARD, DO NOT EXPOSE THIS EQUIPMENT TO RAIN
OR MOISTURE.
IMPORTANT NOTICE
The serial number for this equipment is located on the bottom of the unit. Please write this serial number
on your enclosed warranty card and keep it in a secure area. This is for your security.
CAUTION:
This product satisfies FCC regulations when shielded cables and connectors are used to connect the unit
to other equipment. To prevent electromagnetic interference with electric appliances such as radios and
televisions, use shielded cables and connectors for connections.
NOTE:
This equipment has been tested and found to comply with the limits for a Class A digital device, pursuant
to Part 15 of the FCC Rules. These limits are designed to provide reasonable protection against harmful
interference in a residential installation. This equipment generates, uses, and can radiate radio frequency
energy and, if not installed and used in accordance with the instructions, may cause harmful interference
to radio communications. However, there is no guarantee that interference will not occur in a particular
installation. If this equipment does cause harmful interference to radio or television reception, which can be
Part Number: MANL-0927-02
Page 3

determined by turning the equipment off and on, the user is encouraged to try to correct the interference by
one or more of the following measures:
• Reorient or relocate the receiving antenna.
• Increase the separation between the equipment and receiver.
• Connect the equipment into an outlet on a circuit different from that to which the receiver is connected.
• Consult the dealer or an experienced radio/TV technician for help.
Information to User
Alteration or modifications carried out without appropriate authorization may invalidate the user's right to
operate the equipment.
CAUTION:
• Use of controls or adjustments or performance of procedures other than those specified herein may
result in hazardous radiation exposure.
• The use of optical instruments with this product will increase eye hazard.
THE ON/OFF SWITCH IS SECONDARY CONNECTED AND THEREFORE DOES NOT SEPARATE THE
UNIT FROM MAINS POWER IN STANDBY POSITION.
CAUTION: TO PREVENT ELECTRIC SHOCK, DO NOT USE A (POLARIZED) PLUG WITH AN
EXTENSION CORD, RECEPTACLE OR OTHER OUTLET UNLESS THE BLADES CAN BE FULLY
INSERTED TO PREVENT BLADE EXPOSURE.
ATTENTION: POUR PREVENIR LES CHOCS ELECTRIQUES NE PAS UTILISER CETTE FICHE
POLARISEE AVEC UN PROLONGATEUR, UNE PRISE DE COURANT OU UNE AUTRE SORTIE DE
COURANT, SAUF SI LES LAMES PEUVENT ETRE INSEREES A FOND SANS EN LAISSER AUCUNE
PARTIE A DECOUVERT.
Please read through these operating instructions so you will know how to operate your model properly.
After you have finished reading the instructions, put them away in a safe place for future reference.
IMPORTANT
CAUTION: TO PREVENT THE RISK OF ELECTRIC SHOCK, DO NOT REMOVE COVER. NO USER
SERVICEABLE PARTS INSIDE. REFER SERVICING TO QUALIFIED SERVICE PERSONNEL.
The lightning flash with arrowhead symbol, with an equilateral triangle, is intended to alert the user to the
presence of uninsulated “dangerous voltage” within the product’s enclosure that may be of sufficient
magnitude to constitute a risk of electric shock to persons.
The exclamation point within an equilateral triangle is intended to alert the user to the presence of
important operating and maintenance (servicing) instructions in the literature accompanying the unit.
Important Safety Instructions:
READ INSTRUCTIONS - All the safety and operating instructions should be read before the product is
operated.
RETAIN INSTRUCTIONS - The safety and operating instructions should be retained for future reference.
HEED WARNINGS - All warnings on the product and in the operating instructions should be adhered to.
Part Number: MANL-0927-02
Page 4

FOLLOW INSTRUCTIONS - All operating and use instructions should be followed.
CLEANING - Unplug this product from the wall outlet before cleaning. The product should be cleaned only
with a polishing cloth or a soft dry cloth. Never clean with furniture wax, benzine, insecticides or other
volatile liquids since they may corrode the cabinet.
ATTACHMENTS - Do not use attachments not recommended by the product manufacturer as they may
cause hazards.
WATER AND MOISTURE - Do not use this product near water - for example, near a bathtub, wash bowl,
kitchen sink, or laundry tub; in a wet basement; or near a swimming pool; and the like.
ACCESSORIES - Do not place this product on an unstable cart, stand, tripod, bracket or table. The
product may fall, causing serious injury to a child or an adult, and serious damage to the product. Use only
with a cart, stand, tripod, bracket or table recommended by the manufacturer, or sold with the product. Any
mounting of the product should follow the manufacturer's instructions, and should use a mounting
accessory recommended by the manufacturer.
CART - A product and cart combination should be moved with care. Quick stops, excessive force, and
uneven surfaces may cause the product and cart combination to overturn.
VENTILATION - Slots and openings in the cabinet are provided for ventilation and to ensure reliable
operation of the product and to protect it from overheating, and these openings must not be blocked or
covered. The openings should never be blocked by placing the product on a bed, sofa, rug, or other similar
surface. This product should not be placed in a built-in installation such as a bookcase or rack unless
proper ventilation is provided or the manufacturer's instructions have been adhered to.
POWER SOURCES - This product should be operated only form the type of power source indicated on the
marking label. If you are not sure of the type of power supply to your home, consult your dealer or local
power company.
LOCATION - The appliance should be installed in a stable location.
NON-USE PERIODS - The power cord of the appliance should be unplugged from the outlet when left
unused for a long period of time.
GROUNDING OR POLARIZATION -
• If this product is equipped with a polarized alternating current line plug (a plug having one blade wider
than the other), it will fit into the outlet only one way. This is a safety feature. If you are unable to insert
the plug fully into the outlet, try reversing the plug. If the plug should still fail to fit, contact your electrician to replace your obsolete outlet. Do not defeat the safety purpose of the polarized plug.
• If this product is equipped with a three-wire grounding type plug, a plug having a third (grounding) pin,
it will only fit into a grounding type power outlet. This is a safety feature. If you are unable to insert the
plug into the outlet, contact your electrician to replace your obsolete outlet. Do not defeat the safety
purpose of the grounding type plug.
POWER-CORD PROTECTION - Power supply cords should be routed so that they are not likely to be
walked on or pinched by items placed upon or against them, paying particular attention to cords at plugs,
convenience receptacles, and the point where they exit the product.
OUTDOOR ANTENNA GROUNDING - If an outside antenna or cable system is connected to the product,
be sure the antenna or cable system is grounded so as to provide some protection against voltage surges
and built-up static charges. Article 810 of the National Electric Code, ANSI/NFPA 70, provides information
with regard to proper grounding of the mast and supporting structure, grounding of the lead-in wire to an
Part Number: MANL-0927-02
Page 5
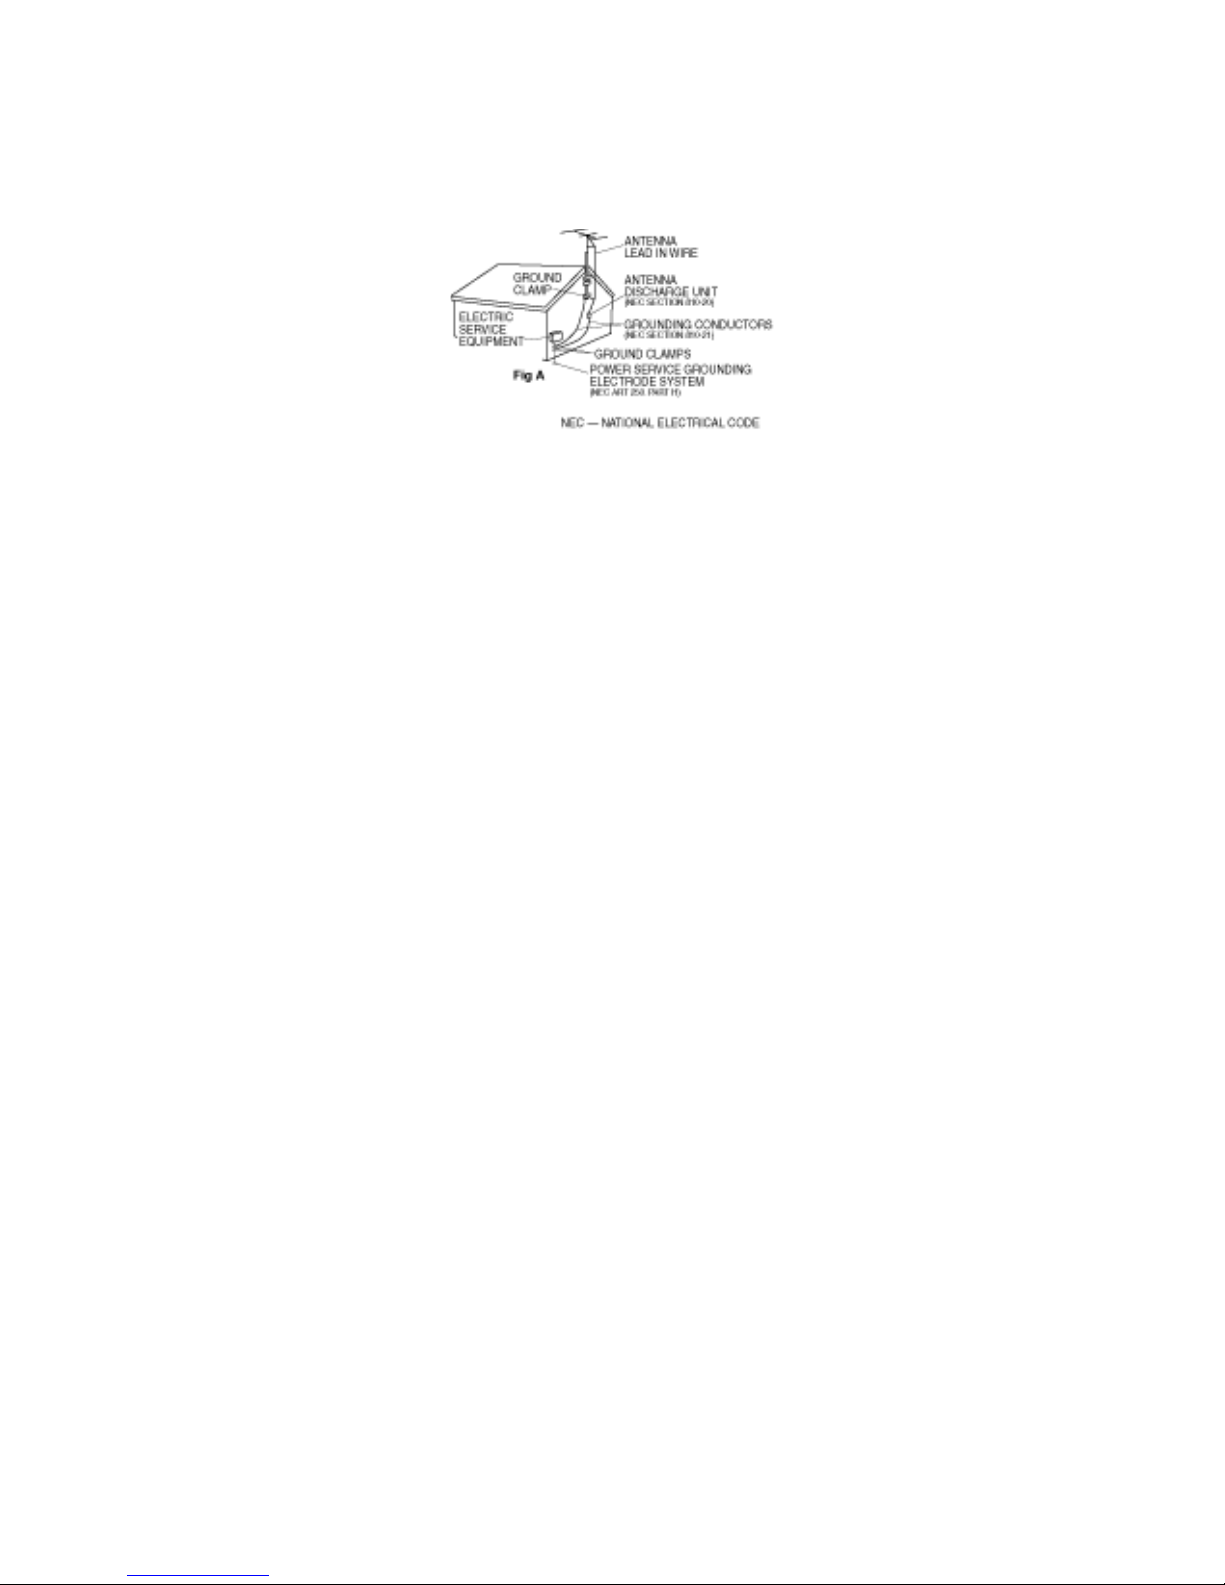
antenna discharge unit, size of grounding connectors, location of antenna discharge unit, connection to
grounding electrodes, and requirements for the grounding electrode. See Fig. A.
LIGHTNING - For added protection for this product during a lightning storm, or when it is left unattended
and unused for long periods of time, unplug it from the wall outlet and disconnect the antenna or cable
system. This will prevent damage to the product due to lightning and power-line surges.
POWER LINES - An outside antenna system should not be located in the vicinity of overhead power lines
or other electric light or power circuits, or where it can fall into such power lines or circuits. When installing
an outside antenna system, extreme care should be taken to keep from touching such power lines or
circuits as contact with them might be fatal.
OVERLOADING - Do not overload wall outlets, extension cords, or integral convenience receptacles as
this can result in a risk of fire or electric shock.
OBJECT AND LIQUID ENTRY - Never push objects of any kind into this product through openings as they
may touch dangerous voltage points or short-out parts that could result in a fire or electric shock. Never
spill liquid of any kind on the product.
SERVICING - Do not attempt to service this product yourself as opening or removing covers may expose
you to dangerous voltage or other hazards. Refer all servicing to qualified service personnel.
DAMAGE REQUIRING SERVICE - Unplug this product from the wall outlet and refer servicing to qualified
service personnel under the following conditions:
• When the power-supply cord or plug is damaged.
• If liquid has been spilled, or objects have fallen into the product.
• If the product has been exposed to rain or water.
• If the product does not operate normally by following the operating instructions. Adjust only those controls that are covered by the operating instructions as an improper adjustment of other controls may
result in damage and will often require extensive work by a qualified technician to restore the product
to its normal operation.
• If the product has been dropped or damaged in any way.
• When the product exhibits a distinct change in performance - this indicates a need for service.
REPLACEMENT PARTS - When replacement parts are required, be sure the service technician has used
replacement parts specified by the manufacturer or have the same characteristics as the original part.
Unauthorized substitutions may result in fire, electric shock or other hazards.
SAFETY CHECK - Upon completion of any service or repairs to this product, ask the service technician to
perform safety checks to determine that the product is in proper operating condition.
WALL OR CEILING MOUNT - The product should not be mounted to a wall or ceiling.
HEAT - The product should be situated away from heat sources such as radiators, heat, registers, stoves
or other products (including amplifiers) that produce heat.
For customers within the USA and Canada, FOCUS ENHANCEMENTS, Inc. warrants this product against
defects in materials or workmanship as follows:
Part Number: MANL-0927-02
Page 6

For a period of TWO years from the date of purchase, FOCUS ENHANCEMENTS, Inc. will repair or
replace the unit, at our option, without charge for parts or labor. After the period of TWO years, you must
pay all parts and labor charges.
The limited warranty is extended only to the original purchaser. It does not cover damage or failure caused
by or attributable to Acts of God, abuse, misuse, improper or abnormal usage, faulty installation, improper
maintenance, lightning, or other incidences of excessive voltage, or any repairs or tampering by other than
the FOCUS ENHANCEMENTS repair facility. It does not cover replacement of batteries or other
consumable parts, transportation costs or damage in transit. This warranty will become void if the serial
number or model number identification has been wholly or partially removed or erased. Repair or
replacement under the terms of this warranty do not extend the terms of this warranty. Repairs or
replacement performed outside of the warranty period will carry a warranty for 60 days from return
shipment. This warranty can not be modified by an agent of FOCUS ENHANCEMENTS, Inc. unless in
written and signed by an officer of FOCUS ENHANCEMENTS, Inc.
Should this product prove defective in workmanship or material, the consumer's sole remedies shall be
such repair or replacement provided by the terms of this warranty. Under no circumstances shall FOCUS
ENHANCEMENTS, Inc. be liable for any loss or damage, direct, consequential, or incidental, arising out of
the use of or inability to use this product. Some states do not allow limitations on how long an implied
warranty lasts or the exclusions or limitations of incidental or consequential damages, so the above
limitations or exclusions may not apply to you. This warranty gives you specific legal rights. You may also
have other rights which vary from state to state.
Before requesting warranty or repair service, refer to http://www.focusinfo.com/support/, to review the
Trouble Shooting guidelines and the FAQs.
In the United States or Canada, to obtain warranty service, call or write the FOCUS ENHANCEMENTS,
Inc. Technical Support Line for a Return Material Authorization (RMA) number. Technical Support can be
reached at:
Email:support@FOCUSinfo. com
Telephone:408-370-9963 8AM - Noon
and 1PM - 5PM (PST), Monday to Friday (Hint: Mondays tend to be the busiest)
Fax: 408-866-4859
Address: FOCUS ENHANCEMENTS, Inc.
1370 Dell Ave.
Campbell, CA. 95008
Please mark the RMA number clearly on the outside of the package. Include a copy of your sales receipt,
a brief description of the symptoms, your name, address within the USA or Canada, phone number and
any special shipping instructions. Then deliver or ship the product, postage and shipping costs prepaid, to
the address above.
For customers outside the USA or Canada, A warranty can only be offered through your dealer or
distributor and not through FOCUS ENHANCEMENTS directly, for this product.
Please contact your dealer or distributor for repairs or technical support. Refer to http://www.focusinfo.com/
order-desk under, “FOCUS Resellers Worldwide”, for a list of International Dealers and Authorized Service
Centers.
Part Number: MANL-0927-02
Page 7

FS-2 Studio DTE Disk Recorder User Guide TABLE OF CONTENTS
CHAPTER 1 INTRODUCTION
What is a DTE Disk Recorder? ....................................................................................................1-1
What is the FireStore FS-2? ........................................................................................................1-1
Basic Applications .......................................................................................................................1-2
Receiving, Unpacking, and Inspecting ........................................................................................1-2
Package Contents .......................................................................................................................1-2
Installation and Site Requirements ..............................................................................................1-3
Mounting in a 19” Electronics Rack .............................................................................................1-3
Inserting the Internal 3.5” IDE Drive ............................................................................................1-3
Using External Disk Drives ..........................................................................................................1-4
Physical Features ........................................................................................................................1-4
Front Panel ............................................................................................................................1-4
Rear Panel ............................................................................................................................1-5
Setting Up the FS-2 .....................................................................................................................1-7
Formatting the Drive ....................................................................................................................1-9
Setting the Time and Date ...........................................................................................................1-9
CHAPTER 2 FS-2 FUNCTIONS
Edit/Utility/Input Buttons ..............................................................................................................2-1
Edit Function Keys ................................................................................................................2-1
MARK IN - Mark In Key ..................................................................................................2-1
MARK OUT - Mark Out Key ...........................................................................................2-1
PLAYLIST – Add to Playlist key .....................................................................................2-1
KEEPER - Keeper Key ...................................................................................................2-1
FOLDER - Folder Key ....................................................................................................2-1
Utility Function Keys ..............................................................................................................2-2
OSD - (On Screen Display) ............................................................................................2-2
HDD – HDD Bypass Key ................................................................................................2-2
LOCK – Keypad Lock Key ..............................................................................................2-2
REMOTE – Remote Key ................................................................................................2-2
E-E – Electronic to Electronic Key ..................................................................................2-2
Input Source Selection Keys .................................................................................................2-2
CMPST – Composite Video Source Input Key ...............................................................2-2
Y/C – S-Video .................................................................................................................2-2
CMPNT – Component Video Source Input Key .............................................................2-2
SDI Serial Digital Video Source Input Key ......................................................................2-2
DV Video Source Input Key ............................................................................................2-2
LCD Menu Soft Keys ...................................................................................................................2-2
Transport Control Keys ................................................................................................................2-3
MENU Menu Key ............................................................................................................2-3
Back Index Key ...............................................................................................................2-3
Forward Index Key .........................................................................................................2-3
Stop Key .........................................................................................................................2-3
Play Key .........................................................................................................................2-3
Record Key (Red) ........................................................................................................... 2-3
SHIFT Shift Key ..............................................................................................................2-3
FS-2 Studio DTE Disk Recorder User Manual
7
Part Number: MANL-0927-02
Page 8

TABLE OF CONTENTS FS-2 Studio DTE Disk Recorder User Guide
Back Search Key ............................................................................................................2-4
Forward Search Key .......................................................................................................2-4
LCD Display .................................................................................................................................2-4
(1) Play/Record Status Symbol ......................................................................................2-5
(2) Record/Play Status Indicator .....................................................................................2-5
(3) Current System Status ..............................................................................................2-5
(4) Volume Number ........................................................................................................2-5
(5) Track or Clip Number ................................................................................................2-5
(6) Timecode/User Bit Display Mode ..............................................................................2-5
(7) Timecode or User Bit Value ......................................................................................2-6
(8) Current Disk Volume .................................................................................................2-6
(9) Available Space on Volume ......................................................................................2-6
(10) Folder Display .........................................................................................................2-6
(11) Soft Key One (MENU) Function Display .................................................................2-6
(12) Soft Key Two (DISP) Function Display ...................................................................2-6
(13) Soft Key Three (SHFT) Function Display ................................................................2-6
FS-2 Menus and Functions .........................................................................................................2-6
Menu Items ...........................................................................................................................2-7
Sub-Menu Available ..............................................................................................................2-7
Soft Keys ...............................................................................................................................2-7
Record Mode Menu ...............................................................................................................2-7
Normal Record ...............................................................................................................2-8
Retro Disk .......................................................................................................................2-8
Retro Cache ...................................................................................................................2-9
Loop Record ...................................................................................................................2-9
Still ................................................................................................................................2-10
Time Lapse ...................................................................................................................2-10
Control Mode .......................................................................................................................2-10
Local .............................................................................................................................2-10
Remote .........................................................................................................................2-10
AV/C .............................................................................................................................2-11
Syncro Slaved ..............................................................................................................2-11
Play Mode ...........................................................................................................................2-11
Play Clip .......................................................................................................................2-11
Loop Clip ......................................................................................................................2-11
Loop All .........................................................................................................................2-11
Play All ..........................................................................................................................2-11
Play From Mode ..................................................................................................................2-12
Track List ......................................................................................................................2-12
Play List ........................................................................................................................2-12
Folder List .....................................................................................................................2-12
Playlist .................................................................................................................................2-12
Open .............................................................................................................................2-13
Save .............................................................................................................................2-13
New ..............................................................................................................................2-13
Edit ...............................................................................................................................2-13
View ..............................................................................................................................2-15
Delete List .....................................................................................................................2-15
HDD Bypass ........................................................................................................................2-15
Internal HDD .......................................................................................................................2-15
Record Format Mode ..........................................................................................................2-16
8
FS-2 Studio DTE Disk Recorder User Guide
Part Number: MANL-0927-02
Page 9

FS-2 Studio DTE Disk Recorder User Guide TABLE OF CONTENTS
Setup Mode .........................................................................................................................2-16
SET DATE & TIME .......................................................................................................2-17
OS VERSION # ............................................................................................................2-17
OS UPGRADE ..............................................................................................................2-17
PAL/NTSC .................................................................................................................... 2-18
RS422 REMOTE ..........................................................................................................2-18
AUDIO INPUT ..............................................................................................................2-19
AUDIO IN LEVELS .......................................................................................................2-19
TC MODE .....................................................................................................................2-19
TC SET .........................................................................................................................2-20
ON SCREEN DISPLAY ................................................................................................2-21
FF/RW HI RES .............................................................................................................2-21
GPI PORT .................................................................................................................... 2-22
BACK LIGHT ................................................................................................................ 2-22
STOP OUTPUT ............................................................................................................2-22
AUDIO CORRECT .......................................................................................................2-23
PREFERENCES ...........................................................................................................2-23
ANALOG OUT ..............................................................................................................2-23
NETWORK SETTING MENU .......................................................................................2-23
REF VIDEO ..................................................................................................................2-25
VIDEO ADJUST ...........................................................................................................2-25
Utilities .................................................................................................................................2-25
ORGANIZE PINN .........................................................................................................2-25
ORGANIZE OMF ..........................................................................................................2-26
DELETE CLIP ...............................................................................................................2-26
FORMAT DISK .............................................................................................................2-27
PARTITION .................................................................................................................. 2-27
REPAIR ........................................................................................................................2-27
FILE NAME ...................................................................................................................2-28
FACTORY RESET .......................................................................................................2-28
CHAPTER 3 USING THE FS-2
How to Make a Recording ...........................................................................................................3-2
How to Playback ..........................................................................................................................3-2
How to Put Recorded Clips on a Computer System ....................................................................3-2
Mounting FireWire Disk Drives to Computer Systems (Windows XP, 2000, 98SE and ME) 3-3
Using FireStore FS-2 Recorded Avid OMF Clips on Avid Editing Systems ..........................3-4
Dismounting FireWire Disk Drives from Computer Systems
(Windows XP, 2000, 98SE and ME) .....................................................................................3-5
Mounting FireWire Disk Drives to Computer Systems (Macintosh) ......................................3-5
Dismounting FireWire Disk Drives from Computer Systems (Macintosh) .............................3-6
Creating a Play List .....................................................................................................................3-6
How to Mark Scenes ...................................................................................................................3-7
How to Connect the FS-2 to a Computer Network ......................................................................3-7
FS-2 Studio DTE Disk Recorder User Manual
Part Number: MANL-0927-02
9
Page 10

TABLE OF CONTENTS FS-2 Studio DTE Disk Recorder User Guide
CHAPTER 4 SPECIFICATIONS
Technical Specifications ..............................................................................................................4-1
Input/Outputs .........................................................................................................................4-1
Control ...................................................................................................................................4-2
Power ....................................................................................................................................4-2
Physical Specification ...........................................................................................................4-2
Audio/Video/Timecode Specification .....................................................................................4-2
DTE File Formats ..................................................................................................................4-2
Disk Information ....................................................................................................................4-2
Compatible DV Formats ........................................................................................................4-2
FS- 2 LCD Display Modes ...........................................................................................................4-3
10
FS-2 Studio DTE Disk Recorder User Guide
Part Number: MANL-0927-02
Page 11

INTRODUCTION
CHAPTER 1
INTRODUCTION
Thank you for purchasing the Focus Enhancements
FireStore FS-2 DTE DV Studio Disk Recorder.
The FS-2 is designed for use as a record or
playback device in studios, mobile vans and other
installations.
The purpose of this User Guide is to explain the
features and operation of the FireStore FS-2. Study
the contents of this User Guide before attempting to
use your FS-2.
Check the Focus Enhancements website regularly
for updates to FS-2 software and documentation:
www.focusinfo.com/support
Alternatively, contact your Focus Enhancements
FireStore dealer/distributor.
This chapter contains the following sections:
What is a DTE Disk Recorder?
What is the FireStore FS-2?
Basic Applications
Receiving, Unpacking, and Inspecting
Package Contents
Installation and Site Requirements
Mounting in a 19” Electronics Rack
Inserting the Internal 3.5” IDE Drive
Using External Disk Drives
Physical Features
Setting Up the FS-2
Formatting the Drive
Setting the Time and Date
What is a DTE Disk
Recorder?
A DTE Disk Recorder is a device that allows you to
record or play back DV video directly to/from a
removable IDE disk drive or removable FireWire
disk drives. The FS-2 features analog and digital
inputs and outputs including DV25, SDI, composite,
component, S-Video, AES/EBU digital audio and
balanced analog audio.
Audio and video are recorded to disk as a DV25
data stream in NLE native file formats.
What is the FireStore FS-2?
The FireStore FS-2 is a DTE Disk Recorder that
mounts horizontally in a standard electronics rack.
With the FireStore FS-2, it is possible to:
Input DV25, SDI, composite,
component, S-Video, AES/EBU digital
audio and balanced analog audio and
record to disk in native DV25 NLE file
formats.
Playback video from disk or transcode
during recordings in DV25, SDI,
composite, component, S-Video, AES/
EBU digital audio and balanced analog
audio formats.
Capture clips to hard disk at the
acquisition stage. There is no need to
capture them later.
Record clips to disk in DTE
Technology-based “edit-ready” file
formats such as Raw DV, AVI Type 1,
AVI Type 2, Matrox AVI, Canopus AVI,
Pinnacle AVI, QuickTime and Avid DVOMF. This means clips are
immediately available to your NLE
system without first having to transfer
or convert the files.
Connect your FireWire disk directly to
your computer or connect via FireStore
which allows mounting and
dismounting of the drives without recabling or computer re-boots.
Use the FS-2's 10/100BaseT Ethernet
port to share files over a network via
FTP.
Jump from clip to clip without spooling
through tape when in playback mode.
As well as video, record and play back
embedded DV audio in either 2channel (16-bit, 48kHz) or 4-channel
(12-bit, 32kHz) formats.
FS-2 Sudio DTE Disk Recorder User Guide
1 - 1
Part Number: MANL-0927-02
Page 12

INTRODUCTION
Record external timecode, embedded
timecode or create your own Free
Run, Regen or Rec Run timecode. You
can also preset timecode and user-bit
values.
Record, play and navigate using
FireStore FS-2's VTR style controls.
Lock to your facilities Reference Video
signal during playback and record.
Record and recall a single frame of DV
video and record user definable timelapse sequences.
Use trick playback modes up to 30X/-
30X fast-forward and rewind speeds,
reverse play, loop clip and loop entire
disk.
Control the FS-2 remotely via industry
standard RS422 (Sony 9-pin),
FireWire (for starting record/pause or
AV/C) from a DV based camcorder
GPI port. Alternatively, or control the
FS-2 via RS-232C (using the optional
wired remote control available as an
accessory).
Create and save multiple playlists on
the FS-2. These can be shared
between different units.
Utilize the internal 120GB, 7200RPM,
3.5" IDE drive or daisy chain up to
eight FireWire (IEEE-1394) hard
drives (in addition to the internal
removable FSHDD-1 FireWire hard
drive) together for extremely long,
uninterrupted record times.
Basic Applications
You can use the FS-2 in the acquisition stage of
production, the editing/post production stage, and
the presentation stage. The FS-2 is most useful in
the following applications:
Presentation Video Source
Broadcast Tape Deck Replacement
Time Lapse Recorder
Film-to-Disk Transfer
NLE/Linear Edit Source/Recorder
Endless Video Program Looping
Security Recorder/Player
Medical Recorder/Player
Web based Video Storage
Industrial Monitoring
Video DJ and Karaoke Player
Outside Broadcast
Receiving, Unpacking, and
Inspecting
Upon receipt of the FS-2 unit, examine the shipping
container. If there is evidence of damage or rough
handling, have an agent of the carrier present when
the equipment is unpacked.
Unpack the equipment carefully. Inspect it for
scratches, dents, or cracks. If the equipment is
damaged, save all packing materials and notify
both Focus Enhancements and the carrier
immediately.
Package Contents
Please take a moment to study the contents of your
FS-2 package. You should have the following
contents:
One (1) FireStore FS-2 unit with
attached rack mounting ears
One (1) 120GB IDE disk drive in caddy
One (1) 6-pin to 6-pin FireWire cable
(for External Drive connection)
One (1) 6-pin to 6-pin FireWire cable
(for front panel port loop)
One (1) User Guide
One (1) Focus Enhancement's
Warranty Card and Statement
One (1) Focus Enhancement's
FireStore DV Conversion Suite Demo
Disk
If any of these contents are missing, contact Focus
Enhancements or your FireStore dealer/distributor
immediately.
1 - 2
FS-2 Sudio DTE Disk Recorder User Guide
Part Number: MANL-0927-02
Page 13
INTRODUCTION
You may need to purchase cables to connect more
than one hard disk drive to the FS-2 at a time. Your
Focus Enhancements dealer can help you identify
additional cables you may need.
Installation and Site Requirements
Focus Enhancements recommends that FS-2 units
be installed in a restricted access area, such as an
equipment room or closet and the installation be
performed by trained installers.
The units are designed and tested to operate
reliably between +5 - +40C (41 - 104 F).
To maintain this range, consider the following:
Air temperature surrounding the
equipment must remain within the
specified range.
Air flow around the equipment must be
sufficient to maintain proper operating
temperatures
If in doubt about the site temperature, take
measurements to be certain. If measured
temperatures fall outside the defined ambient
temperature range, you must bring the temperature
within the defined range.
Storage temperature for the units must remain
between -20 - +60C (-4 - 140 F).
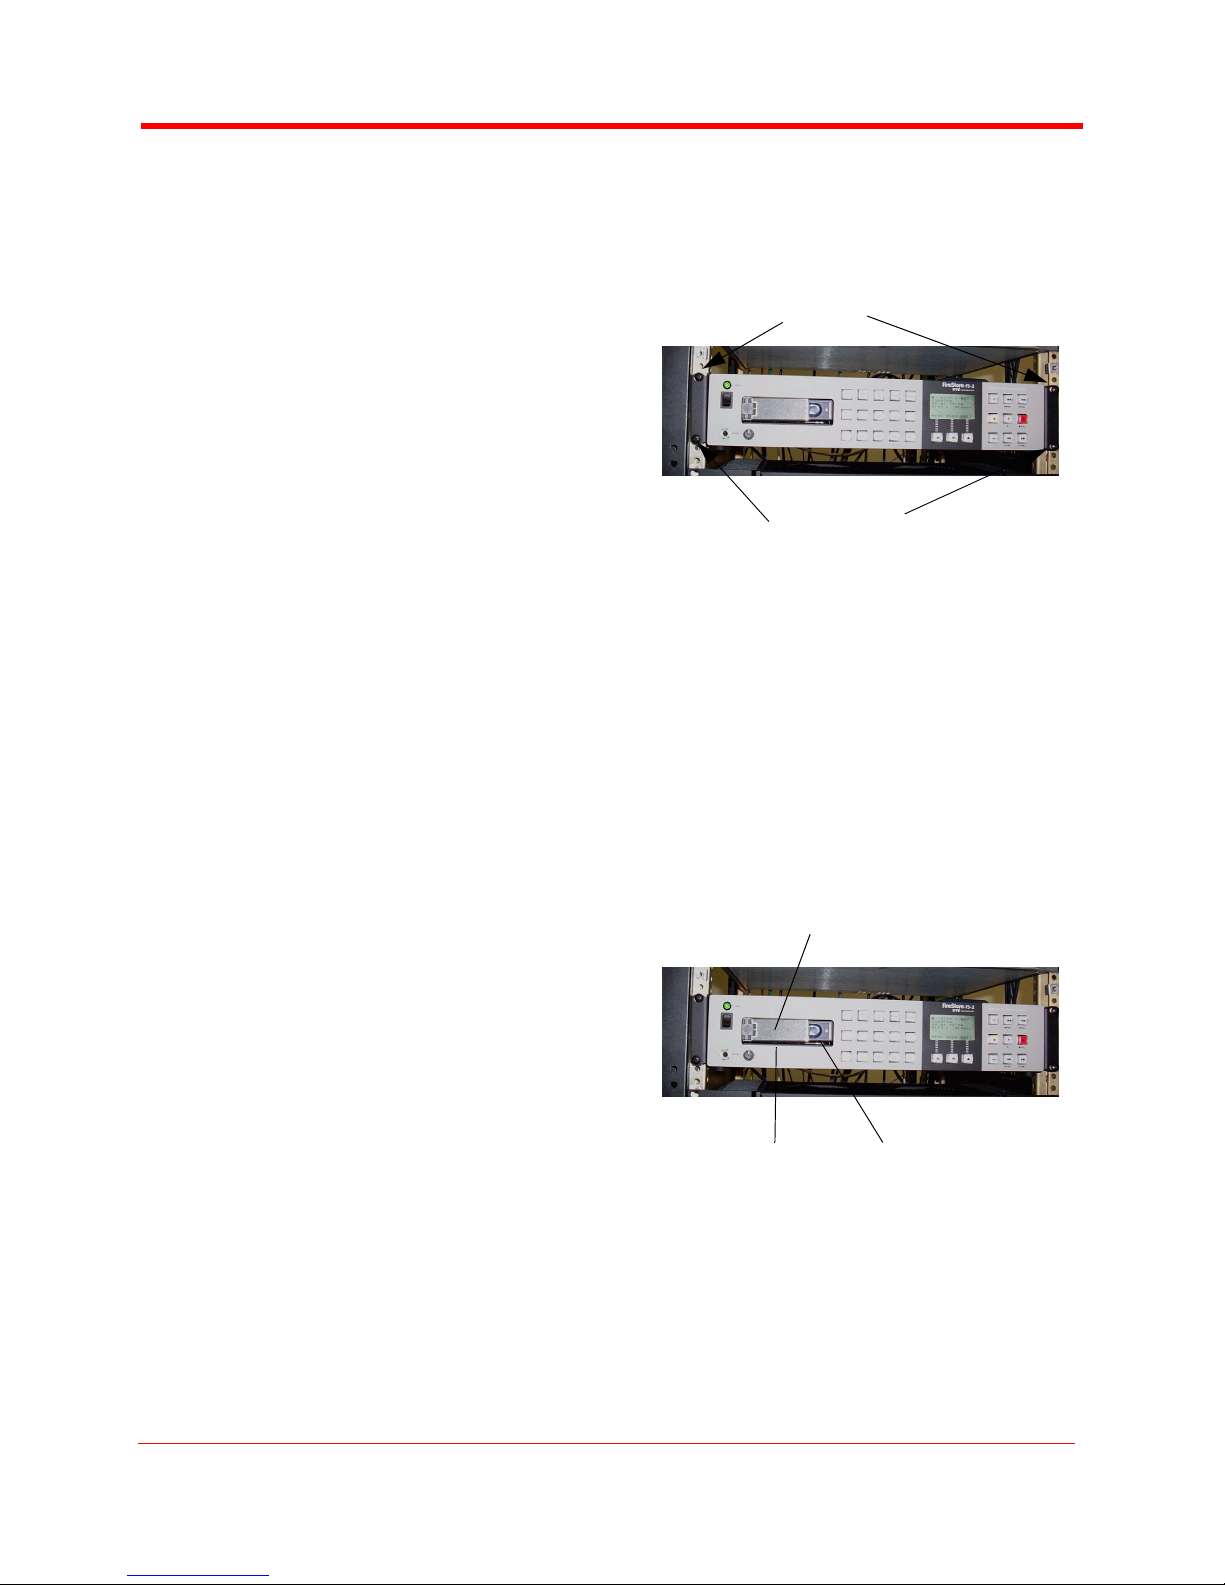
unit that support standard 19” audio/
visual racks. Using the provided
hardware mount the FS-2 securely in
the rack.
Screws
Screws
S
TEP 3: Connect the FS-2 unit to the wall
current using the attached power cord.
Inserting the Internal 3.5” IDE
Drive
Insert the internal 3.5” IDE drive as follows:
S
TEP 1: Remove the drive from its packaging.
S
TEP 2: Slide the drive carefully into the bay
until it is seated firmly.
Lock Handle
Mounting in a 19” Electronics
Rack
The FS-2 measures 15.89” high x 17.36” wide by
3.47” deep. It is an 2RU chassis featuring front rack
mount ears to be mounted into a standard 19”
audio/visual rack. There must be room behind the
unit for the attachment of cables.
To mount the FS-2 in a standard 19” audio/visual
rack, do the following:
S
TEP 1: Determine the desired location. The
FS-2 requires 3.47 vertical inches of
rack space. To prevent overheating,
the FS-2 requires a minimum of 1.75
vertical inches of space above and
below the unit.
S
TEP 2: The FS-2 includes a pair of universal
FS-2 Sudio DTE Disk Recorder User Guide
mounting ears on the front sides of the
Part Number: MANL-0927-02
Drive Bay
S
TEP 3: Press the Lock Handle flush with the
chassis face to lock the drive in place.
To remove the drive, slide the Release Lever to the
right. The Lock Handle disengages. Pull the drive
toward you to remove it.
NOTE: This drive is not intended for hot-swap
operation.
Release Lever
1 - 3
Page 14
INTRODUCTION
\
Using External Disk Drives
In addition to using a 3.5” IDE drive in the internal
slot, you can also connect any FireWire disk drive to
the HDD I/O port on the FS-2. Power a single
FireWire disk drive on the FS-2 at any given time. If
you are using more than one external FireWire
drive, you must provide external power to these
drives. It may also be necessary to partition and
format the drives before their use with the FS-2.
Refer to “Formatting the Drive” on Page 1-9 for
instructions on preparing drives before use.
NOTE: You can “hot swap” connected external
FireWire HDDs on the FS-2. This means you can
disconnect and connect drives from the system
without the need to power cycle the unit. However,
make sure the FS-2 is in STOP mode before
removing a disk drive.
Physical Features
The FS-2 features two main surfaces, the front
control panel and the rear connector panel.
Front Panel
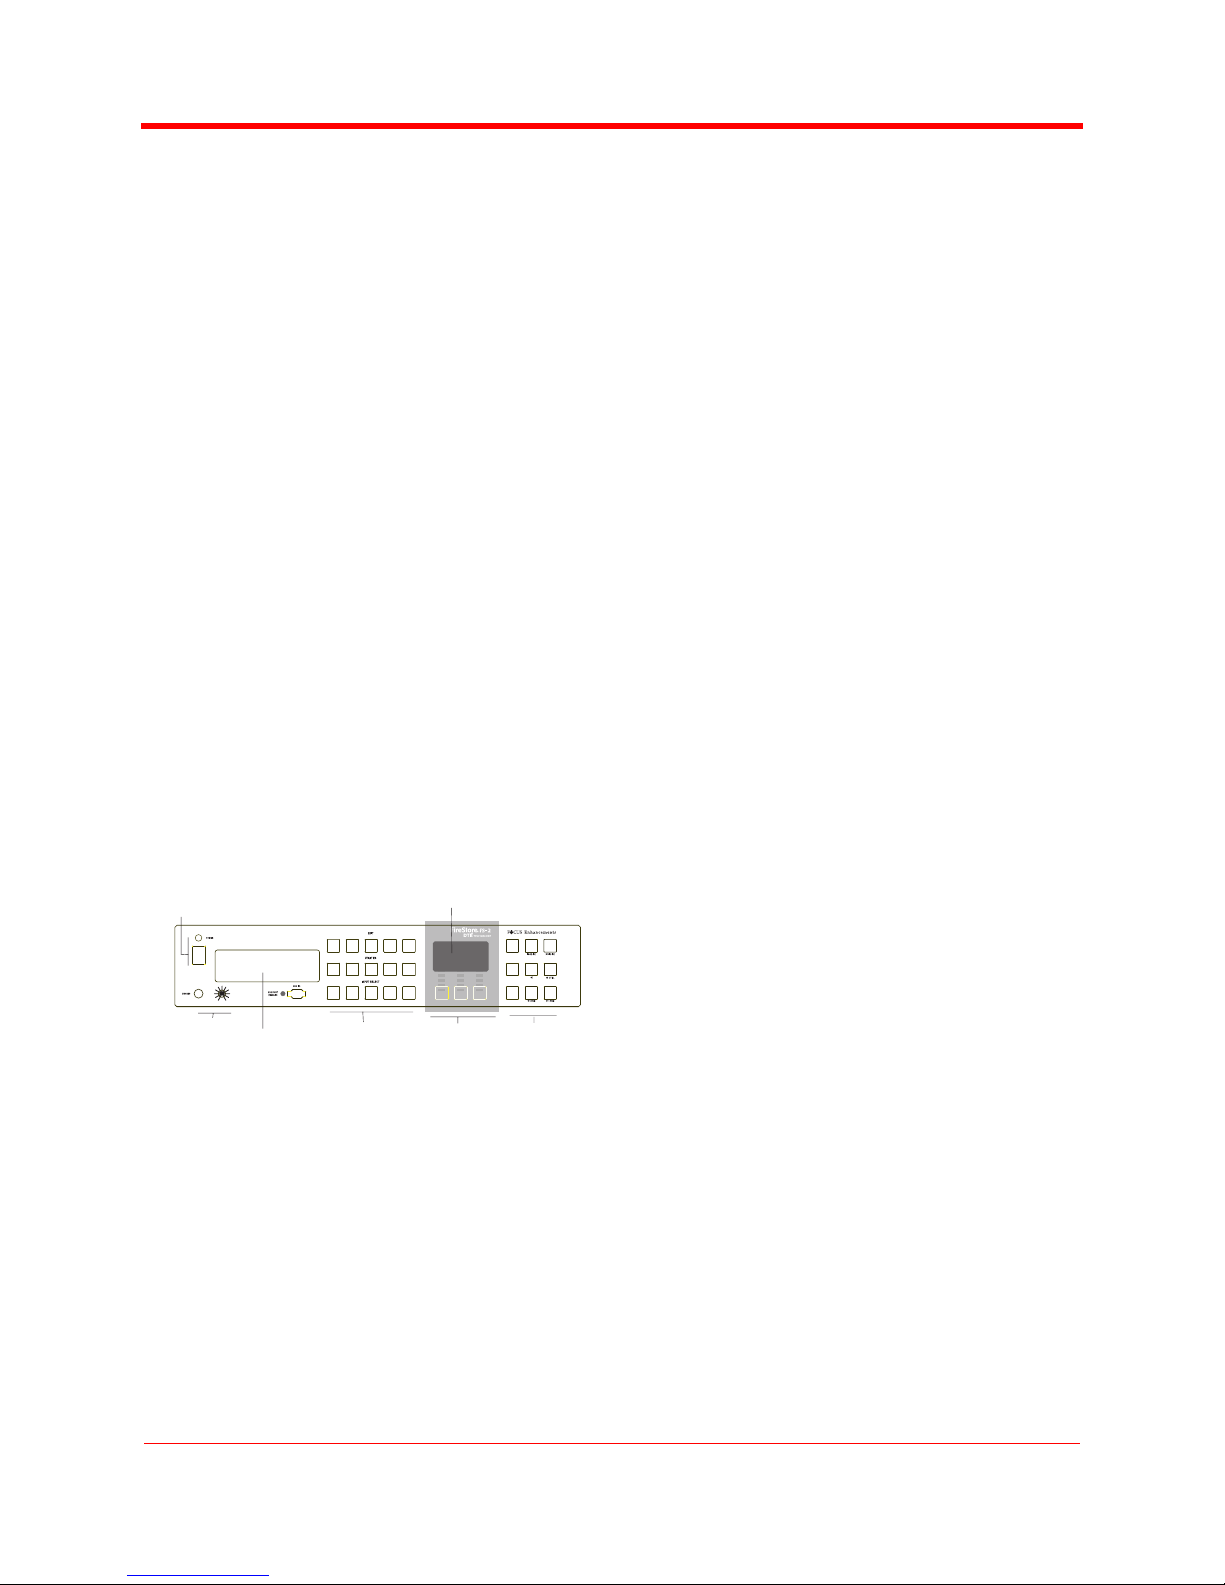
The front panel contains the seven control areas, as
shown in the illustration below and described in this
section:
1
2
3
4
1 Power Rocker Switch and Power LED
This is the FS-2's main power switch. This switch,
although mechanical, is controlled via software. When the
power switch is set to ON and then OFF, in most cases
the unit will take a moment to power down. During this
time, the FS-2 is ensuring that any files that have not
been closed properly in a record session get closed. This
5
6
7
prevents errors occurring on particular files. The green
LED above the power switch will be ON when the unit is
powered up.
2 3.5mm Headphone Jack and Volume Knob
This jack is for connecting a pair of monitor headphones.
You can monitor audio of the selected input (even if E-E
is not selected) when not in record. When in record or
playback, you can monitor the current audio. The
headphone jack also includes a volume control.
3 Disk Drive Bay
The disk drive bay accepts a standard 3 1/2” removable
disk drive in the supplied sled. Minimum system
requirements for this drive are 7200RPM with a 2MB
cache. Drive performance may vary. Focus
Enhancements recommends that a FireStore qualified
and tested disk drive be used. Check the Focus
Enhancements website for an updated list. This bay is not
intended for hot swap operation.
4 Edit / Utility / Input Buttons
This set of buttons contains edit, utility and input select
functions for the FS-2. In some cases, these buttons work
in conjunction with the FS-2 menus on the display.
Input selections are either Composite, Y/C (S-Video),
Component, SDI and DV. You must select the audio
source for each input in the SETUP -> AUDIO INPUT
menu, the Timecode mode in the SETUP -> TC MODE
menu, and the reference video source in the SETUP->
REF VIDEO menu. Refer to Chapter 2 for more details.
5 LCD Display
The FS-2 LCD displays the FS-2’s current status
including track number, disk number, timecode, record /
playback mode as well as other information. It also
displays the FS-2 menu system. The LCD is a green
backlit 128x64 graphical display.
6 Display Soft Keys
T
his set of soft buttons enables you to navigate the FS-2
menus. The function of the keys vary depending on what
is displayed at the base of the FS-2 LCD. Refer to
Chapter 2 for more information.
7 Transport Control Keys
This set of buttons controls playback and record functions
of the FS-2. These functions include play, reverse play,
fast forward, fast rewind, forward frame, back frame, next
track, previous track, stop, record, and so on.
1 - 4
FS-2 Sudio DTE Disk Recorder User Guide
Part Number: MANL-0927-02
Page 15
INTRODUCTION
Rear Panel
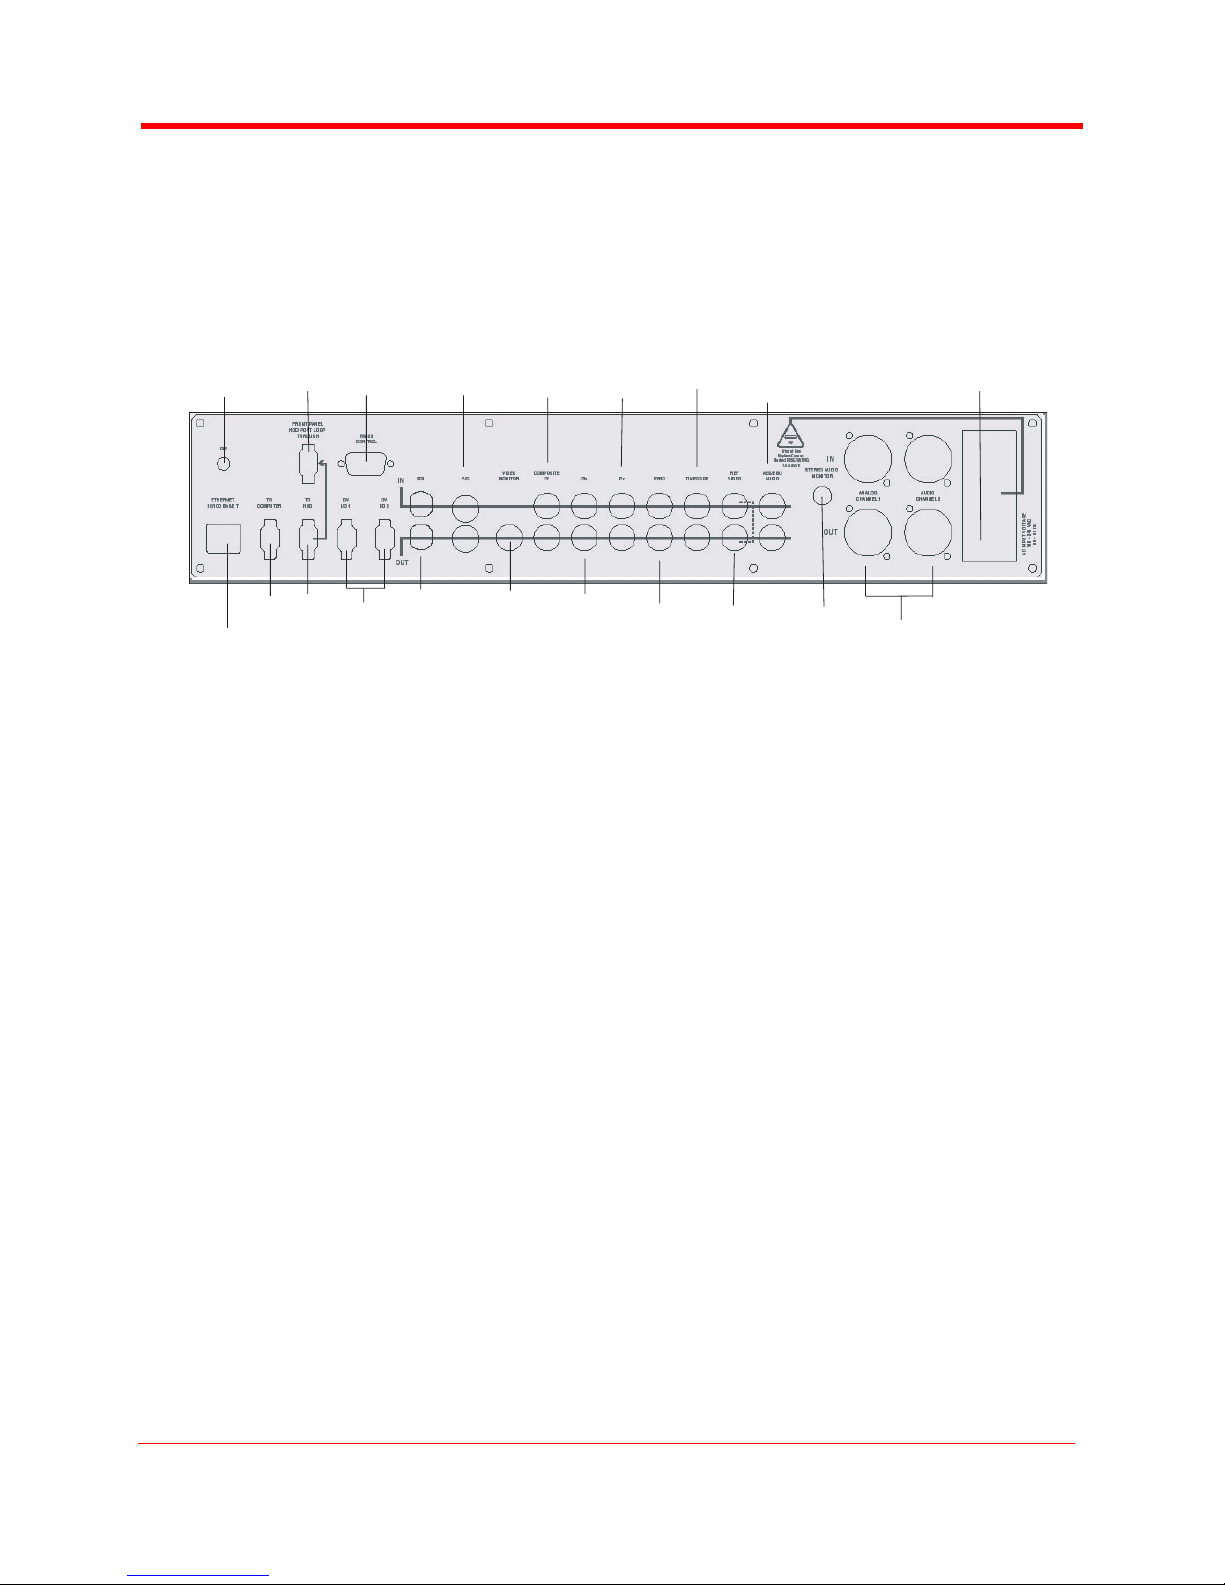
The FS-2 rear panel shown below contains control /audio/video input/output areas described in this section.
You can select any of the available inputs as a source. When selected, that source is what is recorded to disk. If the unit
is in E-E mode or recording, all outputs are live with the incoming signal.
For any particular video input, there is an associated audio input selected as a default. You can change that default to
another input utilizing the AUDIO INPUT MENU under SETUP. Refer to Chapter 2 for more information.
5
1
7
9
11
13
15
17
20
3
4
6
8
2
1 GPI : For connection of the optional wired remote control (ACSS-0019-01), the optional RS232C cable (CBLA-
0114-01) or contact closure cable. GPI accepts a 3.5mm TRS ccnnector.
2 Ethernet 10/100 BaseT - For connecting FS-2 to a network or computers for file exchange.
3 To Computer: For connecting FS-2 to a computer's FireWire 400 port. Allows any disk drives connected to FS-2
to mount to the computer.
4 To HDD : For connecting external FireWire 400 disk drives to the FS-2. Use FS-2's HDD Bypass function with this
port. When connection is made with "Front Panel HDD Port Loop Through", it allows the front panel FireWire connector
to be used for connection of external FireWire HDDs.
5 Front Panel HDD Port Loop Through: When patched to the "To HDD" port, this connector activates the front panel
FireWire port for connection of external HDDs.
6 DV I/O 1 and DV I/O 2: For connection of DV video devices.
7
RS422 Control: This is the input connector for external RS422 control devices.
8 SDI Input : For connecting SDI input sources.
SDI Output: For output to SDI devices.
9 Y/C Input: For connecting Y/C (S-Video) input sources.
Y/C Output: For connecting to Y/C (S-Video) devices.
10 Video Monitor Output: For connection to a video monitor (composite). You can view the On Screen Display from
this connection.
11 Composite / Y input: For connecting composite input sources or the Y signal for component input sources.
Composite / Y Output: For output to composite devices or the Y signal to component devices (select either
composite or component form ANALOG SETTINGS in the SETUP MENU).
12 Pb Input : For connecting the Pb signal from component input sources.
Pb Output: For output of the Pb signal to component devices.
10
12
14
16
18
19
FS-2 Sudio DTE Disk Recorder User Guide
1 - 5
Part Number: MANL-0927-02
Page 16

INTRODUCTION
13 Pr Input: For connecting the Pr signal from component input sources.
Pr Output: For output of the Pr signal to component devices
14 Sync Input: For connecting the Sync signal on non sync on green component sources.
Sync Output: For connecting the Sync signal to non sync on green component devices.
15 Timecode Input: For connecting external analog VITC timecode sources.
Timecode Output: For connection to external analog VITC timecode devices.
16 Reference Video: For reference video loop through.
To use this Reference Video input, select REF VIDEO from from REF VIDEO in the SETUP menu.
17 AES/EBU Digital Audio Input and Output: For connecting AES/EBU input sources or output to AES/EBU devices.
18
Stereo Audio Monitor Output: For connection of audio monitors.
19 Balanced Analog Audio Input Channels 1 and 2: For connecting balanced analog audio input sources.
Balanced Analog Audio Output Channels 1 and 2: For output to balanced analog audio devices.
20 AC In: Use the power cord supplied to connect to the power outlet.
FS-2 Sudio DTE Disk Recorder User Guide
1 - 6
Part Number: MANL-0927-02
Page 17

INTRODUCTION
Setting Up the FS-2
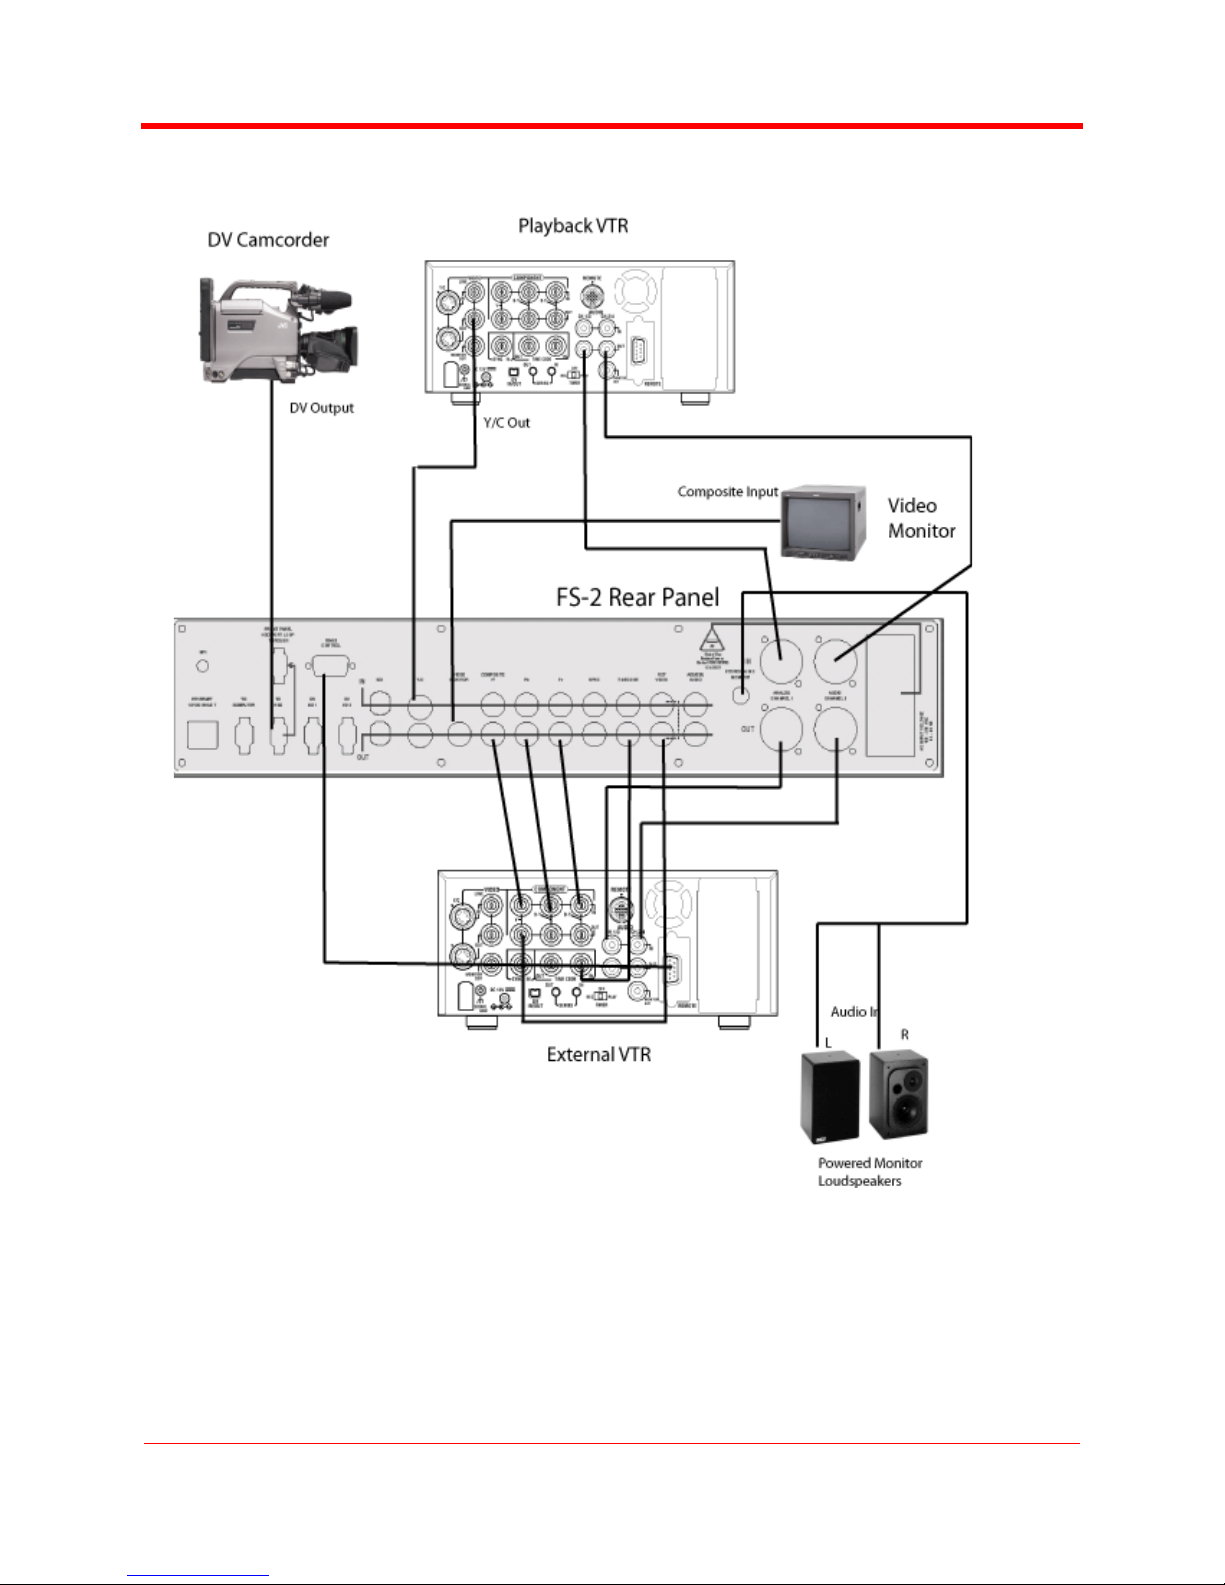
This section explains how to set up the FS-2 for use. Refer to the illustration on the following page to perform
these procedures:
Connect the following:
S
TEP 1: Plug in the power cord.
S
TEP 2: Connect a Video input device.
S
TEP 3: Connect an Audio source (if desired).
S
TEP 4: Connect a Monitor if desired.
S
TEP 5: Connect Speakers or Headset (to monitor the audio) if desired.
S
TEP 6: Connect a Tape Drive if desired.
S
TEP 7: Connect a Reference Video signal if desired.
S
TEP 8: Connect a Time Code Generator if desired.
S
TEP 9: Connect an External Control Device (RS232) Device if desired.
FS-2 Sudio DTE Disk Recorder User Guide
1 - 7
Part Number: MANL-0927-02
Page 18
INTRODUCTION
1 - 8
FS-2 Sudio DTE Disk Recorder User Guide
Part Number: MANL-0927-02
Page 19
INTRODUCTION
Formatting the Drive
Use this procedure to format the FS-2 internal or
connected external disk drives when it is not yet
formatted.
S
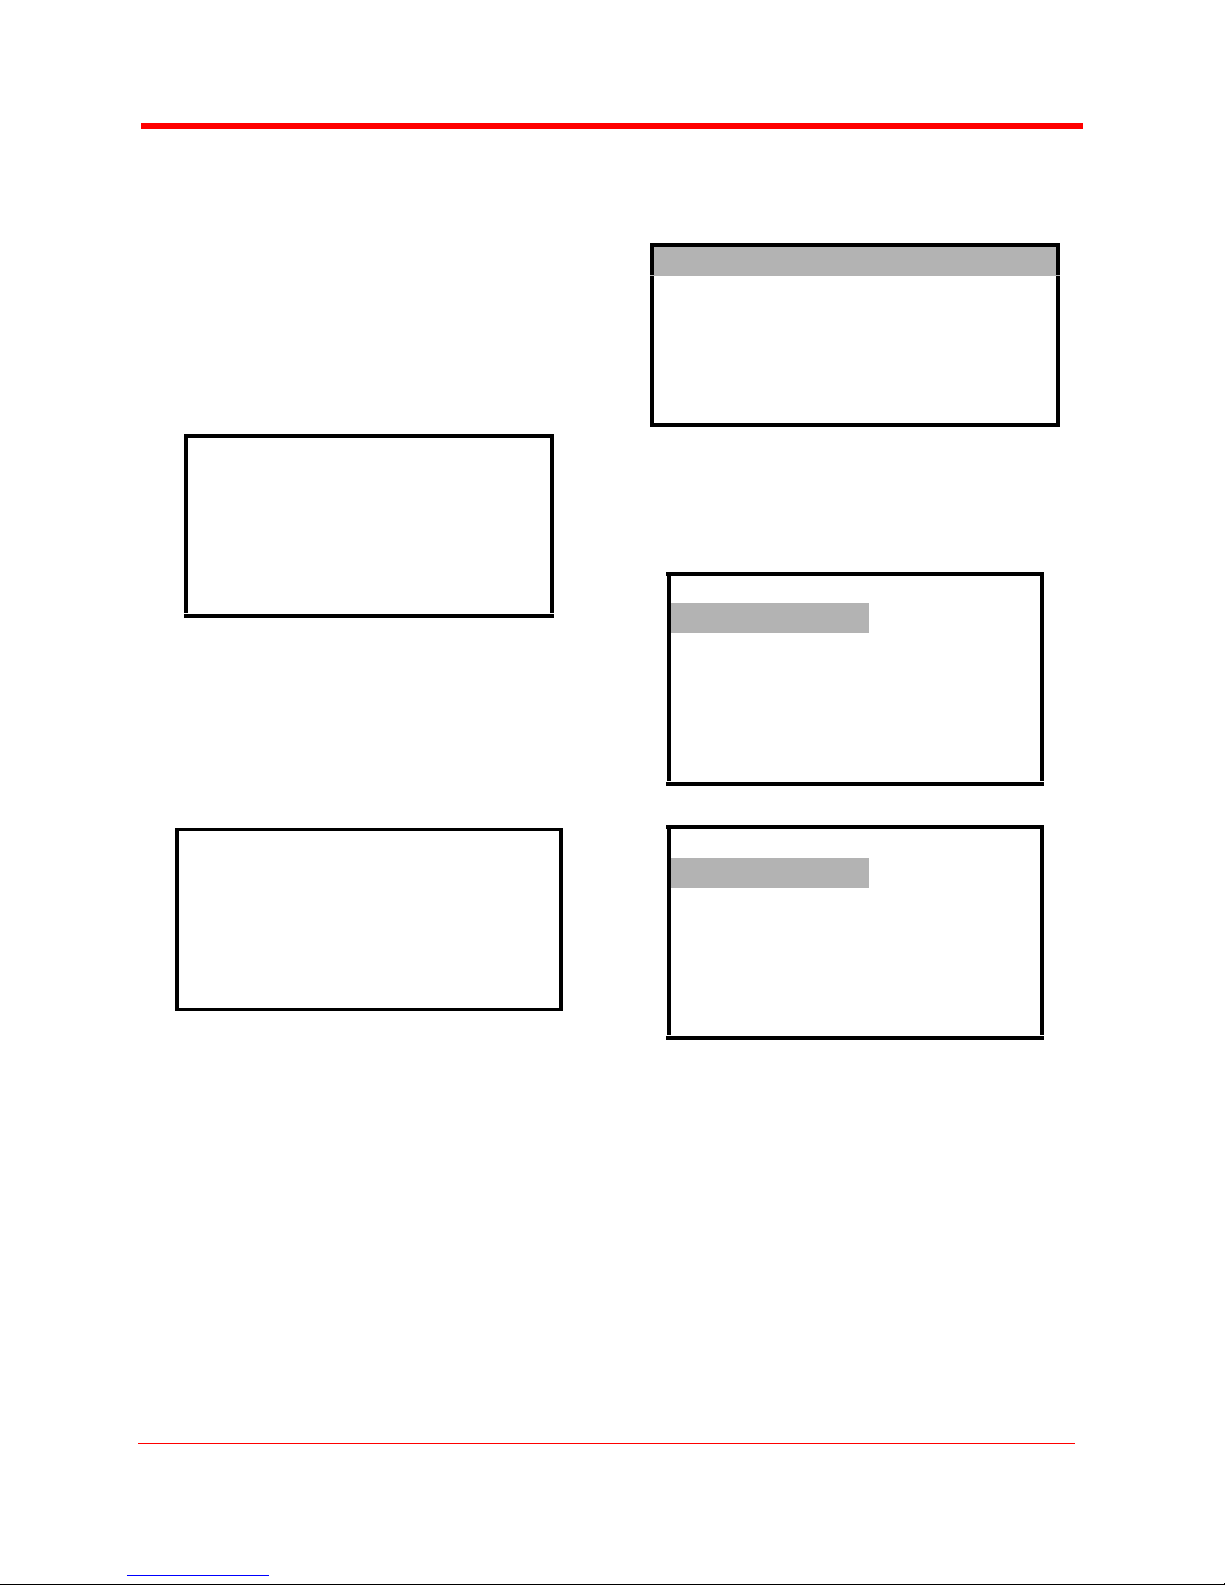
TEP 1: From the Utilities Menu, select
FORMAT DISK as shown below.
When you make this selection, the following screen appears:
FORMAT DISK
VOLUME 1? :
SIZE 115GB
FREE 540 MIN
SET DATE
SET TIME
EXIT SEL
S
TEP 3: Select SET DATE or SET TIME and
press SEL to open the sub menu as
shown below.
EXIT YES NO
S
TEP 2: Select between volumes by pressing
the | and | buttons.
• When you select the volume and
press YES, the following screen
appears:
FORMAT WILL
ERASE ALL DATA!! :
CONTINUE FORMAT
VOL 1?
EXIT YES NO
• When you select YES, a message
indicating that the formatting is
progressing appears.
S
TEP 3: Press EXIT to return to the menu
screen.
WARNING: FORMAT ERASES ALL DATA ON
THE DISK DRIVE!
Setting the Time and Date
Before using the FS-2, use this procedure to set the
time and date.
S
TEP 1: Select the Setup Menu.
S
TEP 2: Select SET DATE & TIME. The
following screen appears.
SYSTEM DATE
02/24/02
MM/DD/YY
| & |
MOVES CURSOR
EXIT
SYSTEM TIME
16:21:13
Hh:Mm:Ss
| & |
MOVES CURSOR
EXIT
S
TEP 4: Scroll from value to value using the
FORWARD and BACK INDEX
Buttons.
S
TEP 5: Press the DOWN and UP arrows to
scroll though digits in value.
S
TEP 6: Press EXIT to return to the menu
screen.
Regardless of the display, the file
name always remains YYYYMMDDHHMMSS.xxx (Year-Month-DateHour-Minute-Second).
FS-2 Sudio DTE Disk Recorder User Guide
1 - 9
Part Number: MANL-0927-02
Page 20

INTRODUCTION
.
1 - 10
FS-2 Sudio DTE Disk Recorder User Guide
Part Number: MANL-0927-02
Page 21
FS-2 FUNCTIONS
CHAPTER 2
FS-2 FUNCTIONS
This chapter contains the following sections:
Edit/Utility/Input Buttons
LCD Menu Soft Keys
Transport Control Keys
LCD Display
FS-2 Menus and Functions
Edit/Utility/Input Buttons
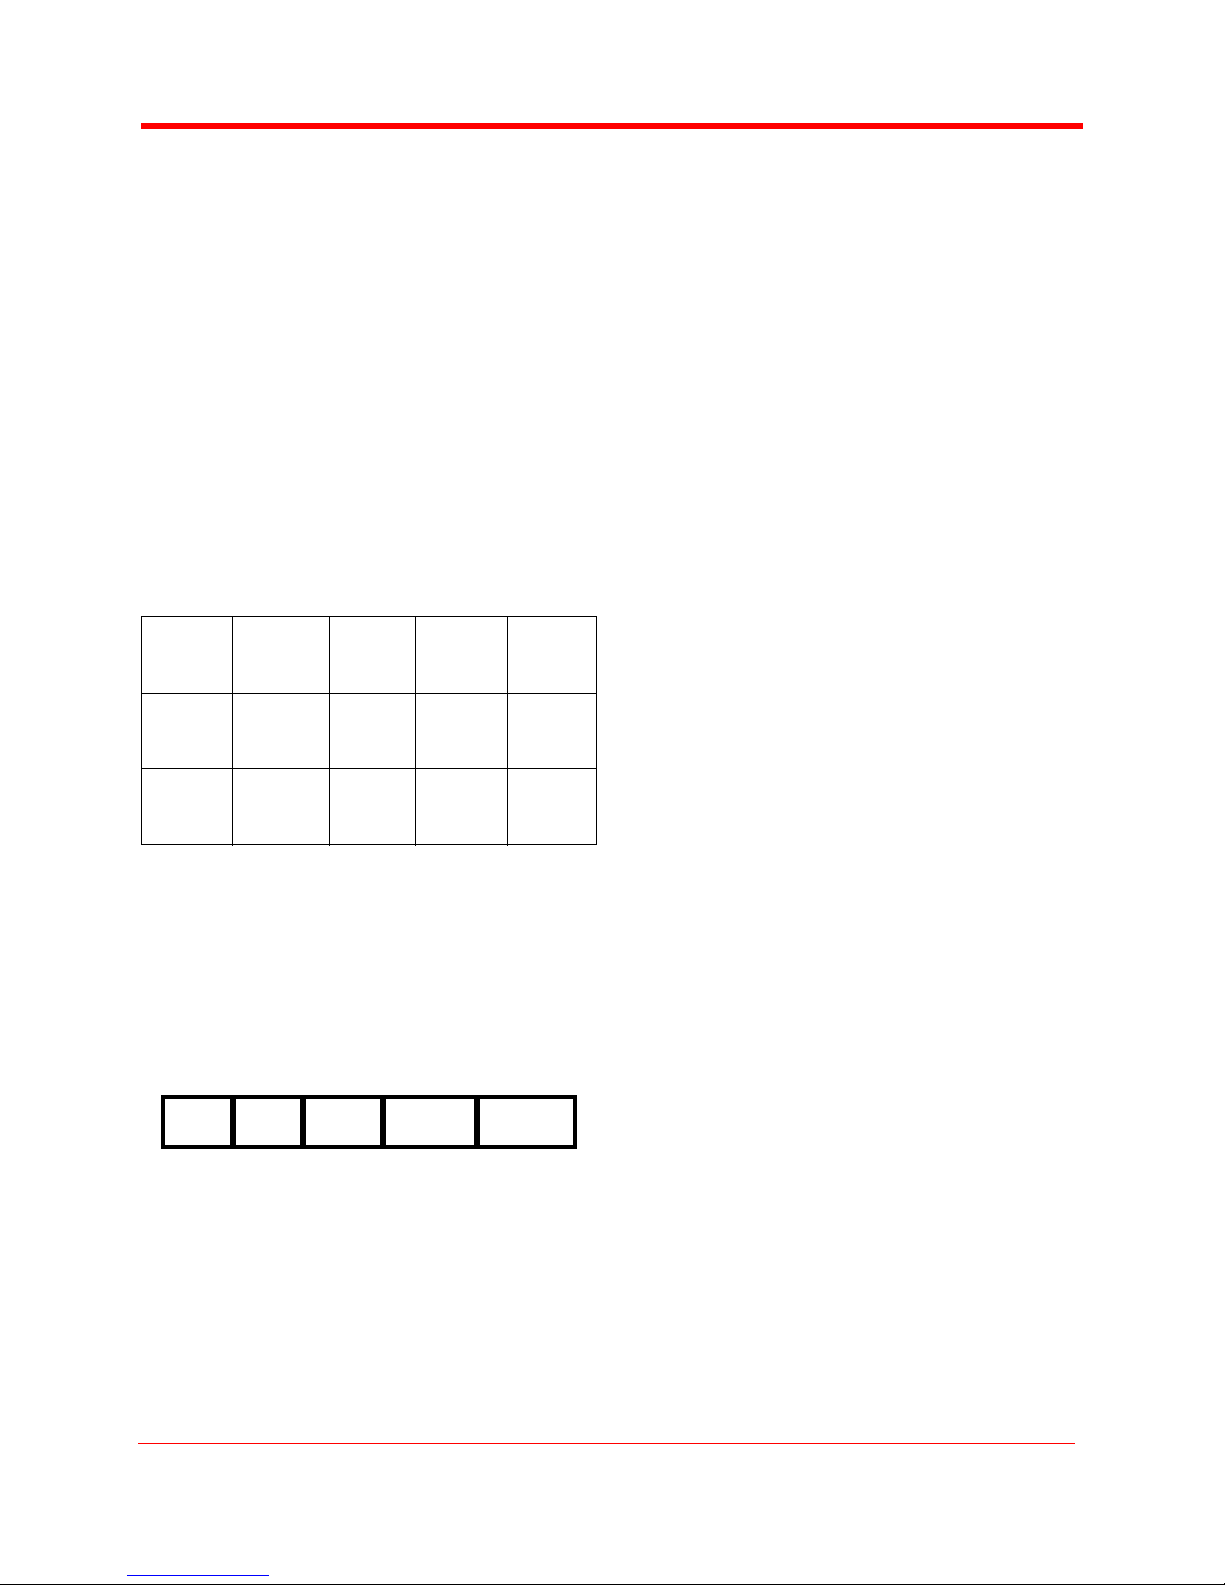
To the right of the hard disk drive are a bank of 15
buttons as shown below.
MARK IN MARK
OUT
OSD HDD LOCK REMOTE E-E
CMPST Y/C CMPNT SDI DV
The first contains five buttons that are Edit functions
keys. The second row consists of five buttons that
are Utility keys. The third row has five buttons that
are Input buttons.
Edit Function Keys
MARKINMARK
OUT
MARK IN - Mark In Key
Use the MARK IN key to mark a particular frame as
a starting point when creating a clip for a playlist.
Refer to “Playlist” on page 2-12 of this user guide
for more information about Playlists.
NOTE: It is only possible to mark in and outpoints
during playback.
PLAY
LIST
PLAY
LIST
KEEPER FOLDER
KEEPER FOLDER
MARK OUT - Mark Out Key
Use the MARK OUT key to mark a particular frame
as an ending point when creating a clip for a playlist.
NOTE: Once you have selected In and Out points,
press the PLAYLIST key. (The In and Out key lights
will turn off). You are then free to add more clips to
the play list by again selecting In and Out points.
When finished, go to the PLAYLIST menu under
SETUP.
PLAYLIST – Add to Playlist key
Press this key during stop or play to add a current
clip to the playlist.
Once In and Out points have been selected, press
this key to add selected clips to the playlist.
KEEPER - Keeper Key
By pressing the Keeper key during a recording, you
can mark each clip into the KEEPER folder on disk.
To add all KEEPER clips to the KEEPER folder on
the disk drive, select UTILITIES->ORGANIZE
FOLD from the FS-2 menu.
FOLDER - Folder Key
By pressing the Folder key during a recording, you
can mark each clip into particular pre-named
folders on disk (up to 10 folders can be prenamed.
Default names for the folders are 0 through 9. Refer
to “How to Mark Scenes” on page 3-7 of this User
Guide to setup Scene Marking folders).
By continually pressing the FOLDER key, you can
scroll though the available folders. You can also
SCENE MARK clips to folders using the numeric
keypad on the optional remote control units.
SCENE MARK can be marked on the current clip
during recording, playback or in stop mode. Once
selected, the clip is marked for placement into that
particular folder.
To add all SCENE MARKED clips to their
respective folders on the disk drive, select
UTILITIES -> ORGANIZE CLIP from the FS-2
menu.
For more on SCENE MARKING, refer to “How to
Mark Scenes” on page 3-7 of this user guide.
If the FOLDER key is lit during playback, the FS-2
PLAY FROM mode is set to FOLDER.
FS-2 Sudio DTE Disk Recorder User Guide
2 - 1
Part Number: MANL-0927-02
Page 22

FS-2 FUNCTIONS
Utility Function Keys
OSD HDD LOCK REMOTE E-E
OSD - (On Screen Display)
Press this key to enable on screen display on the
monitor output (composite). By continuously
pressing the OSD button, the key scrolls between
off, absolute timecode, counter timecode and the
menu. When off, the key will not light.
HDD – HDD Bypass Key
Press this key to immediately open the HDD
Bypass confirm screen as described in the HDD
Bypass section of the Menu. For more information,
refer to “HDD Bypass” on page 2-15
LOCK – Keypad Lock Key
This key turns lock on or off. When the key is lit, the
keypad is locked. When off, it is not locked.
REMOTE – Remote Key
When you press this key, the FS-2 goes directly to
the REMOTE mode as described under the Control
Modes menu. The key will backlight in Local mode.
When in the FS-2 is in remote mode, you cannot
use front panel keys for operation.
Another press exits REMOTE mode and the
backlight turns off.
E-E – Electronic to Electronic Key
When you press this key, the selected input is
passed on to all outputs on the FS-2 regardless of
what state the unit is in (STOP, REC and so on.).
The only time output is stopped is when something
is being played back from disk.
Input Source Selection Keys
In all cases, when selected, the key lights.
Switching is not seamless. You cannot change
inputs while in record mode.
CMPST – Composite Video Source Input Key
Press this key to select composite video as the
input source.
The default audio link is balanced analog audio.
You can also select AES/EBU audio as the input
link in the SETUP->AUDIO INPUT menu.
Y/C – S-Video
Press this key to select S-Video (Y/C) as the input
source.
The default audio link is balanced analog audio.
You can also select AES/EBU audio as the input
link in the SETUP->AUDIO INPUT menu.
CMPNT – Component Video Source Input Key
Press this key to select Component video (Y, R-Y,
B-Y) as the input source.
The default audio link is balanced analog audio.
You can also select AES/EBU audio as the input
link in the SETUP->AUDIO INPUT menu.
SDI Serial Digital Video Source Input Key
Press this key to select SDI video (SMPTE 259M)
as the input source.
The default audio link is embedded AES/EBU
digital audio in the stream. You can also select
either balanced analog audio or separate AES/EBU
audio as the input link in the SETUP->AUDIO
INPUT menu.
DV Video Source Input Key
Press this key to select DV video (25Mb/s) as the
input source.
The default audio link is embedded 2-channel or 4channel digital audio in the stream. You can also
select either balanced analog audio or AES/EBU
audio as the input link in the SETUP->AUDIO
INPUT menu.
LCD Menu Soft Keys
The three keys below the FS-2 LCD display are soft
keys for navigating and selecting items in the FS-2
menu.
CMPST Y/C CMPNT SDI DV
2 - 2
FS-2 Sudio DTE Disk Recorder User Guide
Part Number: MANL-0927-02
Page 23

FS-2 FUNCTIONS
These keys are also utilized for selecting different
display modes. They are called soft because their
function changes depending upon what is displayed
on the LCD above the particular key.
NOTE: In some cases when navigating the FS-2
menus, you can use the right soft key to scroll down
through the menu. To scroll up, just hold down the
SHIFT key as well as the right soft key.
Transport Control Keys
This set of buttons controls playback and record
functions of the FS-2. These functions include play,
reverse play, fast forward, fast rewind, forward
frame, back frame, next track, previous track, stop,
and record. This area also features hot keys for
changing, controlling, and navigating the FS-2
menu system. Each of these keys is described
below as shown in order left to right, top to bottom.
MENU
| |
■ ●
SHIFT
MENU Menu Key
Press this key to launch the FS-2 menu system.
Once pressed, the Menu screen appears on the FS2 LCD and the button lights. If you press the MENU
key while in a particular screen in the menu system,
that menu will be marked and the MENU key will
light. You can then EXIT the menu and perform
other functions. If your press the MENU key at
anytime, you will return to the marked MENU
(except if you are in REC mode).
| Back Index Key
Press this key to return to the beginning of the
current clip if in playback mode. Press it twice to
return to the previous clip during playback. In Stop
mode press it to return to the beginning of the
previous clip. If you press SHIFT and Back Index,
the previous disk drive is selected.
| Forward Index Key
Press this key to skip forward to the next sequential
clip for playback. If you press SHIFT, the back index
goes to the next disk drive.
■ Stop Key
Press this key to stop the selected mode and return
the FS-2 to Pause. Press it again to put the FS-2
into STOP (standby with splash screen). The
splash screen is the first frame of the selected clip
when PREVIEW is set to on or it can be set by the
end user. When the FS-2 is in Stop mode, the key
lights.
Play Key
Press this key to start playback of the selected clip.
If you press the SHIFT key plus the PLAY button,
the FS-2 immediately goes into reverse play mode.
● Record Key (Red)
Press this key once when the FS-2 is in STOP
mode and the FS-2 goes into REC-PAUSE. The
Rec button flashes. Press it again to start recording.
If you press REC during a recording, the current clip
is closed and a new clip is created without dropping
any frames. This key is the only key that is RED on
the front panel.
If you press REC and SHIFT simultaneously, to
capture a single frame of video. In a particular
session, all single frames of video are saved as part
of the same clip on disk.
SHIFT Shift Key
Use the SHIFT key to give particular keys a
secondary functionality. When you press it, the
SHIFT key lights and remains in SHIFT mode until
the button is released. The SHIFT mode of
particular keys is listed below that key or displayed
on the FS-2 LCD.
FS-2 Sudio DTE Disk Recorder User Guide
2 - 3
Part Number: MANL-0927-02
Page 24

FS-2 FUNCTIONS
Back Search Key
Press the Back Search button to allow video to be
played at different speeds (both slower and faster
than real-time). Refer to the NOTE: under Forward
Search Key for more information.
Forward Search Key
Press the Forward Search button to play video
different speeds (both slower and faster than realtime). Refer to the NOTE: below for more
information.
NOTE: Pressing the FF Search button multiple
times results in increases in the search speed. This
mode is bidirectional in forward X times normal
search speed. Press the Back Search button to
cause the FF speed to slow down by one step.
For instance, if you are in 10X FF speed and you
press the Back Search button once, you are in 2X
FF mode. This also applies to backward search
speeds. The default speed resolution is as follows
(NTSC and PAL have slightly different multiples for
both greater and less than 1X play speed):
REVERSE: -30X, -10X, -2X, -1X
(reverse play), -1/2X(-15fps), Still.
FORWARD: Still, +1/2X (+15fps), +1X
(play), +2X, +10X, +30X
Standard Forward Search and Reverse Search
also have a “higher resolution” mode where more
speeds are available. This mode can be set in the
FF/RW MENU in the FS-2 Setup Menu. Once set,
these speed resolutions become the default when
you press Fast Backward or Fast Forward.
REVERSE: -30X, -25X, -18X, -15X, -
12X, -10X, -8X, -5X, -4X, -3X, -2X,
-1/30, -1/15, -1/10, -1/6, -1/5, -1/3,-1/2
FORWARD: +30X, +25X, +18X, +15X,
+12X, +10X, +8X, +5X, +4X, +3X,
+2X, +1/30, +1/15, +1/10, +1/6, +1/5,
+1/3, +1/2
LCD Display
The FS-2 LCD screen displays different FS-2
modes and states. On boot up, the FS-2 displays
the following screen:
WELCOME
TO FIRESTORE-2!
PLEASE WAIT....
Depending on the connected disk drive, the FS-2
may or may not display “Please Wait” during boot
up.
Once booted up, if no disk drive is connected to the
FS-2 (either through the internal slot or externally
via the HDD I/O port), the following screen appears:
NO DISK
DETECTED!
MENU
Insert a drive into the front panel drive bay or
connect a FireWire disk drive to the HDD I/O port.
If you received a drive from Focus Enhancements,
it should be configured and ready to use. If the
message “No Disk Detected” appears, make sure
the drive is inserted properly.
If the message “No Format Detected” appears, you
must partition and format the inserted drive before
use. The FS-2 prompts you through the steps
required to perform a format.
2 - 4
WARNING: Formatting and partitioning erases all
data on a disk!
FS-2 Sudio DTE Disk Recorder User Guide
Part Number: MANL-0927-02
Page 25
FS-2 FUNCTIONS
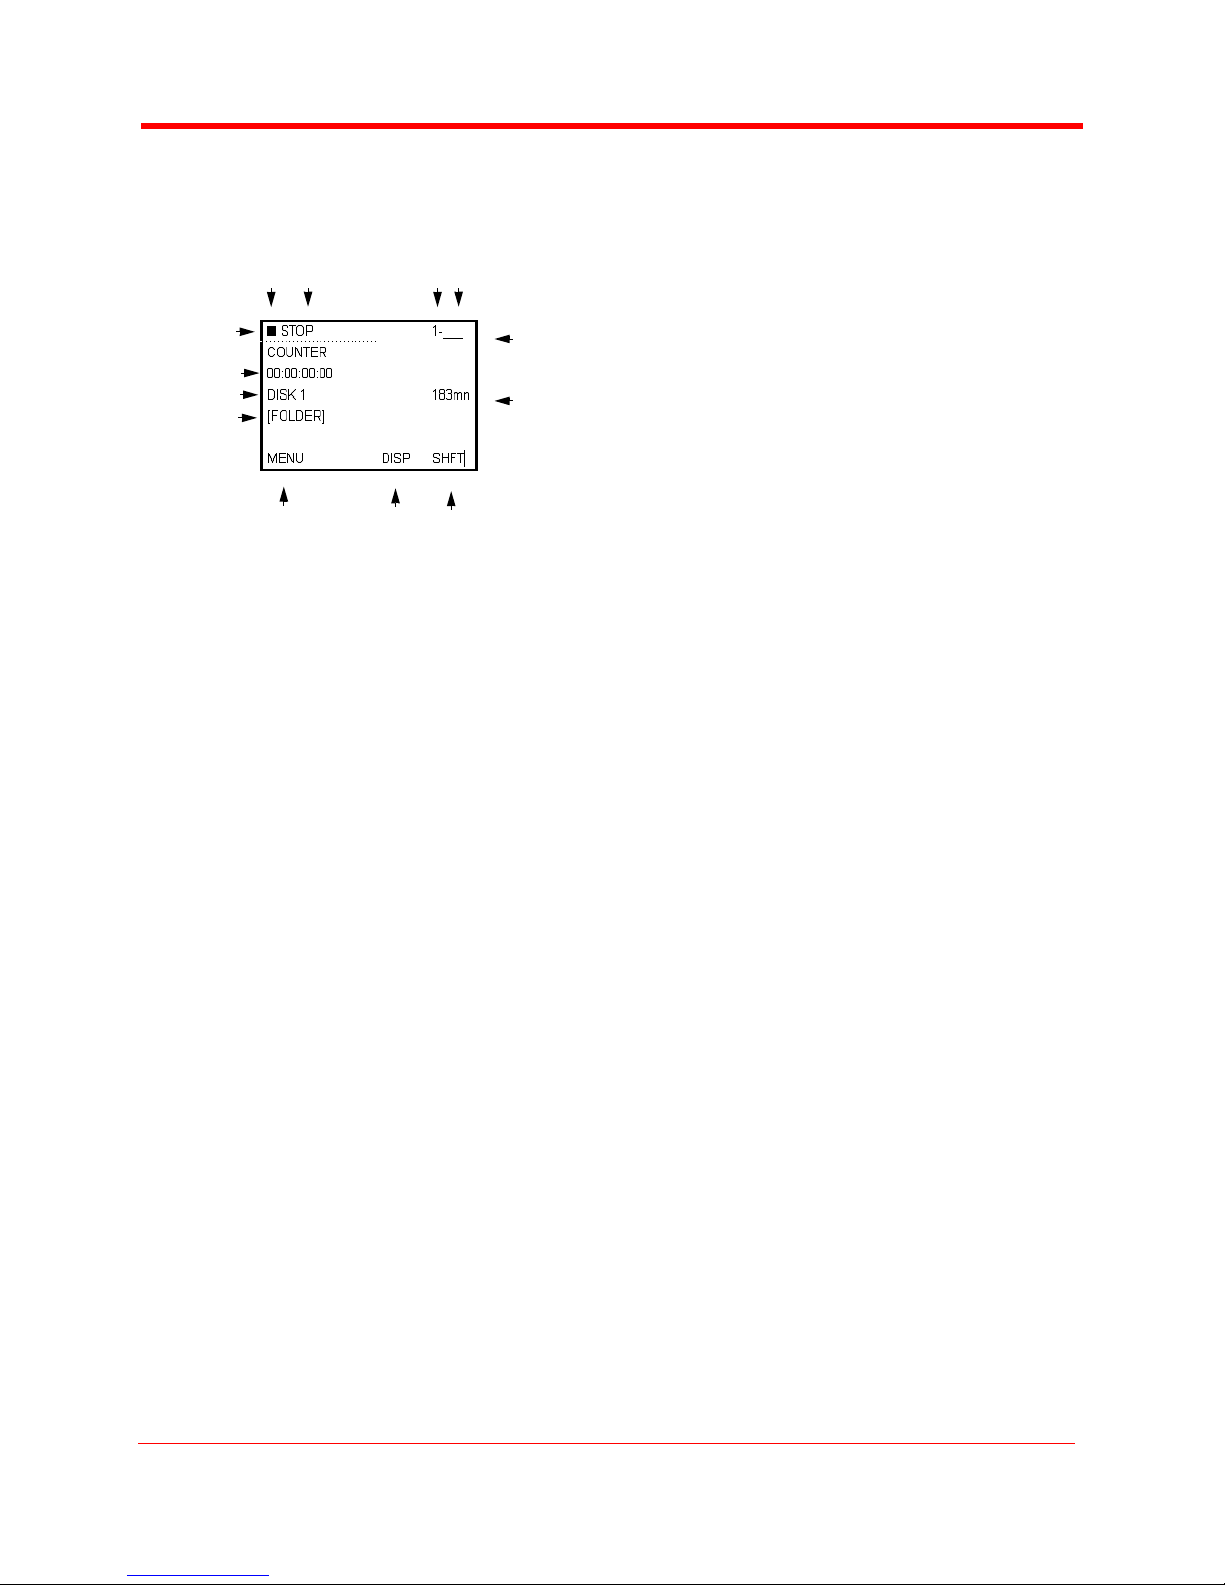
Once ready for use, the FS-2 default Splash Screen
appears as follows:
23 45
1
6
7
8
9
10
11
12 13
(1) Play/Record Status Symbol
This symbol displays a graphical representation of
the current FS-2 state as follows:
■ - STOP
, - Play or Reverse play
- Fast Forward search and speed
- Fast Back Search and Speed
● - Record and Record Mode
|| - Pause
NOTE: Each symbol has multiple display modes.
For a complete list, refer to “FS- 2 LCD Display
Modes” on page 4-3 of this user guide.
(2) Record/Play Status Indicator
In this space, the FS-2 displays a character that
indicates what record or playback mode it is in. The
characters displayed and their respective modes
are listed in “FS- 2 LCD Display Modes” on page 43 of this user guide.
(3) Current System Status
The current system status of the FS-2 is displayed
in the top left corner of the LCD display. For
instance, it displays whether the FS-2 is in record,
play, stop, pause, fast search or slow motion
modes.
(4) Volume Number
The volume or disk number of the current clip
recording or playback session is displayed in the
top right corner of the LCD display. For example, a
display value of “2-014” identifies a track as being
on volume 2.
(5) Track or Clip Number
The track number is displayed in the top right corner
of the LCD Display. This is the current clip or track
number being recorded or played back. For
example, a display value of “2-014” identifies a track
as being clip 14 on volume 2.
(6) Timecode/User Bit Display Mode
This identifies the display mode for timecode or
user bit values. Selections are:
COUNTER - Counts frames during
record or playback of the current clip
only.
REMAINING - Counts down the
number of frames available (time) on a
particular disk during a record session.
In a playback session, this display
shows the remaining time on the
current clip.
DV NTSC or PAL - Displays the
external timecode value being
generated by a camcorder or other
device during a record session.
Timecode mode has to be set to EXT
TC for this function to operate (refer to
“TC MODE” on page 2-19 of this user
guide). In playback mode, this displays
the embedded DV timecode value in a
particular track.
USER BIT - Displays the set user bit
value in a particular clip. A user bit
value must be added for this to display
(refer to “TC SET” on page 2-20 of this
user guide).
ABSOLUTE - Displays an absolute
timecode value for the particular
session (sum of all COUNTER
timecodes on connected volumes).
This is primarily used when you set the
FS-2 to AV/C mode and are controlling
it with an external FireWire device,
such as a computer.
FS-2 Sudio DTE Disk Recorder User Guide
2 - 5
Part Number: MANL-0927-02
Page 26

FS-2 FUNCTIONS
NOTE: The FS-2 will not accept NDF
TC values in DF TC mode.
(7) Timecode or User Bit Value
Displays the timecode or user bit value of display
mode selected as follows:
00:00:00:00 - Drop Frame
00;00;00;00 - Non Drop Frame
(8) Current Disk Volume
Displays the current disk volume in relation to
available space.
(9) Available Space on Volume
Displays the space in time available on the current
volume, for example,
DISK 1 183min - Current Disk time
remaining is 183 minutes
NO DISK - No attached Disk
(10) Folder Display
In record or playback, this displays the particular
folder a clip is in (if applicable). If playing an entire
folder (PLAY FROM menu set to particular folder),
it displays the folder name as follows: [FOLDER].
(11) Soft Key One (MENU) Function Display
Displays the current function related to Soft Key one
(left key on the top row of buttons). You can use this
key for opening the FS-2 Menu and also as a STOP
key during a recording.
(12) Soft Key Two (DISP) Function Display
Displays current function of Soft Key two (middle
key on the top row of buttons). This changes the TC
display between COUNTER, REMAINING, DV TC
(NTSC or PAL), USER BIT, and ABSOLUTE when
in record or playback modes.
(13) Soft Key Three (SHFT) Function Display
Displays current function of Soft Key three (right key
on the top row of buttons).
FS-2 Menus and Functions
The FS-2 features a comprehensive menu system
which allows a number of features to be initiated
and setup. The menu system contains the following
selections:
RECORD MODE
•NORMAL REC
• RETRO DISK
• RETRO CACHE
• LOOP RECORD
•STILL
• TIME LAPSE
CONTROL MODE
•LOCAL
•REMOTE
•AV/C
• SYNCRO SLAVE
PLAY MODE
•PLAY CLIP
• LOOP CLIP
• LOOP ALL
• PLAY ALL
PLAY FROM MODE
• TRACK LIST
• PLAY LIST
•FOLDER LIST
PLAYLIST
• OPEN
•SAVE
•NEW
•EDIT
•VIEW
• DELETE LIST
HDD BYPASS
INTERNAL HDD
RECORD FORMAT
•RAW DV
•AVI TYPE 1
•AVI TYPE 2
• CANOPUS AVI
2 - 6
FS-2 Sudio DTE Disk Recorder User Guide
Part Number: MANL-0927-02
Page 27

FS-2 FUNCTIONS
•MATROX AVI
•QUICKTIME
•AVID OMF
• PINNACLE
• MXF SONY
•MXF 1
• 24P AVI TYPE 2
• 24P QUICKTIME
SETUP
• SET DATE & TIME
• OS VERSION NO
•OS UPGRADE
•PAL/NTSC
•RS422 REMOTE
• AUDIO INPUT
• AUDIO IN LEVELS
• TC MODE
• TC SET
• ON SCREEN DIS
•FF/RW HI RES
•GPI PORT
• BACKLIGHT
•STOP OUTPUT
• AUDIO CORRECT
• PREFERENCES
•ANALOG OUT
• NETWORK SETUP
• REF VIDEO
• VIDEO ADJUST
UTILITIES
• ORGANIZE PINN
• ORGANIZE CLIP
• ORGANIZE OMF
• DELETE CLIP
•FORMAT
• PARTITION
• REPAIR
•FILE NAME
• FACTORY RESET
Each of these selections is explained in this
chapter.
To enter the FS-2 MAIN MENU, press the MENU
key or soft key 1 (MENU) while in Stop mode. The
following MENU SCREEN appears:
RECORD MODE
CONTROL MODE
PLAY MODE
PLAY FROM
EXIT SEL ▼
Menu Items
The four line list indicates the currently highlighted
menu item. Push soft key 3 (under the ▼ symbol) to
see more selections. To scroll up (USE THE
symbol) through the menu, press SHIFT + soft key
3.
Sub-Menu Available
The symbol at the end of a line indicates a menu
item that has a sub-menu available. Press the SEL
Soft Key, to display the sub-menu.
Soft Keys
EXIT -- Press EXIT to return to the FS-
2 MAIN MENU screen.
SEL -- Press SEL to select the current
menu item. If a sub-menu is available,
it will open.
Scroll Arrow -- The ▼ or symbol
allows you to scroll up or down through
menu items.
Record Mode Menu
The FS-2 RECORD MODE MENU allows you to
enable different record functions.
Select the mode. by pressing SEL to
open the sub menu.
Press EXIT to exit back to the menu
screen.
FS-2 Sudio DTE Disk Recorder User Guide
2 - 7
Part Number: MANL-0927-02
Page 28

FS-2 FUNCTIONS
Once a particular mode is selected in the Record
Mode menu, the unit remains in that mode until a
different mode is selected.
Available items in the RECORD MENU are:
NORMAL REC
RETRO DISK
RETRO CACHE
LOOP RECORD
STILL
TIME LAPSE
NOTE: When an inserted or attached HDD is nearly
full, in some record sessions, the HDD time
remaining may display “001min” remaining. If
RECORD is pressed, the FS-2 sometimes displays
NO SPACE LEFT. Focus Enhancements advises
that when a disk drive is close to being full, you
make sure other disk drives are readily available in
order to avoid lost footage.
Normal Record
This is the standard and default record mode. When
you press REC, the FS-2 begins standard
recording. Press the REC once to put the FS-2 into
REC PAUSE mode. Press it again to put the FS-2
into RECORD mode.
Retro Disk
RETRO DISK Record constantly buffers video in a
loop to a determined amount of space on the harddisk drive so that when record is triggered, a retro
time period can be added to the beginning of any
clip. You can select the RETRO DISK value to close
the available disk drive space.
NOTE: It is not possible to set the retro time to the
entire available capacity on the disk.
RETRO DISK
HDD AVAIL:
183 MIN
RETRO TIME:
15 MIN
EXIT
Set RETRO TIME by pressing the
and buttons. Time is selectable in
one minute increments.
Hold the button for more than 3
seconds to allow numbers to increase
by 10 times.
Press EXIT to return to the RECORD
Press the REC key when in RETRO DISK mode to
put the FS-2 into a RETRO DISK state (the FS-2's
REC button flashes as if in PAUSE state). The FS2 is actually recording in this state, but until you
press the REC key a second time, the video
recorded records over itself in a continuous loop.
RETRO DISK always keeps at least the selected
amount of time in a series of one minute clips. For
instance, if you set the RETRO DISK value to 3
minutes, the FS-2 will always have 3 minutes (made
up of three, one (1) minute clips) of video saved to
disk. As the recording goes past the 3 minute point,
a fourth clip is created. Once that clip reaches one
minute, the oldest of the previous 3 clips is deleted.
Another fourth clip is then created.
If you select a RETRO session that is 60 minutes or
greater, instead of one minute clips, the FS-2
creates 9 minute, 13 second clips (2GB clips on
disk). The functioning of RETRO DISK remains the
same. The larger file size prevents the FS-2 from
reaching its 999 track limitation for very long
RETRO records.
Due to the larger files sizes, the maximum amount
of drive space available is decreased to
accommodate the last recording in a session. For
instance, if you have 90 minutes of disk space
remaining, after you set RETRO record to greater
than 60 minutes, the available space changes to 88
minutes of available disk space.
If you set RETRO time to 88 minutes, the recording
will be made up of about nine and a half 9 minute,
13 second clips. There must be space available in
this situation in order to record the final clip which
eventually will write over clip 1. This ensures that at
any given time, at least 88 minutes of video exist
after a compete RETRO DISK record loop.
NOTE: The FS-2 must always have at least one
minute of disk space (under 60 minutes) or 9
minutes, 13 seconds of disk space (when the
RETRO DISK value is set to greater than 60
minutes) remaining in addition to the set RETRO
DISK value, in order to function correctly. For
2 - 8
FS-2 Sudio DTE Disk Recorder User Guide
Part Number: MANL-0927-02
Page 29

FS-2 FUNCTIONS
instance, it is not possible to set a RETRO DISK
value of one minute if only one minute of disk space
remains.
Once RETRO DISK time is set, you can exit the
Menus and return to the Main Screen. An “L” will
now appear next to the record symbol on the FS-2's
display. Pressing the REC key once to put the FS-2
immediately into RETRO DISK RECORD. Clips are
being recorded to disk for X number of minutes in
one or nine minute increments (each as a separate
track).
The REC button flashes (as when the unit is in
pause). When you press the REC key, the FS-2
leaves RETRO DISK mode and goes into standard
record.
All one minute tracks in the set loop sequence
appear and are saved as their own tracks on disk
(for example, 1-001, 1-002, 1-003 etc.) except for
the recording that was in progress, which takes on
the characteristics of a standard track. At this stage,
the FS-2 is essentially in standard record mode (the
“L” on the display disappears). No frames are lost
across tracks during the record session.
Once paused, the unit returns to RETRO DISK
record mode again (the “L” reappears in the LCD
and viewfinder) for further RETRO recordings or
until it is disabled in the RETRO DISK Menu.
RETRO DISK can be used in LOCAL and SYNCRO
SLAVE RECORD control modes.
WARNING: Make sure FS-2 is in STOP mode
before removing the disk drive from the system. Do
not attempt to remove when FS-2 is in REC or RECPAUSE mode.
Retro Cache
RETRO CACHE Record constantly buffers video in
a loop to a 10 second data buffer to cache video so
that when record is begun, a retro time period can
be added to the beginning of any clip.
RETRO CACHE
CACHE: 10 sec
Pressing the REC key when in RETRO CACHE
mode puts the FS-2 into a RETRO CACHE state
(the tally light on the FS-2 flashes as if in PAUSE
state). The FS-2 is actually recording in this state,
but until your press the RECORD key a second
time, the video recorded records over itself in a
continuous loop. It is much the same as RETRO
DISK recording except that it utilizes a data buffer
separate to the disk drive to cache video.
RETRO CACHE is also accurate down to the frame
instead of the 1 minute clips used in RETRO DISK.
Once a RETRO CACHE value is set, pressing the
REC key once puts the FS-2 immediately into
RETRO CACHE Record. A “C” now appears next to
the record symbol on the FS-2's display.
Video is being recorded to the FS-2 cache. The
REC button flashes (as if the unit is in pause). When
you press the REC key, the FS-2 leaves the
RETRO CACHE record mode and goes into
standard record (the “C” on the display disappears).
Any clip recorded in this mode has the contents of
the cache added to the beginning of the clip.
Once paused, the unit returns to the RETRO
CACHE record mode again (the “C” reappears in
the LCD) for further RETRO CACHE recordings or
until it is disabled in the RETRO CACHE REC
Menu.
RETRO CACHE RECORD can be used in LOCAL
and SYNCRO SLAVE RECORD control modes.
Loop Record
When you select LOOP RECORD when REC has
begun, video is recorded to available disk space.
Clips are recorded to disk continuously in oneminute clips (up to 60 minutes – over 60 minutes,
2GB files).
When the disk capacity’s record time is reached, an
additional one-minute (or 2GB) segment is created.
After this clip is complete, the oldest one-minute clip
(or 2GB segment) is recorded over, followed by
each sequential oldest clip.
When you press STOP during a record session,
recording stops and clips in the current LOOP
RECORD session are saved to disk. They are also
saved in a single folder.
EXIT
FS-2 Sudio DTE Disk Recorder User Guide
NOTE: Loop record works with only one disk drive.
2 - 9
Part Number: MANL-0927-02
Page 30

FS-2 FUNCTIONS
Still
When you select STILL when REC has begun, a
single frame is grabbed.
You can grab a still quickly by pressing SHIFT + the
Record button on the front panel.
Use STILL with LOCAL and SYNCRO RECORD
control modes. If STILL is in the RECORD MODE
when power is cut to the unit or it is turned off, on
reboot, the FS-2 goes to NORMAL REC mode.
Time Lapse
You can select an interval of up to twenty-four
hours. The interval is the period of time between the
FS-2 capture’s of a single frame of video (a value of
00:00:00:00 means no frames will be recorded).
TIME LAPSE
00:00:00:00:
| & |
MOVES CURSOR
EXIT
Set REC INTERVAL by pressing the
TIME and buttons. Select the
time in seconds (up to 59), then
minutes up to 59, then hours up to 23.
Use | and | keys to scroll
between values.
Press EXIT to return to the menu
screen.
Control Mode
LOCAL
REMOTE
AV/C
SYNCRO SLAVE
EXIT SEL
Select the Control mode. The
highlighted mode is the current mode
after exit.
Press EXIT to return to the menu
screen.
Control Mode has the following functions:
LOCAL
REMOTE
AV/C
SYNCRO SLAVE
Local
Select this function to control the FS-2 from the front
panel buttons only. You can also control the FS-2
with the optional wired remote control units (same
as those for the FS-3 and DR-DV5000).
Remote
Select this function to control the FS-2 by an
external device through the RS-422 port. The FS-2
takes on the characteristics of a VTR as setup in the
RS422 MENU screen in the SETUP MENU. You
cannot use the FS-2 front panel controls in this
mode.
The FS-2 has a menu item that allows the FS-2 to
appear to external controllers as a Sony BVW-75
BetaSP VTR when in Remote RS422 mode. It also
has a generic RS422 mode.
2 - 10
In remote, you can also slave an FS-2 to another
device (such as a Betacam or other non-DV deck)
using the RS422 port.
NOTE: Not all controllable functions of a BVW-75
are available on the FS-2. This mode is only for
greater compatibility with existing control systems.
FS-2 Sudio DTE Disk Recorder User Guide
Part Number: MANL-0927-02
Page 31

FS-2 FUNCTIONS
AV/C
Use this function in PLAYBACK and other
situations where the FS-2 is controlled by an
external FireWire device (such as a DV NLE
system).
NOTE: AV/C does not function completely with all
NLE systems. Contract Focus Enhancements
technical support for more information.
Syncro Slaved
In SYNCRO SLAVED mode, a camcorder and the
FS-2 share the same REC function and the FS-2 is
slaved to the camcorder. Once it is set and you exit
the CONTROL MENU, they return to the default
splash screen. The FS-2 also immediately enters
REC PAUSE mode and a “Y” appears next to the
record symbol on the FS-2 interface.
All REC and REC PAUSE functions are controlled
by the camcorder exclusively. Every time you press
the camcorder REC button, the FS-2 goes into the
selected RECORD MODE. When you press it a
second time, the FS-2 goes into REC PAUSE.
Press the REC button again on the camcorder to
start the selected RECORD MODE. At this point, a
new track is created on disk.
When used with RETRO DISK or RETRO CACHE
functions, as soon as SYNCRO SLAVE is set, the
camcorder begins recording to disk. Press the REC
button on the camcorder to move the FS-2 out of
RETRO DISK or RETRO CACHE and puts it into
standard REC mode. When the camcorder is
triggered back into REC PAUSE mode, the FS-2
once again goes into RETRO DISK or RETRO
CACHE mode.
The FS-2 buttons (other than MENU) are locked out
when in this mode. It is also not possible to use the
optional FS-2 remote control units. You can only
exit SYNCRO SLAVE by entering the CONTROL
MENU which you can do directly by pressing the
MENU button when on the FS-2 default splash
screen. If the camcorder is set to VTR mode, the
FS-2’s control panel becomes active in order to
allow playback.
If a tape ends while using SYNCRO SLAVE mode,
the FS-2 continues to record.
To STOP a recording, push the FS-2 STOP button
twice.
Play Mode
PLAY CLIP
LOOP CLIP
LOOP ALL
PLAY ALL
EXIT
Select the mode. The highlighted
mode is the current mode after exit.
Press EXIT to return to the menu
screen. The default mode is PLAY
CLIP.
The play mode has the following functions:
PLAY CLIP
LOOP CLIP
LOOP ALL
PLAY ALL
Play Clip
For this function, the FS-2 plays the selected clip
from start to finish when you press the PLAY button.
At the end of the particular clip, the FS-2 pauses.
Loop Clip
For this function, the FS-2 plays the selected clip
from start to finish. Immediately after completing the
clip, the FS-2 begins playing the clip again without
a pause. It stays in this state until stopped.
Loop All
For this function, the FS-2 plays the entire contents
of the disk (all clips) in order from start to finish. At
the end of the last clip, the FS-2 begins to play from
the beginning of the first clip again without a pause.
It stays in this state until stopped.
Play All
For this function, the FS-2 plays the entire contents
of the disk (all clips) in order from start to finish. At
the end of the last clip, the FS-2 pauses.
FS-2 Sudio DTE Disk Recorder User Guide
2 - 11
Part Number: MANL-0927-02
Page 32

FS-2 FUNCTIONS
Play From Mode
This selection allows your to select where clips will
be played back from. There are three options
available.
TRACK LIST
PLAY LIST
FOLDER LIST
EXIT
Select the mode. The highlighted
mode is the current mode after exit.
Press SEL for the highlighted menu
item to open the sub-menu. In submenu, the currently highlighted mode
is the current mode after exit.
Scroll from value to value using the
FORWARD and BACK INDEX
Buttons.
Press the DOWN and UP arrows to
scroll though digits in value.
Press EXIT to return to the menu
screen.
Track List
When you select this setting, all clips on attached
disk drives are played back sequentially based on
the order of their base file name regardless of
whether they have been marked in the KEEPER or
SCENE MARKING folders. If Track List is selected,
all PLAY MODES relate to all clips on the
connected disk drives.
Play List
This selection plays the items in the play list.
When the FS-2 PLAY MENU is set to “TRACKLIST”
the name of the SCENE MARKED folder appears
without brackets on the LCD display (for example, 2
SCENE 2).
When the PLAY FROM menu is set to “FOLDERS”,
the name of the SCENE MARKED folder appears in
brackets on the LCD display (for example, 2
<SCENE 2>).
Playlist
The FS-2 playlist feature allows you to playback
clips in a custom, user defined, order.
This selection has the following choices:
OPEN
SAVE
NEW
EDIT
VIEW
DELETE LIST
Playlists are created using the FS-2 front panel.
You can create custom in and out play points on
clips. Multiple playlist can be saved on disk and can
be opened, saved and edited at any time. Use the
PLAY FROM menu to select particular playlists to
playback. Use the PLAYLIST menu selection to
modify, open or save playlists.
Play lists can be named with an 8 character/number
name (such as 04-05-04 or PROMO2).
A playlist can consist of multiple sequences (a
sequence can be entire clip, a portion of a clip or
combined portions of clips). Each sequence gets a
number in the playlist starting with 0001. The
corresponding track number of the clip sequence is
also displayed (for example, 1-005 is a sequence
from track five on volume 1).
The PLAYLIST menu appears as follows:
Folder List
When you selected this setting, you can play back
clips only from a selected folder. Select a particular
folder to play clips from. Highlighted folder is the
selected folder after exit. Once set and when PLAY
is pressed, only clips within that particular folder will
playback. If Folder List is selected, all PLAY
MODES relate to clips in the selected folder only.
2 - 12
OPEN
SAVE
NEW
EDIT
EXIT SEL
FS-2 Sudio DTE Disk Recorder User Guide
Part Number: MANL-0927-02
Page 33

FS-2 FUNCTIONS
Only one playlist can be opened at a time.
Select the mode to activate it.
Press SEL for the highlighted menu
item to open the sub-menu. In submenu, the currently highlighted mode
is the current mode after exit.
Press EXIT to return to the menu
screen. These settings are saved on
power down.
Open
Open allows you to open a playlist on disk. Do this
as follows:
S
TEP 1: In the PLAYLIST menu, select the
OPEN option and press SEL to open. A
display similar to the following appears.
03-20-20
06-20-20
03-25-20
03-30-20
Save
When a playlist has been created or modified, save
allows changes that were made to be saved to that
playlist.
If you modify a playlist or create a new one and try
to exit the playlist menu, the SAVE function will
automatically appear.
If you have made modifications and wish to save
them as a new file name, modify the file name prior
to saving it.
SAVE PLAYLIST?
02-20-20
NEXT
Select NEXT and a display similar to the following
appears.
EXIT SEL
S
TEP 2: Once the sub menu is opened, select
the desired playlist from the list. A
display similar to the following appears.
PLAY LIST
OPENED
03-20-20
EXIT VIEW PLAY
TEP 3: Once selected, you can VIEW or PLAY
S
the particular playlist.
If PLAY is selected, exit to the main
display and press play. The PLAYLIST
button lights and playback will be from
the selected Playlist only.
This can also be done form the PLAY
FROM -> PLAYLIST menu.
CONTINUE SAVE?
02-20-20
BACK YES NO
Select YES or NO.
New
Even if a playlist is open, you can begin creating a
new one. If you select NEW, the current playlist will
be closed and any new additions will be saved in
the new playlist.
Edit
The edit menu allows you to modify an existing
playlist.
The selected playlist must be opened in order to
edit. EDIT allows you to remove, insert or move
clips within a playlist.
FS-2 Sudio DTE Disk Recorder User Guide
2 - 13
Part Number: MANL-0927-02
Page 34

FS-2 FUNCTIONS
To remove a clip, use the following steps:
TEP 1: Select EDIT from the PLAYLIST menu
S
and then REMOVE CLIP. You are
given a list of clips in the open playlist.
(If no clips are in the playlist, the
message “PLAYLIST EMPTY” will
appear.).
INSERT ITEM
IN CLIP 1-001
OUT CLIP 1-001
I 00:00:15:00
O 00:00:21:24
0001 1-001
0002 1-004
0003 1-001
0004 1-003
NEXT
S
TEP 2: Select the clip you wish to remove and
then select NEXT.
DELETE ITEM?
HDD: 01
CLIP 0001
00:00:01:23
00:00:02:00
EXIT YES NO
You will be asked again if you are sure you want to
delete the item from the playlist.
Once removed, the playlist will update.
Insert clip allows you to insert a selected clip in an
existing playlist. A playlist must be opened and you
must have selected in and out points for the clip you
would like to insert before continuing.
S
TEP 1: From the PLAYLIST menu, select EDIT
-> INSERT CLIP. The selected clip
number and its details will be listed.
S
TEP 2: Press NEXT.
S
TEP 3: You are given the choice of inserting at
the BEGIN, END or CUSTOM part of
playlist. Once you have selected your
choice, the updated playlist will be
display.
EXIT NEXT
MOVE clip allows you to move a clip within an
existing playlist. To move a clip, use the following
steps:
S
TEP 1: Select MOVE CLIP from the PLAYLIST
-> EDIT menu.
S
TEP 2: Once selected, scroll to the clip you
wish to move.
0001 1-001
0002 1-004
0003 1-001
0004 1-003
NEXT
S
TEP 3: Once selected, press NEXT. The clip
info will display.
CLIP INFO
HDD: 01
CLIP 0001
00:00:01:23
00:00:02:00
EXIT NEXT BACK
TEP 4: Select NEXT, EXIT or BACK. You will
S
then be able to move the clip to the
BEGIN, END or CUSTOM of the
playlist.
S
TEP 5: Press NEXT. The updated playlist will
be displayed.
2 - 14
FS-2 Sudio DTE Disk Recorder User Guide
Part Number: MANL-0927-02
Page 35

FS-2 FUNCTIONS
View
View allows you to view the track info of an OPEN
playlist. A playlist must be opened in order to view.
TEP 1: Select VIEW from the PLAYLIST ->
S
EDIT menu.
0001 1-001
0002 1-004
0003 1-001
0004 1-003
NEXT
S
TEP 2: Scroll to the desired clip, then select
NEXT. The clip info will display.
CLIP INFO
HDD: 01
CLIP 0001
00:00:01:23
00:00:02:00
EXIT BACK
Delete List
Delete list allows you to delete an entire playlist.
S
TEP 1: Select DELETE LIST form the
PLAYLIST menu. All the playlists on
disk will be displayed.
03-20-20
06-20-20
03-25-20
03-30-20
EXIT SEL
S
TEP 2: Select the playlist you wish to delete
and press SEL. You will be asked
“DELETE PLAYLIST XX-XX-XX?
S
TEP 3: Press YES to continue delete.
HDD Bypass
HDD Bypass mode allows the connected FireWire
HDD to be mounted/dismounted to a computer
without removing.
In this mode, the computer connects to the “HDD
I/O” port on the FS-2 Rear Connector Panel.
When HDD Bypass is selected, the following will
display on the FS-2 LCD:
For more information, refer to “Playlist” on page 212 of this user guide.
GO TO HDD
BYPASS?
EXIT YES NO
To Exit this mode, press the EXIT key.
Be sure to properly dismount the
FireWire drive from the computer
system first before exiting HDD
Bypass mode on FS-2.
Internal HDD
The internal HDD function allows you to remove the
front mounted IDE drive from FS-2 without first
having to power the unit down.
Select Internal HDD by pressing the
SEL button.
Answer YES to “Remove Internal
HDD?” (Selected EXIT to exit from the
menu).
Remove the disk drive from FS-2
when prompted with “Remove HDD
now. Then Press Exit.”.
FS-2 Sudio DTE Disk Recorder User Guide
2 - 15
Part Number: MANL-0927-02
Page 36

FS-2 FUNCTIONS
Record Format Mode
The RECORD FORMAT menu allows selection of
particular DTE Technology native NLE file formats
prior to recording. All files are in the DV25 standard.
RAW DV
AVI TYPE 1
AVI TYPE 2
CANOPUS AVI
MATROX AVI
QUICKTIME
AVID OMF
PINNACLE
MXF SONY
MXF 1
24P AVI TYPE 2
24P QUICKTIME
EXIT
Select this format to activate it. The
highlighted format is the current format
after exit.
Use to scroll through the selections.
Press EXIT to return to the menu
screen.
The RECORD FORMAT MODE menu contains the
following selections:
RAW DV
AVI TYPE 1
AVI TYPE 2
CANOPUS AVI
MATROX AVI
QUICKTIME
AVID OMF
PINNACLE
MXF SONY
MXF 1
24P AVI TYPE 2
24P QUICKTIME
NOTE: When recording in AVID OMF or
PINNACLE AVI format, you must first do an
Organize Pinn or Organize OMF before using clips
in an NLE. Refer to Page 2-25 for more details.
Setup Mode
The SETUP MENU allows you to set various
functions of the FS-2.
SET DATE&TIME
OS VERSION #
OS UPGRADE
PAL/NTSC
EXIT SEL
Select the Menu Item.
Press SEL to open the sub menu
(where applicable).
Use to scroll through the selections.
Press EXIT to return to the menu
screen.
The SETUP menu contains the following
selections:
SET DATE&TIME
OS VERSION #
OS UPGRADE
PAL/NTSC
RS422 REMOTE
AUDIO IIN LEVEL
TC MODE
TC SET
ON SCREEN DIS
FF/RW HI RES
GPI PORT
BACKLIGHT
STOP OUTPUT
AUDIO CORRECT
PREFERENCES
ANALOG OUT
NETWORK SETUP
REF VIDEO
VIDEO ADJUST
2 - 16
FS-2 Sudio DTE Disk Recorder User Guide
Part Number: MANL-0927-02
Page 37
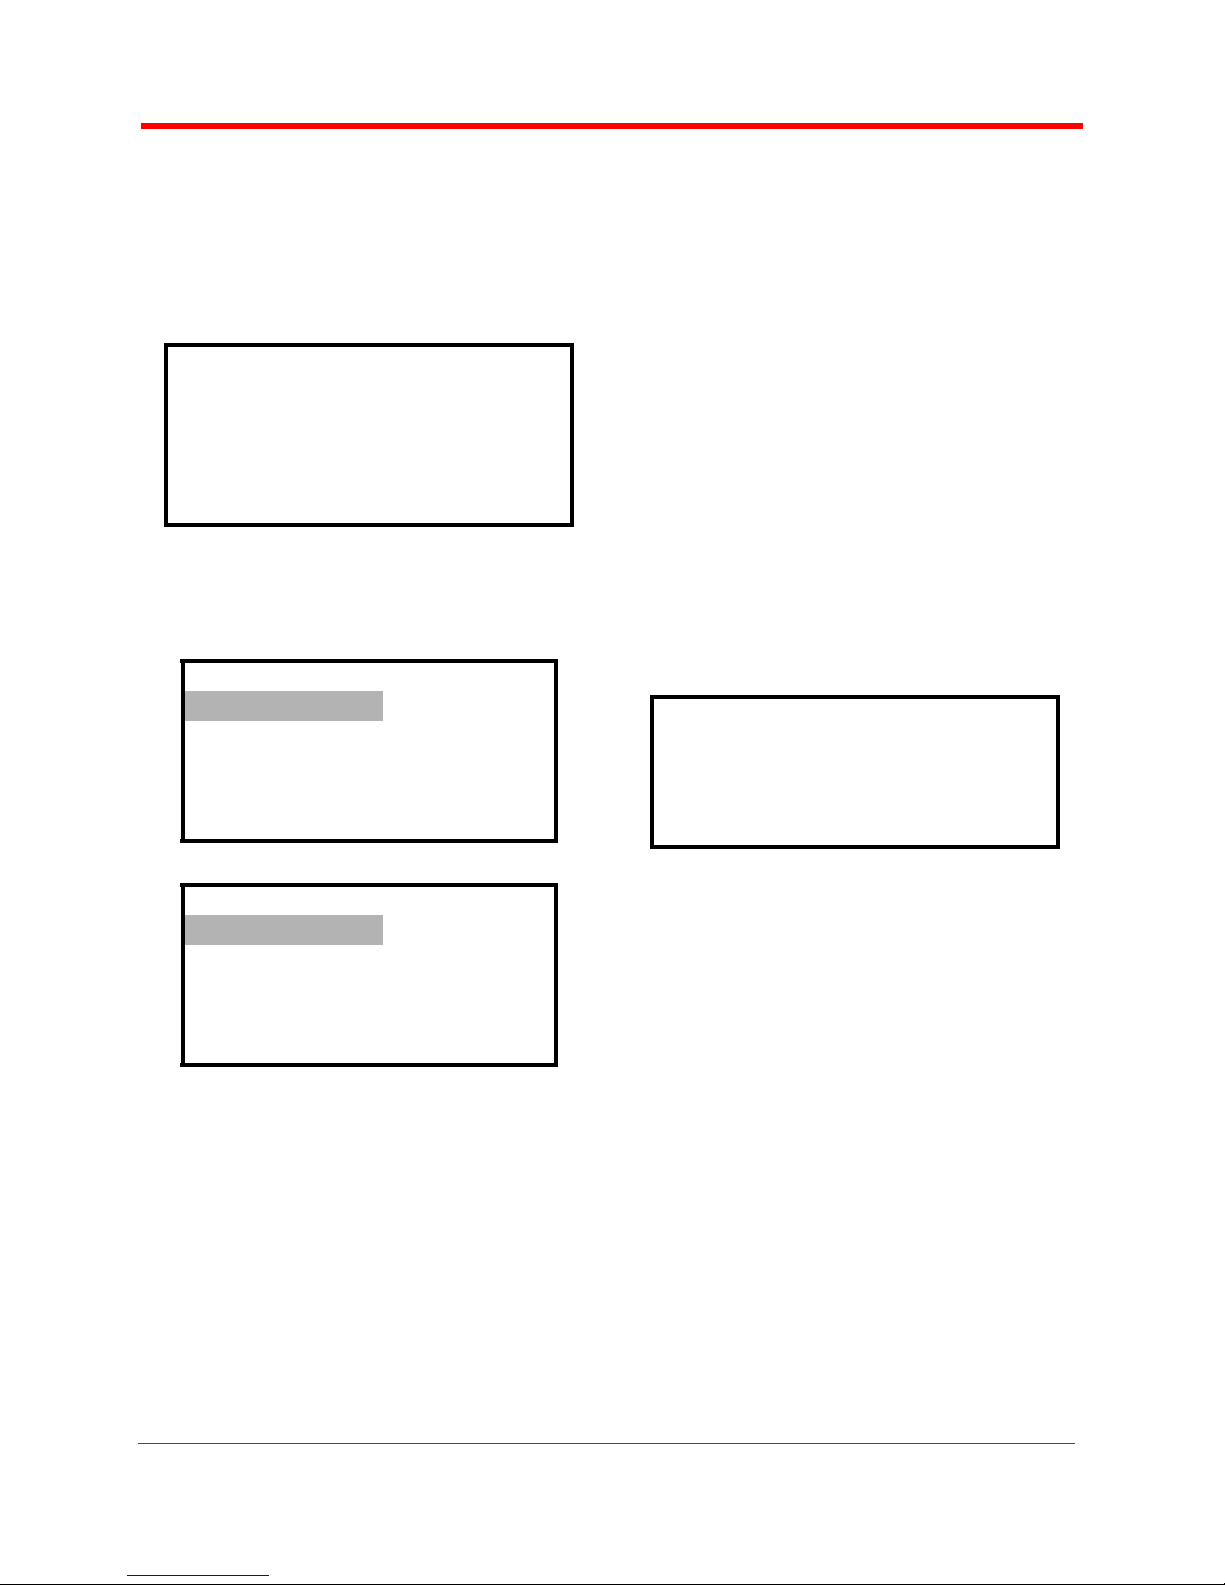
FS-2 FUNCTIONS
SET DATE & TIME
This selection provides a way to set date and time
for file naming purposes. Date and Time are set in
different menus.
Select the Menu Item.
SET DATE
SET TIME
EXIT SEL
Press SEL to open one of the following
sub menus.
SYSTEM DATE
02/24/02
| & |
MOVES CURSOR
The date and time form the basis of the FS-2 file
naming structure for use of clips on a computer.
On the FS-2, files are identified by TRACK and
VOLUME (disk drive) number on the LCD. For
instance, a file on the FS-2 LCD identified as 1-043
is clip number 43 on Volume (disk) 1.
On a computer, files are identified by their base file
name made up of DATE and TIME. For instance, a
clip named 20030615-210943-01.mov is a clip that
began recording at 9:09:43PM on June 15th. 2003.
NOTE: DATE/TIME is used when creating File
name only. the FS-2 does not record this
information into the stream. The FS-2 records
DATE/TIME which is in the DV stream which is sent
from the input source.
OS VERSION #
This selection displays the current FS-2 Operating
System Firmware version.
OS VERSION
3.0.m.032603
EXIT
SYSTEM TIME
16:21:13
| & |
MOVES CURSOR
EXIT
Scroll from value to value using the
FORWARD and BACK INDEX
Buttons.
Press the DOWN and UP arrows to
scroll though digits in value.
Press EXIT to return to the menu
screen. Regardless of the display, the
file name always remains
YYYYMMDD-HHMMSS.xxx (YearMonth-Date-Hour-Minute-Second).
EXIT
OS UPGRADE
To upgrade system software, you must download a
new .bin file to a FireWire drive on your computer.
The latest version of FS-2 software can be
downloaded from http://www.focusinfo.com/
support.
To install new OS software to FS-2, do the
following:
S
TEP 1: Download software from the Focus
Website to your local computer.
S
TEP 2: Unzip file using WinZip (Windows) or
Stuffit (Macintosh) on a computer
system with a FireWire (IEEE-1394)
connection.
S
TEP 3: Rename the unzipped file called
“XXXX.bin” to “fs2.bin”.
S
TEP 4: Connect a FireWire disk drive that has
been used with FS-2 to the computer
and copy over the file “fs2.bin”.
FS-2 Sudio DTE Disk Recorder User Guide
2 - 17
Part Number: MANL-0927-02
Page 38

FS-2 FUNCTIONS
STEP 5: Disconnect the FireWire drive from
computer and connect it to the FS-2.
TEP 6: Power on FS-2 normally.
S
S
TEP 7: Enter the FS-2 menu and select
“SETUP”.
S
TEP 8: From the SETUP menu, select “OS
UPGRADE”. When you select OS
upgrade, the following screen appears:
UPGRADE
SYSTEM
FIRMWARE
EXIT YES NO
S
TEP 9: Select YES. You are warned with the
following display:
UPGRADE WILL
ERASE CURRENT
OS!!!
CONTINUE?
PAL/NTSC
Use this screen to select the record standard as
either PAL or NTSC. The highlighted selection is
the current one after exit.
NTSC
PAL
EXIT
NOTE: Do not combine PAL and NTSC clips on a
single drive.
RS422 REMOTE
This menu allows you to setup the FS-2 for remote
operation via the RS422 control port.
For easy integration with existing control systems,
you can make the FS-2 look like either a Sony
BVW-75 Betacam SP deck or a generic recorder in
terms of its control capabilities to outside devices.
Using the TC SOURCE submenu, you can also
select the timecode source for FS-2 control.
Options are ABS, DV and COUNTER.
EXIT YES NO
S
TEP 10: Select YES to begin the OS upgrade.
A message appears indicating the upgrade has
begun.
S
TEP 11: After upgrade is complete, power cycle
the FS-2. The new software should
now be loaded and ready to use.
If no .bin file is found, the screen will display “OS
UPGRADE ERROR”. Check your connections and
make sure you have the correct file name.
You must restart your system once an OS upgrade
is complete.
NOTE: If you need to restore the factory default
Operating System, hold down the Left and Middle
soft keys under the LCD during boot up.
2 - 18
Part Number: MANL-0927-02
TYPE
TC SOURCE
EXIT
You can set the FS-2 to two different remote
modes:
BVW-75 – The FS-2 appears as and is
identified as a Sony BVW-75 BetaSP
deck to the remote control device.
NOTE: Some BVW-75 control functions are not available on the FS-2.
The FS-2 mainly responds to commands such as PLAY, STOP,
REWIND, REC, FF, and so on. Commands such as Insert, Edit, and other
specialty commands are not possible.
FS-2 Sudio DTE Disk Recorder User Guide
Page 39

FS-2 FUNCTIONS
Generic - The FS-2 appears as and is
identified as a generic device to the
remote controller.
After you have set up RS422 to control the FS-2
using an external RS422 device, press the
REMOTE button on the front panel or select
REMOTE from the Control Mode menu.
AUDIO INPUT
In this menu, you can change the default audio
input linked to a particular video input.
COMPOSITE
S-VIDEO
COMPONENT
SDI
EXIT SEL
Select the mode to activate it.
Press SEL for the highlighted menu
item to open the sub-menu. In the submenu, the currently highlighted mode
is the current mode after exit.
Press EXIT to return to the menu
screen. These settings are saved on
power down.
Each video input and its available audio inputs
(defaults are underlined) are listed below:
Composite: Analog Balanced Audio
AES/EBU Digital Audio
S-Video (Y/C): Analog Balanced Audio
AES/EBU Digital Audio
Component: Analog Balanced Audio
AES/EBU Digital Audio
SDI: Embedded
Analog Balanced Audio
AES/EBU Digital Audio
DV: Embedded
AUDIO IN LEVELS
This menu item allows you to set the audio input
levels for FS-2.
Adjust the audio level between -34.5dB and +12dB
in 1.5dB increments.
0.0dB
|----------------------------------x----------------------|
EXIT
TC MODE
This selection allows you to select different
timecode options for use when FS-2 is recording.
EXT TC
REC RUN
REGEN
FREE RUN
EXIT SEL
Select the mode to activate it.
Press SEL for the highlighted menu
item to open the sub-menu. In submenu, the currently highlighted mode
is the current mode after exit.
Press EXIT to return to the menu
screen. These settings are saved on
power down.
The following selections are available:
EXT TC Mode - Whatever the
incoming timecode, the FS-2 records
it. You can select between Selected
Input, VITC Reference, VITC Analog,
LTC, Firewire (DV), or SDI timecode.
Select the desired TC value. Choosing
EXT TC mode will clear any stored
number.
NOTE: If the FS-2 is set to EXT TC
when in SYNCRO SLAVE mode, EXT
TC will stop once tape in camcorder
ends. Use different TC mode when
using SYNCRO SLAVE. (TC Preset
FS-2 Sudio DTE Disk Recorder User Guide
2 - 19
Part Number: MANL-0927-02
Page 40
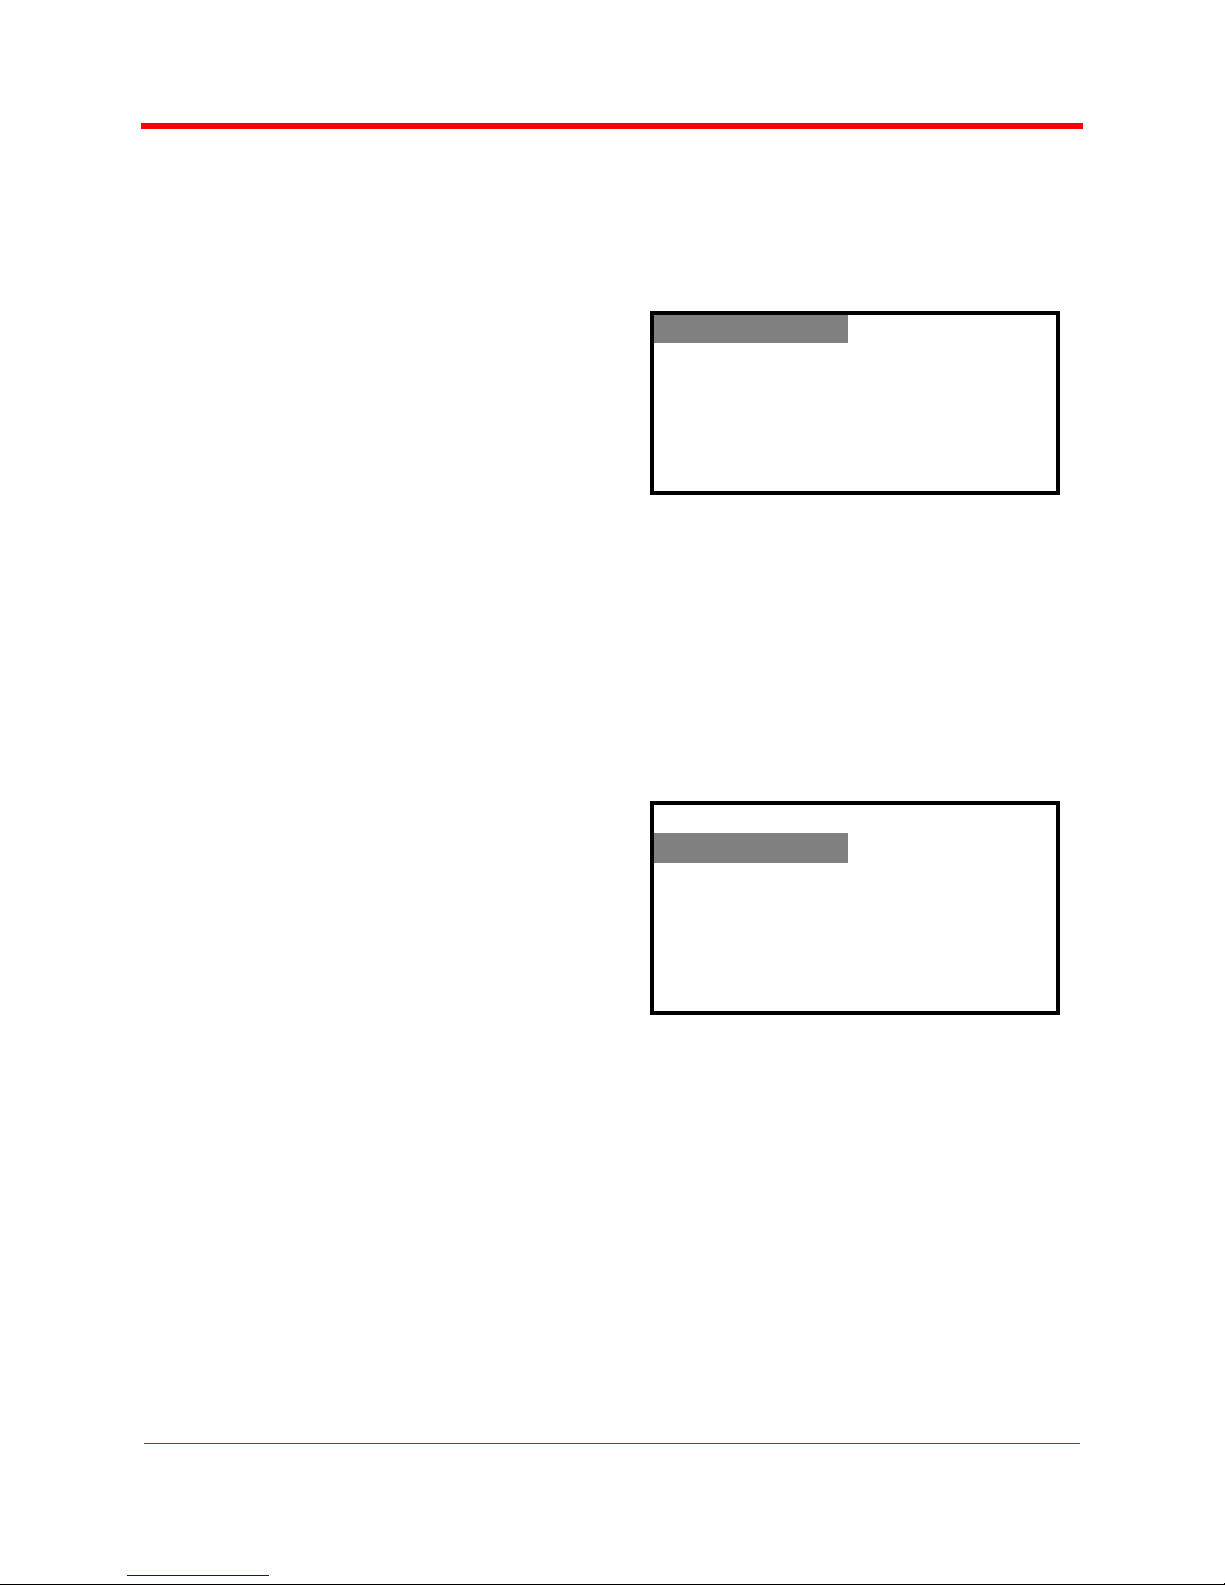
FS-2 FUNCTIONS
cannot be changed while in the EXT
TC mode.)
REC RUN Mode - In this mode, the
FS-2 does the following:
(1) The last timecode number
recorded + 1 is used as the
timecode number for the first frame
of the next recording.
(2) The number entered by a
setting in the TC PRESET menu is
used for the first frame of the next
recording.
The last number used is stored in
the memory, so this mode persists
across recording sessions.
REGEN Mode - After a disk is
mounted (at startup, upon manual
connect) and after the track list has
been constructed, the FS-2 looks at
the last track and looks at the
timecode number of the last frame in
that track. The FS-2 stores that
number for use as the TC value (+ 1)
for the first frame of the next recording.
If the drive is empty, FS-2 uses the
value (+ 1) stored in memory.
FREE RUN Mode - When the user
enables FREE RUN mode, the FS-2
begins counting from the value stored.
If the user uses the TC PRESET
function, when the number is entered
and the TC PRESET menu is exited,
the FS-2 begins counting.
Once a timecode value is set and FS-2 is set to
REC RUN or FREE RUN timecode settings, the
preset value will be the starting point for timecode.
Use the forward and back index buttons to move
from value selection to value selection. Press the up
and down arrows to set values.
TC SET
This menu allows you to set Timecode values for
various modes. It also allows the selection of drop
or non-drop frame (NTSC only) settings.
Once a timecode value is set and the FS-2 is set to
REC RUN or FREE RUN timecode settings, the
preset value will be the starting point for timecode.
Use this menu as follows:
Display this menu item by selecting it.
Press SEL to open the sub menu.
Press EXIT to return to the menu
screen.
TC PRESET
UB PRESET
DROP/NON DROP
EXIT SEL
For TC PRESET, scroll from value to
value using the FORWARD and BACK
INDEX Buttons.
Press DOWN and UP arrow to scroll
though digits in value.
Press EXIT to return to the menu
screen.
This selection allows you to set a user bit value.
TC PRESET
2:00:00:00:00
| & |
MOVES CURSOR
EXIT
For UB Preset, scroll from value to
value using the FORWARD and BACK
INDEX Buttons.
Press DOWN and UP arrow to scroll
though digits in value.
Press EXIT to return to the menu
screen.
NOTE: You cannot set UB values after selecting
EXT TC mode in the TC MODE menu.
2 - 20
FS-2 Sudio DTE Disk Recorder User Guide
Part Number: MANL-0927-02
Page 41
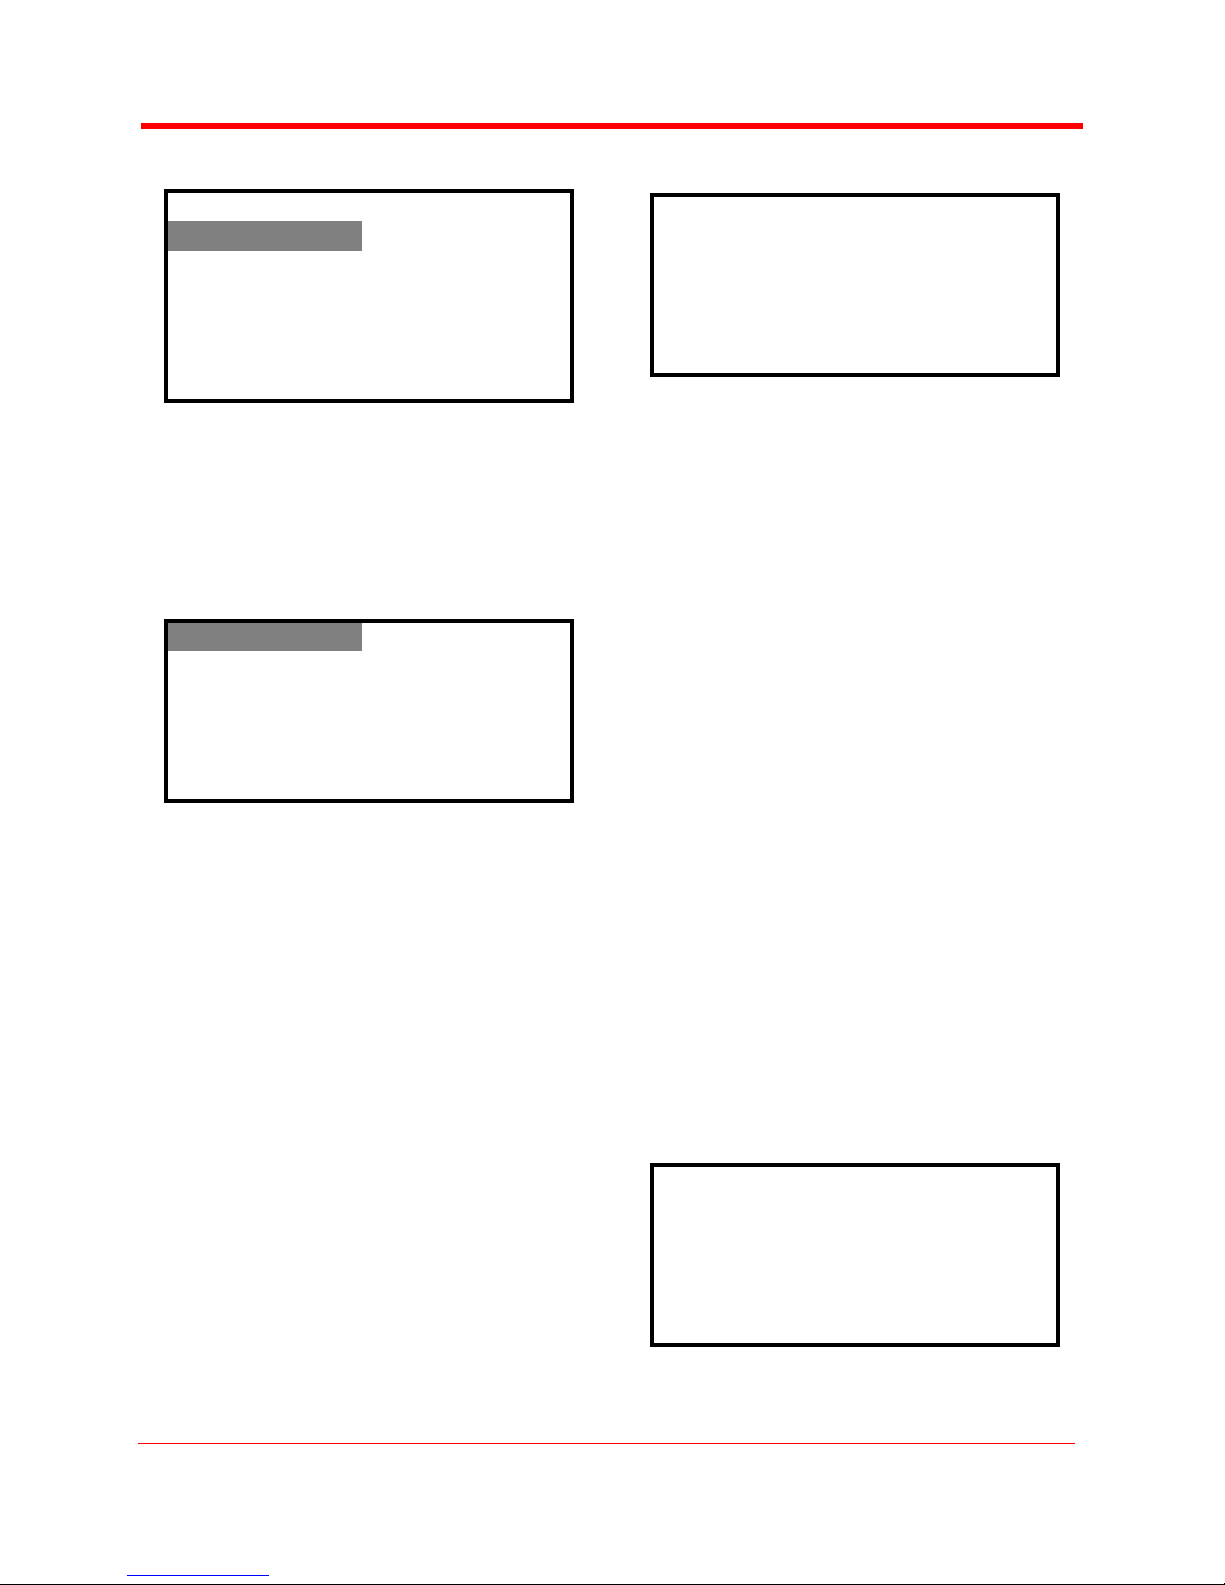
FS-2 FUNCTIONS
UB PRESET
F:00:00:00:00
| & |
MOVES CURSOR
EXIT
For DROP and NON-DROP, select the
mode. The highlighted mode is the
current mode after exit.
Press EXIT to return to the menu
screen.
DROP
NON-DROP
EXIT
For DROP and NON-DROP, select the mode. The
highlighted mode is the current mode after exit.
Pressing EXIT returns to the menu screen.
This item not applicable for PAL use. On the FS-2
display, DROP is identified by a (:) symbol and
NON-DROP by a (;) symbol.
ON SCREEN DISPLAY
This Setup selection allows you to turn on or off the
superimpose on FS-2's Monitor Output. The
highlighted item is current after exit.
ABS
TC
MENU
OFF
EXIT
Press DOWN and UP arrow to scroll
though the selections.
Press EXIT to return to the menu
screen.
NOTE: By repeatedly pressing the front panel OSD
key, you can cycle between these modes.
FF/RW HI RES
This allows the default for the FS-2 Fast Forward
Search and Fast Back Search keys to have high
resolution enabled or disabled as the default. Once
set, the selection becomes the default.
REVERSE: -30X, -25X, -18X, -15X, -
12X, -10X, -8X, -5X, -4X, -3X, -2X,
-1/30, -1/15, -1/10, -1/6, -1/5, -1/3,-1/2
FORWARD: +30X, +25X, +18X, +15X,
+12X, +10X, +8X, +5X, +4X, +3X,
+2X, +1/30, +1/15, +1/10, +1/6, +1/5,
+1/3, +1/2
Select this mode to activate it. The
highlighted mode is the current mode
after exit.
Press EXIT to return to the menu
screen.
When ABS is selected, the ABS timecode value is
displayed on the bottom center of the monitor
output.
When TC is selected, the TC (Counter) timecode
value is displayed on the bottom center of the
monitor output.
When MENU is selected, the FS-2 Menu is
displayed in the top left corner of the monitor output.
FS-2 Sudio DTE Disk Recorder User Guide
ENABLE
DISABLE
EXIT
2 - 21
Part Number: MANL-0927-02
Page 42

FS-2 FUNCTIONS
GPI PORT
This menu allows you to change the setting of the
GPI port.
Select the function. The highlighted
function is the current function after
exit.
Press EXIT to return to the menu
screen.
DISABLE
PAUSE/UNPAUSE
INDEX (NEW FILE)
REC SNAPSHOT
EXIT
DISABLE - This selection allows you
to connect a 3.5mm to DB9 cable to
the GPI port and control the FS-2 via
RS232C from an external device. You
can also use the FS-2 with the optional
wired remote control unit.
The remaining three selections allow functions to
occur from a simple contact closure as follows:.
PAUSE/UNPAUSE -This selection
allows control of pause and unpause
during a record or playback session.
INDEX (NEW FILE) - This selection
allows a new file to be created during a
record session without losing any
frames.
REC SNAPSHOT - This selection
allows a single frame of video to be
recorded to a file. Each sequential use
of this function adds another frame to
the same file until stopped.
BACK LIGHT
This selection allows you to enable or disable the
FS-2 back-light.
BACKLIGHT
ON
OFF
AUTO OFF
EXIT
Select the state. The highlighted state
is the current one after exit.
Press EXIT to return to the menu
screen.
The ON setting keeps the back-light on
permanently while the OFF setting keeps the backlight off permanently.
AUTO OFF turns off the back light after one minute.
Press any keypad button on the FS-2 to turn the
back-light back on in AUTO OFF state.
STOP OUTPUT
With this selection, you can set the default output
picture while the FS-2 is in STOP mode and not in
E-E mode. The selected mode is the current state
after exit.
GREY
NO OUTPUT
CLIP PREVIEW
CUSTOM
EXIT
2 - 22
When you select GREY, a gray screen appears.
If you select NO OUTPUT, a blank screen appears.
If you select CLIP PREVIEW and scroll from one
clip to the next on the FS-2 using the index forward/
back buttons, the first frame of each clip is
generated and shows on all outputs after 1 second
if you pause on that clip.
FS-2 Sudio DTE Disk Recorder User Guide
Part Number: MANL-0927-02
Page 43

FS-2 FUNCTIONS
If you select CUSTOM, the FS-2 looks on disk drive
volume 1 for any clip named “SPLASH.dv” and
always displays the first frame of that clip. You can
name any RawDV clip “Splash.dv” and the first
frame from that clip will appear as the default output
in STOP mode.
AUDIO CORRECT
This sub-menu allows you to change the AUDIO
CORRECTION setting on the FS-2.
AUDIO CORRECT
OFF
MEDIUM
HIGH
EXIT
Select the state. The highlighted state
is the current state after exit.
Press EXIT to return to the menu
screen.
The AUDIO CORRECTION selection is an
advanced feature of the FS-2. You should use the
factory default settings for most operations (Factory
default is MEDIUM).
Audio Correction Mode allows you to alter the
performance of the audio error corrector while
recording. It is useful when recording to the FS-2
from tapes with lots of dropouts. Error correction
only effects AVI 2, Canopus AVI, Matrox AVI,
QuickTime, AVID OMF, Pinnacle, MXF Sony, MXF
1, 24p QuickTime, and 24p AVI Type 2. It does not
effect RawDV or AVI 1. The selections are:
OFF: No audio correction.
MEDIUM (default): For “normal” clean
tape played back on a camcorder or
other VTR with clean heads. There are
occasional very short audio mutes.
HIGH: For cases where there are
visible picture disturbances and likely
long audio dropouts (1/2 sec and up).
PREFERENCES
This menu allows you to select system preferences
and save them to disk. This allows you to restore to
other systems at a later date.
PREFERENCES
SAVE
RESTORE
EXIT SEL
When you select ‘SAVE”, you are prompted with the
message “SAVE CURRENT PREFERENCES?”.
When you accept, a file is written to the connected
disk drive saving the current user settings.
When you select RESTORE the FS-2 searches for
a saved user preference on the disk and if found,
restores your PREFERENCES. PREFERENCES
are essentially a snapshot of all settings that can be
saved on the FS-2.
ANALOG OUT
Composite or Component
With Analog Output, you can select the “Y” output
on the rear panel for use as a composite signal or
the Y signal on the component output.
When you select COMPONENT OUT, you can also
select either SMPTE, BETACAM, or MII output
levels. Refer to Chapter 4 for more information.
The selected mode is the current mode after you
select Exit.
NETWORK SETTING MENU
With NETWORK SETUP, you can connect FS-2 to
a network. When this is done, you can do FTP file
transfers to/from FS-2 or control he FS-2 using
Telnet. The NETWORK SETTINGS MENU
contains the following:
IP SETTINGS
USER/PASSWORD
VIEW IP INFO
SERVICES
FS-2 Sudio DTE Disk Recorder User Guide
2 - 23
Part Number: MANL-0927-02
Page 44

FS-2 FUNCTIONS
FOCUS Enhancements is in no way liable for
device security (Telnet and FTP). Contact your
system administrator regarding the best security
practices.
IP SETTINGS
DHCP
CUSTOM IP
EXIT SEL
With the IP settings menu item, you can select
either DHCP (the network provides the IP address)
or a CUSTOM IP.
If you select DHCP and then EXIT, the FS-2
attempts to log onto the network.
If you select CUSTOM IP, a sub menu opens to ask
you to insert an IP number, Sub Net Mask, and
Gateway.
IP ADDRESS 000.000.000.000
SUBNET MASK 255.255.255.255
GWY 000.000.000.000
Once complete, press the SEL key when EXIT is
highlighted to exit the menu or the NEXT key to
continue to modify items.
Once exited, the FS-2 attempts to log into the
network and one of two things happen:
If the FS-2 successfully logs onto a
network, it displays NETWORK
CONNECT SUCCEEDED.
If the FS-2 is unable to log onto a
network, it displays “NET CONNECT
FAILED. CHECK NETWORK CABLE”.
Press the VERIFY button on the FS-2 to take you
back to the IP Settings menu to verify your values.
Press the EXIT button to take you back to the
SETUP menu.
USER/PASSWORD
This menu allows you to set a username and
password for the FS-2 to connect to a network. If
you are unsure what username and password to
use, contact you system administrator.
USER: FS2
PASWD: FOCUS
EXIT
SAVE
NEXT
EXIT
NEXT SEL
If you do not have these values, contact your
system administrator. The default values for the IP
address is 000.000.000.000, Sub Net Mask
255.255.255.000 and Gateway 000.000.000.000.
To modify the custom IP values, select the item to
modify and then press the right arrow key to select
the values. Use the Up arrow key to increase the
value (HINT: press the SHIFT key on the FS-2 front
panel plus the up arrow key to decrease a value).
Values loop back to the beginning once the
maximum value has been entered.
To modify the next item or set of values, press the
NEXT key on the FS-2 front panel.
2 - 24
Part Number: MANL-0927-02
To modify the username and password, select the
item to modify and then press the right arrow key to
select values.
Use the Up arrow key to increase the value (HINT:
press the SHIFT key on the FS-2 front panel plus
the Up arrow key to decrease a value).
Values loop back to the beginning once the
maximum value has been entered.
To modify the next item, press the NEXT key on the
FS-2 front panel. It is only possible to have one
username and password per unit. The maximum
number of characters for each is seven.
VIEW IP INFO
In cases where DHCP is being used, by selecting
VIEW IP INFO, you can see the IP address that the
network has provided the FS-2.
FS-2 Sudio DTE Disk Recorder User Guide
Page 45
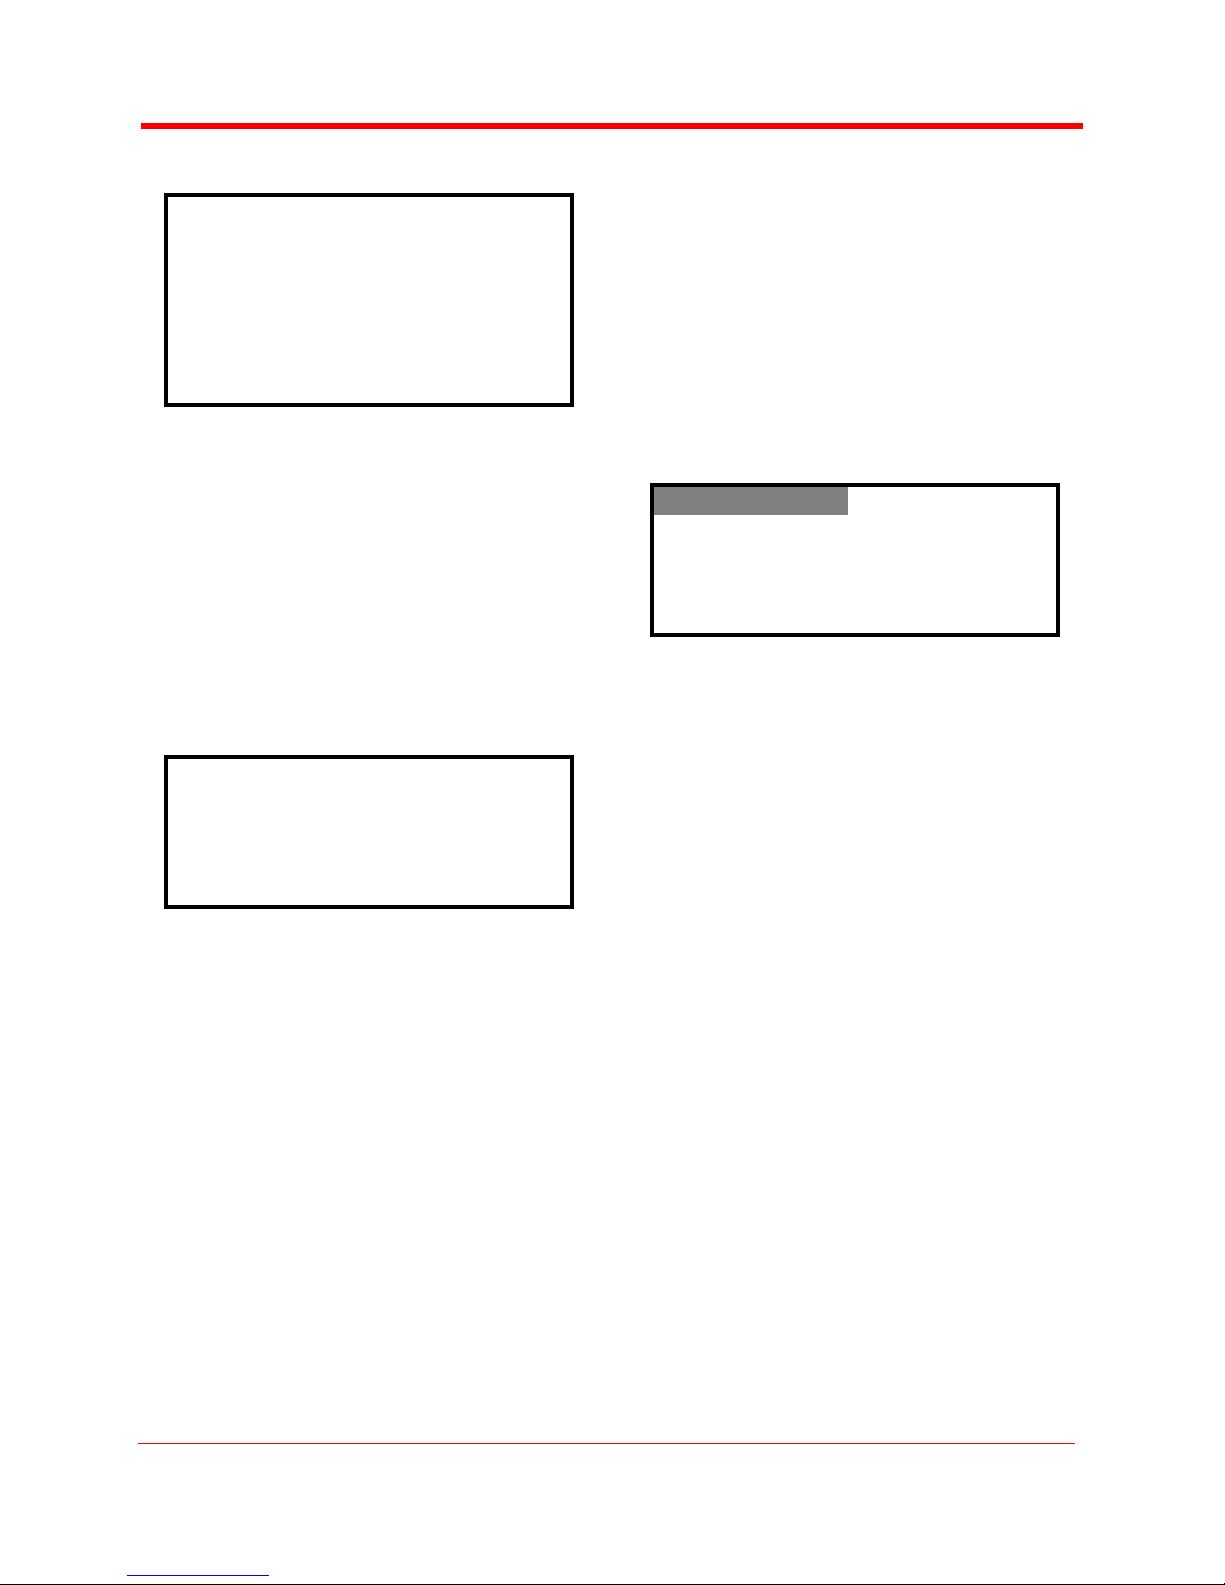
FS-2 FUNCTIONS
IP 100.000
001.000
MSK 255.000
000.000
DHCP DISABLED
NOT CONNECTED
NEXT
If the FS-2 is not connected to a network or was not
able to successfully log on, this screen displays
“DHCP DISABLED NOT CONNECTED”. Check
your settings or contact your system administrator
for further assistance.
SERVICES
The SERVICES menu allows you to select either
FTP or TELNET for your network connection. With
each, it is necessary to enable or disable the
function within the sub menu.
FTP
TELNET
SATURATION- adjustable between -
255 and +256
BRIGHTNESS- adjustable between -
127 and +128
CONTRAST- adjustable between -127
and +128
Utilities
This menu allows you to access various UTILITIES
functions.
ORGANIZE PINN
ORGANIZE OMF
DELETE CLIP
EXIT SEL
Select the Menu Item. Press SEL to
open the sub menu (where
applicable).
Press EXIT to return to the menu
screen.
This menu contains the following selections:
EXIT SEL
REF VIDEO
The Reference video menu allows you to select
where the reference video source will come from for
recording and playback modes, Choices are:
REF VIDEO - the reference video port
on FS-2's rear panel,
FREE RUN - reference video is
generated on FS-2.
SELECTED INPUT - reference video
source comes from the selected input.
VIDEO ADJUST
The video adjust menu's allow you to make
adjustments to FS-2 analog input sources.
Adjustments include:
HUE - adjustable between -179 and
+180
ORGANIZE PINN
ORGANIZE CLIP
ORGANIZE OMF
DELETE CLIP
FORMAT
PARTITION
REPAIR
FILE NAME
FACTORY RESET
ORGANIZE PINN
Once you have finished a Pinnacle recording
session, do the following:
S
TEP 1: From the FireStore SETUP MENU,
select ORGANIZE PINN.
S
TEP 2: When prompted “ORGANIZE
PINNACLE CLIPS? Select YES.
S
TEP 3: You can now remove the disk drive
from FireStore to begin editing.
FS-2 Sudio DTE Disk Recorder User Guide
2 - 25
Part Number: MANL-0927-02
Page 46
FS-2 FUNCTIONS
Products such as the Pinnacle AVI file format were
created for use with products such as Pinnacle
Liquid Edition. The Pinnacle AVI file format creates
three files simultaneously during a recording; an
AVI video file and two separate WAV audio files
labeled as left and right. An additional “Edition.ale”
file per recording session is also created which
contains timecode data. This file must be kept with
the media. This is shown in the following illustration.
Once clips have been imported into Liquid Edition,
an Index file is created on the disk drive per clip. Do
not delete this file since it is required to continue
work in the particular project. The illustration below
shows this.
When you make this selection, the following screen
appears:
ORGANIZE
KEEP CLIPS?
EXIT YES NO
ORGANIZE OMF
When files are recorded in the AVID OMF file
format, this command automatically takes all the
OMF and AIF audio files at the end of a recording
session and places them into a folder on the disk
drive named “OMFI MediaFiles”. When the disk is
connected to a computer, this folder is recognized
by Avid’s Media Tool feature enabling direct import
of files into the Avid timeline.
NOTE: If you have selected files as a KEEPER or
they have been SCENE MARKED, you cannot use
this feature and keep files in their selected folders.
If you would like to use clips in KEEPER or SCENE
MARKED folders in Avid, manually create the
“OMFI MediaFiles” folder when your disk drive is on
your computer and drag the desired clips into this
folder.
When you make this selection, the following screen
appears:
ORGANIZE CLIP
This selection places all files that were identified as
a KEEPER or were SCENE MARKED during
recording into a folder marked KEEPER or the
prenamed SCENE MARKING folders on the disk
drive. These folders can be imported directly into
most DV NLE bins.
2 - 26
Part Number: MANL-0927-02
ORGANIZE
AVID OMF CLIP?
EXIT YES NO
For more information on using FS-2 clips in Avid,
refer to “Using FireStore FS-2 Recorded Avid Clips
on Avid Editing Systems” on page 3-4.
DELETE CLIP
When you make this selection, the following screen
appears:
FS-2 Sudio DTE Disk Recorder User Guide
Page 47
FS-2 FUNCTIONS
DELETE
CLIP 1-001? :21:13
BASE:
20010612-165423
EXIT YES
In the DELETE CLIP X-XXX screen,
select between clips by pressing the
and buttons.
If you select YES, a message appears
indicating that the selected clip is
being deleted.
Press EXIT to return to the menu
screen.
Once a clip has been deleted, the FS-2 display reorganizes the clip number sequence. For instance,
if there are three clips on disk (1-001, 1-002, 1-003)
and you delete clip 1-002, after delete is complete,
clip 1-003 becomes clip 1-002. Base file names are
not affected however.
NOTE: It is generally not recommended to delete
too many clips (greater than 30), since in a drive
without formatting fragmentation may occur.
FORMAT DISK
When you make this selection, the following screen
appears:
FORMAT WILL
ERASE ALL DATA!! :
CONTINUE FORMAT
VOL 1
EXIT YES NO
When you select YES, a message
indicating the formatting appears.
Press EXIT to return to the menu
screen.
PARTITION
When you make this selection, select the
connected disk drive you wish to partition. Then, the
following screen appears:
PARTITION WILL
ERASE ALL DATA!! :
CONTINUE FORMAT
VOL 1
EXIT YES NO
When an unknown volume type (HDD) is connected
to the FS-2, the Partition process puts a FAT32
format onto the drive. It will erase any previous
partition and data.
FORMAT DISK
VOLUME 1? :
EXIT YES NO
Select between volumes by pressing
the and buttons.
When you select the volume and press
YES, the following screen appears:
FS-2 Sudio DTE Disk Recorder User Guide
Select YES and a progress message appears on
the screen.
NOTE: You cannot add multiple partitions an a
single drive using the FS-2.
REPAIR
When you make this selection, the following screen
appears:
CHECK DISK
CURRENT CLIP
EXIT SEL
2 - 27
Part Number: MANL-0927-02
Page 48

FS-2 FUNCTIONS
Select the desired function.
Press SEL to open the sub-menu.
Press EXIT to return to the menu
screen.
CHECK DISK
This selection scans the entire volume for any
errors (usually, if a file was corrupted during a
recording, check disk will alert you of this).
CURRENT CLIP
This selection performs a similar function, but on
the selected clip only. If an error is found, the FS-2
prompts you to repair the problem. CURRENT CLIP
will repair the last file in the current session if it has
been damaged.
Select between volumes by pressing the and
buttons. Press EXIT to return to the menu
screen.
FILE NAME
When you make this selection, the following screen
appears:
CLIP 1-001
BASE: :
20010612-166523
EXIT
This selection displays the base file name of the
selected clip.
FACTORY RESET
When you select this function, the FS-2 reverts all
settings and values back to its factory default state.
Press YES to start factory reset.
Press EXIT or NO to exit from the
menu.
Warning: Factory Reset is not un-doable!!!
The factory reset values are as follows:
Display:
COUNTER
Rec Mode:
DEFAULT REC MODE: NORMAL
RETRO DISK – RETRO VALUE ->
000min
RETRO CACHE – CACHE ->00 sec
TIME LAPSE –> 00:00:00:00
Play Mode:
DEFAULT PLAY MODE: PLAY CLIP
Play From:
DEFAULT PLAY FROM MODE:
TRACK LIST
Control Mode:
DEFAULT CONTROL MODE: LOCAL
Rec Format:
DEFAULT REC FORMAT: AVI TYPE 2
Setup:
SET DATE&TIME:
• DATE: 07/24/03
• TIME: 12:00:00
OS VERSION NO. -> VARIABLE
PAL/NTSC ->VARIABLE
RS422 REMOTE ->
• TYPE ->BVW-75
• TC SOURCE->DV
AUDIO INPUT
• COMPOSITE -> BALANCED
ANALOG
• Y/C -> BALANCED ANALOG
• COMPONENT -> BALANCED
ANALOG
• SDI -> EMBEDDED
• DV -> EMBEDDED
AUDIO LAVELS -> 0.0Db
ANALOG OUT -> COMPOSITE
NETWORK SETTINGS
• IP -> 000.000.000.000
• SUBNETMASK ->
255.255.255.000
• GATEWAY -> 000.000.000.000
USER/PASSWORD -> FS2/FOCUS
2 - 28
FS-2 Sudio DTE Disk Recorder User Guide
Part Number: MANL-0927-02
Page 49

FS-2 FUNCTIONS
REF VIDEO -> REF VIDEO
VIDEO ADJUST
• HUE -> +0
• SATURATION -> +0
• BRIGHTNESS -> +0
• CONTRAST -> +0
TC MODE -> EXT TC
TC SET:
• TC PRESET -> 00:00:00:00
• UB PRESET -> 00 00 00 00
DROP/NON-DROP -> NON-DROP
OSD -> OFF
FF/RW HI-RES -> DISABLED
GPI -> DISABLE
BACKLIGHT -> ON
STOP OUTPUT -> NO OUTPUT
CLIP PREVIEW -> PREVIEW ON
AUDIO CORRECTION -> MEDIUM
FOLDER PREF -> SCENE MARK
FS-2 Sudio DTE Disk Recorder User Guide
2 - 29
Part Number: MANL-0927-02
Page 50

FS-2 FUNCTIONS
2 - 30
FS-2 Sudio DTE Disk Recorder User Guide
Part Number: MANL-0927-02
Page 51
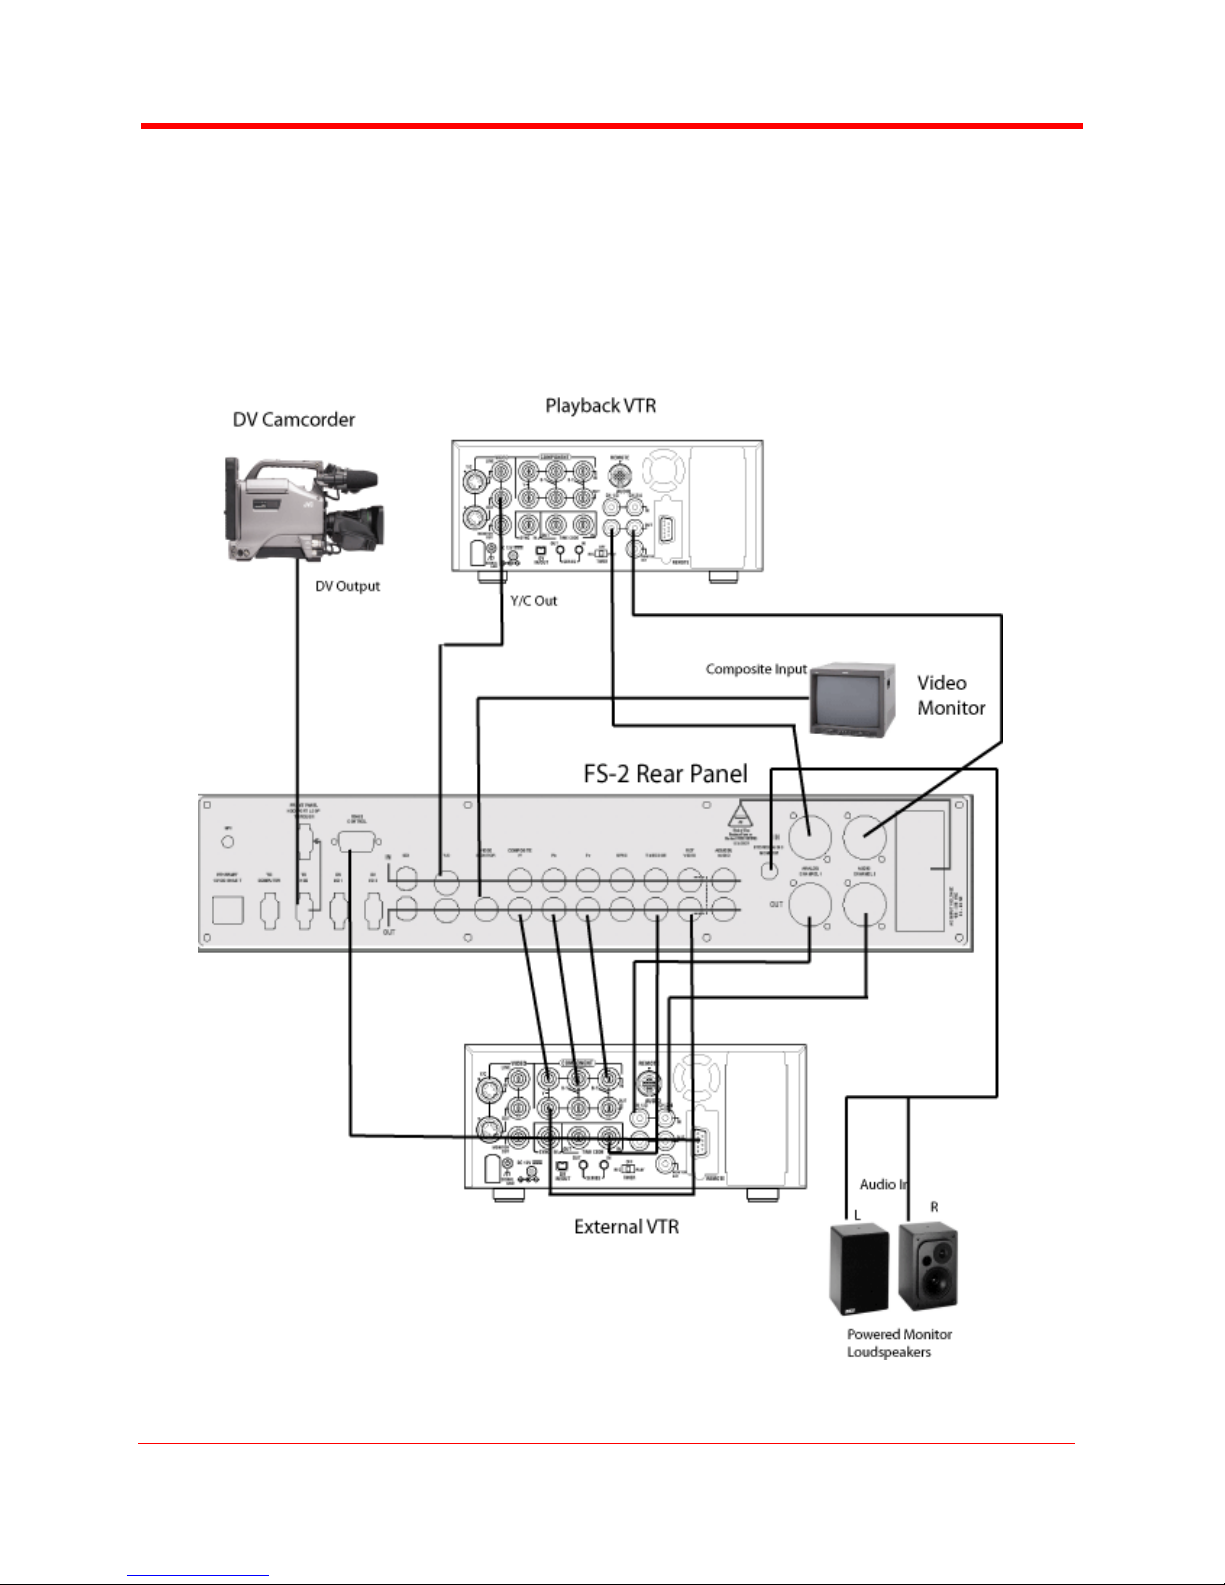
Using the FS-2
CHAPTER 3
USING THE FS-2
This chapter contains the following procedures:
How to Make a Recording
How to Playback
How to Put Recorded Clips on a
Computer System
Creating a Play List
How to Mark Scenes
How to Connect the FS-2 to a
Computer Network
To perform these procedures use input and output
sources as illustrated in the following diagram.
FS-2 Sudio DTE Disk Recorder User Guide
3 - 1
Part Number: MANL-0927-02
Page 52

Using the FS-2
How to Make a Recording
Use the following procedure to make a recording
using the FS-2.
S
TEP 1: Make sure the FS-2 is connected to
S
TEP 2: Connect the required devices as
S
TEP 3: Make sure the drive in the FS-2 has
S
TEP 4: Manually select the input source using
S
TEP 5: Select the record format as follows:
S
TEP 6: Press the red record button twice.
S
TEP 7: Press STOP when you have finished
power and has been turned on using
the power switch on the rear of the
chassis.
explained in Chapter One. For this
example, that would include a video
source (audio and video), speakers or
headset if desired, and a monitor if
desired.
been formatted. If it is not, the LCD
screen indicates that it has not been.
Refer to the Utilities Menu in Chapter 2.
the front panel buttons (that is,
CMPST, Y/C, CMPNT, SDI, or DV).
a. Press the Menu soft key.
b. Select RECORD FORMAT
c. Select the desired format. Once
selected, it is highlighted.
d. Press the Exit button twice.
(Pressing this button once, acts as a
pause function, pressing it again
activates the record function.)
Timecode on the front panel LCD will
advance when recording begins.
the recording.
How to Playback
Use the following procedure to play back a
recording using the FS-2.
NOTE: In all cases, if a monitor is connected, it
displays the signal going through the FS-2
This procedure assumes that you have already
recorded material on the hard drive as explained in
the previous section.
S
TEP 1: Select the desired clip by using the
Forward Index and Back Index buttons.
These buttons step you through the
clips on the selected disk drive.
S
TEP 2: If more than one disk drive is
connected, press the SHIFT key as
required until the desired drive appears
on the LCD.
S
TEP 3: Press the PLAY button once to begin
S
TEP 4: Press the Stop button once to pause or
playback.
twice to stop the playback.
How to Put Recorded Clips
on a Computer System
Once you have recorded clips to a FireWire disk
drive using FireStore, you can use those clips in
most computer based DV NLE systems.
Traditionally, in order to get footage into an NLE
system, it was necessary to capture or digitize that
footage utilizing a video capture card. Using the FS2 recorded clips, you can skip this capture stage by
just connecting a FireWire disk drive to your
computer using an OHCI compliant IEEE-1394
(FireWire) PCI card or connection of use the HDD
Bypass mode (refer to page 2-15 for more
information).
FireWire disk drives used with the FS-2 can be
connected to any computer system that will read a
FAT 32 volume. This includes Windows 98SE,
Windows ME, Windows 2000, Windows XP and
Mac OS9 and OS10. FAT32 volumes will not work
with Windows NT and older Macintosh based
operating systems.
Check the FOCUS Enhancements' website
(www.FOCUSinfo.com) for more information.
In order to use the FS-2 recorded FireWire disk
drives on a computer, you must have an active
IEEE-1394 connection on your computer. You also
must have loaded any required FireWire disk drive
drivers onto your computer system (Consult your
FireWire disk drive documentation for more
information).
Connect your FireWire disk drive to your computer
system utilizing a standard 6-pin to 6-pin FireWire
cable and connect power to the drive if necessary
(some FireWire disk drives receive power from the
computer's FireWire connection.
Consult your FireWire disk drive documentation for
more information).
This section contains the following subsections:
3 - 2
FS-2 Sudio DTE Disk Recorder User Guide
Part Number: MANL-0927-02
Page 53
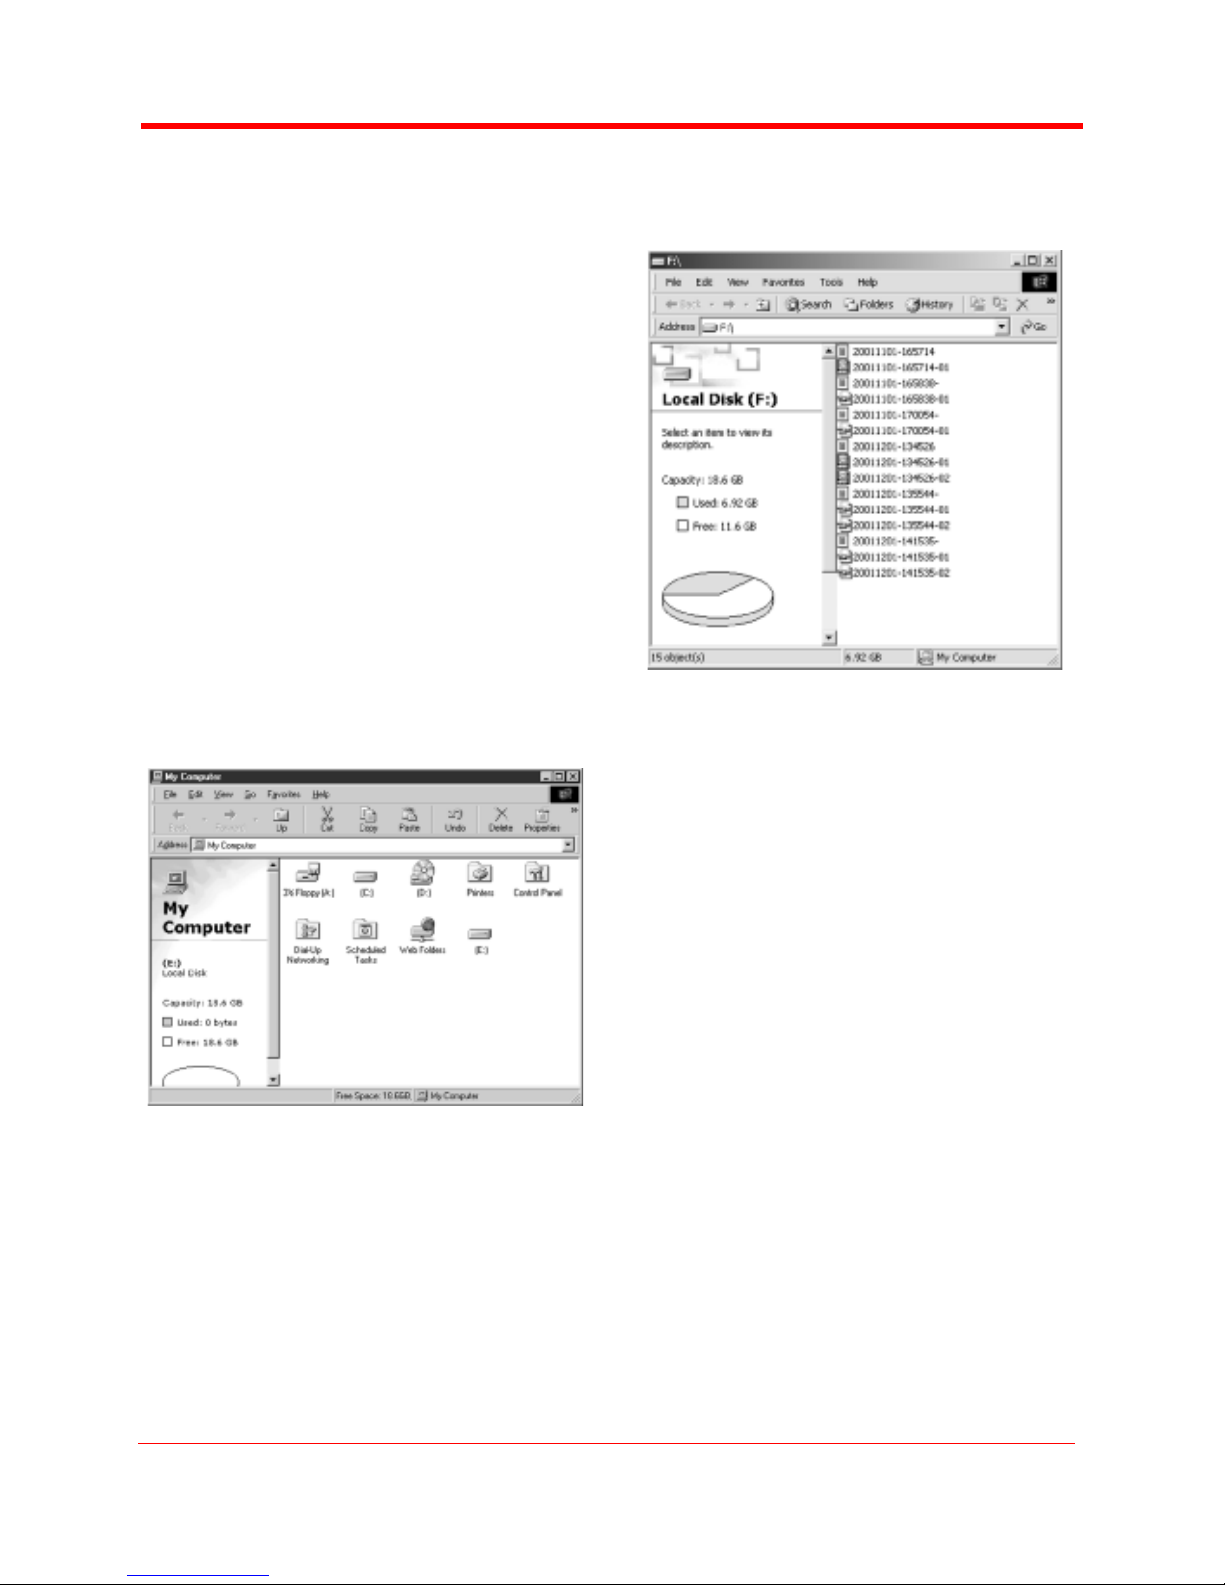
Using the FS-2
Mounting FireWire Disk Drives to
Computer Systems (Windows XP,
2000, 98SE and ME)
Using FireStore FS-2 Recorded Avid
OMF Clips on Avid Editing Systems
Dismounting FireWire Disk Drives
from Computer Systems (Windows XP,
2000, 98SE and ME)
Mounting FireWire Disk Drives to
Computer Systems (Macintosh)
Dismounting FireWire Disk Drives
from Computer Systems (Macintosh)
Mounting FireWire Disk Drives to
Computer Systems (Windows XP,
2000, 98SE and ME)
STEP 1: On a Windows based computer
S
TEP 2: Locate your FireWire disk drive. This
system, double click the My Computer
icon on the top left hand corner of the
desktop. You will see the following
window:
will probably be labeled E:, F:, G:, and
so on. (drive C: is usually your
computer's main disk drive). Once you
have identified it, double click on the
FireWire disk drive.
If you have trouble locating the
FireWire disk drive, right mouse click
each drive and select Properties from
the menu. Click the Hardware tab
which lists the drive type). Once
opened, you should see the following
window:
The FireWire disk drive contains several different
files. Clips can appear as
RawDV (.dv)
AVI Type 1
(YYYYMMDDHHMMSSa01)
AVI Type 2 or 24p AVI Type 2
(YYYYMMDDHHMMSSb01)
Canopus AVI
(YYYYMMDD-HHMMSSb01)
Matrox AVI
(YYYYMMDD-HHMMSSm01 with a
separate .wav audio file per track)
Pinnacle AVI
(YYYYMMDD-HHMMSSp01 with two
separate .wav audio files per track)
QuickTime or 24p Quicktime (.mov)
Avid OMF (.omf with two separate .aif
audio files per track).
MXF (.mxf)
The FAT32 file system has a limitation where any
particular file cannot exceed 2GB in size. This
equates to roughly 9 minutes of recording time.
When clips are being recorded to FireStore that
exceed 9 minutes in length, FireStore automatically
creates a new file without dropping any frames.
FS-2 Sudio DTE Disk Recorder User Guide
3 - 3
Part Number: MANL-0927-02
Page 54
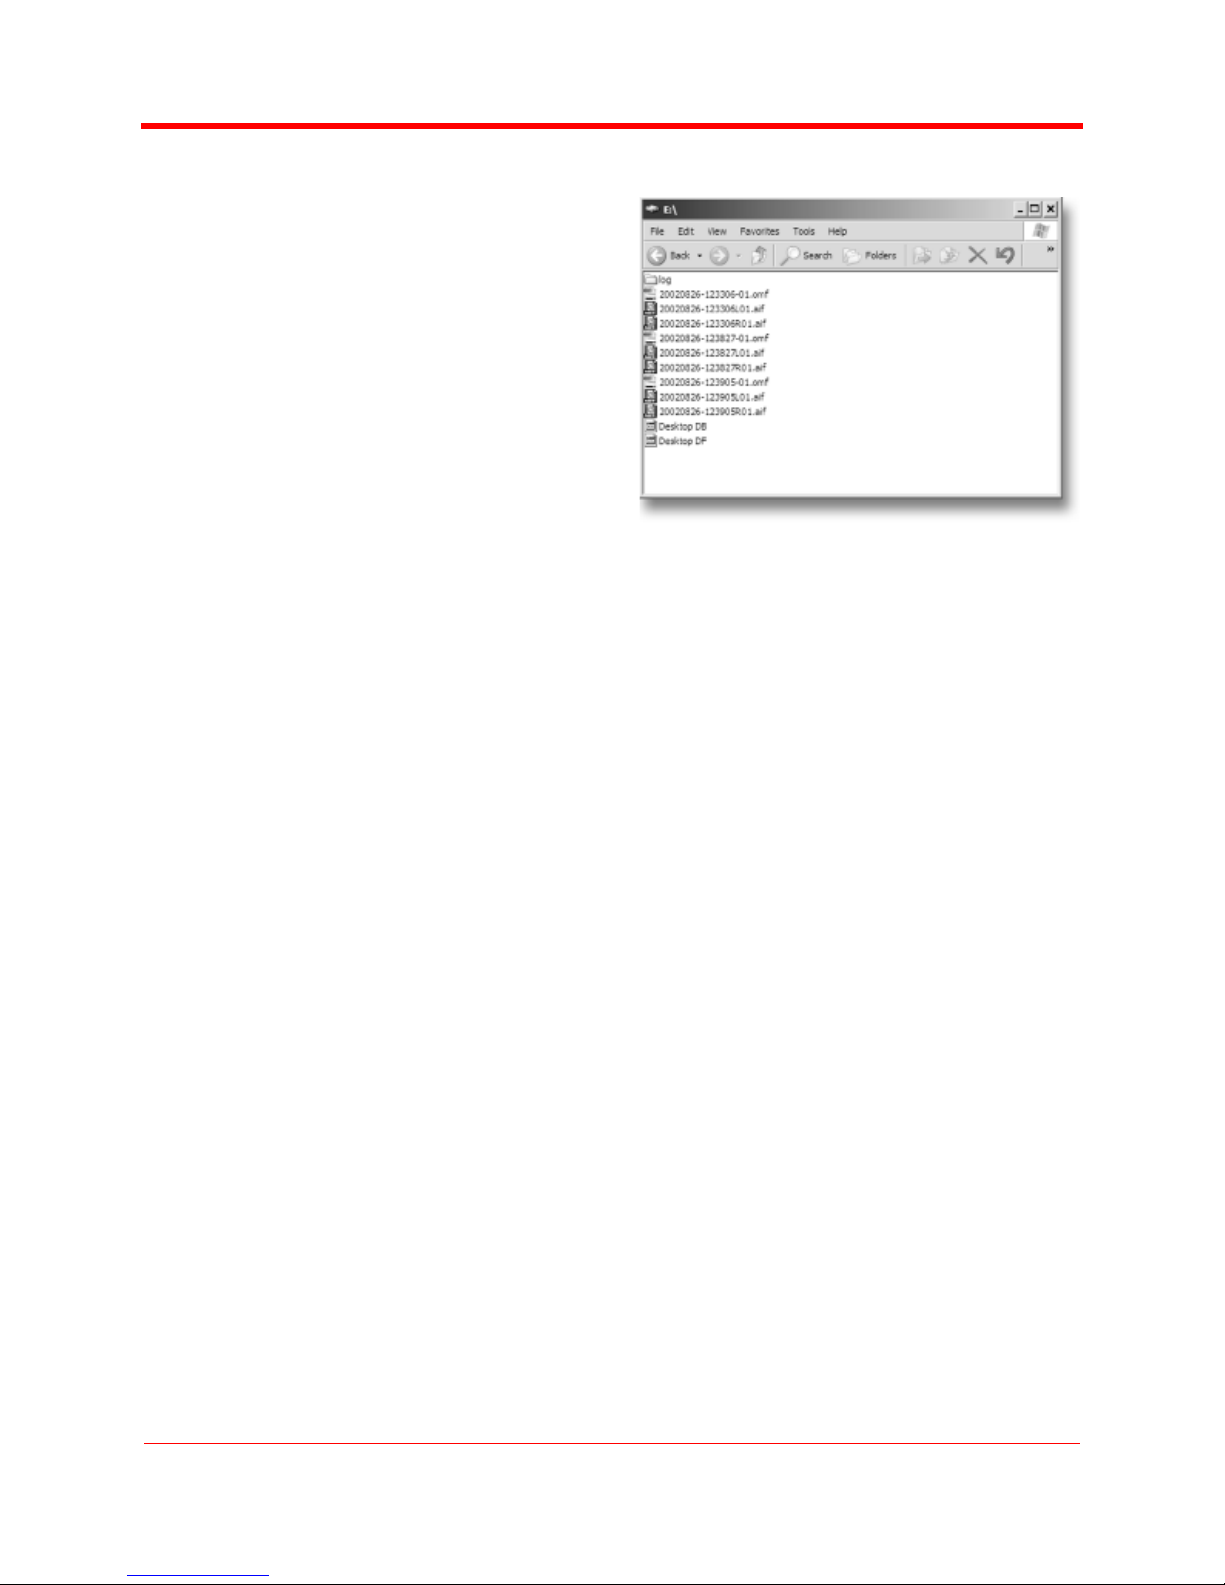
Using the FS-2
The two clips will have the same primary file name,
however, the last two digits will be different.
The first 2GB part of the clip will be labeled with “01” after the primary file name.
The second 2GB segment will be labeled with a “02”. Additional 2GB segments will be labeled with a
“-0X” number.
With most NLE systems on a Windows computer, it
is possible to utilize clips within the timeline by
selecting the clips on the source volume (in this
case, the connected FireWire disk drive) and
importing them directly into the NLE’s bin.
Clips can then be immediately used in the NLE’s
timeline.
With FireWire disk drives such as the FireStore
FSHDD-1, the drive itself is fast enough to directly
stream the clips to the NLE eliminating the need to
copy or transfer the clips before use.
When utilizing the Avid OMF file format, you must
follow the following steps to import clips.
Using FireStore FS-2 Recorded
Avid OMF Clips on Avid Editing
Systems
The Avid DV OMF file format was developed for use
with Avid editing systems on Windows 2000,
Windows XP or Mac 0S10. These include Avid
Xpress Pro, NewsCutter, Media Composer
Adrenaline, and Symphony (with the DV option).
The Avid DV OMF file format creates three files
simultaneously; an OMF video file and two separate
AIF audio files. On the computer's desktop, the files
appear as shown below.
On the FS-2, the video file (OMF) and the audio files
(AIF) appear as one track.
If you delete an Avid DV OMF file, the FS-2 deletes
the audio and video portions at the same time.
In order to use the FS-2 recorded Avid DV OMF
files on your Avid NLE system from the external
FireWire drive, use the following procedure.
S
TEP 1: Locate the external FireWire drive on
your computer.
If you have trouble, you can locate the
name of the external drive by selecting
My Computer on a Windows system.
On a Mac, the FireWire drive should
appear on the desktop.
S
TEP 2: Open the FireWire drive when you
have found it and create a new folder
named “OMFI MediaFiles”.
To do this on Windows, select File>
New>Folder from the pull down menu.
On Mac, select File>New Folder. You
must type “OMFI MediaFiles” correctly
in order for Avid to see the disk drive.
3 - 4
S
TEP 3: Drag all the OMF and AIF files into the
S
TEP 4: Launch Avid. Once you have opened
FS-2 Sudio DTE Disk Recorder User Guide
Part Number: MANL-0927-02
new folder (do not drag in the files titled
Desktop DB or Desktop DF).
NOTE: if you are using the ORGANIZE OMF function on FS-2 prior to
using the disk on a computer, step 2
and 3 are not necessary.
the desired project or created a new
project.
Page 55
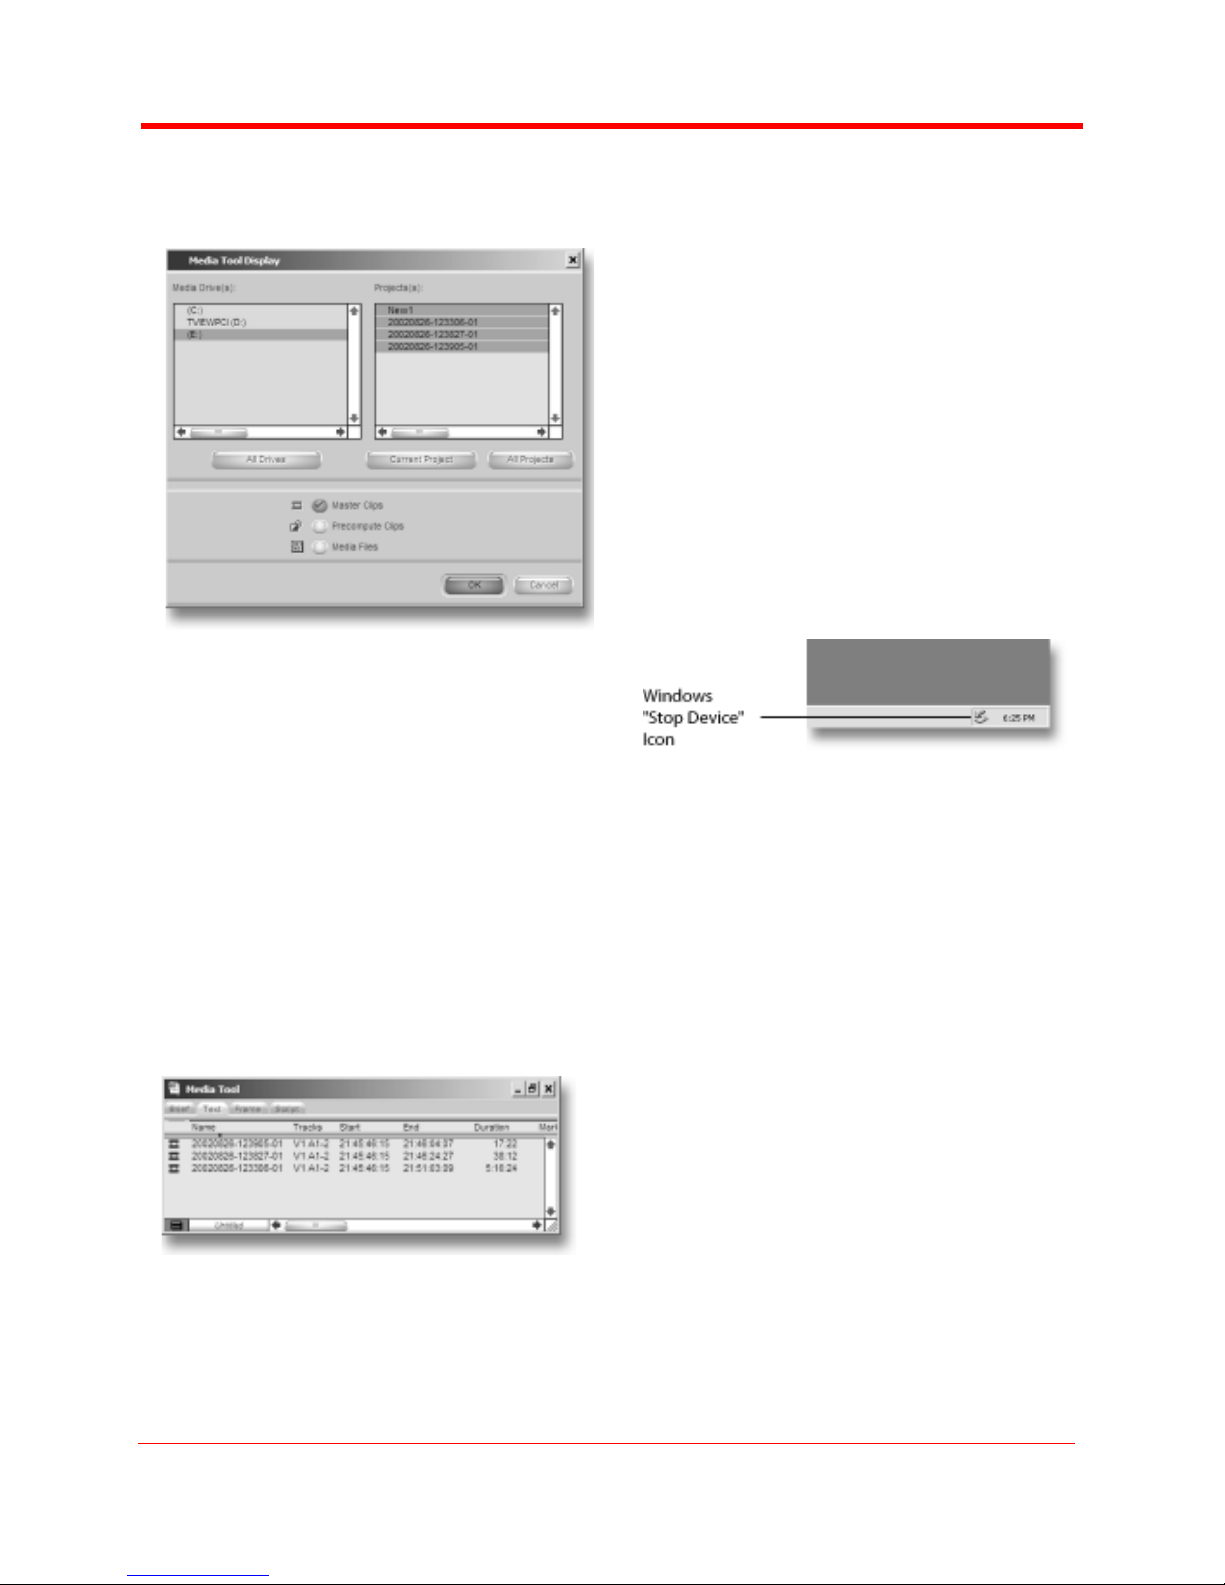
Using the FS-2
STEP 5: Select Tools>MediaTool. The
following window will appear:
S
TEP 6: Locate and select the external FireWire
S
TEP 7: Ensure Master Clips is checked then
drive under Media Drive(s).
NOTE: If the drive does not appear,
check to make sure you have created
the OMFI MediaFiles folder correctly
with proper case and spacing. Also,
check to see that the drive is properly
connected and recognized by the computer). Under Project(s), select All
Projects (This highlights all items in the
Project(s) window).
press OK. The following Media Tools
Window will appear:
Select All).
S
TEP 10: Drag the contents of the Media Tools
Window into the bin. It is now possible
to use these clips in the Avid timeline.
Dismounting FireWire Disk Drives
from Computer Systems (Windows XP, 2000, 98SE and ME)
Once you have completed working with your disk
drive on a Windows XP, Windows 2000, Windows
98SE or Windows ME computer system, you must
dismount the drive before unplugging it.
To do this, use the following procedure:
S
TEP 1: Click the Stop Device icon at the
S
TEP 2: Once clicked, your computer system
S
TEP 3: Select the message by clicking on it.
bottom right side of the Windows task
bar as shown below.
prompts you to “STOP” the connected
FireWire disk drive. This begins the
dismount process.
The computer will now dismount the
disk drive and notify you when it is safe
to remove the volume.
Mounting FireWire Disk Drives to
Computer Systems (Macintosh)
TEP 8: Create a new bin (select File -> New
S
Bin) or open an existing bin in Avid.
S
TEP 9: Once opened, select all items in the
FS-2 Sudio DTE Disk Recorder User Guide
Media Tools window (select Edit>
Note: Even if your FireWire disk drive was bought
for use on a Macintosh, you MUST first partition and
format the drive as a FAT32 volume on the FS-2 for
it to work.
S
TEP 1: On a Macintosh, start your computer
S
TEP 2: Ensure the required FireWire disk drive
Part Number: MANL-0927-02
and connect your FireWire disk drive to
the computer utilizing a standard 6-pin
to 6-pin FireWire cable.
Consult your FireWire disk drive documentation for more information.
drivers have also been loaded onto you
computer system (consult your
3 - 5
Page 56
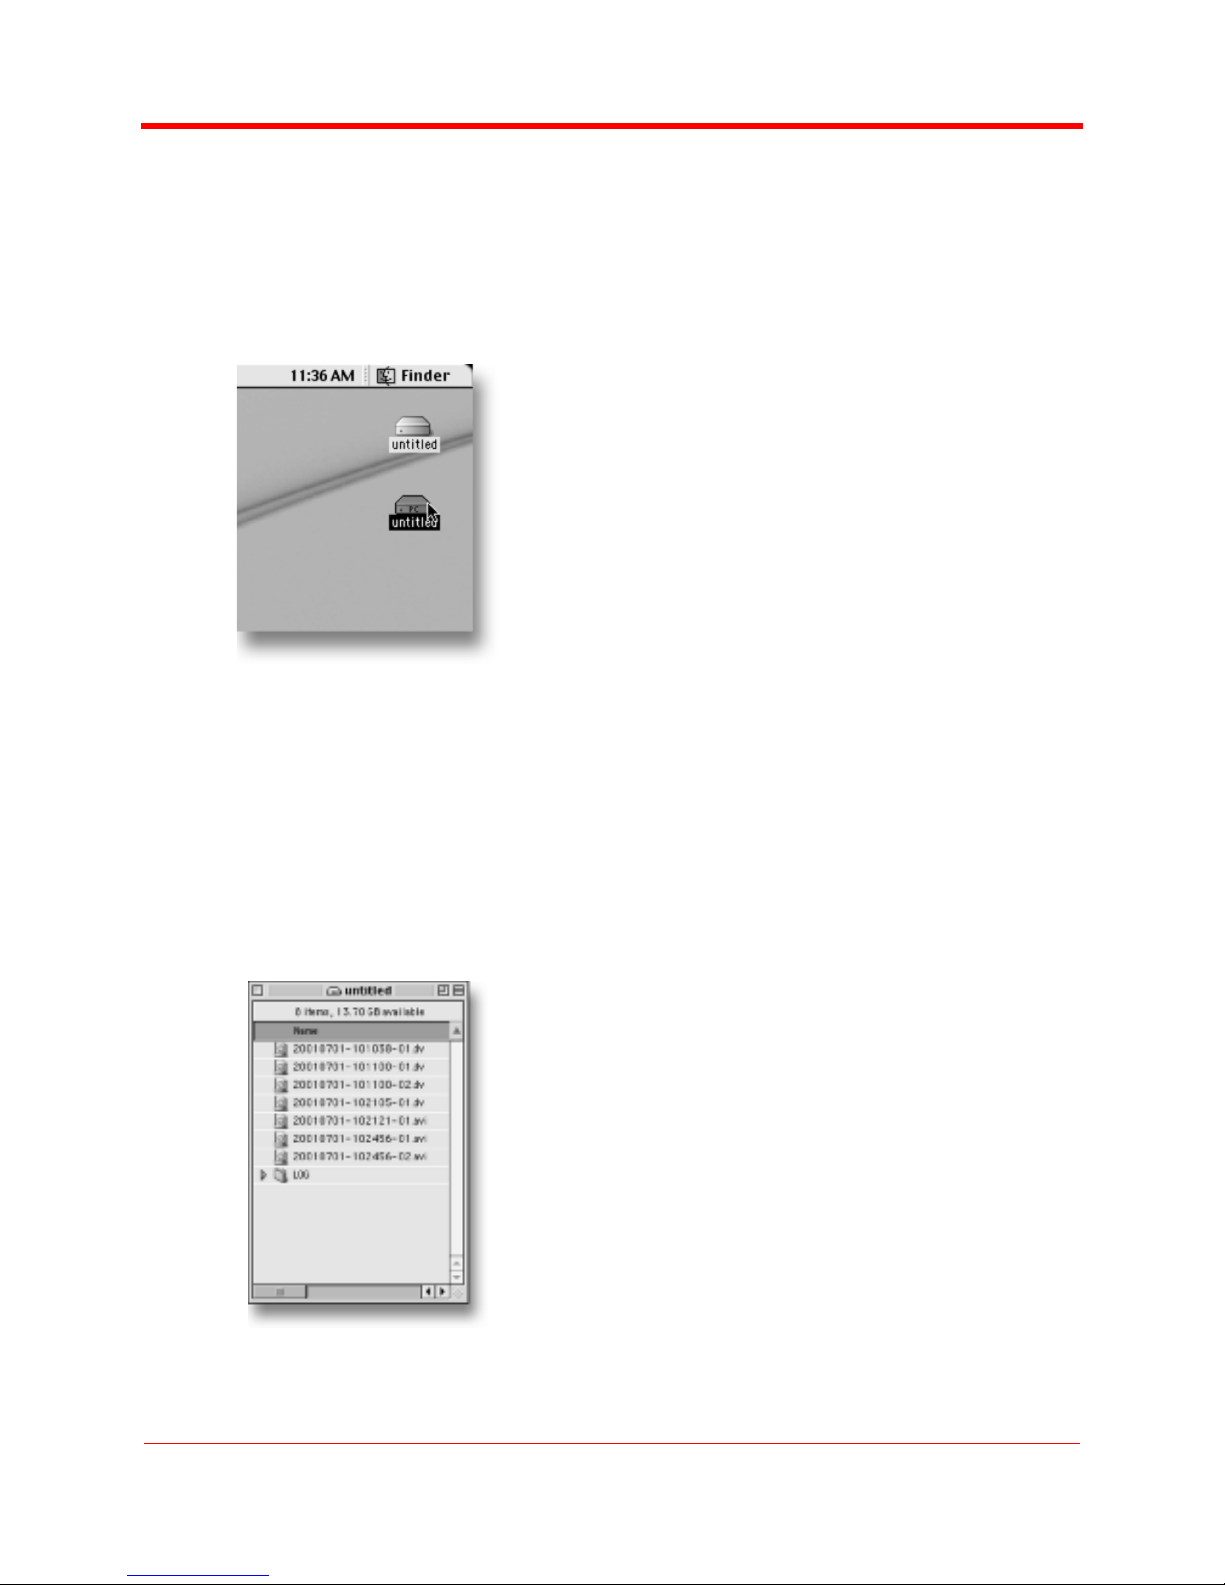
Using the FS-2
FireWire disk drive's documentation for
more information).
When mounted, your FireWire disk
drive should appear on the computer's
desktop as shown below:
The FireStore formatted disk drive
appears as a FAT32 volume with a PC
label. This is not always the case on
Version 10 of the Macintosh operating
system however.
S
TEP 3: Once you have located your FireWire
disk drive on the desktop, double click
the disk icon to open it up. Once
opened, you will see the following:
Dismounting FireWire Disk Drives
from Computer Systems (Macintosh)
Once you have completed working with your disk
drive on a Macintosh computer system, you must
first dismount the drive before unplugging it.
Do this as follows:
S
TEP 1: Select the disk drive on the computer's
desktop. It is marked with a PC symbol.
S
TEP 2: Once selected, drag the drive into the
trash. This will then dismount the
particular disk drive.
Creating a Play List
Use the following procedure to create a simple
playlist on the FS-2.
S
TEP 1: Ensure no playlist is open.
S
TEP 2: TO ADD A CLIP - Play a clip you wish
to add to the playlist. Using the front
panel buttons, press MARK IN and
MARK OUT for the particular portion of
the clip to add to the playlist. Both
buttons will light.
S
TEP 3: Once marked, press the front panel
PLAYLIST button. The MARK IN and
MARK OUT key lights will go out.
S
TEP 4: Navigate to the next clip and again
S
TEP 5: Repeat steps 2 and 3 to add all desired
S
TEP 6: Once you have selected all the clips
S
TEP 7: Select SAVE and name the playlist. (It
S
TEP 8: To playback the playlist, navigate to
All playback will now come only from the created
playlist.
mark in and out points followed by
pressing PLAYLIST.
clips.
you wish to add to the playlist, stop
playback and navigate to the
PLAYLIST menu on FS-2.
is also possible to modify your created
playlist at this stage using the
PLAYLIST-> EDIT menu.
PLAY-FROM in the FS-2 menu and
select PLAYLISTS. Select the desired
playlist and then exit. The PLAYLIST
button on the front panel will light.
3 - 6
FS-2 Sudio DTE Disk Recorder User Guide
Part Number: MANL-0927-02
Page 57
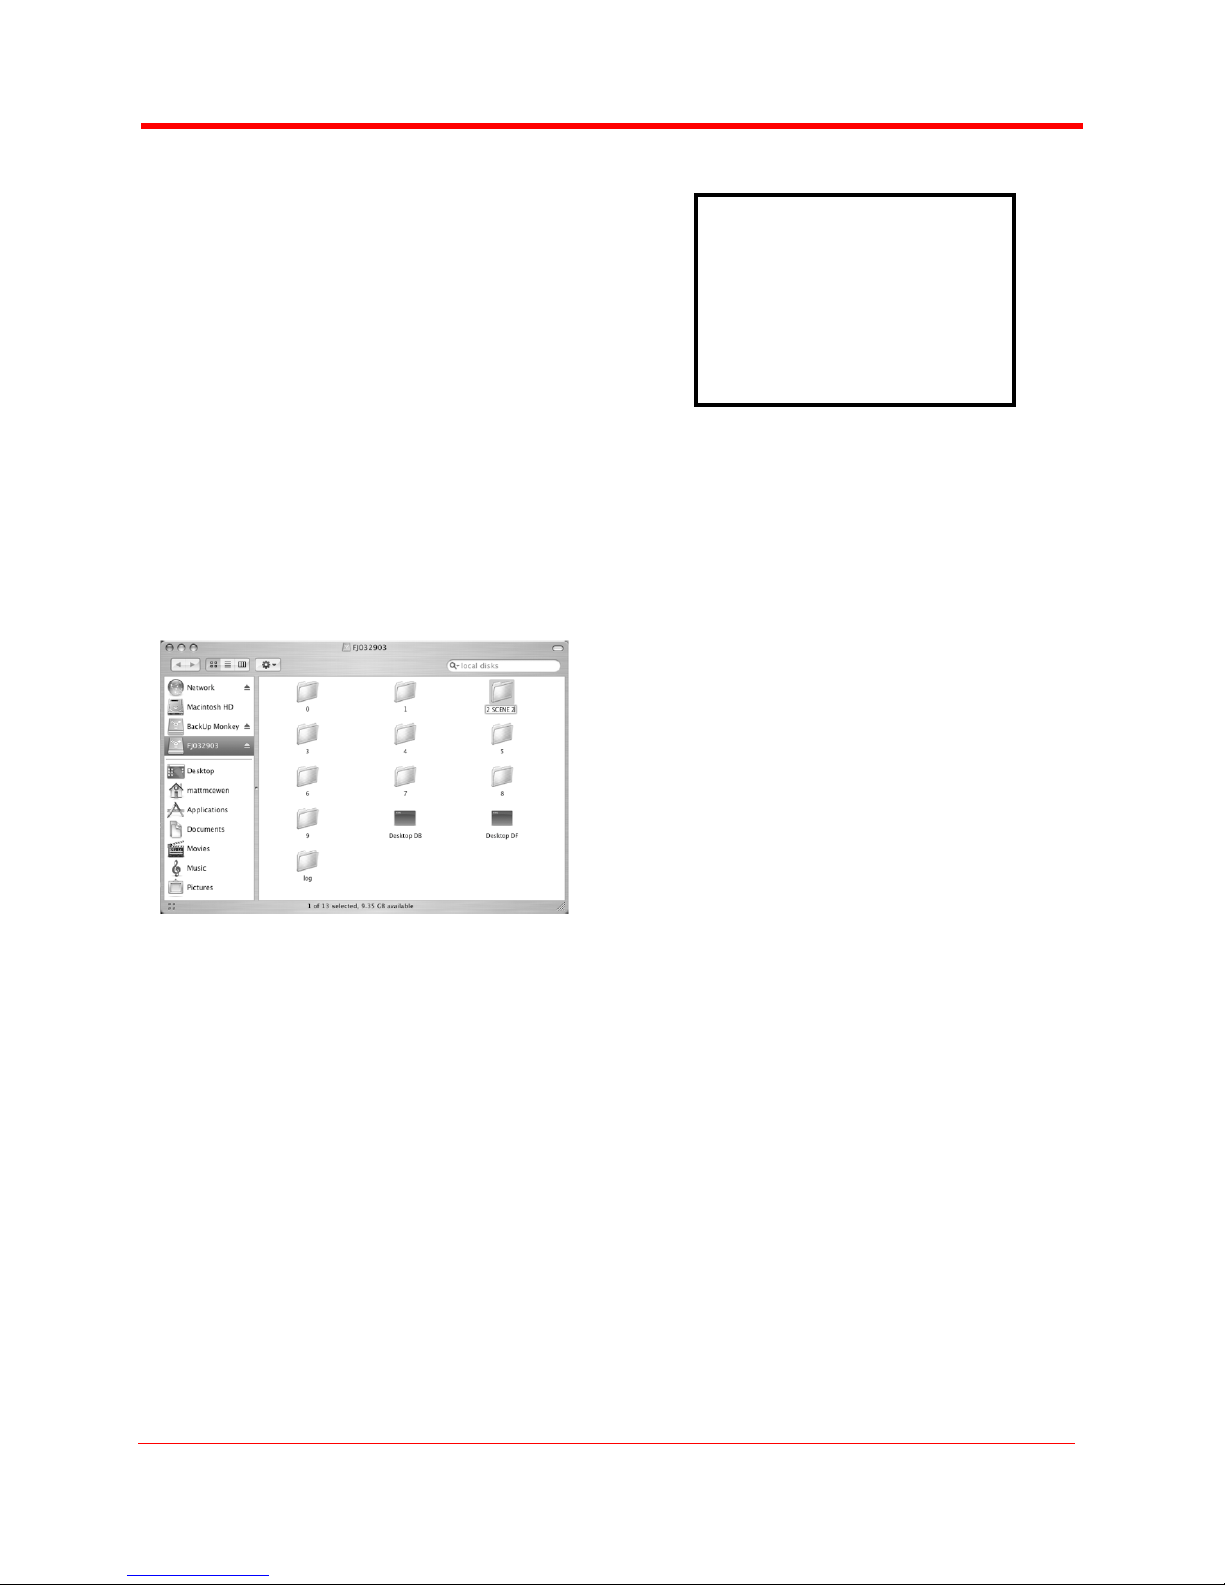
Using the FS-2
How to Mark Scenes
The FS-2 Scene Marking feature allows clips to be
marked for placement in particular folders during
recording, playback or stop mode.
When a drive is formatted using FireStore, ten
folders are created numbered 0 through 9. After
format on FireStore, you can connect the HDD to a
computer and give each of these folders a custom
name (if you need help mounting your FireWire
HDD to your computer system, refer to “How to Put
Recorded Clips on a Computer System” on Page 3-
2. To rename each folder, click on the folder name
until it is highlighted, then type in the desired name
of the folder.
NOTE: Folder names cannot exceed eleven
characters.
■ STOP 1-1001
COUNTER
00:00:00:00
DISK 1 184 min
<2SCENE 2>
MENU DISP SHFT
If the FS-2 PLAY MENU is set to “TRACKLIST” the
name of the SCENE MARKED folder will appear
without brackets on the LCD display (for example, 2
SCENE 2). If the PLAY FROM menu is set to
“FOLDERS”, the name of the SCENE MARKED
folder appears in brackets on the LCD display (for
example, 2 <SCENE 2>.
You can also SCENE MARK clips to folders using
the numeric keypad on the optional remote control
unit. To add all SCENE MARKED clips to their
respective folders on the disk drive, select
UTILITIES>ORGANIZE CLIP from the FS-2 menu.
Once complete, an additional file is added to the
disk named “grade” and files are moved to the
selected folder for easy access on an NLE system.
Folders are ordered on FireStore in numerical
followed by alphabetical order. For instance, if
folders are named “Scene 1”, “Scene 2” and
“Auditions”, they appear on FireStore as “1
Auditions”, “2 Scene 1” and 2 Scene 2”. The folder
number is added in front of the folder name on the
FS-2 LCD display for easy identification when using
the optional remote control commander keypads.
To create a custom order to Folders, it is
recommended that you change the name to change
the numerical/alphabetical order.
To use SCENE MARKING, locate a clip you wish to
mark and then during playback, record, or stop,
press the SHIFT + Folder keys. Continually press
the keys to cycle through to the desired folder. Each
SCENE MARK FOLDER is shown on the FS-2 LCD
display.
Do not delete the file named “grade” from the disk if
you intend to use the disk on FireStore again.
How to Connect the FS-2 to a
Computer Network
You can connect the FS-2 to a network using the
10/100 Base T Ethernet port on the rear panel. Do
this as follows:
S
TEP 1: Use a standard RJ85 cable to connect
between the Ethernet port on the rear
panel to a network.
S
TEP 2: Power up the FS-2 and make sure your
network is functioning properly.
Contact your system administrator for
additional help.
S
TEP 3: Navigate to the FS-2 NETWORK
SETTINGS menu (MENU>
SETTINGS>NETWORK SETTINGS).
Once in the menu, open the IP
SETTINGS sub menu.
S
TEP 4: Select either DHCP (network supplies
the IP address) or CUSTOM IP (you
enter the IP address, Sub Net Mask
FS-2 Sudio DTE Disk Recorder User Guide
3 - 7
Part Number: MANL-0927-02
Page 58

Using the FS-2
and Gateway). Exit once complete.
S
TEP 5: If your network requires a user name or
password, navigate to USER/
PASSWORD and enter both.
S
TEP 6: Make ruse FTP is enabled. Navigate to
MENU -> SETTINGS -> NETWORK
SETTINGS -> FTP.
S
TEP 7: Exit the NETWORK SETTINGS menu
and the FS-2 attempts to log onto the
network.
3 - 8
FS-2 Sudio DTE Disk Recorder User Guide
Part Number: MANL-0927-02
Page 59

Specifications
CHAPTER 4
SPECIFICATIONS
This chapter contains detailed technical
specifications for the FS-2 as follows:
Technical Specifications
FS- 2 LCD Display Modes
Technical Specifications
Input/Outputs
Component - Y, Pr, Pb (3 x BNC in, 3 x BNC out)
if Component SMPTE:
• 100% white at 700mv with 300mv
Sync
• 700mv Chroma levels
• Setup default to OFF
• Chroma offset default to OFF
(override allowed on defaults)
If Component Betacam
• 100% white is at 714mv with
286mv Sync
• 4/3 Chroma boost to 934mv p to p
• 350mv Chroma offset default to
ON
• Setup default to ON
If Component MII:
• 100% white is at 700mv with
300mv Sync
• Black to White range is restricted
to 647mv (700-setup)
• 350mv Chroma offset is ON
• Setup is ON
Sync (1 x BNC in, 1 x BNC out)
Signal/Noise Ratio 54 dB
Bandwidth 5.5 MHz
K Factor % @ 2T .5 % maximum
Y/C Delay 25 nS
Subcarrier locking range 100Hz
Subcarrier free-run frequency +/- 30 Hz (NTSC or
PAL Fsc deviation
Genlock Horizontal
adjustment range 100 uS
Genlock Color
adjustment Range 360 Degrees
Residual Subcarrier .5 IRE
SCH Phase 2 Degrees
Subcarrier free-run frequency +/- 20 Hz
S-Video - Y/C (1 x 4-pin DIN in, 1 x 4-pin DIN out)
Levels Adjustments
Video Gain - +/- 20% 2mv resolution
Chroma Gain - +/- 20% 2mv resolution
Setup ON adds 7.5 IRE, or 53mv to
luminance channel
OFF no change to luminance
channel
Chroma Offset ON adds 350mv to U and V
OFF no Chroma Offset
Serial Digital - SD-SDI (1 x BNC in, 1 x BNC out)
- conforms to the SMPTE 259M standard
Timecode (1 x BNC in, 1 x BNC out)
Balanced Audio (2 x XLR in, 2 x XLR out) Stereo
Audio Monitor (1 x 1/4” TRS jack)
General Audio Specifications
Balanced Inputs
Input Impedance 600 Ohms +/-10
Ohms
Composite (1 x BNC in, 1 x BNC out)
Monitor Video Out - Composite (1 x BNC)
General Composite Specifications
Differential Phase 1 Degree maximum
Differential Gain 1% maximum
Hue Accuracy 1 Degree
FS-2 Sudio DTE Disk Recorder User Guide
Quantization 16 bits 32/48Khz
Output Level into 600 Ohms
at unity +/- 1 dBm with 24
dBm input
Common mode rejection @1 KHz (dB)100 dB
Analog Input adjustment range -34dB to +12dB (in
1.5dB steps, default setting 0dB)
4 - 1
Part Number: MANL-0927-02
Page 60

Specifications
Amplitude with no clipping 25 dBM. 2V
Balanced Outputs
THD 1%
Channel Separation 20hz to 20Khz 70
dB
SNR 90 db
Quantization 16 bits 32/48Khz
Output Impedance 600 Ohms +/-10
Ohms
Bandwidth at -3dB points 100Khz
Headphone Output (1 x 1/4” TRS jack w/ level
control)
Headphone adjustment range -73dBdB to +6dB
Headphone Output Impedance32 Ohms, 32mW
AES/EBU Digital Audio (1 x XLR in, 1 x XLR out)
Reference Video Loop Through (2 x BNC)
DV Video I/O - 25 Mb/s (1 x 6-pin IEEE-1394)
DV Video Pass Through - up to 400 Mb/s (1 x 6pin IEEE-1394)
External HDD I/O - up to 400 Mb/s (1 x 6-pin
IEEE-1394)
FireWire Computer I/F (1 x 6-pin IEEE-1394)
10/100 Base T Ethernet
Control
GPI & RS-232C Control (1 x 3.5mm
mini jack)
RS-422 (1 x DB9 Serial)
Power
110V to 220V AC, 50 - 60 Hz, Auto
Ranging 100W
IEC Power Input
Physical Specification
18.41lbs (8.36kg)
19" x 17.3" x 3.5" (483mm x 440mm x
89mm)
Audio/Video/Timecode Specification
25Mb/s, 8-bit 4:1:1 (NTSC-DV) or
4:2:0 (PAL-DV) video (user switchable)
SMPTE or DV embedded or External
Timecode (Drop or Non Drop)
2-ch., 16-bit or 4-ch., 12-bit embedded
Digital Audio
DTE File Formats
RawDV (.dv), AVI Type 1, AVI Type 2, Canopus AVI
and Matrox AVI (.avi), QuickTime (.mov), Pinnacle
(.avi) or Avid DV-OMF (.omf)
Disk Information
Internal Disk Type: 120 GB, IDE, 7200
RPM
External Disk Type: User Supplied
IEEE-1394a FireWire
Disk Format: FAT32
FAT32 FireWire HDD compatible with
Windows 98SE, ME, 2000, XP and
Mac OS9 and OSX Compliance and
Warranty
CE, C-Tick and FCC
2-Year Limited Warranty
Compatible DV Formats
DV, MiniDV, DVCam and DVCPro
4 - 2
FS-2 Sudio DTE Disk Recorder User Guide
Part Number: MANL-0927-02
Page 61

Specifications
FS- 2 LCD Display Modes
The table below shows LCD characteristics when
used with different FS-2 control, record, play and
stop modes:
PLAY/REC MODE
Stop STOP
Pause ll PLAY
Play > PLAY
Rec (Pause) ll REC
Normal Rec (Rec) REC
Retro Disk (Stop) L STOP
Retro Disk (Standby) L REC
Retro Cache (Stop) C STOP
Retro Cache (Standby) C REC
Loop Record (Stop) O STOP
Loop Record (Standby) O REC
Loop Record (Rec) O REC
Snap (Stop) STOP
FS-2 LCD
Snap (Standby) ll SNAP
Snap (Rec) ll SNAP
Time Lapse (Stop) STOP
Time Lapse (Pause) ll T REC
Time Lapse (Rec) T REC
CONTROLTYPE
AV/C* (Stop) A STOP
AV/C* (Rec Pause) ll A <REC TYPE> REC
AV/C* (Rec) A <REC TYPE> REC
AV/C* (Play Pause) ll A PLAY
AV/C* (Play) A ALL
Syncro Slave (Pause) ll Y <REC TYPE>REC
Syncro Slave (Rec) Y <REC TYPE>REC
* AV/C is only for use when the FS-2 is connected
to a computer system. To control the FS-2 from a
camcorder, use Synchro Slave Mode.
FS-2 LCD
FS-2 Sudio DTE Disk Recorder User Guide
4 - 3
Part Number: MANL-0927-02
Page 62

Specifications
4 - 4
FS-2 Sudio DTE Disk Recorder User Guide
Part Number: MANL-0927-02
 Loading...