

Page 1
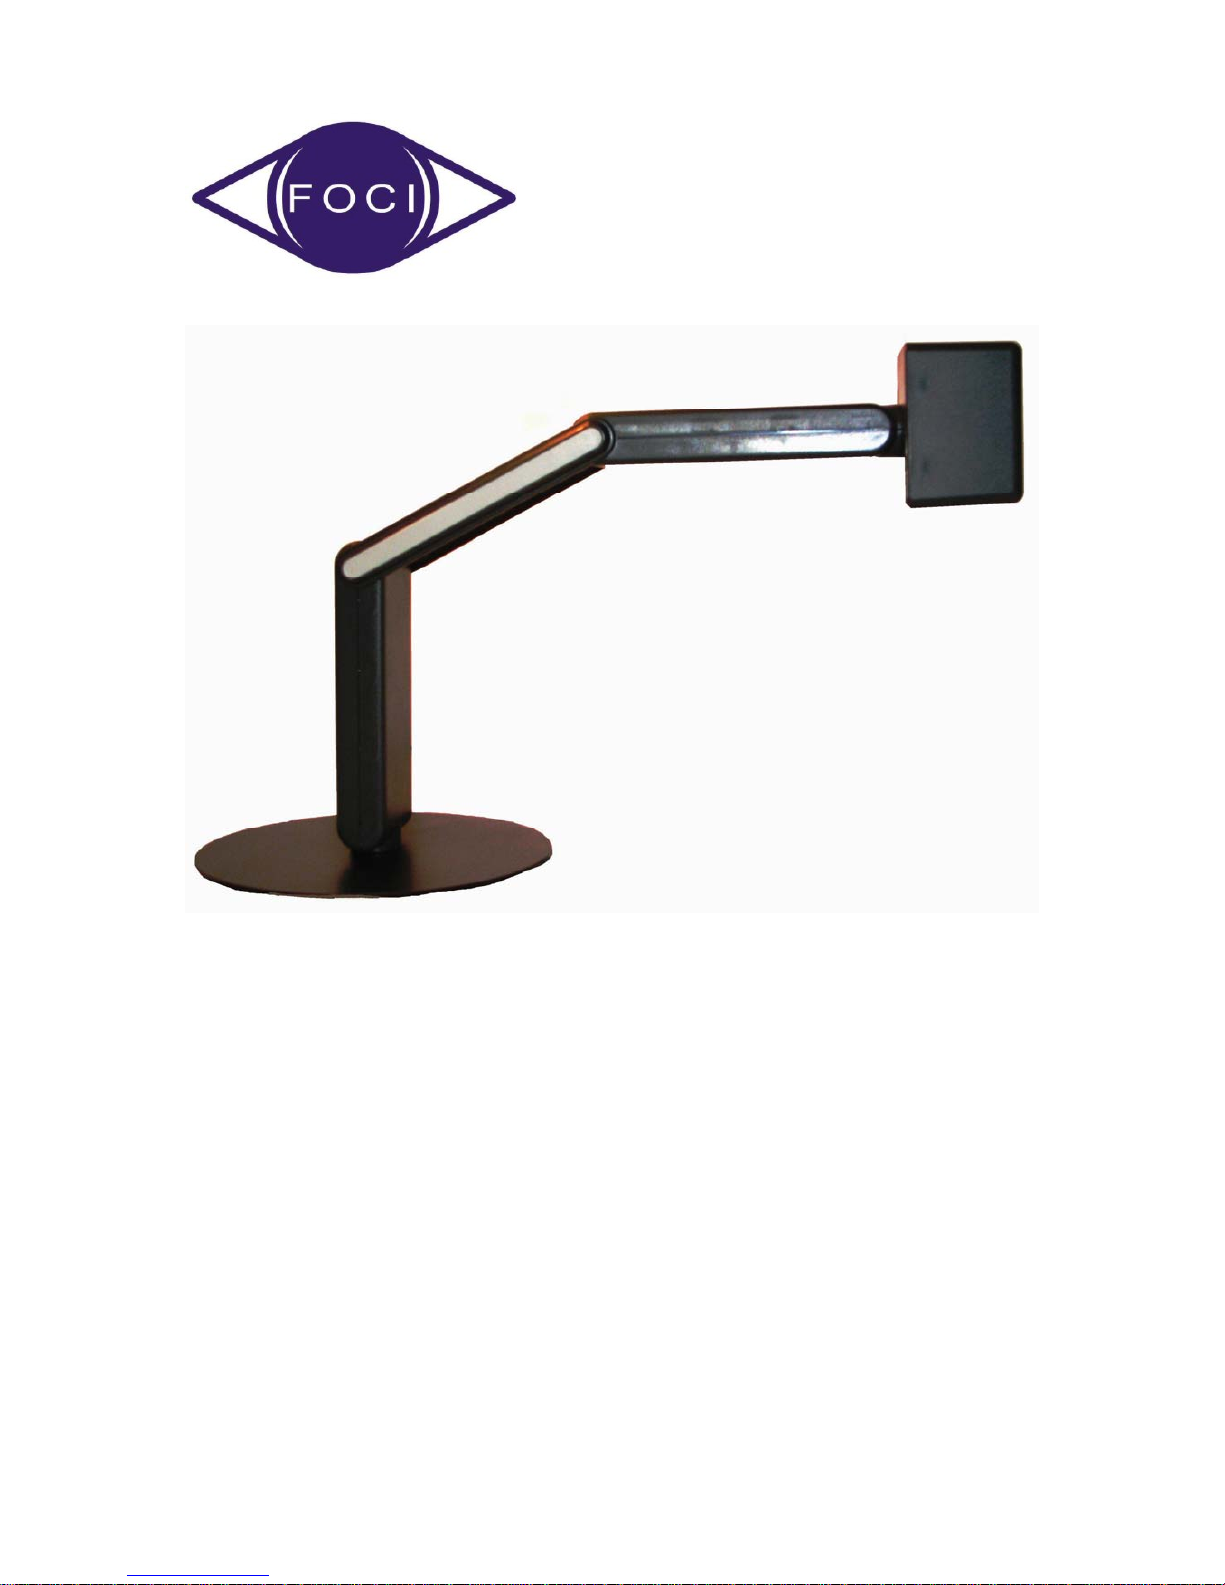
iDex USB
Manual
Page 2

iDex Manual
2
Contact details Producer:
FOCI BV.
The Netherlands
www.foci.nl
[email protected]
Page 3

iDex Manual
3
Index
Index ............................................................................... 3
1. General ....................................................................... 4
2. Get started! ................................................................. 5
3. First use ...................................................................... 7
4. FOCI iDex Software .................................................. 14
5. Operating the camera ............................................... 20
6. Picture modes and picture settings .......................... 21
7 Combination with Magnification Software .................. 24
8 Keyboard shortcuts .................................................... 25
9 List of shortcuts FOCI iDex Software ......................... 27
10 General hotkeys ....................................................... 30
11 Technical Data ......................................................... 31
12 Safety & maintenance .............................................. 32
Page 4

iDex Manual
4
1. General
Congratulations with the purchase the iDex, the FOCI
portable Computer Connected Video Magnifier.
Our aim was to develop a highly qualitative and userfriendly product. We think we have succeeded, and we
hope you have the same opinion.
Serial Number: The serial number of the device can be
found on the first page and also under the help menu in
the software program
Page 5
iDex Manual
5
2. Get started!
To use the iDex, you need the following :
1. iDex
2. USB wires
3. Computer
4. iDex Software
5. Carrying bag
iDex
The portable video magnifier iDex consists of two parts a
foldable arm with Camera and a Base Plate.
USB cables
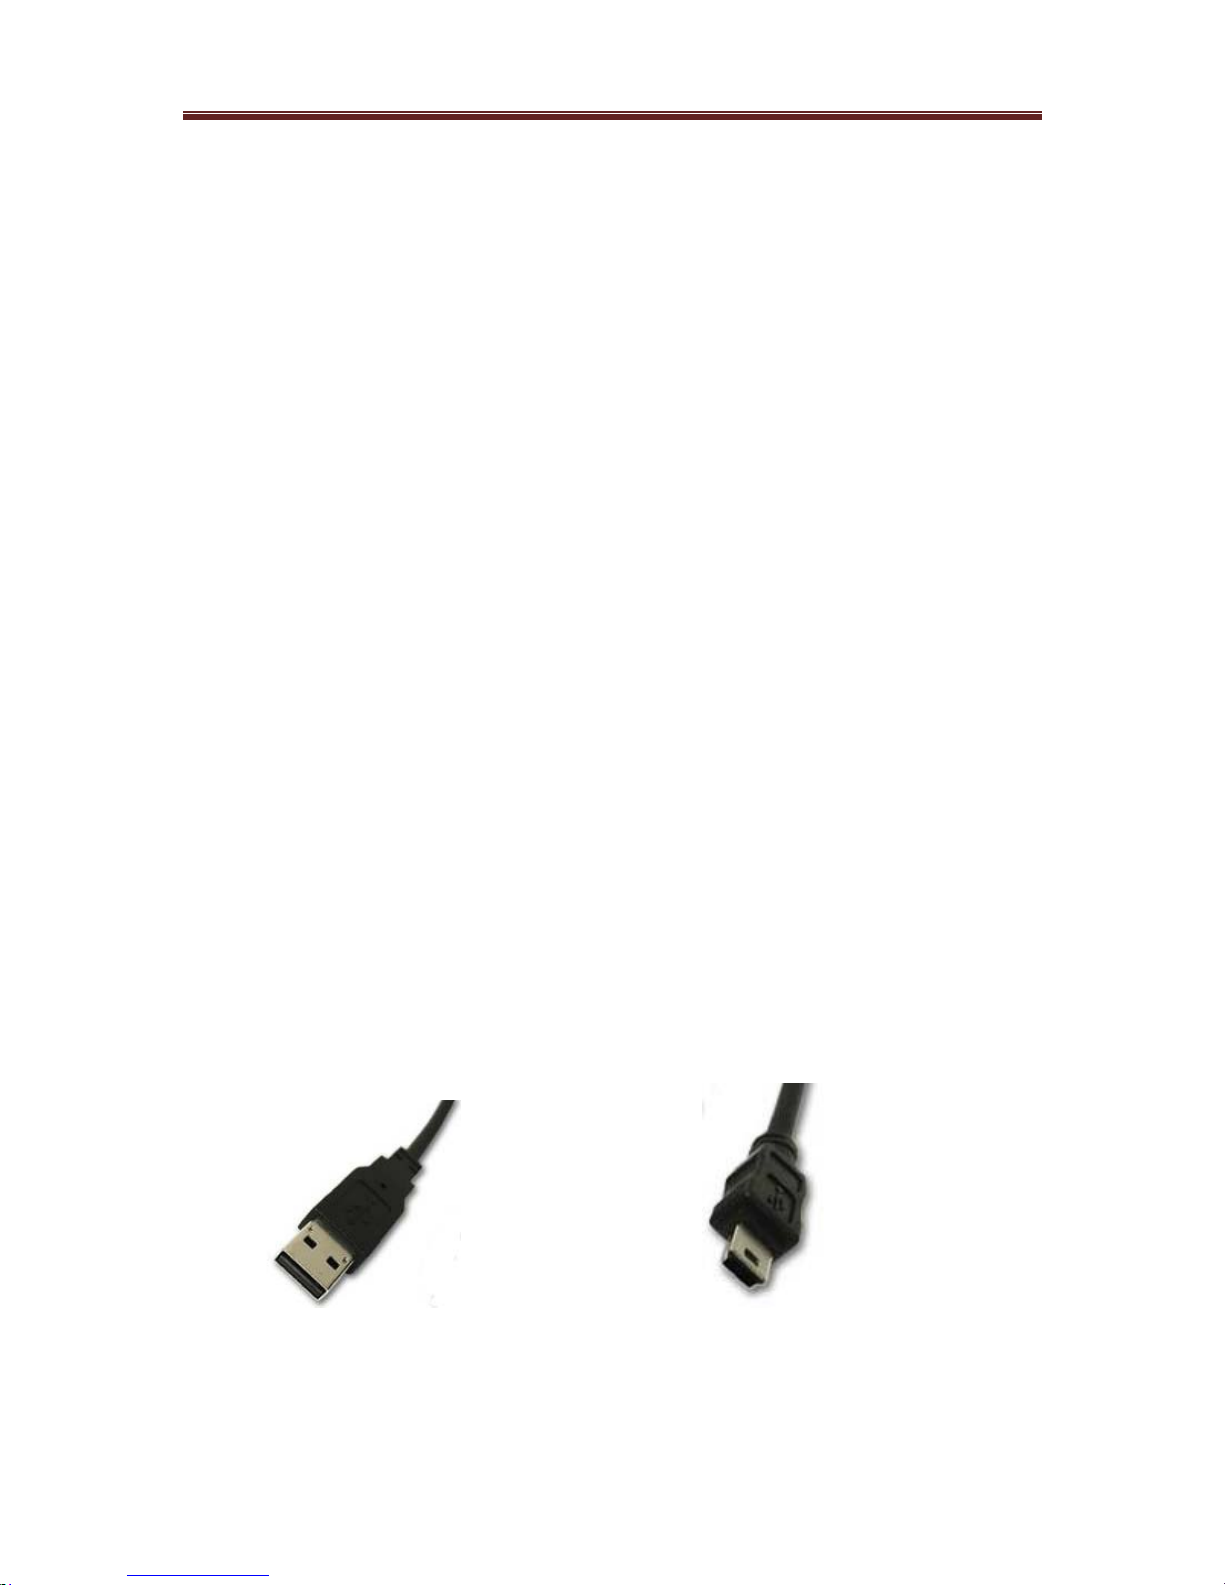
You need (always) two USB cables to connect the iDex.
Both should have the following requirements:
• Be compatible with USB Hi-Speed (or USB2.0).
•
The PC connector : USB Type A, Male
•
The iDex connector USB Type Mini-B-5, Male.
Computer Connector iDex Connector
Page 6

iDex Manual
6
Note: The iDex needs 2 wires connected to be able to use
the device. The iDex will not function when one USB wire
is connected.
Computer
To be able to use the iDex, you have to connect it to a pc.
That pc should at least have the following properties:
• Two USB2.0 ports.
• Operating system: Windows XP (Direct X 9.0C) or
Windows Vista.
• 512 MB RAM memory
FOCI iDex Software
A CD-Rom with all Software to for using the iDex is
provided with your purchase.
The latest version of the iDex Software can be
downloaded on our website, http://www.foci.nl.
Carrying bag
The iDex is a robust and solid device. However, for
transport, the carrying bag should be used to avoid
damage to the iDex.
Page 7

iDex Manual
7
3. First use
When you use the iDex for the first time, use the following
sequence:
1. Install the FOCI iDex Software
2. Connect the iDex
3. Check whether it works
Install the FOCI iDex Software
The FOCI iDex software can be found on the CD-ROM
that comes with the iDex. The latest version of the
Software can be downloaded from our website (Free).
The installation works in the same way most Windows
programmes work. Start the file “setup.exe” on the CDROM.
Attention:
• If the current DirectX version on your pc is older than
the 9.0c version, than the FOCI iDex software will
automatically replace your DirectX installation by the
required 9.0c version. After this, the computer might
ask you to restart the computer.
Page 8

iDex Manual
8
Tip 1
If you only have one USB2.0 port on your PC, you can use
a powered hub in order to have more ports. You can find
a powered USB2.0 hub in every pc shop.
Tip 2
If you use a laptop on its battery, the performance of the
system is reduced to save battery power. When using the
iDex, assure that the system performance is set to the
same parameters as when connected to the PowerSupply.
Page 9
iDex Manual
9
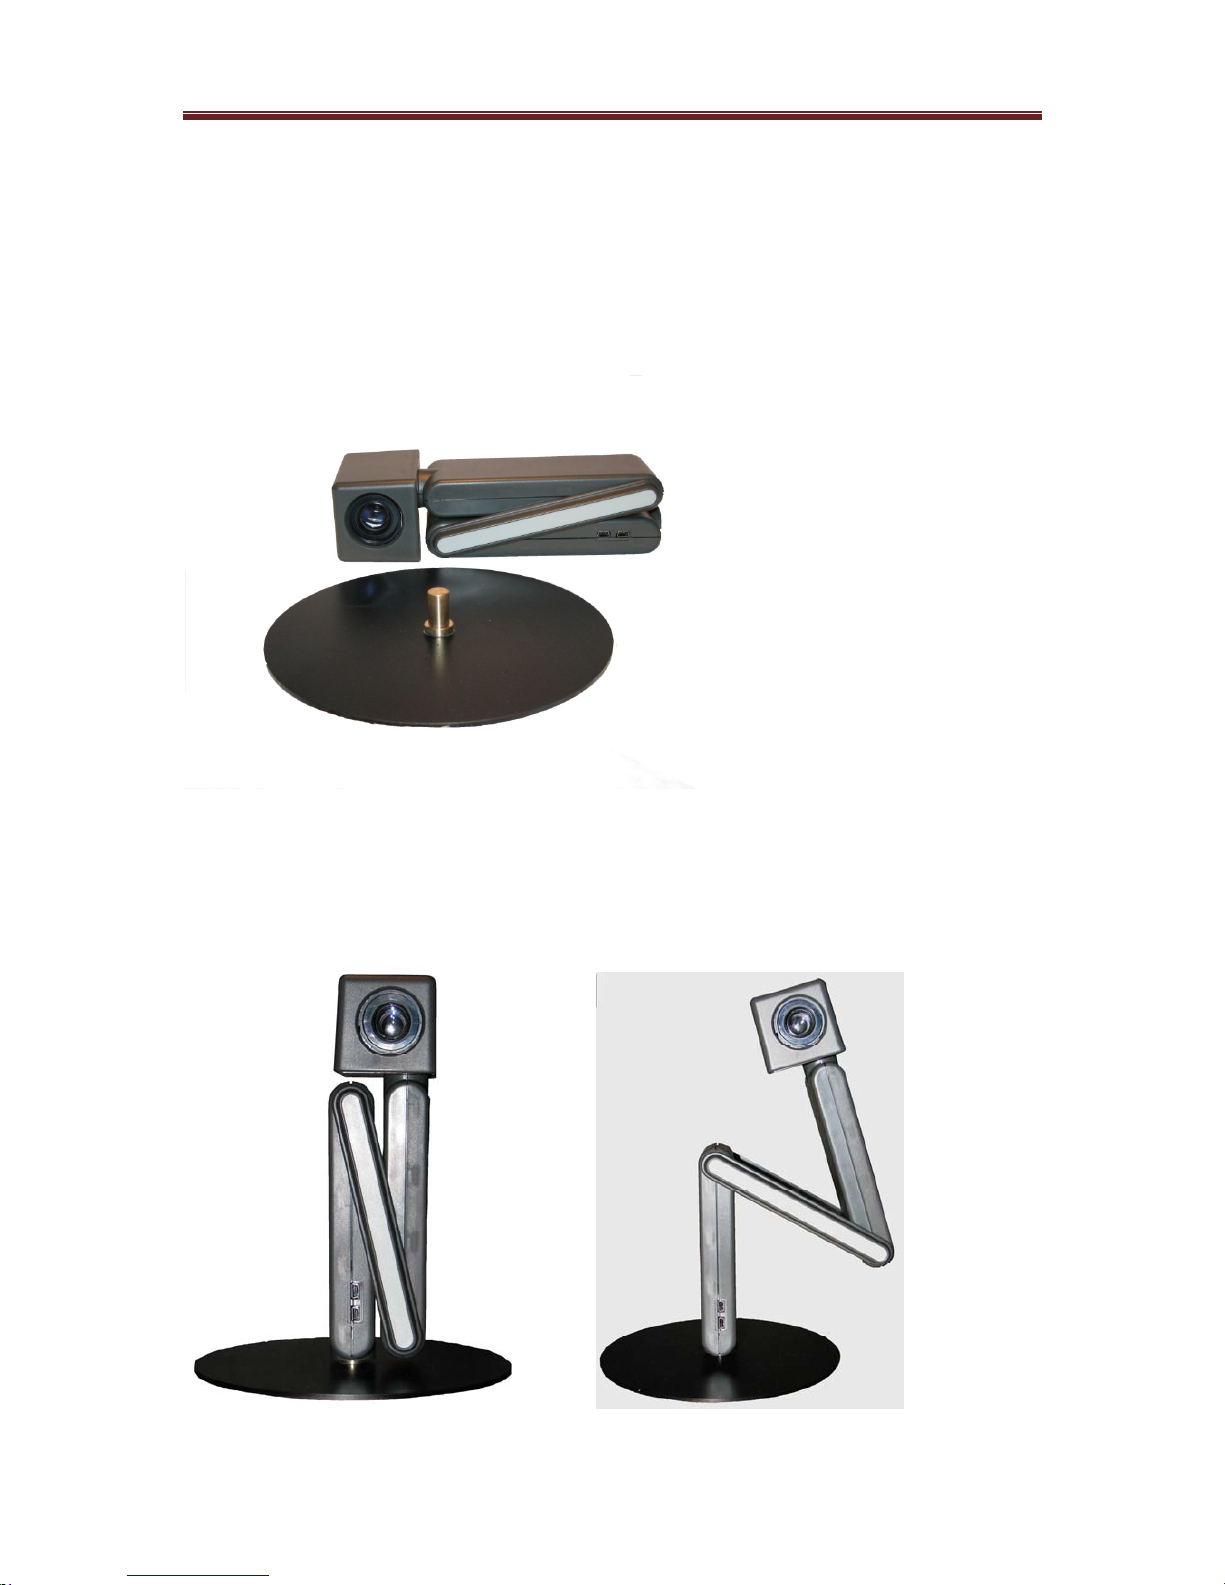
Unfold the iDex
The iDex consist of 2 pieces. The arm with Camera and
the Base Plate. In the carrying bag you will find them as
below:
To be able to use the iDex you should mount it on the
Hinge Pin and unfold it. The 4 pictures below show how
to unfold the unit:
Page 10
iDex Manual
10
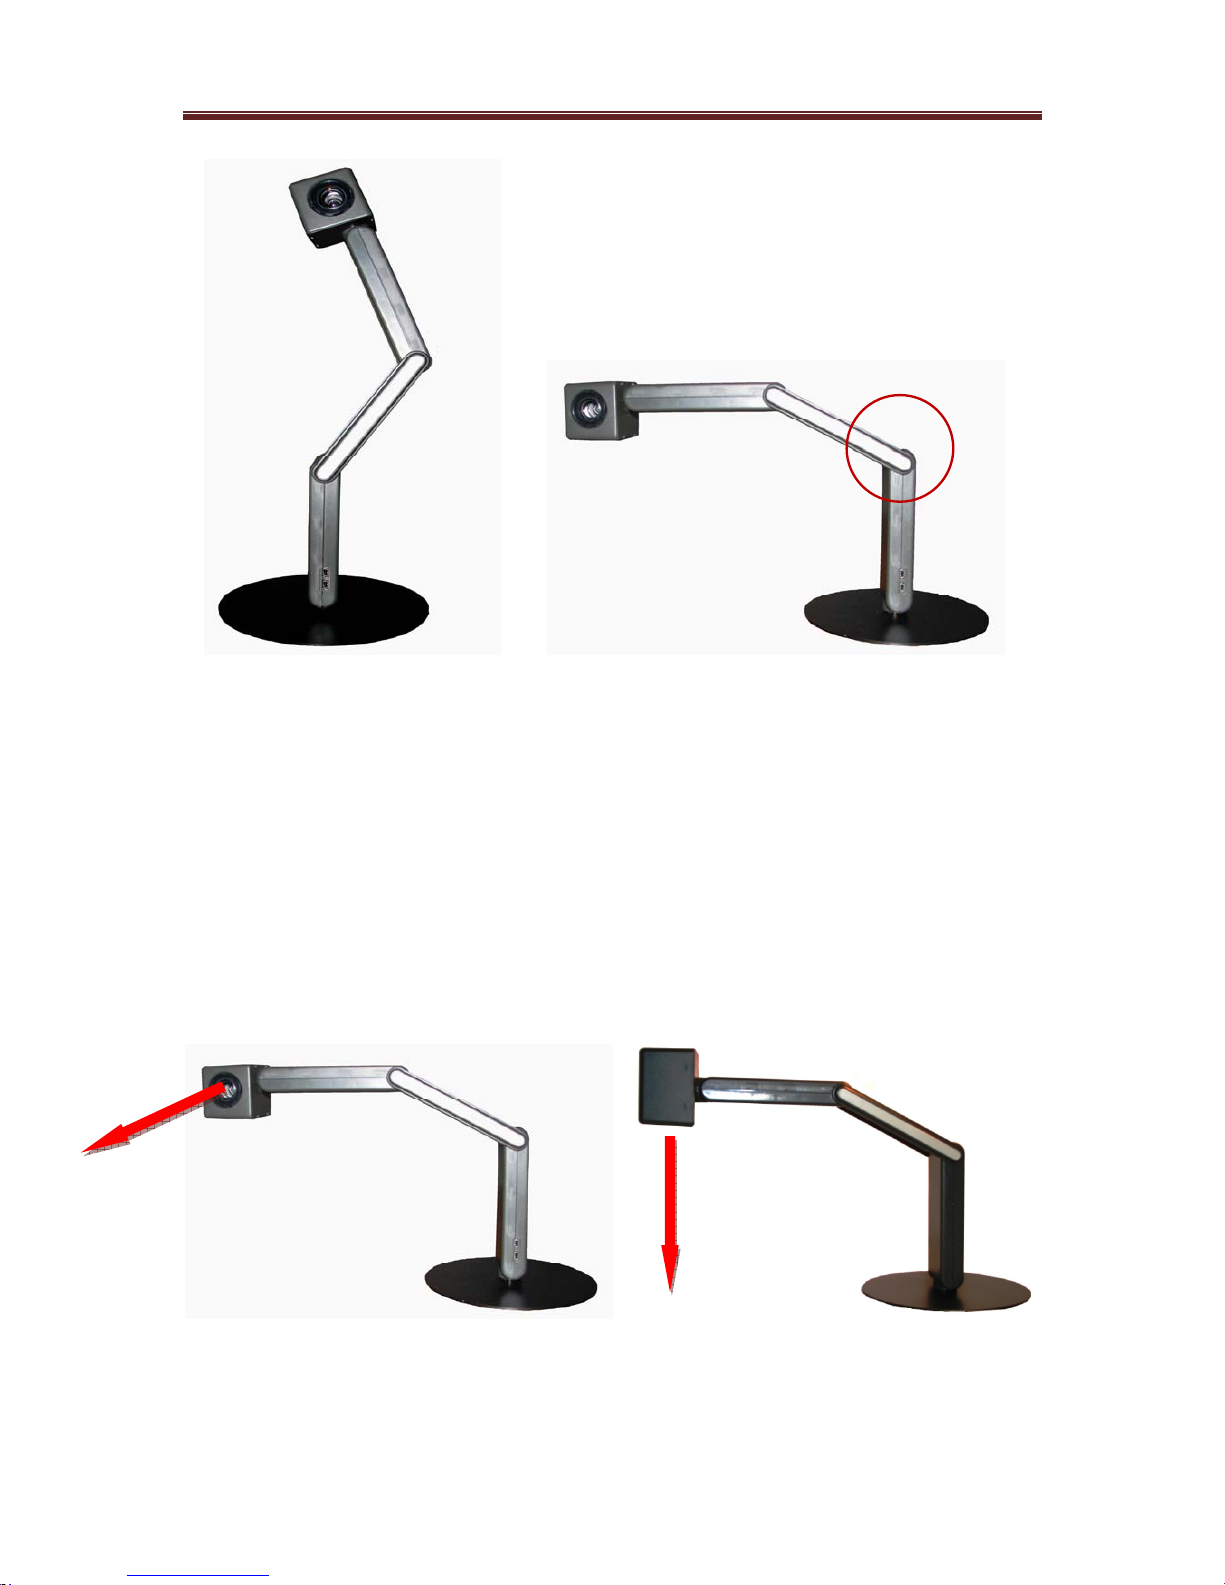
Note: the hinges into the red circle in the last picture
should be positioned against the hard stop. This is the
only way to unfold the iDex.
Reading and Far Vision
The camera can be rotated to the front for Far Vision or
downwards (ground) which enables the user to use it for
reading.
Page 11
iDex Manual
11
Connect the iDex
After having successfully installed the FOCI iDex software
and after having restarted your pc, you can now connect
the iDex.
Connect the iDex to the USB ports of your computer via
two USB cables.
As soon as you have connected the magnifier, a balloon
will pop-up in the taskbar with the message “new
Hardware found”
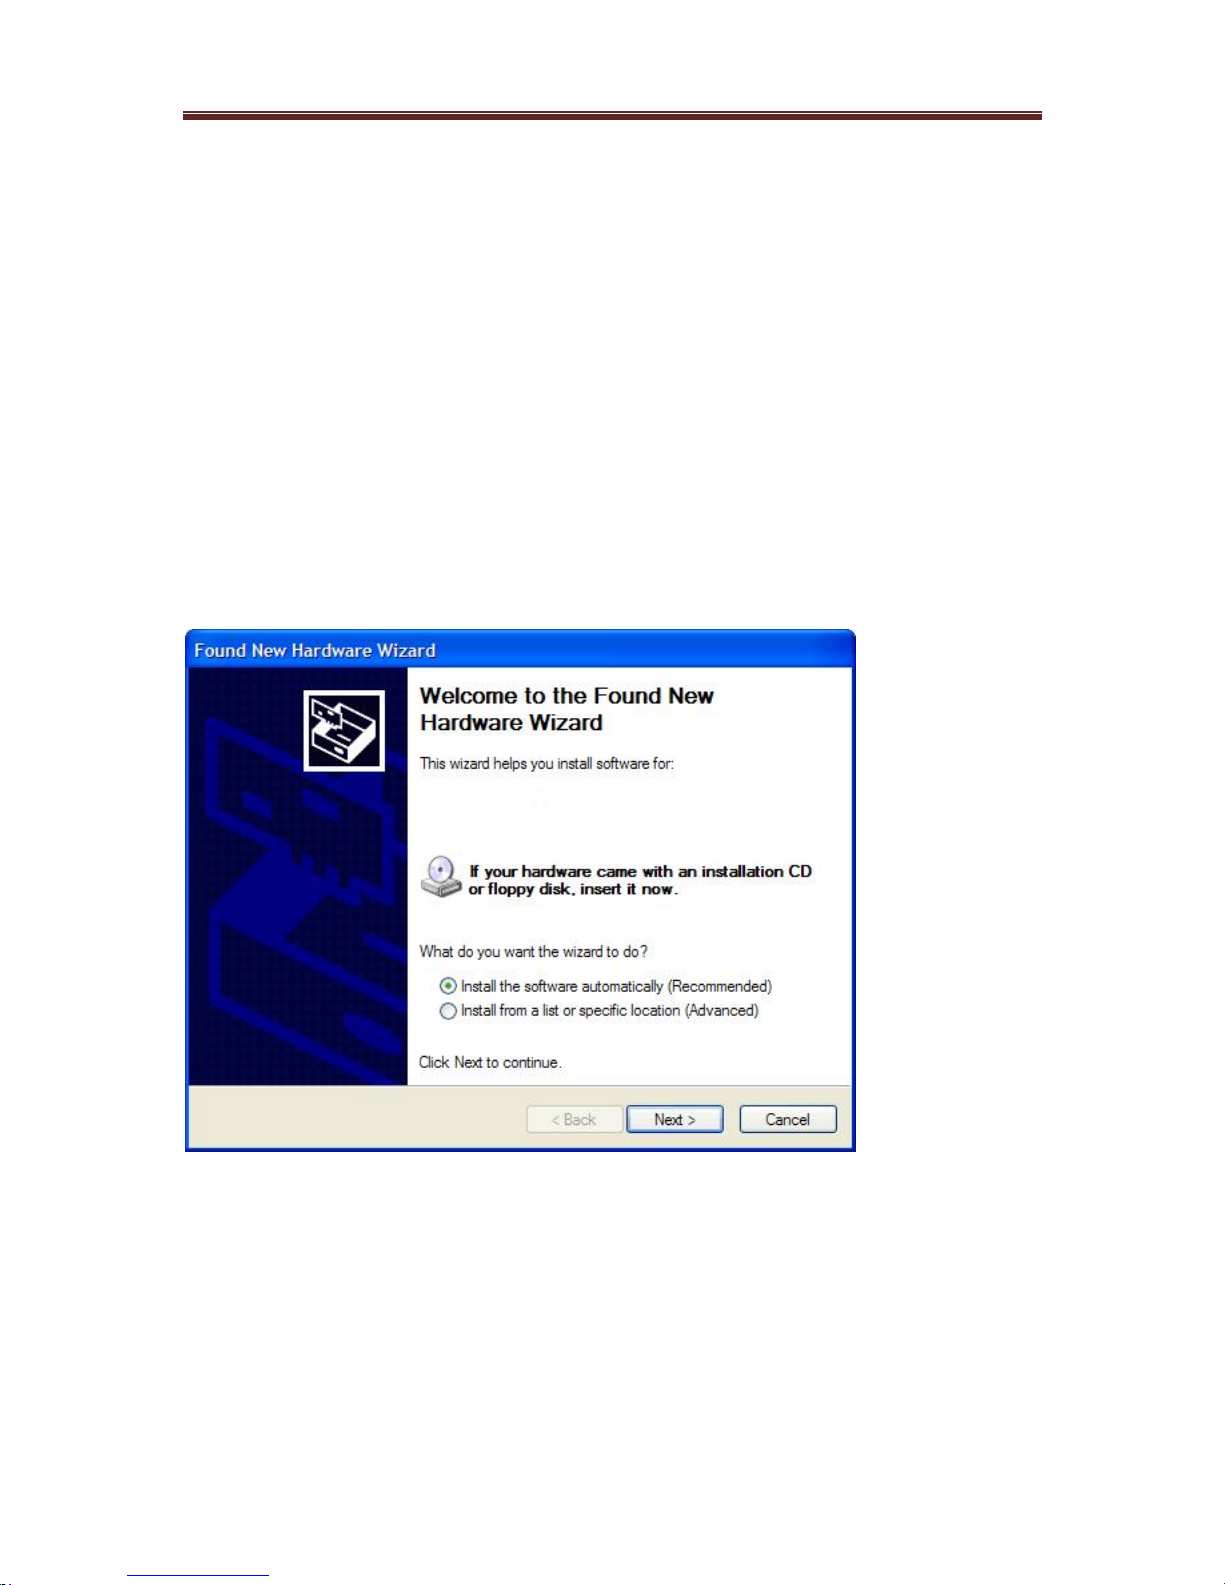
Afterwards you get the wizard “Found New Hardware”.
Select “Next”.
New hardware was found”. Select “Next”. The system will
now look automatically for the correct driver.
Page 12
iDex Manual
12
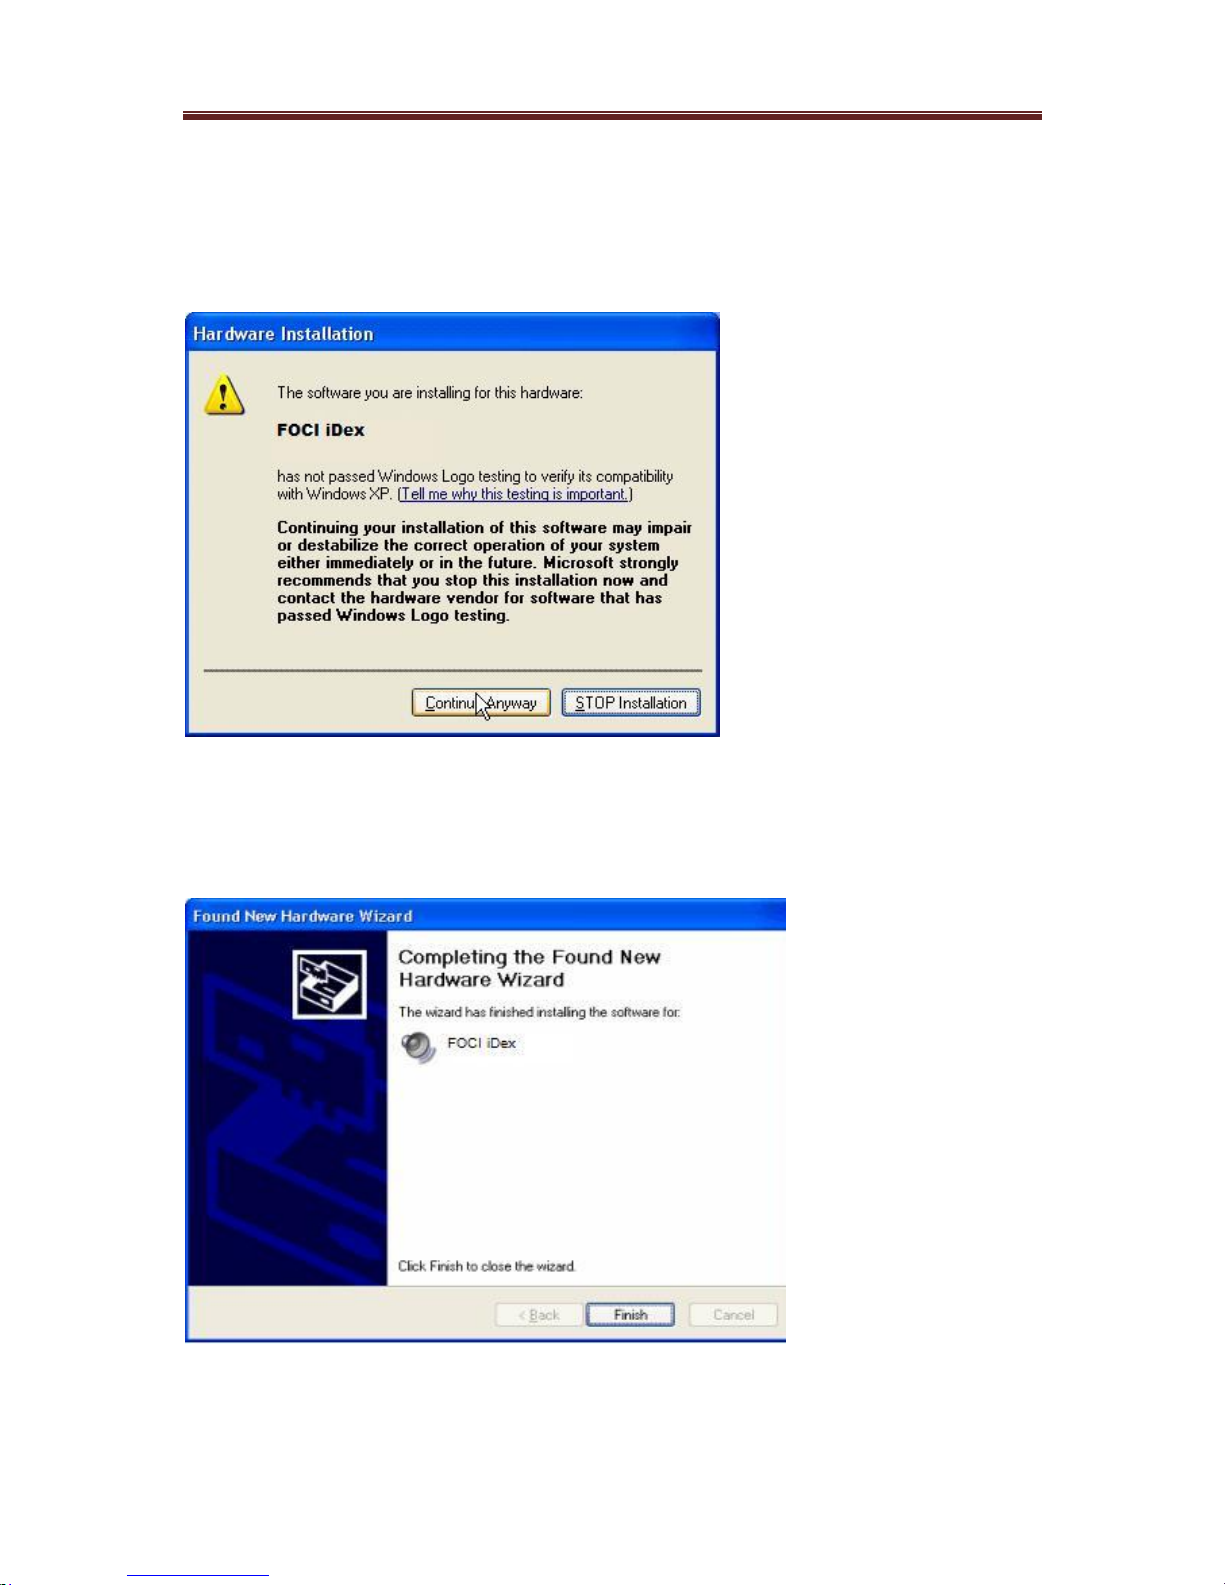
As soon as the driver is located by the computer, you will
get the following:
Select “Continue anyway”.
The drivers will be installed. And the message will appear:
Select “Finish”. The drivers are successfully installed.
Page 13
iDex Manual
13
Checking whether the magnifier works
As soon as you have installed the software and connected
the magnifier, you can start the FOCI iDex programme to
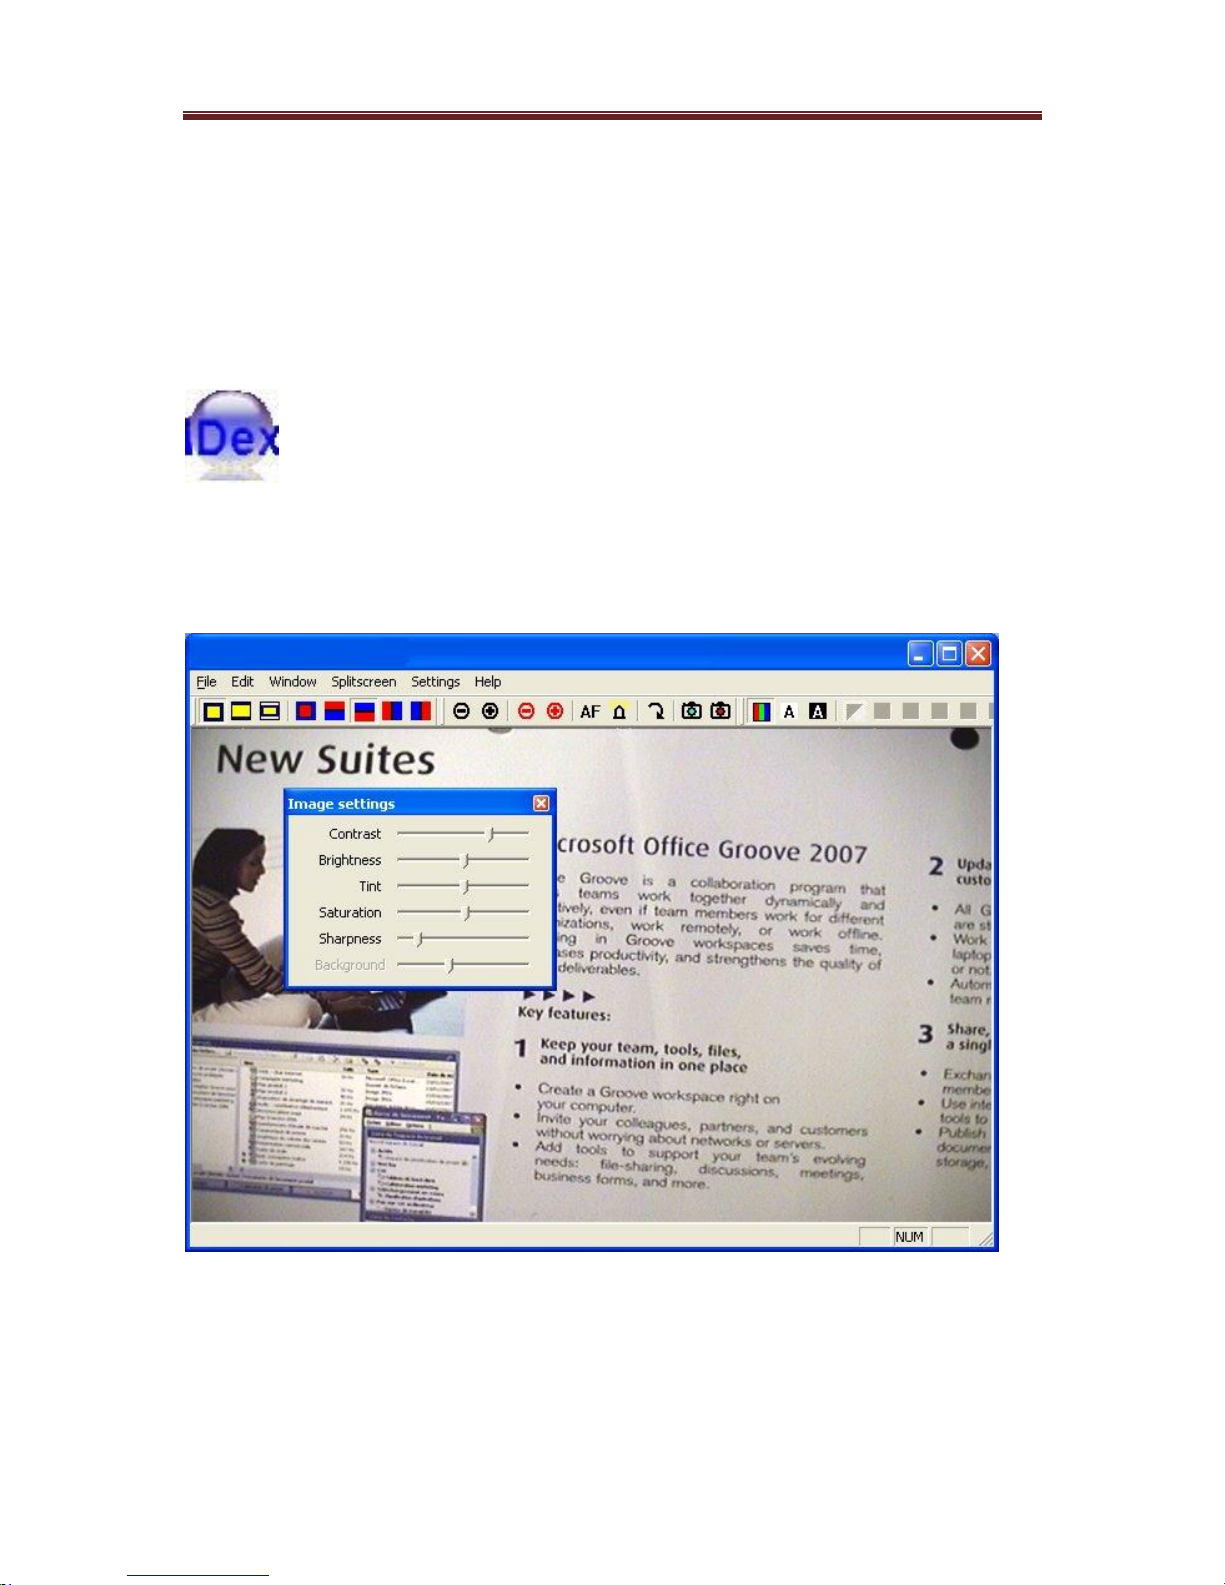
check whether the magnifier works. In your Start Menu
and on your Desktop look for this icon:
If you start the programme, you will be able to see the
camera picture in a separate window.
(The picture does of course depend on the document that
lies underneath the camera.)
If you are able to see the camera picture, then all software
has been successfully installed.
Page 14
iDex Manual
14
4. FOCI iDe x Software
Now that you have connected and tested the
magnifier, we continue to expand on the iDex
software program and the use of the iDex. This
programme is called FOCI iDex Software.
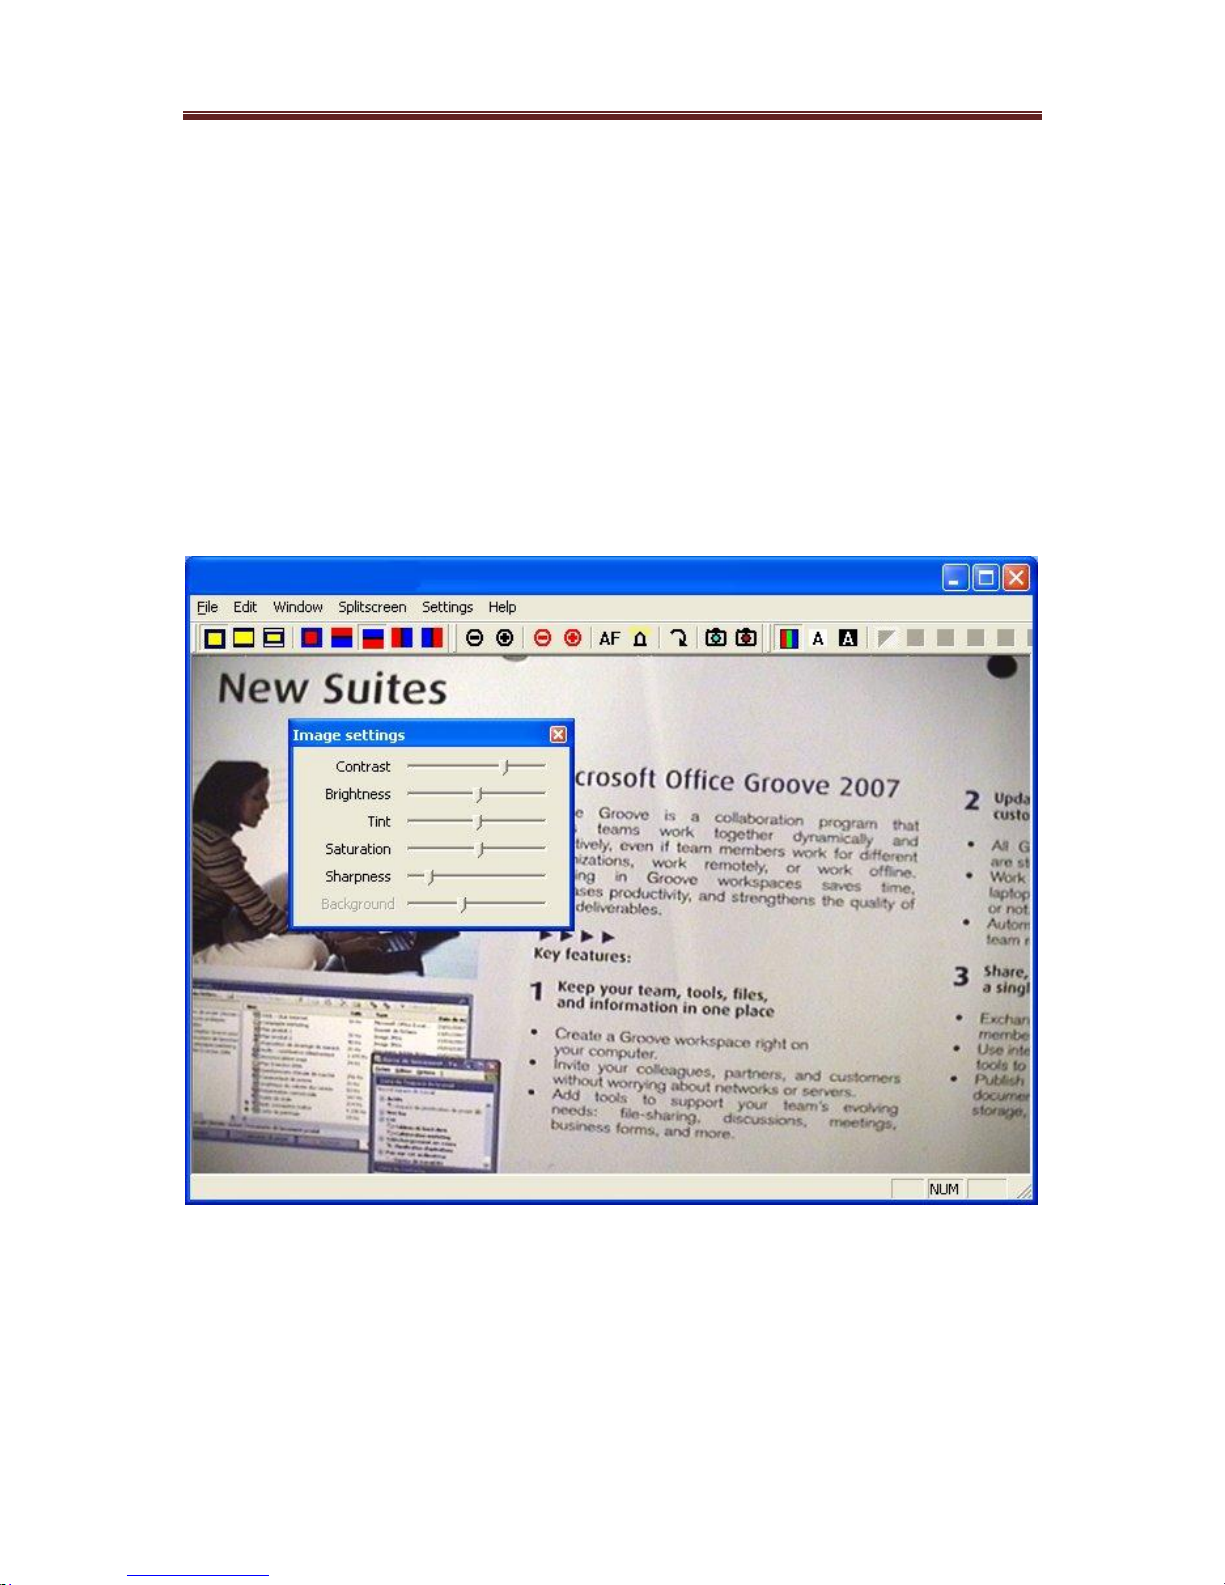
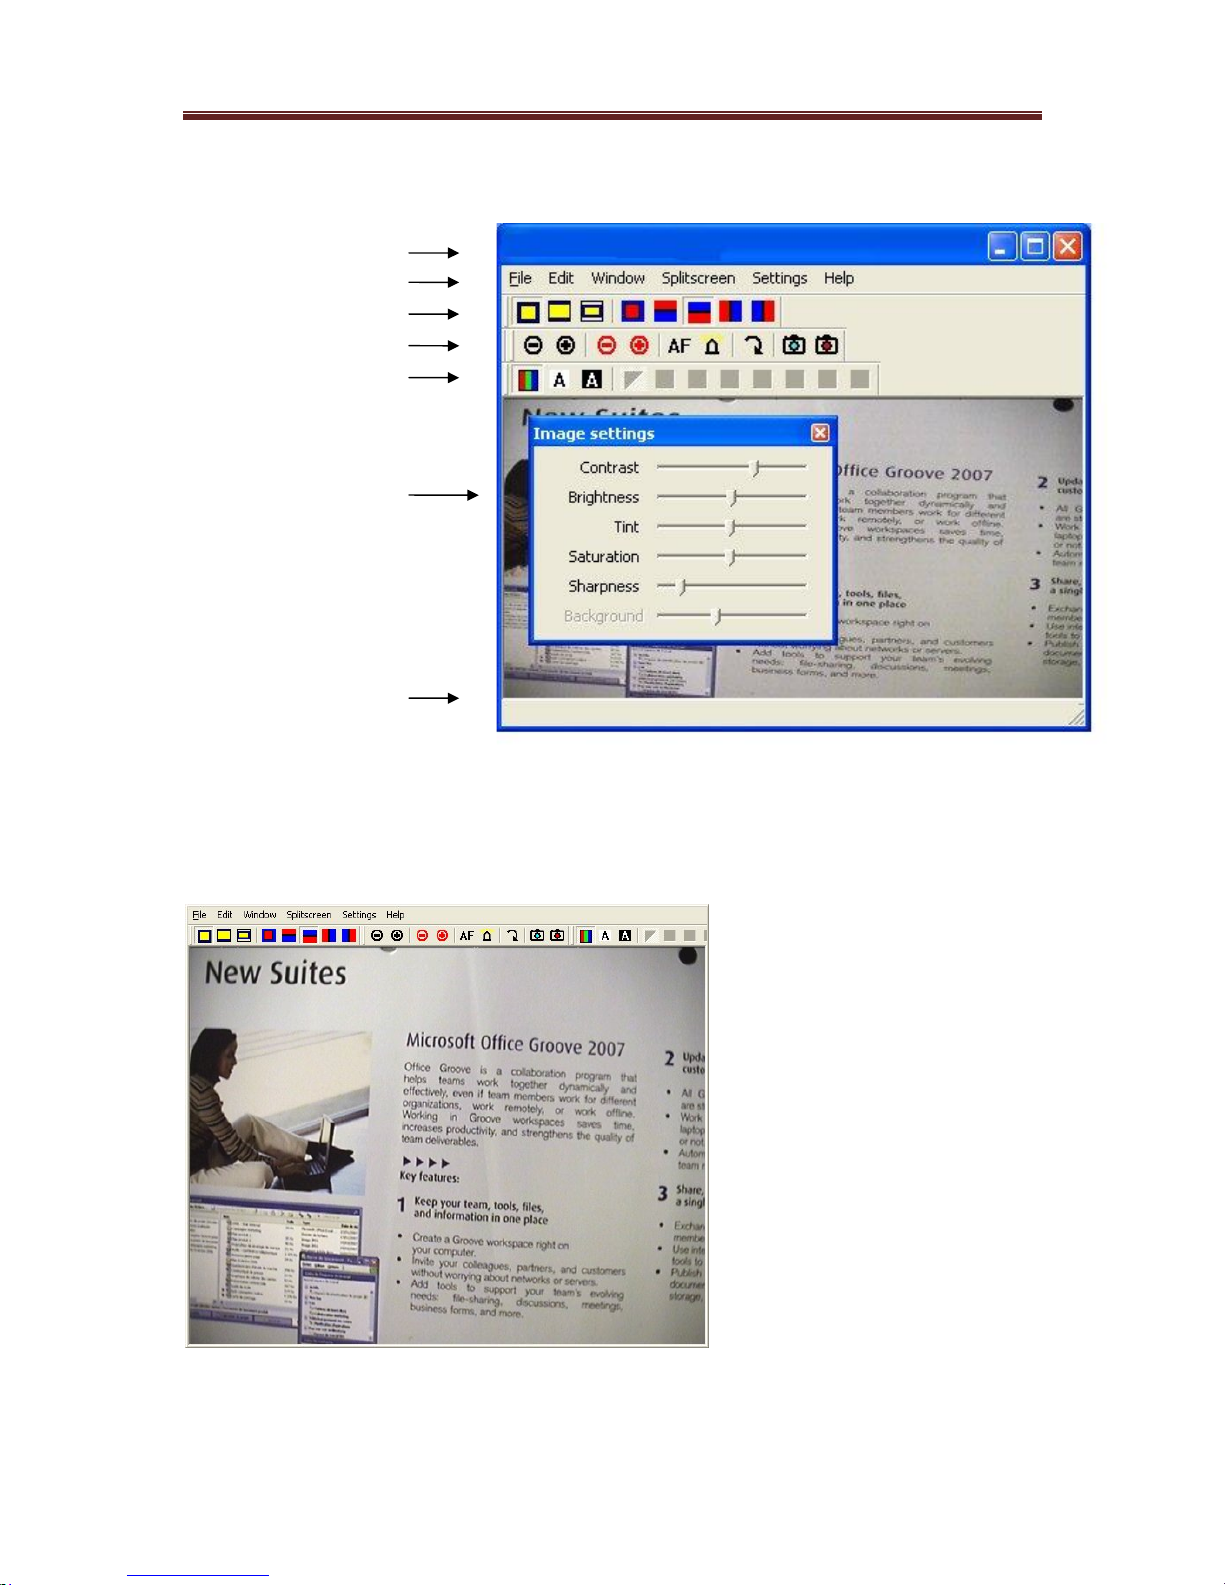
Summary of the window
The iDex software window looks as shown below.
Page 15
iDex Manual
15
This window Elements:
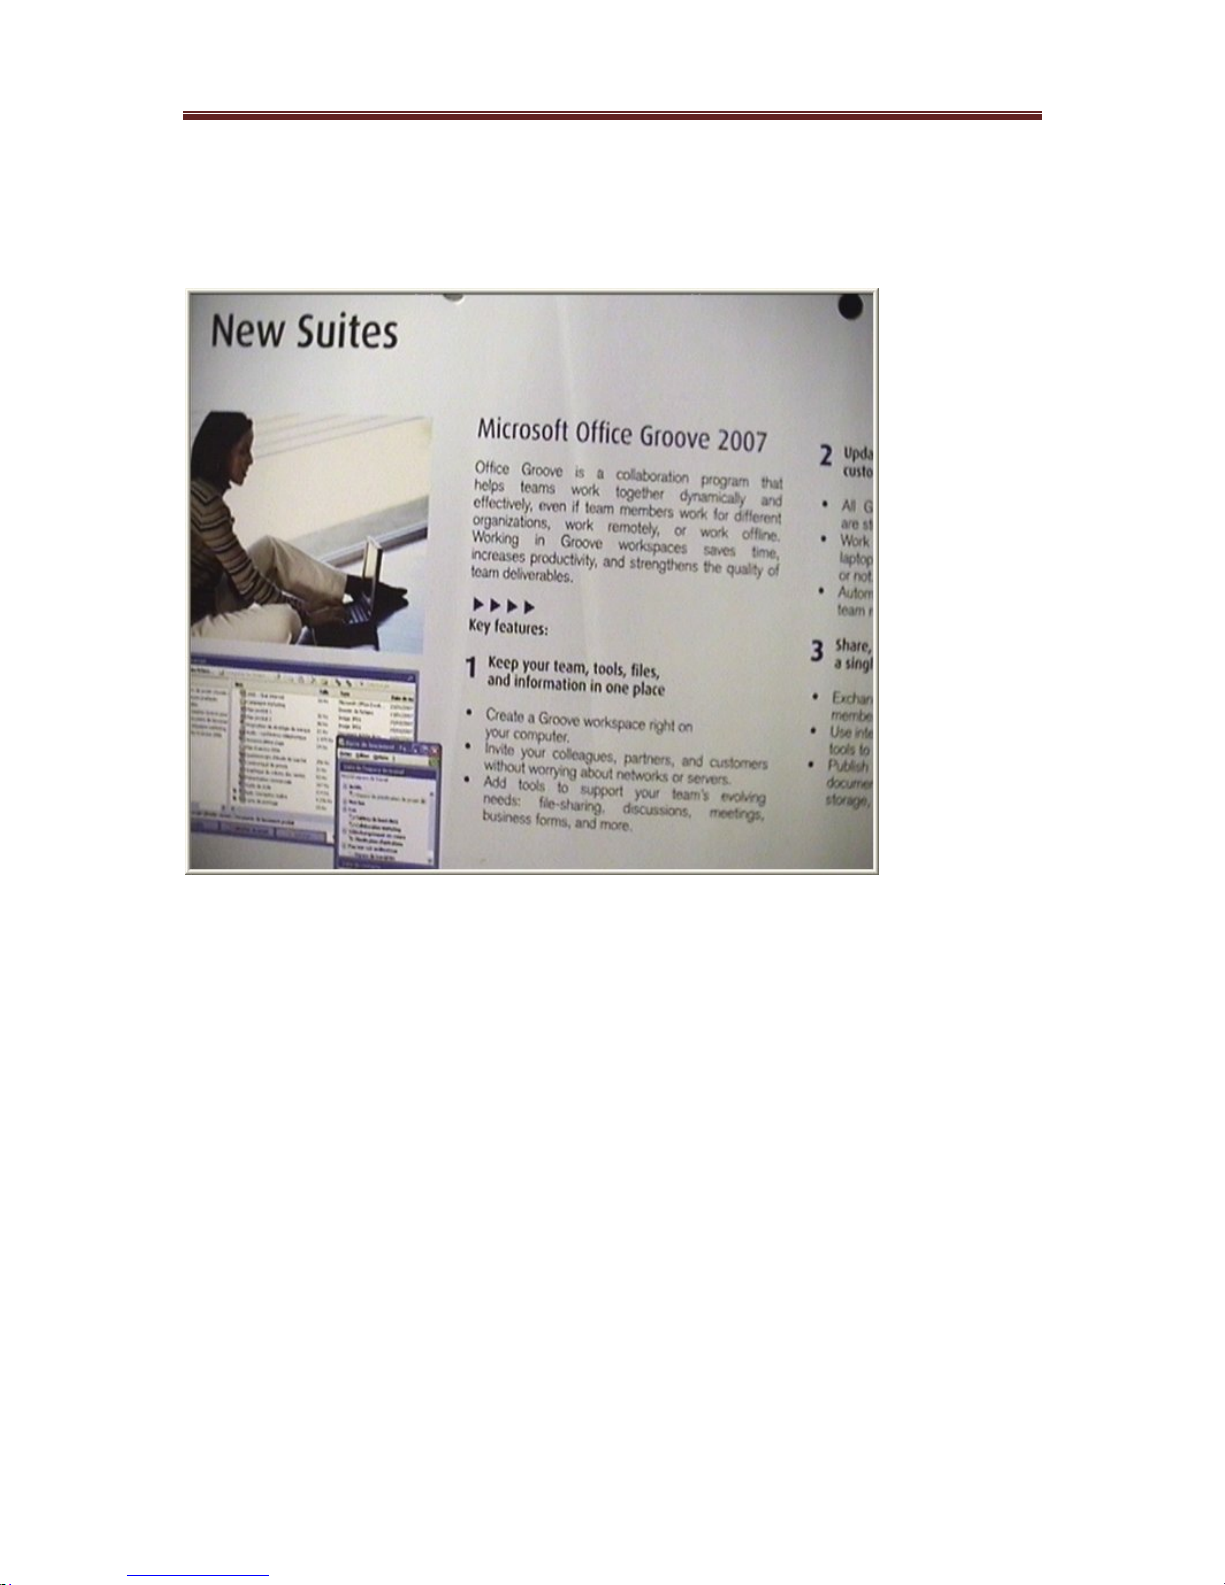
Via the menu “Window”, you can show or hide these
elements. In the following example, the Title bar, Status
bar and Toolbar Picture settings are hidden:
Title bar
Menu bar
Toolbar Proportions
Toolbar Camera
, Toolbar Picture
modes
Toolbar Picture
settings
Page 16
iDex Manual
16
This way there is more room on the screen for the picture.
You can actually hide all elements, as shown in the
following example.
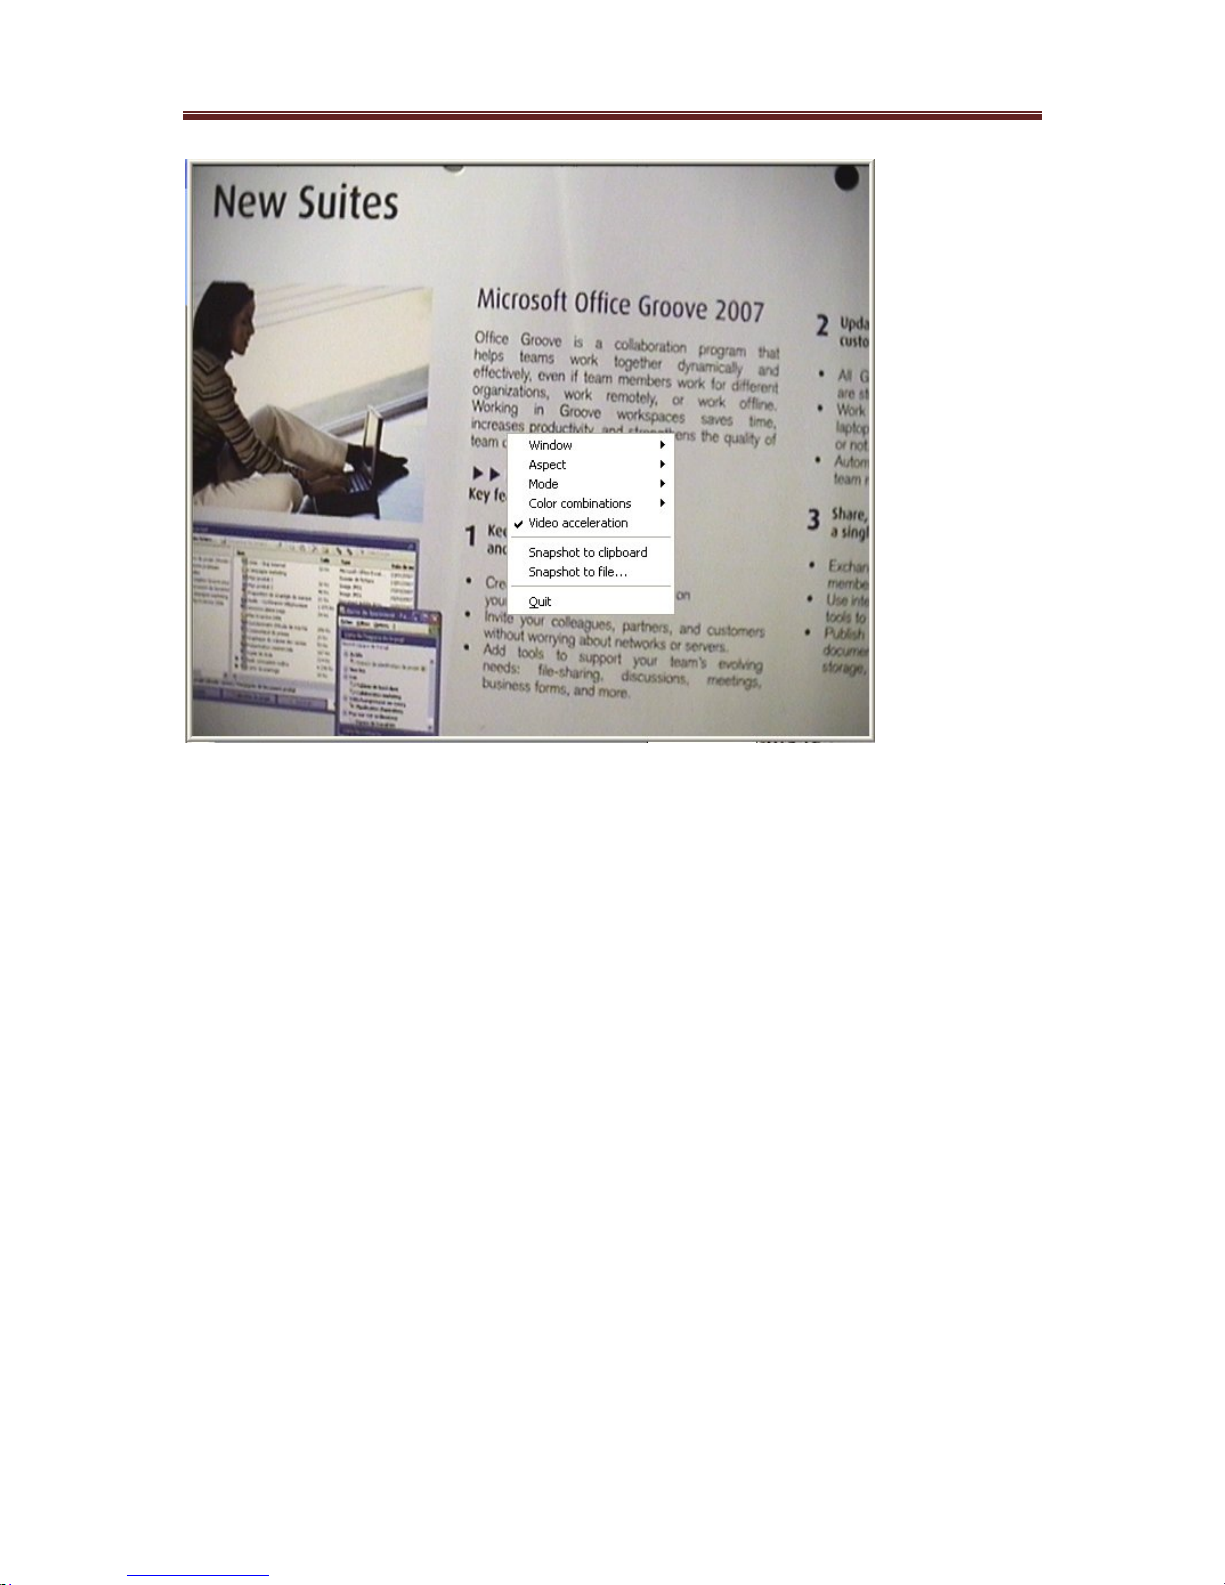
Even when the Menu bar is hidden, you can still select the
main options by clicking in the picture with the right mouse
button.
Page 17
iDex Manual
17
You can change the size of the window by clicking with the
mouse on the bottom right corner and drag it to the
required size format.
You can move the window by clicking on the Title bar or in
the picture and drag.
You can quickly maximize the window by double-clicking
on the Title bar or in the picture.
You can always put the window on the foreground via the
menu “Window”. When the setting Always on top is
selected, the window of FOCI iDex Software is always
visible on top of any other window, even when you start up
another programme.
Page 18
iDex Manual
18
Image dimensions
Depending on the shape of the window and the screen
format (normal or wide screen), it can be that the picture of
the iDex does not exactly fit the window. The way to solve
this problem depends on the chosen picture settings. You
can change the setting on the Toolbar Picture settings.
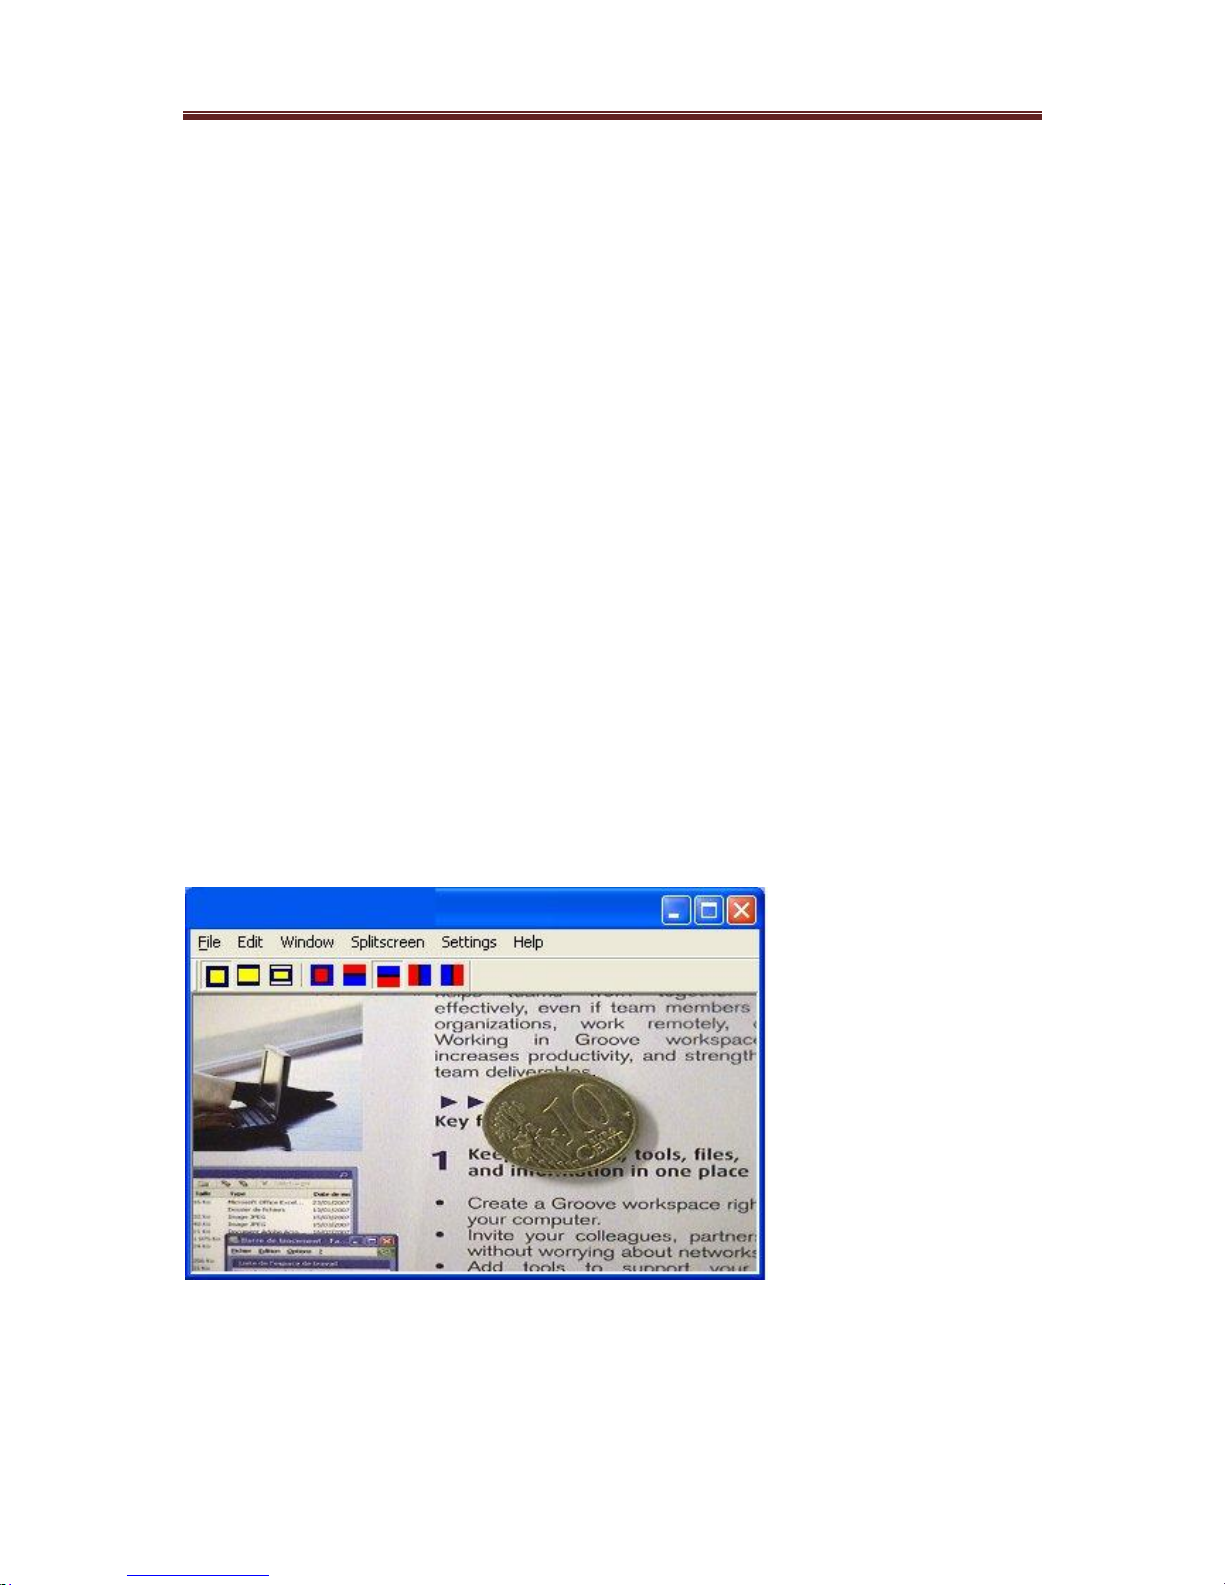
In the following example, the window is always wider than
the camera picture.
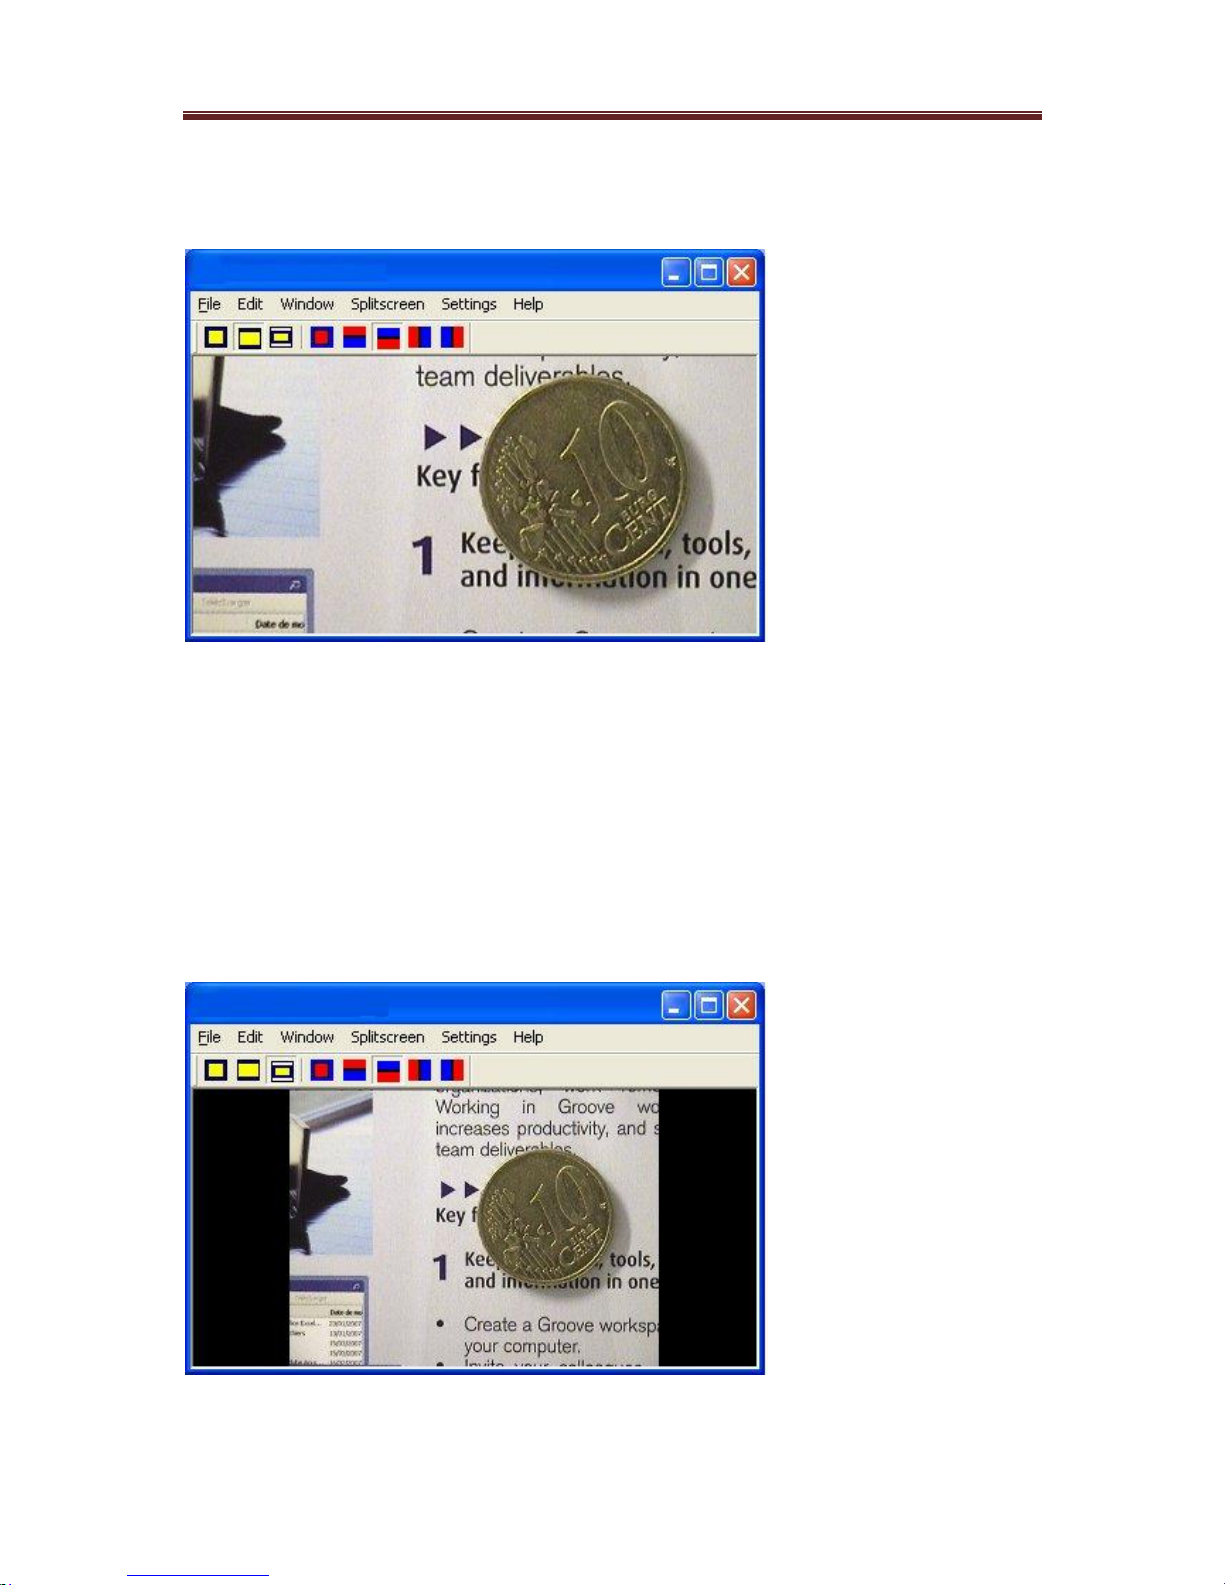
Window filling
The camera’s picture is enlarged in order to fill the
window. The result is that the picture is deformed. You can
easily see this in round objects: they become oval,
stretched horizontally and vertically.
In the following example, you can see how the width of the
picture was stretched in order to fill the window.
Cutting out
A part of the camera picture is cut out, so it fits the
window. No Deformation, but a part of the picture is lost.
Page 19
iDex Manual
19
In the following example, a part of the picture was cut off
at the top and the bottom of the picture.
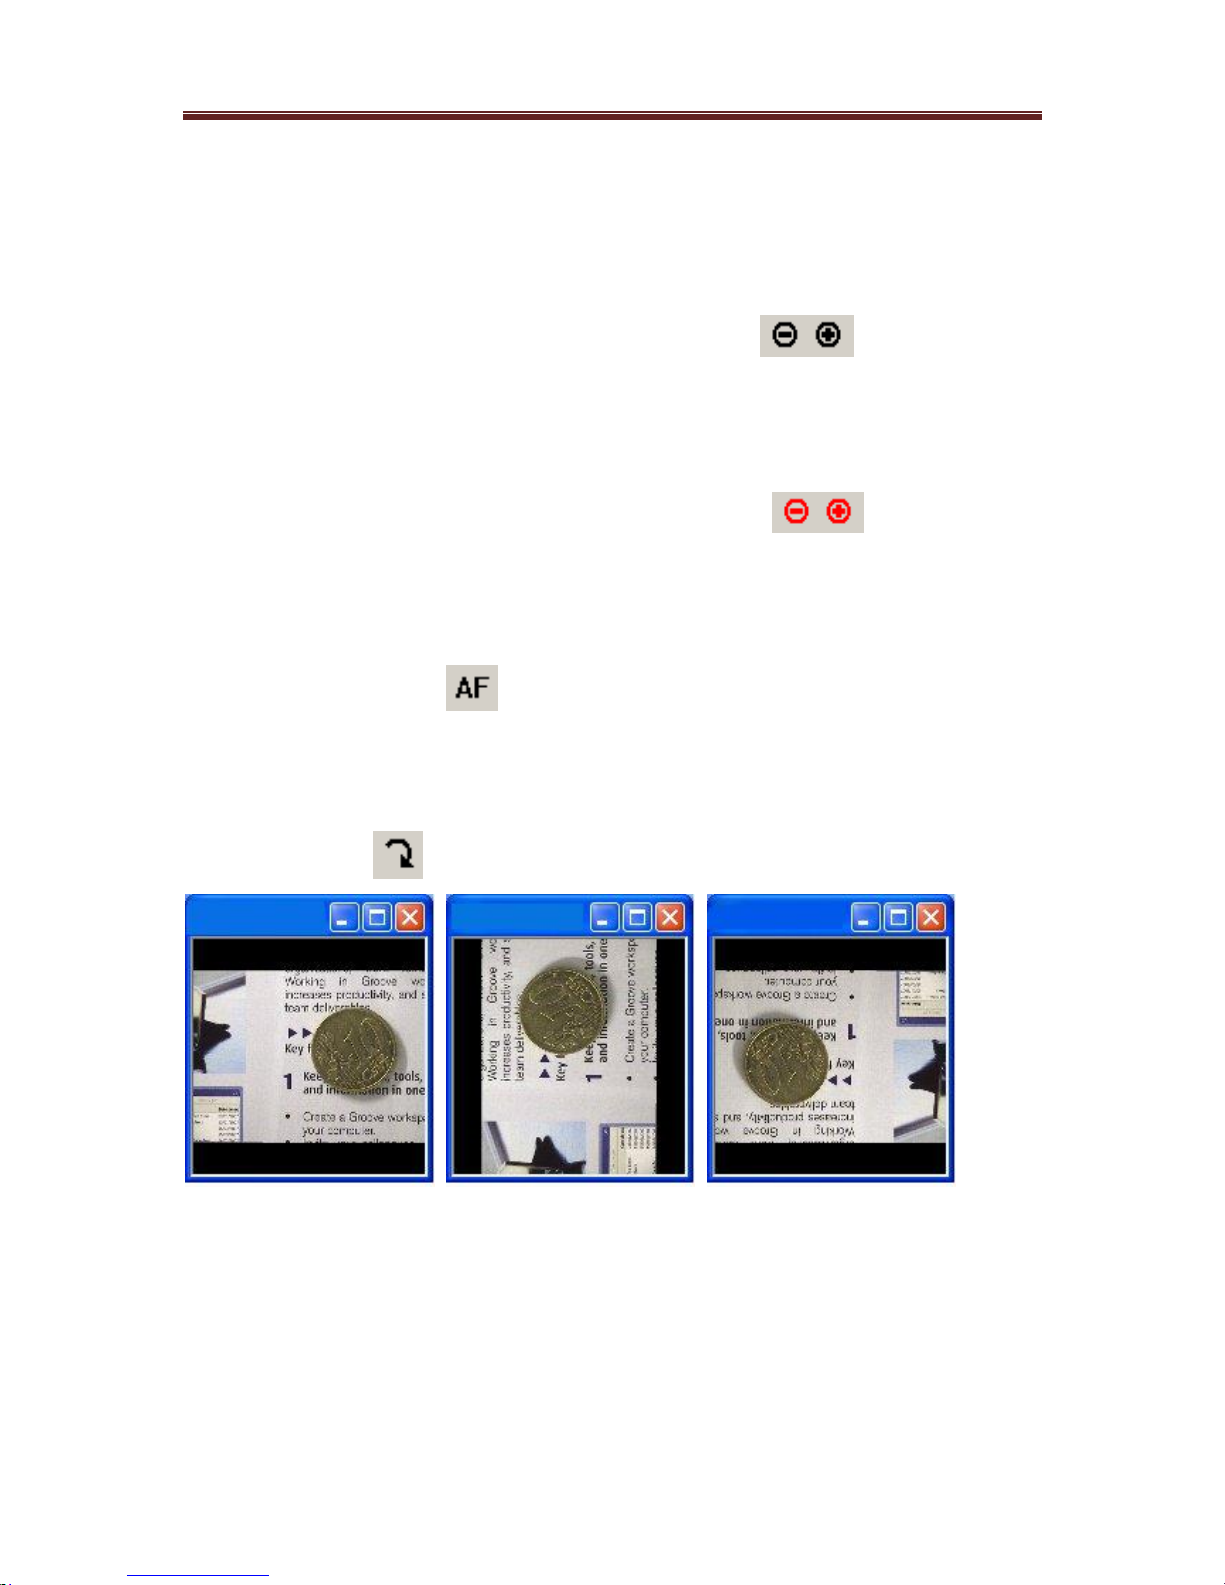
Fitting
The camera picture is put in the window without any
deformations. The excess space in the window is filled
with black bars.
In the following example, you can see that black bars have
been added to the left and right-hand side of the picture.
Page 20
iDex Manual
20
5. Operating the camera
The Camera Toolbar in the iDex program fully operates
the iDex Camera.
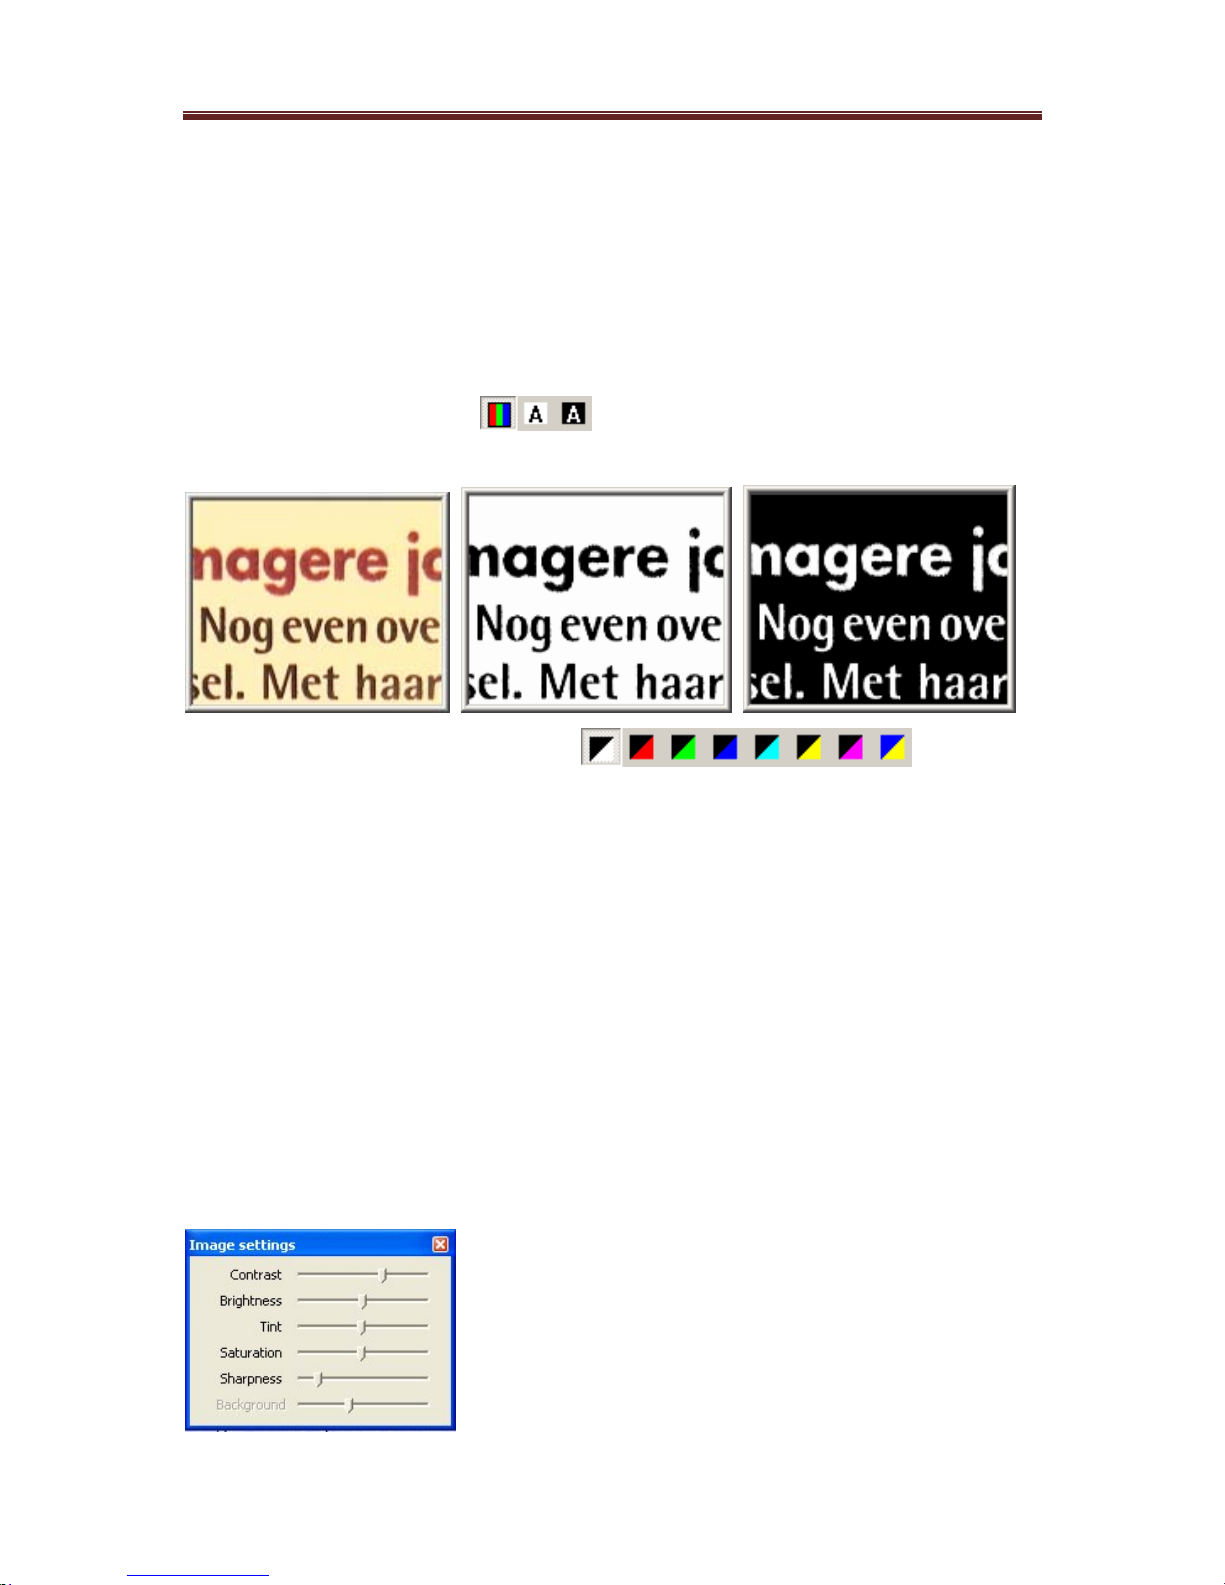
Zooming in and out (reading) :
: magnifies
and reduces the picture when the object is close to the
camera (less than one meter). To use when reading
documents.
Zooming in and out (faraway) :
: magnifies
and reduces the picture when the object is far away from
the camera (more than one meter). To use when reading a
sign.
Auto focus :
: Switches the auto focus of the
Camera on or off. When the distance of the object to the
camera constantly changes (e.g. when reading a thick
book), you need to use this automatic focus.
Rotating :
: Rotates the picture 90°, 180° or 270°.
Page 21
iDex Manual
21
6. Picture modes and picture settings
The Toolbar: Picture modes
To make reading documents easier, you can set different
picture modes in the FOCI iDex Software.
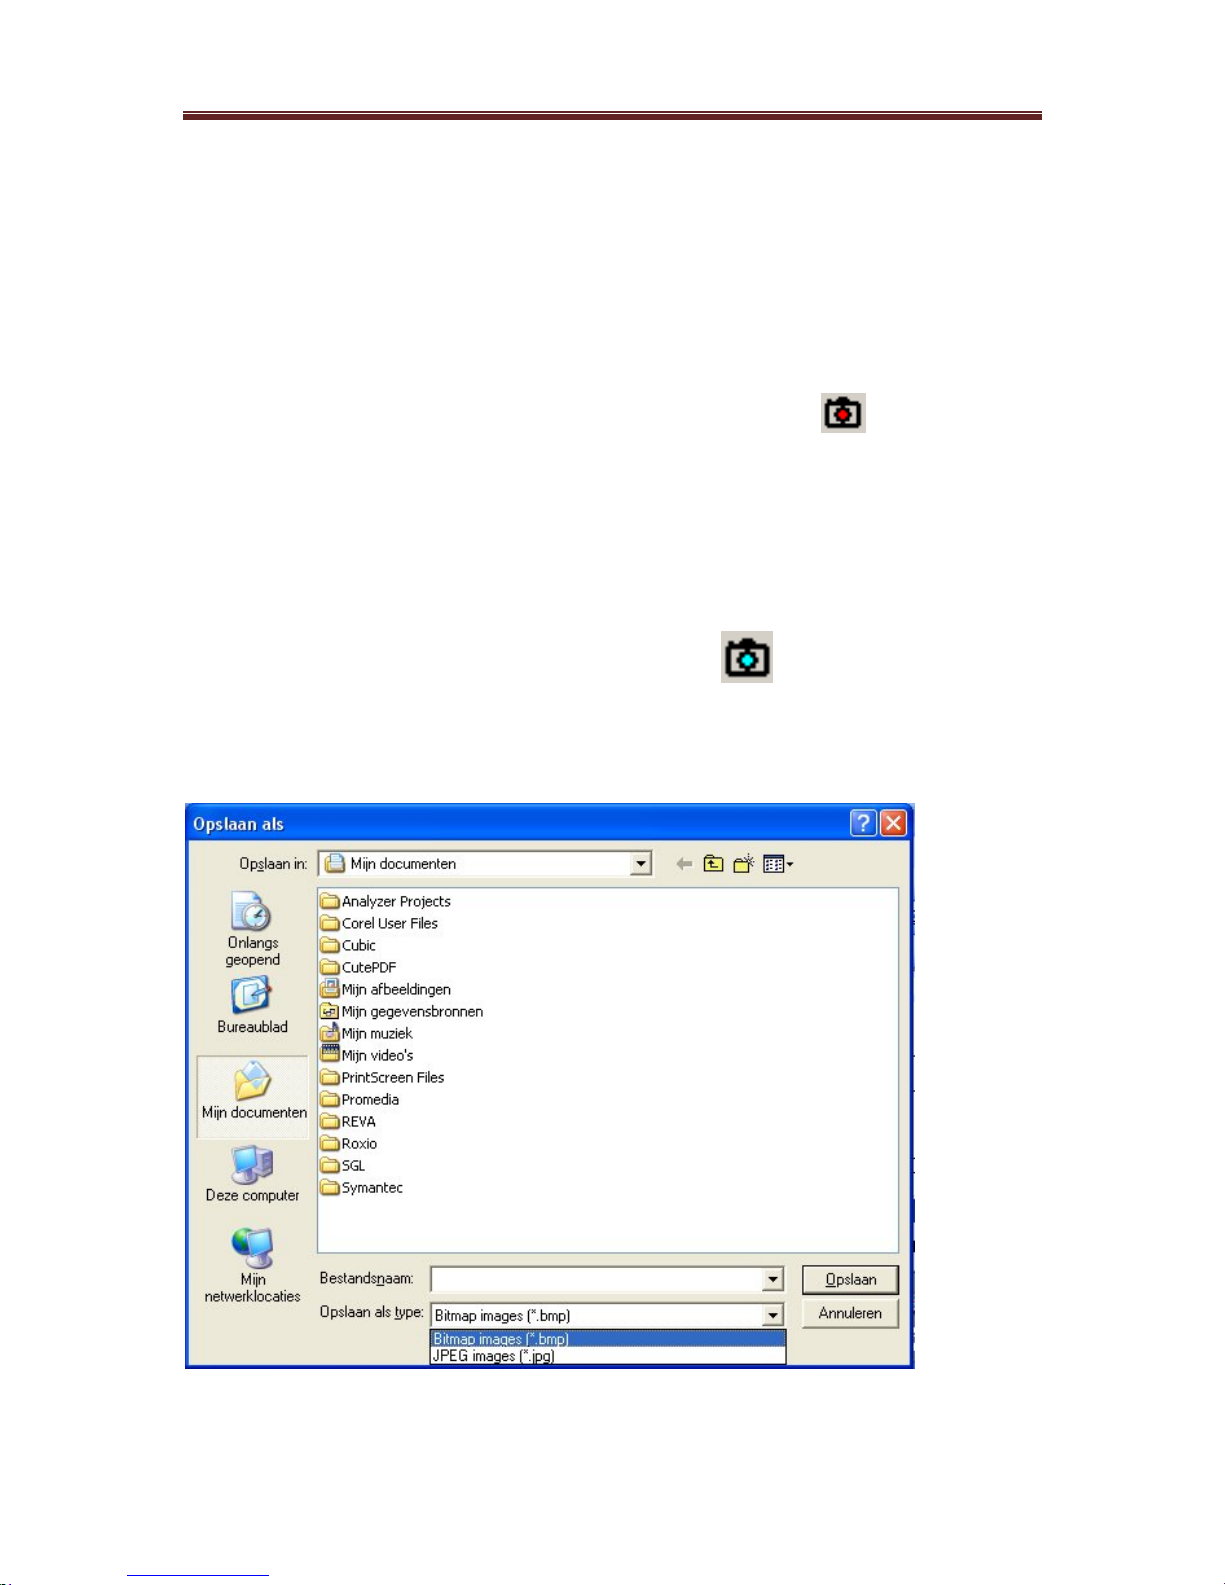
Picture modes :
: The mode can be chosen.
Possibilities are: colour, positive and negative mode.
Background colours :
: In the
positive and negative mode you can choose between
eight different combinations of foreground and background
colours.
The Toolbar: Picture settings
You can select the level of contrast, the brightness, the
colour, the intensity (of the colours), the definition of the
picture and the background suppression.
Drag the setting bars to the desired position in order to
adapt the picture.
Page 22
iDex Manual
22
Snapshots
It is possible to store the picture shown in the iDex
Software program. This way, you can look at it later on or
you can adapt it.
How to put a snapshot to the clipboard
When you use the keyboard shortcut “Ctrl-C”, you put a
copy of the picture on the clipboard. Afterwards, you can
paste it (“Ctrl-V”) in another program, such as a word
processor.
How to store a snapshot as a file
When you press the key S, you can save a copy of the
picture as a file. The dialog box Save as appears:
Page 23

iDex Manual
23
Via this dialog box, you can save the picture under the
name and on the location that you wish.
The picture can be saved in two different file sizes:
• A bitmap file (.bmp): high quality, pictures are approx
about 900 kb.
• A JPEG file (.jpg): lower quality, less than 100kb per
picture.
Video acceleration
The video card of your computer can autonomously
perform a part of the tasks needed to show a video
picture. This is the video acceleration function. In order to
get a smooth and sharp picture, we advise you to switch-
on the video acceleration.
You can switch the video acceleration on or off via the
menu “Settings”.
Exceptionally, it can be that the video acceleration creates
compatibility problems with other software. This can be the
case if you use a dated magnification programme, e.g. a
dated version of Lunar or ZoomText. In that case, you’d
better temporarily switch off the video acceleration
function.
Page 24

iDex Manual
24
7 Combination with Magnification Software
Supported magnification software
The iDex software is compatible with the so-called “CCTV”
functions of the main magnification programmes.
The following magnification programmes are supported:
• Ai Squared: ZoomText from version 9.04 or higher
(see http://www.aisquared.com/ )
• Dolphin Computer Access Ltd: Lunar, Lunar Plus,
SuperNova or SuperNova Pro, each time version 6.53
or higher (see http://www.yourdolphin.com/)
Split screen
If you use a compatible magnification programme, you can
divide your computer picture in two parts via the menu
“Split screen” of the iDex software :
• In the one part, you can find the desktop of your
computer, possibly enlarged by your magnification
programme.
• In the other part, you can find the camera picture.
Via the menu “Split screen”, you can choose one of the
four different settings for the split screen.
Page 25

iDex Manual
25
8 Keyboard shortcuts
Keyboard shortcuts are a way to work with iDex
Software program through the keyboard.
General keyboard shortcuts
The iDex Software program makes a distinction between
two kinds of keyboard shortcuts:
• “Keyboard shortcuts in the iDex Software program”:
you can only use these keyboard shortcuts when this
program is the active programme on your desktop.
You activate The iDex Software program by clicking
“iDex” on the task bar, by clicking inside the window
“iDex Software” or by using Alt-Tab.
• “General keyboard shortcuts”: these keyboard
shortcuts can be used at any given time, even if the
iDex Software program is not the active programme.
General keyboard shortcuts are useful when the picture is
shown in split screen. You can activate another
programme (e.g. a word processor), but via the General
keyboard shortcuts of the program you can directly adapt
the settings of the video picture.
When selecting general keyboard shortcuts, it is important
to make sure that these keyboard shortcuts do not conflict
with other key combinations of the system, such as:
• Keyboard shortcuts of the programme that you are
currently using.
• Other general keyboard shortcuts, such as Ctrl-Alt-Del,
keyboard shortcuts for your magnification software, …
Page 26
iDex Manual
26
Adjusting keyboard shortcuts
You can adjust the keyboard shortcuts to fit a specific
keyboard (such as a keyboard of a laptop) or the wishes of
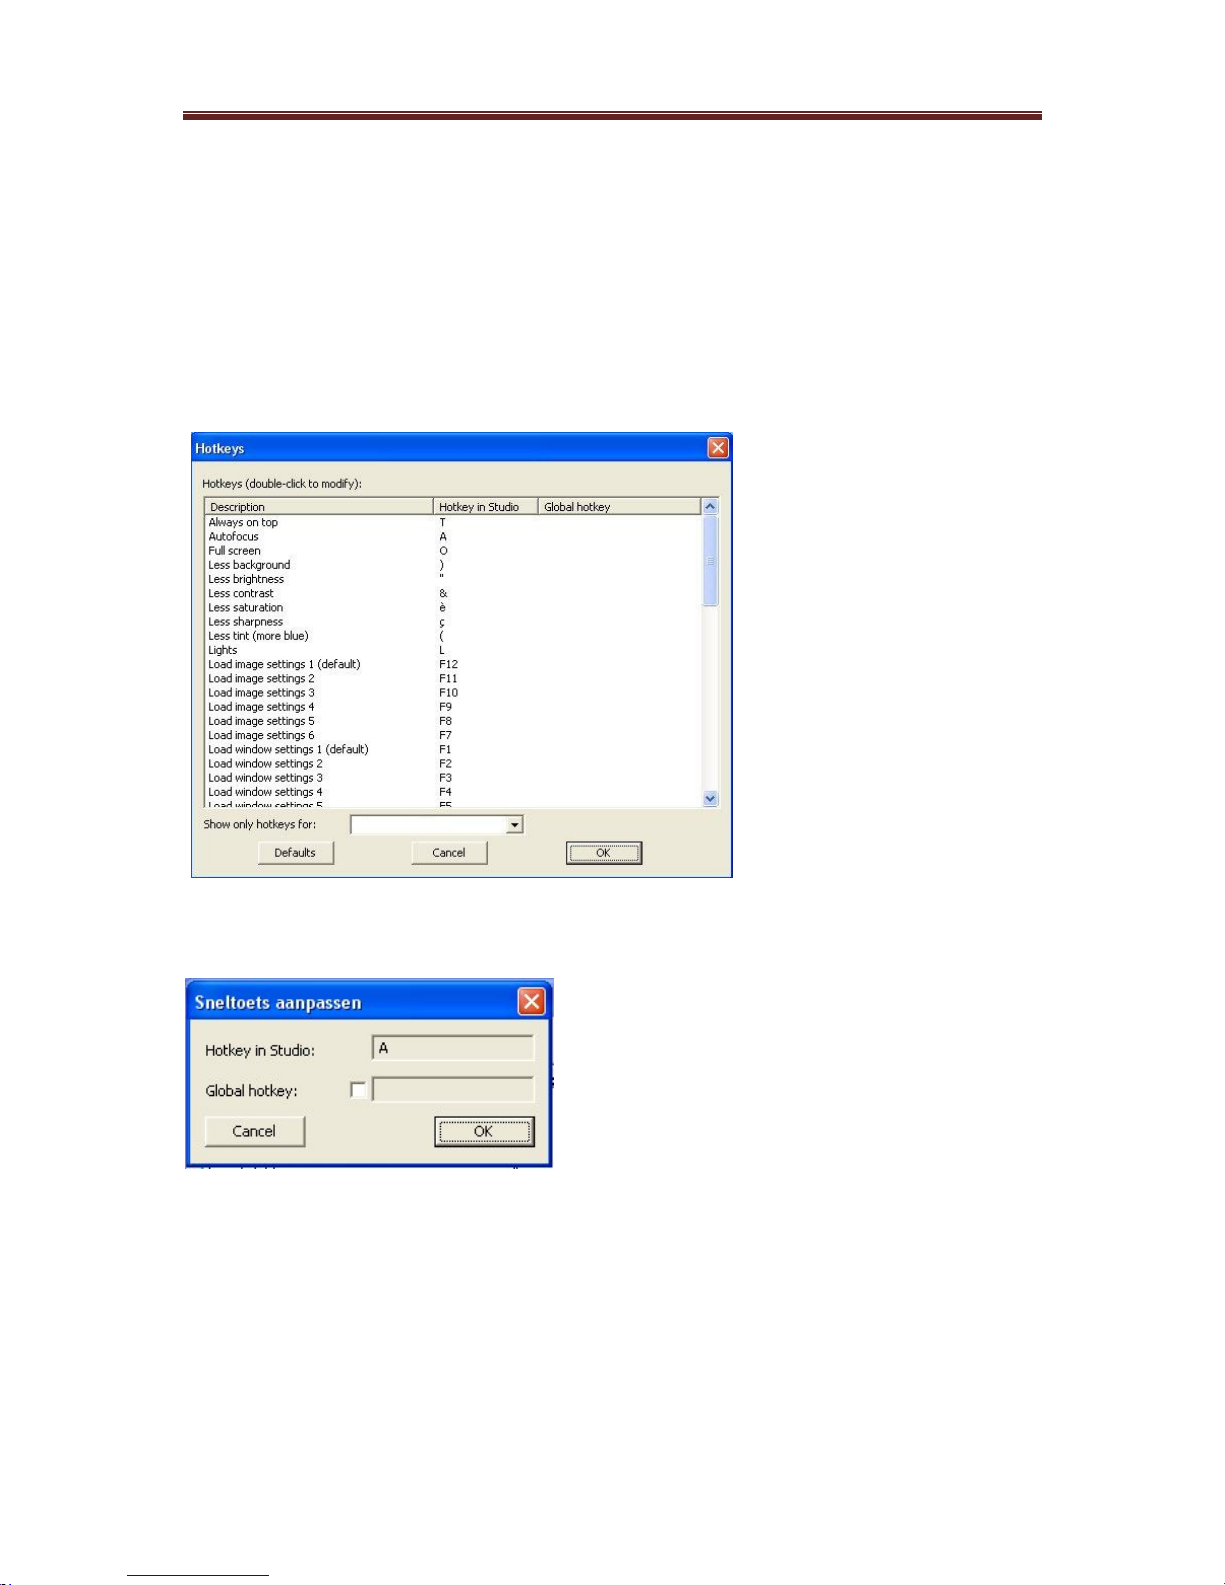
the user. You need to use the menu “Settings” – “Hotkeys”
A dialog box shows you a list of all available keyboard
shortcuts.
To change a keyboard shortcut, you double-click on the
description of a keyboard shortcut.
Afterwards, you enter the key or key combination of your
choice and select “OK”.
Page 27
iDex Manual
27
9 List of shortcuts FOCI iDex Software
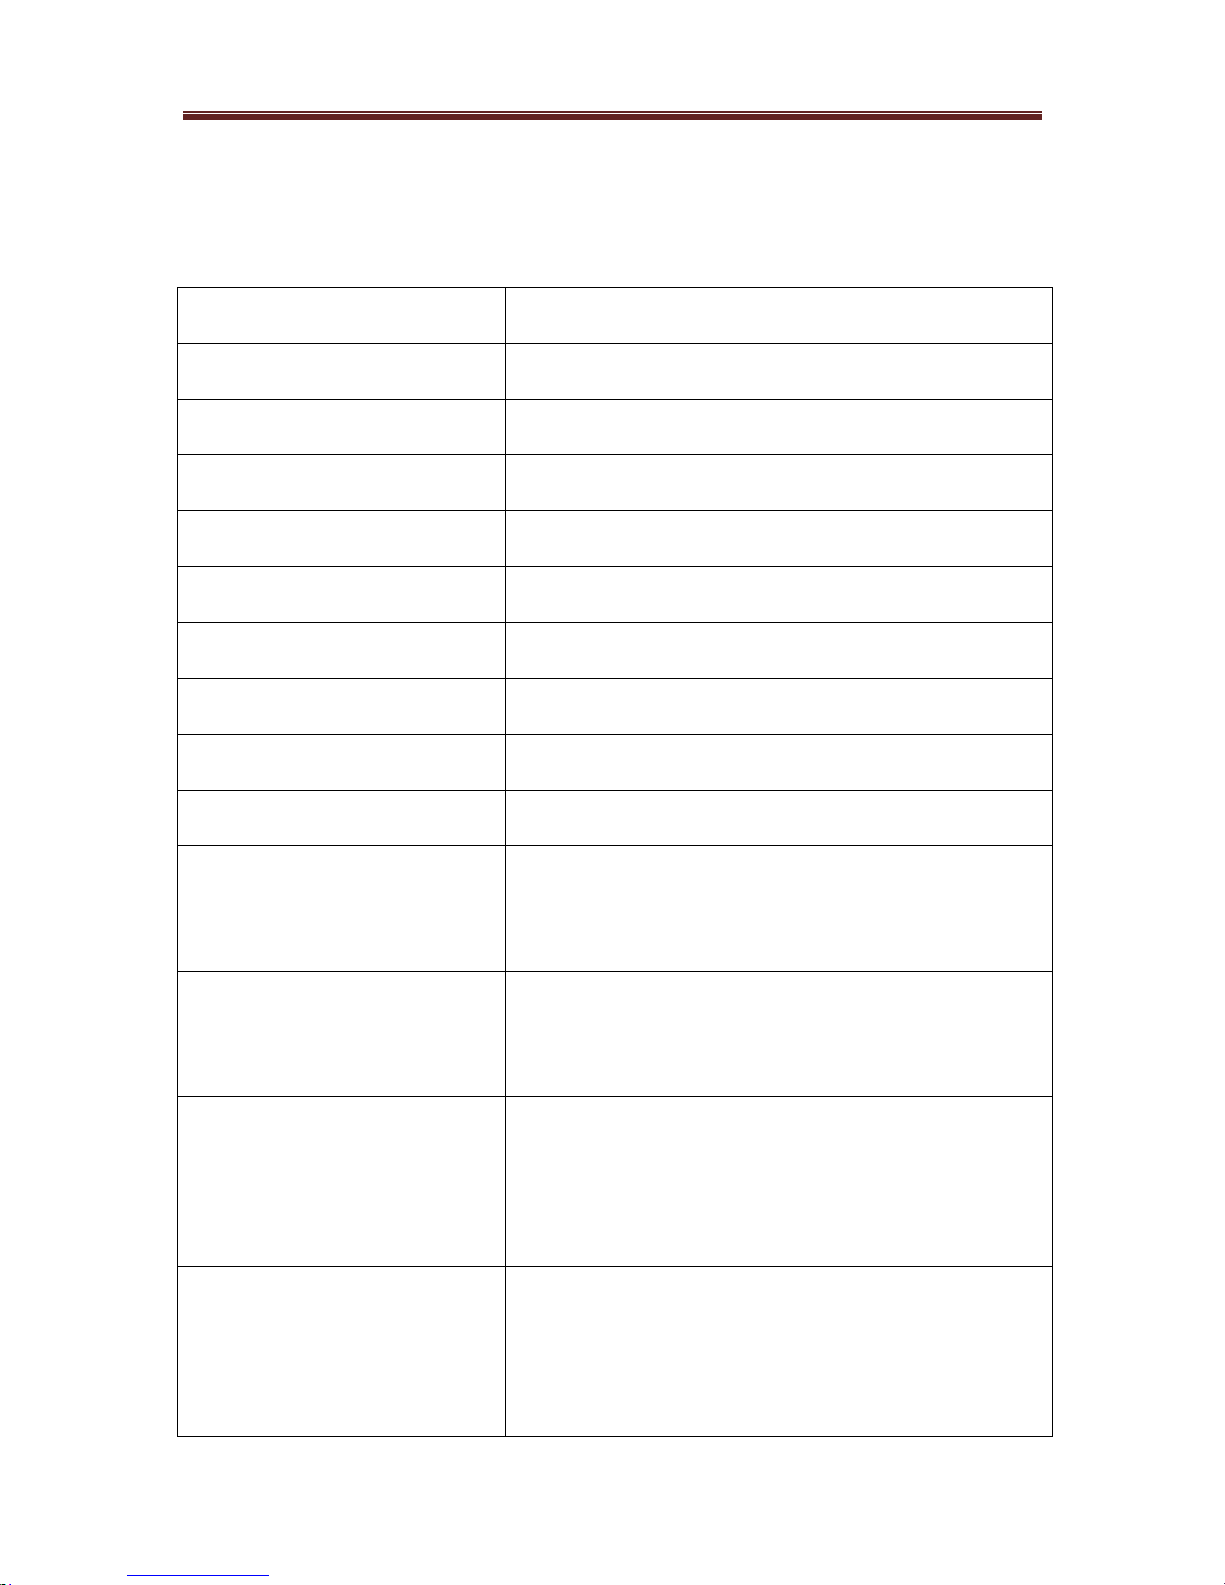
Window settings
T “Always on top” on/off
Y Maximize on/off
U Menu bar on/off
I Title bar on/off
O Full screen on/off
P Status bar on/off
W Toolbar Proportions on/off
X Toolbar Camera on/off
C Toolbar Picture modes on/off
V Toolbar Picture settings on/off
F1 Set all window settings back to
their defaults
F2 - F6 Load one of the saved window
settings
Ctrl + Shift + F2 to
Ctrl + Shift + F6
Save the current window settings.
Load the saved settings with keys
F2-F6.
Space bar Changes between the splitscreen
settings. Only in combination with
Zoomtext and Lunar
Page 28
iDex Manual
28
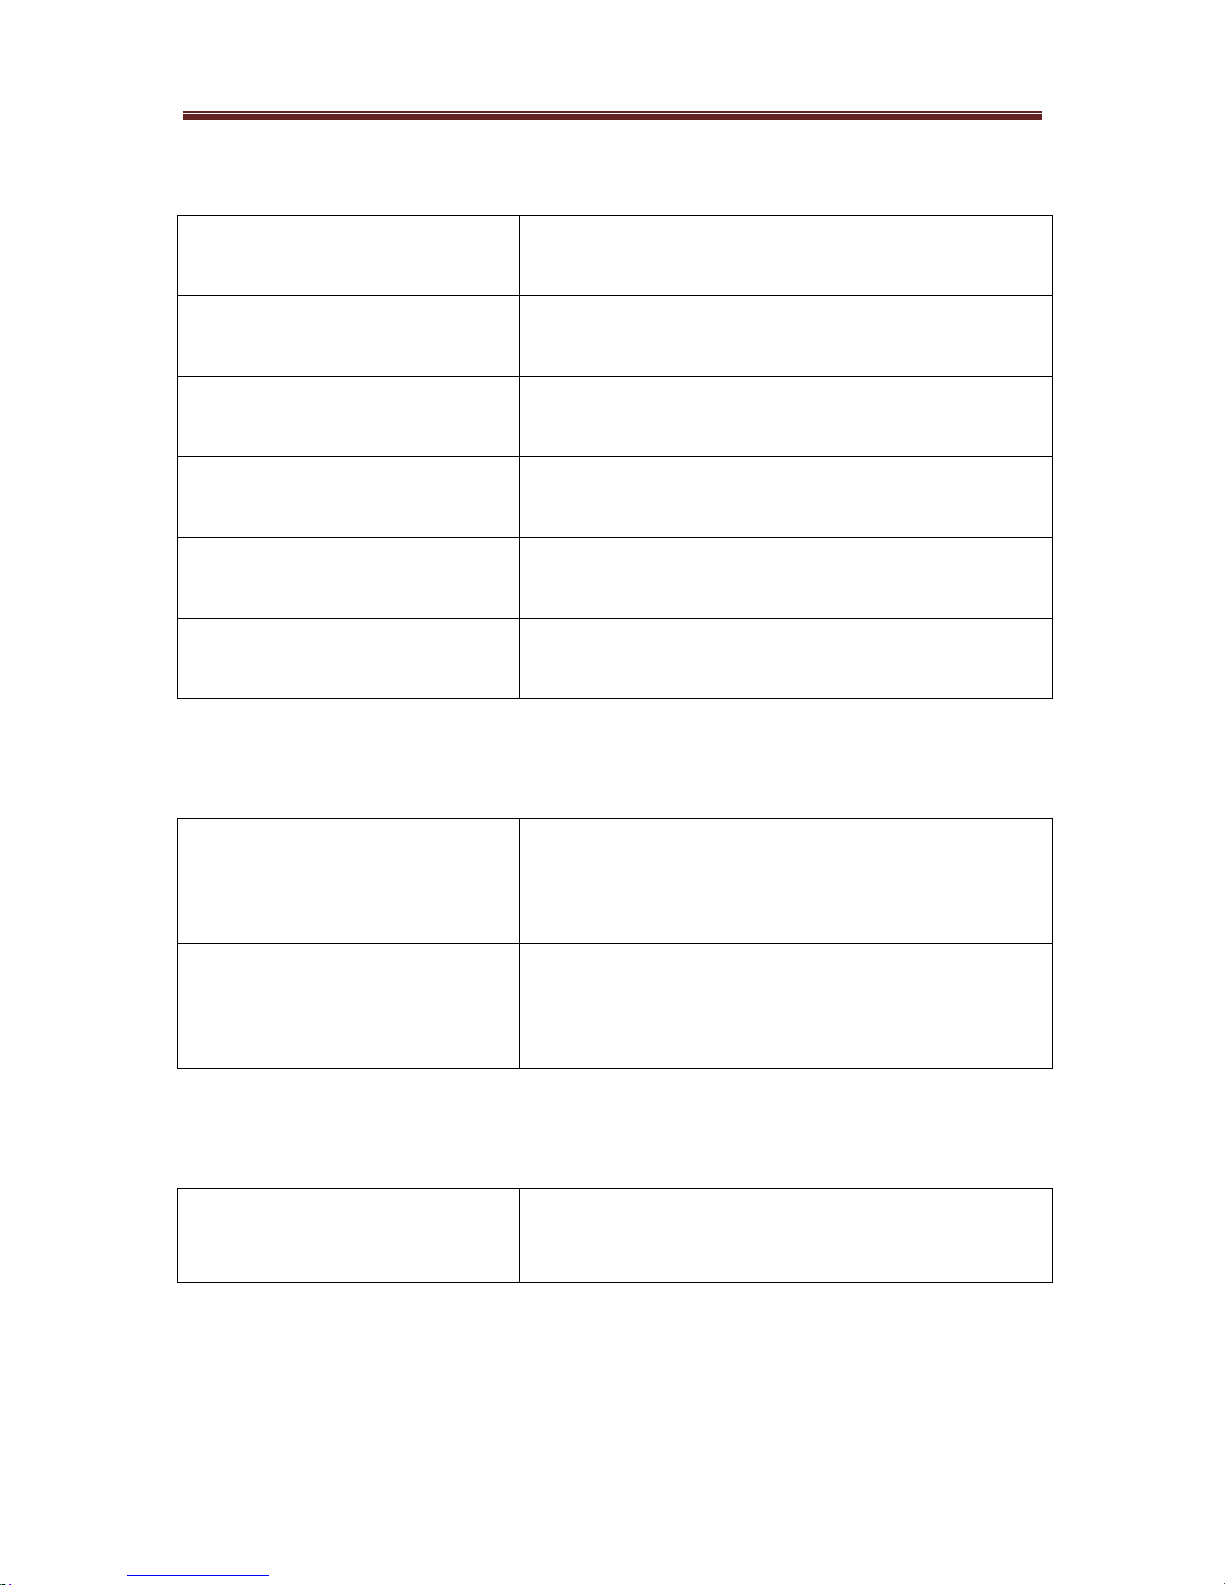
Camera Control
PageUp Zoom in (far)
PageDown Zoom out (far)
Insert Zoom in (near)
Delete Zoom out (near)
A Autofocus
R Rotate image 90°, 180°, 270°
Image Mode
M Toggle image mode (color,
positive, negative)
B Toggle colour combinations (fore-
&background colours)
Image Dimensions
Q
Picture settings (window filling,
fitting, cutting out)
Page 29
iDex Manual
29
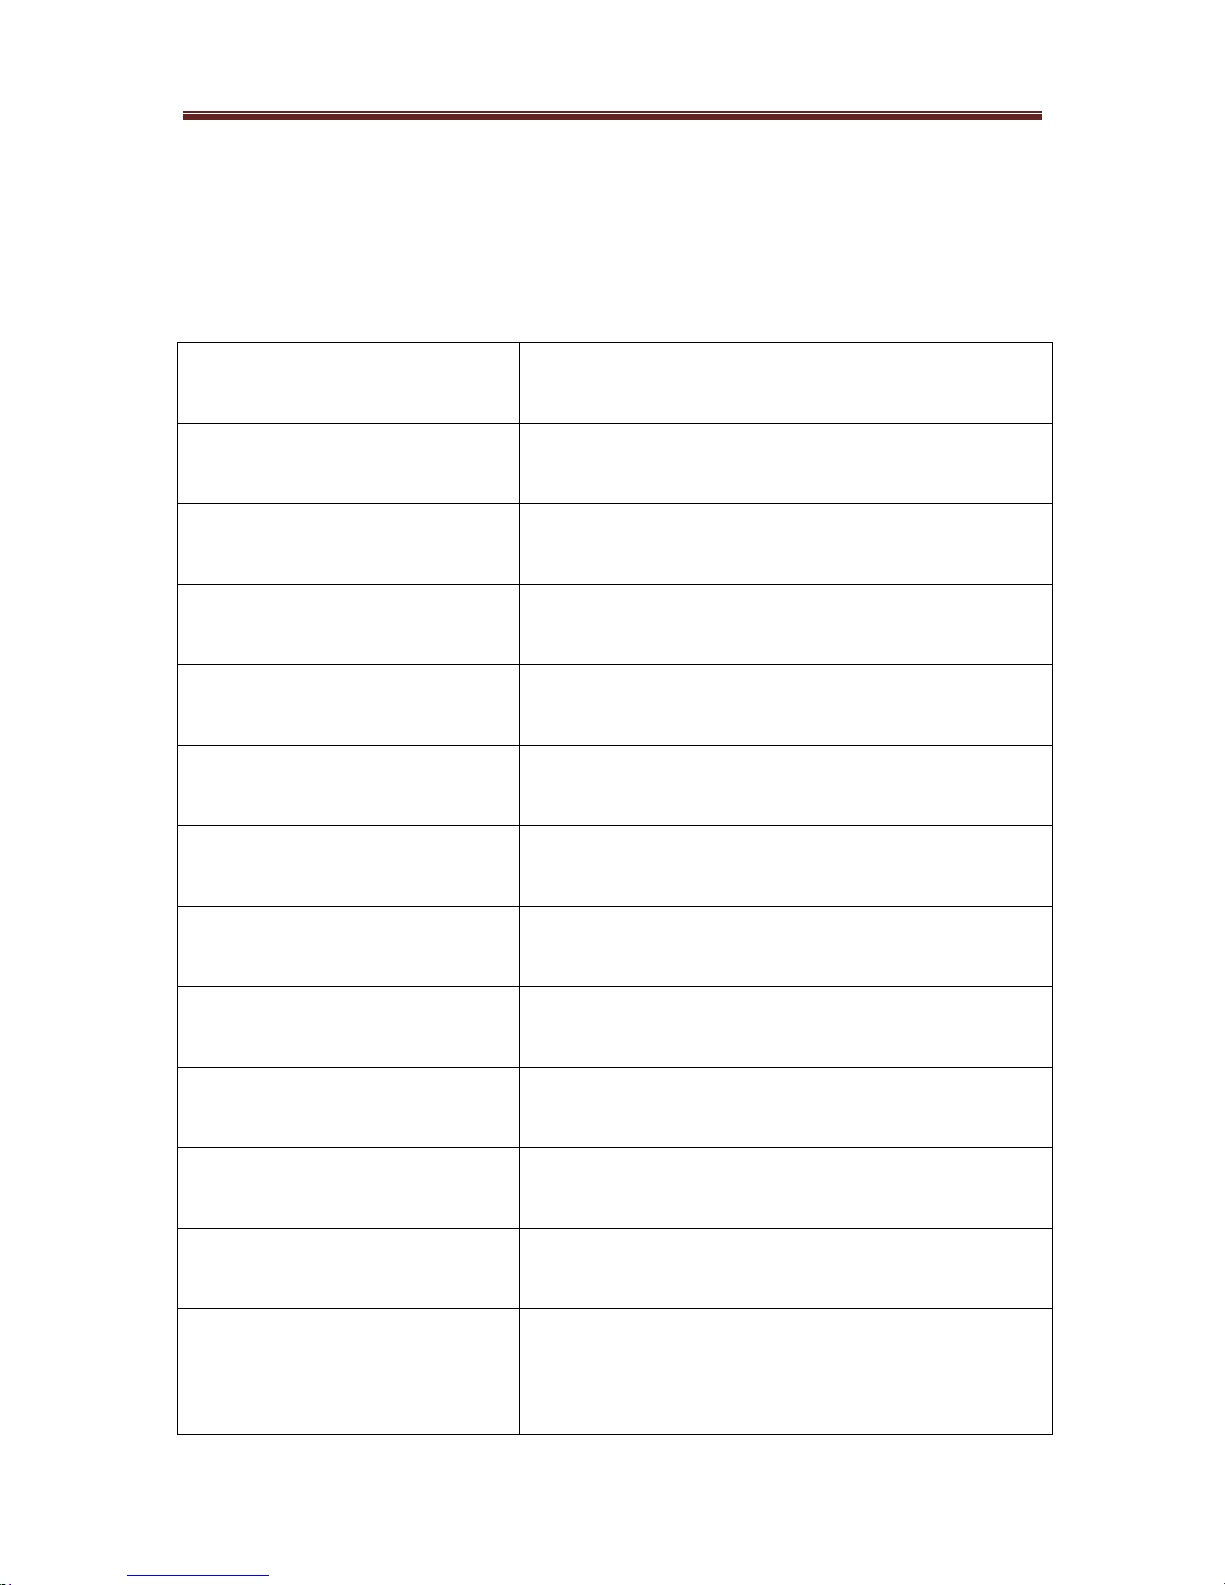
Picture settings
(The numbers refer to numeric keys on top of the
keyboard, not the separate numeric keypad)
1 (&) Less Contrast
2 (é) More Contrast
3 (“) Less Brightness
4 (‘) More Brightness
5 (() Less Tint (more blue)
6 (§) More Tint (more green)
7 (è) Less Saturation
8 (!) More Saturation
9 (ç) Less Sharpness
0 (à) More Sharpness
° ()) Less Background
_ (-) More Background
F12 Image Settings to defaults (zoom,
image mode, contrast, brightness)
Page 30
iDex Manual
30
F7 - F11 Load one of the saved image
settings
Ctrl + Shift + F7
to
Ctrl + Shift + F11
Save the current image settings.
Video Accerleration
D Video accerleration on/off
Snapshots
S Snapshot to file
Ctrl-C Snapshot to clipboard
10 General hotkeys
Ctrl + Shift + PageUp Zoom in (far)
Ctrl + Shift + PageDown Zoom out (far)
Ctrl + Shift + Insert Zoom in (near)
Ctrl + Shift + Delete Zoom out (near)
Ctrl + Space bar Changes splitscreen
Page 31

iDex Manual
31
11 T echnical Data
Type: FOCI iDex
Connections: 2 x USB 2.0, mini-B-5
Supply: 2 x 5V DC, 500mA
Power: 5W
The magnification always depends on the Size of the
Screen used and the distance to the object.
Maximum Viewing angle 140 mm
Minimum viewing angle 13 mm
On a wide screen of 17”, this corresponds to a
magnification range of 2,7 to 29 times
Page 32
iDex Manual
32
12 Safety & maintenance
Safety regulations
• Handle this manual with care, it contains
all the information you need on your iDex.
• Install the magnifier in a dry, well-ventilated and clean
room. Do not use the iDex in direct sunlight or next to
the radiator.
• Avoid the iDex get in contact with liquids to avoid
electrical damage.
• When you move the magnifier from a cold to a
warmer surroundings, you can have condensation. To
avoid any breakdowns or short-circuits, you should
leave the magnifier switched on for at least one hour.
• Remove the USB cables at the plug, never remove
them by pulling at the cable.
• All connections have been made in such a way that
you can only use them in one way. Never force a
connection.
• Never try to repair the magnifier yourself. In case of a
breakdown, contact your distributor or FOCI.
• If you want to transport the magnifier, please first
disconnect all connections.
Page 33

iDex Manual
33
Maintenance
• You can clean the magnifier by using a moist cloth.
Never use chemical products, since they can damage
the finish and/or certain parts.
• Do not touch the camera lens.
• Do not expose the camera lens to sharp or hard
objects.
• If the lens is dirty, clean it with an eyeglass wipe.
• Handle your iDex with care and you will be able to get
a great deal of use out of it.
 Loading...