

FNW 6701 Installation Manual
INSTALLATION, OPERATION & MAINTENANCE INSTRUCTIONS
6701 KNIFE GATE VALVES
INTRODUCTION
This instruction manual includes installation, operation and maintenance information for 2" through 30" stainless
steel and stainless steel lined knife gate valves. This manual addresses hand-wheel operated knife gate valves
only. Please refer to other FNW manuals for other knife gate valves, actuated valves, modifications, or
accessories.
INSTALLATION
WARNING
To avoid personal injury to yourself, fellow workers, or damage to property from release of process fluid, before
installation:
a. Shut off all operating lines to the valve site
b. Isolate the valve site completely from the process
c. Release process pressure
d. Drain the process fluid from the valve site
1. If the valve was supplied with an actuator, secondary support may be necessary. Contact FNW for
recommendations.
2. Before installing the valve, inspect the valve body port and associated equipment for any damage that may
have occurred and for any foreign matter that may have collected in shipping or storage. Make certain the
body interior is clean.
3. Before installing the valve, inspect the pipe line and mating flanges, making sure the pipe is free of foreign
material and the flanges are clean and have no burrs or pits that could cause leakage.
4. Due to stainless steel castings, machining tolerances, and flange thickness, the body tapped hole depth may
vary slightly from valve to valve. It is therefore recommended that all knife gate valves be installed with
stainless steel ASTM A-304-B8 studs or ASTM A-316-B-8M studs. The use of carbon steel B-7 studs may
also be considered. We further recommend the use of Teflon thread compound.
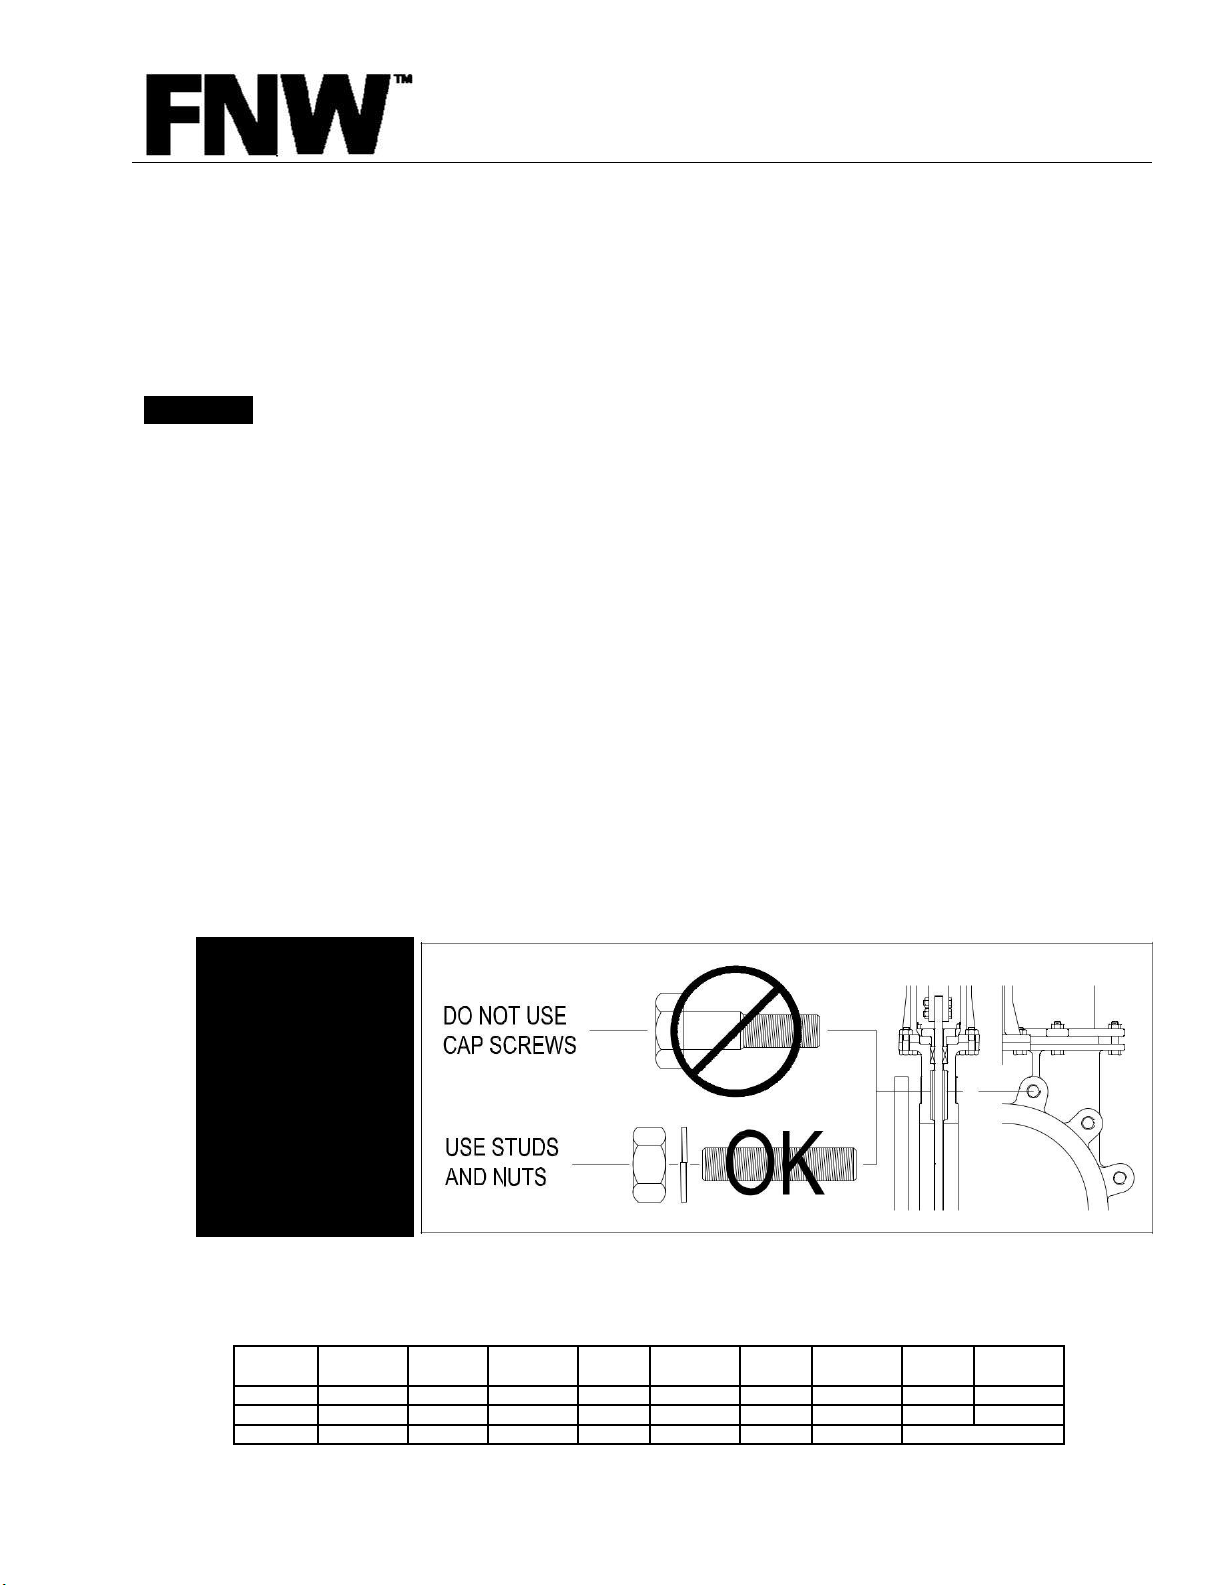
For Stainless
Steel Lined
Valves,
STUDS ONLY
are highly
recommended
Damage to liner
can result if cap
screws are used.
NOTE: The use of cap screws or bolts may harm the chest in the knife gate by
bottoming out and should never be used on this area of the knife gate valve.
STUD SIZES FOR FLANGE BOLTING
Valve
Stud *
Valve
Stud *
Valve
Stud *
Valve
Stud *
Valve
Stud *
Size
Diameter
Size
Diameter
Size
Diameter
Size
Diameter
Size
Diameter
2”
5/8”
4”
5/8”
10”
7/8”
16”
1”
24”
1-1/4”
2-1/2”
5/8”
6”
3/4”
12”
7/8”
18”
1-1/8”
30”
1-1/4”
3”
5/8”
8”
3/4”
14”
1”
20”
1-1/8”
* National
Coarse
DOC: IOM_FNWKGV_ ver_12-2018 Page 1 of 7
INSTALLATION, OPERATION & MAINTENANCE INSTRUCTIONS
6701 KNIFE GATE VALVES
5. The FNW Knife Gate is manufactured with ANSI B 16.5 - 150# raised face flange dimensions. The use of a
suitable gasket between the body and the pipe line flange shall be selected by the customer. We recommend
the use of a PTFE gasket.
6. FNW knife gate valves may be installed in any orientation in the pipe line; however the normal method is with
the hand-wheel vertical above the valve body. Other positions are acceptable; however, they may result in
uneven valve wear.
7. Verify that the valve is either unidirectional or bidirectional. Care must be taken with the unidirectional valve
as the valve seals in one flow direction only. Typically, the valve will have a seat side indicated by the word
“SEAT” cast into the body and is usually installed with the seat downstream of flow. In rare occasions, it may
be advantageous to install the valve with the seat upstream (usually with modification to the valve); contact
FNW regarding these applications.
8. Carefully place the valve between the flanges and loosely assemble the valve by putting in the bottom two or
three studs, then carefully insert the gaskets into place. The bottom studs will help locate the gasket and hold
it in position.
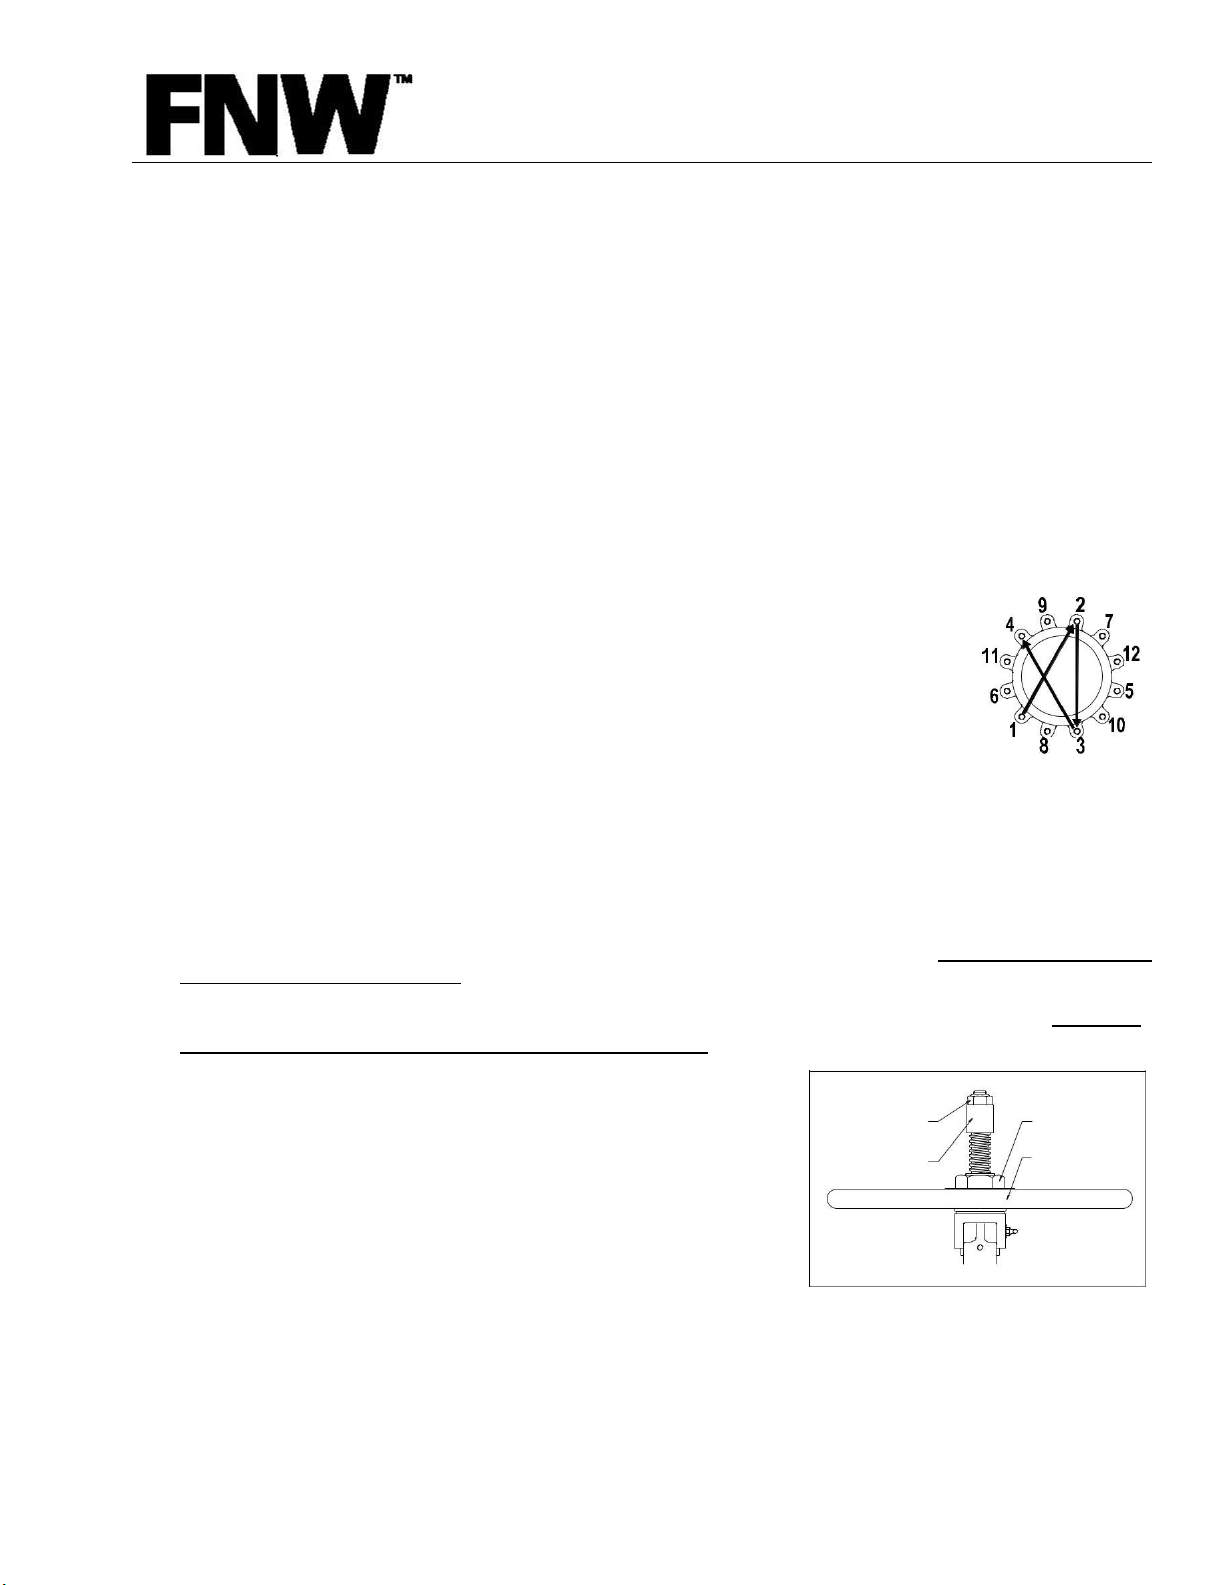
9. Carefully insert the balance of the studs into place and tighten all of them evenly by
using the cross-over pattern. Do not tighten in rotation.
CAUTION: Do not over tighten chest cavity studs.
Typical Cross-over Pattern
10. RESILIENT SEATED VALVES – All resilient seated knife gate valves require the resilient seat to be
lubricated before stroking, regardless of the type of actuator. The fit pressure of the gate against the resilient
seat, on the sides of the valve up through the packing gland, is such that stroking the valve dry, that is with no
lubrication of any kind, will cause the resilient seat to cold flow beyond safe limits and will damage the seat
with just a few strokes. CRC 6-56™ or WD-40® (Note: Make sure the lubricant used is compatible with
the seat material and process media), sprayed on the seat, up in the chest area, on both sides, will
normally provide sufficient lubrication. This should be repeated every 2 or 3 strokes. This is CRITICAL to the
life and performance of the seat. In operation, the process product normally supplies adequate lubrication.
11. VALVES WITH STOPPERS (LOCK CAPS) – After installing resilient seated valves with stoppers, be sure to
determine that the stopper and stopper nut are set properly.
a.
Remove the stopper nut and stopper.
STOPPER
b.
Turn the hand wheel in a clockwise motion until the gate bottoms
(LOCK CAP) NUT
HAND WHEEL
out.
STOPPER
NUT
c.
For perimeter resilient seated valves, turn the hand wheel an
HAND WHEEL
(LOCK CAP)
additional 1/4 turn, and then go to step “g”.
d.
For high performance knife gate valves, spin the hand wheel
once, letting it spin freely, counterclockwise until it stops on its
own.
e. Turn the hand wheel an additional 1/2 turn counterclockwise.
f. Now freely spin the hand wheel clockwise once, until it stops on
its own.
g. Return the stopper and run it down till it meets the wheel nut.
h. Return the stopper nut and run it down tight against the stopper to hold it in position.
DOC: IOM_FNWKGV_ ver_12-2018 Page 2 of 7

INSTALLATION, OPERATION & MAINTENANCE INSTRUCTIONS
6701 KNIFE GATE VALVES
OPERATION
1. After the valve has been installed, cycle the valve once completely. Open the valve by turning the hand wheel
counter clockwise, reverse the operation for closing. (Note: This will detect if any damage has been incurred
due to either shipping or installation processes.) After cycling the gate valve, turn the hand wheel
counterclockwise several turns allowing partial opening for preparation to fill system.
2. Open upstream valve slowly, building system pressure gradually, allowing installation personnel to detect any
excessive packing gland leakage, making adjustments necessary.
3. After the system has come to full pressure, open the knife gate valve fully by turning the hand wheel
counterclockwise, then close the valve fully by turning the hand wheel clockwise. In resilient seated knife gate
valves, this process will result in "seating in the valve". This step may be eliminated with the metal seated
valve.
4. You may now use the valve for its intended purpose, keeping in mind that a knife gate valve should be used
in a full open or full closed position. Knife gate valves should not be used for throttling service unless
specifically configured for such use.
MAINTENANCE
Valve parts are subject to normal wear and must be inspected and replaced as necessary. Inspection and
maintenance frequency depends on the severity of the service conditions. This section includes instructions for
packing adjustments, repacking, seat replacement and seating adjustment.
WARNING
To avoid personal injury to your self, fellow workers, or damage to property from release of process fluids, before
performing any maintenance:
a. Shut off all operating lines to the valve.
b. Isolate the valve completely from the process.
c. Release process pressure.
d. Drain the process fluid from the valve.
1. NORMAL MAINTENANCE - Normal maintenance of FNW knife gate valves may only include a periodic
tightening of the packing gland. Should a leak occur at the packing gland, simply tighten the packing gland
bolt closest to the leak. This may require tightening two or three bolts on larger valves. After the leak has
stopped, tighten all packing gland bolts 1/4 turn. Do not over tighten. The only other normal maintenance
required would be to grease the valve stem, by using a grease gun at the grease fitting located on the valve
yoke.
2. REPACKING - From time to time, it may be necessary to repack the valve completely. This can be done
following the warning procedure listed above. Standard repacking kits are available from FNW. Packing kits
include the necessary packing which insures a tight seal. When ordering packing kits, be sure to specify valve
model number, seat type, and type of valve. Repacking the valve includes the following steps:
a. Isolate and clear the valve as mentioned in the warning procedure
listed above.
b. Remove packing gland nuts and lock washers.
c. Raise blade to full open position.
d. Pull up the packing gland to the top of the blade and secure it to the
top of the blade
e. Using a packing hook, remove all of the old packing.
45°
CUT BUTTING ENDS AT 45° ANGLES
DOC: IOM_FNWKGV_ ver_12-2018 Page 3 of 7
 Loading...