

Page 1
BLQ32SVF AND BLQ36SVF BRICK
LINER KIT
INSTALLATION INSTRUCTIONS
IMPORTANT: Read entire instruction sheet before installing brick liner
This brick liner accessory is approved for use in VFS32NRK/PRK and VFS36NRK/PRK vent-free gas replaces. Do not use brick
liner accessory in any other replace models.
The Brick Liner Kit contains the following:
32" Fiber Panel Kit BLQ32SVF
Description
Rear Panel
Right Side Panel
Left Side Panel
Retainer Brackets
#10 Screws
36" Fiber Panel Kit BLQ36SVF
Description
Rear Panel
Right Side Panel
Left Side Panel
Retainer Brackets
#10 Screws
Tools Required
• Phillips Screwdriver
• 5/16'' Nut Driver
• Flashlight
If any of these parts are missing or damaged, contact the dealer
where you purchase this kit. If they cannot supply original replacement parts call FMI PRODUCTS, LLC at 1-866-328-4537
for information.
IMPORTANT: Always handle rebrick panels with two hands.
WARNING: Turn off, unplug, and let replace cool before installing brick liner. Only a qualied service person
should service and repair replace.
NOTICE: You must remove logs before installing brick liner.
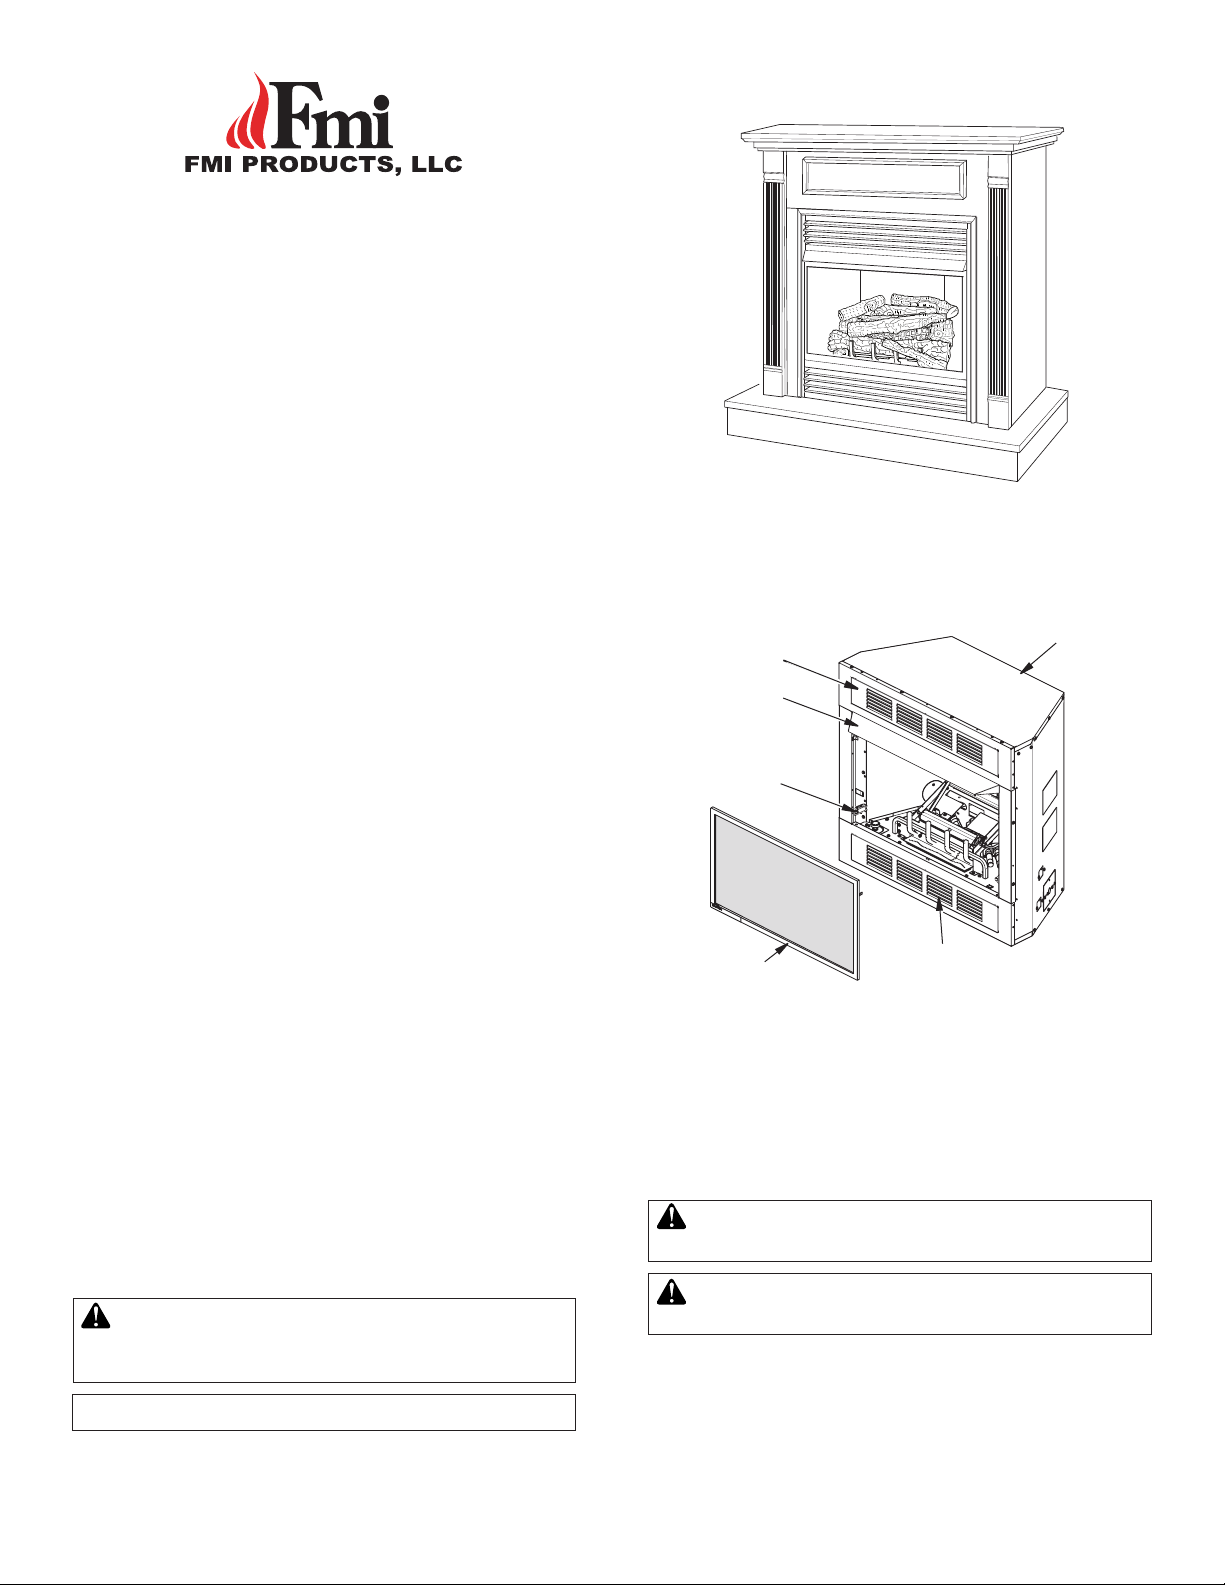
1. To remove the screen push in on the bottom left and right
corners. The screen should spring forward, lift screen up off
the hinge brackets.
Part No.
126383-04
126383-06
126383-05
116531-01
Part No.
126377-04
126377-06
126377-05
116531-01
Qty.
1
1
1
2
4
Qty.
1
1
1
2
4
www.fmiproducts.com
Top Panel
Assembly
Fireplace
Hood
Magnet
Screen
Assembly
Figure 1 - Removing Fireplace Screen
2. Remove logs. Remove the three screws that attach the log
base assembly to the replace. There are two on the front of
the base and the third one is located behind the base. Carefully pull the base forward as far as you can (see Figure 2,
page 2).
CAUTION: Do not pick up log base assembly by burners.
This may damage burners. Only pick up base by the grate.
WARNING: A qualied service person must connect and
disconnect replace to gas supply. Follow all local codes.
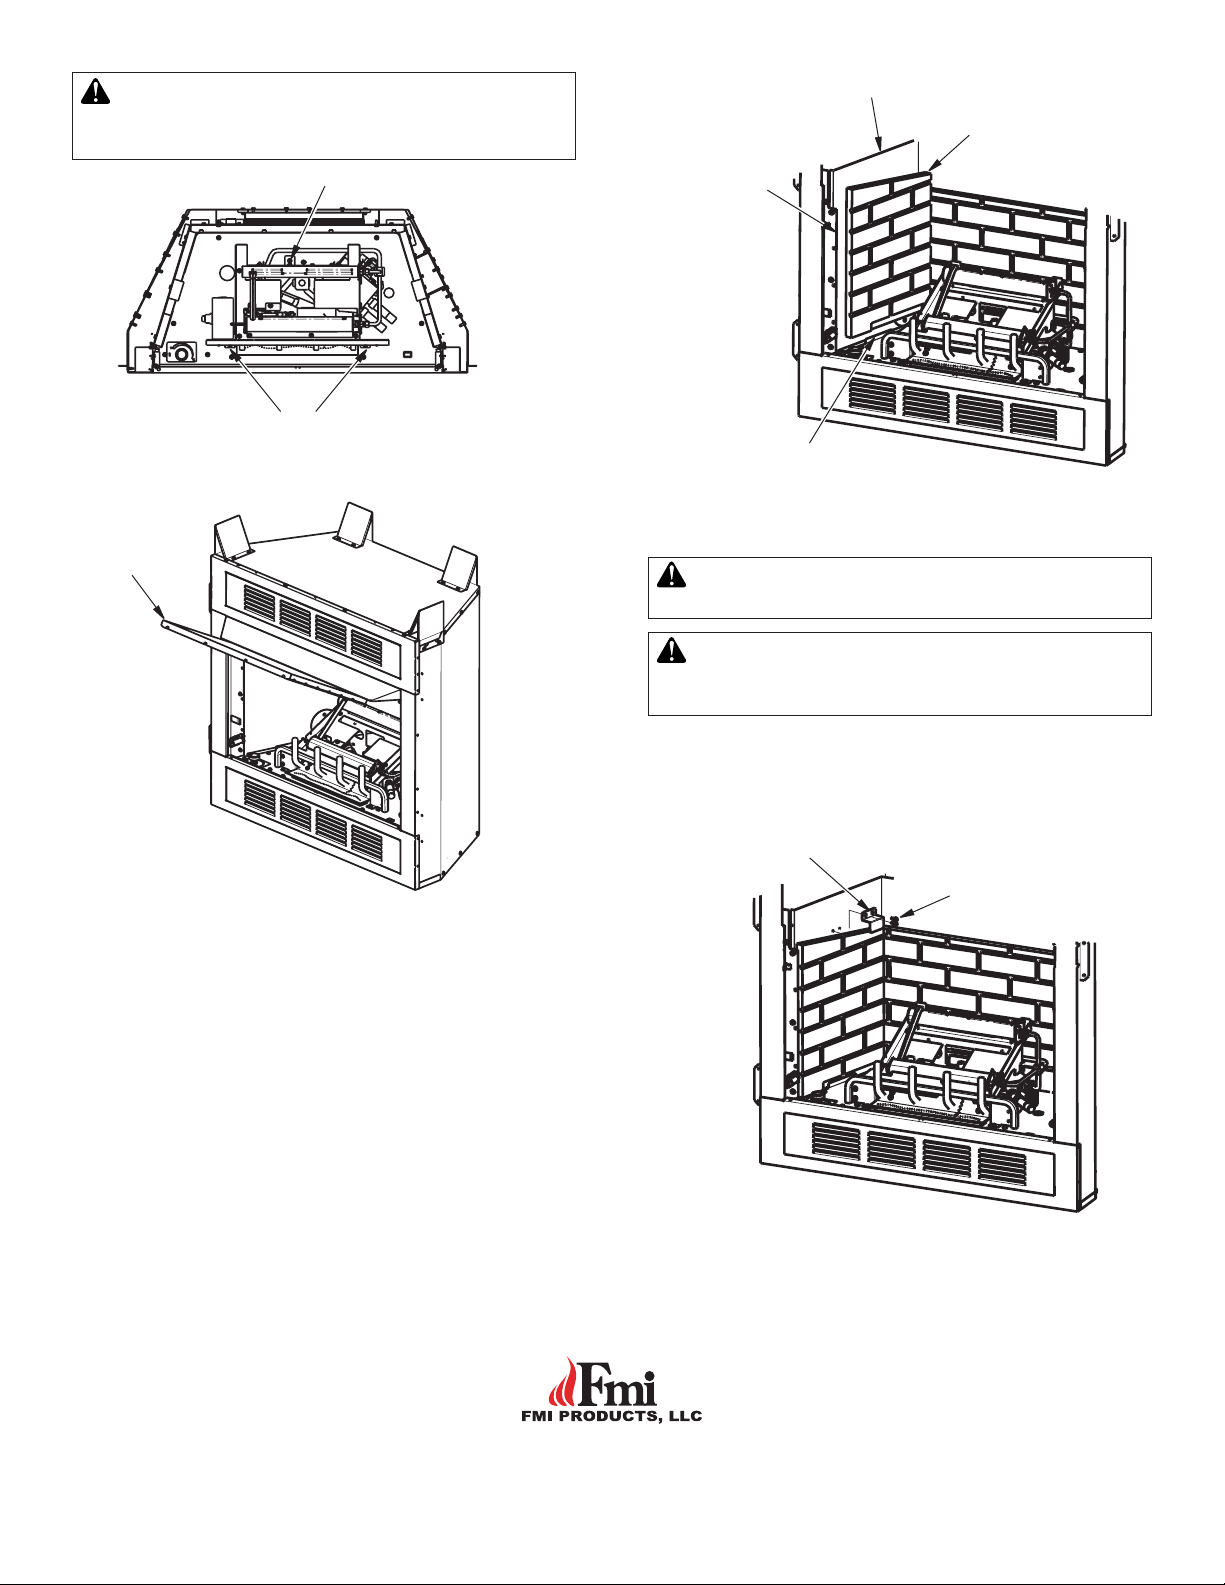
3. Install rear panel (small row of bricks at the top) by angling
the bottom of the panel into the replace and sliding it behind
the base. Be careful to not scratch the face of the rear panel.
Stand the panel straight up against the back of the replace
(see Figure 3, page 2).
Bottom Panel
Assembly
Top Outer Casing
Page 2
CAUTION: Always handle ber panels with two hands.
Do not force ber panels into place. Excessive force will
break ber panels.
Side Wall
Side Panel
Rear Screw
Front Two Screws
Figure 2 - Removing Log Base Assembly from Fireplace
Rear Brick
Panel
Retaining
Edge
Floor Panel
Retainer
Figure 4 - Installing Side Brick Panel
WARNING: Test all gas piping and connections for
leaks after installing or servicing. Correct all leaks at once.
WARNING: Never use an open ame to check for a
leak. Apply non corrosive leak detection uid to all joints.
Bubbles forming show a leak. Correct all leaks at once.
8. Replace logs. Make sure logs are put in their proper position.
See Installing Logs in the Fireplace Owner ʼs Manual.
9. Replace screen (see Figure 1, page 1).
Figure 3 - Installing Rear Brick Panel
4. Place the side panel behind the oor panel retainer. Slide front
side of the panel behind the retaining edge of the replace.
Gently press the panel back against the side wall (see gure
4). The bottom edge of the panel will rest on the oor and
against the back panel.
5. Secure side panel to side wall of replace with one retainer
bracket and two screws (see Figure 5).
6. Repeat steps 4 and 5 to install other side of rebrick panel.
7. Put log base assembly back into replace. Secure log base
assembly with the three screws removed in step 2 (see Figure
2).
Retainer Bracket
Screws
Figure 5 Securing Side Brick Panel
2701 S. Harbor Blvd.
Santa Ana, CA 92704
1-866-328-4537
www.fmiproducts.com
126452-01
Rev. A
10/12
 Loading...