

Page 1
1
Page 2

Contents
WARNING.................................................................................................................. 4
Safety Guidelines ....................................................................................................... 4
1. Me and my FLYSURFER kite.................................................................................5
2. FLYSURFER kites.................................................................................................. 5
2.1. Descriptions..................................................................................................... 5
2.2. COOL............................................................................................................... 6
2.3. EXTACY........................................................................................................... 7
2.4. PSYCHO²......................................................................................................... 8
2.5. SPEED............................................................................................................. 9
3. FLYSURFER (FS) special functions..................................................................... 10
3.1. Safetysystem ................................................................................................. 10
3.1.1. Depowerloop Quick Release Activation................................................... 10
3.1.2. KITE-LEASH............................................................................................ 11
3.2. PullStopSystem (PSS)................................................................................... 12
3.3. Automatic Drainage System (ADS)................................................................ 13
3.4. Blow-Out Valves and TPU ............................................................................. 13
3.5. The FLYSURFER 3-line-system (EXTACY/PSYCHO²) ................................. 13
3.6. The FLYSURFER 4-line-system (COOL /SPEED)......................................... 13
3.7. Easy Line Connectors (ELC).......................................................................... 14
3.8. Variable Line Length (VLL) ............................................................................ 14
3.9. JET FLAP Technology................................................................................... 14
3.10. Nose Valves (EXTACY/SPEED).................................................................. 14
3.11. MULTIWAC (PSYCHO²/SPEED)................................................................. 15
3.12. DIRECTWAC (COOL/EXTACY)................................................................... 15
4. Rigging of the kite................................................................................................. 15
5. Launch preparations............................................................................................. 16
5.1. Laying out the kite.......................................................................................... 16
5.2. Pre-inflation.................................................................................................... 16
5.3. Connecting the safety .................................................................................... 16
5.4. HANDLEPASS-LEASH.................................................................................. 17
6. Launching the kite ................................................................................................ 18
6.1. In light winds.................................................................................................. 18
6.2. In the power-zone.......................................................................................... 18
6.3. From the edge of the wind window ................................................................ 19
6.4. First launch in the water................................................................................. 20
7. Flying of the kite ................................................................................................... 21
7.1. Steering.......................................................................................................... 21
7.2. Power/Depower ............................................................................................. 21
7.3. Trimmer.......................................................................................................... 21
8. Jumping with current FLYSURFER kites.............................................................. 22
9. Kite-control in extreme situations.......................................................................... 22
9.1. Flying the kite in the zenith............................................................................. 22
9.2. Being lifted on the beach................................................................................ 22
9.3. Kite “over-flies“............................................................................................... 23
9.4. Kite collapses................................................................................................. 23
9.5. Kite is about to impact on land or water......................................................... 23
9.6. Kite doesn’t immediately land after safety deployment .................................. 23
2
Page 3

10. Relaunching the kite from the water................................................................... 24
10.1. From the trailing edge.................................................................................. 24
10.2. From the leading edge................................................................................. 24
10.3. Backward start............................................................................................. 25
10.4. Relaunch from the edge of the wind window................................................ 26
10.5. Quick launch................................................................................................ 26
10.6. Kite doesn’t launch anymore, you start drifting away................................... 27
10.7. Being rescued with FLYSURFER kites........................................................ 27
11. Landing............................................................................................................... 28
11.1. At the edge of the wind window ................................................................... 28
11.2. In the power-zone ........................................................................................ 28
12. Packing and storing your kite.............................................................................. 29
13. Frequent problems and their solutions................................................................ 30
13.1. Fear of using the Safetysystem.................................................................... 30
13.2. Kite flies backwards ..................................................................................... 30
13.3. Kite fills up with water................................................................................... 30
14. Tuning Tipps....................................................................................................... 31
14.1. MULTIWAC-System..................................................................................... 31
14.2. Variable Line Length (VLL) .......................................................................... 33
14.3. Depower-line adjustment ............................................................................. 34
15. Wind ranges ....................................................................................................... 35
16. Line setup and lengths........................................................................................ 37
17. Maintenance and repair...................................................................................... 40
17.1. General care................................................................................................ 40
17.2. UV-light........................................................................................................ 40
17.3. Saltwater...................................................................................................... 40
17.4. Sand............................................................................................................. 40
17.5. Moisture....................................................................................................... 40
17.6. Cleaning....................................................................................................... 40
17.7. Wear and tear parts ..................................................................................... 40
17.8. Repair .......................................................................................................... 41
17.9. Little Connection Lines (LCL)....................................................................... 41
18. FREE-REPAIR Guarantee.................................................................................. 42
3
Page 4

WARNING
Launching and flying a kite can be potentially dangerous, especially when
ignoring basic safety guidelines.
Always be extremely careful when using a kite.
Incorrect handling or misuse of a kite may cause serious injuries and/or death.
When using a kite, you are responsible for your own safety and that of others
around you.
A kite can be dangerous for as long as the Safety-System hasn’t been
deployed.
Never hesitate to use the Safety-System (you can’t ever use it too early or not
enough, only too little or too late).
Never use a kite prior to professional instruction by a certified kite surfing
school. For trained inflatable-kite users, a proper introduction into the
FLYSURFER-System is essential (thoroughly read this manual).
You can find competent FLYSURFER-schools under www.flysurfer.de
Safety Guidelines
• Never launch a kite during thunderstorms, in stormy conditions or before
gustfronts.The risk of injury increases over-proportionally with the wind strength,
the gustiness, with suddenly increasing or completely onshore wind.
• Check the weather conditions and choose the right size of kite, a kite that’s too
big can be very dangerous.
• Lines under tension can cut like a knife. Never touch the lines unless the kite is
properly secured on the ground.
• Only use a kite with a fully functioning Safety -System, wear a helmet and impact
vest.
• Always check the current condition of your equipment, especially wear and tear
parts (depowerloop, pulleys and V-lines) as they are very important for a safe
and controlled flying. Never launch a kite that has any weakened or worn parts.
• Only sail out as far as you are able to swim back.
• Thoroughly check the kite-spot for shallows, obstacles, currents etc.
• Keep two line-length of distance between yourself and other beach users,
obstacles, etc. Never fly the kite above other people downwind of you.
• Make sure that you are being watched while you are kite surfing and someone
can call for help in an emergency.
• Only use the kite if you are in a good physical condition and never under the
influence of drugs and/or alcohol.
4
Page 5
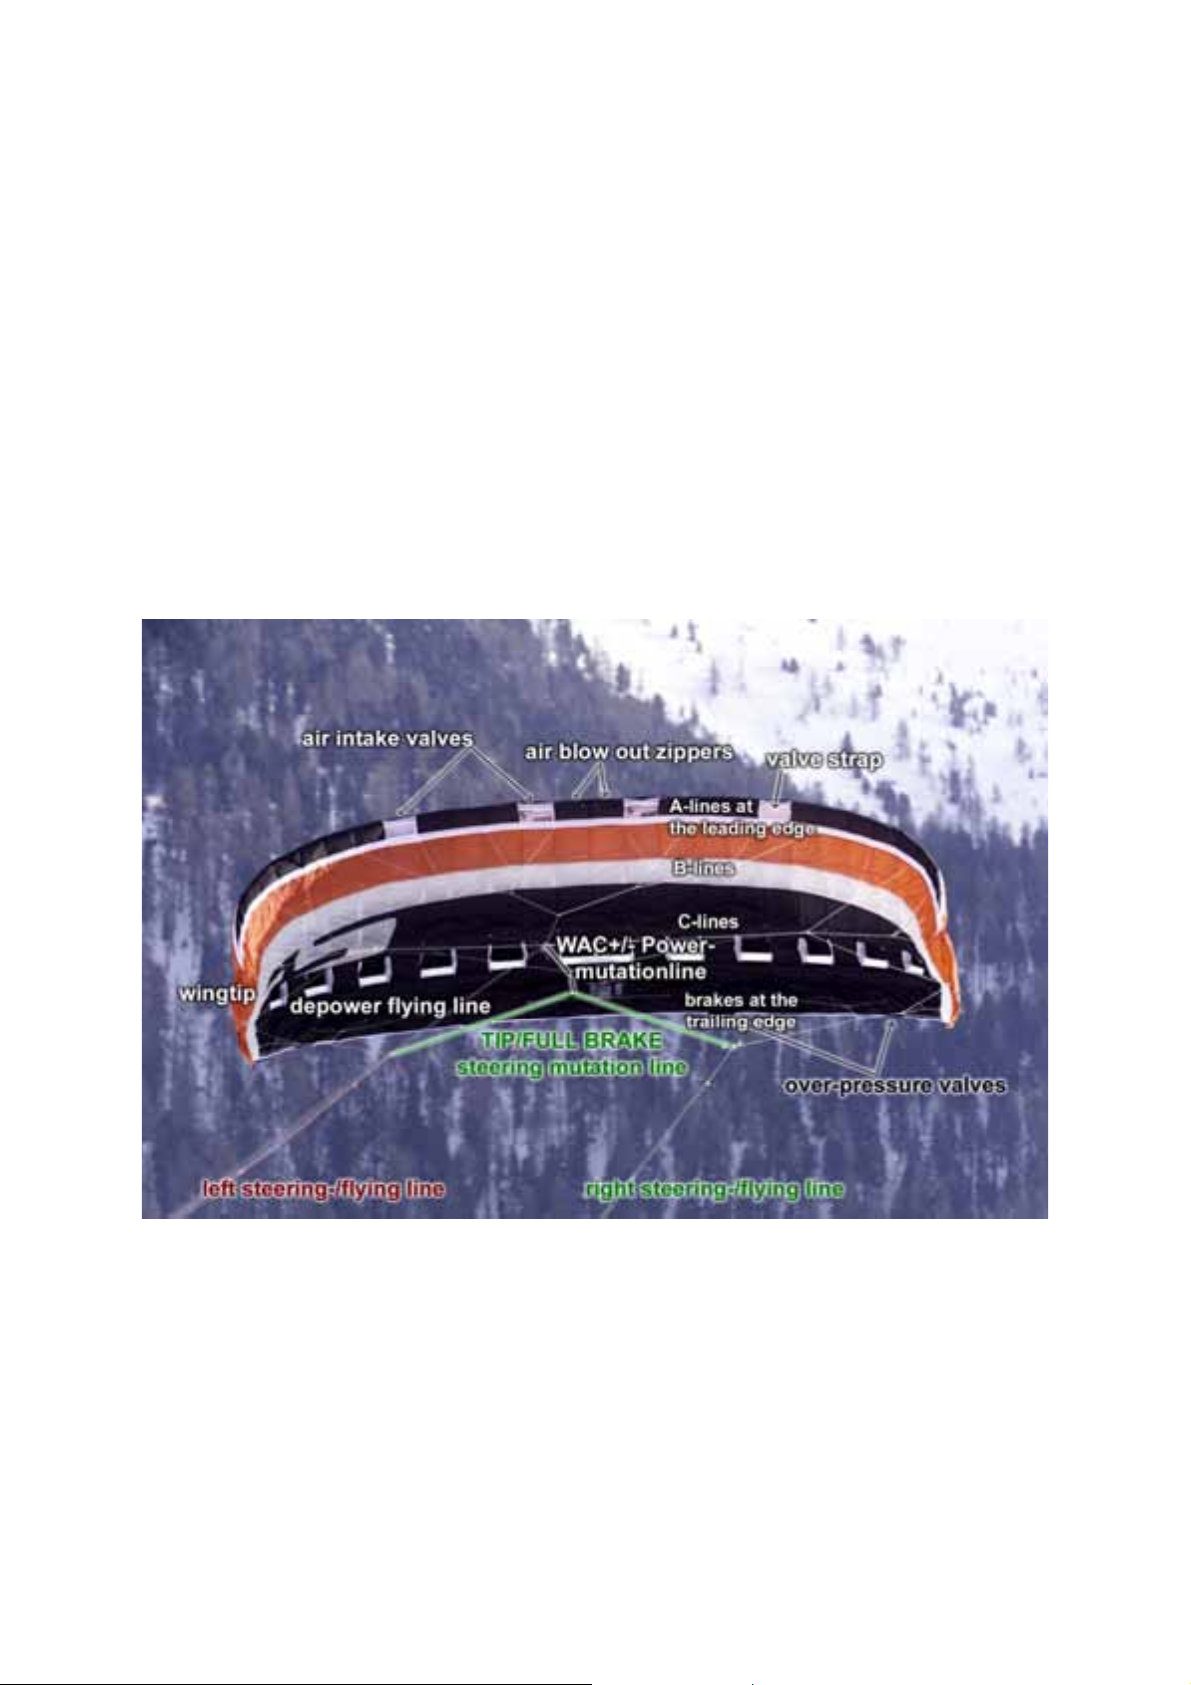
1. Me and my FLYSURFER kite
To ensure save riding and maximum fun with your new FLYSURFER, we
recommend that you read these instructions thoroughly. In this manual we have tried
to address all questions put to us in the past.
If there are still some unanswered questions then internet forums like
www.oase.com, www.kiteforum.com or www.foilzone.com will provide you with
unbiased and helpful advice.
Alternatively pay a visit to our website www.flysurfer.de, through which you will also
have the ability to contact our team directly. Also use the guarantee registration,
which can also be found there.
2. FLYSURFER kites
2.1. Descriptions
5
Page 6
2.2. COOL
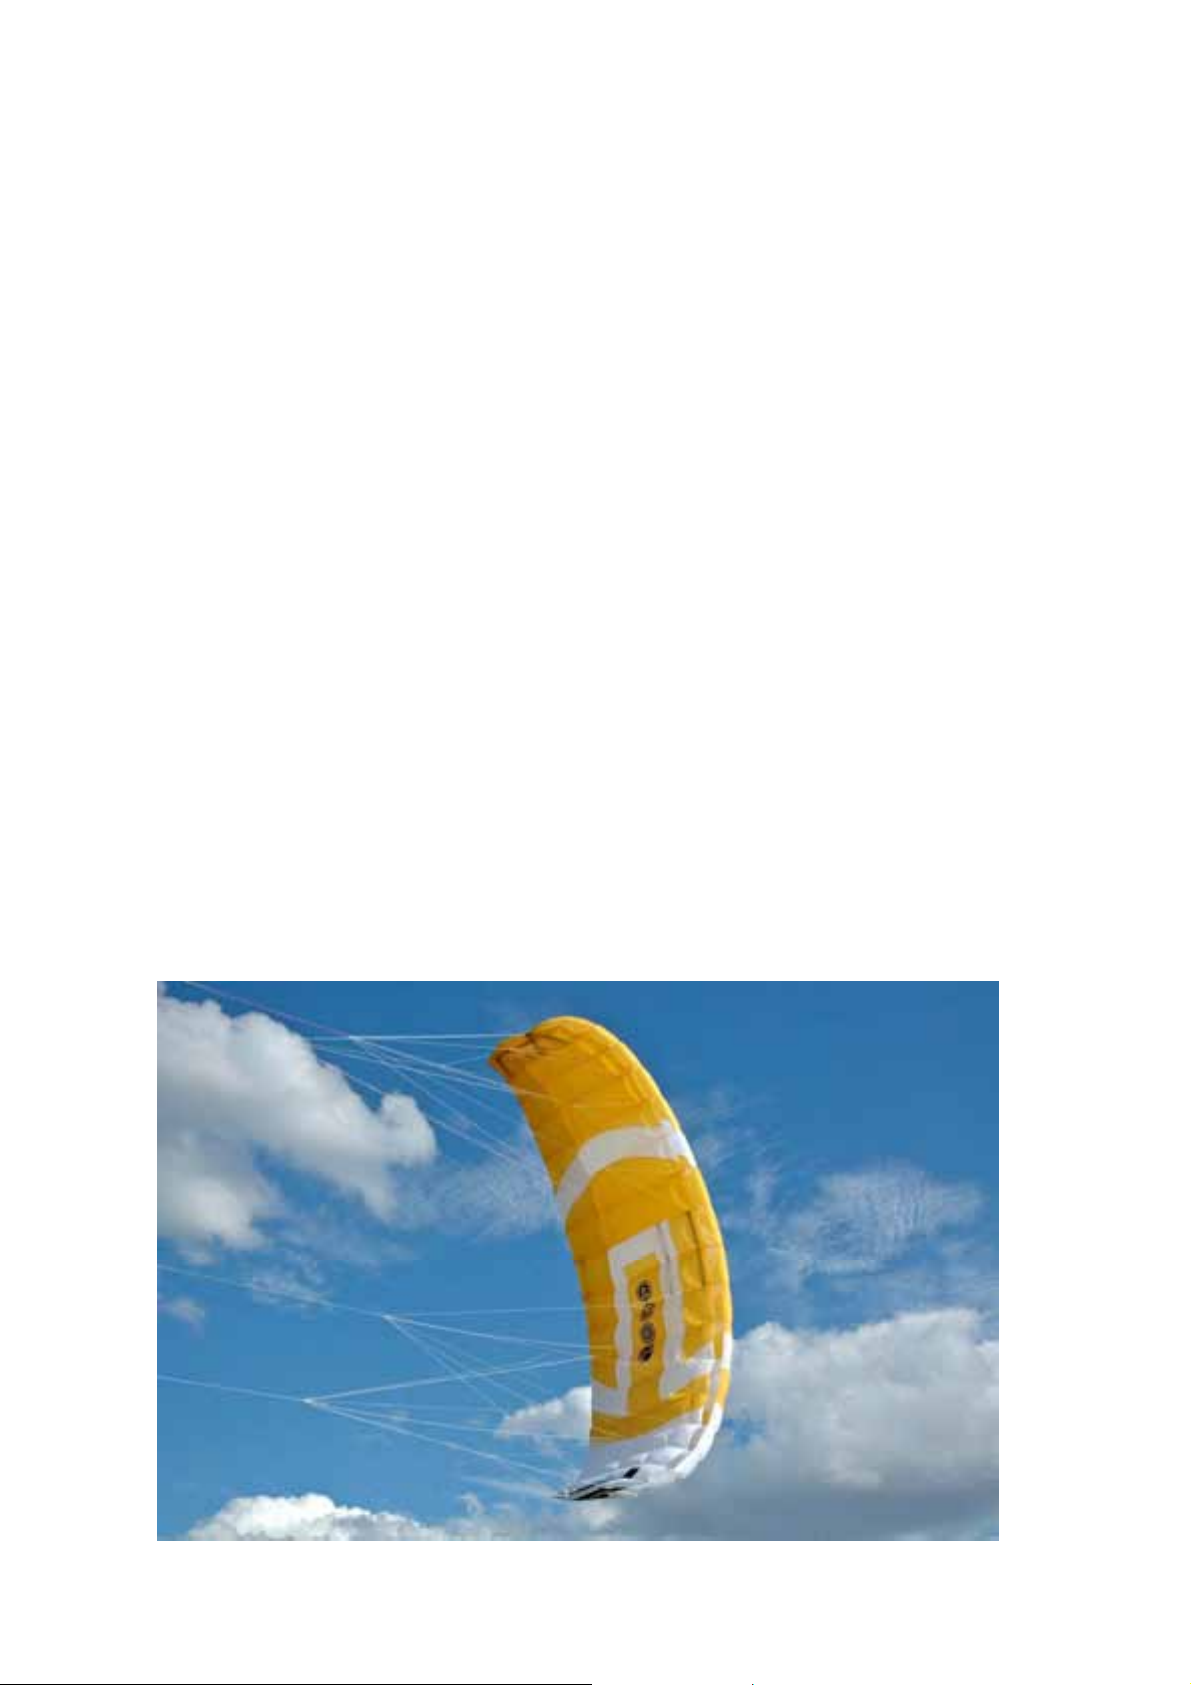
COOL is the brand new Open-Cell Snow and land kite from FLYSURFER. Thanks to
the latest design-software, FLYSURFER was able to improve on the very popular
ROOKIE² and create the COOL.
Even more stability and performance has been achieved by relocating the
attachment points.
The COOL stays in the air even in the most difficult of conditions allowing the kiter to
fully concentrate on his/her riding.
The performance has also been enhanced by a slightly different profile and smoother
surface area.
Standard line-lengths are now extended to 21m for more power and control.
Coloured flying-lines make setup easier than ever, especially on snow. Together with
the simple DIRECTWAC system this makes the COOL super easy to set up and fly.
The COOL will be delivered - ready to fly - like all FLYSURFER kites complete with
bar and lines already attached.
The new COOL will also be delivered with a trim strap and Rotor Kite-Leash (RKL) in
all sizes, the same as on all other FLYSURFER kites. All safety features found on
other FLYSURFER kites are also featured on the COOL (great as a trainer kite as
well as a small riding kite).
With the 4-line system on the COOL, changing to handles is simple and still allows
the rider to take full advantage of the kites de-power ability.
The new COOL stands for more stability, more performance and power. Like its
predecessor, the COOL is priced extremely competitively, offering incredible value
and legendary FLYSURFER quality.
Features:
o DIRECTWAC (3.13.)
o FLYSURFER 4-line-system (3.6.)
o ROTOR KITE-LEASH (3.1.2.)
6
Page 7
2.3. EXTACY
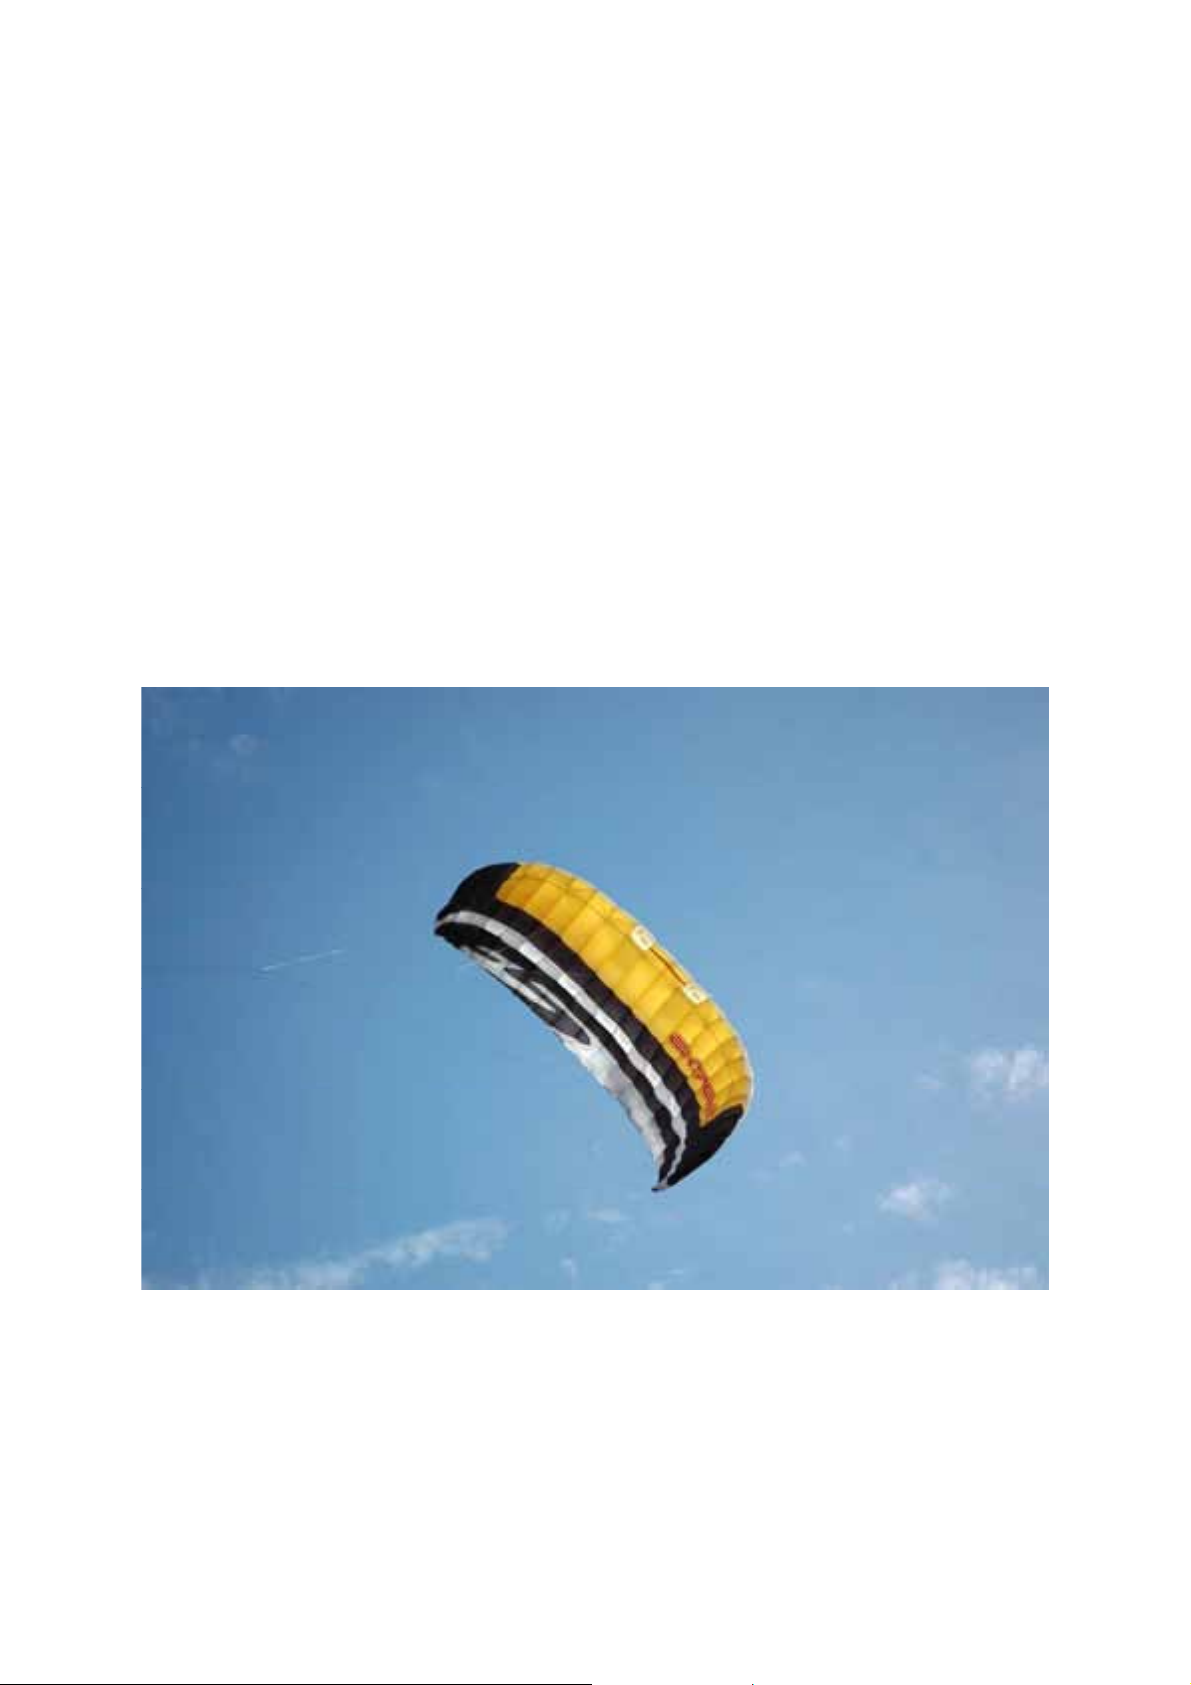
Because of its fast turning speed and defined bar forces, the EXTACY is ideal for all
freestyle-tricks and for waves. FLYSURFER is using their old strengths with higher
performance per m².
Thanks to modern profile research, we were able to develop a kite, which barely
backstalls. Because of this, modern unhooked moves have become much easier for
the kiter.
This characteristic wasn't only demanded by new-school fanatics, but also by
beginners and their instructors.
In addition, FLYSURFER has simplified things even more on the EXTACY with the
DIRECTWAC. Pulleys are no longer necessary in the bridle lines. The optimal setup
is standard.
Features:
o AutoBleedSystem (ABS) (3.3.)
o Blow-Out Valves (3.4.)
o DIRECTWAC (3.12.)
7
Page 8
2.4. PSYCHO²
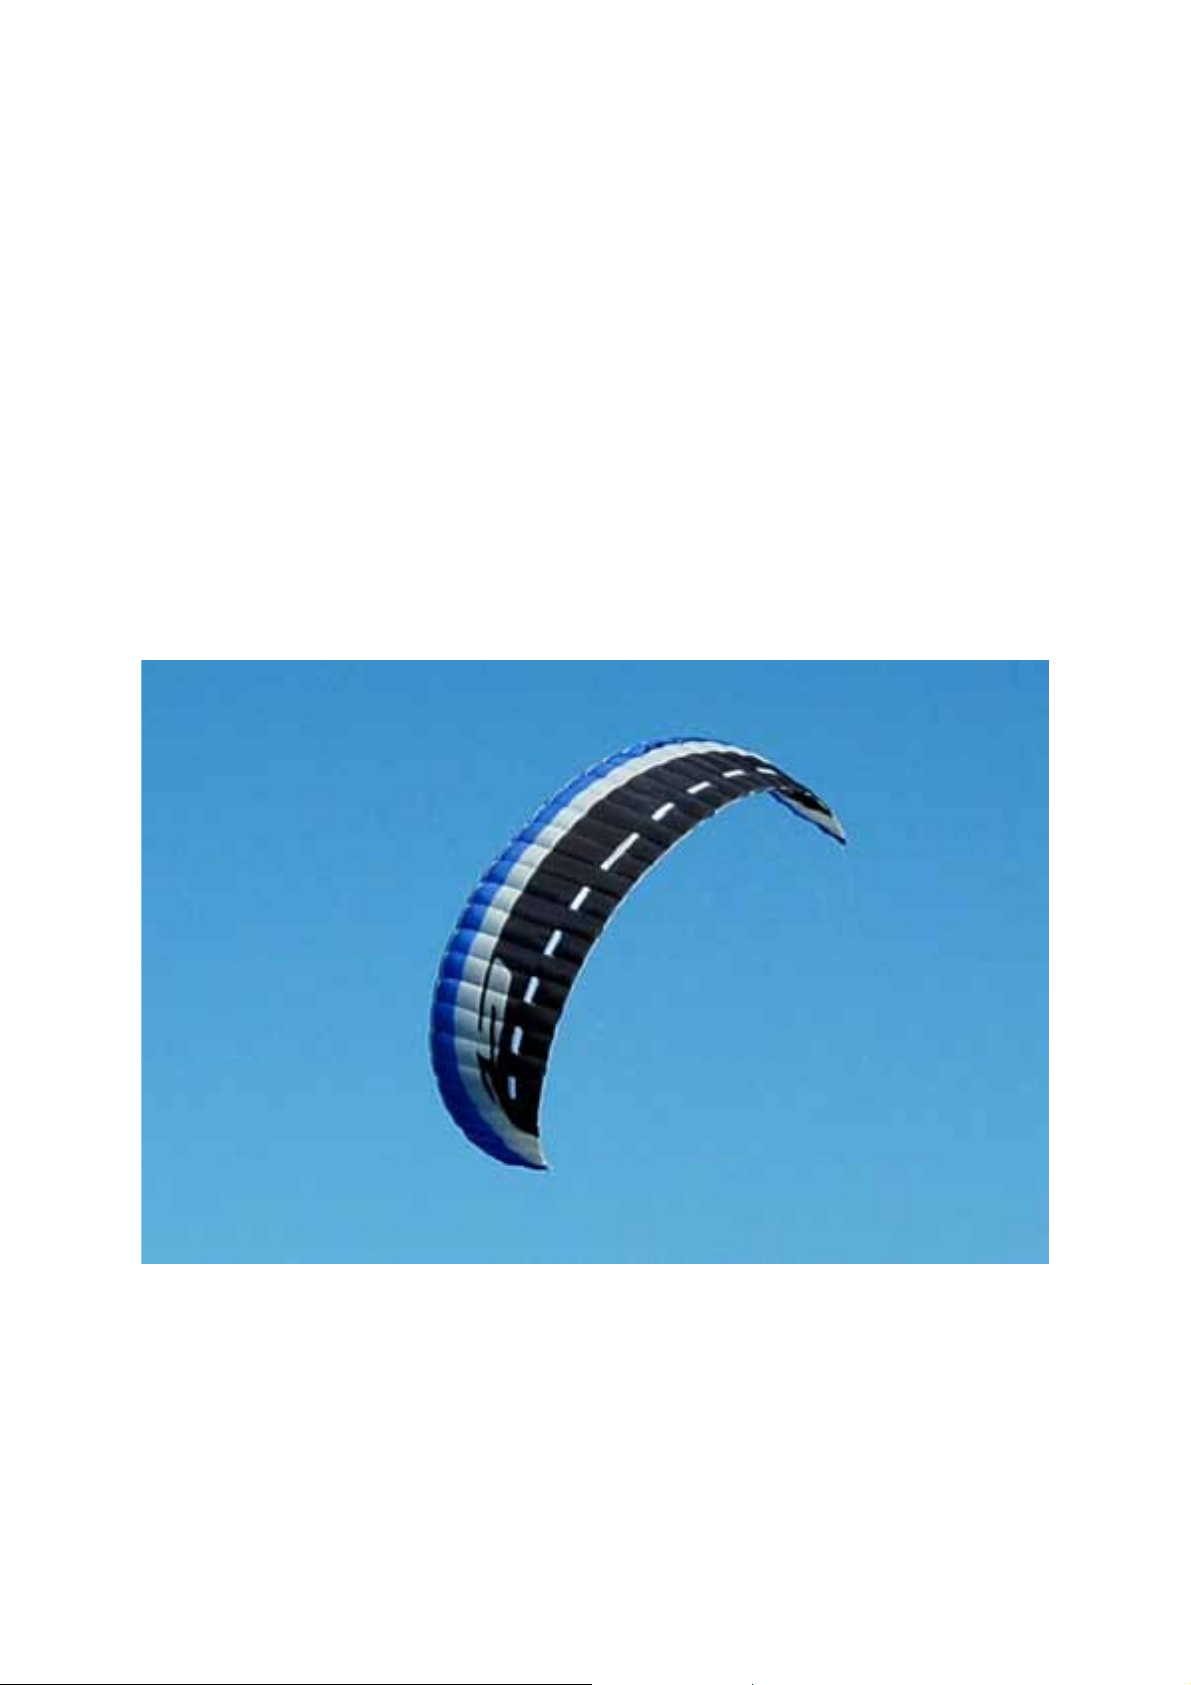
Even previous tube kite fanatics are changing, because the PSYCHO²’s potential is
very convincing. FLYSURFER has set new standards, because of their enormous
head start in technology.
There has never been a kite, which is so easy to handle and still provides huge
hang-time.
Features:
o AutoBleedSystem (ABS) (3.3.)
o Blow-Out Valves (3.4.)
o Easy Line Connection (ELC) (3.7.)
o FLYSURFER 3-line-system (3.5.)
o JET FLAP Technology (3.9.)
o MULTIWAC (3.11., 14.1.)
o PullStopSystem (PSS) (3.2.)
o ROTOR KITE-LEASH (RKL) (3.1.2.)
o Variable Line Length (VLL) (3.8., 14.2.)
8
Page 9
2.5. SPEED
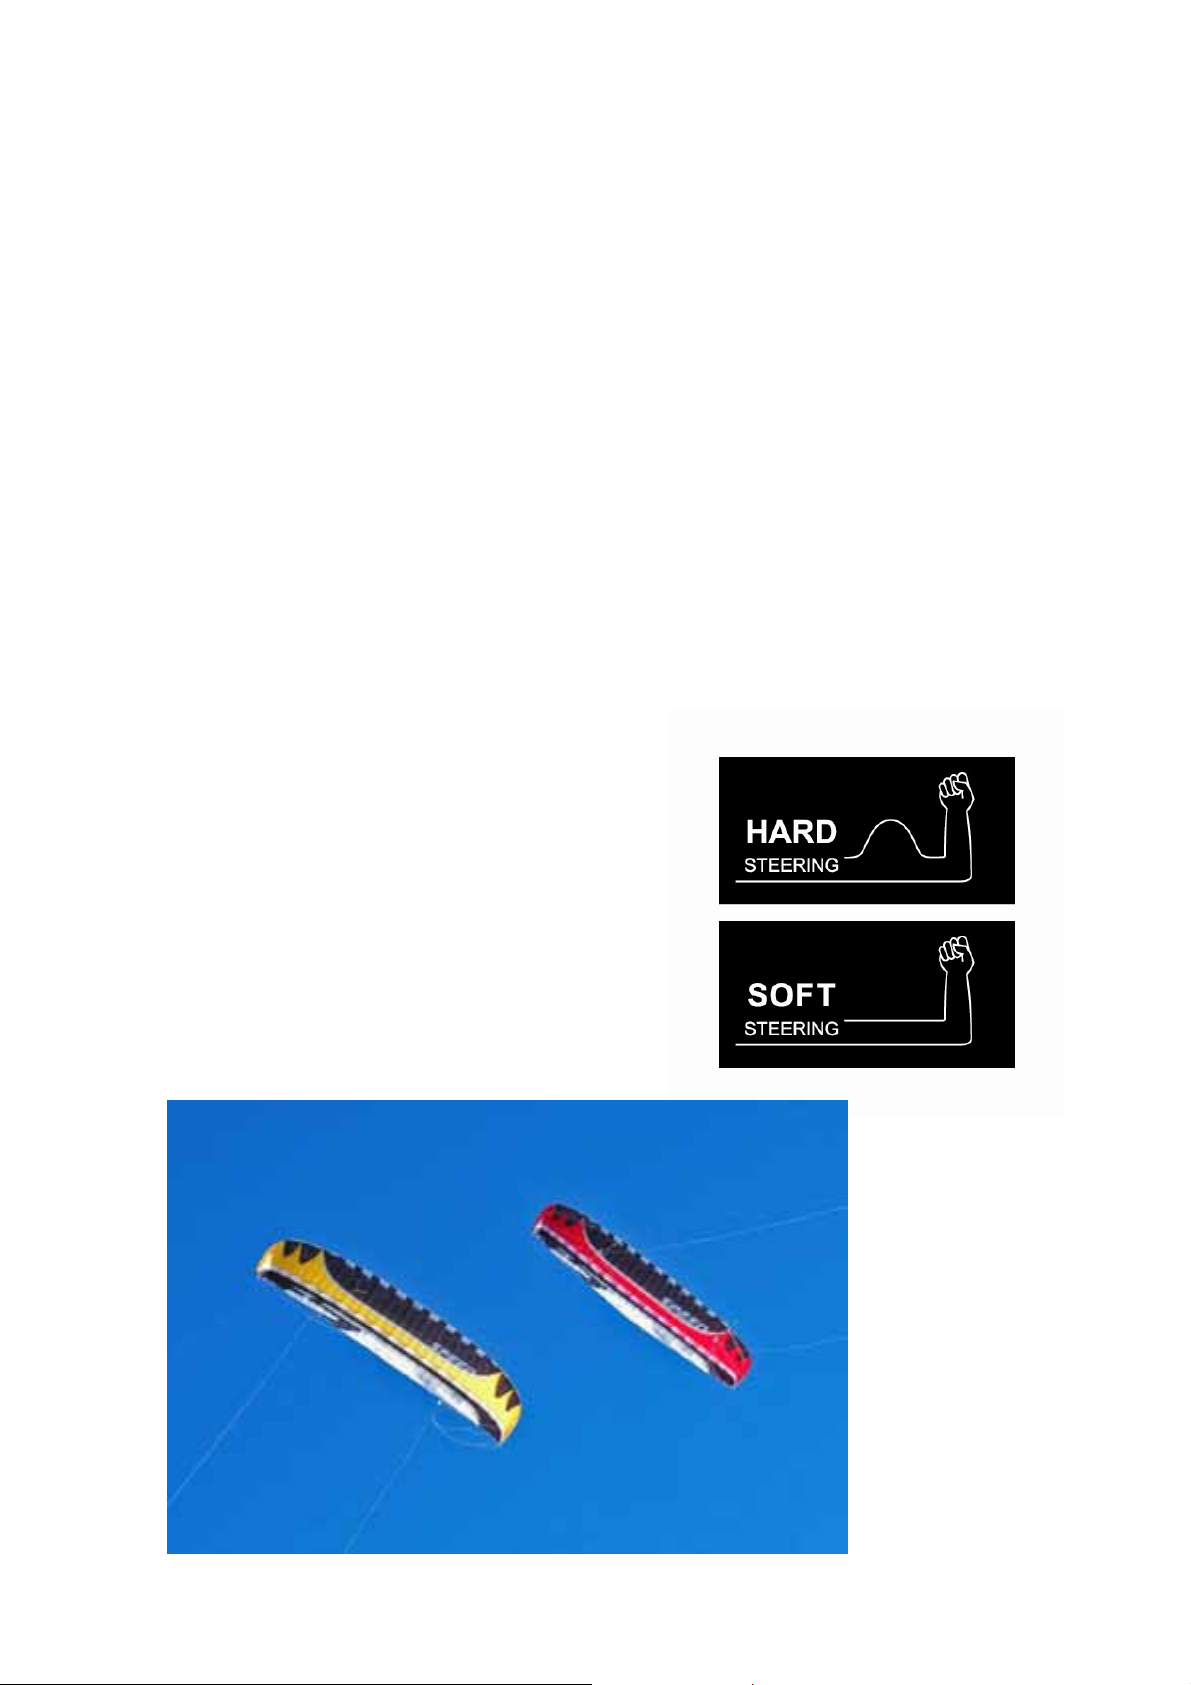
With the SPEED, FLYSURFER has been able to develop a kite, which is very
versatile. The SPEED is a high-performer that has excellent low wind performance
and superb stability. Nobody would believe that a kite with an Aspect Ratio of 5.9
would remain in the sky, but it does. The SPEED will attract a lot of attention,
because of its appearance and other kiters will become jealous, when they see that
you're the first kiter on the water in low winds.
There has never been a kite which has covered a bigger wind range than the
SPEED. Even in increasing winds, the SPEED can be steered extremely close to the
wind window. The thereby produced upwind-performance gets you further upwind
and does it much faster than ever before. The new XD-14 profile, which has been
developed on the computer and optimized in the wind tunnel, makes all this possible.
The bar forces can be adjusted individually:
Because of the new WAC-System, you have the possibility to choose between 5
different stages of HARD-STEERING or SOFT-STEERING. Kiters who like to cruise,
will most likely choose the SOFT-STEERING-SETUP (SSS). Kiters (of inflatable
kites) who like to ride unhooked and prefer high bar forces and high steering forces,
will probably choose the HARD-STEERING-SETUP (HSS). The SPEED allows you
to easily adjust the steering characteristics to suit your personal preferences!
The SPEED will surprise you with its unbelievable turning-speed, its enormous lift
and the huge hangtime.
Features:
o AutoBleedSystem (ABS) (3.3.)
o Blow-Out Valves (3.4.)
o Easy Line Connection (ELC) (3.7.)
o JET FLAP Technology (3.9.)
o MULTIWAC (3.11., 14.1.)
o PullStopSystem (PSS) (3.2.)
o ROTOR KITE-LEASH (RKL) (3.1.2.)
o Variable Line Length (VLL) (3.8., 14.2.)
9
Page 10
3. FLYSURFER (FS) special functions
3.1. Safetysystem
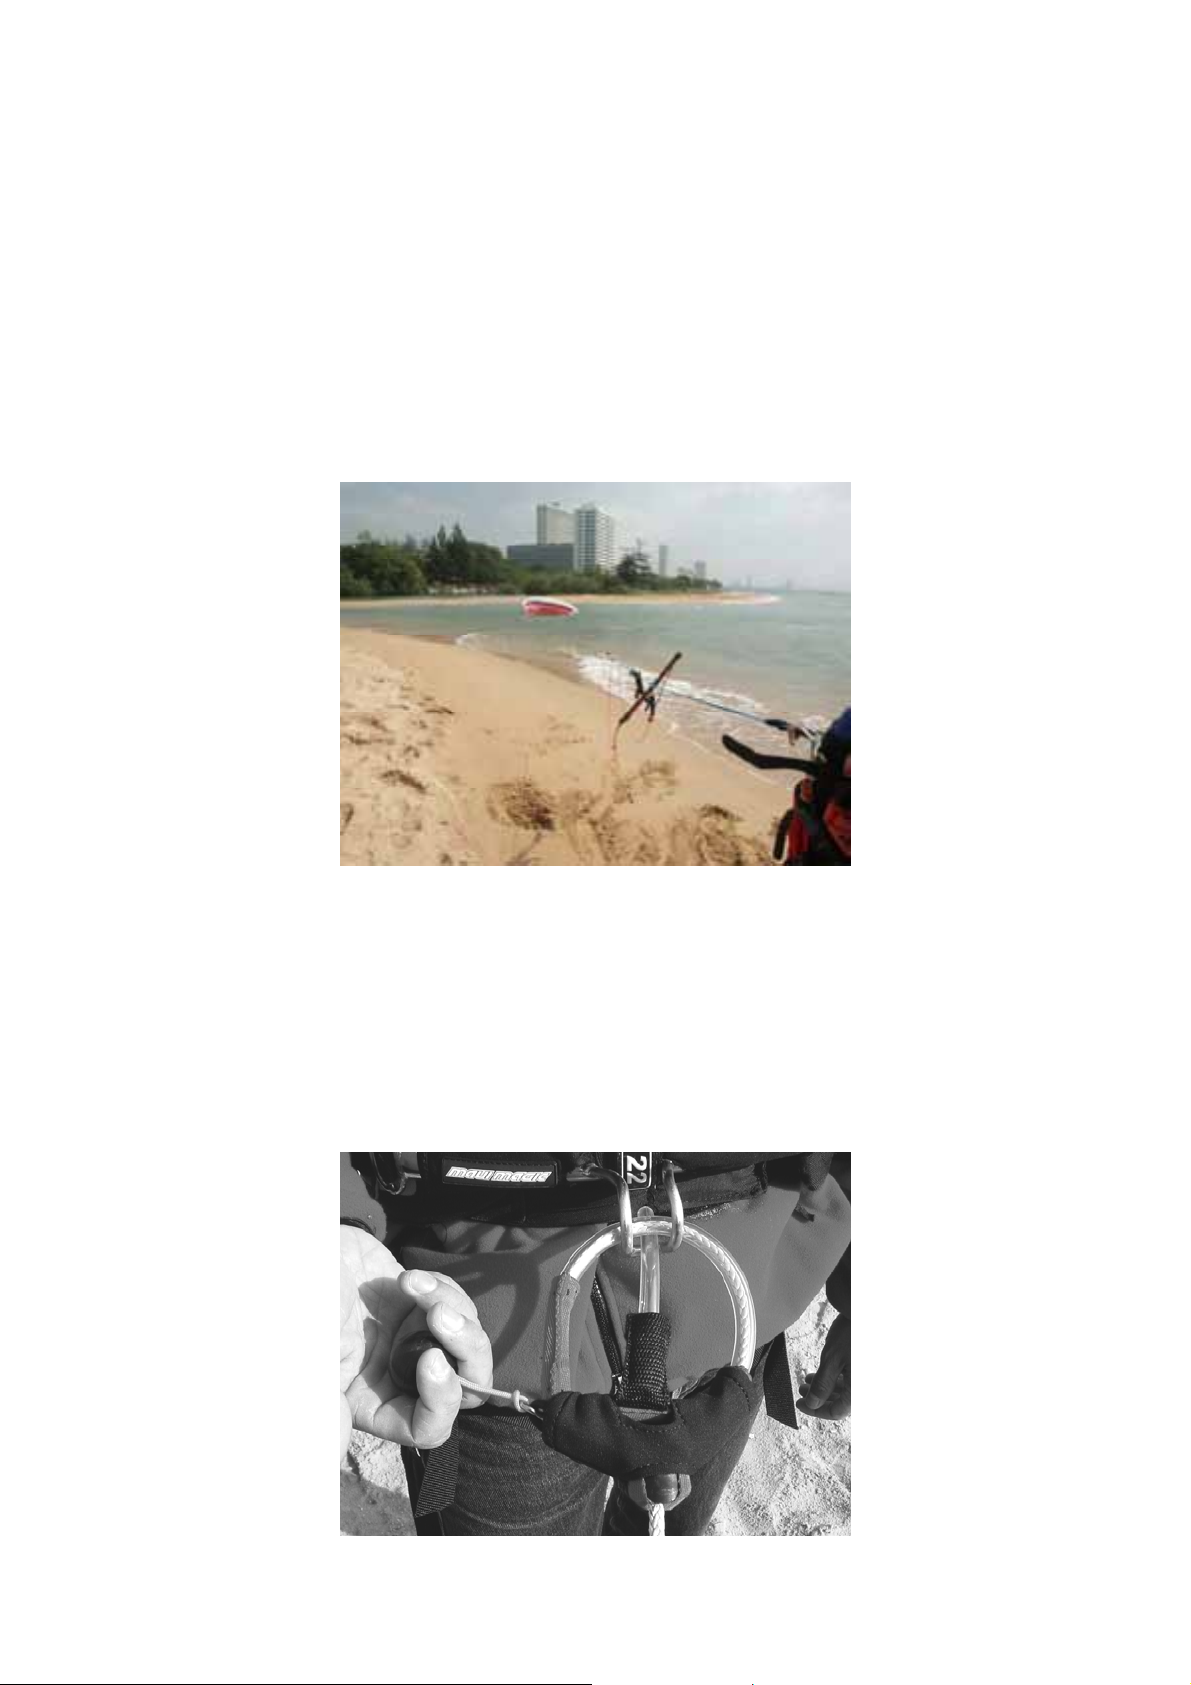
The FS Safetysystem is activated when the rider unhooks from the depowerloop (or
pulls the quick release on the depowerloop) and lets go of the bar. In this case the
trailing edge folds forward and the wingtips of the kite fold up. The kite falls
backwards with reduced pull until it lands on its trailing edge, ready for relaunch.
Important: If the kite doesn’t immediately fall to the ground, but instead flaps in the
air, then keep calm and wait a little. The kite will eventually land itself safely.
3.1.1. Depowerloop Quick Release Activation
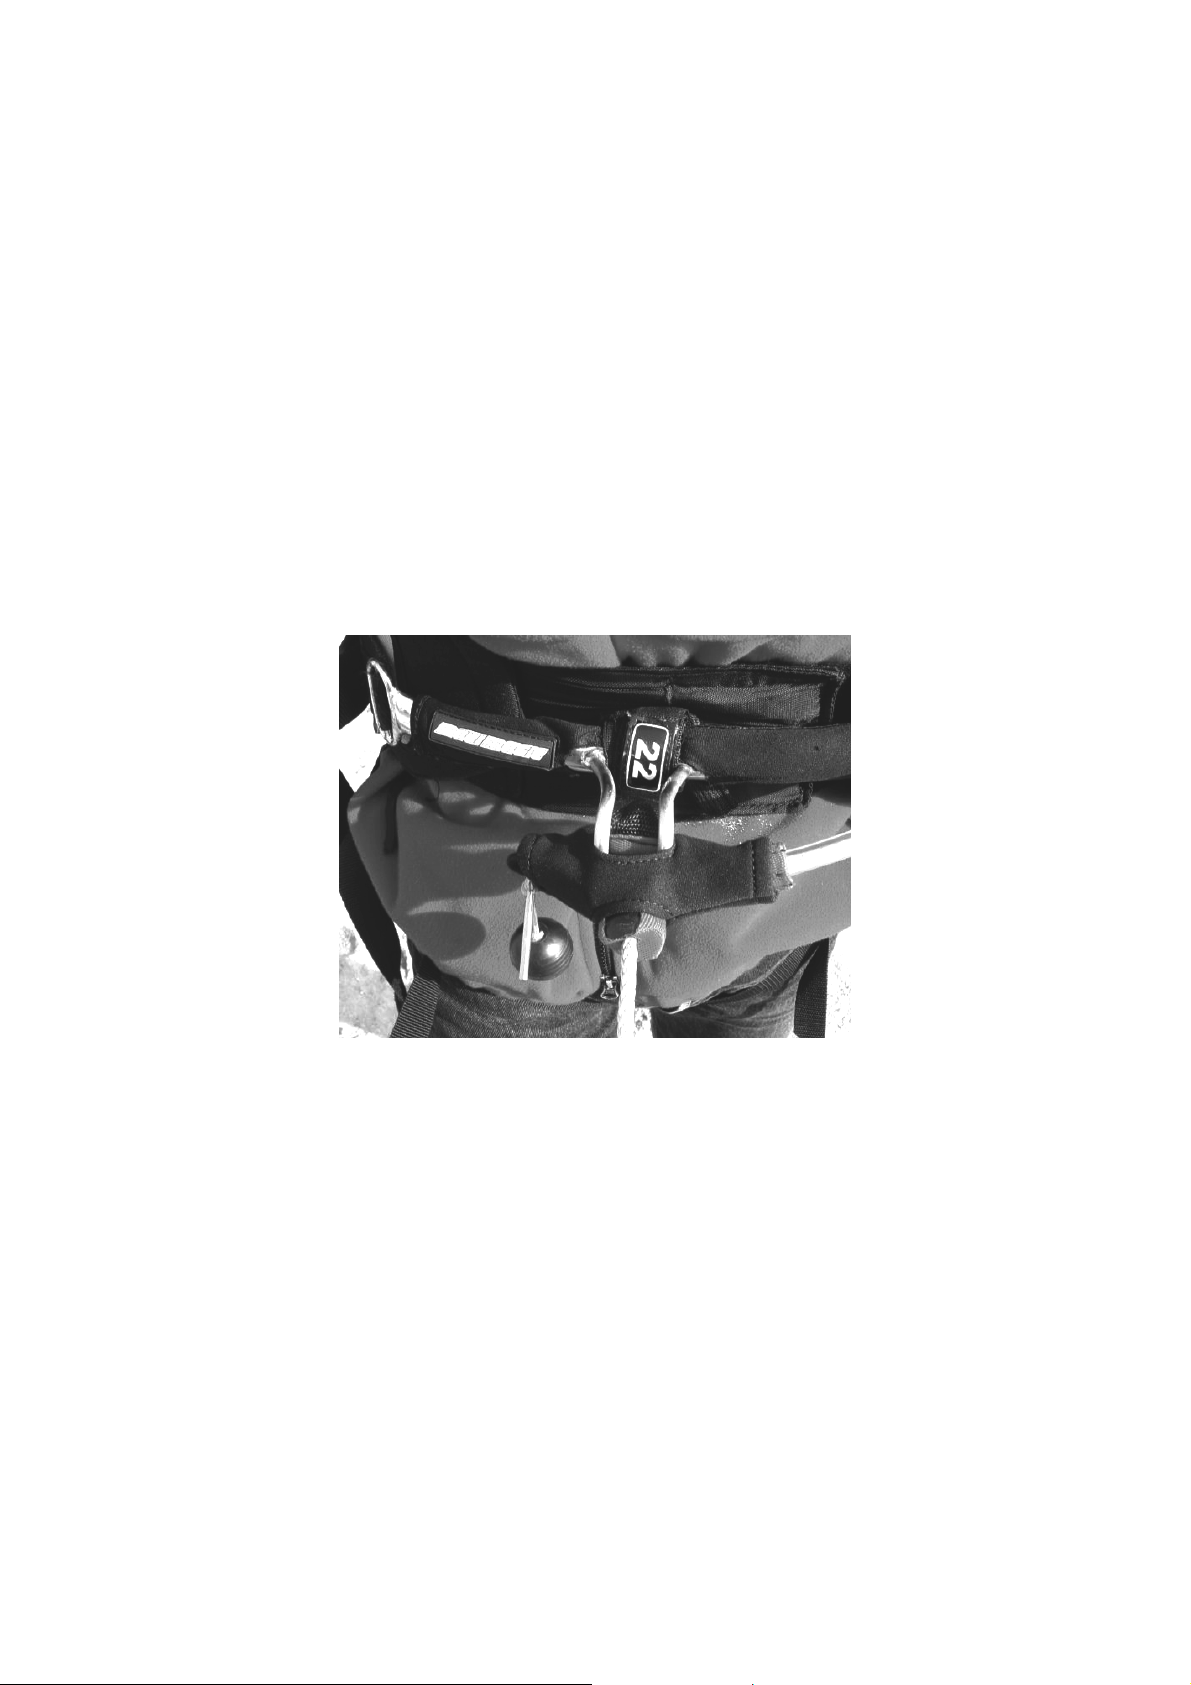
To activate the Safetysystem in an emergency, pull the red ball on the depowerloop.
Once free let go of the red ball immediately. The minute the depowerloop has
released and you let go of the red ball, the kite will automatically divert into
safety-mode.
10
Page 11
Assembly
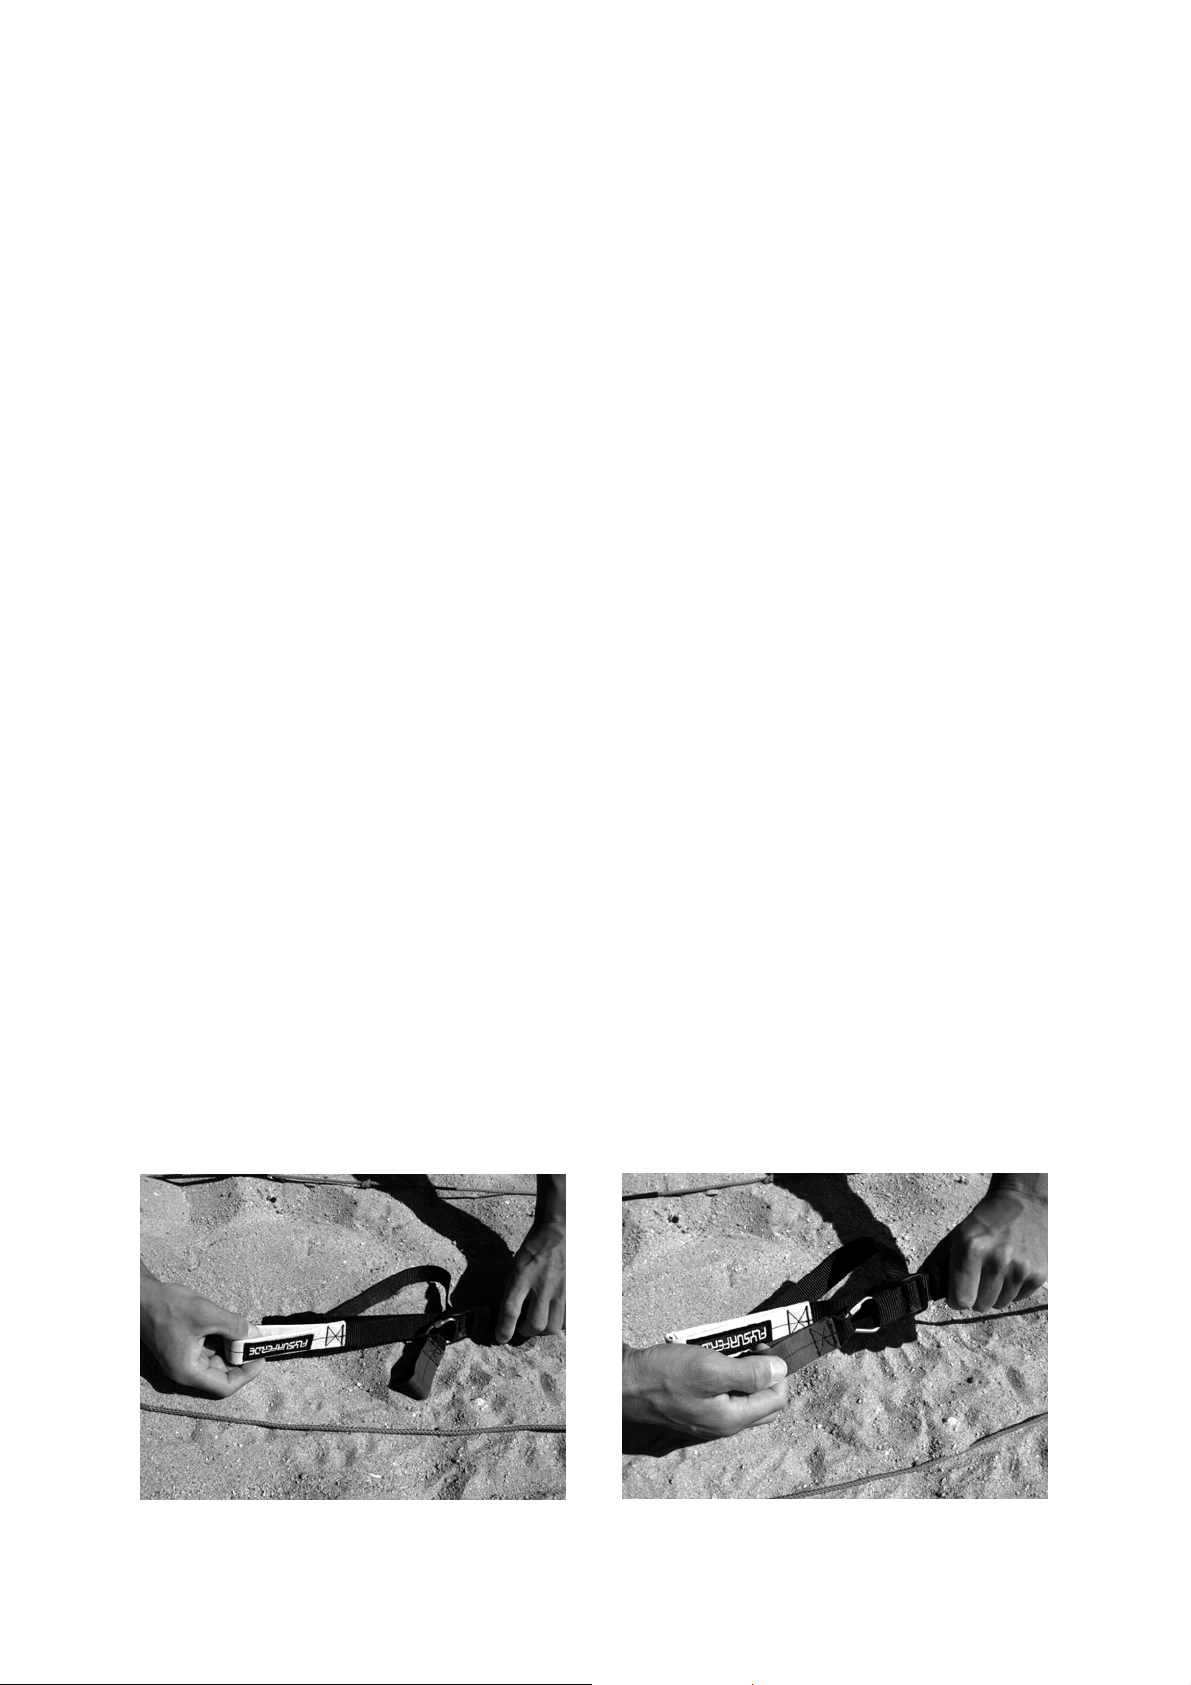
Guide the released blue end of the depowerloop through the blue loop on the
crossbar.
Now push in the metal pin from the outside, first through the blue loop than into the
guide pocket on the cross-bar.
Please check the reassembled depowerloop before you hook in and launch.
Try a test deployment just to be sure you put the loop back together properly.
Tips for assembly in the water
For this there is a so-called rescue loop directly above the cross-bar on the
depowerloop, with which you can hook up if the safety line is pulled. But you can no
longer release yourself in an emergency. That’s why you should park the kite in the
zenith as long as you’re far enough away from other objects, so you can reassemble
the depowerloop as shown above. Then you can rehook the depowerloop as you
normally would.
Further alternatives can be found on www.flysurfer.de in our video gallery.
Compatibility
If you want to use your FS Quick Release in conjunction with other systems,
Wichard shackle e.g., you will have to get your new combined system tested for its
functionality. On combined safety systems, both release options should remain
functional.
3.1.2. KITE-LEASH
The kite is secured by a KITE-LEASH, so that it doesn’t fly away when the safety is
activated. All FS KITE-LEASHes are also equipped with an emergency release.
KITE-LEASH Quick Release
The Quick Release on the KITE-LEASH is activated in the same way as on the
depowerloop, by pulling on the red ball. Through this you can completely detach
yourself from the kite when only connected via the KITE-LEASH.
11
Page 12
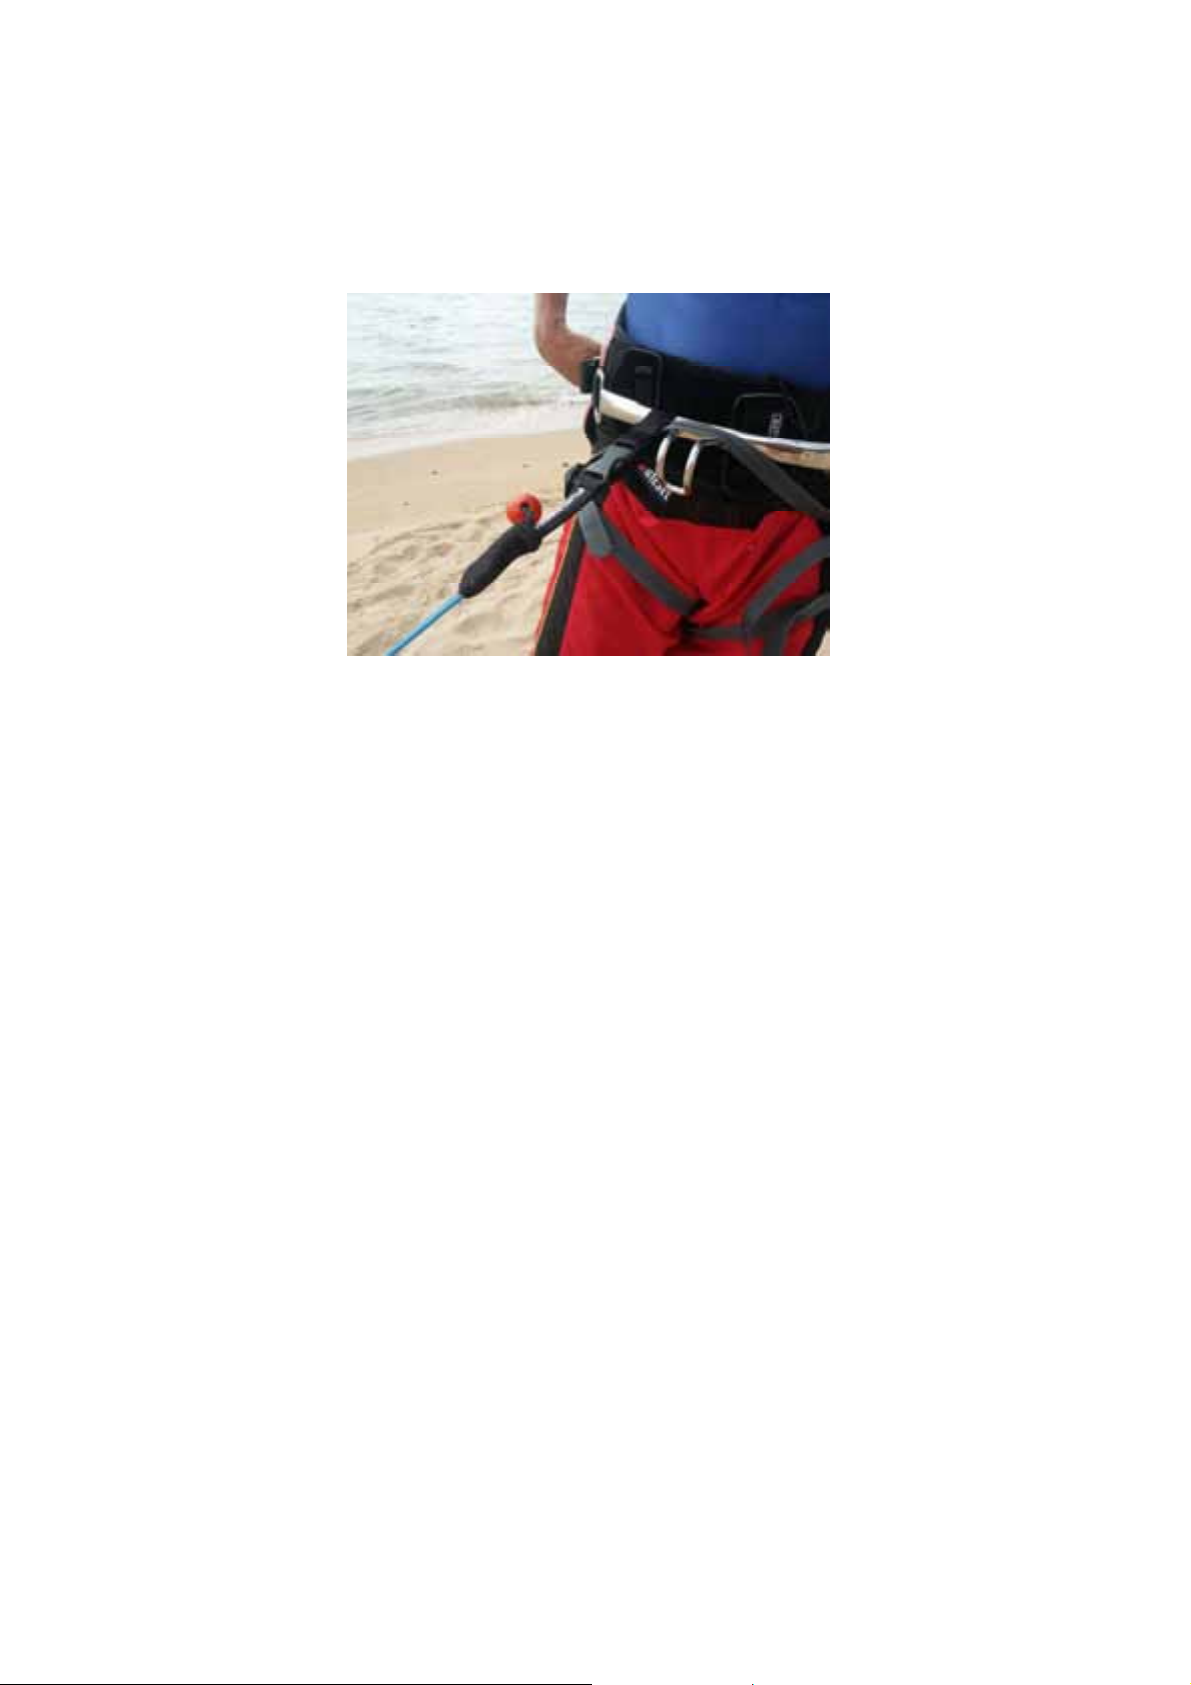
This option is very important if you are still in acute danger after having deployed the
standard Safetysystem (e.g. when kite kite/lines are caught up in a boats propeller),
or if the Safetysystem doesn’t work (e.g. wrong use, in extremely gusty winds etc.).
Please remember that, in this scenario it is possible for your kite to fly away and
potentially harm other beach users downwind of you.
Never launch a kite, if the wind picks up and the size of your kite is
inappropriate. Never overestimate your kiting ability in stronger winds! No
safety-system will be able to help!!
The worldwide analysis of accidents shows how the endangerment increase is
above average. Especially during onshore wind and stronger winds (cold front,
thunderstorm …) you are in great danger. If you are lifted several metres, a
safety-sytem won’t help!!!
ROTOR KITE-LEASH (RKL) (EXTACY/PSYCHO²)
The RKL enables multiple rotations of the bar without getting the Safety-System
tangled around the depowerloop. After about 100 rotations in one direction, the thin
depower-line should be untwisted. It is also important to make sure that it isn’t
tangled up with the steering-lines (chapter 5.3.).
Anyone who prefers the STANDARD KITE-LEASH can certainly upgrade their
FLYSURFER kite.
3.2. PullStopSystem (PSS)
The Pull-Stop-System enables the kite to blow out completely and eliminate all
restpull. Once the kite has landed in safety-mode, pull slowly on the red or green
leader-line until the kite is lying flat and has lost the remaining pull.
When using a larger kite, the kite can blow out even better if you release the safety
line from the harness. But the kite could fly away if you let go and potentially harm
other people downwind of you.
To relaunch, slowly let go of the pulled leader-line whilst still in safety-mode.
In strong winds we recommend to swim towards the kite just as much as pulling
yourself along the ROTOR-LEASH, this counteracts the rest-pull in safety-mode.
The Pull-Stop-System isn’t needed for the ROOKIE², because it loses all of its air
when in safety-mode and consequently can’t build up anymore pressure.
Please remember: Never launch a kite if the wind picks up, even if you think
you still have control. A safety-system won’t help.
12
Page 13

3.3. Automatic Drainage System (ADS)
FS kites have a built-in drainage system. It forces entered water through openings
along the trailing edge towards the wingtips where it drains out. This enables the kite
to remain relaunchable, even after it has taken on water (e.g. after crashes in big
waves). The kite can drain out buckets of water in no time at all and the minute it has
regained its flying weight it will relaunch and can be “flown dry”. Once the kite is
totally dry, it will perform as usual (water inside the kite can affect its performance).
Even sand and debris are automatically removed.
3.4. Blow-Out Valves and TPU
Over-pressure valves or the flexible TPU elements inside the kite will absorb the
overpressure in a split second during a crash and thus prevent damage to the
structure of the kite.
The so-called Blow-Out Valves close independently and are completely
maintenance-free! They are, however, not meant to be abused by crashing the kite
intentionally. Depending on the impact intensity and impact angle, the kite can still
sustain damage despite of this remarkable invention.
Always avoid hard impacts of the kite into the water, the snow or land!
The Blow-Out-Valves of the SPEED have been moved from the trailing edge closer
to the leading edge, where the over-pressure is produced. Therefore the durability is
increased, despite higher flying speeds and the reduced profile depth.
With the TPU elements, the kite can absorb a crash without having to release the
overpressure. In case the capacity overload is too high, the TPU elements can be
replaced very easily.
3.5. The FLYSURFER 3-line-system (EXTACY/PSYCHO²)
All FLYSURFER functions can only be operated with 3 lines with the EXTACY and
PSYCHO². The red and green line act as steering-line, the black depower-flying-line
assumes the pull of the kite.
3.6. The FLYSURFER 4-line-system (COOL /SPEED)
The COOL and SPEED have 4 flying-lines. That way, it can be flown with steering
handles or with a bar.
Conversion to handles:
In order to use handles for your kite, untie the loops at the end of the bar leader-lines
and tie them to the appropriate handle. The thinner back-lines are attached to the
back end of the handles, the black front lines to the front connection points of the
handles. All lines have to run freely! The leader-lines on the handles should be the
same length at the front and the back, in order to ensure an optimal trim.
Check the new setup in light winds first.
13
Page 14
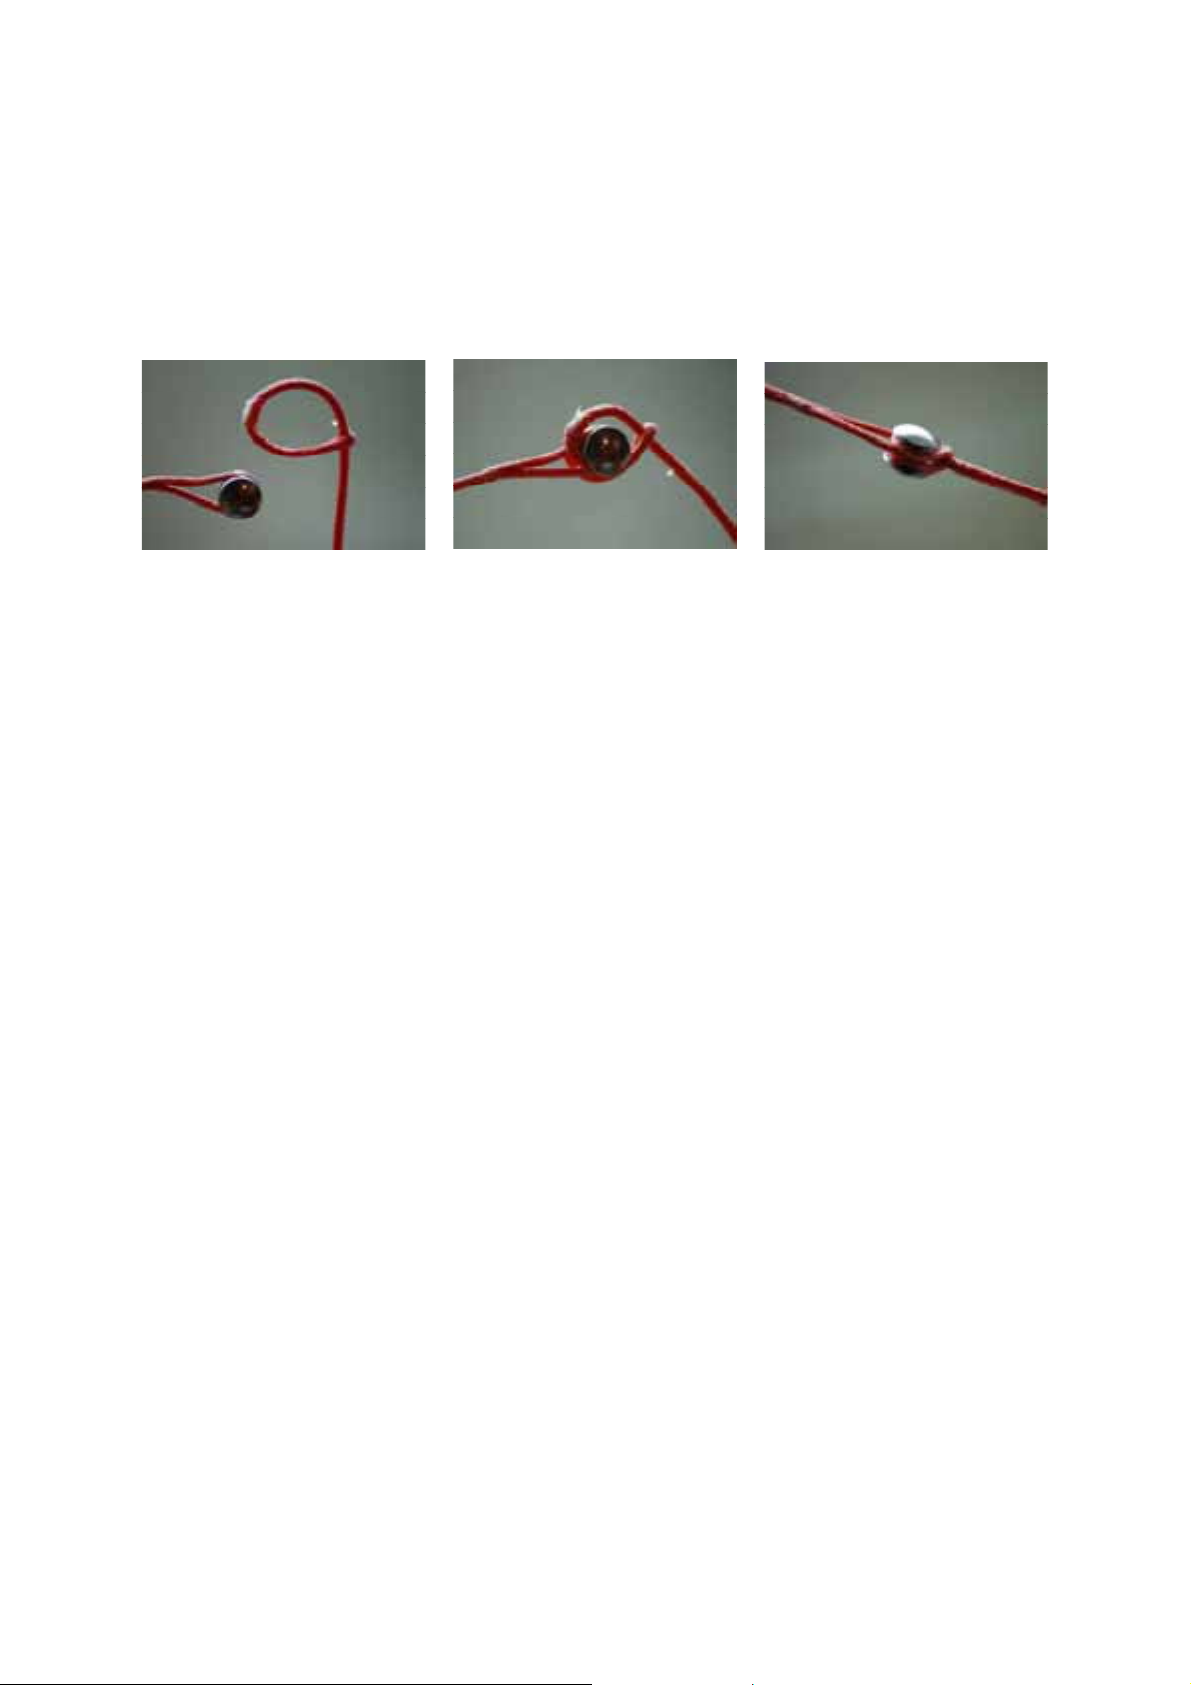
3.7. Easy Line Connectors (ELC)
The Easy Line Connectors enables a quick loosening and connection of the kite’s
flying-lines, without reducing the collapse load of the line. That way, it is much easier
to put tangled up bridle lines back in order. Make sure not to lose the metal
connectors.
Connect the lines the way it is illustrated below. Compare the result with the pictures
and check the stability of the connection.
3.8. Variable Line Length (VLL)
FLYSURFER kites (except for the ROOKIE²) have 3 separable flying-lines of 3, 6 and
12 m, which add up to 21 m in length. That way, the line length of 21 m can be
reduced in 3 m intervals from 21 m to 0 m, if desired. The 3 sections can also be
obtained individually, so the lines can also be extended if desired. An exact
description can found in our tuning section (chapter 14.2.).
3.9. JET FLAP Technology
Most FLYSURFER kites are equipped with the trend-setting JET FLAP Technology
(JFT).
Air is conducted from the bottom sail (pressure area) to the top sail (low-pressure
area) and is blown out there with higher speed. The connection is established
through jet shaped channels, which are located in the rear section of the wing.
When increasing the angle-of-attack, the danger of airflow stall will be minimized.
The result of the delayed stall is a higher lift per m². Furthermore, the JET FLAPs
decrease luffing, due to their elevator characteristic.
3.10. Nose Valves (EXTACY/SPEED)
Since the EXTACY, we have been using a special nose valve, which effectively
prevents the profile from denting when depowering. The result is a larger wind
window, because of less kite-resistance when depowering. Thus, the performance is
enhanced. The power/m² is higher and the downwind pull is reduced, which again
increases the flight speed and upwind performance. The bottom line: kiting is more
fun!
14
Page 15
3.11. MULTIWAC (PSYCHO²/SPEED)
The MULTIWAC-System enables you to adjust the flight characteristics of your kite to
your own personal preferences in a matter of seconds. Clearly arranged flags mark
and illustrate the individual trim options. The tips (Full BRAKE/Tip BRAKE) and the
WAC (WAC+/WAC-) of the PSYCHO² can be adjusted individually in 5 stages.
Feeling, immediacy, stability, backstall and flight speed can be adjusted. The setup
possibilities of the SPEED are even easier and allow you to adjust the steering forces
in 5 stages. The exact trim options can be found in the tuning section (chapter 14.1.).
3.12. DIRECTWAC (COOL/EXTACY)
The DIRECTWAC system is specially designed for those, who prefer a common,
uncomplex kite. The bridle line system is very simple, has the best option installed
serially and doesn’t need any pulleys. The wear and tear is extremely low. The
steering-lines run directly to the tips. That lets beginners see what pulling on the bar
does.
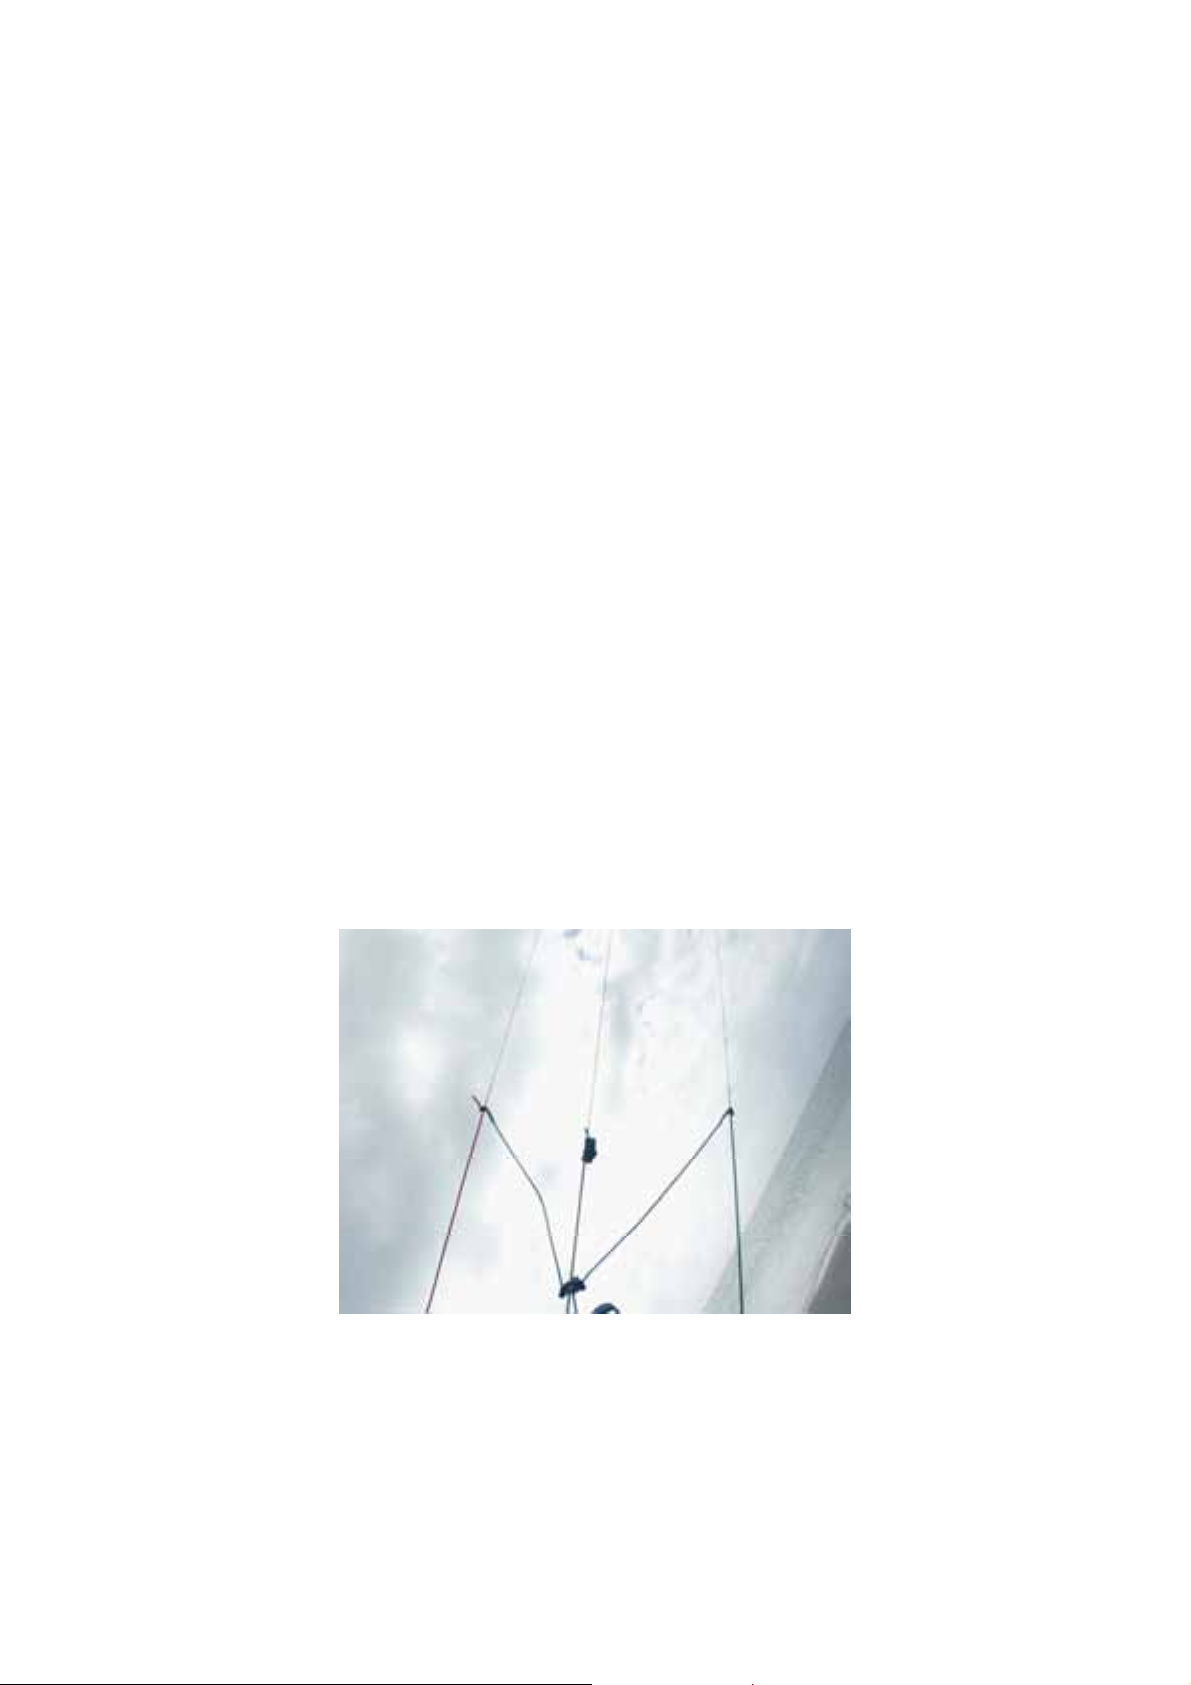
4. Rigging of the kite
Attaching the flying-lines, first use
The kites are delivered with a fully assembled bar. But in case you ever have to
remove the bar, please observe the correct reassembly.
For this, the blue cross safety lines have to be threaded onto the thin steering-lines
(before looping the flying-lines and leader-lines).
15
Page 16
5. Launch preparations
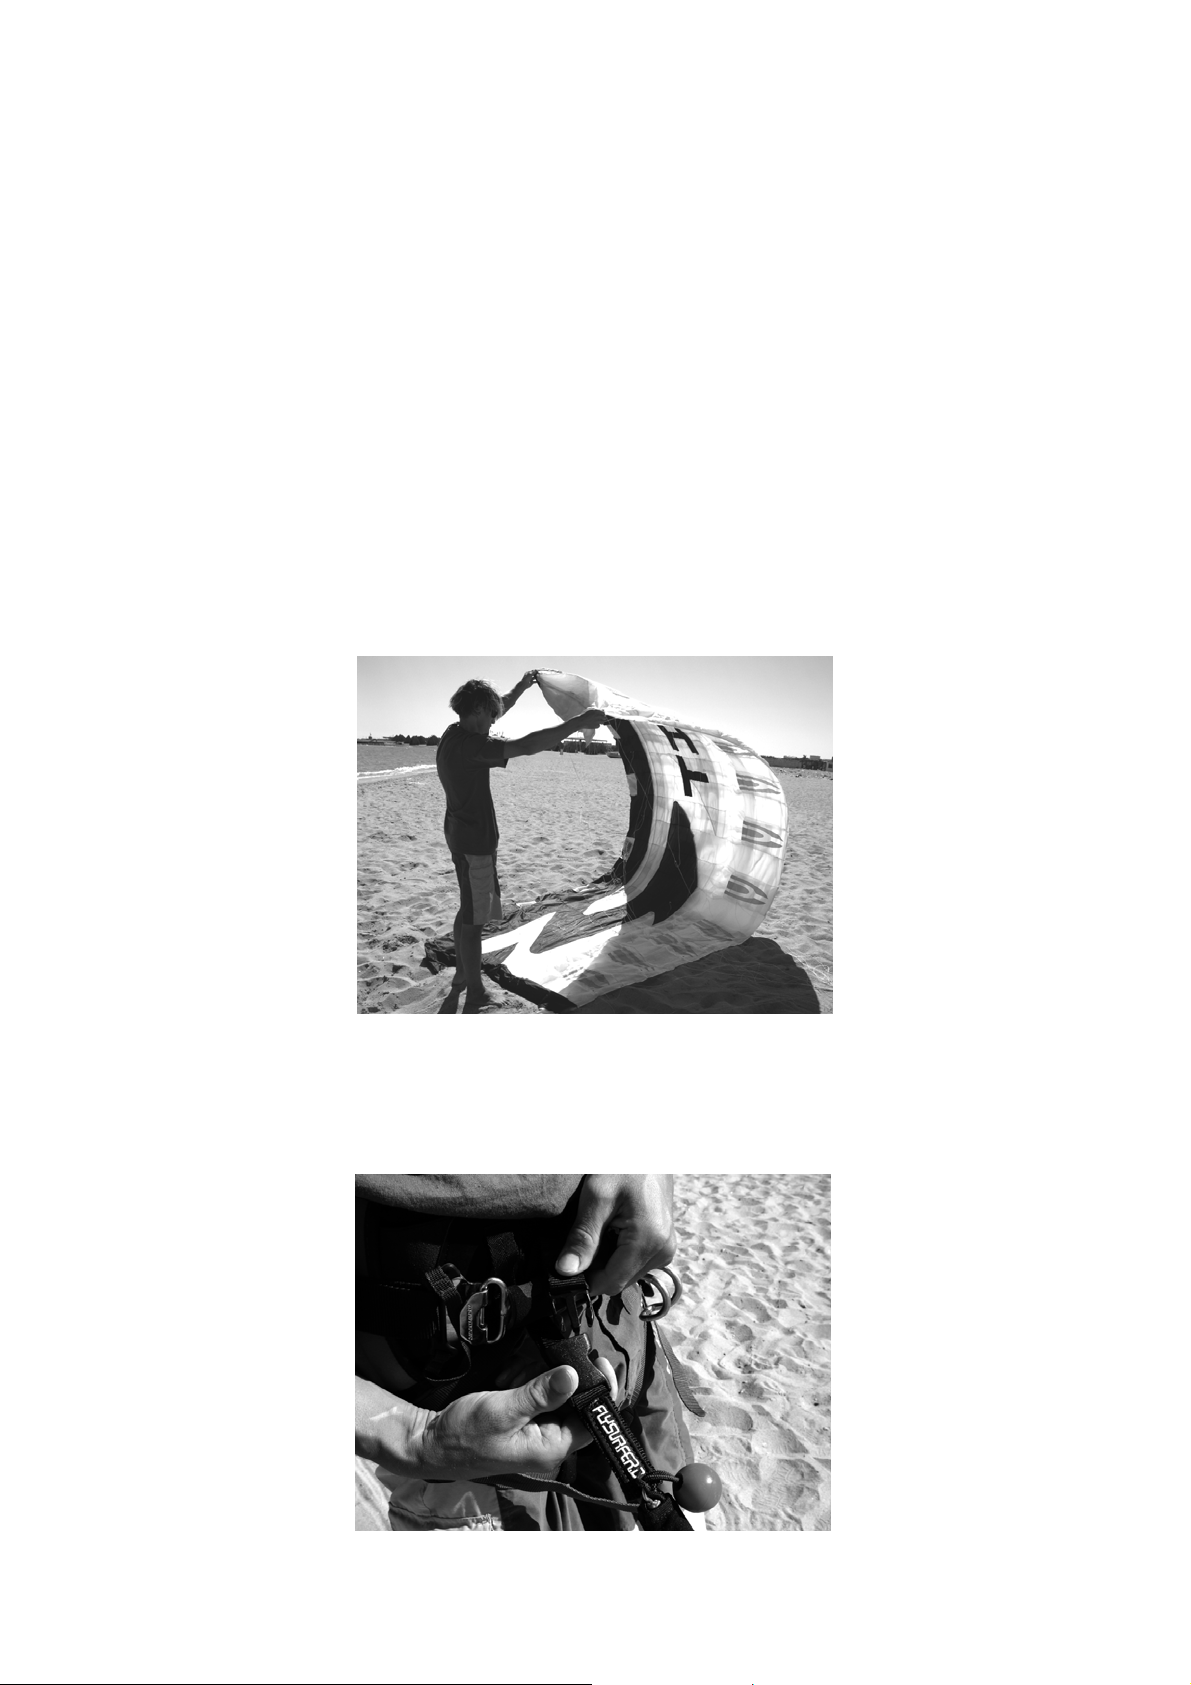
5.1. Laying out the kite
Unfold and lay out the kite, trailing edge facing the wind for a launch from the powerzone, or with the wingtip facing upwind for a launch from the edge of the wind
window. Weigh down the kite with sand (if available; if not, any none piercing or blunt
objects).
Now unwind the flying-lines from the bar in a 90° angle to the kite. Finally check all of
the kite’s lines, pulleys and Safety-Systems for tangles, knots, sand blocking or
previously sustained damage.
5.2. Pre-inflation
It is not essential to pre-inflate the new kites. However a thorough pre-inflation gives
you maximum control over the kite and helps in light wind starts.
There are many ways to pre-inflate a FS kite. The EXTACY/PSYCHO² have new
valve straps, which make it even easier to pre-inflate. The kite should remain calm,
so that the pulleys don’t tangle up with the bridle lines. The ROOKIE² has many
openings, so it is full as soon as you launch. Pre-inflation is therefore not necessary.
5.3. Connecting the safety
Attach the KITE-LEASH onto the harness spreader-bar. Make sure that the plastic
clip is free of sand and has engaged properly to avoid unwanted release. You should
be able to hear the clip lock in; otherwise optimal safety can’t be ensured.
16
Page 17
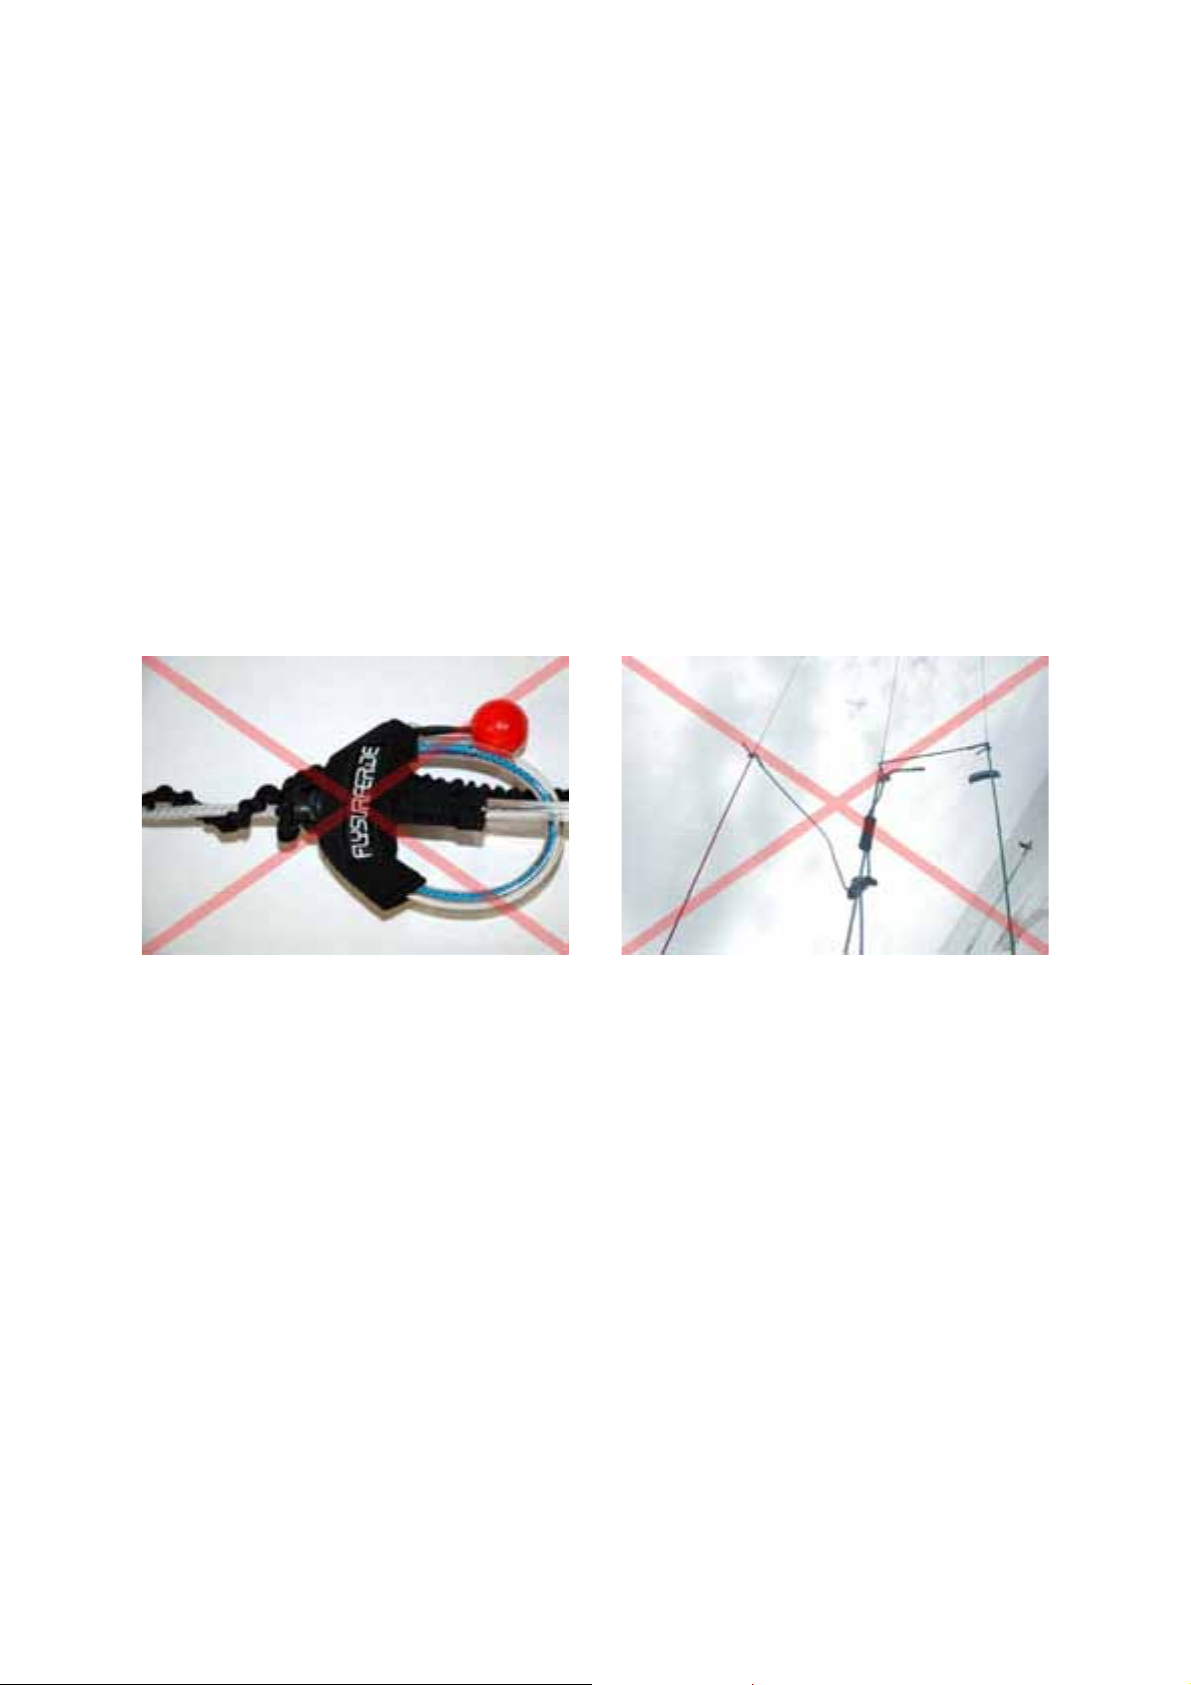
5.4. HANDLEPASS-LEASH
Handlepasses are tricks, where you pass the bar from one hand to the other behind
your back.
Because of the relaunchable Safetysystem, the FLYSURFER KITE-LEASH can be
used as a HANDLEPASS-LEASH. Attach a line to the harness, that runs around your
back and then add an extension for the FLYSURFER-LEASH. It is also important to
install an additional, easy-to-reach quick release, in order to release from the kite in
an emergency.
FLYSURFER doesn’t recommend using a ”SUICIDE-LEASH“, which is directly
attached to the depowerloop, because it prevents a releasing of the safety. A
SUICIDE-LEASH is only for professionals, who do handlepasses high in the air.
Please check that the leash is never tangled up. This is especially important
when using the ROTOR-LEASH.
The leash mustn’t be wound around the depowerloop as it can seriously affect the
functionality of the Safetysystem. Please also check for tangles during riding and
unwind them, if necessary by hand.
17
Page 18
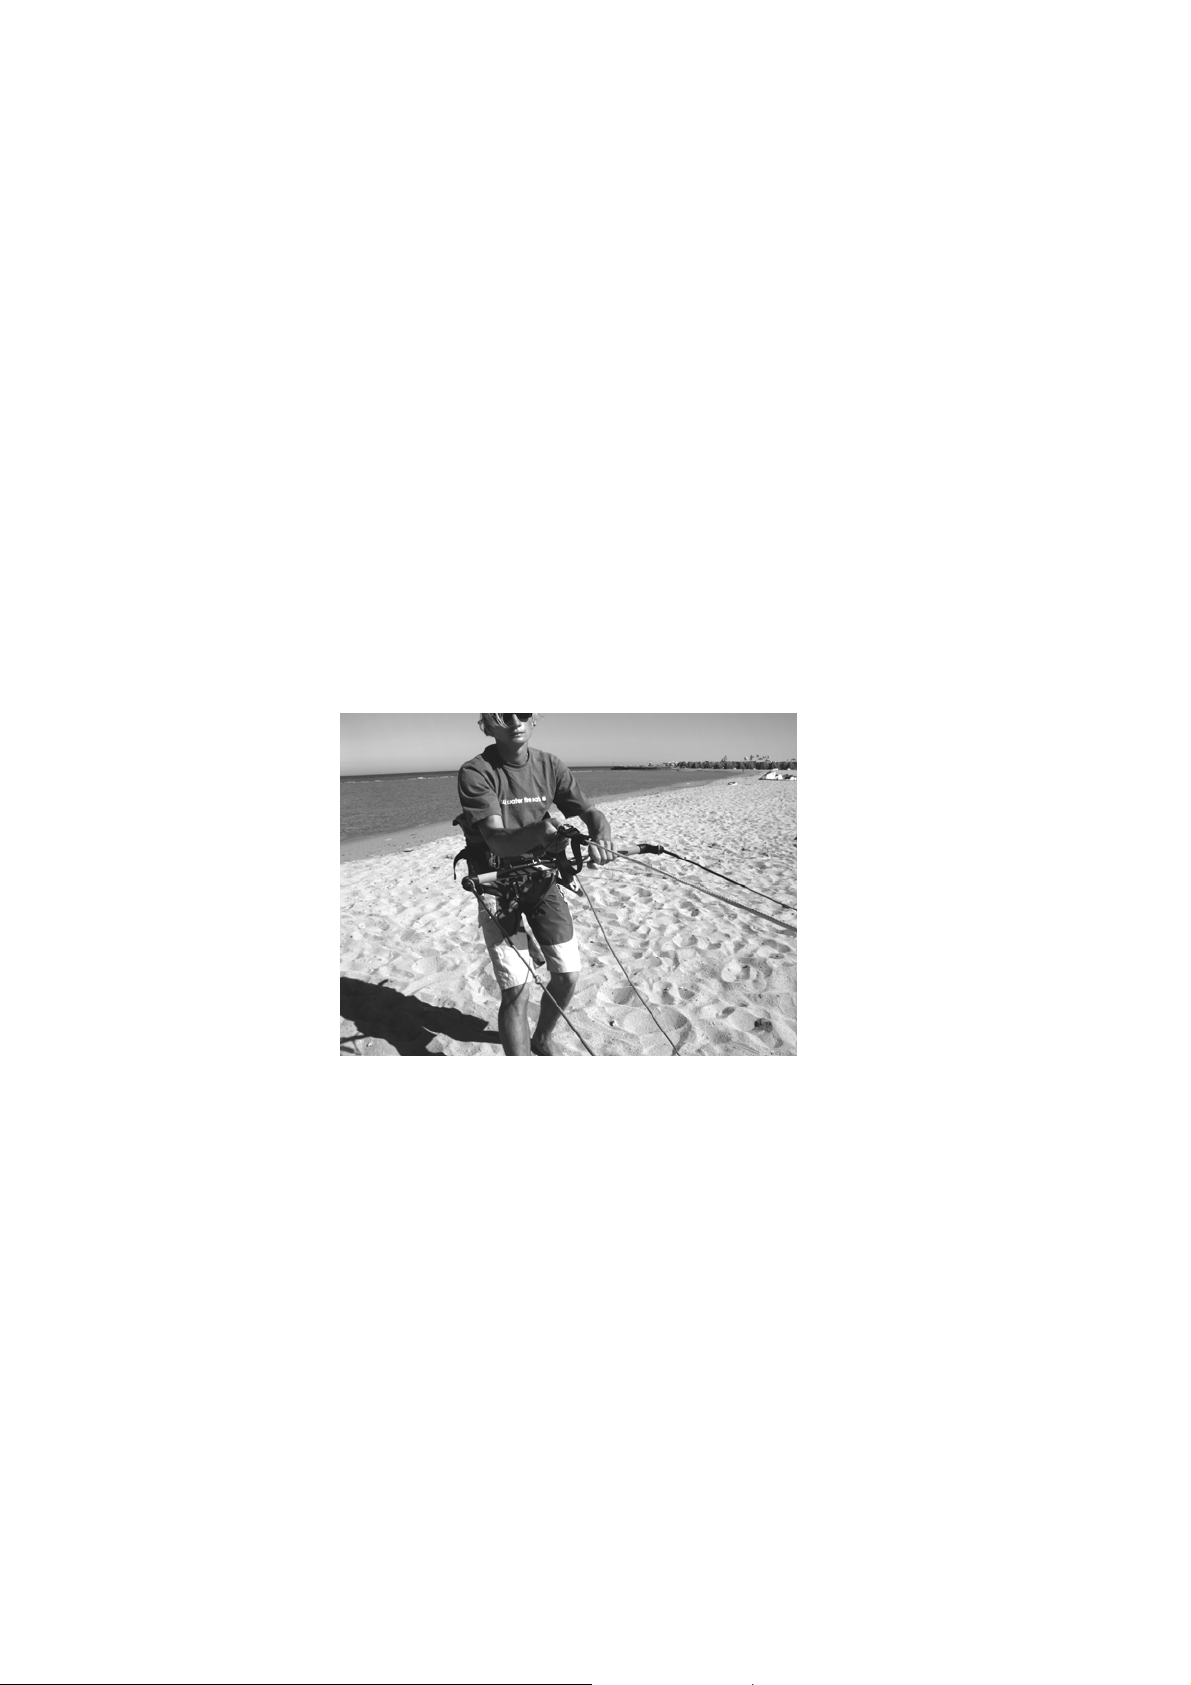
6. Launching the kite
FLYSURFER kites are very easy to launch, assisted and by yourself. Here there are
various options and tips to bear in mind, too.
It is very important, that during launches the kite is fully depowered.
Pull the trimmer all of the way down and stretch out your arms and only pull the bar
on one side to steer.
It is also recommended to first practice the various launching methods in light winds.
6.1. In light winds
To launch the kite in very light winds inflate it more than usual and start it from the
power-zone (chapter 6.2.). Hook into the harness and then grab the upper end of the
trimmer with one hand.
Be careful not to accidentally pull on the safety-line at the same time. To launch the
kite, pull the trimmer/depower-line with a prolonged tug towards you (you can also
use a pumping action in light winds).
This launch technique also works very well in the water, if the wind hasn’t got enough
power to launch the kite on its own. In very shallow waters it is important not to walk
back as not to sink the kite.
6.2. In the power-zone
If you have enough room and the wind isn’t too strong, you can start the kite in the
power-zone. This launching method bears a higher risk and should only be
performed by experienced kiters. When the kite is ready for launch with its trailing
edge facing the wind and you being directly upwind of the kite, fully depower to
launch. Shake of any remaining sand or debris with small steering impulses, in case
you weighed down the kite with sand.
18
Page 19
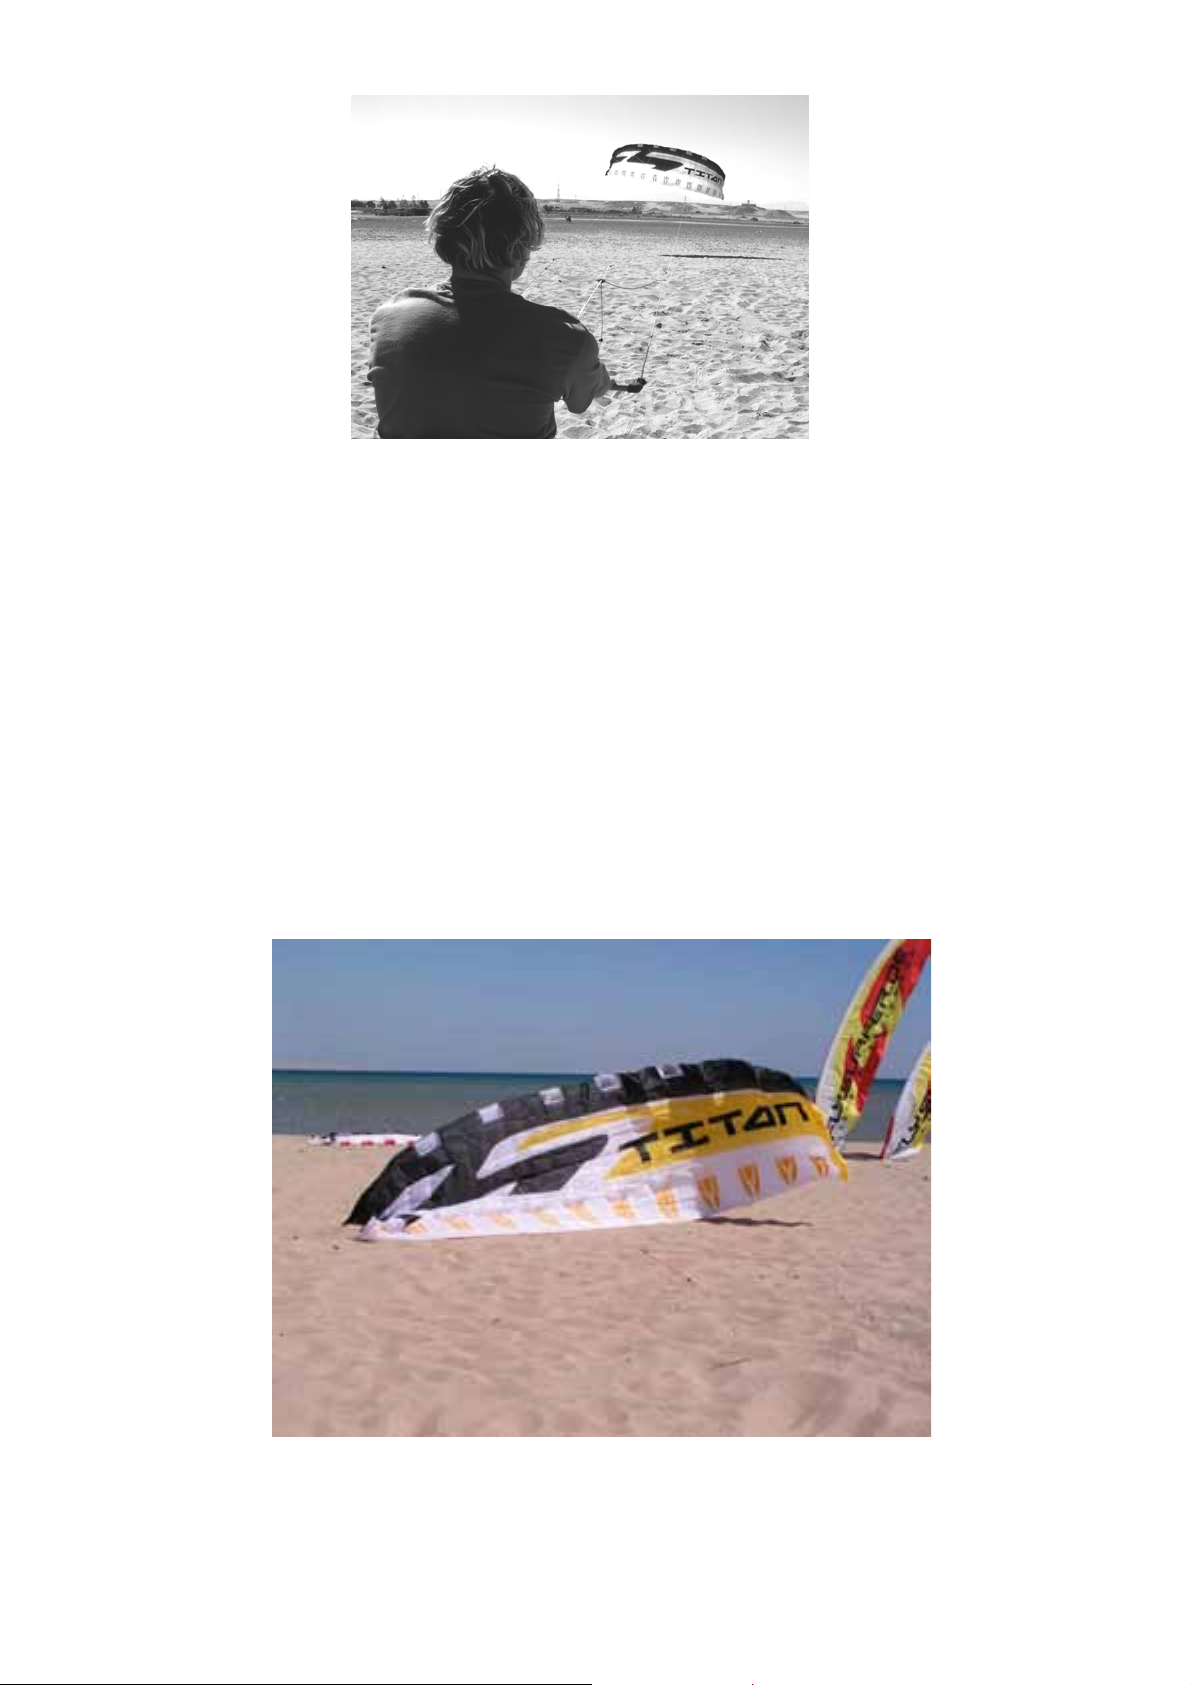
6.3. From the edge of the wind window
The launch from the edge of the wind window should be the standard method for
launching a FLYSURFER kite. The main advantage being that you won’t get dragged
downwind as you would when launching out of the power-zone. This can be quite
dangerous in strong winds and with lack of space downwind.
From the edge of the wind window by weighing the kite down
Lay out the kite parallel to the wind and weigh down the upwind wingtip with sand (or
other none piercing or blunt objects). Now position yourself about 30° upwind of the
kite. Hook into the sand-free SAFETY-LEASH and the depowerloop and slowly
tension the downwind flying-line by steering the bar. Slowly move downwind as the
kite starts to inflate. At some point the kite will start to stand upright on its wingtip,
now slowly steer it upwards along the edge of the window into the zenith. Now all you
have to do is shake off any remaining sand, which you used to weigh down the kite.
19
Page 20
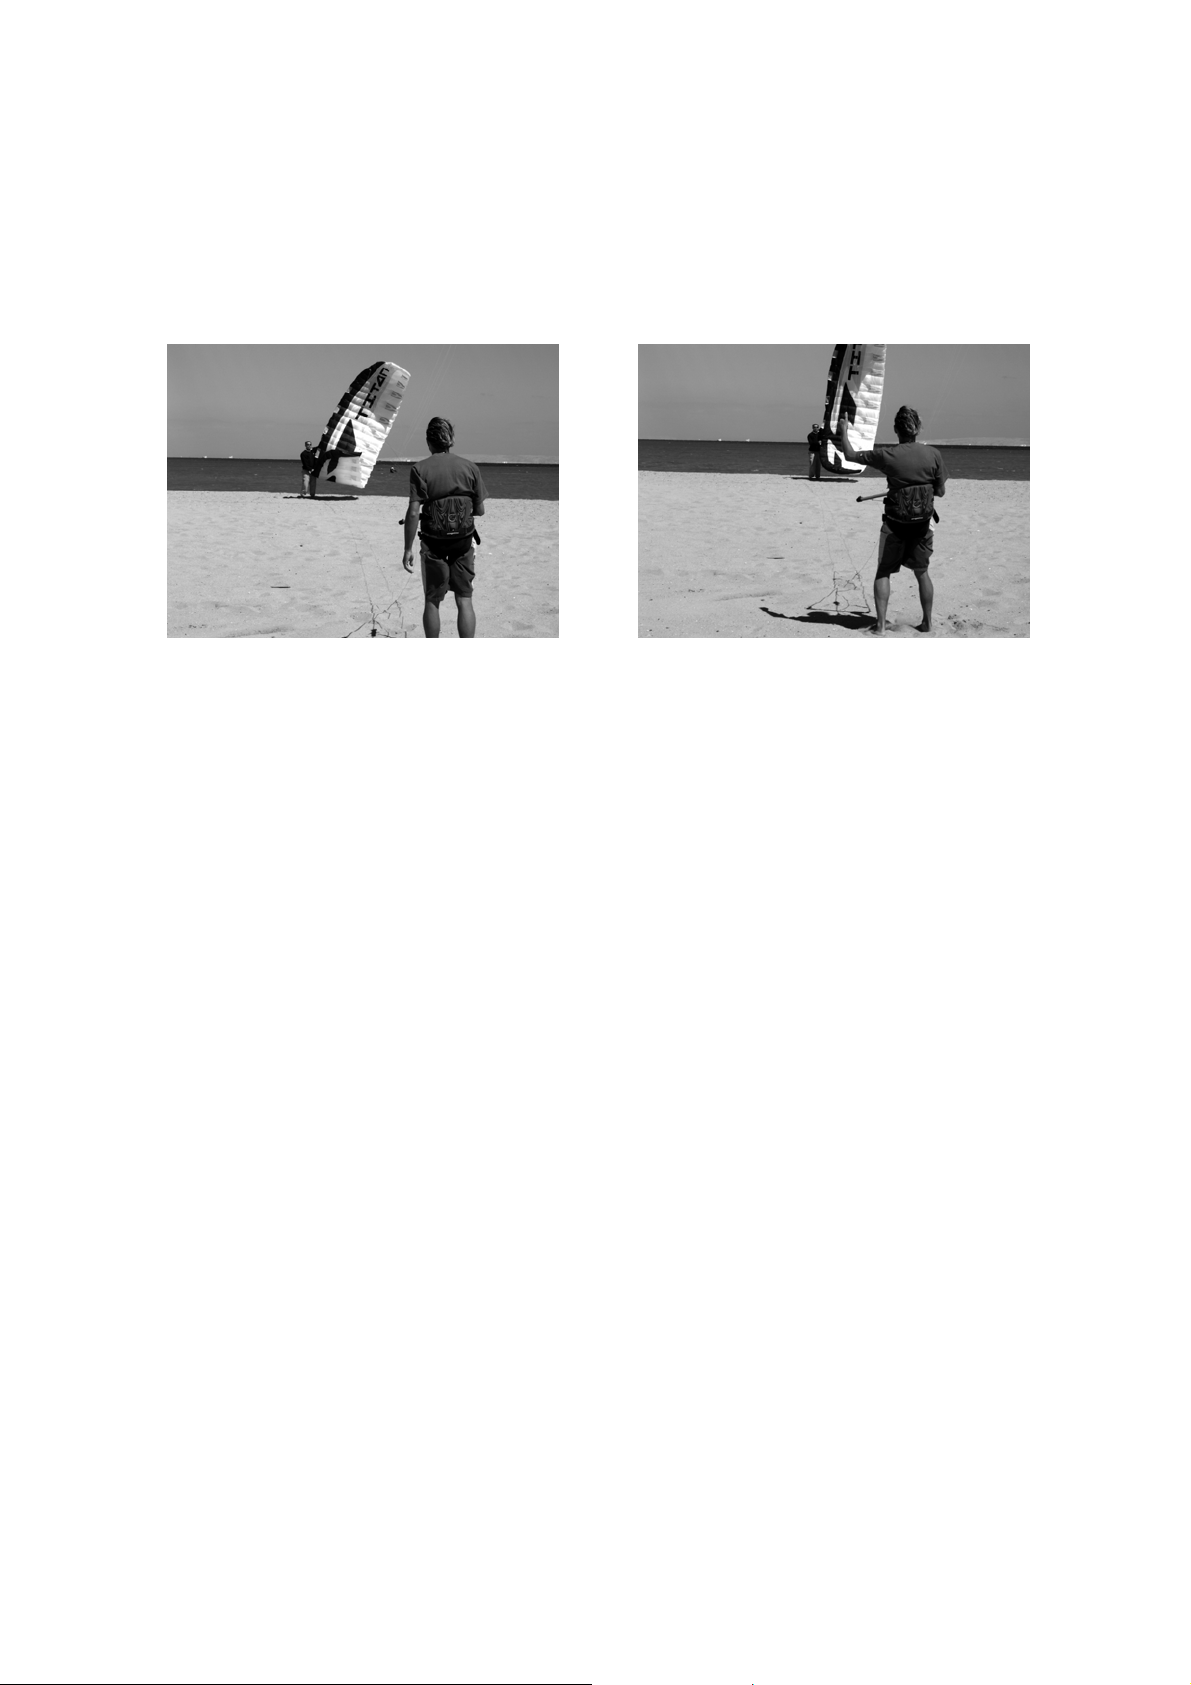
From the edge of the wind window without assistance or weighing it down. Position
yourself directly upwind of the kite, as if you would launch from the power-zone. Hook
yourself into the depowerloop and keep the safety-line pulled to stop the kite from
launching prematurely. Once the kite is inflated enough, move slowly downwind until
the kite is almost at the edge of the wind window and one of the wingtips is starting to
fold slightly. Now let go of the safety-line and immediately depower. As the kite
launches steer it to the edge of the wind window just above the ground to reduce pull.
6.4. First launch in the water (Boat-launch)
To launch the kite in the water you should be an experienced FLYSURFER and the
lines and kite should have been thoroughly wrapped up with pulled safety-line. You
should first try these steps in shallow waters and in light winds.
Take the kite out of the bag and open it carefully. While unwrapping, face the leading
edge towards the wind to help inflation. Keep the bar between your legs or hooked in
the harness, so the bar can’t fly into the lines.
All current FLYSURFER kites only require about 20% pre-inflation. Lay the kite on
the water with the bridling and the trailing edge facing you. Carefully unwind the
flying-lines, as the kite drifts away from you. First attach, if possible, the SAFETYLEASH and then launch the kite as usual by depowering.
You can now body-drag back towards your board unless you have kept it stored on
your back in the kite bag.
Attention: This is a very advanced launching method and extreme caution should be
applied at all times. A not properly pulled safety or floating lines can cause serious
accidents and should only be performed by experienced FLYSURFERs, especially in
stronger winds.
20
Page 21
7. Flying of the kite
7.1. Steering
The steering of FLYSURFER kites works the same as on any other kite. For those
who don’t know how to steer and control a kite, it is strongly recommended to
participate in a kite-course before attempting to use the kite. Kites can be extremely
dangerous in untrained hands, not just for the user but also to innocent bystanders.
Pull on the left side of the bar to initiate a left hand turn and vice versa.
7.2. Power/Depower
To depower a kite, push the bar away from your body; to power up, pull the bar
towards you. A depowered kite accelerates and moves further to the edge of the
wind window. That’s why it goes better upwind.
7.3. Trimmer
The Trimmer adjusts the basic setting and angle of attack on the kite. The Trimmer
on FS kites should always be pulled in slightly in order to avoid possible backstalling/oversheeting.
With a completely released Trimmer and the bar fully pulled in, the kite is overly
powered up or over-sheeted. This causes the kite to fly backwards. We recommend
that you only pull the bar in slightly when the trimmer is on the most open setting.
The advantage of an open trimmer is that in light and constant winds experienced
riders can ride with the bar resting against the gust-absorber, providing relaxed and
effortless sailing.
If you power up too much, the kite is very wet and/or you fly it at the lower wind limit,
it is possible for the kite to back-stall = fly backwards and loose its lift. In this
scenario, immediately depower = arms out and if necessary pull in the trimmer.
To depower the kite more in strong winds (less angle of attack) pull on the larger,
yellow handle. To power up the kite some more (more angle of attack) pull on the
smaller blue handle. In light winds you will generally power up the kite some more
with the trimmer further out (but not to such an extent that it won’t fly forwards
anymore, then depower again).
In case you have problems with back-stalls (PSYCHO²), just set the kite more to TIPBRAKE and WAC – (see MULTIWAC-System). The HARD-STEERING option of the
SPEED lets you effectively prevent backstall. In addition, you can decrease the
depower length.
21
Page 22

8. Jumping with current FLYSURFER kites
There are many different ways of jumping. The kites jump very direct and simple.
They have particular stability, which lets the kites sail on for some time and that gives
them the chance to catch themselves. Ride with medium speed at about 90° to the
wind. Steer the kite fast and fully depowered into its zenith and then back hard
(around 11:00 to 11:30). Wait until the kite has passed the zenith and then power up
the kite to its maximum.
Before you lose the edge fully power up and jump up simultaneously and steer the
kite into the zenith. Shortly before you land depower in the direction you are going, in
order to land smoothly.
Especially when using the PSYCHO², it is important not to fly the kite too
aggressively to the opposite wind window, because it will be very difficult to regain
control and land smoothly.
9. Kite-control in extreme situations
Dangerous situations can often be avoided in advance. It is very important to stick to
some basic safety guidelines and if in doubt, not to launch the kite.
If however you find yourself in an extreme situation, it is important not to panic and
react quickly and decisively. We strongly recommend that you practice the use of the
Quick Release in order to automate the procedure. This way you will react faster and
remain in control.
9.1. Flying the kite in the zenith
FLYSURFER kites are at their most stable in the zenith! However, that’s also where
you are in the greatest danger of being lifted. The kites are also very stable at the
edge of the wind window, when there is enough wind.
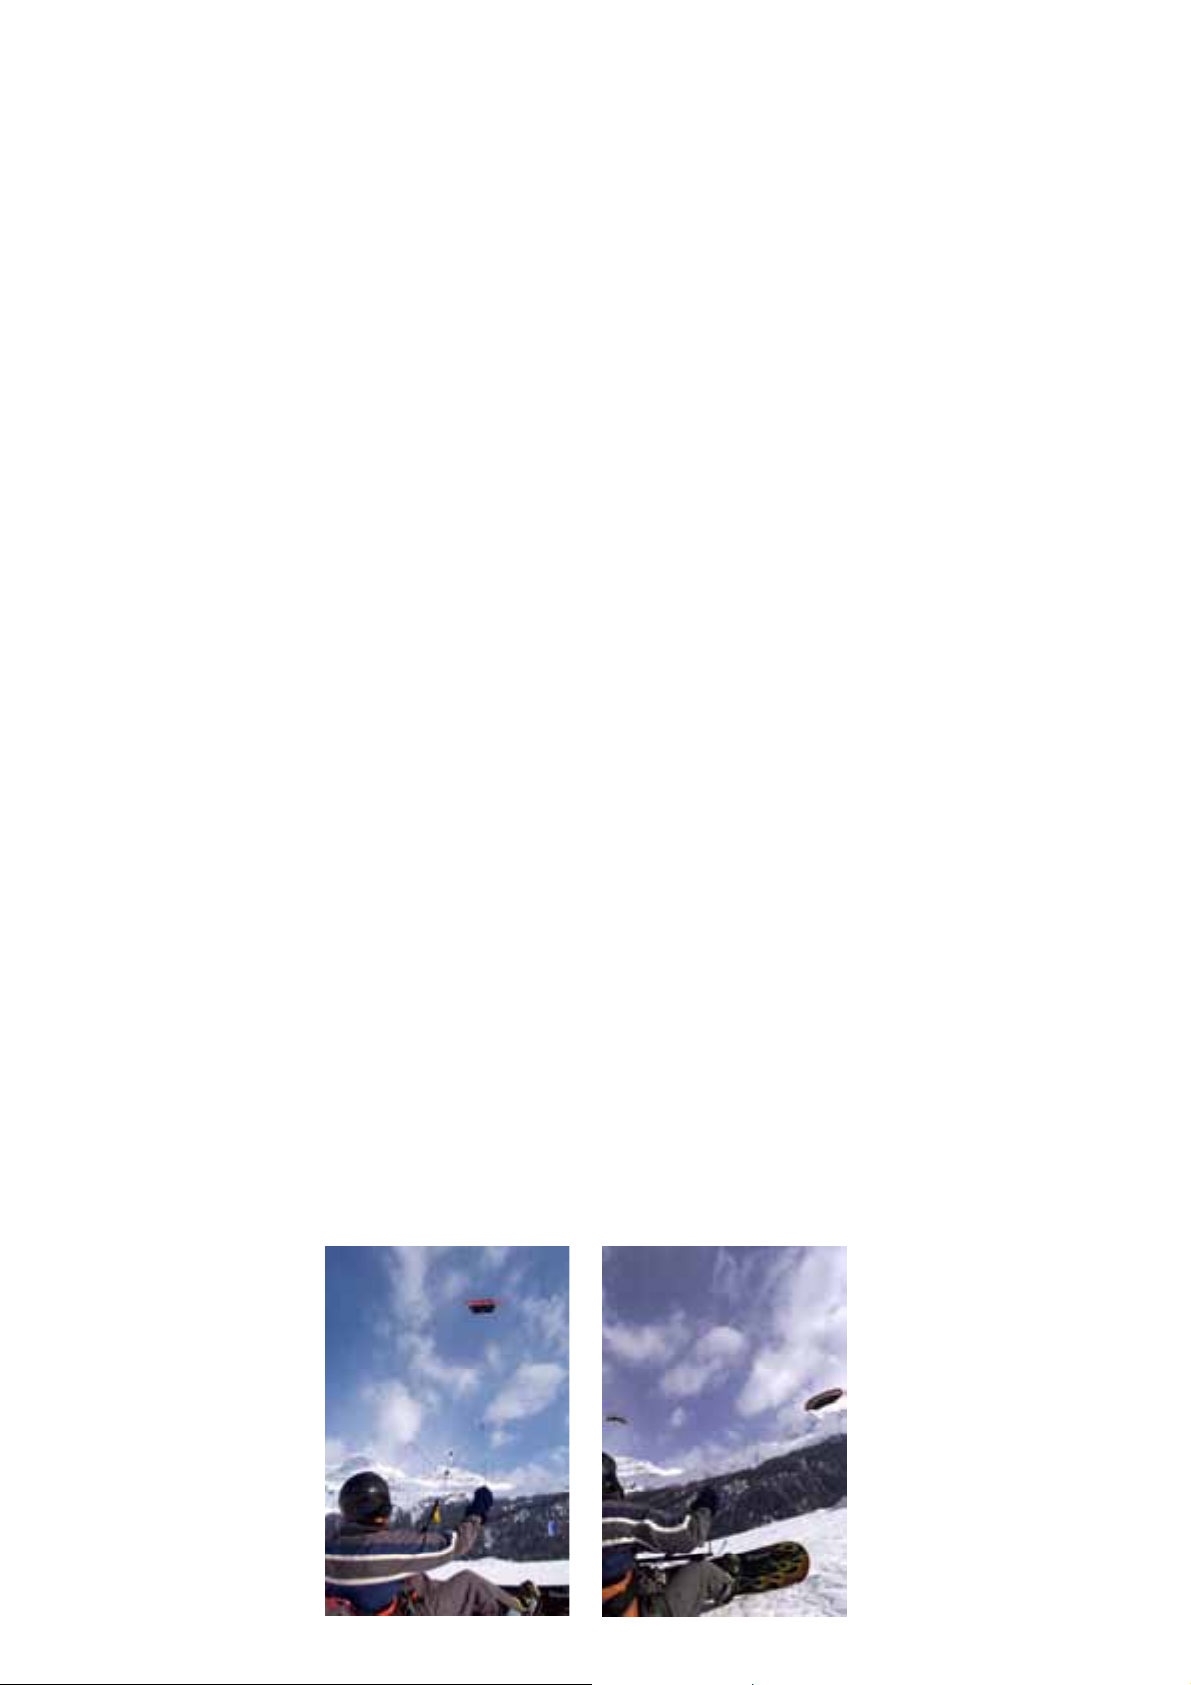
9.2. Being lifted on the beach
It is important to leave enough space downwind of you and to constantly keep an eye
on the weather. If you “park” the kite at the edge of the wind window you can avoid
being lifted. If a strong gust catches you unaware, directly use the safety system by
pulling the quick release at the depowerloop before you are too high to use it. If you
are too high to use the QR, you can only depower the kite as much as possible to
reduce its lift. If the Kite tries to luff, keep tension in the backlines. When the kite is in
the zenith and you are about to touch down, gently power up to soften your landing.
If you get lifted up very high, keep the kite as still as possible and fully depowered
(pull yellow strap if necessary) in its zenith (leading edge facing the wind).
Don’t panic! You actually have a small paraglider over top of you and you will be
able to control your flight with gentle steering impulses.
The Quick Release has to be pulled immediately after touching down.
As already mentioned before, it is absolutely necessary to keep an eye on the
weather in conditions upwind and obtain weather information, in order to avoid
being lifted. If you choose to ignore this information, you may suffer severe
injuries!
22
Page 23
9.3. Kite “over-flies“
If your kite over-flies (e.g. in gusty conditions), it is possible to get it back by either
powering up or steering it to the side. It may be possible to power up more by pulling
on one of the steering-leader-lines, than when powering up with the bar. If you
cannot prevent the kite from over-flying, the kite may collapse. Your FLYSURFER
kite is very stable, so this will rarely happen.
9.4. Kite collapses
If the kite collapses, this is called front-stall or luff. Fortunately, you have a
FLYSURFER kite and you will notice this phenomenon more often when watching
other kites. If a kite luffs it is best to unhook and to let go of the bar (if that’s not
possible pull the Quick Release) in order to land it in safety-mode. A kite that reopens in the middle of the power-zone can develop enormous forces, which can
exceed the structural limits of harness, kite or rider. If the kite collapses whilst riding,
it is most likely that the conditions are too gusty for your ability and you are better off
waiting for the conditions to improve.
9.5. Kite is about to impact on land or water
If the kite hits the ground or water at speed in the middle of the power-zone, it is
possible that it will explode, especially if you don’t release the kite’s pull. In these
situations try to unhook in time and let go of the bar (pull Quick Release if
necessary). If you haven’t got enough time for this, actively reduce as much pull in
the lines as possible before impact, so it isn’t a frontal impact.
Fortunately, all current closed FLYSURFER kites have overpressure valves or
flexible elements (TPU), so that the short discharge of overpressure makes them
lighter and more robust than any other kite system on the market. The absorption of
the overpressure is released from the open cells at the front and on the sides of the
COOL. However, the kites are still not indestructible, just like you. So don’t go over
the top.
9.6. Kite doesn’t immediately land after safety deployment
The new safety was optimized for less rest pull, and the wingtips fold in when in
safety-mode, in order to minimize the wind attack area. That’s why the kite doesn’t
land backwards as quickly, which reduces the force on the kite.
The kite shouldn’t be kept on the beach when in safety-mode, because it could
launch if a gust of wind catches it. Whoever wants to land the kite precisely
downwind in the lower wind range, can pull on the leader-lines to force the kite to
back-stall and land. It is important not to let go of the leader-lines in the power-zone,
because this would result in a power-zone start.
23
Page 24
10. Relaunching the kite from the water
There are different ways of relaunching a FLYSURFER kite from the water.
Here we describe a few. On our homepage www.flysurfer.de you will find some
videos with further techniques for relaunching the kites.
For whom this is too complicated: The kites have three steering-lines and a pull on
one of the three lines will launch it! Only the SPEED requires a skilled rider during a
relaunch. The COOL cannot be launched from the water, because it is an open-cell
kite (without valves).
10.1. From the trailing edge
If the kite is on the water trailing edge down, simply fully depower (pull the trimmer if
necessary) and it will launch by itself.
If the wind is too strong for a power-zone start, only depower on one side and fully
pull on the other side. That way, the kite turns and you can restart it at the edge of
the wind window (chapter 10.4.).
10.2. From the leading edge
If the kite is in the water, leading edge down, you have various options to relaunch it.
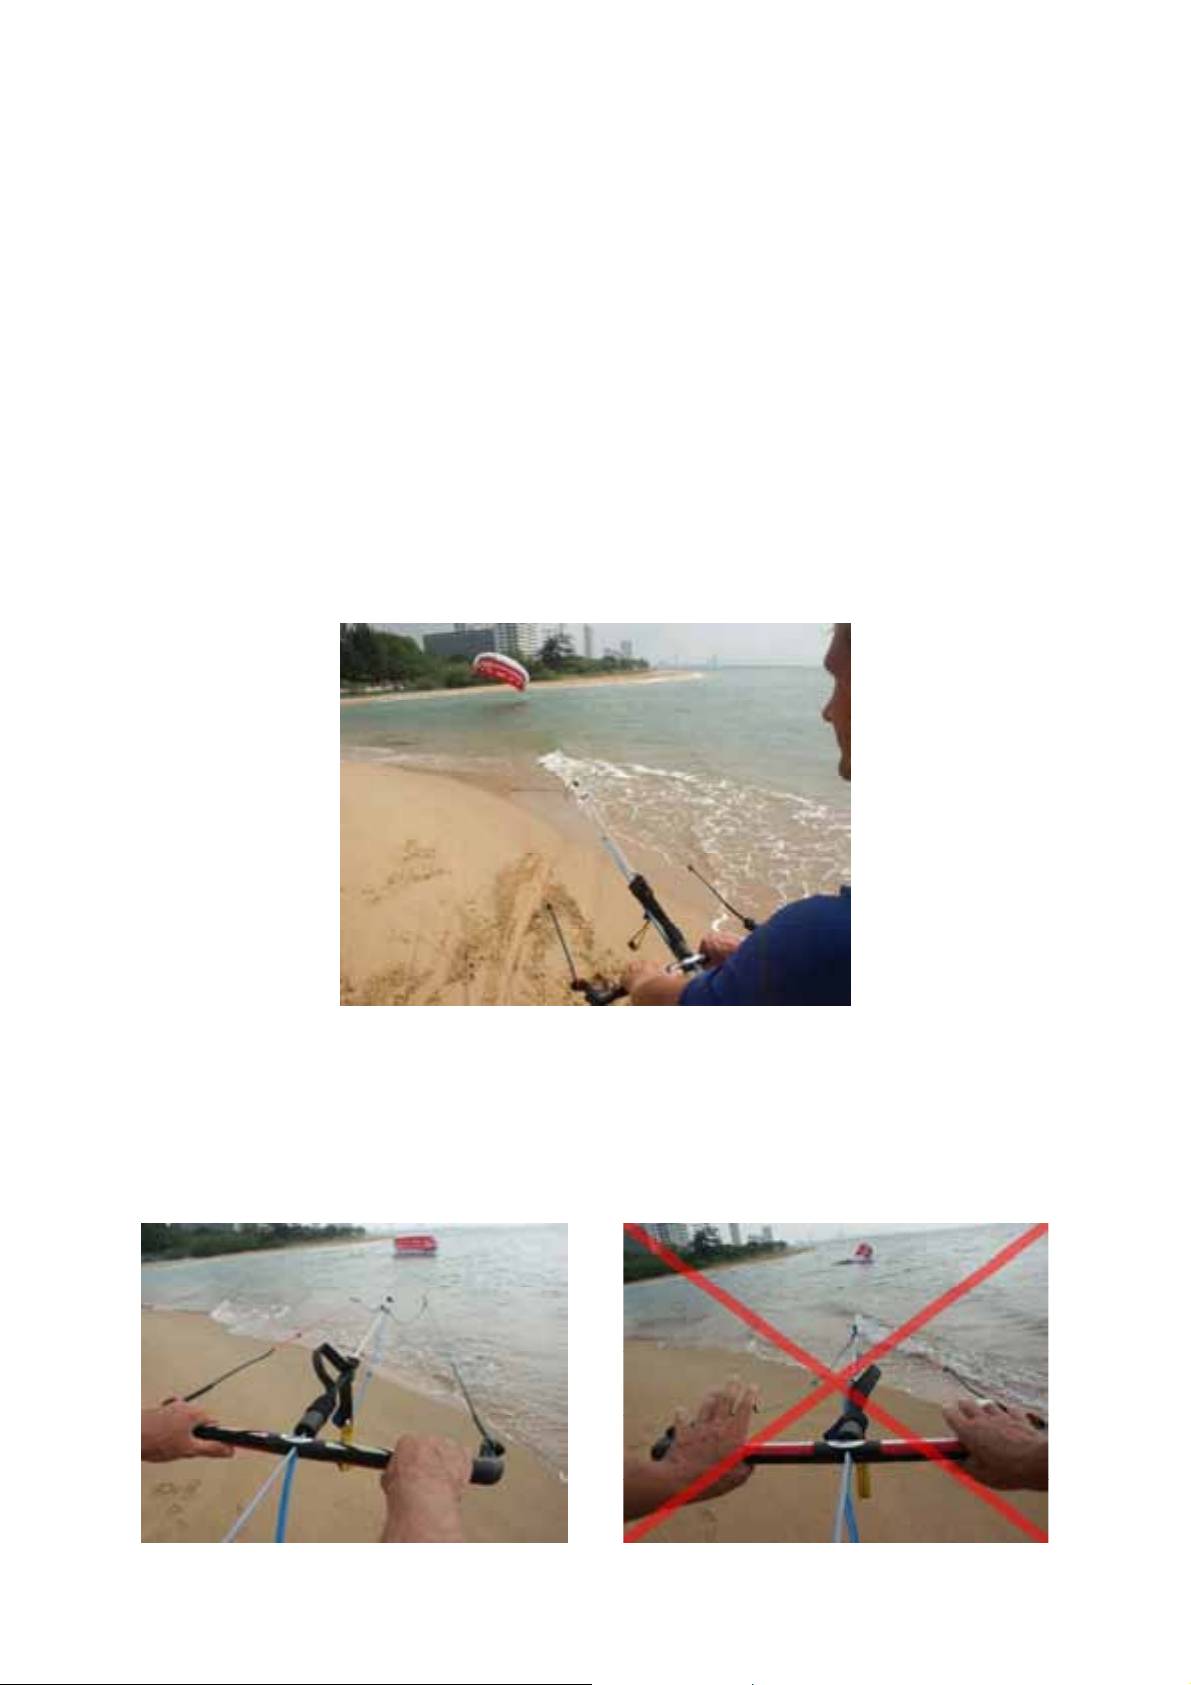
Important: Don’t get tempted to turn the bar because of the crossed over flying-lines.
The green side is still on your right!
24
Page 25
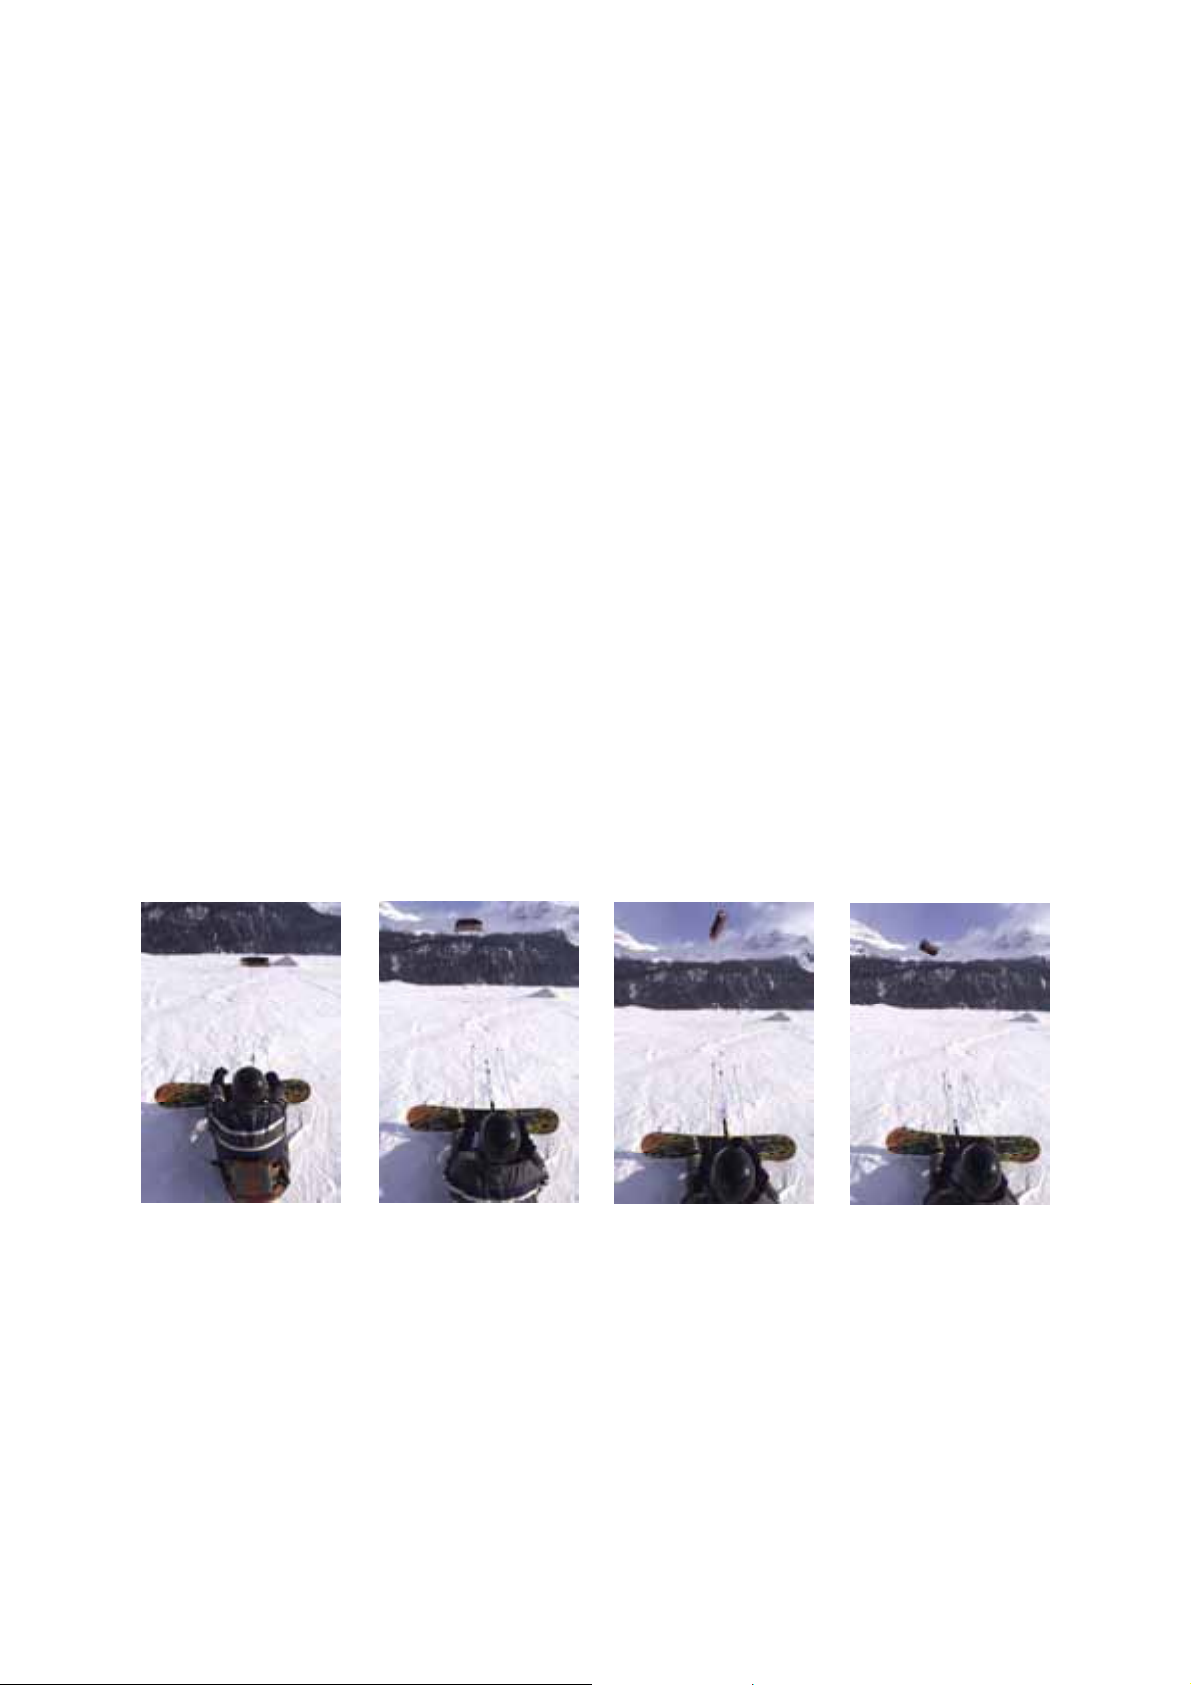
10.3. Backward start (in light winds with the SPEED at all times)
By pulling both of the thick steering-leader-lines, the kites can be launched
backwards. As soon as the kite has landed on its trailing edge, it can be launched as
usual (chapter 10.1.).
You can also let the kite fly up very high and then let go of one of the steering-leaderlines. As soon as the kite has rotated more than 90°, you can let go of the second
steering-leader-line and the kite will fly to the edge of the wind window. That way, you
will avoid a launch from the power-zone. This technique is more comfortable
especially in stronger winds.
Tip: If the board is already strapped to your feet and you are holding it in front of you,
you can avoid the body drag and keep going when you launch the kite. In addition,
you can also build up the necessary counter-pressure for launching in weak winds, if
you have the board in front of you. In very weak winds, you can pull on the steeringleader-lines, to give the kite a launching impulse.
Caution: Can be very damaging to the material in strong winds, because high
pressure can develop on the lines and the kite.
Prevention of body drag in strong winds and power-zone start (PSYCHO²/EXTACY
and SPEED when set to SOFT-STEERING):
By extremely powering up / over-sheeting (fully open trimmer and strong pulling of
the bar toward the body), the kite can be flown out of the power-zone gently up to 60°
when it stalls. As of 60° the kite can be flown into the zenith as usual by fully
depowering.
This method requires flair from the kiter, but prevents the high strain on kite and kiter.
25
Page 26
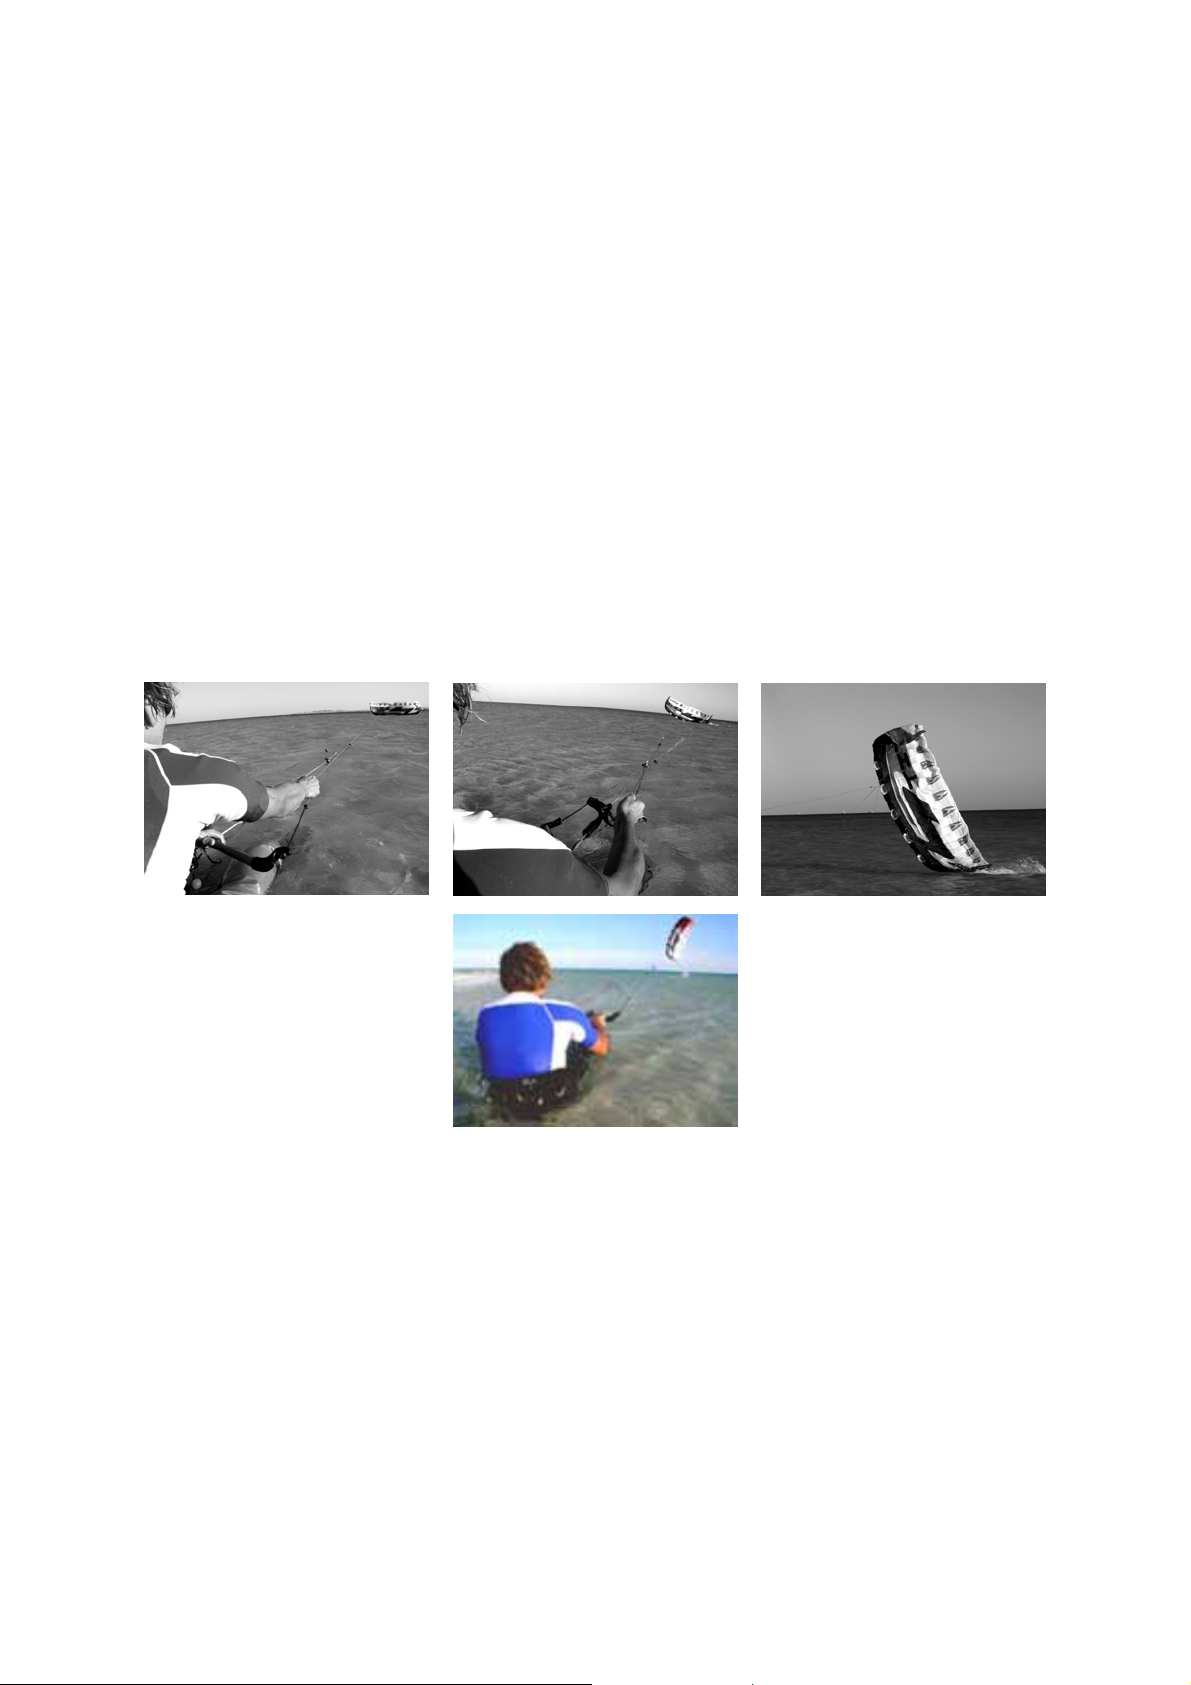
10.4. Relaunch from the edge of the wind window (in stronger winds expect
SPEED)
Grab one of the two steering-leader-lines and pull gently so that the kite starts to
move to one side. Make sure that the other side is depowered, in order to ease the
movement of the kite to the edge of the wind window. Just before the kite reaches
the edge of the window pull the line all the way. The kite will stand up and launch with
little pressure. If it doesn’t stand up despite there being enough wind and you having
pulled in the line correctly, it is probable that the kite is already too far at the edge of
the wind window. You will then have to pull the opposite leader-line and steer the kite
back into the power-zone. Now, try again and pull a little sharper, earlier on.
When the kite gets to the edge of the wind window, you can simply pull on the
steering-leader-lines, until the kite collapses. The wind will re-open it and you can
easily launch it depowered.
It might be helpful to pull the trimmer before launching from the edge of the wind
window. It could also be useful to pull the entire trimmer towards your body during a
relaunch. That way, the kite moves to the edge of the wind window more easily. The
relaunch at the edge of the wind window is extremely difficult and not recommended
for the SPEED, because of its high Aspect Ratio.
Attention: Never wrap the lines around parts of your body. This is especially
dangerous with the very thin flying and bridle-lines. Extreme danger of injury!
10.5. Quick launch
If you pull sharply on the leader-line it is possible to turn the kite on its spot so that it
will launch in the power-zone (light and medium wind).
Experienced kiters can even launch the kite before having stopped “planing”.
CAUTION: In strong winds and when there are obstacles downwind of you, you
should avoid using this launch method.
26
Page 27

10.6. Kite doesn’t launch anymore, you start drifting away
If you are unable to re-launch the kite and you start drifting away, it might be
necessary to disconnect yourself from the kite before you drift too far and are unable
to swim back to the shore. Once back you can always get a boat and salvage the
kite. Main thing is that you are safe.
If you judge the situation correctly and early enough, whilst still close to the shore you
might be able to rescue yourself and the kite. In this case you wrap up the kite as you
would on land, but you must be careful not to get caught in the lines. First, activate
the Pull-Stop-System (if available, in any case pull the SAFETY-LEASH all the way
through) and keep the lines under tension, then start to wind them onto the bar. Once
at the kite, open the air outlet zipper and wind the kite around the bar. Don’t try to
throw the bar into the lines.
If the wind is blowing only slightly off-shore, direct the kite to the edge of the wind
window by pulling on the shore-side leader-line and see whether it has enough pull to
get you back. If you only have to swim a short distance to the shore against the wind,
it is enough to pull the kite with the activated Pull-Stop-System against the wind.
10.7. Being rescued with FLYSURFER kites
Experienced FLYSURFER riders can try to rescue others, who have got themselves
into trouble, can’t re-launch their kite (e.g. snapped line …) and drift out to sea. This
is always a little tricky and should only be attempted in safe conditions and from very
good riders. The rescuer should also have a line-cutter to free himself from tangled
lines.
It is important, that the to-be-rescued rider’s kite hasn’t taken on too much water, as
this makes a rescue almost impossible (anchor). The rider about to be rescued
should detach him/herself from the kite. The rescuing rider cautiously approaches
from upwind of the none re-launching kite. Whilst sailing past, the rescuing rider will
attempt to grab the wingtip nearer the shore and drag it behind him. If successful
he/she can sail back to the shore, dragging the kite behind him/her. Here it is very
important that the rescuing rider is extremely cautious not to get tangled in any lines.
Important: Look after yourself first. If you put yourself into danger when attempting
to rescue someone else, try and seek help from others.
27
Page 28
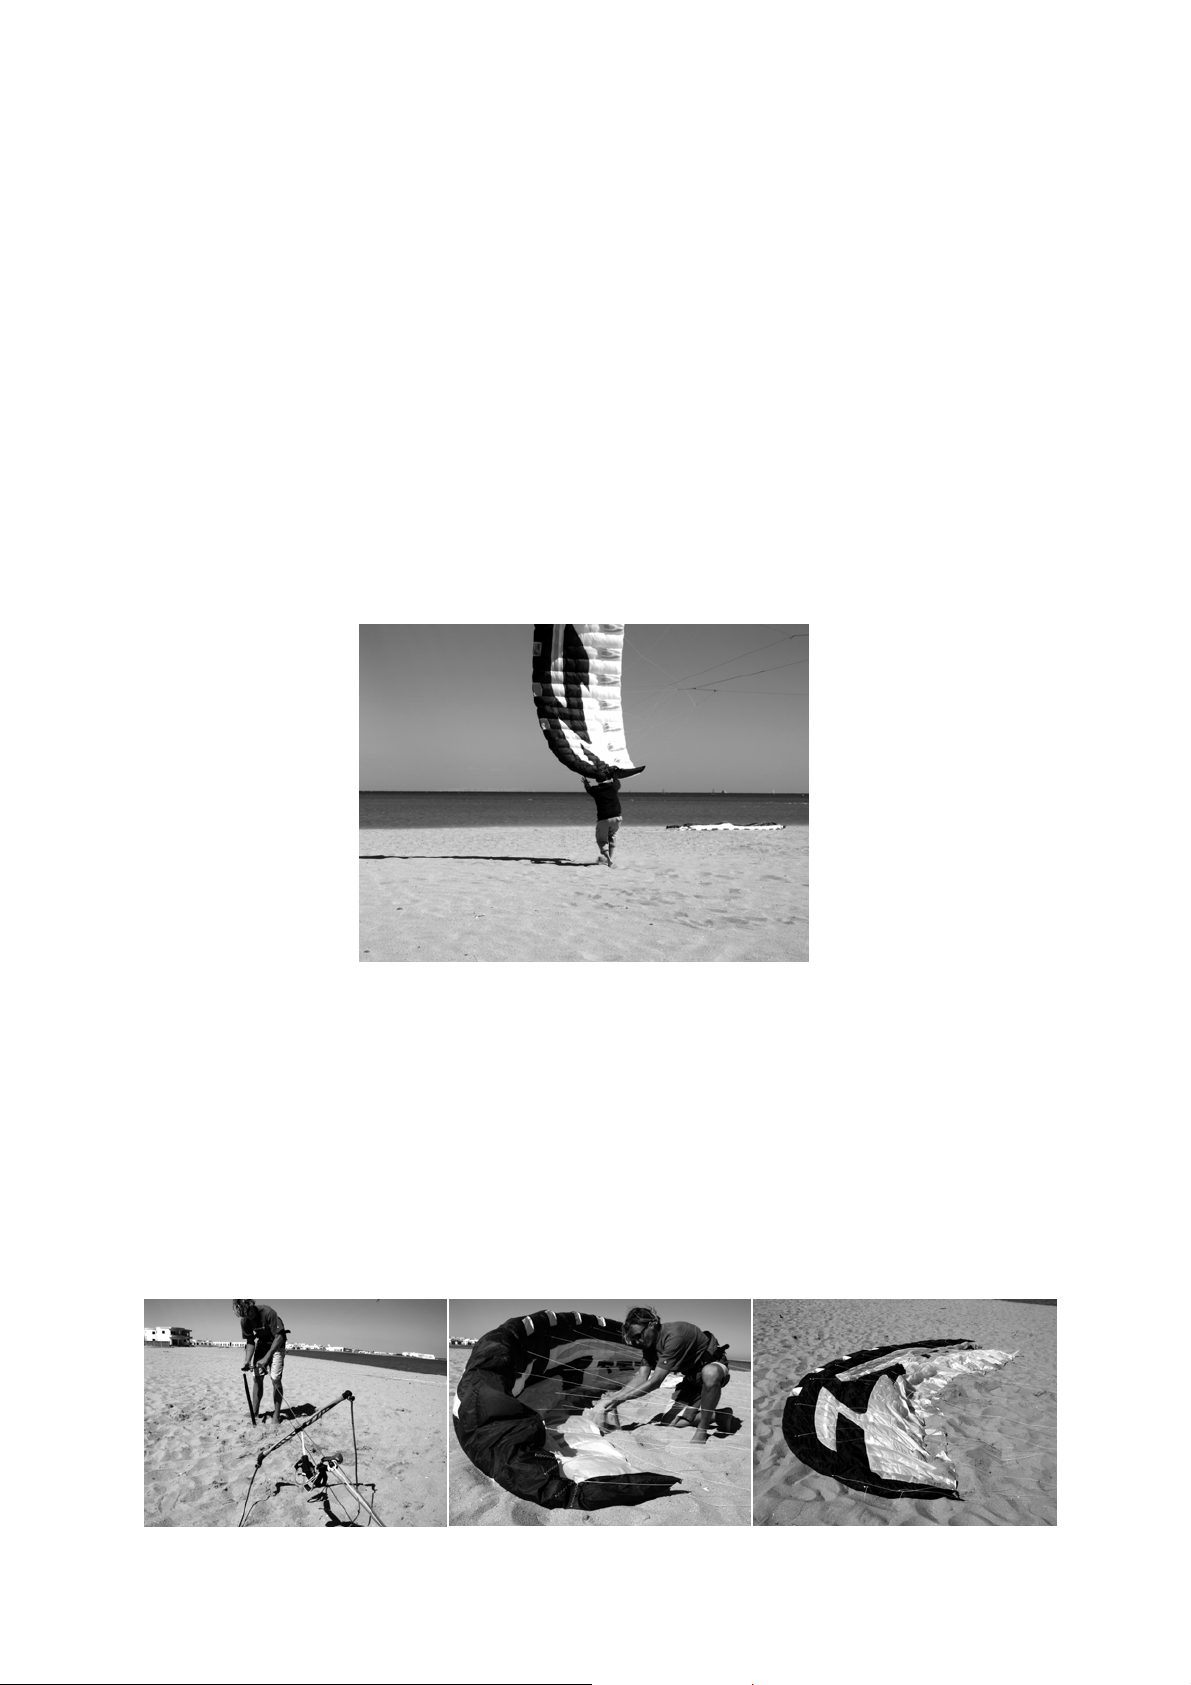
11. Landing
11.1. At the edge of the wind window
Basically every kite is caught by a helper at the edge of the wind window. Especially,
if there are strong winds and very little room downwind.
Fly the kite at the edge of the wind window slightly above the ground and let a
competent helper catch it. The helper will approach the kite from upwind, grab the
lower wingtip and pull it towards him/her. You should now walk toward him to relieve
the tension in the lines and still leave some tension in the upper line to assist the
helper in letting the wingtip blow out downwind. The helper lays the kite on its upper
sail and weighs down the wingtip (e.g. with sand). That way, the kite is in an optimal
position to be relaunched without a helper.
The secured kite should not be twirled around by gusty winds, because the lines
could get tangled up.
Tip: During gusty winds, you shouldn’t wait too long to land the kite. Maybe you will
be able to fly the kite away from the edge of the wind window, by powering up or by
flying the kite up and down. This increases the collapse resistance stability.
11.2. In the power-zone
A FS kite can be landed single handed and safely. Check that the landing spot is free
of people and obstacles. Then unhook and let go of the bar (in an emergency pull the
Quick Release on the depowerloop). Once the kite has landed, it can be secured by
a helper or you can let it blow against a suitable object where the wind should pin it
down. Otherwise secure the SAFETY-LEASH onto a solid pole, rock etc. The kite
should then be secured immediately; to make sure it doesn’t restart.
If there are no suitable objects near you it is possible to tie the safety to a board
buried in the sand (only suitable for light winds). Then quickly run up to the kite
outside of the lines and secure it additionally.
28
Page 29
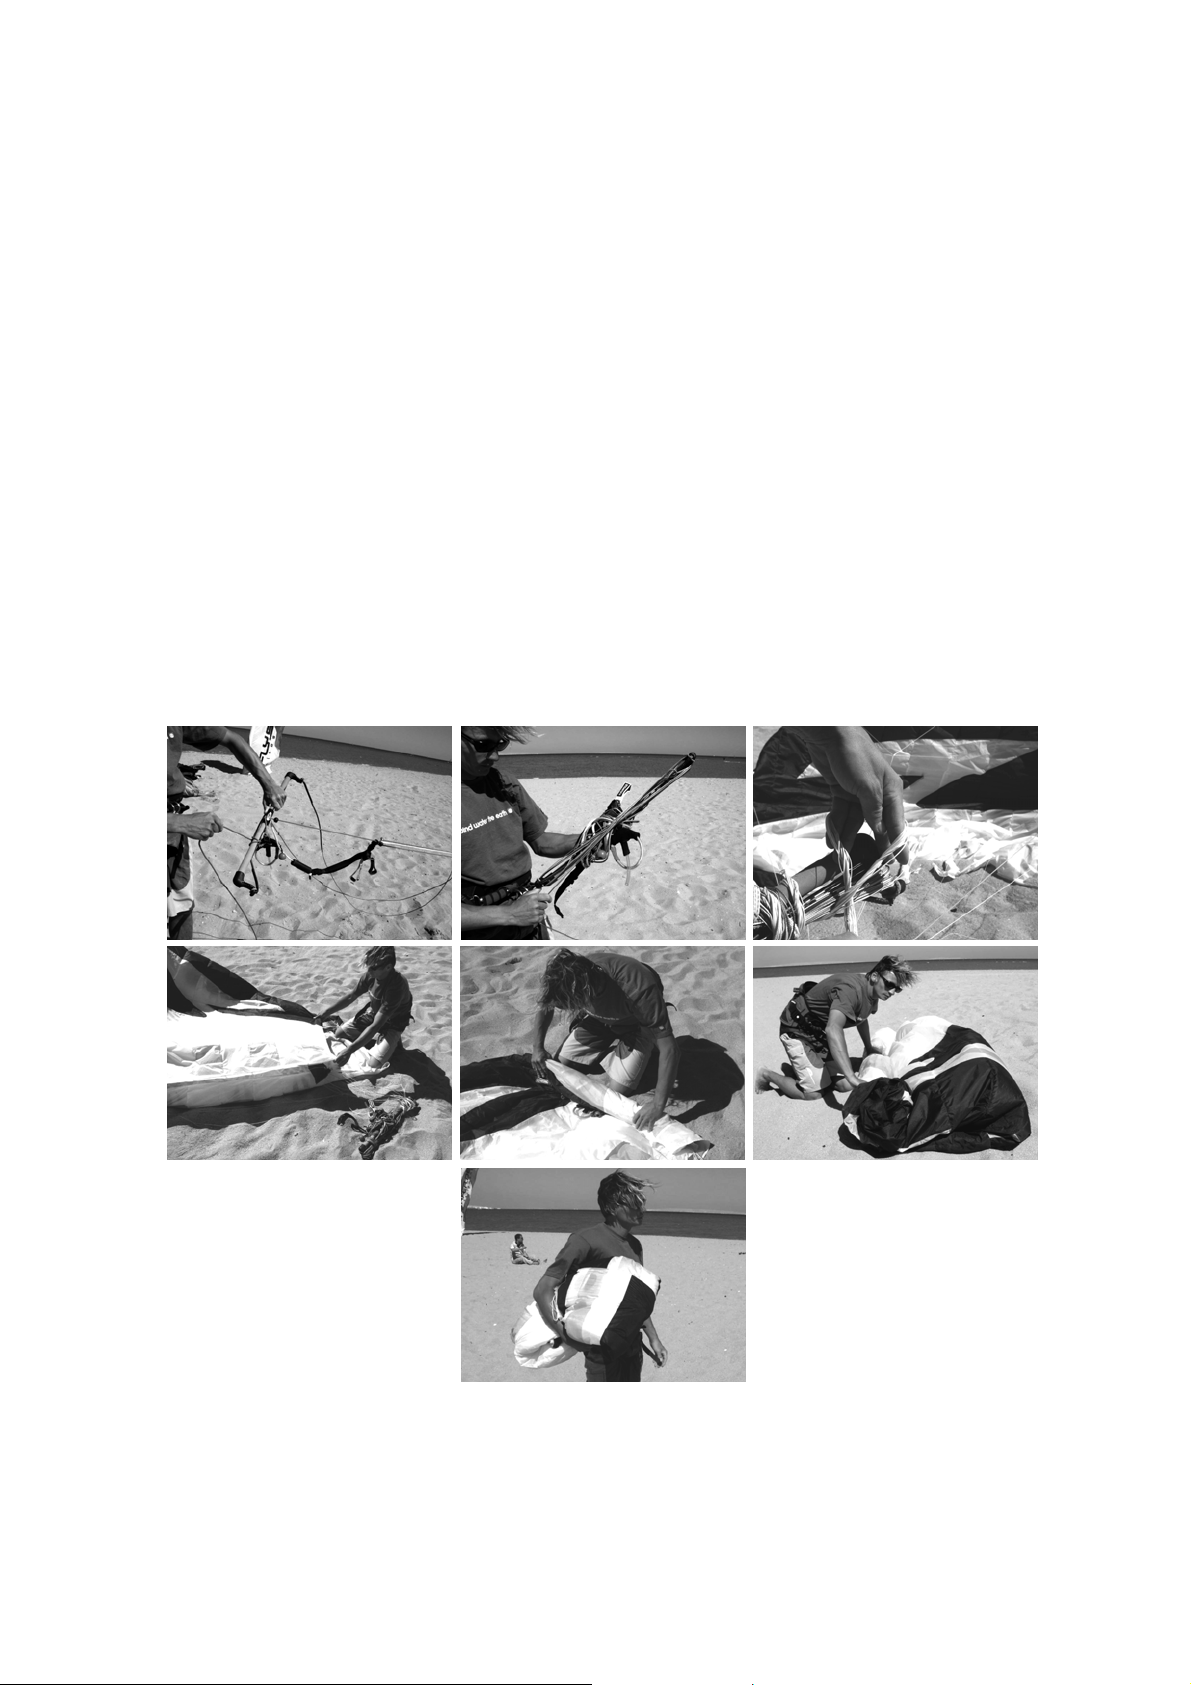
12. Packing and storing your kite
Weigh down the upwind wingtip with something heavy (e.g. sand) and open the
zippers in the middle between the valves.
Now, pull the safety-line all the way (Picture 1) and start winding the lines in the
following way. Always wind up the flying-lines in a figure of eight around the winders
on the bar until you get to the pulleys of the bridle-lines. Now secure the lines with a
half hitch and wrap (if you haven’t done so already) the safety around the bar.
Take the downwind wingtip and place it on top of the weighed down wingtip. Throw
the lines inside the kite, so that you can place the bar on top of the two wingtips and
start rolling the kite all the way around the bar.
Important: Never place the bar on top of the kite’s underside, (where all the bridlelines are attached) as this can quite easily result in knotted and tangled bridle-lines.
Now simply fold over the flexible ends of the kite which overhang the bar and put it in
its bag
Info: FLYSURFER materials are extremely robust; therefore you won’t encounter
any problems when rolling up the wet kite-bar.
The salt from the salt-water is no problem for your kite and lines during your holiday.
After the holiday, you should dry the kite properly. You don’t have to wash out the
salt-water.
29
Page 30

13. Frequent problems and their solutions
13.1. Fear of using the Safetysystem
Problem: Fear of the kite not being able to restart or malfunctioning.
Solution: FLYSURFER kites have a super safe Safetysystem, which enables the
kite to restart in any situation right away without any problems. Because of this,
FLYSURFER riders constantly use their Safetysystem, so they can (e.g. to take a
break on the beach, by simply unhooking). This increases the trust in this system and
also increases the probability of use in dangerous situations.
It is better to use the Safetysystem very often, rather than get into difficulties!
13.2. Kite flies backwards
Problem: The kite may fly backwards during low winds, too powerful steering
impulses, stiff posture and fully powered bar, or when the kite is wet.
Solution: Push the bar away from your body (depower). If that is not enough, also
pull the trimmer. The so-called depower range (from the depowerloop to the gust
absorber/trimmer) can be shortened by simply moving the knot at the trimmer.
This is very effective against back-stalls.
Generally, the kite shouldn’t be slowed down, which means it shouldn’t be powered
up too much, because this will slow down the flight too much and result in a decrease
of pressure. A fast flying kite builds up pressure more dynamically and has better lift.
If you want to eliminate the backstall of the SPEED, simply set the kite more to
HARD-STEERING.
13.3. Kite fills up with water
Problem: Kite is pulled under water, because the kiter fights against the pull of the
kite and/or against the wind.
Solution: Never pull on the bar if the kite is lying on the water, because this will
pump water into the kite. Never try to move the kite against the wind when it’s lying
on the water, instead let it pull you. Don’t try to pull the kite toward you using the
safety before attempting to relaunch, instead work your way toward the kite. Decide
which launching method to use (see manual) and observe the mentioned tricks. That
way, you will be able to start the kite quickly and safely in all conditions, even if water
has entered the kite.
30
Page 31
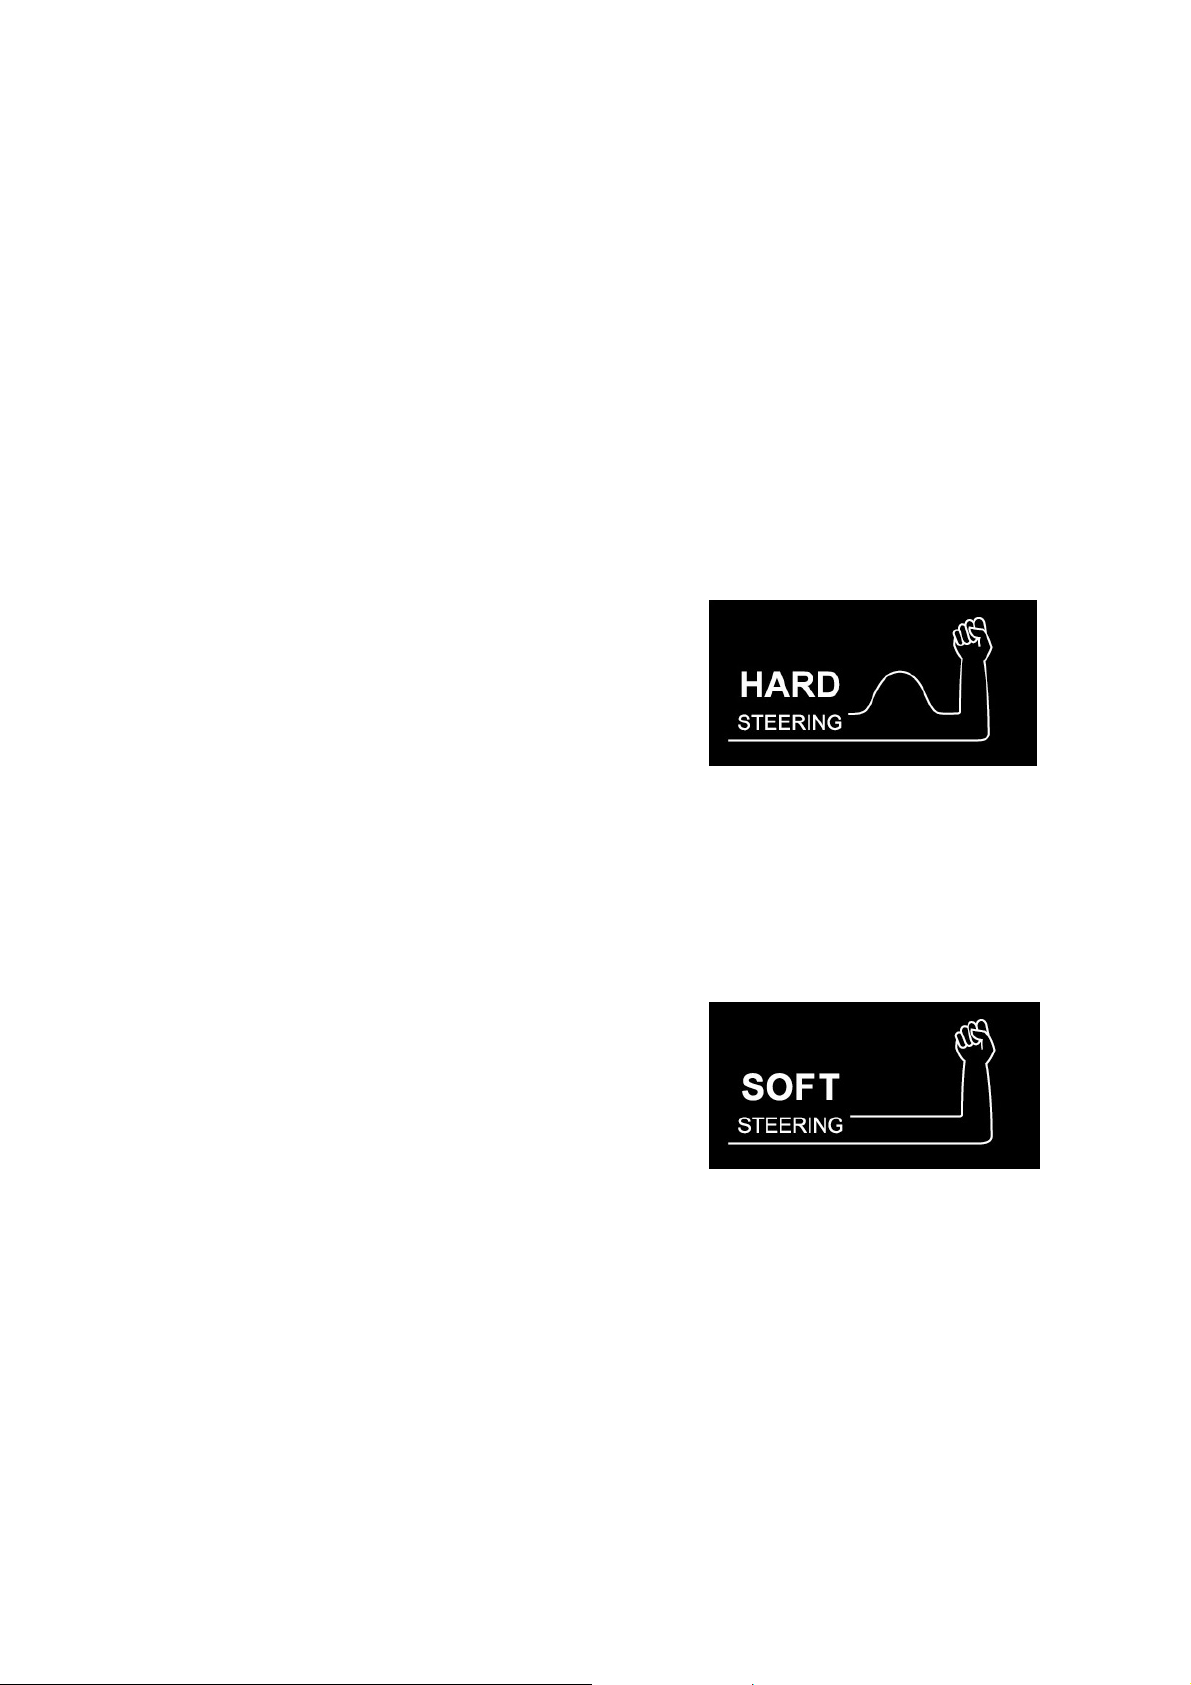
14. Tuning Tipps
14.1. MULTIWAC-System
SPEED:
HARD-STEERING:
This setup is optimal for inflatable kiters and unhooked kiters, who like very hard
steering. When set to HARD-STEERING, the profile’s maximum angle of attack is
limited. In this setup, the kite is practically impossible to backstall, which is very
convenient when doing kiteloops. Therefore, the kite cannot be steered as quickly.
The series kites are delivered in the second hardest adjustment, which is probably
the best compromise.
When the safety is released, the brakes are pulled back less, which increases the
impulse at the beginning, but reduces the chance of the kite relaunching after the
landing.
Difference:
Higher bar forces.
Less tight turning radius.
No backstall by oversheeting or kiteloops.
Safety is “shorter“.
SOFT-STEERING:
This setup is optimal for enthusiasts of soft steering forces, e.g. waveriders or when
flying the SPEED with handles. When using handles, the WAC-line can be removed
completely. The maximum angle of attack in this adjustment is less limited. That way,
the kite can be used like a trick kite and can be turned quickly and looped.
When the safety is released, the brakes are pulled back more, which reduces the
impulse at the beginning, but increases the chance of the kite relaunching after the
landing.
Difference:
Lower bar forces
Tighter turning is possible.
Backstall may occur.
Safety is “longer“.
PSYCHO²:
Dank des neuen MULTIWAC lässt sich das Flugverhalten des PSYCHO²,
sekundenschnell an die persönlichen Vorlieben anpassen. Serienmäßig wird der Kite
auf der mittleren Einstellung ausgeliefert. Für jede Trimmoption, ob WAC- oder
STEERING-Mutation, habt ihr 5 mögliche Positionen.
31
Page 32
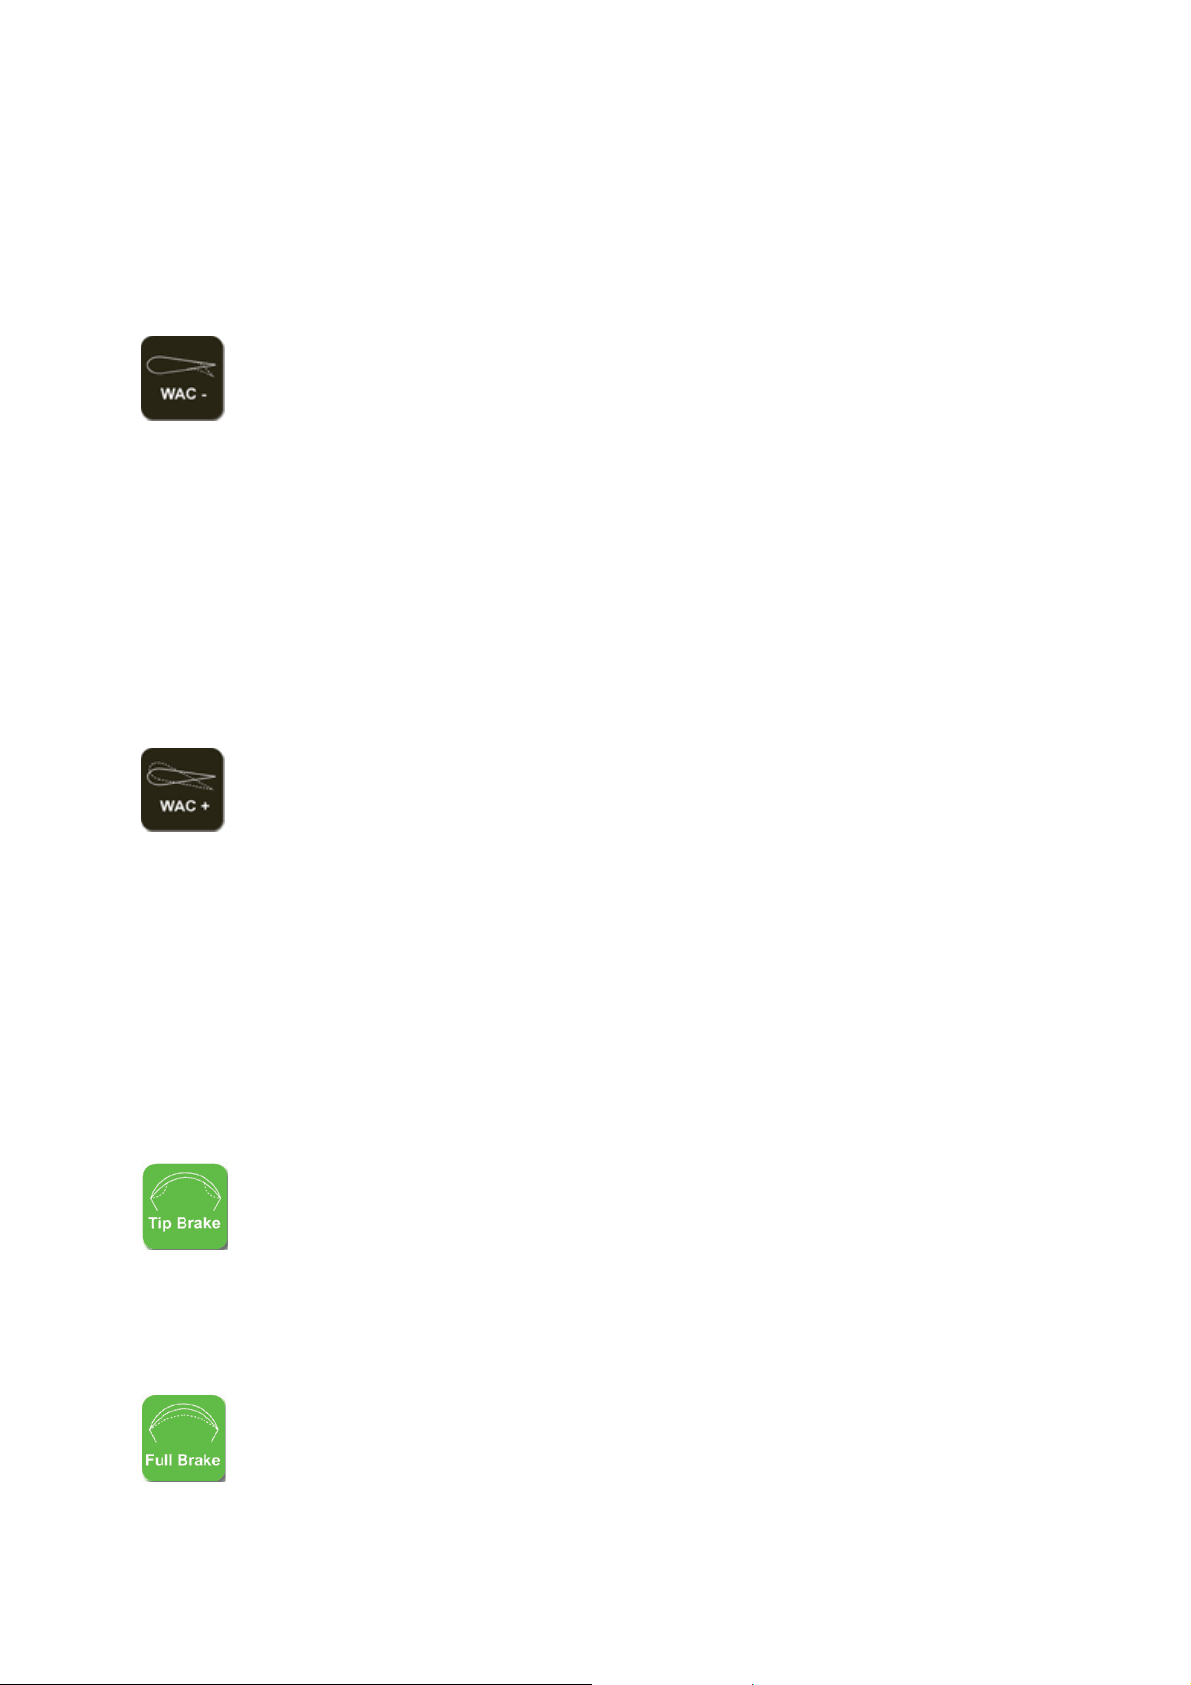
WAC-Mutations:
Optimal for: wakeboarding, freestyle and light wind.
By increasing the black WAC trim line, the kite profile will have a deeper
camber. The lift of the profile will increase, the kite pulls harder, but also has
more downwind pull. The JET FLAPs are used for lift and steering. The kite
is more direct and harder in pressure build-up, therefore not as stable in the
sky with the possibility of luffing with collapsing of the tips and the complete
kite.
Advantage: less backstall.
Disadvantage: more downwind pull.
Optimal for: races.
By decreasing the black WAC trim line, the kite profile will have a flat
camber. The resistance of the profile is reduced. Therefore the kite has less
downwind pull and you can go upwind more easily. The lift of the low
camber is also less aggressive. The Kite will steer more slowly at complete
WAC+ setting.
More feeling for the kite is demanded so you don't provoke the kite to backstall (backwards flight of the kite) by over-sheeting (powering up too much).
Therefore the kite is less vulnerable to luffing with collapsing of the tips or
the complete kite.
Advantage: more upwind performance.
Disadvantage: more backstall.
STEERING-Mutation:
Optimal for: freestylers and beginners.
By increasing the green BRAKE trim line, the kite is depowered more in the
centre and is therefore steered more over the wingtips, like an inflatable
kite. The kite can't be powered up as much, has less back-stall and is
therefore easier to fly. The steering forces are harder and more defined.
Advantage: less backstall.
Disadvantage: less lift.
Optimal for: races.
By decreasing the green BRAKE trim line, the kite is powered up with the
entire surface like a classical soft kite. The kite can be powered up more,
but is therefore easier to back-stall by over-sheeting. The steering forces
are very soft.
Advantage: more lift.
Disadvantage: more backstall.
more lift.
more direct bar forces.
more vulnerable to luffing/collapsing.
slower flying speed.
less luffing/collapsing.
less bar forces.
less lift.
slower steering.
harder and more defined steering forces.
less bar steering forces.
32
Page 33

14.2. Variable Line Length (VLL)
FLYSURFER kites (except for the COOL) have 3 separable flying-lines of 3 m, 6 m
and 12 m, which add up to 21 m in length. That way, you can adjust the line lengths
to your own personal preferences, the spot or the conditions in 3 m intervals. The
advantage to RAM-Air kites is that they don’t lose their projected surface when the
lines are shortened, due to their bridle-lines.
In order to increase or decrease the line lengths, you have to unloop them. Make
sure that the loops and knots are very tight when you put them back together. The
standard lengths are the best compromise for the current riding style. If you want to
lengthen your flying-lines, you just have to buy 3 extension-lines of the same length.
Length Effects Optimal for
Shortened
Standard
length 21 m
Additional
lengthening
Due to decrease in wind window size
faster change of kite position is
possible.
The kite gets a more direct feel.
Less room to move the kite and closer
proximity to water surface. Especially
when close to the water surface,
underpowered riding is more difficult.
Most optimal compromise
Due to increase in wind window size
change of kite position in the window is
prolonged. Therefore it is easier to keep
the kite in motion in the window when
underpowered. If wind strength stronger
at higher kite elevations, light wind
performance is additionally enhanced.
Responsiveness is markedly reduced
e.g. in gusts.
more control when
overpowered, especially in
gusts
tight locations
wave kiting
more safety due to more
direct kite control
reduced risk for lofting
all-round performance
underpowered cruising in
certain conditions
more hang-time
33
Page 34
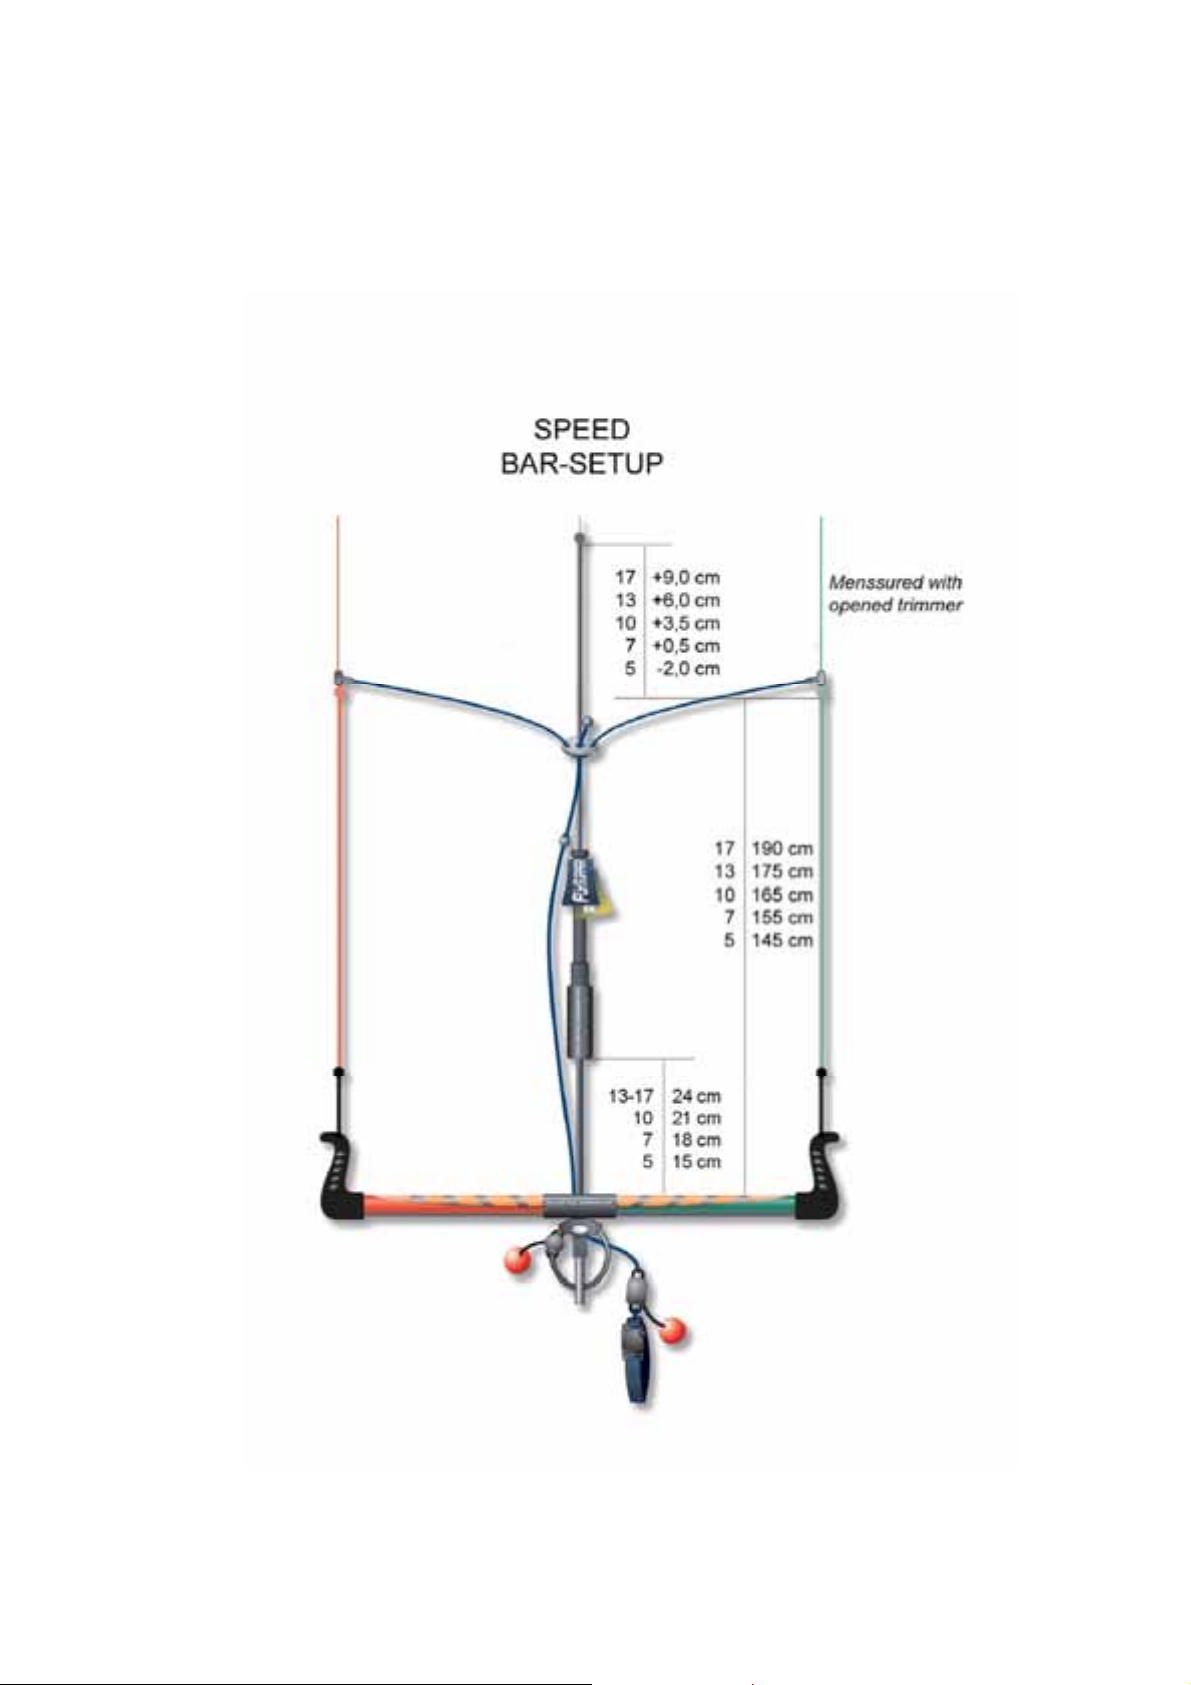
14.3. Depower-line adjustment
Adjustments to the depower-line can be made to suit your preferred arm length
position on the bar. Simply adjust the rope at the bottom of the trim strap to the
desired length. It is important that you adjust the knot at the end of the depower-line
to compensate for the shorter or longer length of the line between the trim strap and
the bar. If you shorten the rope you must move the knot at the end of the depowerline up, and down if you lengthen it.
The BAR-SETUP of our other kites can be found on our homepage
www.flysurfer.de – support / bar setup.
34
Page 35

15. Wind ranges (for a very good 75 kg rider using a 150 cm board)
Wind range: COOL
4.0 6.0 9.0
4 4 4 min. wind
4 - 16 4 - 13 4 - 10 under powered
16 - 34 13 - 28 10 - 21 normal powered
34 - 46 28 - 38 21 - 28 over powered
1 : 3 1 : 3 1 : 3 depower effect
Wind range: EXTACY
4.5 7.0 10.0 13.0 17.0
5 5 5 5 5 min. wind
5 - 15 5 - 12 5 - 10 5 - 9 5 - 8 under powered
15 - 32 12 - 26 10 - 22 9 - 19 8 - 17 normal powered
32 - 44 26 - 35 22 - 29 19 - 26 17 - 23 over powered
1 : 3.4 1 : 3.4 1 : 3.4 1 : 3.4 1 : 3,4 depower effect
Wind range: PSYCHO²
7.0 10.0 13.0 17.0 21.0 26.0
5 5 5 5 5 5 min. wind
5 - 12 5 - 10 5 - 9 5 - 8 5 - 6 5 - 5 under powered
12 - 26 10 - 22 9 - 19 8 - 17 6 - 15 5 - 13 normal powered
26 - 38 22 - 32 19 - 27 17 - 24 15 - 22 13 - 19 over powered
1 : 3.8 1 : 3.8 1 : 3.8 1 : 3.8 1 : 4.2 1 : 4.2 depower effect
Wind range: SPEED
5.0 7.0 10.0 13.0 17.0
5 5 5 55 5 min. wind
5 - 12 5 - 10 5 - 8 5 - 7 5 - 6 under powered
12 - 32 10 - 27 9 - 23 8 - 20 7 - 17 normal powered
32 - 45 27 - 38 23 - 32 20 - 28 17 - 24 over powered
1 : 4 1 : 4 1 : 4 1 : 4 1 : 4 depower effect
More information about the wind ranges of your kite can be found on our homepage
www.flysurfer.de – kites / product / technical data.
35
Page 36

Wind conversion table
Beaufort Knots km/h m/s mph
1 1 - 3 1,1 - 5,4 0,3 - 1,5 0,7 - 3,5
2 4 - 6 5,5 - 11,9 1,6 - 3,3 3,6 - 7,5
3 7 - 10 12,0 - 19,4 3,4 - 5,4 7,6 - 12,2
4 11 - 15 19,5 - 28,4 5,5 - 7,9 12,3 - 17,8
5 16 - 21 28,5 - 38,5 8,0 - 10,7 17,9 - 24,0
6 22 - 27 38,6 - 49,7 10,8 - 13,8 24,1 - 31,0
7 28 - 33 49,8 - 61,5 13,9 - 17,1 31,1 - 38,3
8 34 - 40 61,6 - 74,5 17,2 - 20,7 38,4 - 46,4
9 41 - 47 74,6 - 87,8 20,8 - 24,4 46,5 - 54,7
10 48 - 55 87,9 - 102,2 24,5 - 28,4 54,8 - 63,6
11 56 - 63 102,3 - 117,3 28,5 - 32,6 63,7 - 73,0
12 > 64 > 117,4 > 32,6 > 73
36
Page 37
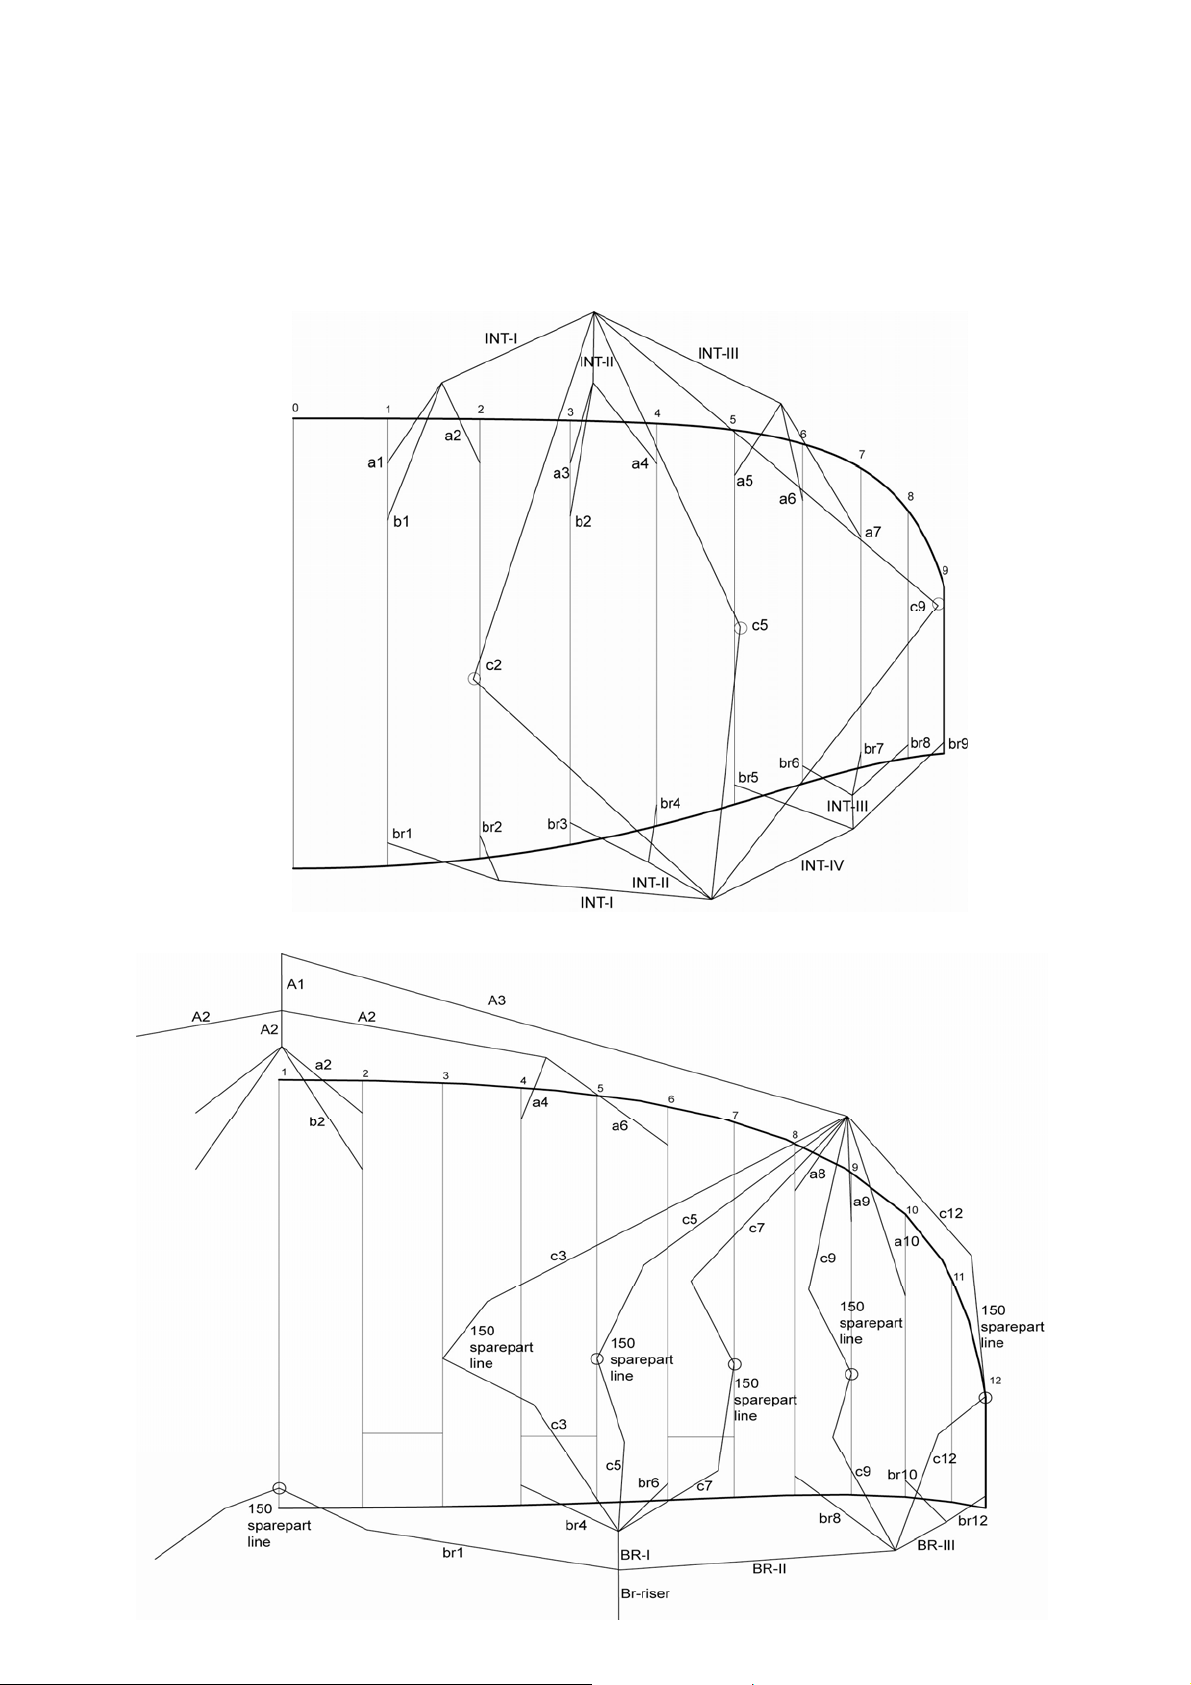
16. Line setup and lengths
The following line setups are only patterns!
Attention: There are variations in line lengths, etc. within the various kite models.
The current line setup for your kite can be found on our homepage
www.flysurfer.de - kites/product/line setup.
Line setup COOL (9 m²)
Line setup EXTACY (10 m²)
37
Page 38
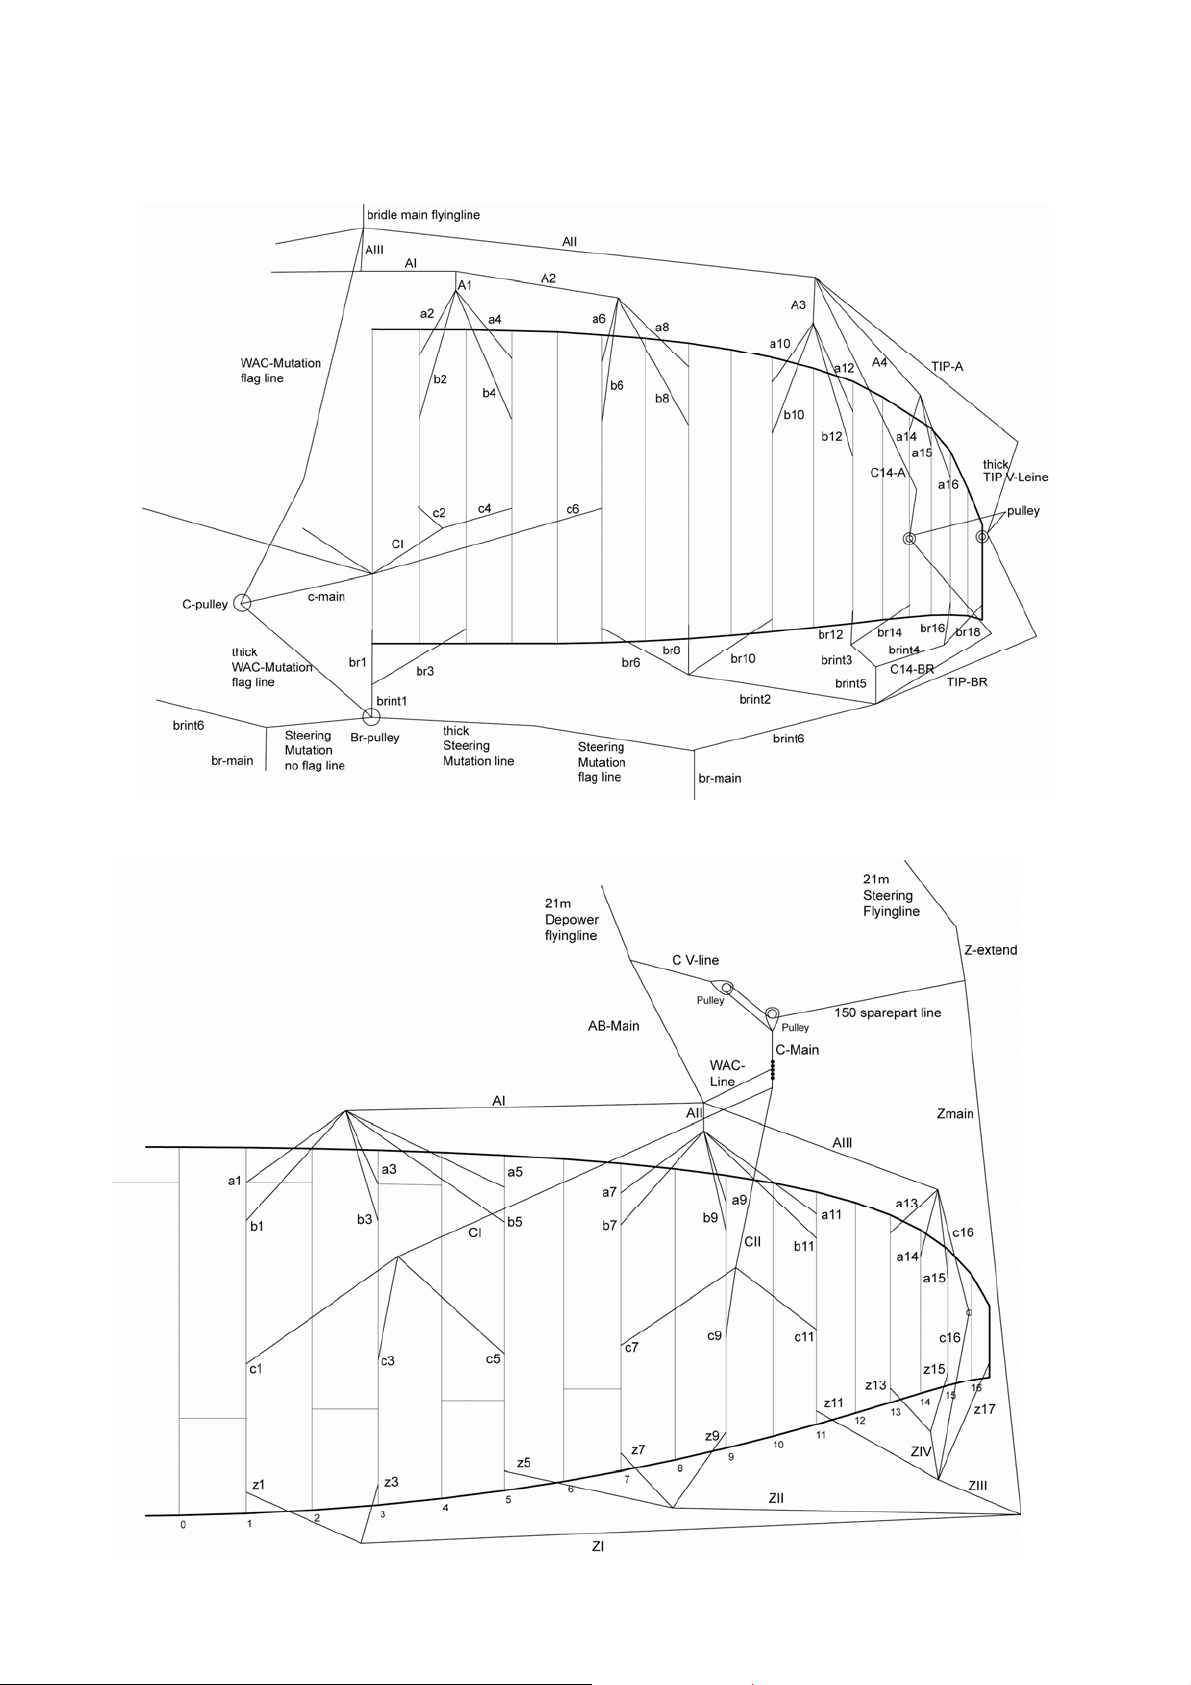
Line setup PSYCHO² (21 m²)
Line setup SPEED (10 m²)
38
Page 39
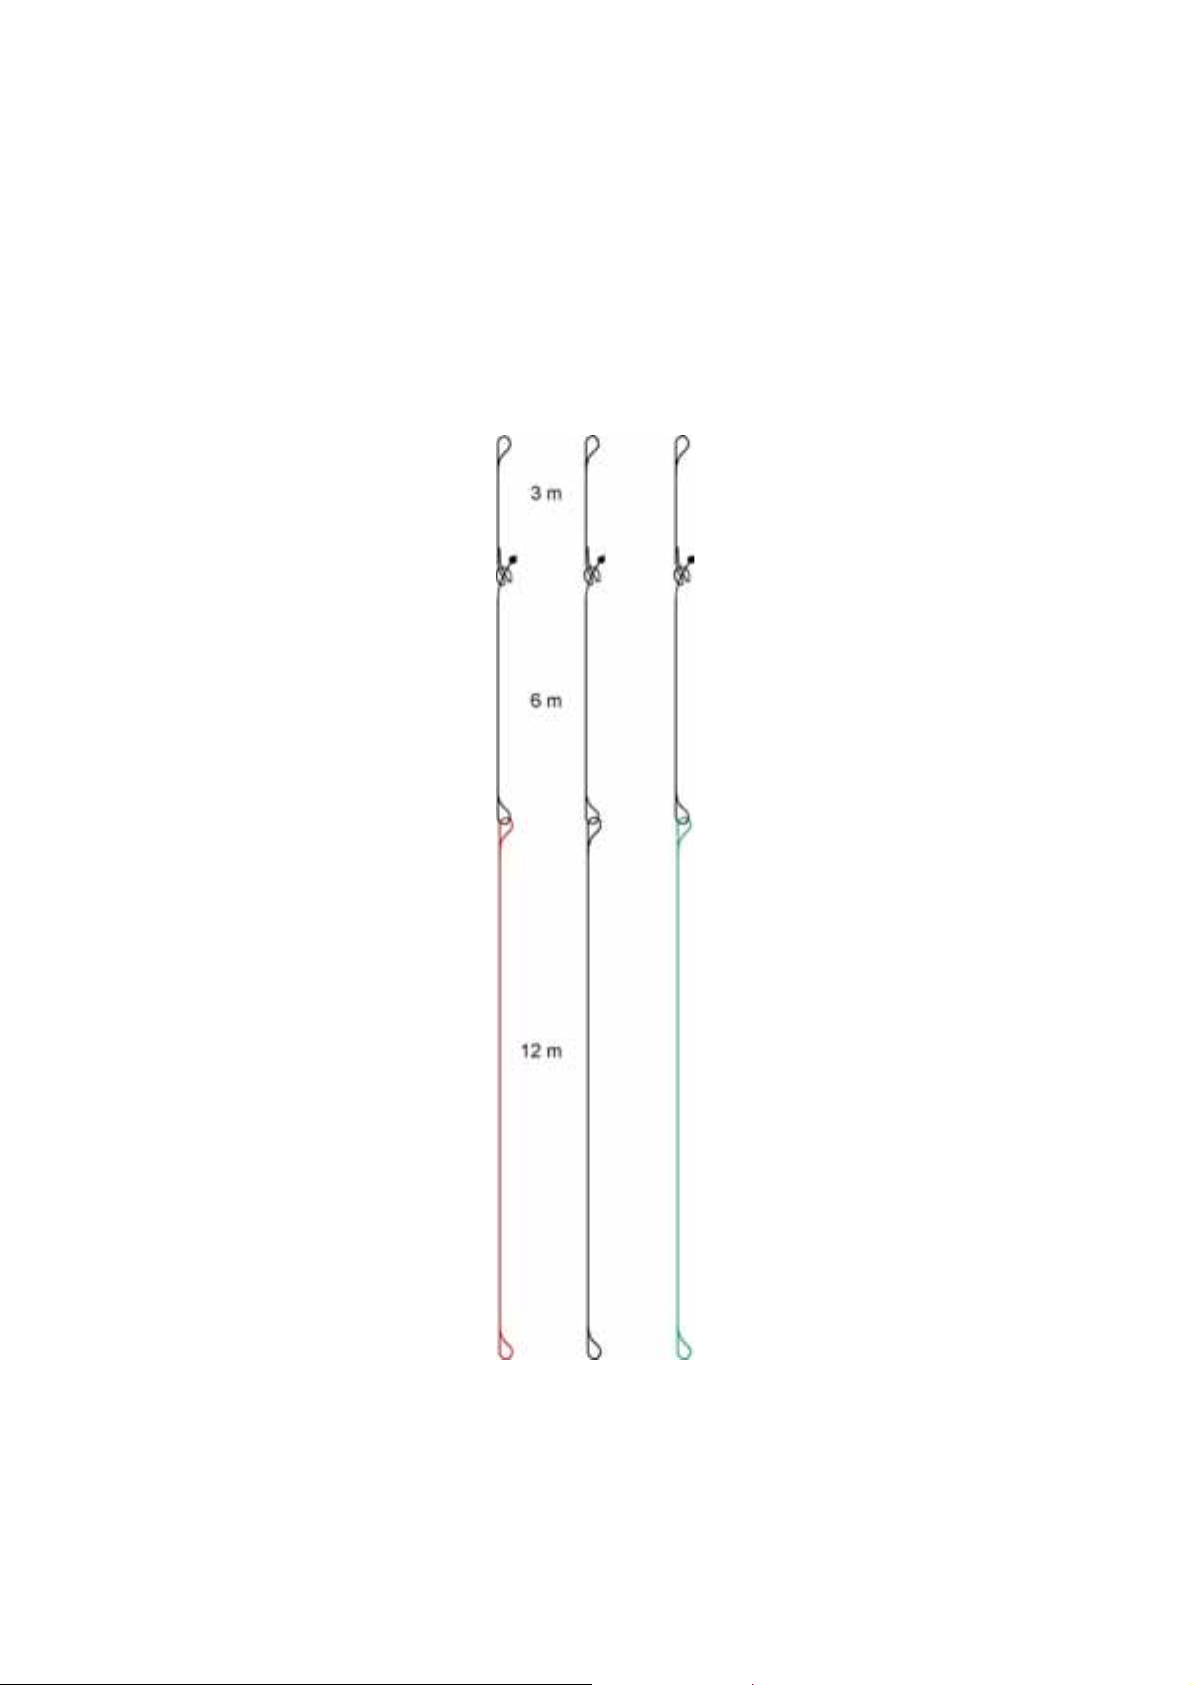
The flying-lines:
The flying-lines consist of one black depower-flying-line (500 kg breaking strength),
as well as one green and one red steering-line (200 kg breaking strength). They all
consist of single pieces of 12, 6 and 3 meters. That way, you can reduce the line
lengths in 3-meter-intervals from 21 m to 0 m. All lines have been pre-stretched.
Nevertheless, the depower-flying-line will become about 8 cm longer than the
steering-lines, due to the higher load when in flight. The trimming of the kite has been
adjusted to this stretching of the depower-flying-line.
39
Page 40

17. Maintenance and repair
17.1. General care
FLYSURFER kites are extremely UV- and saltwater resistant, as well as very tear
resistant. However for maximum durability a few things should be pointed out:
17.2. UV-light
Even though the fabric has been tested for UV-resistance, we advise not to expose
the kite to unnecessary UV-light (e.g. leave it in bright sunlight).
17.3. Saltwater
The material has also been tested against saltwater. However, the kite can still be
rinsed out with fresh water on the inside and outside from time to time (e.g. after a
vacation) and then let it dry in the shade.
17.4. Sand
Sand is relatively rounded, so it is not particularly harmful to the kite. Glass or other
sharp or abrasive objects found on the beach can cause severe damage. Sand which
enters the kite will work its way to the wingtips, and will be removed automatically
from the kites.
17.5. Moisture
If a kite is stored wet and in a warm environment, it is possible for mildew to develop.
This won’t damage the kite but leaves ugly, dark stains. In extreme circumstances it
is possible for the kite to rot. Moisture can cause discolorations of the fabric.
17.6. Cleaning
Only clean the kite with clear freshwater. All uses of chemical products can weaken
the material and invalidate the warranty.
17.7. Wear and tear parts
Generally speaking, all moving parts are wear and tear parts. FLYSURFER only
chooses material with the highest quality standards. We are constantly developing
our materials further to provide our customers with maximum safety and product
quality. This aside, all kites should be regularly checked for signs of wear and tear.
After the kite has been exposed to heavy loads, you should thoroughly check all
affected parts to make sure that none of them have been weakened and/or show
excessive signs of wear and tear. When jumping, weakened parts can be dangerous
especially on land or in shallow waters.
Important: A kite should be viewed as a flying machine and like all flying machines
needs a regular, thorough check-up to ensure its safe usage. We recommend that a
specialist also performs a thorough safety check on your kite at least once a year.
40
Page 41

Important wear and tear parts are:
All knots on the line-system should be checked before your first flight and after a few
hours of use, if they are secure.
Also check the V-lines, which travel over the pulleys for signs of wear. Replace
immediately with Dyneema lines > 300kg if they are worn.
The pre-streching of the lines will reduce in the course of time. For this, we
developed a special line, which reduces the shortening of the lines to 1/3.
Check that the pulleys are running freely and whether they show signs of wear.
Replace if necessary with originals or pulleys of >500kg braking strength. We
strongly recommend only using original pulleys, which can withstand the loads
developed by the kite.
Also check all connections of the kite’s line-system for weaknesses and replace if
necessary with original parts.
The depowerloop-line and the ROTOR-LEASH, which travel through the hole in the
bar, should constantly be checked for wear. Replace, if necessary with original lines
or a wear-resistant > 1000 kg line. The depowerloop-line can be detached from the
trimmer and the depowerloop itself.
17.8. Repair (with included repair-kit)
Make sure that the damaged area is clean, dry and free of grease.
Cut a piece of repair-cloth in the correct size, thinly but evenly spread the glue (glue
is quite runny) across one side and stick over the damaged area. Leave it to dry and
you’re ready to go.
TIP: When using glue during a repair, make sure not to accidentally stick the inside
cross ribs or the upper and lower sails together.
Quick repairs are possible by using self-adhesive spinnaker repair tape. Stick the
correct size piece of self-adhesive tape to the inside of the kite. This type of quick fix
won’t last indefinitely and should in time be replaced with a proper repair. At least
your day out on the water is saved.
17.9. Little Connection Lines (LCL)
Each connecting point on the kite is joined by the 1 cm long, so-called Little
Connection Line with a knot at the end. These are helpful during repairs, so you can
simply open the lines on the kite. They are very tear proof, white (ca. 45 kg) /
black (ca. 30 kg), so they mostly prevent a destruction of the canopy.
Replacements for the Little Connection Lines are enclosed with every kite.
41
Page 42

18. FREE-REPAIR Guarantee
skywalk will take over the repair (within the first 6 months after purchase) at no
charge for all end customers in Germany, Austria and Switzerland, who use their
skywalk paraglider or FLYSURFER kite for private and recreational activities.
Commercial use, such as schooling or rental, as well as careless or deliberate
damages (e.g. crashing into obstacles, etc.) are excluded from this guarantee.
Terms and conditions:
The guarantee is valid for all skywalk paragliders, as well as all FLYSURFER Kites,
which were purchased after 01.01.2005.
In order to be eligible for the FREE-Repair Guarantee, the customer must register in
the internet under FREE-REPAIR.com within 2 weeks after purchase, with a
correctly filled out warranty card. False statements about the date of purchase or
dealer name will result in loss of the FREE-Repair Guarantee for all
skywalk/FLYSURFER products of the customer.
All warranty claims expire, if a skywalk paraglider or FLYSURFER kite is not repaired
by skywalk/FLYSURFER or a workshop, which has been authorized by
skywalk/FLYSURFER.
The skywalk paraglider or FLYSURFER kite repaired by skywalk, will be sent back
(not prepaid) within 4 weeks. If the repair takes longer, a comparable paraglider or
kite may be supplied by skywalk/FLYSURFER for the additional time at no extra cost.
If desired, a rental paraglider or rental kite can be obtained against payment for the
period of repair.
All costs and risks for transports (damaged paraglider/kite to skywalk, return of the
repaired paraglider/kite, possibly rented equipment to and from the customer) are the
responsibility of the owner.
After claim of the guarantee, the warranty period will not be renewed, not even if
skywalk exchanged the craft for a new one.
The service of other deficiencies or damages, especially subsequent damages and
fulfillment interests (literal) etc., are excluded.
Violation of the terms and conditions of the guarantee will result in loss of the
warranty claim.
The guarantee by law is not limited in any way through the additional FREE-Repair
Guarantee.
In the event of damage, you should first contact [email protected] or
call +49 8641 6948 42. Then, the clean, dry and sand-free paraglider/kite should be
sent to:
skywalk GmbH & Co. KG
Bahnhofstr. 110
83224 GRASSAU
GERMANY
along with a description of the damage and the course of events (form download
under FREE-REPAIR.com), as well as a phone number and/or e-mail address
(important for queries!!)- and a mailing address for return.
42
Page 43

Advantages Manual:
1. Unequalled light wind performance
Due to the double-sail profile similar to a paraglider and weight optimized inner construction of
FS-kites, no other kite system can compete with FS in light wind conditions. Or in power, wind
range, control, stability, or in water start capabilities.
2. Easiest Handling & Setup
FS riders don’t need helpers for launching and landing. All other kite systems need assistance
during launching and landing. Lines and bar stay attached to the kite for fast setup and you don’t
have to worry about any annoying inflation. Lines don’t tangle when you release the safety, so
you can restart right away.
3. Most Reliable Safety
FLYSURFER kites are designed with safety first. Kiting with FS is easier and safer than with other
kite systems. Many recognized tests can document this.
4. Patented WAC Depower
Our patented depower system is twice as effective, because it combines the tube kite system
with the common RAM-Air kite system. Independent tests proved that FS-kites have the largest
wind window of any of the tested kites, which adds up to a gigantic wind range.
5. WAC-Bar
Patented AUTO-ROTOR-LEASH
Prevents twisting of the SAFETY-LEASH around the depower loop during rotating jumps – The
safety untwists on its own.
Safety Options
Multiple quick releases allow fast deployment in dangerous situations. The FS rescue loop allows
for an easy and immediate restart.
PullStopSystem (PSS)
Allows the kite to lie down and reduce any pull immediately after landing.
Auto-Restart-System
Automatically sets the kite in the relaunch position when the safety is released.
Gust Absorber
This cushion on the depower-line absorbs gust automatically.
Carbon-Bar
Stiff, light and super strong design for our premium kites.
6. Patented JET-FLAP Technology
Prevents the kite from stalling and increases stability, especially during gusty wind conditions and
extreme manoeuvres. Have more fun with control and safety.
7. Patented AIR-INLET-VALVES
Provide for easy setup and fast inflation of the kite prior to launching and prevents air from
escaping when sitting on the water.
8. Water-Drainage-System
The kite automatically drains any water or dirt accumulated while sitting on the water for extended
periods of time.
9. High Durability
Because FS-kites don’t need leak prone, air-filled sections to float, you’re not automatically in
trouble, if you have a hole in the kite. That way, your expensive holiday isn’t ruined.
The so-called Little Connection Lines (LCL) prevent the lines and canvas from getting damaged
during a capacity overload. The kite can be relaunched in a matter of minutes.
Over-pressure valves and/or the patented flexible elements (TPU) inside the kite, effectively
prevent the kite from being damaged during a crash. Of course, all FS-kites are produced using
our specially designed canvas, which is very durable and tear proof.
10. One-of-a-kind FREE-REPAIR warranty (worldwide)
Just in case you still manage to damage the kite, we offer our FREE-REPAIR service for 6
months, to many countries in the world. No other kite manufacturer in the world is so confident
about the reliability of its products.
43
Page 44
44
 Loading...