

Page 1
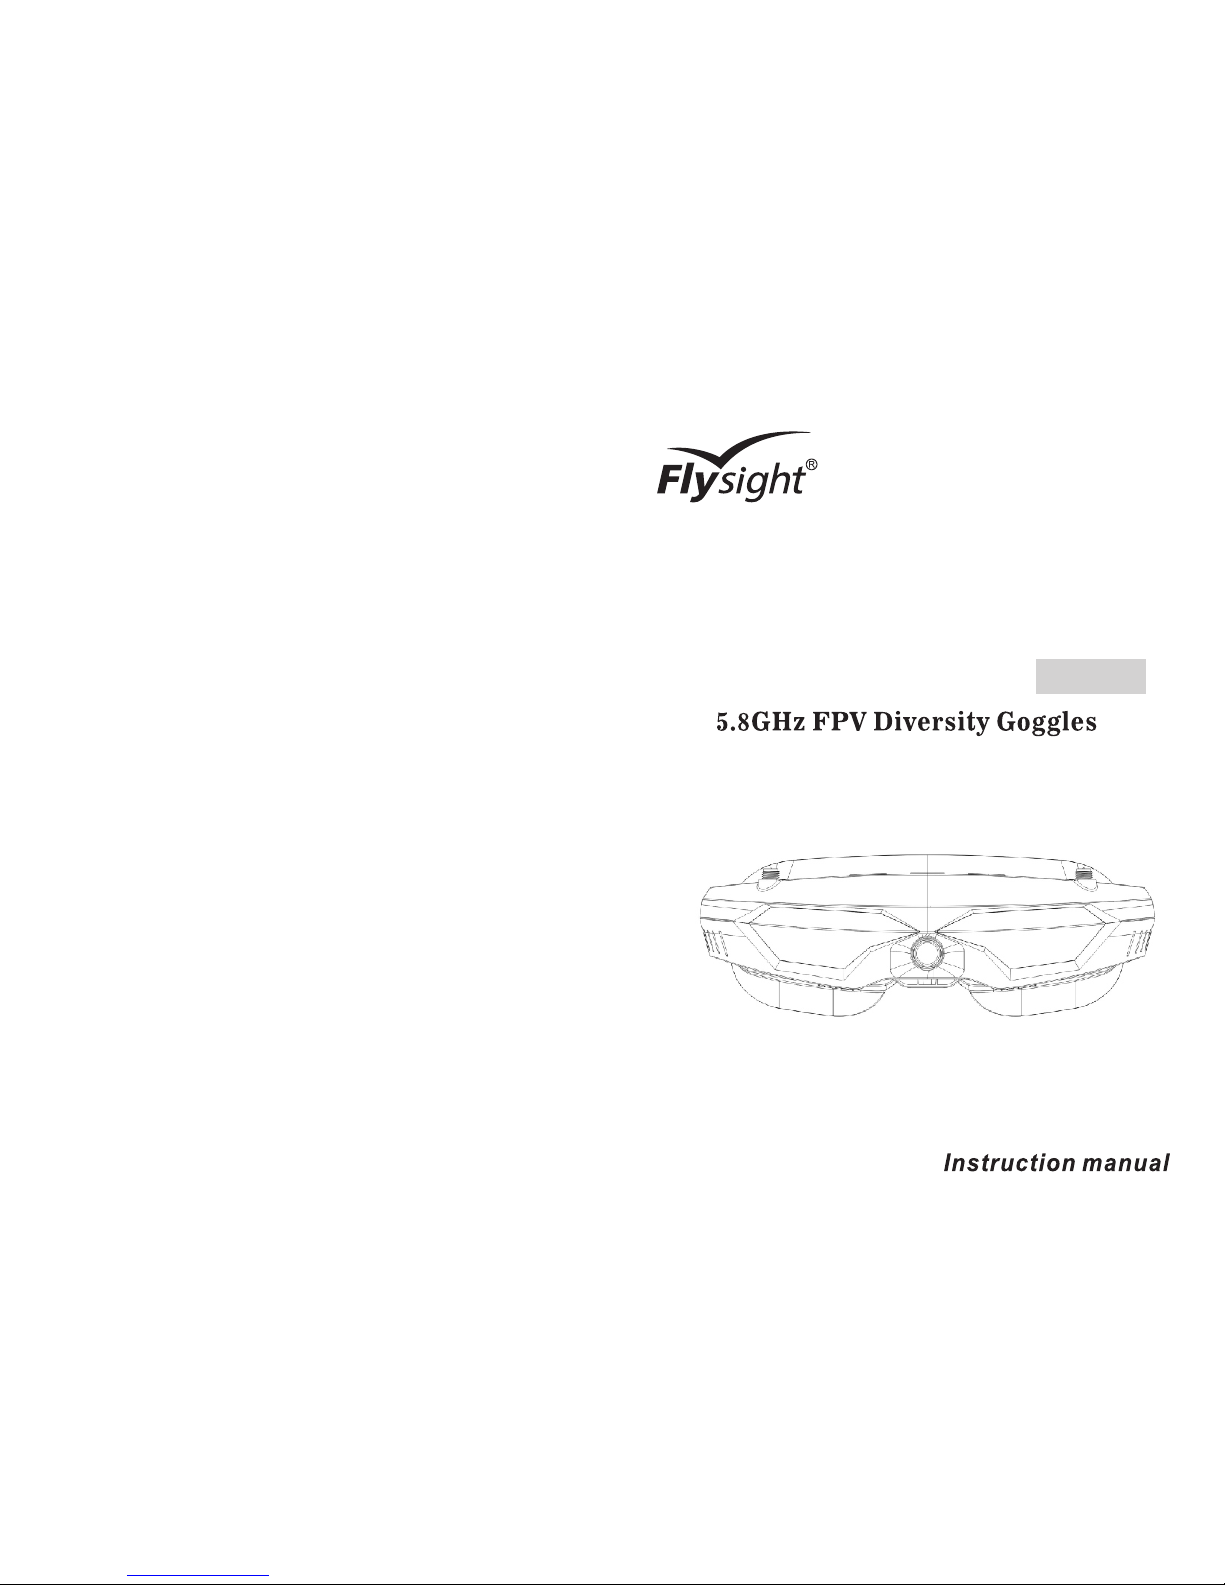
SpeXman Two
SPX02
Page 2
FCC STATEMENT
CE state me nt
SpeXman Two
SPX02
1. This device complies with Part 15 of the FCC Rules. Operation is subject to
the following two conditions:
(1) This device may not cause harmful interference.
(2) This device must accept any interference received, including interference
that may cause undesired operation.
2. Changes or modifications not expressly approved by the party responsible
for compliance could void the user's authority to operate the equipment.
Features
The equipment is in compliance with the essential requirements and other
relevant provisions of the Directive 1999/5/EC.
Unique Picture in Picture Function
Wide Angle Camera
High Sensitivity Multi-Channel Diversity Receivers
HDMI 1.3 Input,100% Compatible with Phantom 3/4 and Inspire
Full Nexwave and Airwave Support
One Button Operation on Contrast&Brightness
Central Mark Helpful for Race Drone
Support Focus Assist&False Color
2S-6S Input (7-28v)
Adjustable Interpupillary Distance
Comfortable Multi-type Eye Cups
Micro Portable Battery switching between 7.4V&12V
Cool Futuristic Design
Page 3
Safety Notice
SpeXm an Two SPX 02
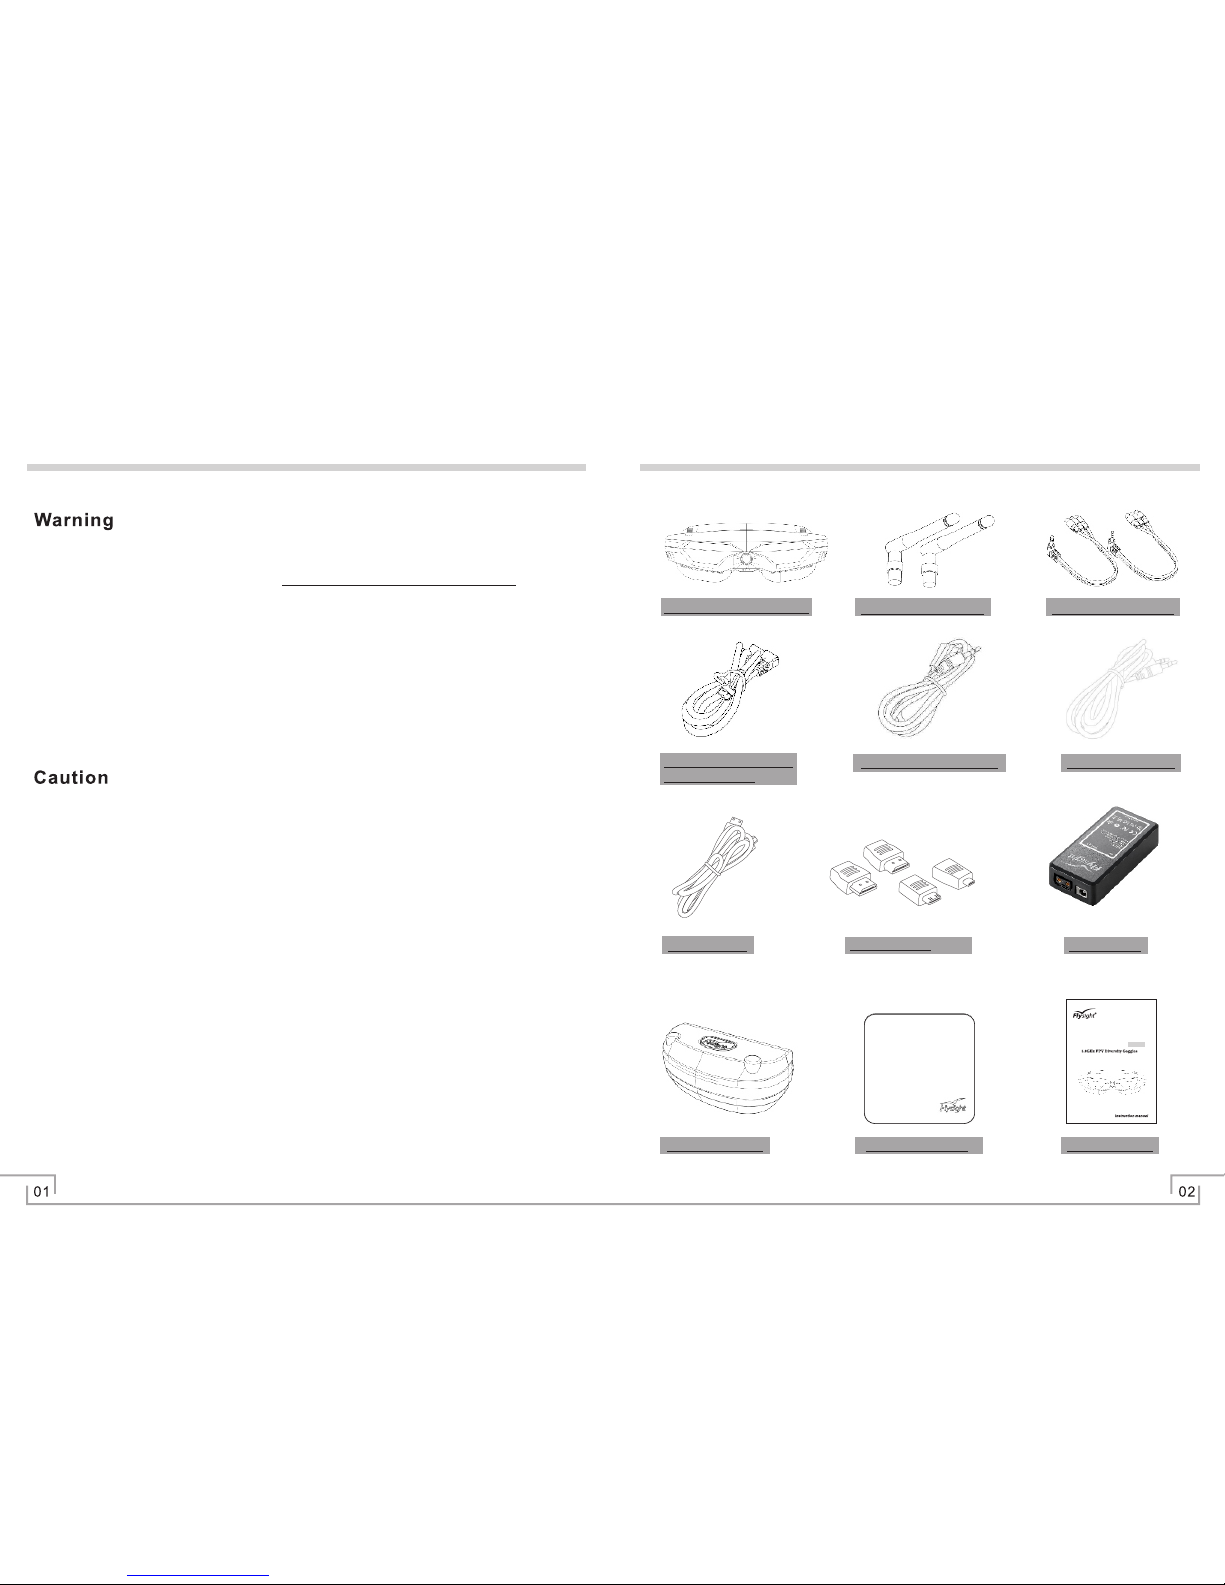
2 x 5.8G Ant ennas
2 x AV-Ou t Cab les
12V DC Ca ble w ith
BEC Plu g
Cable f or Fu taba RC
Cable f or JR R C
Goggl es Ca se
HDMI Ca ble
Clean ing C loth
Output cable
User Ma nua l
3S Batt ery
SpeXman Two
SPX02
Package Contents
●
Do not expose the lenses to direct sunlight. The lens will focus the sun’s energy
and damage the LCDs irreparably. This is not covered under warranty.
● Do not expose the SPX02 to water or moisture.
●
Please use only the recommended accessories.
●
Do not disassemble the product. There are no user serviceable parts inside.
●
Avoid magnetic fields - they may affect the performance of the device.
●
Keep away from open fires.
●
This device is not dust proof or waterproof.
Page 4

Operation Instructions - Modes
DIV AV OUT only works in DIV mode.
AV OUT is onl y worki ng under DIV RX1 RX2 modes.
RX1 RX2 Mode
Function Icons
Antenna Port(SMA)
Menu Button Front
- Button
CAM Button
●
●
●
●
●
●
Press the <MODE> button to switch between DIV, RX1,RX2,AV IN, or HDMI
IN modes.
Under DIV or RX1、RX2 mode, you need enter <Menu> → DIV band、RX1
band、RX2 band to set up wireless receiving band, use the <Menu> left and
right button to select the correct band, press < - > and < + > to select channel to
match your transmitter.
Enter <Menu>→DIV band, press <Menu> button left and right to adjust bands.
DIV mode is made of RF diversity receiving circuit by double antennas. You can
press < - > and < + > to control the channel number.
In this mode the goggles constantly compare the RSSI of ANT1 and ANT2,
and then switch to the strongest signal.
DIV AV OUT port outputs Diversity signal for your video recorder or
external display.
HDMI IN
AV IN
DIV\RX1\
RX2\AV OUT
Earphone OUT
IPD Adjusters
Power Supply
PPM IN
●
●
●
、
Press <Menu> button to enter Menu→RX1 Band、RX2 Band, you can press
<Menu> button left and right to adjust bands. Such is single RF module
working.
AV OUT port output DIV、RX1、RX2 signals for recorder、external use and so
on.
、 、
Cooling Fan
●
●
●
Enjoy your external video and audio signal by connecting through the AV Port.
Wireless receivers are automatically turned off in this mode to save power.
For a clearer image switch to HDMI input. The goggles will display a maximum
input of 1920x1080/ 60Hz.
Mode Button
+ Button
Menu: Next
DIV mode: CH up
RX1\RX2: CH up
Menu: Esc
Menu: wake-up
Menu: right\left
Menu: up\down
Shortcut Key:
Contrast & Brightness
Camera
DIV mode:CH down
RX1\RX2: CH Down
Full\Small\None
Shortcut Key:
PAL/NTSC Switch
Page 5
> Langu age
System S et tings
> Batte ry
Volume
Image
PIP Function (Pictur e in P icture)
Please note that you may experience a delay of up to 5 sec onds be fore th e
function starts after selecting the HDMI mode.
Front Fa ci ng C amera Function
Main Men u an d Na vigation
Please note that you will lose PIP when getting the full screen switching
to the front facing camera function.
Earpho ne P or t
Operation Instructions - Menu Screens
Operation Instructions - Menu Screens
●
Wireless receivers are automatically turned off in this mode to save power.
●
● Press <Menu> button to use the <menu> left and right button to reduce or
increase the volume.
●
●
●
Output audio at DIV、RX1、RX2、AV IN、HDMI modes.
While in any of the Modes tap the <cam> button to enable the front facing
camera function, this will switch the goggles to a small screen display of the
feed from the forward facing camera. Tap <cam> again to a full screen, then
tap <cam> again to return to the previous Mode.
●
●
●
●
●
●
When powered off previous settings will be saved.
You can shortcut key of <Menu> button or press <Menu> button to set up
contrast and brightness to improve the video display quality.
To enable PIP select <cam > .
The secondary image can be made smaller or larger by selecting Size. Cycle
through the two sizes of 200x150, 320x240 pixels using the <menu> left and
right button.
The thirdly image can be moved by selecting Position. Toggle between the
four positions by using the <menu> left and right buttons.
Press the <cam> button to activate and deactivate the PIP on screen.
the mark is red and flashing, please charge it in time.
●
Use the <Menu> button to move between the different icons, you can press
<Menu> button up and down to choose function menu, you can also press
<Menu> button left and right to adjust the value, after finishing setting, please
press <MENU> button to quit.
●
Shortcut key of Contrast & brightness: Without any menu showing, press
<Menu> button left and right to reduce and increase contrast; press <Menu>
button up and down to increase and reduce brightness.
● At any menu and state showing, if there is no pressing any button, the icons on
screen will be off automatically.
●
Press <Menu> button to enter menu, you can choose DC in and 2S-6S battery
types to make their volume icon showed on the top right side of the screen.
●
<Cam> button: Short press this button, you can change the front camera at
full/smallne states; Long press this button, you can switch the TV system
between PAL/NTSC easily.
●
Press <Menu> button to enter menu, you can select 8 kinds of different
languages.
●
The battery volume icon is displayed on the top right side of the screen. When
Page 6
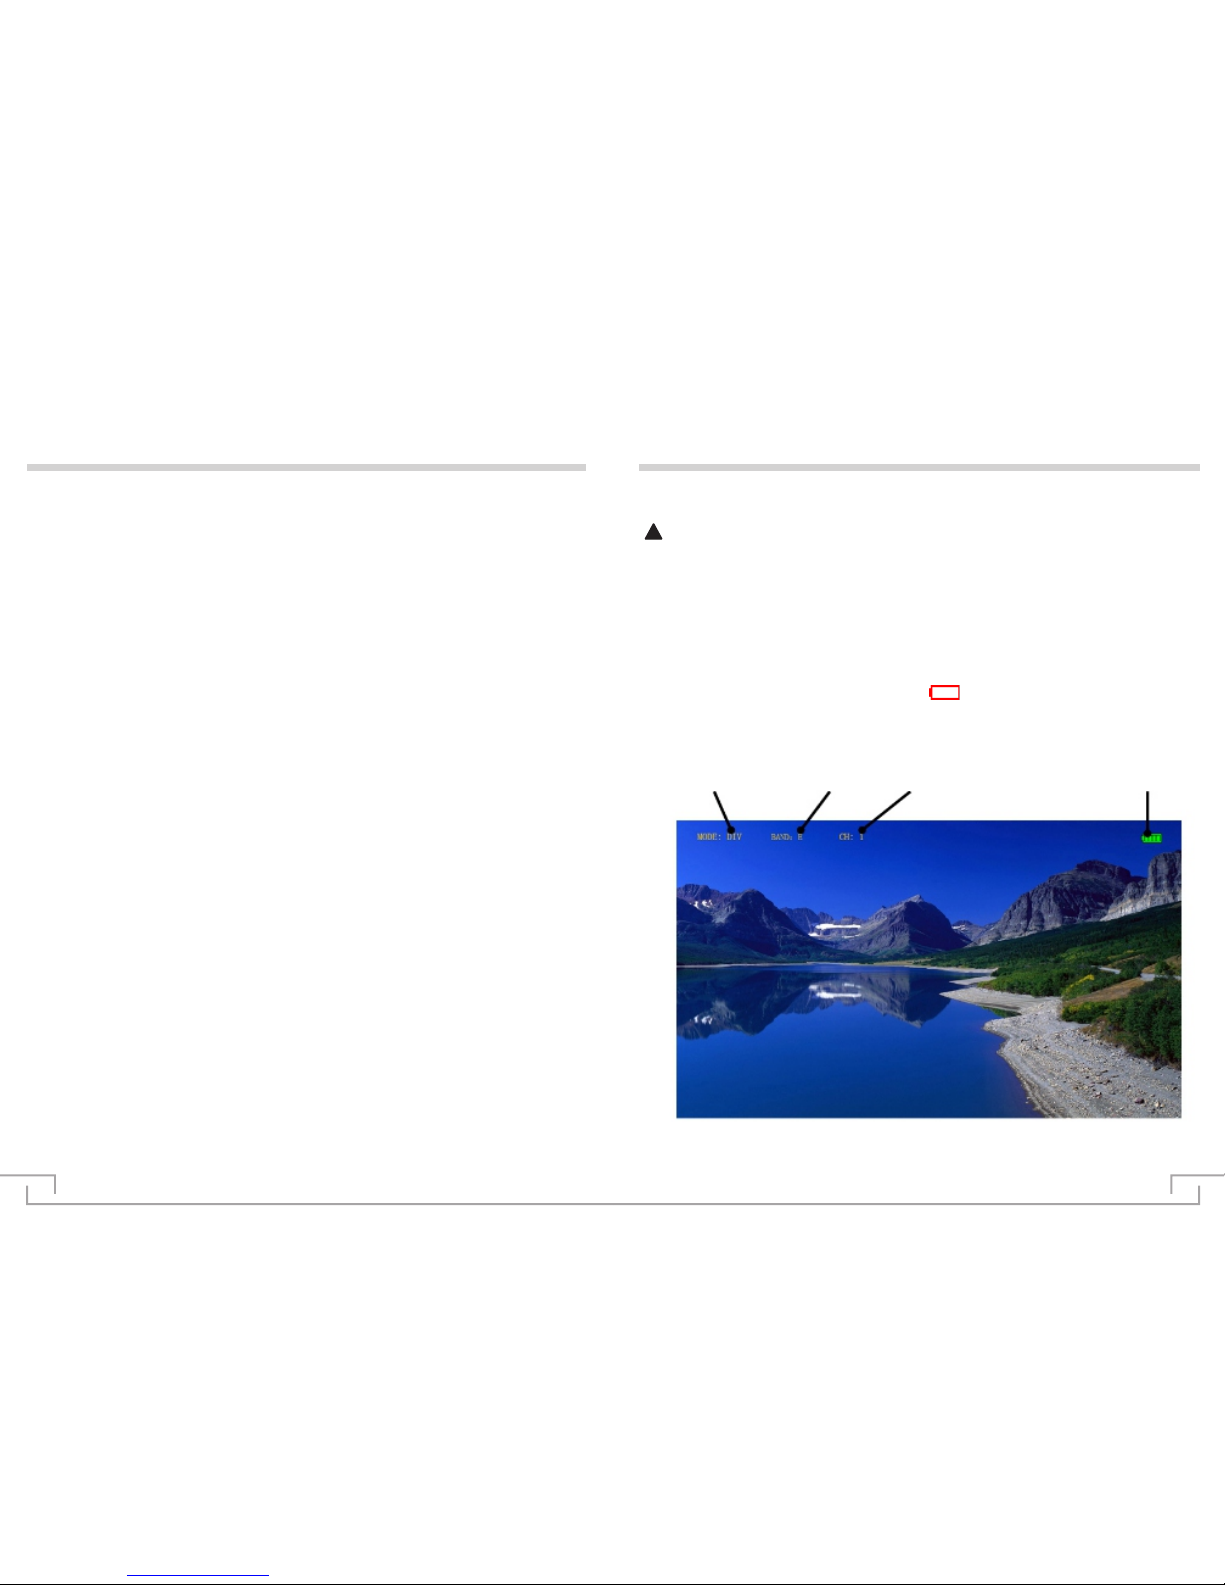
Operat in g Temperatu re
Operation Instructions - Menu Screens
> False Color
> Focus Assist
> Menu
> Fan
On-Screen Icons
> PPM Cha nnel
> Central Mark
> TV System
●
●
●
●
Press <Menu> button to enter menu, find TV system to adjust PAL/NTSC.
Select the channel for binding your RC transmitter to the goggles, you can then
assign switch positions for activating/ deactivating PIP or the front facing
camera.
You need enter <menu> → PPM to set up any channel of CH NO.5.6.7.8.
Press <Menu> button to central Mark, help you get better image position.
●
●
Different work mode, different icon is displayed on the screen.
When battery icon showing red bank as , it means low battery, please
change battery.
Operating Mode Receive band Receive channel Battery icon
calculation in the scene lighting levels, make brightness or lighting value
mapping for the display brightness of false color, from the darkest to the
brightest, in turn display blue, cyan, green, yellow, orange and red.
●
Press <Menu> button to enter menu, assist focus is used in obtain the sharpest
possible picture. This feature is most effective when the subject is properly
exposed and contains enough contrast to be processed.
●
Peaking: Focus in red outline to display focus area visually, making object
●
●
highlighted. It's available for focusing with DSLR and camcorder.
Press <Menu> button to enter menu, you can adjust the fan status: On/Off/ Auto.
Press <Menu> button to enter menu, return the goggles to factory default settings.
07 08
●
Press <Menu> button to enter menu, false color can be intuitive observation and
!
When using the PIP function or HDMI input you can expect the unit to
operate at a higher temperature. To avoid the equipment from overheating
the fan on this unit will turn on automatically.
Page 7

Specification
09
MBP01
Operating instruction
10
Page 8
11
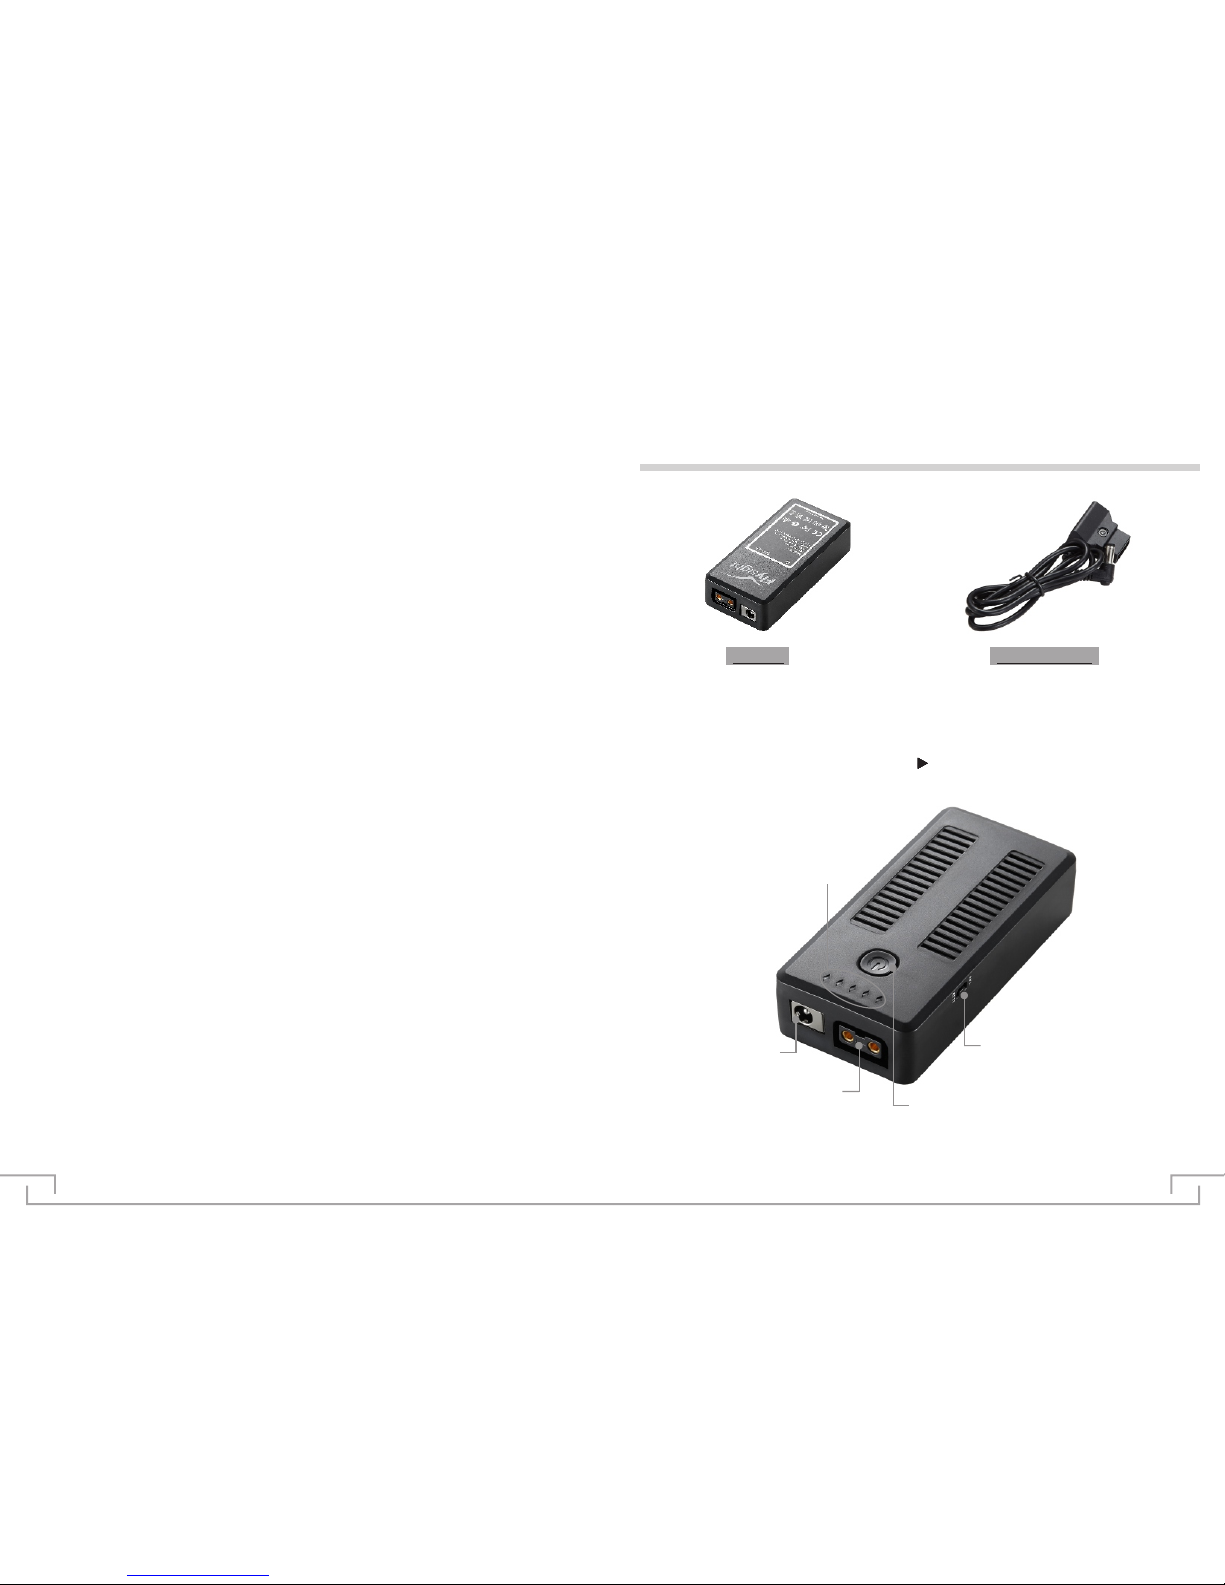
Pr oduct Content
MBP01 Outpu t cable
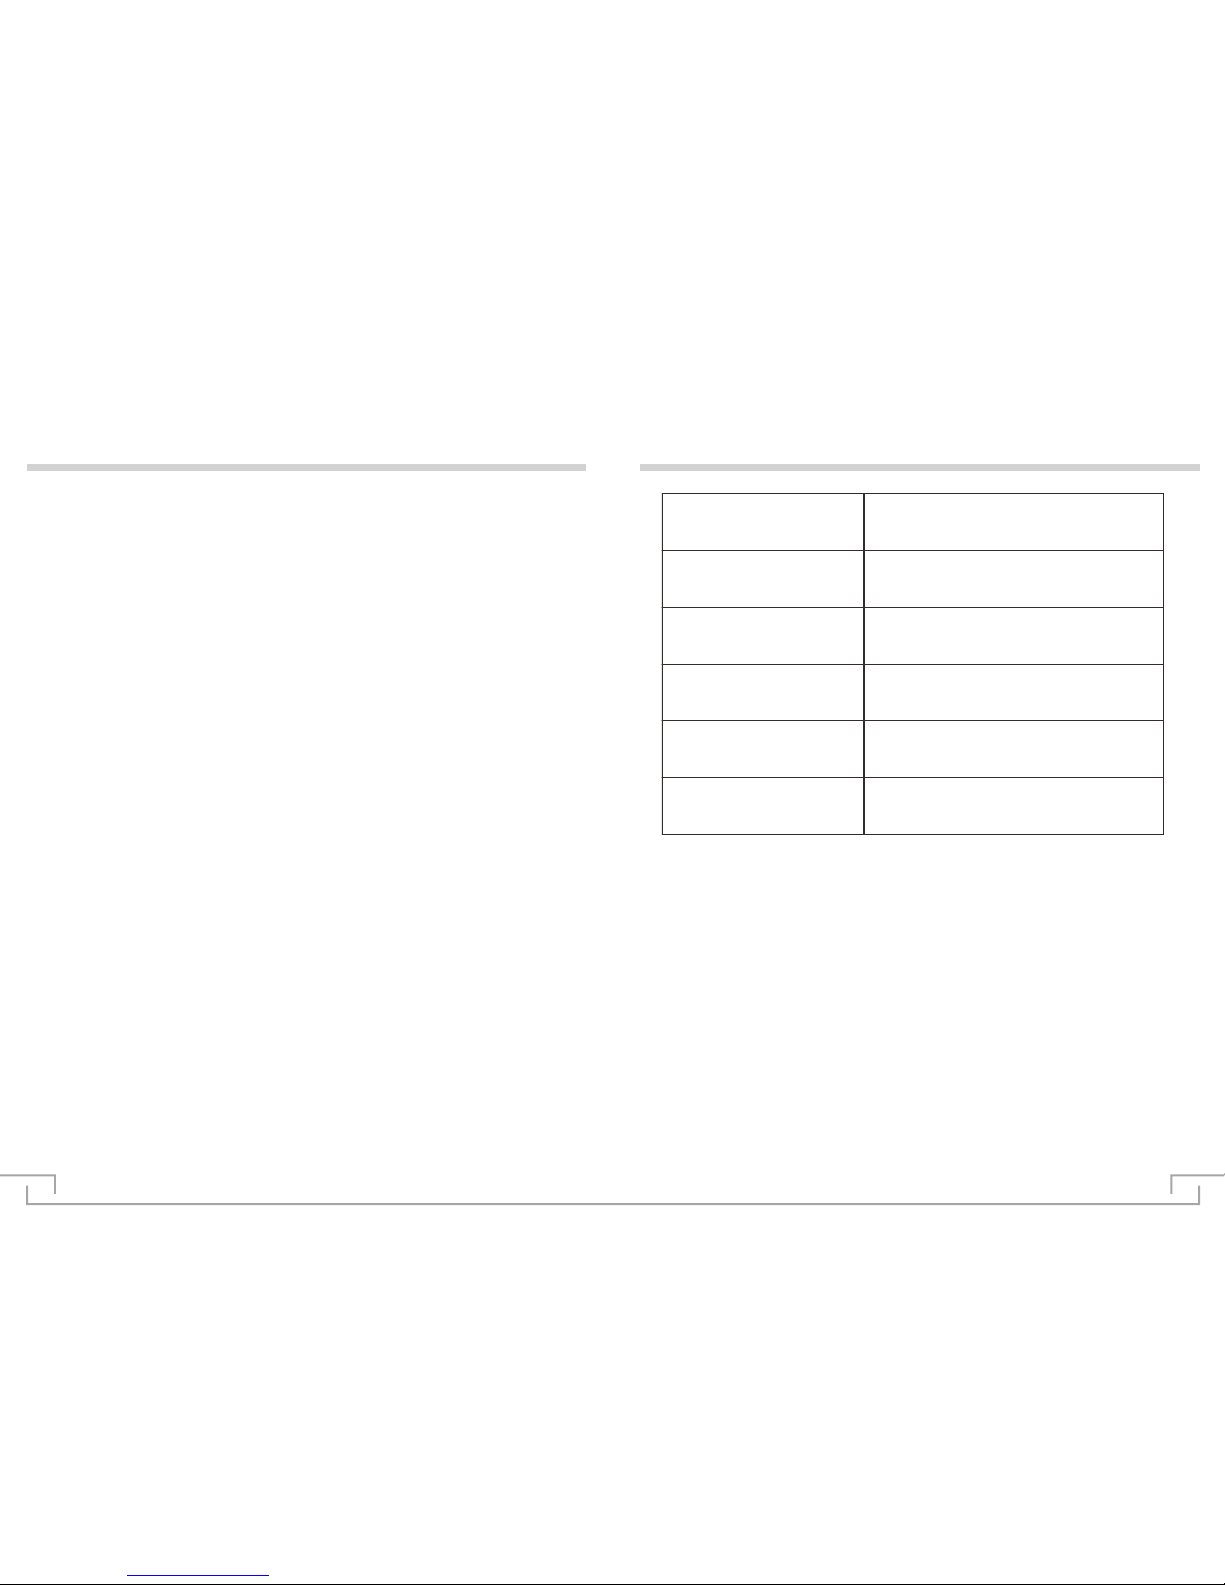
Function diagram
Safety Warning
Attent io n
● In order to reduce the risk of fire, electric shock or product damage, do not let
the machine rain, exposure or moisture.
●
Please use only recommended accessories.
● Do not disassemble the product and should be serviced by qualified person.
●
Do not install the machine or put it in other enclosed spaces such as bookcases
and closets to avoid the risk of electric shock or fire due to overheating.
●
Do not allow the unit to be placed near a fire such as open fire.
●
The machine is not dust proof, not waterproof, please note when using.
● The product can not charge and discharge at the same time.
Red light (charging indicator、
Power alarm indicator)
power input
power output
11.1V and 7.4V switch
Power button、check electricity
12
Page 9
13
Specification
Usage
Chargi ng
Check th e po we r
Discha rg e
Shut dow n
●
Please insert the 12V / 2A power adapter into the power input interface, red
charging indicator light is on, at the same time, the blue power indicator will flash;
when the four blue lights are flashing in turn, it means that the battery is fully
charged; When the four blue lights are all off, only the red light is on, that means
the battery is fully charged.
●
Short press the power button, red, blue light will flash for about 3 seconds
then automatically off (1 blue light flashing for about 25% of the electricity, 2
blue light flashing for about 50% of the power, 3 blue light flashing for about
75%, 4 blue light flashing for about 100% of the power)
●
The power output line corresponding to the positive and negative direction
inserted in the power output interface,
according to the output voltage need, toggle the switch to 7.4V or 11.1V
position, short press the power button once,
after the release, immediately long press the power button for about 3
Seconds until the power indicator blue lights are all on in turn ,that means
boot successfully. When the four blue lights are off in turn (that the lack of
electricity), please charge in time. When the power alarm indicator light
flashes 60 seconds will automatically shut down.
●
Short press the power button once, after the release, immediately long press
the power button for about 3 Seconds until the power indicator blue lights are
all off in turn ,that means the battery is off.
14
Input
DC IN 10-20V/1A
Output 1
7.4V/1500MA 11.1W
Output 2
11.1V/1000MA 11.1W
Battery capacity
1000MAH
Size
88*43*21.5mm
Net weight
80g
 Loading...