

Page 1
Quick Start Guide
Speedy F250-V2
Naze-6DOF
Page 2
Flight Environment Requirements
Flight Safety Tips
Strongly recommend the user to enjoy the pleasure of flight in a safe and reasonable environment . The necessary
flight safety is very important to you, the people around you and the environment.
1. Fly in the open space: please stay away from buildings, trees, high pressure lines and other obstacles, and
keep away from the water, the crowd and the animals.
1. Do not fly in bad weather, such as strong winds (10 m / s), snow, rain, foggy weather, etc..
2. Please keep small accessories and electronic products in the place where children can not reach.
3. Please do not put any part of the model into the mouth, otherwise it will cause serious damage, and even death.
4. Do not touch the rotating parts.
5. Fly in the visual range: please keep the aircraft in sight, avoid flying to tall buildings and other objects that
might stop the line of sight.
6. Control flight height: in order to ensure the flight safety of aircraft and civil aviation, the aircraft's height control
in 120 meters. If you are in the area of a flight height limit of 120 meters or less, please follow the rules.
2. Do not fly in a high voltage line, communication base station, transmission tower or Wi-Fi hot spots, etc., in
order to make the remote control avoid interference.
3. Fly at an altitude of above 6000 meters, due to environmental factors leading to the decline in the performance
of the aircraft battery and power system, flight performance will be affected, please be cautious.
About Speedy F250 V2
Speedy F250 V2 with automatic return and protection function out of control, when Speedy F250 V2 loses the
signal, it can start the protection function out of control and return automatically to takeoff point.
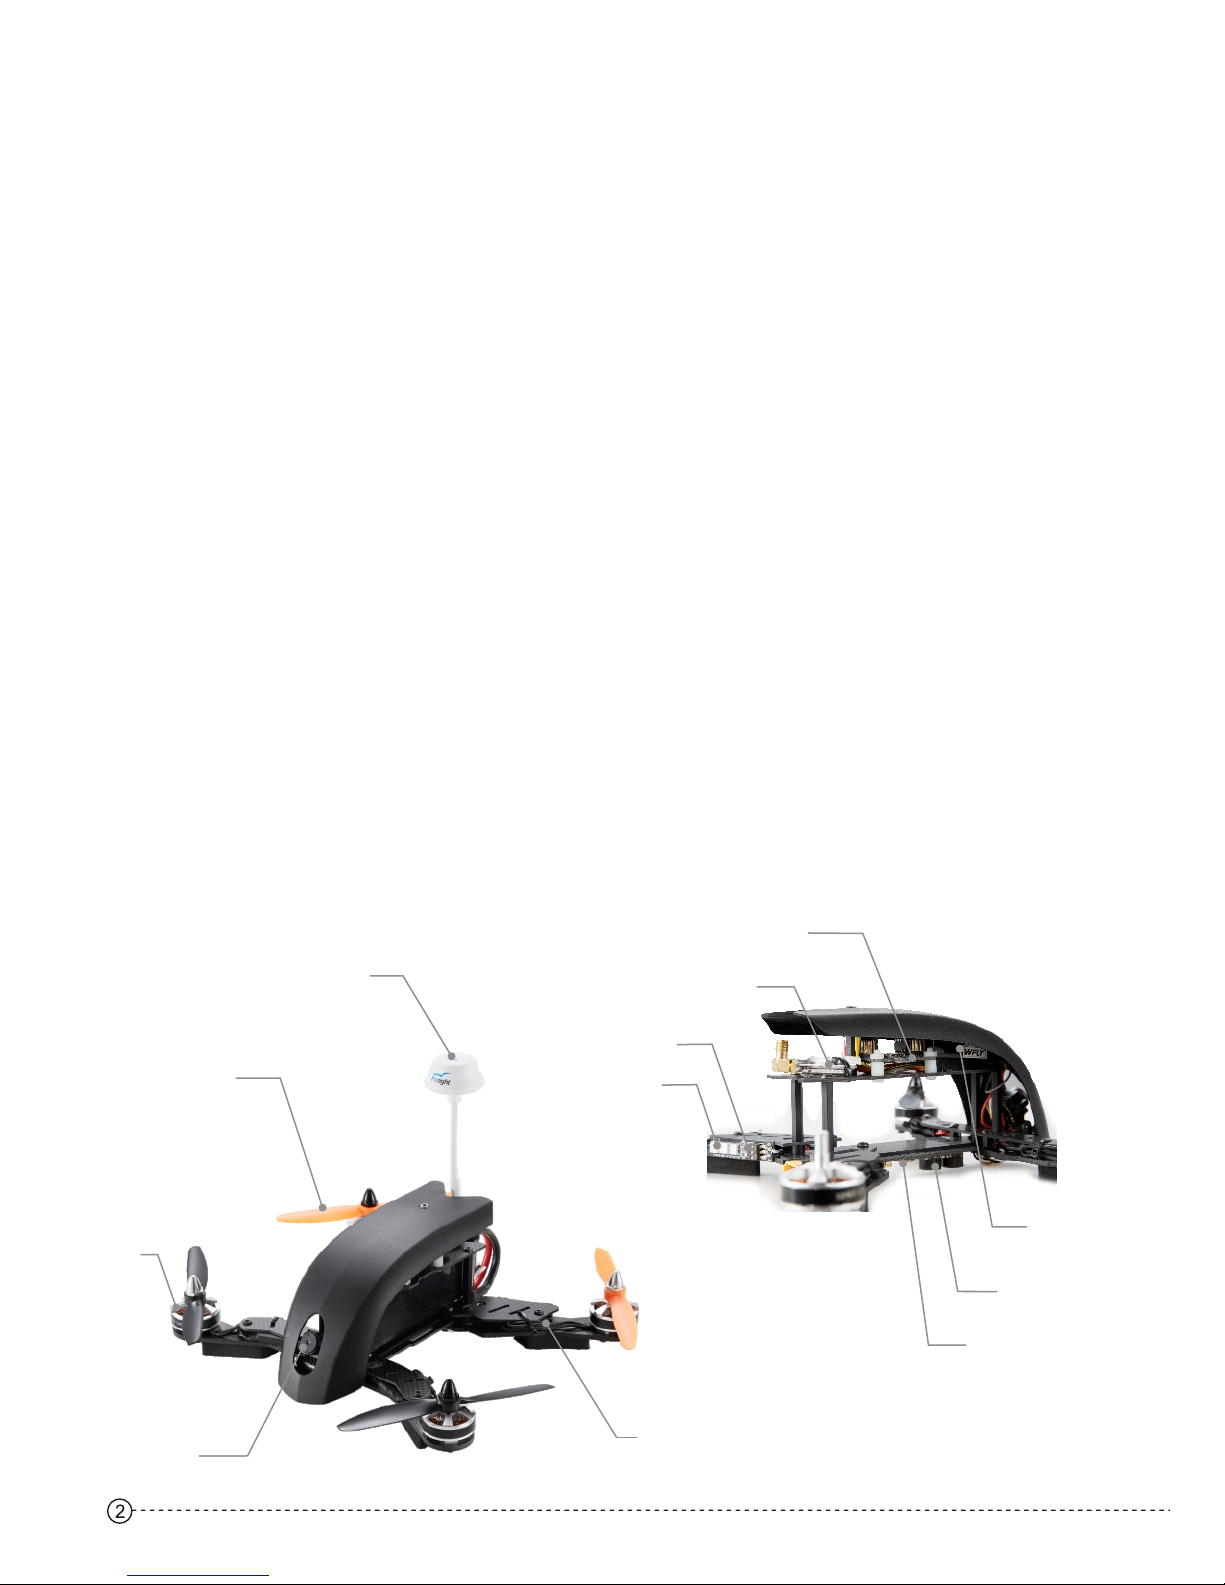
Camera
RC Receiver
Flight Control
Propeller
A/V transmitter antenna
Motor
Electronic Speed Regulator
LED lamp
LED color switch
A/V Transmitter
Power strip
Buzzer
Page 3
3
F250 V2 Fuselage Specification:
Fuselage
Takeoff Weight 530g
Max Lifting Speed 19 m/s
Max Landing Speed 16 m/s
Max Level Flight speed 105-115 KM/h
Max Flight Altitude 6000 m
Flight time 11-13mins
Working temperature 0℃-40℃
About the RC Transmitter
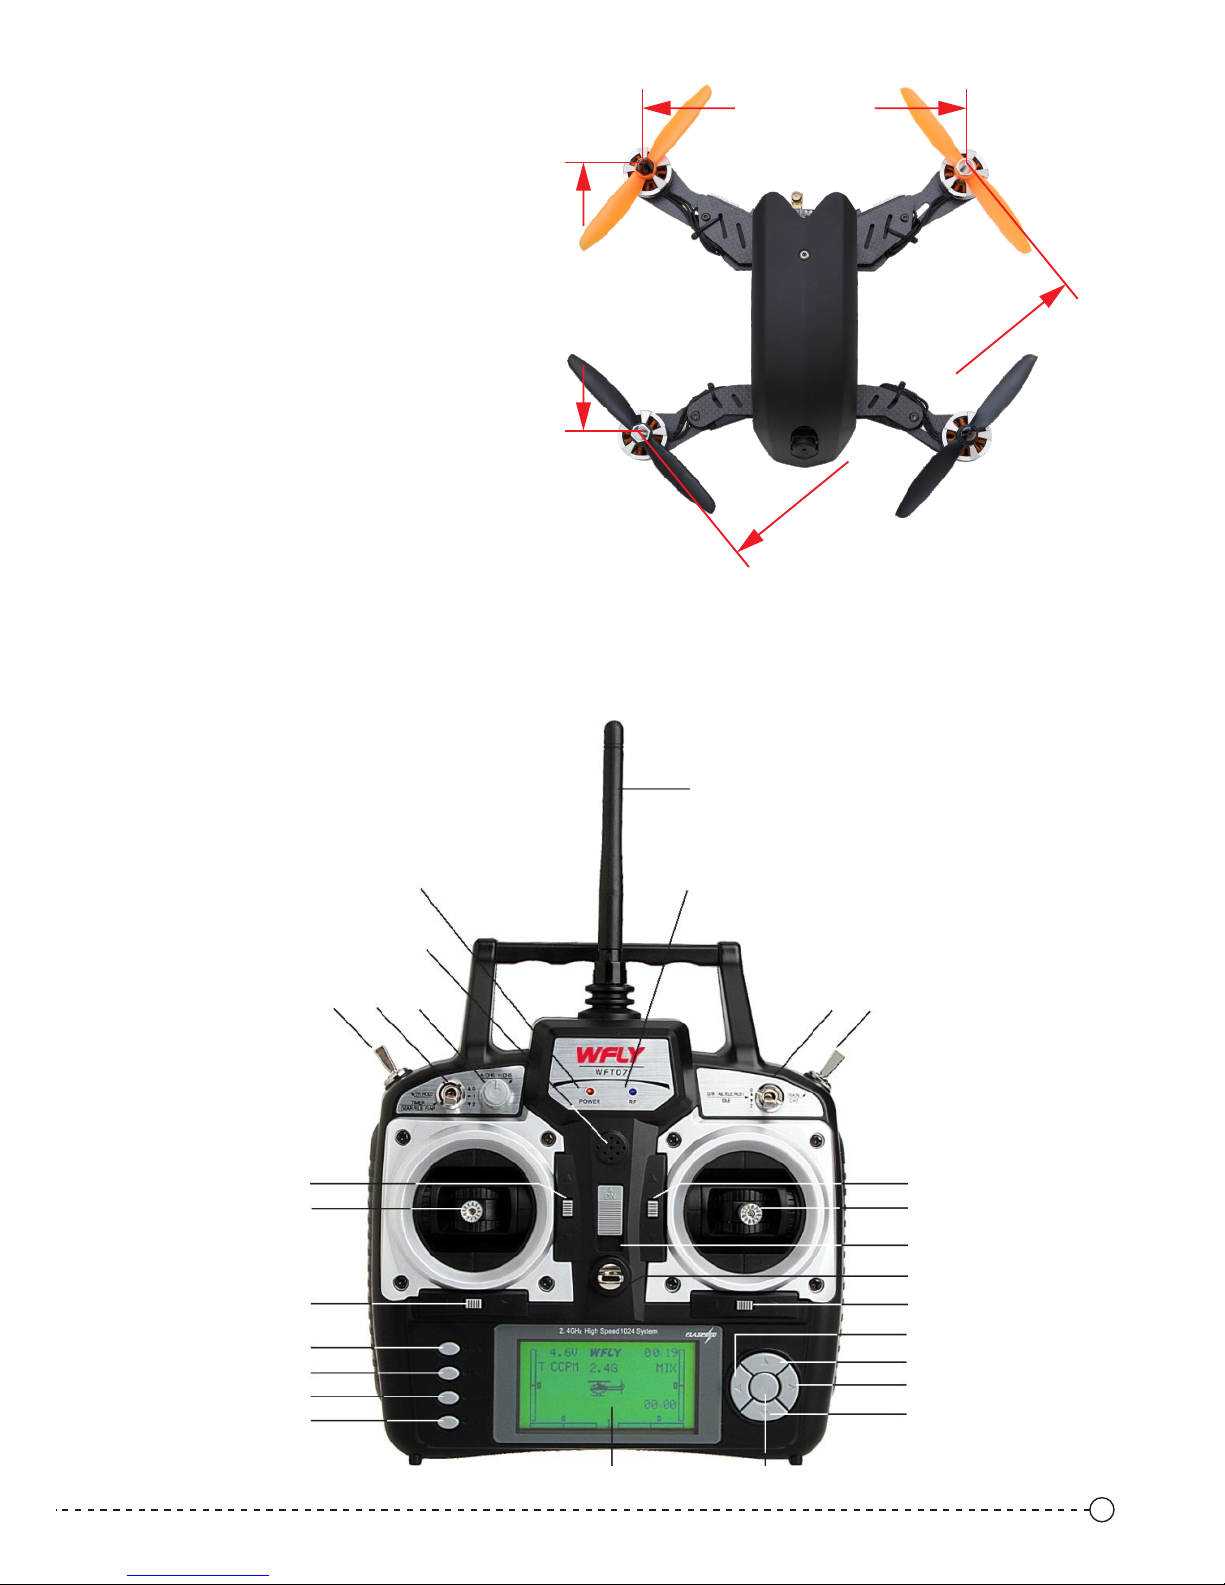
Flysight Speedy F25 0 V2, its standard RC transmitter i s WFLY-07 as below, its max distance is 6000 m.
Remote control has fo ur cust om channels, users can ins tall th e channel function accor ding to t heir own
habits and flight requ ireme nts.
WFT07 RC device Positive
(Left hand throttle)
Antenna(rotatable)
RF light
K3
K4
Elevator trim
Aileron/elevator
stick
Power switch
Neckstrap attachment
Aileron trim
Left
Up
Right
Down
OK
LCD
Reduce
Add
Exit
Menu
Rudder trim
Rudder/
throttle stick
Throttle trim
K1
K2
Power light
V1
Buzzer
2
5
5
m
m
159 mm
192mm
Page 4
4
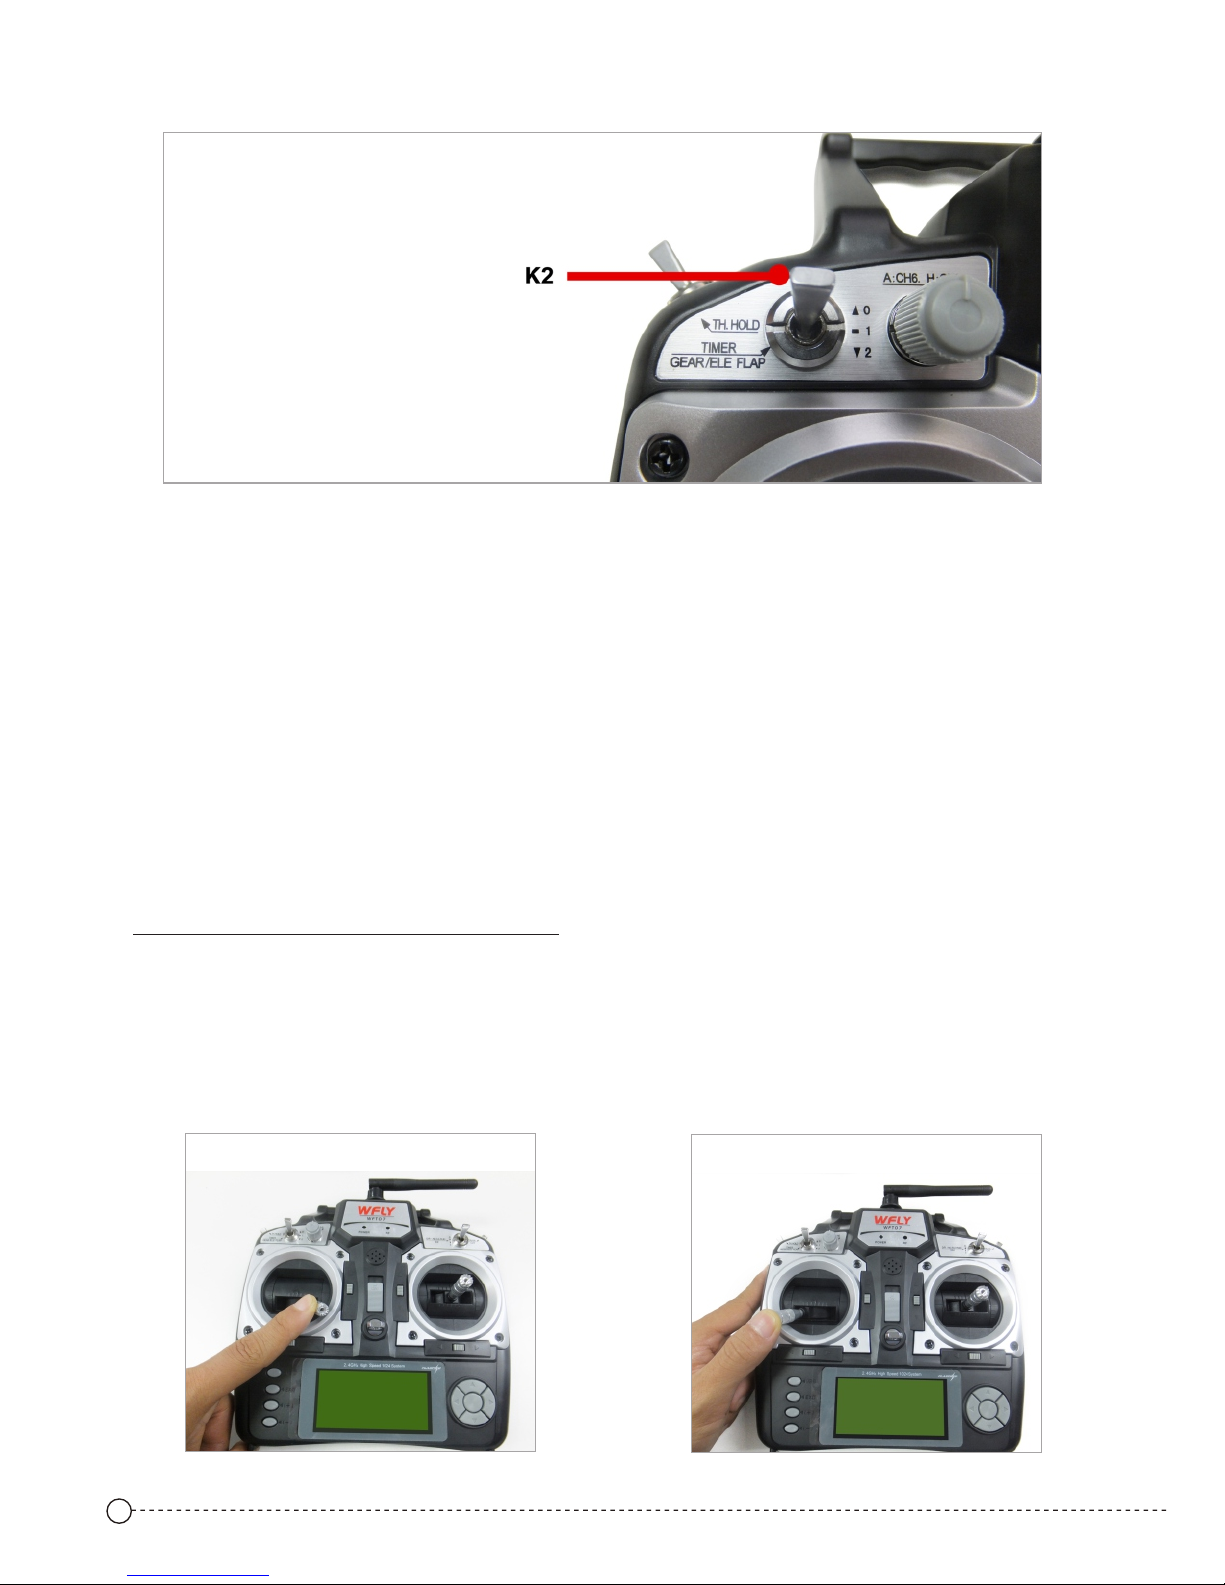
K2 is flight mode switch
ANGLE
HEDAFREE
Manually
Flight Preparation
1. Turn on the RC transmitter.
2. Connected the power of the aircraft, wait for self check(after self check completion,the indicated light of the
flight control flickers slowly), Do Not move the aircraft during this process.
3. Please make sure the normal connection between the RC transmitter and the aircraft (RC receive and RC
transmit connection fails, the "STATUS" red indicator light on the receiver is on; otherwise,it is off).
4. Unlock the aircraft, check the motor rotation direction.
Aircraft unlock and lock
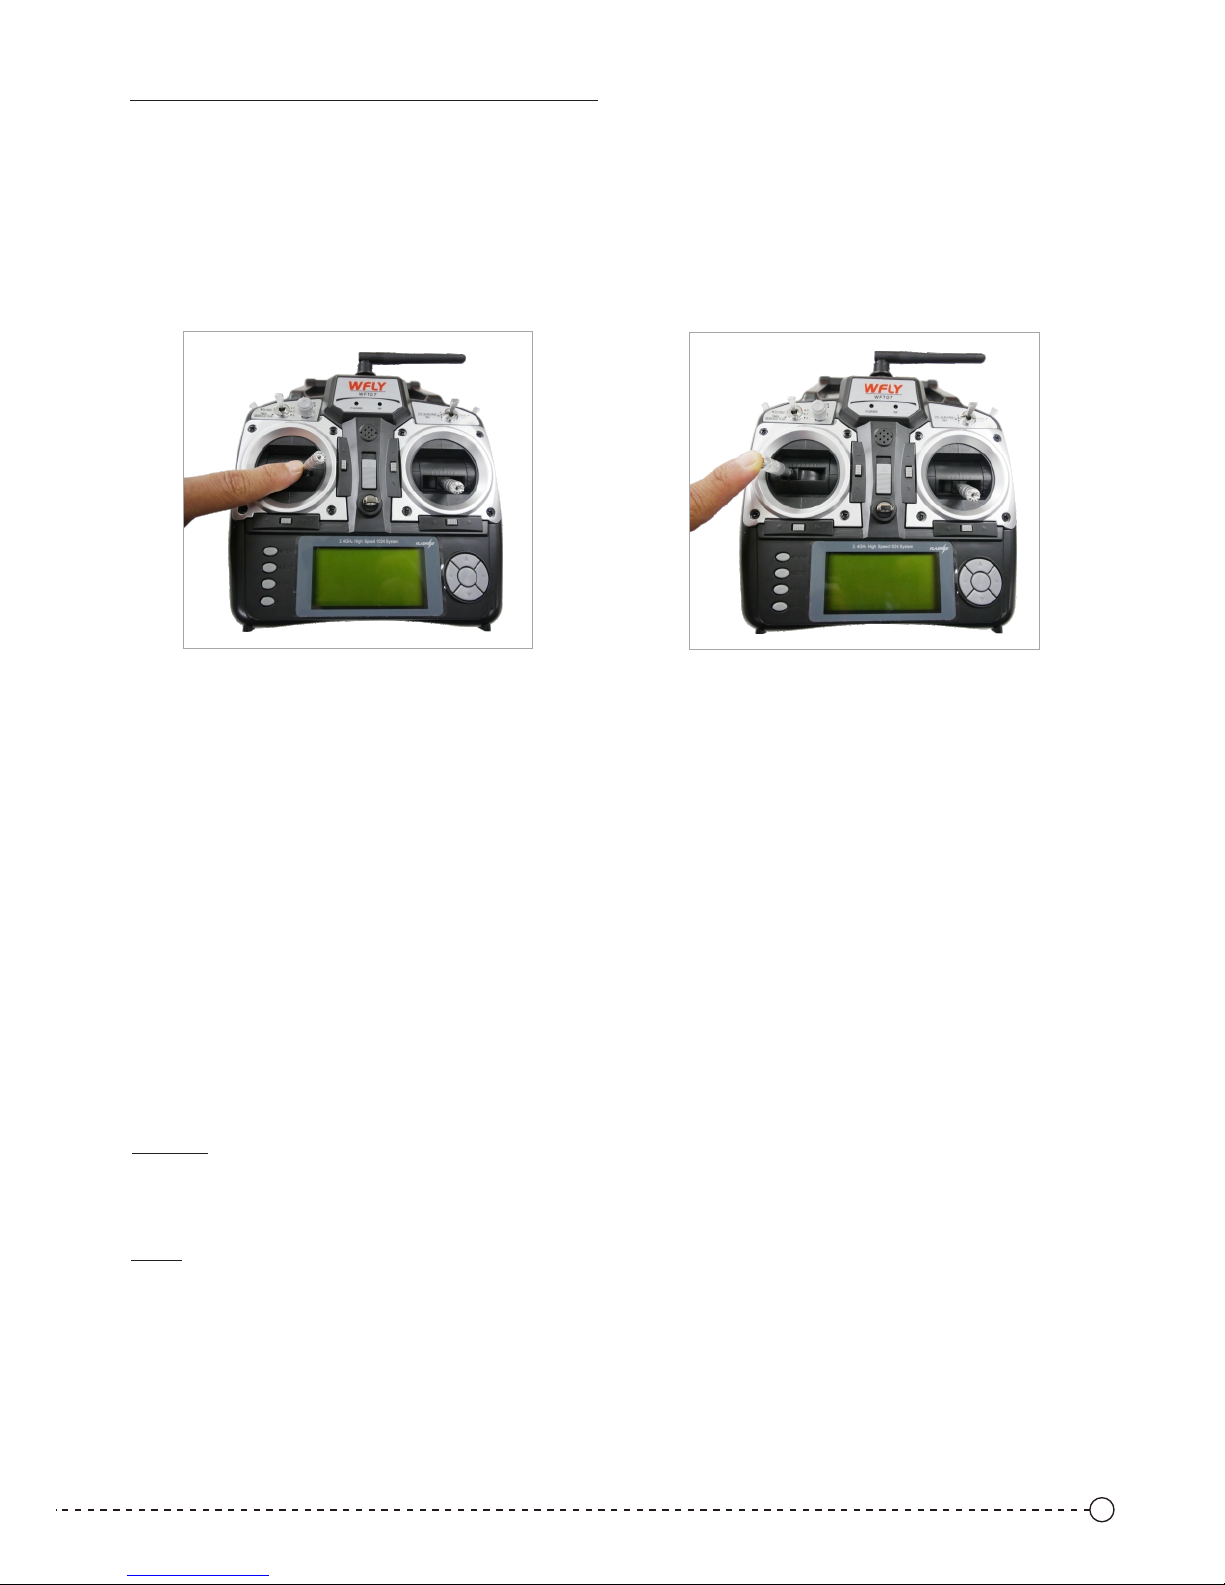
Mode 2--Unlock (Diagram1) and Lock (Diagram2)
1. Unlock: pull the left stick to the bottom on the right corner for 3 seconds, the red light of the flight control system
is on ,that means unlock successfully, the motor starts to rotate.(Diagram1)
2. Automatic lock: the aircraft has automatic lock function, keep the lowest throttle for 8 seconds, the aircraft will
automatically lock.
3. Manual locking: pull the left stick to the bottom on the left corner for 3 seconds, the red light of the flight control
system flicker slowly ,that means lock successfully.(Diagram2)
Diagram 1
Diagram 2
Page 5
5
1. Unlock: pull the right stick to the bottom, meanwhile pull the left stick to the bottom on the right corner for 3
seconds, the red light of the flight control system is on ,that means unlock successfully, the motor starts to
rotate.(Diagram3)
Mode 1--Unlock(Diag ram3) a nd Lock(Diagram4)
Diagram 3
Diagram 4
2. Automatic lock: the aircraft has automatic lock function, keep the lowest throttle for 8 seconds, the aircraft will
automatically lock.
3. Manual locking: pull the right stick to the bottom, meanwhile pull the left stick to the bottom on the left corner for
3 seconds, the red light of the flight control system flicker slowly ,that means lock successfully. (Diagram4)
Flight Operation Instruction
Note: Wrong installation of the p ropellers will lead to the fl ight cr ash.
Please confirm the cor rect mo tor rotation direction , then in stall the propellers pro perly o n the aircraft; when
you install the prope llers , please attention to the po sitiv e and negative direction o f the pro pellers, one hand
hold the motor, and the ot her han d tighten the screw.
Be sure to tighten the sc rew man ually to ensure that the pro pelle r is installed correctly a nd prop erly.
Take off/ Land
Take off:
After the aircraft is u nlock ed successfully, the motor star ts and re lease the rocker, slowly push the th rottle
lever upward(defa ult lef t sticker,Mode2), the air craft t akes off.
Install the propellers
Land:
Pull the throttle lev er down ward slowly, and the aircraft reduce th e flight h eight until it lands on the gr ound.
Pull the throttle lev er to the l owest position to stop the m otor, an d lock the aircraft manual ly or wai t for it to
lock automaticall y .
During the flight, do no t stop th e motor, or the aircraft will c rash. U nless special circumst ances o ccur (such as
an aircraft may crash i nto the c rowd), you need stop motor p eremp torily to minimize the dam age.
Please turn off the aircraft, and t hen the R C transmitter.
 Loading...