

Page 1
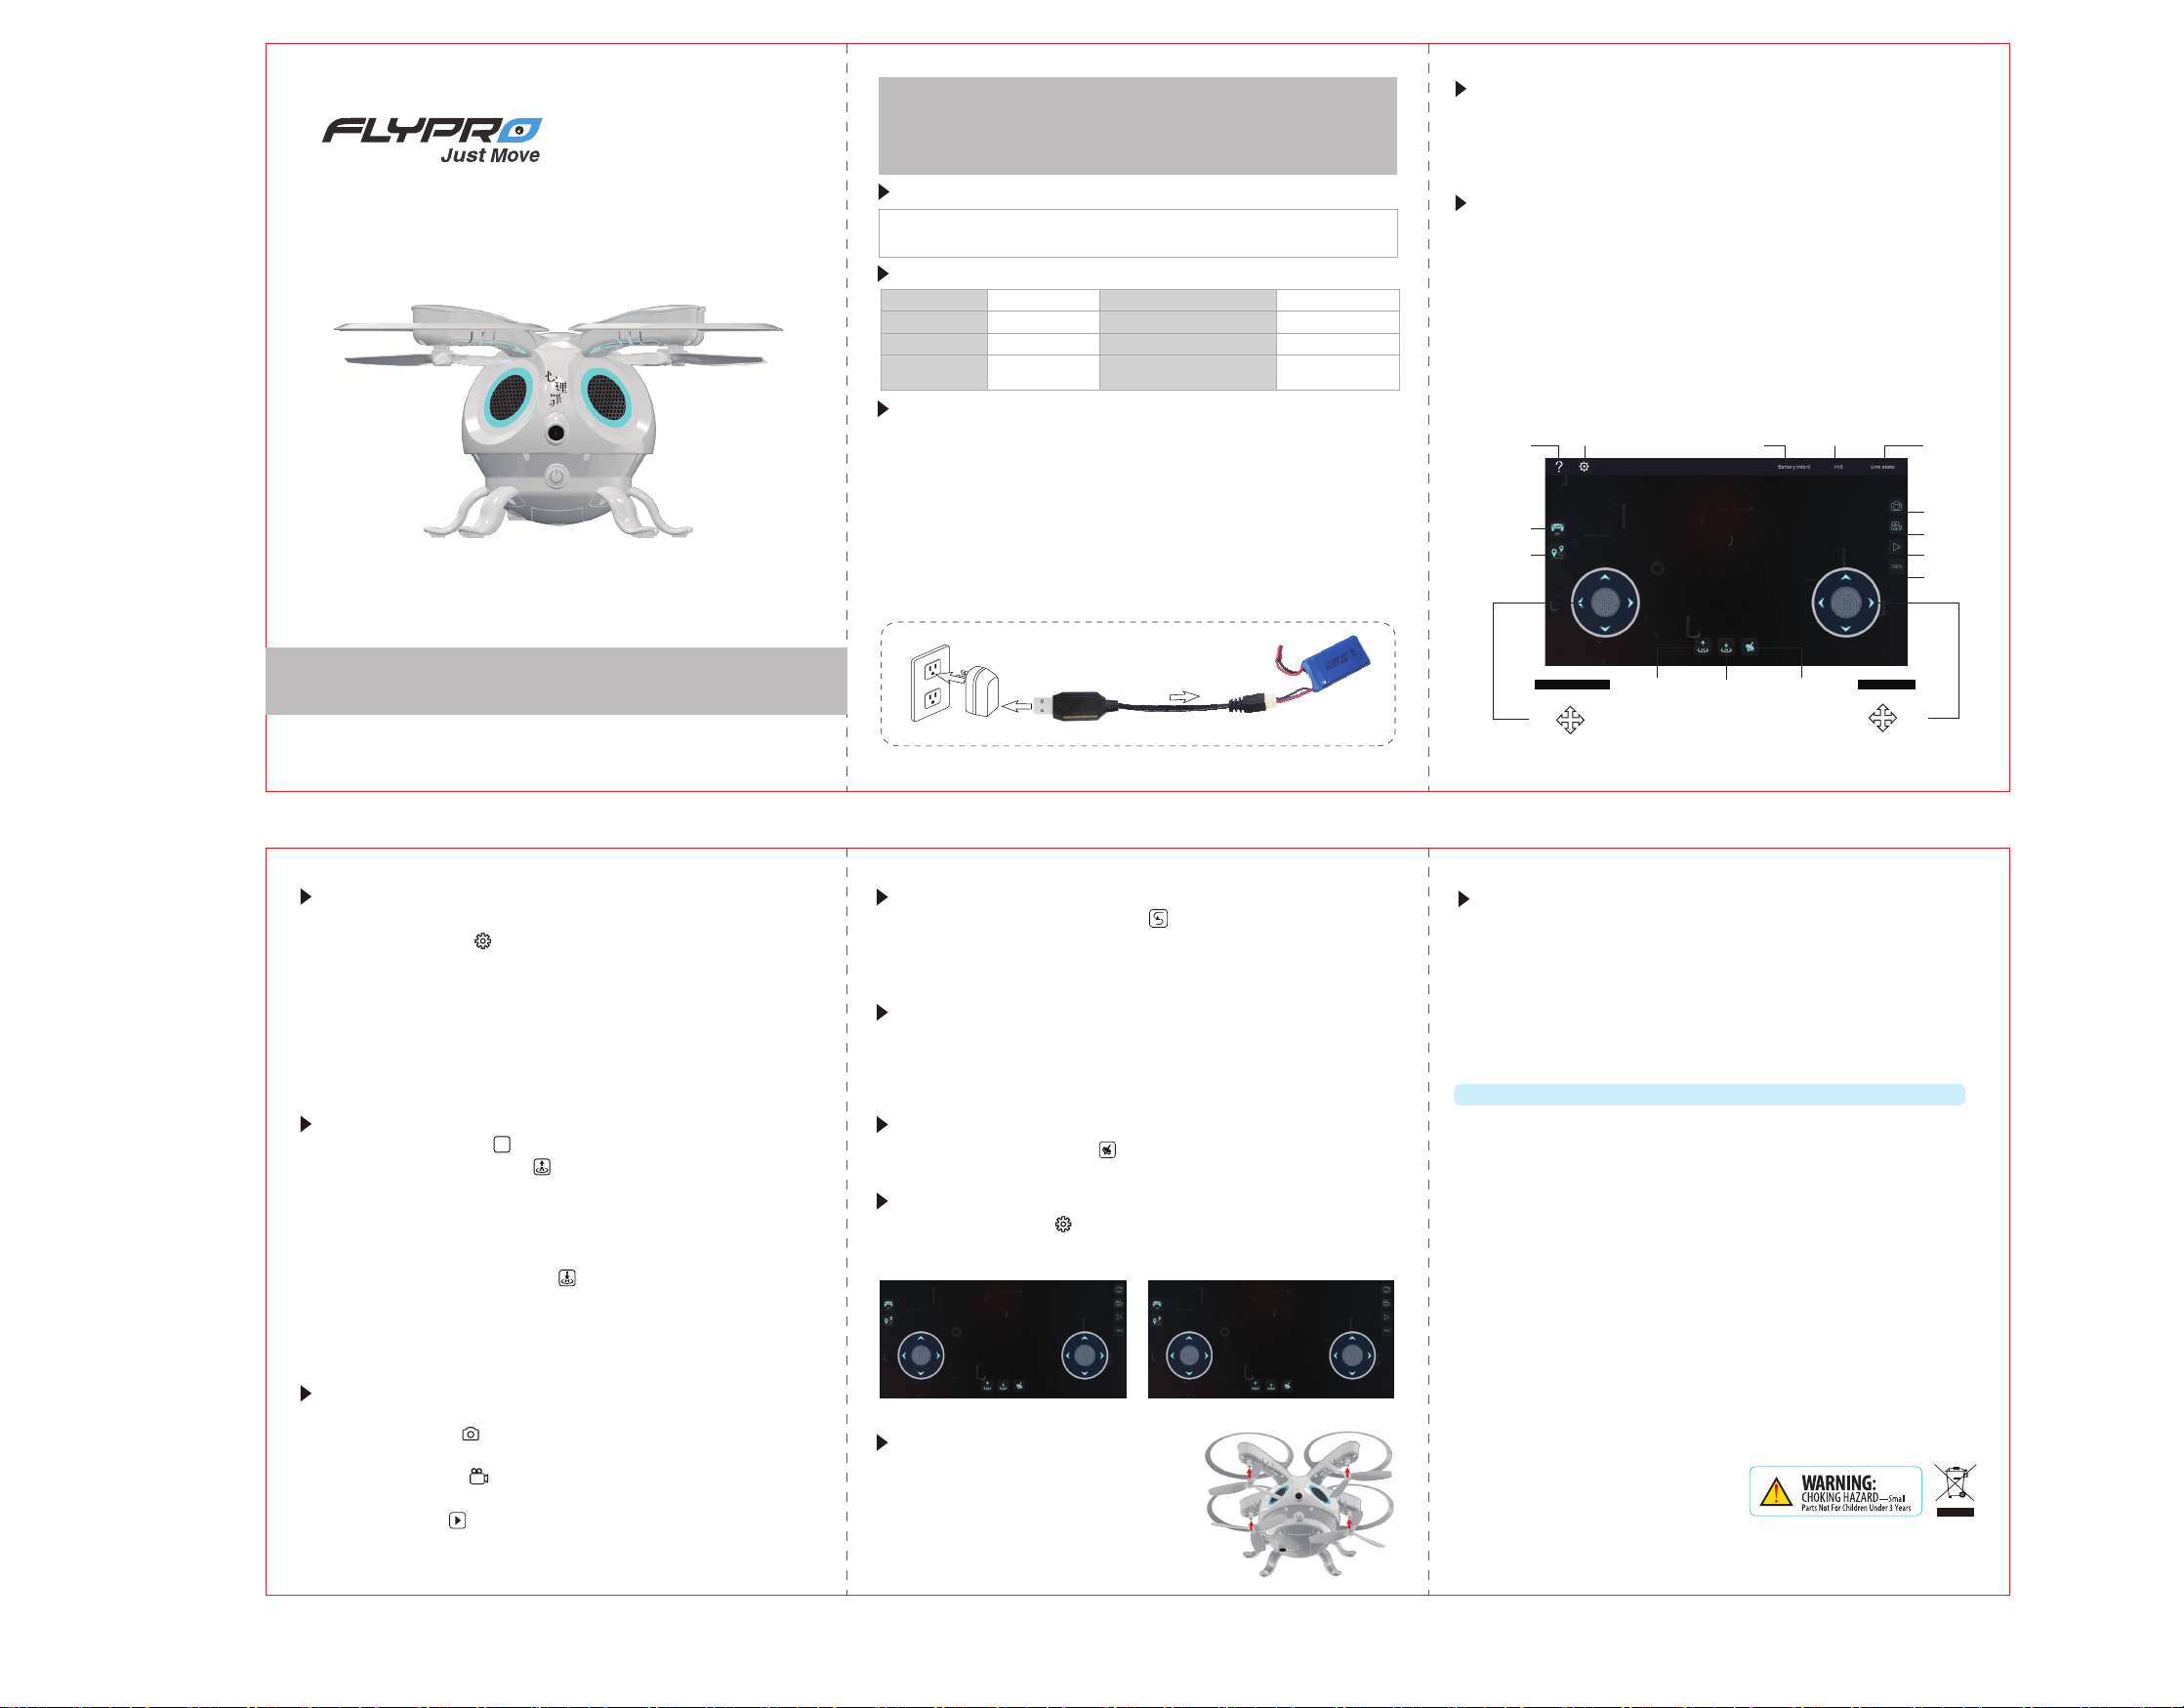
正面
Age:12+
Safety Warning:
• To ensure safety, parents should read this User’s Manul with chilren before start playing.
• To avoid injury, do not touch the product while flying or the propellers still move.
• Be careful to keep your body and loose clothing away from the propellers and motors.
Do not modify or change this product without authorization, or it may injury of your rights
and interests for this product.
Package Content:
⊙Drone ⊙7.4V 530mAh 2S Li-Po Battery ⊙USB Charging Cable
⊙Spare Propeller x2(Ax1,Bx1) ⊙User’s Manual
Specifications
Battery
Control Range
Flying Time
Operating
Temperature
530mAh
30m(100ft)
6 mins
5℃一40℃
Camera
Photo Resolution/Format
Video Resolution/Format
720P
1280 x720 JPG
1280 x720 MP4
Charge the Li-Po Battery
Use lithium polymer battery(530mAh)
⊙ Plug USB cable into the charge port of the battery.。
⊙ Connect USB cable with power source (eg:laptop). The USB connector
red LED light on and steady while charging, the LED off when charging
is complete. A full charge will take about 60 minutes. A fully charged
battery provides up to 6 minutes flight time.
⊙ After fully charged, unplug the USB charging cable. Do not attempt to
overcharge.
Note:Only use the provided USB charging cable, other charege cable may
demage the battery.
Download and Install APP.
iPod、iPhone and iPad users search“Flypro-SQUID”in App Store to download
and install the APP.
Android Android users search “Flypro-SQUID”in Google Play to download
and install the APP.
⊙ IOS 8.0 or above ⊙ Android 4.2 or above
Connect Mobile Device and Drone.
⊙ Press and hold the ON/OFF button until the LED on the drone quickly flash.
⊙ Turn on the wifi to search and connect " Flypro-WUZEI -XXXXXX" on
the mobile device, the LED flash on the drone slow down means wifi
connection successful.
⊙ Open the APP to enter operation interface,the LED on thedrone stop
flash. The drone can be operate when the mobile device interface show
the image that the camera captured.
Note:
* If wifi“ Flypro-WUZEI -XXXXXX”is not available,try to restart the wifi
setting on your mobile device.
* If pair failed, try to restart the drone and repeat the pairing steps. Or move
location to avoid interference.
Help
360° Fixed-Center
Rounding
Waypoint Flight
Settings
Battery Info
Fight Hright
Link State
Take Photo
Take Video
Multimedia
Speed Setting
反面
1106 SQUID User’s Manual
Calibration
1. Place the drone in a flat ground
2. Click the“settings”( )to popup the settings window,Click Acceleration Trim and follow the prompts.
3. The LED on the drone quikly flash while trimming
4. Calibration successful when LED stop flash.
Note:
Flight the drone for the first time or the drone is not able to flight
straight, please refer to the“Calibration”step to calibrate the drone.
Basic Flight
(1)After calibration, click ( )can switch speed from30% 60% and 100%.
(2)Click“One Button Take Off”( ), the drone will automatically ascending
about 50 ft (150cm) then hover and waiting for instruction.
(3)Move the throttle forward / backward can ascend/descend the drone.
Move the steering forward/backward/left/right can control the drone
fly forward/backward/left/right.
(4)
Click the “One Button Landing( ) while flying, the drone wil slowly
descend untill landing to the ground and the propellers stop moving.
(5)Turn off the drone when after landing.
Note:Move the function stick slowly, otherwise the propellers of the drone
may stop working and drmage the drone may causing.
Camera Application
When the drone flight stably.
⊙ Take photo:Click ( ) one time,the mobile device will buzzing one
time, and the green LED on the rear arm of the drone will flash one time.
⊙ Record video:Click ( ) the green LED on the rear of the drone will
flashing click again to stop recording.
⊙Multimedia: Click ( ) to enter multimedia to check the recorded photo
and video.
30%
Waypoint Flight
Click the “Waypoint Flight” button( )to popup operation interface.
Lineation randomly on the interface, the drone will flight along the path
line. Click the cancel button or re-planning a path can cancel the last
flight path.
360° Fixed-Center Rounding
Click the “360° Fixed-Center Rounding”the drone will rounding and record
video surround the original point . Click the 360° Fixed-Center Rounding”
again to exit.
Motion Sensor
Click the Motion Sensor Button( )to entering notion sensor control, steer
the flight direction by tilt the mobile device wtih corresponding direction.
Switch the Throttle Location
⊙ Click the “Settings”( )to choose the location of the throttle.Players
can switch the location of throttle between left or right.
Note: Factory setting the throttle on the left.
Throttle Up
Turn
Left
Throttle Down
Turn
Right
Slide
Left
Forward
Backward
Slide
Right
Turn
Left
Forward
Backward
Turn
Right
Throttle Up
Slide
Left
Throttle Down
T
Slide
Right
( Throttle on the left) (Throttle on the right)
Replacing Propeller
The *4’s propellers are not identical. Each
propellers is labeled with an A or B.When
B
A
installing replacement propellers, be certain
to insatlled the A/B correspondingly.Take
advantage of plier if the propellers cannoby
A
B
hand.。
Motion Sensor
Slide Left
Steering
Forward
Backward
Slide Right
Turn
Left
Throttle
up
down
Turn
Right
One Button
Take off
One Button
Landing
Safety Notes:
• Keep the drone away from crowds, operating the drone in a wide space.• Operating the
drone in legal place.
• Keep the drone within sight.
• Ensure the battery is sufficient charged before operating the drone.
• Ensure the propellers no demage and tightly installed.
• Keep away from the working propellers while flight.
• Do not making or receiving call while flight.
• Do not operating the drone after drinking or drug.
• Landing the drone when low power.
• Landing the drone when the drone is not able to flight straight.
FCC STATEMENT:
This equipment has been tested and found to comply with the limits for a Class B digital
device, pursuant to Part 15 of the FCC Rules. These limits are designed to provide
reasonable protection against harmful interference in a residential installation. This
equipment generates uses and can radiate radio frequency energy and, if not installed and
used in accordance with the instructions, may cause harmful interference to radio
communications. However, there is no guarantee that interference will not occur in a
particular installation. If this equipment does cause harmful interference to radio or
television reception, which can be determined by turning the equipment off and on, the
user is encouraged to try to correct the interference by one or more of the following
measures:
-- Reorient or relocate the receiving antenna.
-- Increase the separation between the equipment and receiver.
-- Connect the equipment into an outlet on a circuit different from that to which the
receiver is connected.
-- Consult the dealer or an experienced radio/TV technician for help.
Changes or modifications not expressly approved by the party responsible for compliance
could void the user's authority to operate the equipment.
The antenna(s) used for this transmitter must
be installed to provide a separation distance
of at least 20 cm from all persons and must
not be co-located or operating in conjunction
with any other antenna or transmitter.
• The antenna(s) used for this transmitter must be installed to provide a separation distance of at least 20 cm.
Made in China Version:20170710001
风琴折
成品尺寸:105x135mm
展开尺寸:315x135mm
 Loading...