

flyingwings Falcon Eco FPV User Manual

FALCON EVO FPV
CRITICAL DATA
Centre of gravity, see “Radio Setup” Page
TARGET FLYING WEIGHT 800 grams
with 2200mah 3S battery
UHU POR
HOT GLUE GUN
CA GLUE
Thank you for purchasing the Falcon EVO FPV wing
The Falcon FPV is designed for First Person Viewing (FPV) and for UAV/Drone
experimentation.
The Falcon Evo comes with a plain “Monkey blunt” from section allowing
modification to fit any camera’s.
There is a power system for this model, see the website for details.
As well as this power system you will require:
2 x Micro size servos Approx 9g
1 x Long range receiver
1 x Lipo battery(s) (2200mah 3S 11.1v or 4000mah 3S Multistar *
1 x connectors set
1 x Transmitter capable of elevon mixing or mixing module
1 x Lipo compatible charger
Power System: (inc with deal).
1 x 2212/6 2200kv or 2212/10 1400kv outrunner
1 x 25-30amp speed controller
v 1.1
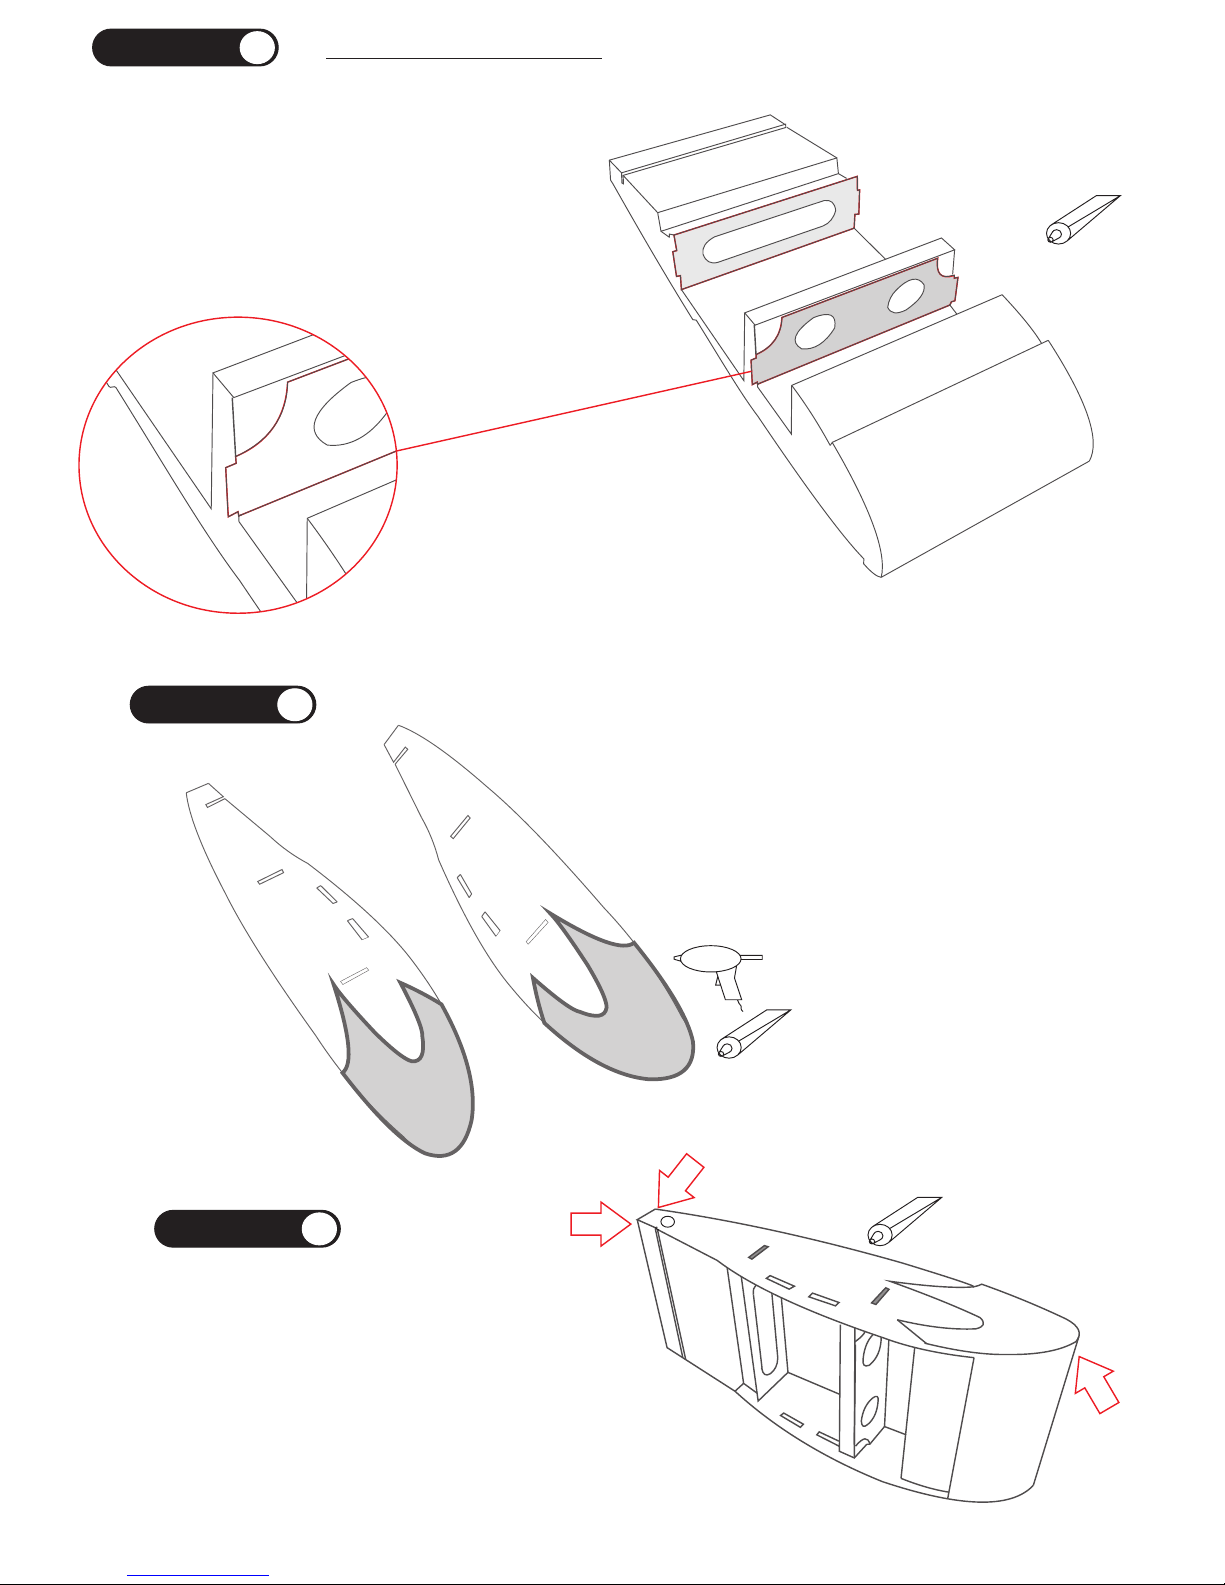
STEP
1
Fuselage assembly
Glue in the two formers as shown, make sure
they are central, with the tabs proud of the foam
fuselage.
Glue in the two side cheeks as shown, make
sure they are central, with the tabs proud of the
foam fuselage.
Tip ! you can spray paint these side parts now, if
you wish.
On a flat surface, turn the fuselage on its side,
check that the sides fit before gluing. Its best to
use a slow drying glue here.
Check for alignment where arrows are pointing.
Repeat for other side, wait until dry.
STEP
STEP
2
3
MAKE A HANDED PAIR !!!!
Coat one side of the correx plastic belly plate with uhu
por glue. Do the same to the under side of the fuselage
inside the recessed part.
Wait 10-15 mins, and insert the front end first working
your way to the back, glue in the belly plate. Hold in
place with some strapping tape if necessary.
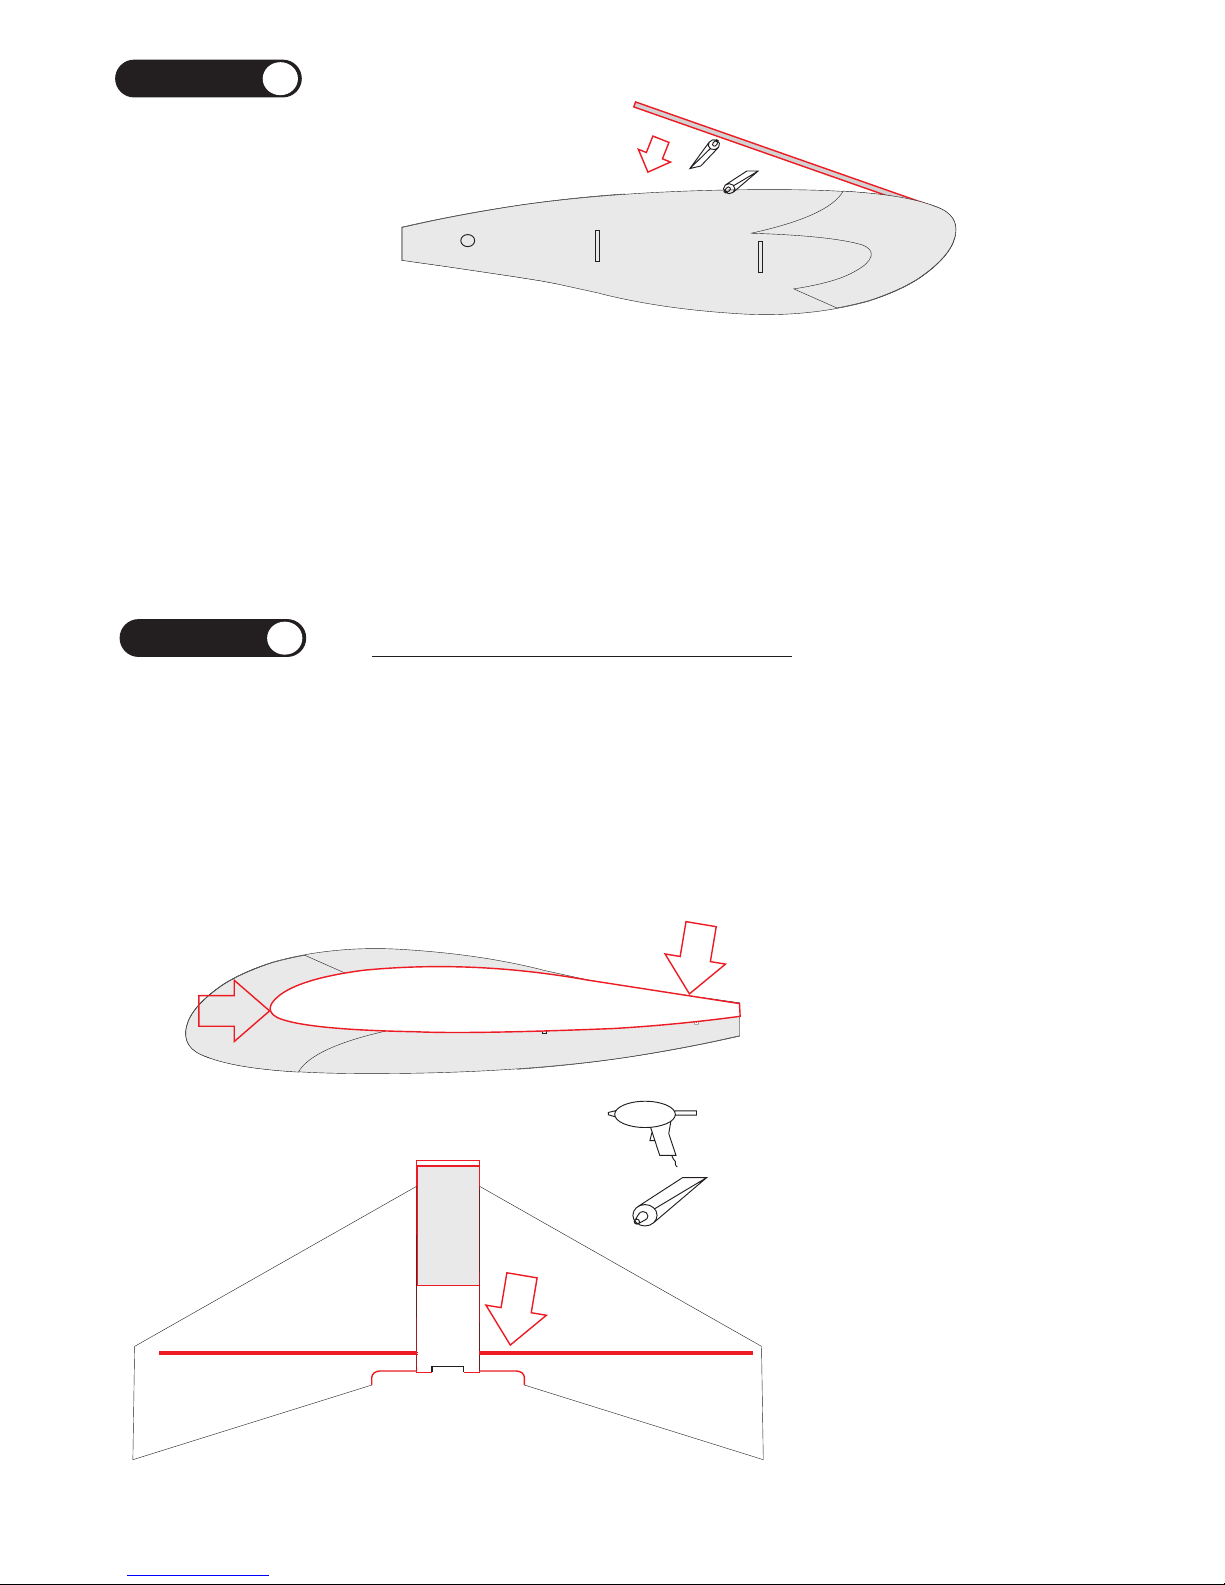
Follow this method and you will be fine, we shall run through the important parts before
gluing anything.
There are 3 Alignment points to consider for each wing panel.
Dry fit (without glue) the wing to the
fuselage and check the 3 alignment
points, do this for both wings
Note: we feel its not necessary to
cover or laminate the fuselage, but
we will leave it to you, now’s the
time to do it.
If you do cover the fuselage,
remove any tape where the wing
attaches to allow a good glue joint.
The rear of the wing top should be at
the same level as the fuselage
Front of the wing panel should slot into
the shape of the side cheeks
The slot cut into the wings should align
with the slot in the fuselage. Don’t
worry if it's a tiny bit out of alignment.
STEP
STEP
4
5
Wing joining and alignment - Critical !!!
1
2
3
 Loading...