

Flying Scot Halyard Installation Manual

Halyard Winch Installation
Before beginning please read t hrough all instructions thoroughly. If you have any questions, please call us at 1-800-864-7208.
Note: This job can be done with the mast on the boat, while it is in the water or you can lay the mast on two horses, winch up, and
hold it in place with clamps.
1. Before you install your new halyard winch, take a close look at how your current winch is installed. The winch pawls must
open down, so they should be to port.
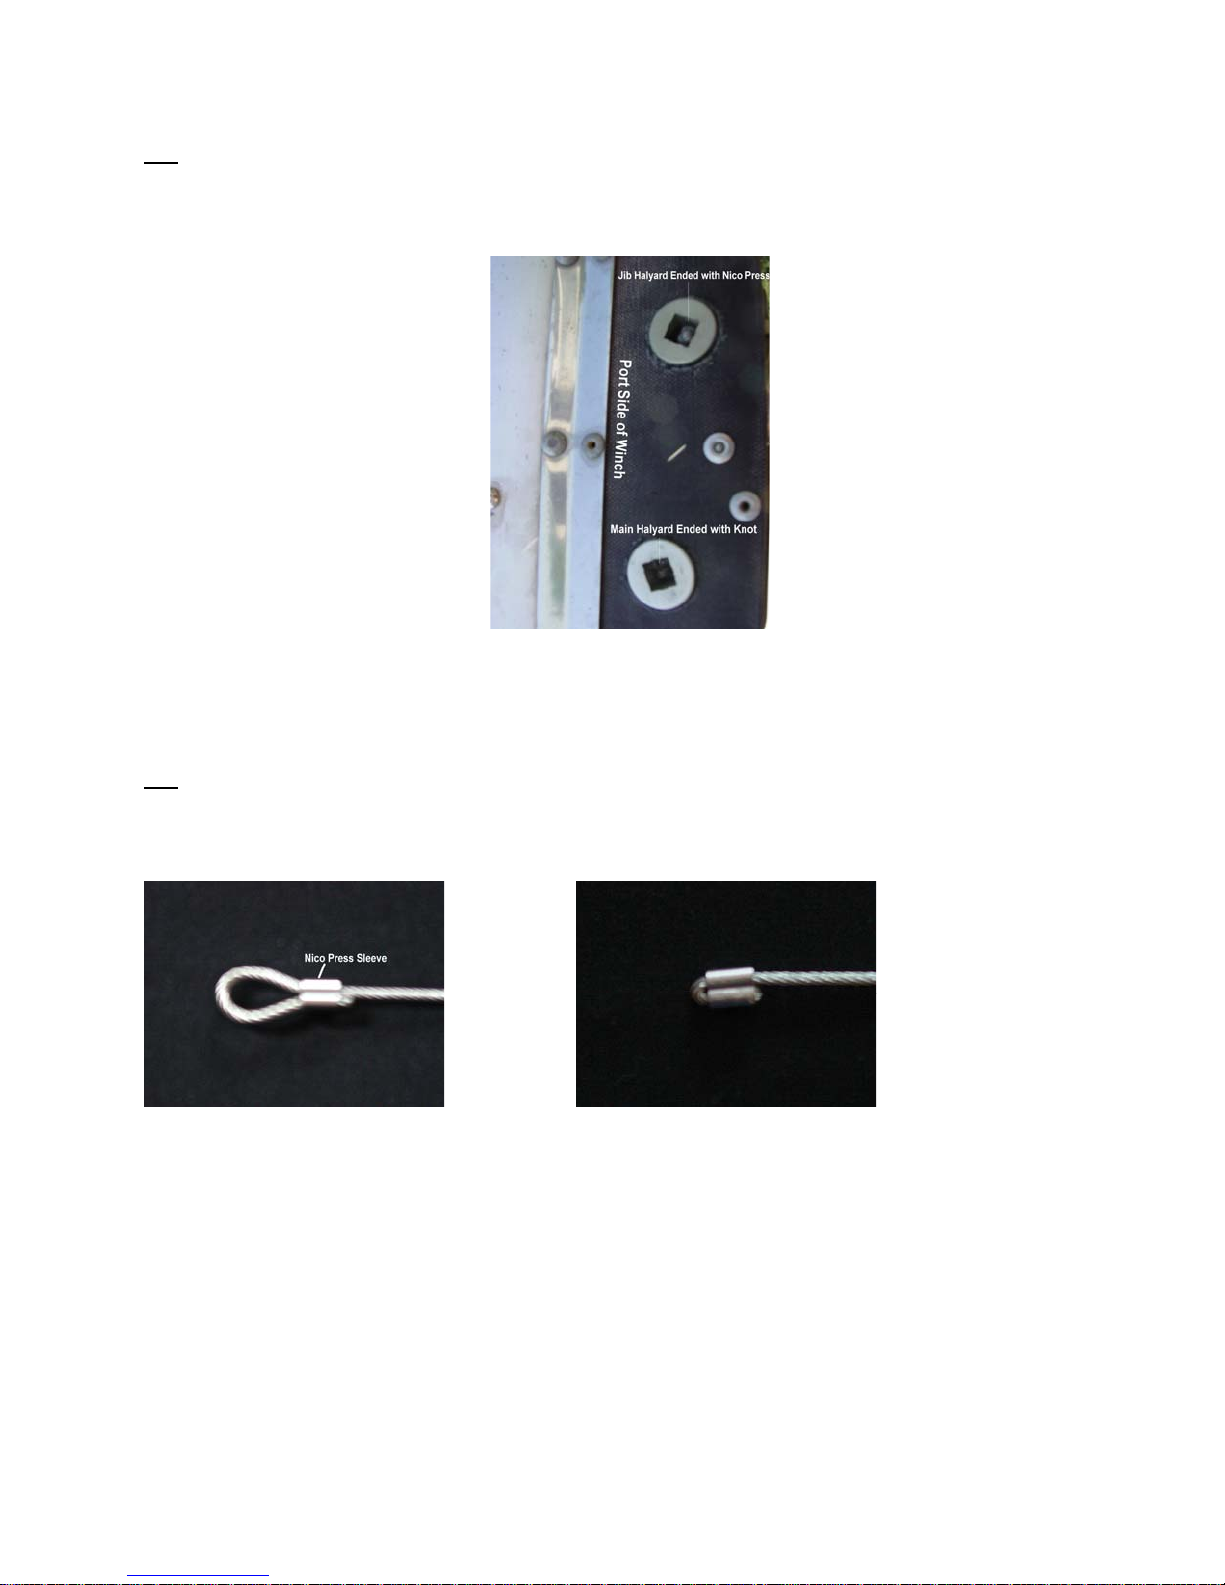
2. Pull the halyards out of the winch to port from where they are locked in the center core of the spool noting that the jib halyard
is led aft of the top winch spacer and the main halyard is led forward of it. (See Image at Step 10)
3. Cut the wires and pull them up and out of the way. Secure them by taping them to the mast.
4. Remove the old winch rivets by driving the center pin through into the mast and drilling out the rivet shanks with a 3/16” bit.
5. Remove the old winch
6. Hold the new winch in place, in line with the old rivet holes, with the pawls to port.
7. Insert one rivet and drive the center pin flush.
8. Repeat step 7 on the opposite side, diagonally across
Note: Drive the center pin flush only. Two or three blows with the hammer will do it. A drift pin or small Phillips
screwdriver is handy in lining up the holes.
9. Repeat step 7 until all the rivets are driven home and the winch is in place
10. Install the halyards making sure to separate the jib and main halyards with the upper, forward winch spacer.
These instructions are intended for the exclusive use of Flying Scot, Inc. customers. Any unauthorized use is strictly prohibited.
11. Feed the halyard into the small hole in the winch spool and out to port of the square winch center hole.
Tip: A small, flat bladed, screwdriver is useful to push the wire out of the port side of the spool. This can be done by
inserting the screwdriver into the starboard side of the spool and pushing the wire.
12. Tie a knot in the main halyard and pull it back into the spool.
13. Lock the jib halyard in place with the nico press sleeve. To install the nico press on the jib halyard, make the loop through
the sleeve (See Image 1 below) and then pull the wire into a tight 180 degrees bend. (See Image 2 below) This will lock the
wire. Once the wire is in place, use a nico press tool to lock the sleeve. If a nico press tool is not available, a squeeze with
vice grips or a blow with a hammer will lock the sleeve.
Tip: Once you have threaded the wire through the nico sleeve, use a pair of vice grips to pinch the half of the sleeve with
the bitter end of the wire through it. This will hold the end in place while you pull the rest of the wire through to tighten
the loop.
Image 1 Image 2
These instructions are intended for the exclusive use of Flying Scot, Inc. customers. Any unauthorized use is strictly prohibited.
 Loading...