

Flying Scot Bow Air Bag Instructions Manual
Bow Air Bag Instructions
Kit Includes
• Bow Air Bag
• Set Webbing Straps
• Flotation Tangs with Screws and Washers
• Wood Blocks with Fiberglass Patches
Additional Material Required
• Resin
• Gel Coat
• 3” disposable bristle paint brush
• Acetone
• Rags
Before Beginning Please Thoroughly Read Through All Instructions.
Please call us at 1-800-864-7208 with any questions.
• 80 Grit Sandpaper
• Hammer
• Cordless Drill w/ 1/8” bit
• Phillips Screwdriver
• Tape Measure
Wood Block Installation
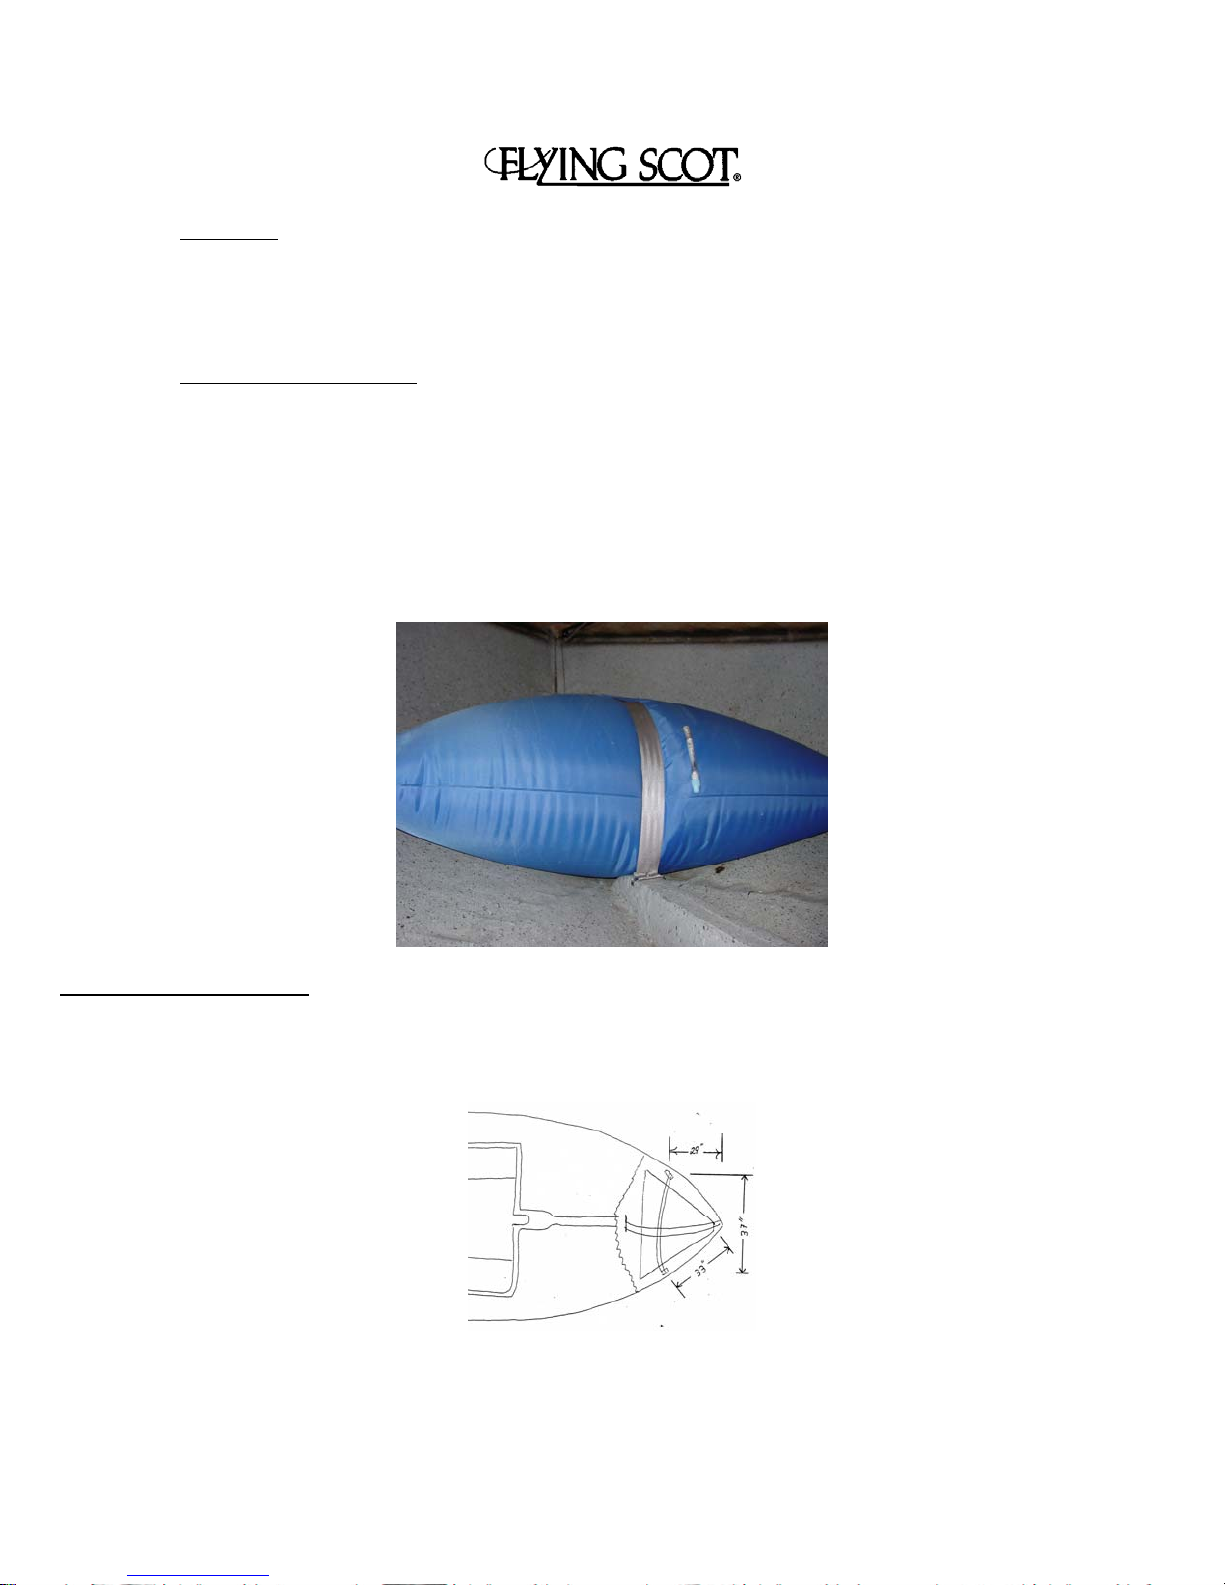
1. In order to provide maximum lift, the bag should be secured to the floor of the boat just forward of the
centerboard trunk. Use the sketch to locate the position for the wood blocks.
2. Lay the uninflated air bag in the bow to be sure the position of the blocks is correct.
These instructions are intended for the exclusive use of Flying Scot, Inc. customers. Any unauthorized use is strictly prohibited.
3. Sand the area that is to be below the blocks well.
4. Paint the sanded area of the hull where the blocks will be attached with the resin and then lay in the small mat
patch
Note: We recommend polyester resin with a small amount of gel coat mixed in to color the resin so that it more closely
matches the surrounding area. Epoxy resin may be used in place of the polyester resin, however, epoxy resin may not wet
out the mat patches as well.
5. Paint the wood block with the resin and press it onto the mat patch with enough pressure to squeeze a small
amount of resin from under the block.
6. Lay the large mat and roving patch over the block with the roving on top and wet it out with the resin.
Note: Be sure to work out any trapped air so that the glass fits tightly over the wood block. A 3” disposable bristle paint
brush works well for wetting out the glass patches. Be sure to have some acetone on hand for clean up.
7. Allow to cure 24 hours
Web Strap Installation
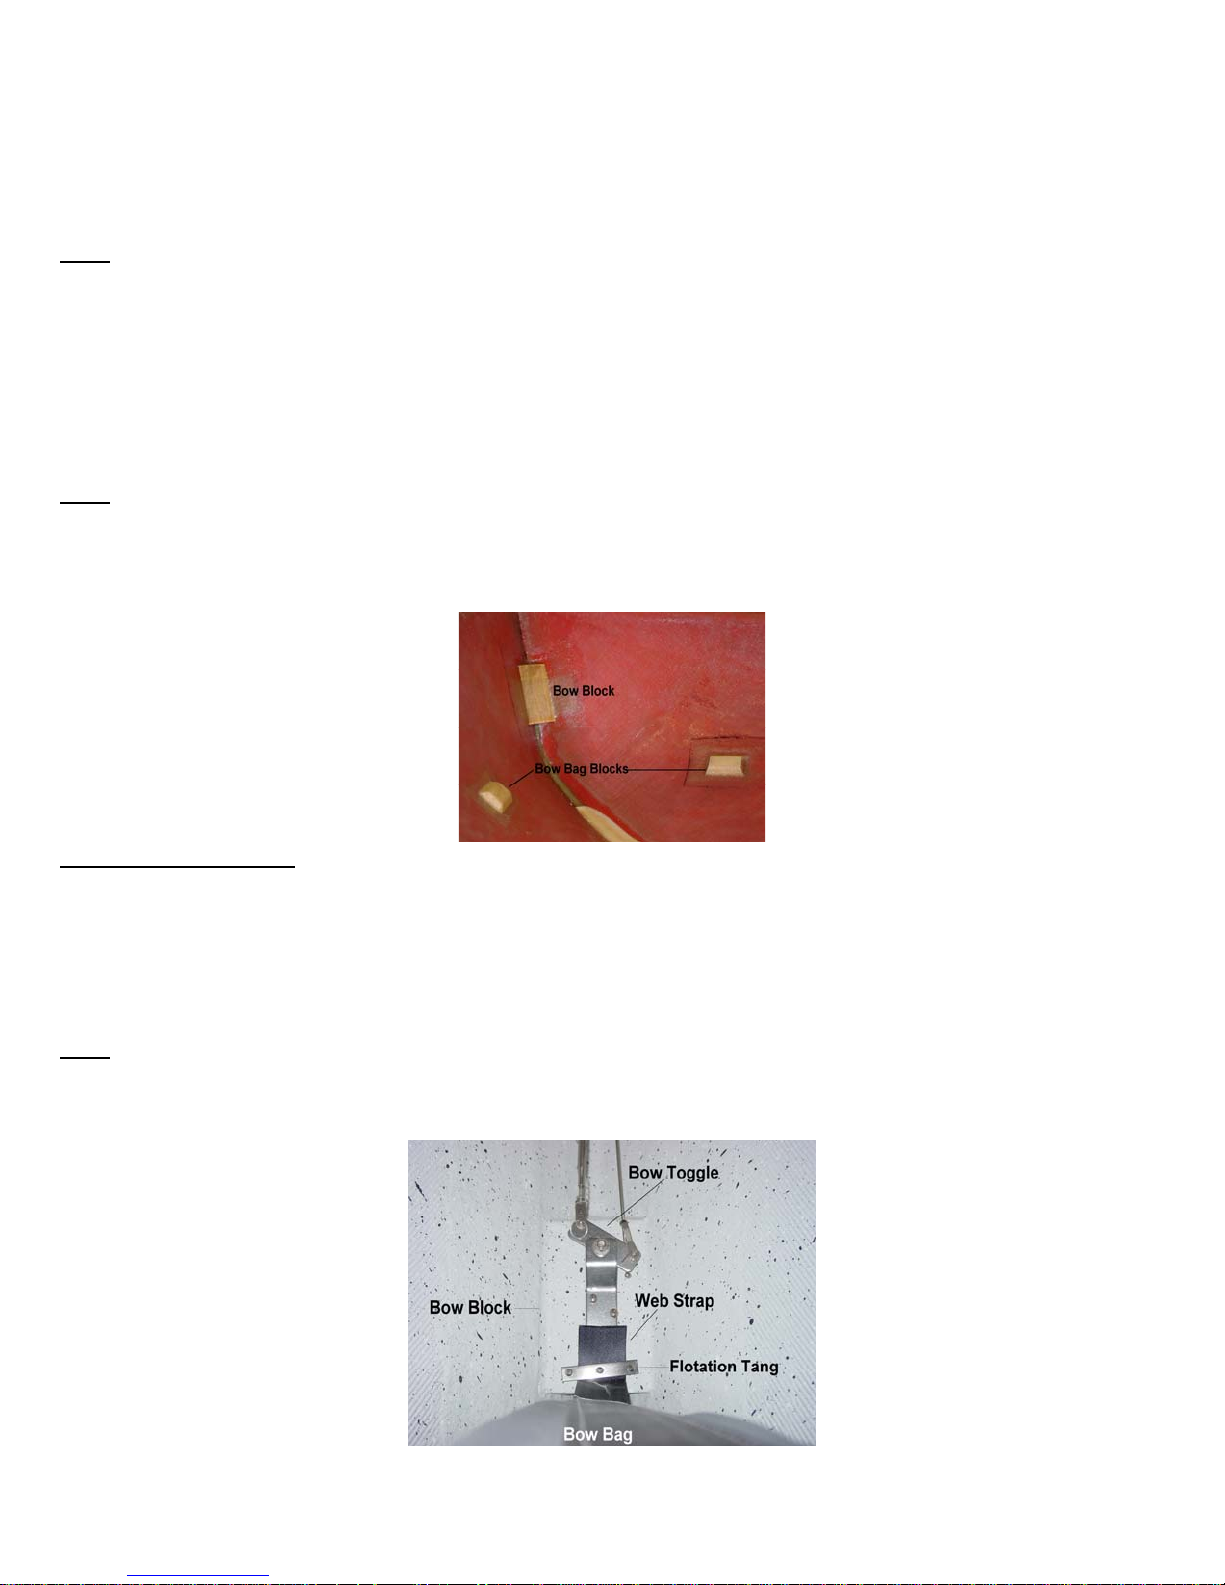
1. Check the entire area where the bag is to be installed and lightly sand any rough or sharp glass edges
2. Lay the uninflated bag into the bow and attach the forward flotation tang to the lower part of the bow block
(the glassed in block where the jib and forestay toggle is attached) using a 9/64” drill bit
Note: Be sure not to drill more than 3/4” deep. A hole drilled too deep can easily go through the bow and show on the
outside.
3. Screw the tang down using the washer on the center screw.
These instructions are intended for the exclusive use of Flying Scot, Inc. customers. Any unauthorized use is strictly prohibited.
 Loading...