

Page 1
The Freemote Quick User Guide
1. Insert the Freemote USB receiver into your PC
The Freemote is plug and play. No driver is needed.
1. 将接收器连接至
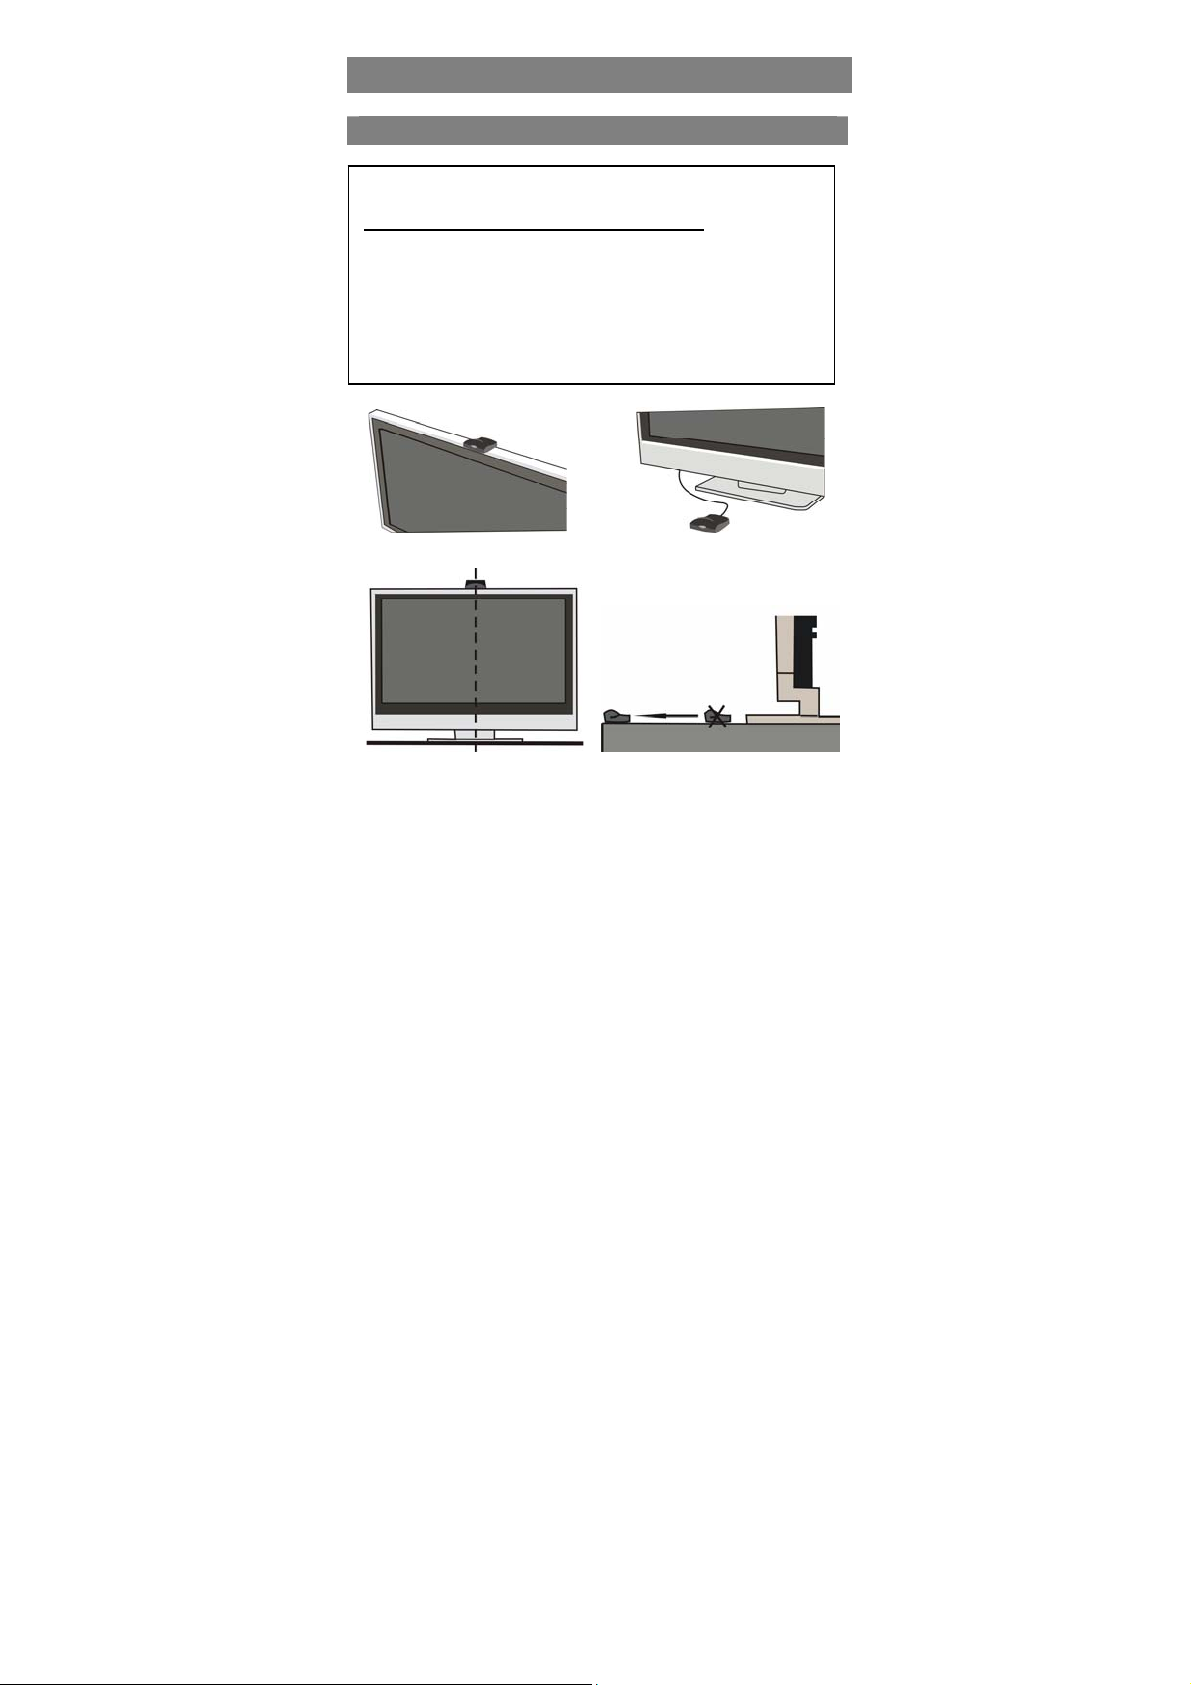
Recommended Position for the receiver
电脑 USB 接口
Put the receiver on the top or bottom of the display
screen (Refer to Imgae A and B). It is recommended that
the receiver is aligned with the horizontal center of the
screen. (Refer to Image C). Make sure the receiver is not
blocked by any objects when pointing the Freemote
handset to it (Refer to Image D and F).
Image A Image B
Image C ImageD
1
Page 2
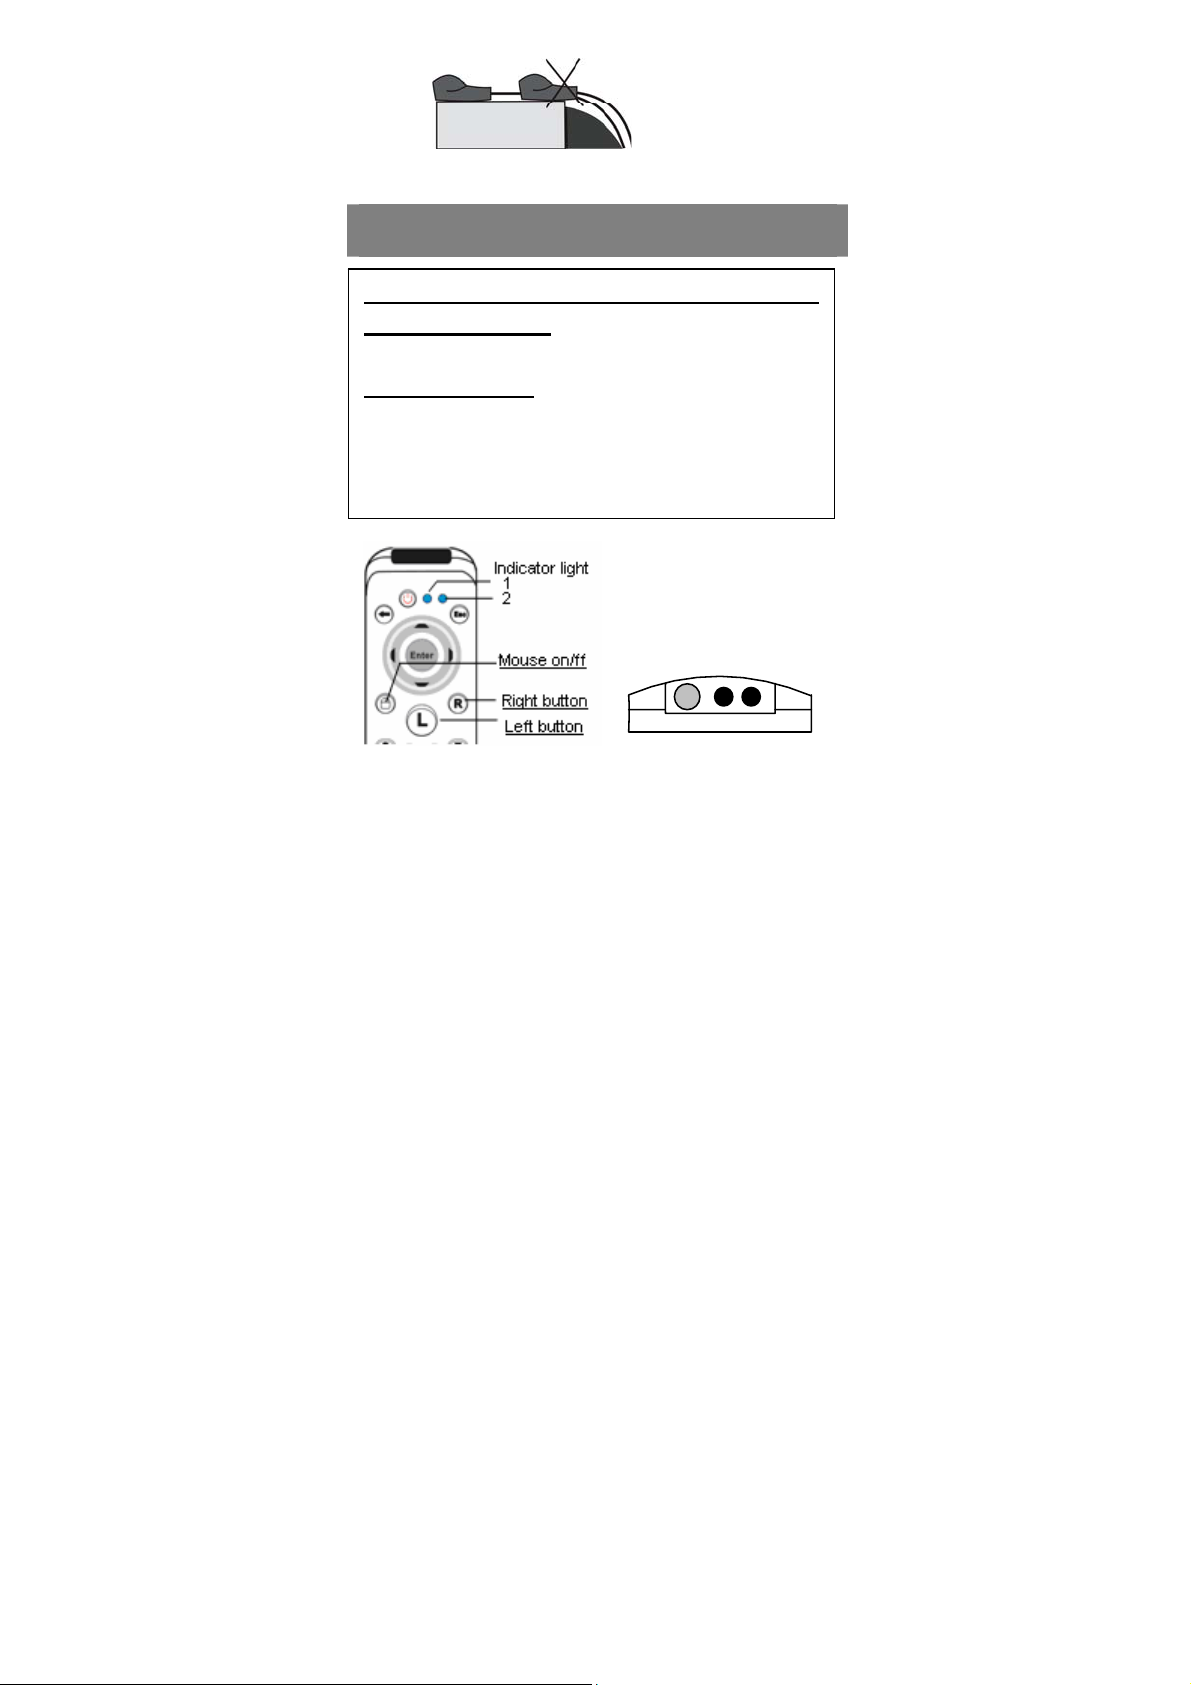
Image E
2. Correctly install 2 AA batteries in the Freemote
handset
Do not mistake the battery positive and
negative electrodes
The Freemote supports rechargeable batteries。
Status indication: After batteries being installed, the
Freemote will automatically initialize. The remote
indicator light 1 will be flashing and the remote indicato r
light 2 will be on. Wait till both the remote indicator light 1
and 2 turn off, then the initialization is finished and you
can start to use the Freemote.
I
mage F Remote Image G Receiver
2
Page 3
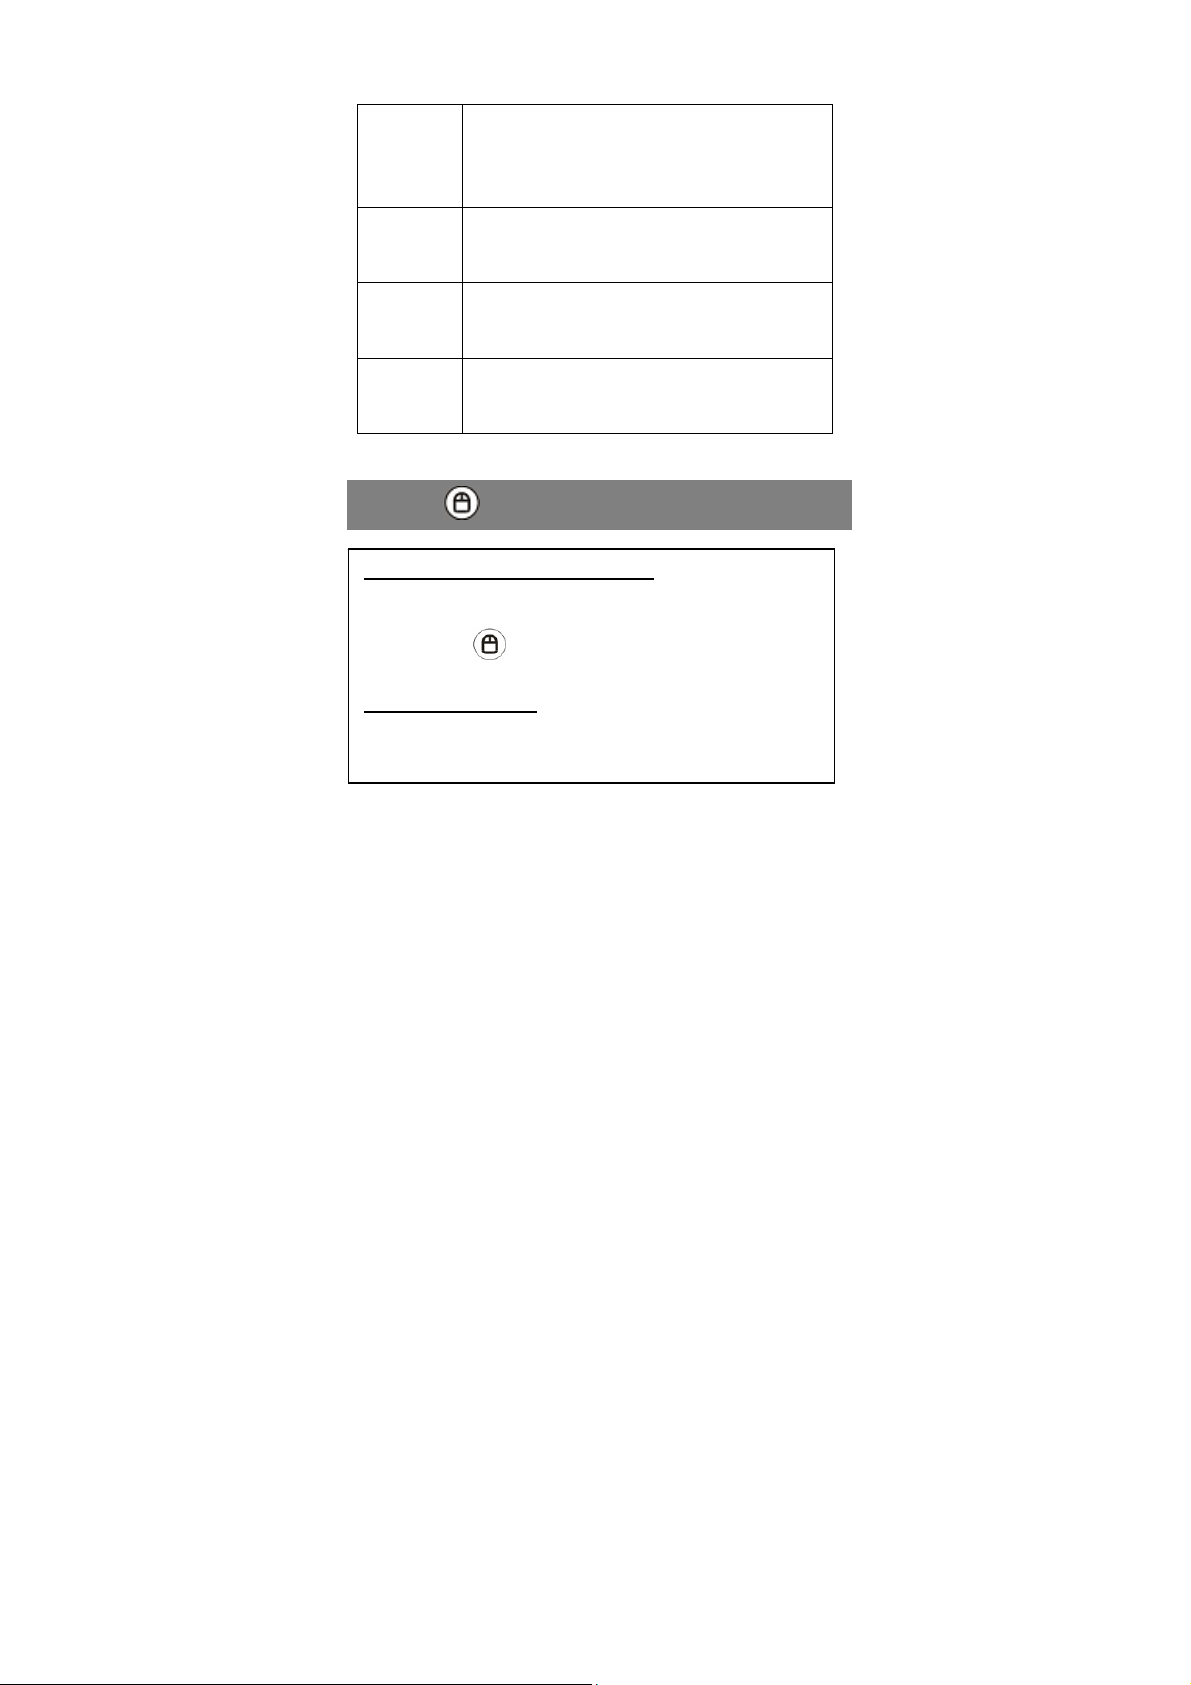
Find more introduction of the indicator lights in bellowing
table.
Remote
indicator
light 1
Remote
indicator
light 2
Receiver
indicator
light 1
Receiver
indicator
light 2, 3
On - the Freemote works in number mode.
Off - the Freemote works in shortcut mode.
Flashing- the remote handset is transmitting
signal.
On - the air mouse function is on.
Off - the air mouse function is off.
Flashing - the receiver is receiving signals
On - the air mouse function is on
Off - the air mouse function is off
3. Click button to start the air mouse function
Air mouse power saving mode
The air mouse function will automatically stop if no click
on “L” button or “R” button in continuous 60 seconds.
Please click
function.
Status indication: When the mouse function is on, the
remote indicator light 2 will be on. When the mouse
function operates correctly, the remote indicator light 1
will be flashing.
button again to start the air mouse
3
Page 4
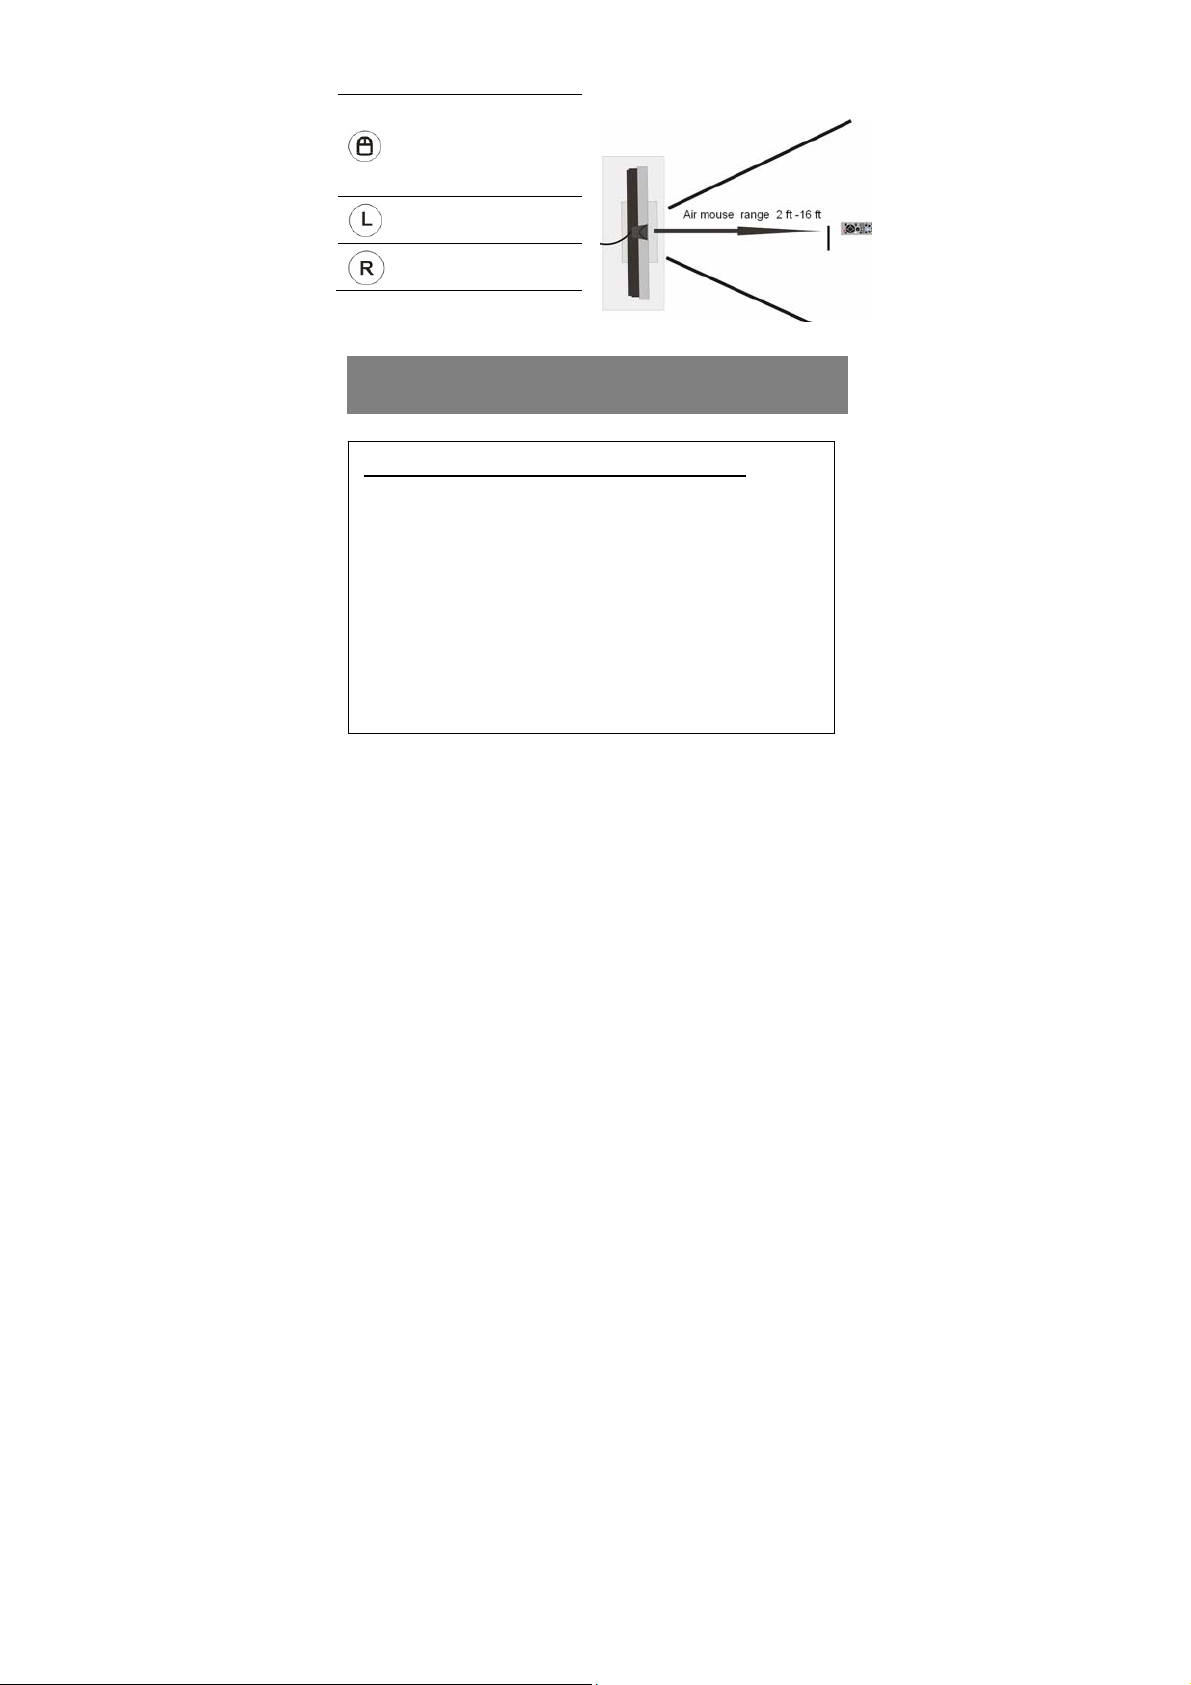
Buttons for air mouse function:
Mouse on/off
(Turn on or turn off
the air mouse
function )
Left mouse button
Right mouse button
4. Point the Freemote handset to the receiver to
move the cursor
Suggestion on using air mouse function
1. Please hold the remote with its face up (refer to image
G) when using air mouse function. It is recommended
you hold the remote with two hands (refer to Image H) to
point it more steady.
2. Make sure the receiver is not blocked by any objects
when pointing the remote to it.
3. Best air mouse function range: 2 feet to 16 feet
4. Prevent other infrared lights (such as strong sun light,
or strong incandescent lights, or fire, etc. ) appear
beside the receiver.
4
Page 5

2. Image H Image I Inert the
Freemote USB receiver into your PC
5. Key features
USB ( the Freemote is compliant
Interface with PC
Transmission
Duration
with USB HID specification )
Plug and play, no driver needed
2.4G RF
Approx. 100 hours continuous of
mouse function use
Approx. 6 months stand by
Range
OS support
Air mouse range: 2 feet to 16 feet
RF button range: approx. 30feet
Compatible with all windows XP/
Vista OS and any other OS which
supports USB mice and keyboards
5
Page 6

Operating Voltage
3V, 2AA batteries
Support rechargeable batteries
USB cable length
9.8 feet
6. Button function
The Freemote uses 2.4 GHz wireless transmission
technology. The RF button range is approx. 30feet. You
do not need to point to the receiver when you press the
buttons.
Find button function in the bellowing table.
Button
Buttons for mouse function
Button
Name
mouse function.
automatically stop if no click on
“L” button or “R” button in
Mouse
on/off
continuous 60 seconds. Please
click this button again to start the
air mouse function.
When the mouse function is on,
the remote indicator light 2 will be
on. When the mouse function
operates correctly, the remote
indicator light 1 will be flashing.
Button function
Turn on or turn off the air
The air mouse function will
6
Page 7

Left
Customizable buttons (Default function)
mouse
button
Right
mouse
button
The same as Left mouse button
The same as right mouse button
Power
(Alt+F4)
Escape
Back
Space
Up/Down/
Left/Right
Enter
Record
Play
Pause
Stop
Shut down the running programs
or shut down the PC
Escape
Back Space
Up / Down / Left / Right
Enter
Record
Play the file when play your
video, music, recording etc.
Pause the file when play your
video, music, recording etc.
Stop the file when play your
7
Page 8

video, music, recording etc.
Replay
Skip
Rew
Fwd
Volume Volume up / Volume down
Replay the file when play your
video, music, recording etc.
Skip to the next file when play
your video, music, recording etc.
Rewind when play your video,
music, recording etc.
Fast forward when play your
video, music, recording etc.
Page Page up / Page down
My
computer
Windows/
number 1
Open “my computer”
In shortcut mode: Open windows
start menu
In number mode: number 1
IE/
number 2
In shortcut mode: Open default
IE
In number mode: number 2
8
Page 9

Outlook/
number 3
In shortcut mode: Open outlook
In number mode: number 3
Desktop/
number 4
TAB/
number 5
Space/
number 6
Number
7,8,9
Mute/
number 0
Uncustomizable buttons
Switch
windows
(Alt+Tab)
Toggle
In shortcut mode: Show desktop
(Minimize all windows)
In number mode: number 4
In shortcut mode: Tab
In number mode: number 5
In shortcut mode: Space
In number mode: number 6
In shortcut mode: none
In number mode: number 7,8,9
In shortcut mode: Mute or
unMute
In number mode: number 0
Switch the windows of the
running programs
Switch between shortcut mode
and number mode. The default
mode is shortcut mode.
When number mode is on, the
indicator light 1 will be on. No
9
Page 10

click on number keys in
continuous 1 min, will
automatically go back to default
mode (shortcut mode).
7. Freemote Programming software guide
The Freemote programming software provides you
the function of selecting 2.4G frequency and customize
buttons. You can download the software on website
http://www.flydigi.com/Service_5_en.html
.
Select 2.4G frequency
The Freemote works at 2.4G RF, which means the signal
can transmit through a wall. In order to prevent interference
from other Freemotes or similar products, we provide 16
selective frequencies for Freemotes. Follow the bellowing
steps to set frequency for the Freemote.
1. Make sure the receiver is connected to your PC.
2. Open the Freemote programming software (Refer to
Image J for software interface).
3. Select a frequency from the software in “Frequency” drop
down menu.
4. Click ”Write Configuration” button in the software.
5. Re-plug the receiver to your PC again to make the
configuration effective. The new frequency has been
written in the Freemote receiver.
6. Set the Freemote handset with the same frequency with
the receiver. Press
and buttons at the same time
10
Page 11

till the remote indictor light 1 begin to flash in a slow
speed. Then the remote indictor light 1 will flash in a
faster speed, which means the remote is searching for
frequency. When the remote finds receiver, the remote
indicator light 1 will be on, and at the same time the
receiver indicator light 1 will be on. Press “Enter” to finish
the process. If the receiver indicator light 1 is not on,
press
to continue searching.
Customize buttons
The Freemote provides 31 customizable buttons. Follow
the bellowing steps to customize buttons.
1. Make sure the receiver is connected to your PC.
2. Open the Freemote programming software (Refer to
Image J for software interface).
3. Click “Read Configuration” button to read the current
configuration from the receiver.
4. Click the button image in the software for the buttons you
want to customize.
5. Select functions in the pop-up ”button definition” window
(Refer to Image K) for the button.
6. Repeat process 4 and 5 for other buttons you want to
customize.
7. Click “Write Configuration” to write the button
configuration in the receiver.
8. You can also use “Save co nfiguration” to save the config
you defined and to “Load configuration” next time.
11
Page 12

Image J Freemote programming software interface
Image K Button definition window
12
Page 13

FCC NOTE:
This device complies with Part 15 of the FCC Rules.
Operation is subject to the following two conditions:
(1)this device may not cause harmful interference, and
(2) this device must accept any interference received,
including interference that may cause undesired
operation.
The manufacturer is not responsible for any radio or
TV interference caused by unauthorized modifications
to this equipment. Such modifications could void the
user's authority to operate the equipment.
13
 Loading...