

FlyControl Flowtron Diplomat FC-8800C, Flowtron Diplomat FC-8800Y, Galaxie GL-6050C, Galaxie GL-6050Y Owner's Manual
Flowtron Diplomat FC-8800C
FC-8800Y
Galaxie GL-6050C
GL-6050Y
OWNER’S MANUAL
MODELS
:
Flowtron/Galaxie, warrants your electronic insect killer to be free from defects in materials or workmanship under normal use and service for one year from date of the original
purchase. All parts, except for burned out bulbs which are defective, will be repaired free of charge. Any implied warranties, including the implied warranty of merchantability
are also limited in duration to the one year period from the original purchase date.
The provisions of this warranty shall not apply to any insect killer which has been subject to misuse, neglect or accident, nor which is used for a purpose for which it is not designed, or which shall have been repaired or altered in any way as to adversely affect its performance and reliability. Service by unauthorized parties voids your warranty.
Flowtron neither assumes nor authorizes any person to assume for it any other liability in connection with its products. No responsibility is assumed for any consequential
damages that may result from the use of a Flowtron product, nor for damages due to accident, abuse, lack of responsible care, the affixing of any unauthorized attachment,
loss of parts or subjecting this unit to any but the specified voltage. Some states do not allow the exclusion or limitation of incidental or consequential damages, so the above
limitation or exclusion may not apply to you.
If the unit fails to operate during the warranty period, send the product along with purchase receipt showing purchase date and description to: Flowtron Service Center, 15
Highland Ave., Malden, MA 02148. Transportation costs for returning any defective product are the responsibility of the consumer.
This warranty gives you specific legal rights and may also have other rights which vary from state to state.
ONE YEAR LIMITED WARRANTY
OPERATION • INSTALLATION • PARTS LIST
GENERAL:
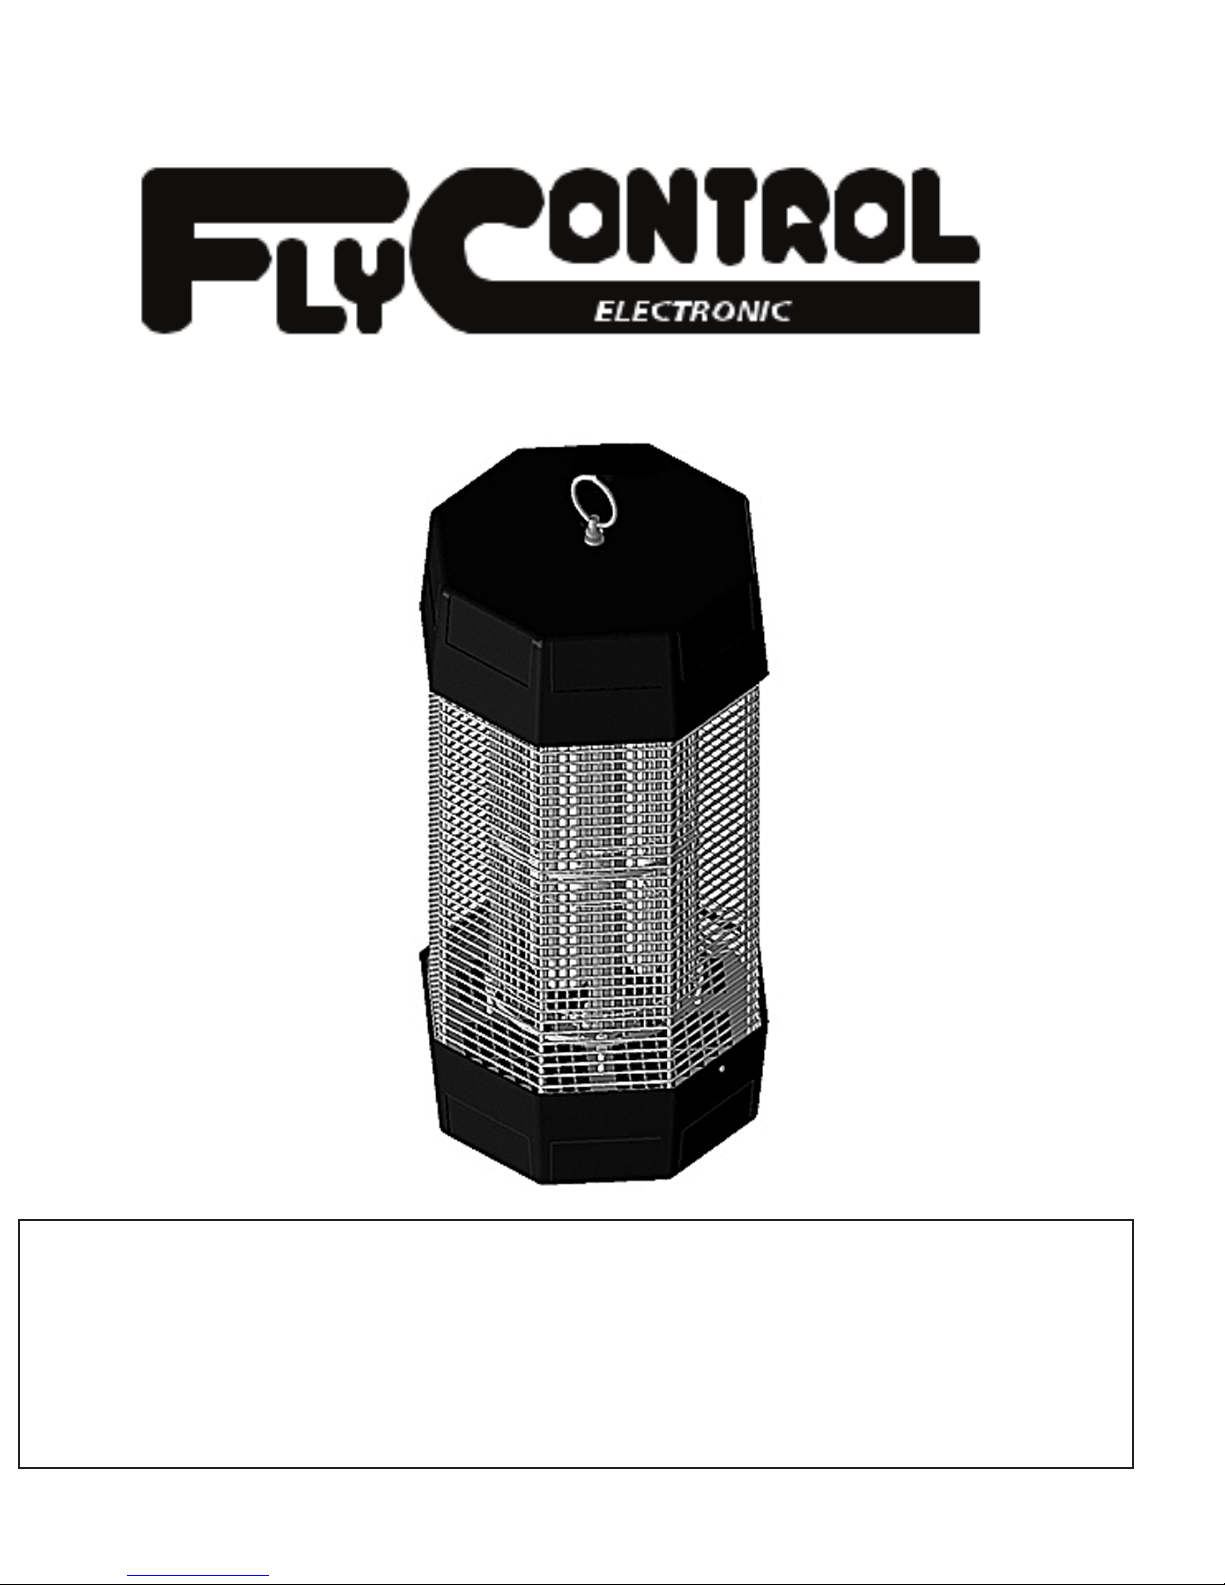
Your new Diplomat insect killer combines 120 watts of black light energy with an exclusive glo-tube reflector, resulting in a powerful insect killing device that is ecologically safe, effective and economical
o use. Light sensitive flying insect pests are attracted to the unit and
t
are immediately eliminated as they pass through the electrically
charged inner killing grid system. Dead insects drop into the removable insect collection tray for fast, easy, sanitary disposal.
IMPORTANT SAFETY INSTRUCTIONS
Please read these instructions before using the Flowtron Electronic Insect Killer and keep for future reference.
Included with your Diplomat insect killer is a special slow-release
strip containing Flowtron’s Fly Sex Lure, a proven attractant for the
common house fly (musca domestica L.). This pheromone sex lure
erves to enhance the Diplomat’s effectiveness in eliminating house
s
flies, making it a capable, dedicated fly control device.
1. For Indoor or Outdoor use. Do not install near gas, oil or other flammable materials. When used
outdoors, do not mount on house, deck or other similar structures.
2. Do not insert fingers or any foreign objects into the unit while it is connected to an electrical outlet.
3. Insect debris within the unit may contribute to fire. Clean dead insects from the unit frequently.
4. Disconnect unit from its power source when not in use, before servicing, re-lamping, cleaning or
similar actions.
5. Use only Flowtron replacement lamp type BF-130; 40 watts maximum.
6. Do not clean this product with water or any other liquid or place it where it can fall into water; or
clean it with a water spray or the like.
7. Do not abuse the power cord – never carry the unit by its cord or yank the cord to disconnect the
plug. Keep cord away from heat, oil and sharp edges.
8. Keep extension cord connection dry and off the ground.
9. Store product indoors when not in use – out of reach of children.
10. Connect only to a circuit that is protected by a ground-fault circuit-interrupter (GFCI).
WARNING: Skin or eye damage may result from directly viewing the light produced by the lamps
in this device. Always disconnect power before re-lamping or servicing.
PLACEMENT:
Proper placement of the device will enhance its effectiveness, range
and safety.
Outdoors:
The Diplomat is recommended for areas up to two acres. Place the
unit about 25 feet away from areas intended for human activity, between the source of insects and the area to be protected. Hang the
unit approximately seven feet above the ground.
The Diplomat is designed for outdoor use and will not be damaged
by rain or moisture. If, during heavy rains, excessive arcing occurs
and is objectionable, simply disconnect the unit.
Indoors:
For best results, place the device adjacent to entrances, exits and in
heavily infested areas. Place away from direct or reflected sunlight.
When installing units in halls, passageways or aisles, maintain a
clear width for continuous passage of minimum 36”. (Reference:
American Disabilities Act).
Height: Install the unit approximately six feet above the floor or
higher in locations where temperatures are significantly cooler at
the lower heights.
Spacing: Space evenly throughout the facility. Distances between
units should be about 45 feet, (2,000 sq. ft. coverage).
INSTALLATION (see illustration 1)
Your unit is designed with versatile mounting capabilities. It can be
wall mounted, ceiling suspended or hung from an outdoor bracket or
pole. (Bracket and pole available as accessories.)
Bracket/Pole Assembly:
1. Remove hole plug from center of top hood using a screwdriver.
2. Remove 1" threaded nipple and hanging ring from hardware package.
3. Screw nipple into hanging ring (resulting in a hanging ring assembly).
4. Thread ring assembly into unit through hole in center of top hood.
Wall Mount Assembly:
1. Remove hood from top of unit by unscrewing the sheet metal
screw located on top of the hood.
2. Remove one of the two key slotted brackets and two nuts and two
bolts from hardware package.
3. Locate the two holes on edge of top plate that match holes of key
slotted bracket. Secure bracket to top plate using the two supplied
nuts and bolts (see illustration 1).
4. Mount the unit to the wall by installing a #8 steel screw into a wall
stud and placing the keyhole bracket onto the screw.
Ceiling Suspension Assembly: (INDOOR USE ONLY)
1. Remove hood from top of unit by unscrewing the sheet metal
screw located on top of the hood. Remove collection tray from
bottom of unit by spreading the sides of the tray away from the
two mounting clips on the unit base.
2. Remove the two key slotted brackets and the four nuts and four
bolts from hardware package.
3. Locate the two holes on edge of top plate that match holes of the
key-slotted brackets. Secure bracket to top plate using two of the
supplied nuts and bolts.
 Loading...