

Flybar 1200 Instruction Manual

Instruction Manual
Flybar 1200
Unpacked your Flybar 1200? Good. Can’t wait to jump on? Not so fast. Before using your Flybar
1200, please t
ake a minute to read through these instructions carefully.
SAFETY
Use your head—play hard, but play safe. The Flybar 1200 puts a lot of power under you.
Using it safely is mostly common sense. It boils down to three rules:
Wear a helmet.
1
Don’t even think about using the Flybar 1200 without one. If worn properly, helmets prevent
hundreds of serious head injuries every year. Choose one that’s been approved by the American
National Standards Institute (ANSI), and make sure you adjust it correctly. The helmet should
fit snugly—if you can easily twist or push it out of position, the straps are too loose. It should sit
squarely atop your head (versus tilted back) to protect your forehead in case of a for
Check for hazards before you start.
2
Never jump without making sure that the surface is safe—solid, flat, clean, well lit, and dry. The
best bet: concrete. Stick to outdoor areas that are free of hazards and give you plenty of room to
maneuver (you’ll need several yards of clear surface on all sides). Define a field of action before
you start a session, and have the discipline to step off the Flybar 1200 if you near the edge.
ward fall.
Hazards to watch out for:
3
• Traffic: Steer clear of streets, parking lots, and any other area vehicles may use. Maintaining
your balance (and attempting challenging moves) is going to require your full attention.
It’s about focus—not about trying to dodge SUVs.
Humans: Using your Flybar 1200 too close to other people is dangerous and rude. There’s
•
no way to predict how they’ll react, so back off. Respect their safety and their space.
Slippery Ground: Don’t try to jump on a surface which is wet, oily, or even lightly covered
•
with sand, gravel, leaves, or litter—you’ll greatly reduce the traction of your Flybar 1200’
tip. You want to maintain an upright posture, not skid off-balance.
•
Overhead Obstacles: Once you master the Flybar 1200, it’s possible to bounce so high
that the top of your head will be 10-to-12 feet in the air
check for overhead clearance all around the field of action.
•
Steep Inclines: Remember, you want to maintain a position perpendicular to the ground.
If the surface slopes sharply, that’s just not possible, and it’s far more likely you’ll skid
sideways and fall.
•
Soft or Weak Surfaces: At peak compression, the Flybar 1200 can pack over 1000
pounds of force. Don’t jump on plank flooring, lawns, or any other surface you wouldn’t
be confident driving a car across.
. Even novices, however, should
s
•
Holes and Uneven Ground: You’re in greater danger of skidding or experiencing a
jarring drop if you use your Flybar 1200 on any surface with holes (e.g. storm grates)
or irregularities such as speed-bumps or curbs.
Stay within your abilities
4
1
2
3
With experience and skill, you’ll be able to react to pretty much any situation reflexively. But skill develops slowly, so take your time. As you put in
the hours, you’ll become instinctively aware of how much traction you have, how high you’re going to bounce, how to correct for balance, and
where you’re going to land. Be prepared to bail out at any time.
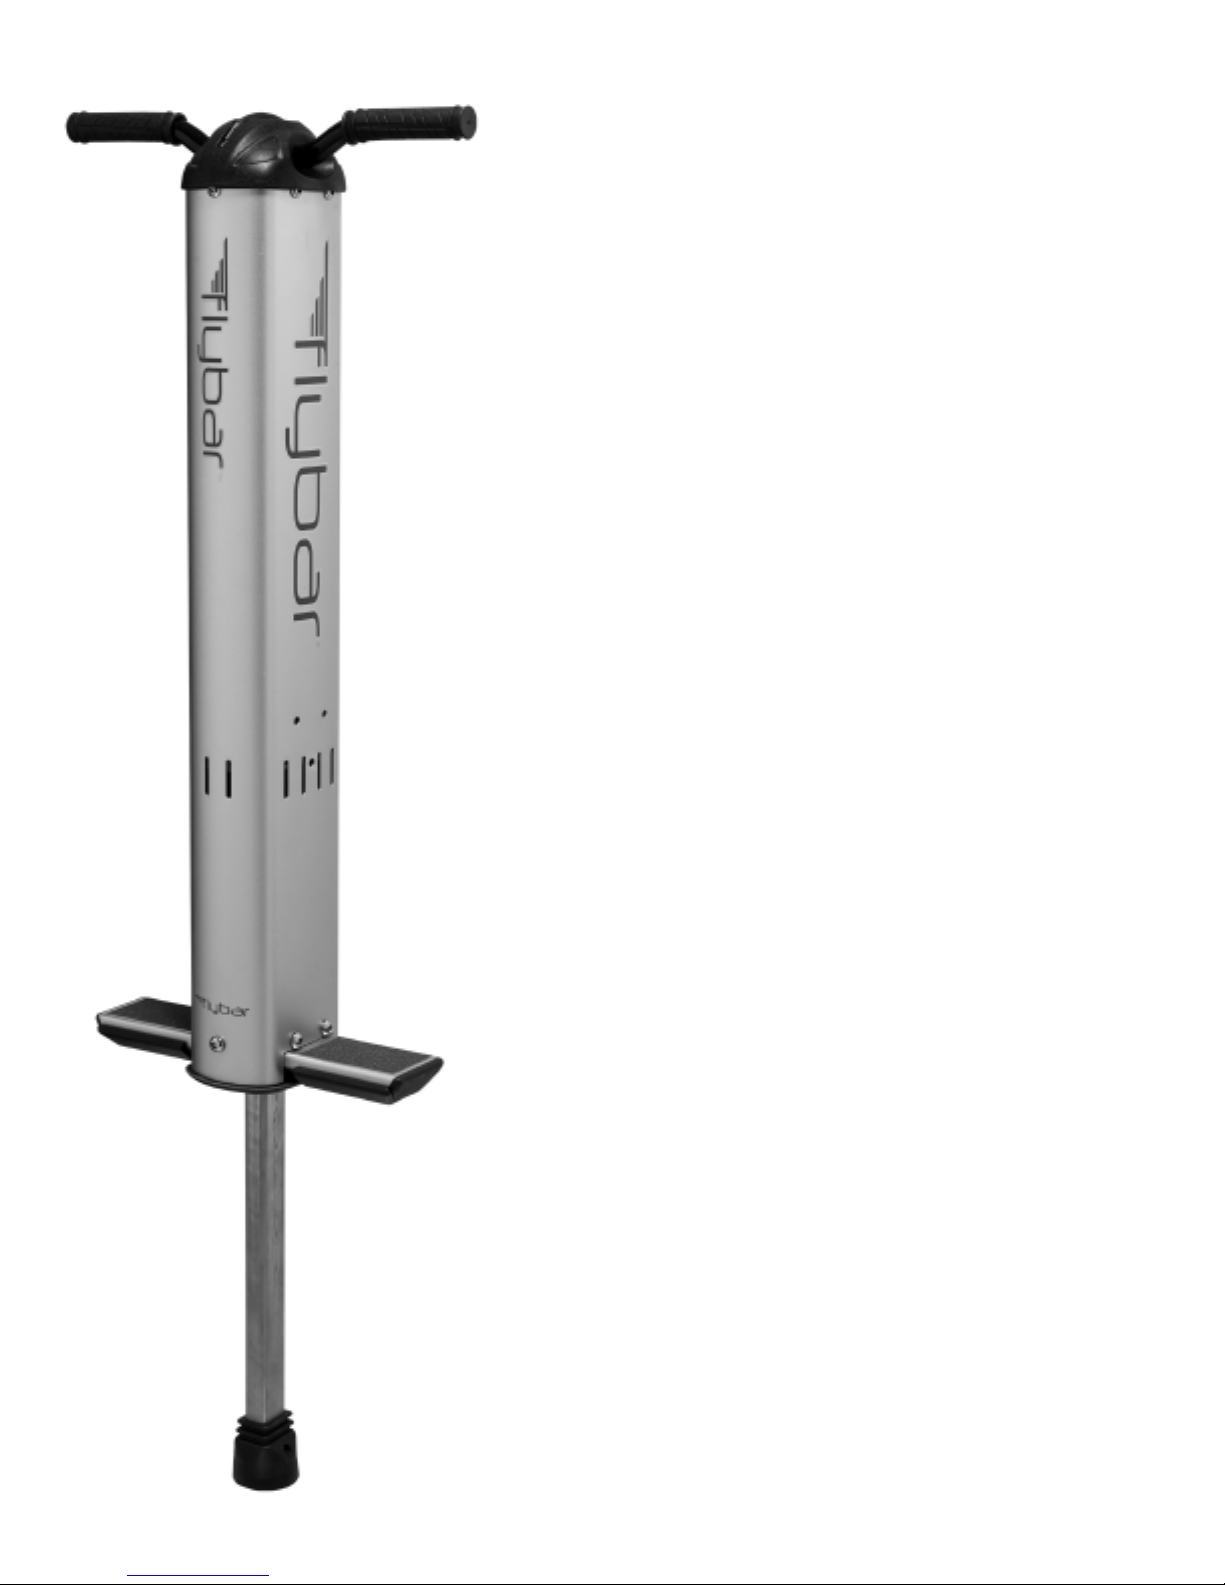
ASSEMBLY
For the most part, your Flybar 1200 comes pre-assembled. All you have to do is attach the handlebar
assembly cap to the top of the outer shell. Use the included 5mm Allen key and attach the handlebar
clamp to the metal plate by tightening the four bolts on the top cap into the corresponding holes on the
metal plate. Be sure to remove the four black boots that are used to keep the bolts in place during shipment.
Bolts are to be tightened increment
ally in a proper order to ensure a firm grip on the handlebars.
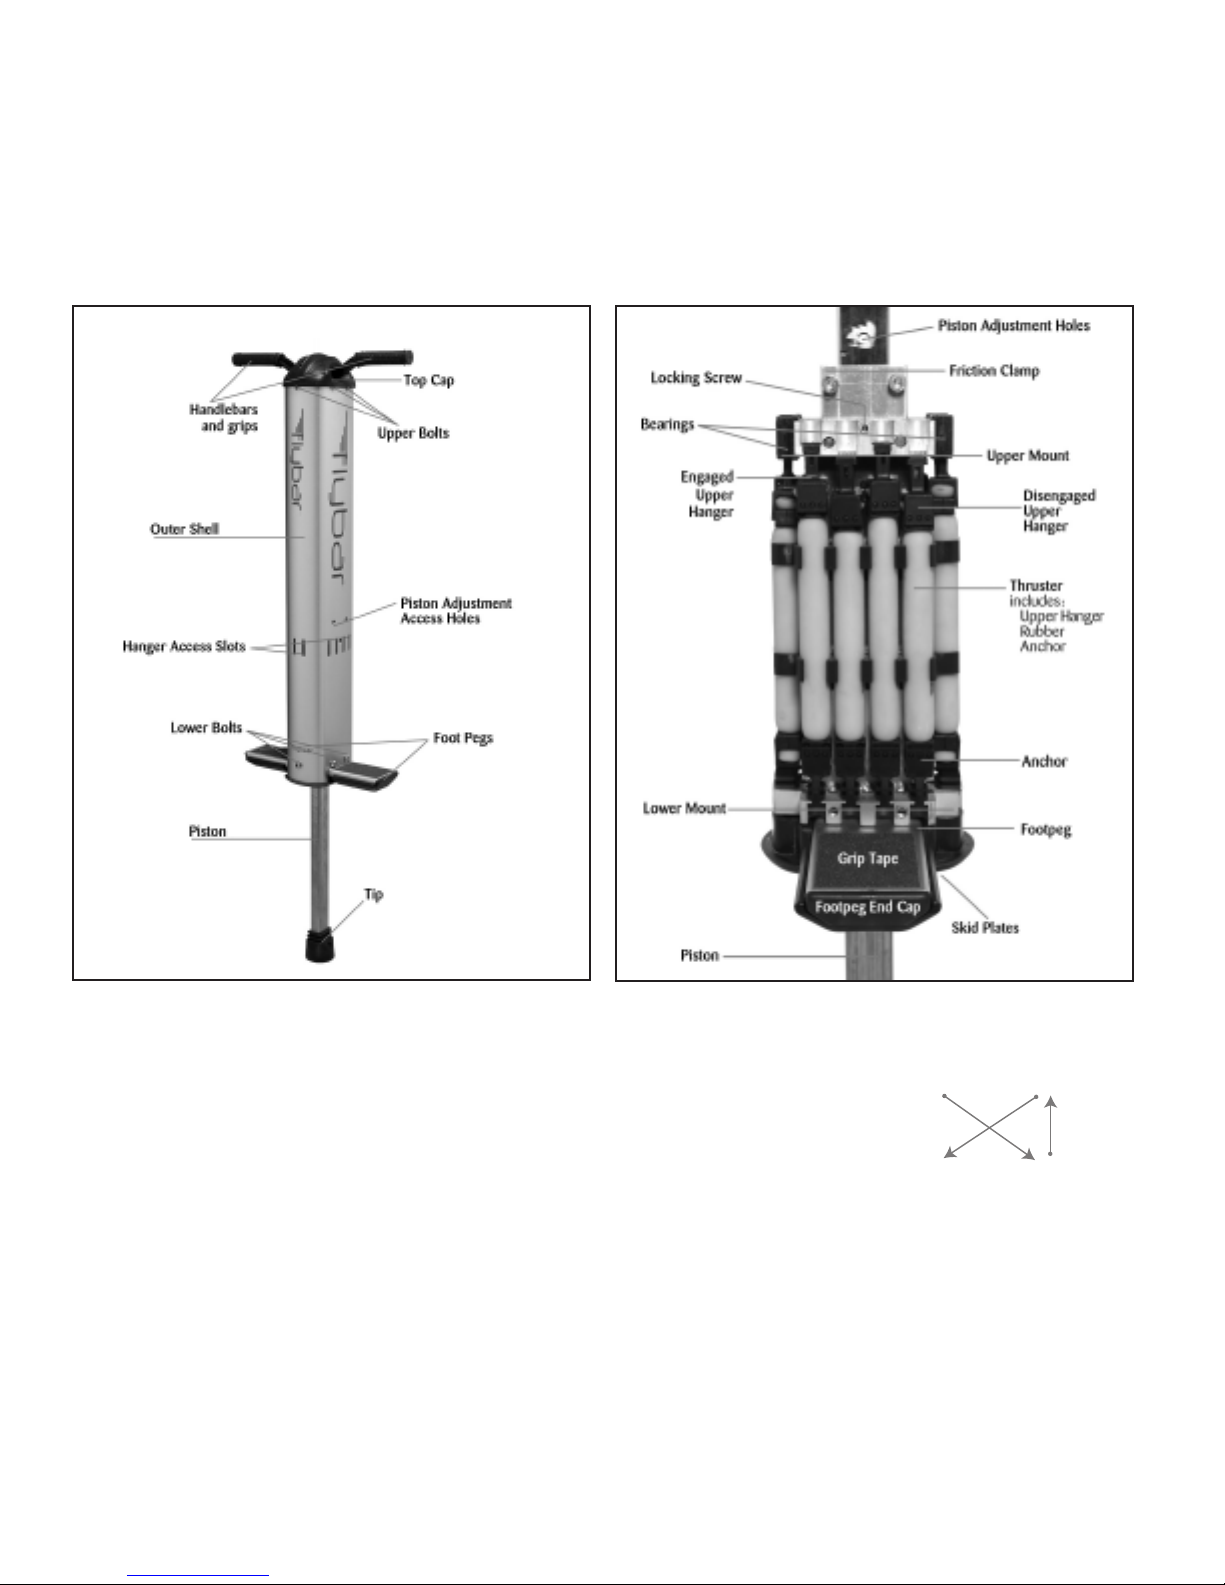
SETUP AND ADJUSTMENT
Before using your Flybar 1200, you’ll need to adjust it to suit your weight, skill level and goals. T
thrusters to engage and how long to set the piston. Before we go any further, remove the shell. Use the end of the Flybar T
to loosen and remove the six bolts near the bottom of the shell. Now, t
his involves two key decisions: how many
ake a good look at the Flybar 1200’
artially tighten bolt 1, then 2,
P
then 3, and then 4. Repeat the sequence
until all the bolts are fully tightened
”
ool marked “
s guts.
A
.
 Loading...