

Page 1

1
F351
User’s Manual
ALL RIGHTS RESERVED
© 2013. All rights are reserved. No part of this document may be reproduced
without permission.
While all efforts have been made to ensure the accuracy of all contents in this
User’s Manual, we assume no liability for errors or omissions or statements of
any kind in this User’s Manual, whether such errors or omissions or
statements are a result of negligence, accidents, or any other cause. The
contents of this User’s Manual are subject to change without notice.
Protect our environment! We strive to produce products in compliance with
global environmental standards. Please consult your local authorities for
proper disposal.
Note: Specifications and information in this User’s Manual are furnished
for information only and are subject to change without prior notice.
These should not be construed as a commitment or a certificate of
technology. FLY mobile phones assumes no responsibility for any errors
or omissions that may appear in this manual.
Page 2

2
Contents
1 GETTING STARTED .................................................................................. 1
1.1 Getting to know your touch phone ......................................... 4
1.2 Installing the SIM card, battery, and storage card ........................... 6
1.3 Charging the Battery ...................................................................... 8
1.4 Starting up the device ..................................................................... 9
1.5 Status Icons ...................................................................................10
2 Using phone features .............................................................................13
2.1 Turning the phone function on and off ..........................................13
2.2 Making a call ................................................................................14
2.3 Answering and Ending a call .........................................................14
2.4 In-call options ...............................................................................14
2.5 Using call history ..........................................................................15
3 Setting on your device ...........................................................................16
4 ActiveSync ................................................................................................20
5 Contacts ....................................................................................................23
6 Exchanging Messages ...........................................................................26
7 Internet ......................................................................................................32
7.1 Ways of Connecting to the Internet ...............................................32
7.2 Browser ........................................................................................32
8 Experiencing Multimedia .......................................................................36
8.1 Camera & Picture ..........................................................................36
8.2 Music ............................................................................................39
8.3 FM Radio ......................................................................................41
Page 3

3
8.4 Sound record .................................................................................42
9 Other applications ...................................................................................42
9.1 Alarm Clock ..................................................................................42
9.2 Calendar........................................................................................43
9.3 Calculator .....................................................................................46
9.4 Download .....................................................................................47
9.5 SIM card .......................................................................................47
TROUBLESHOOTING
SAFETY PRECAUTIONS
TECHNICAL SPECIFICATIONS
Page 4
4
1 Getting Started
1.1 Getting to know your touch phone
Page 5
5
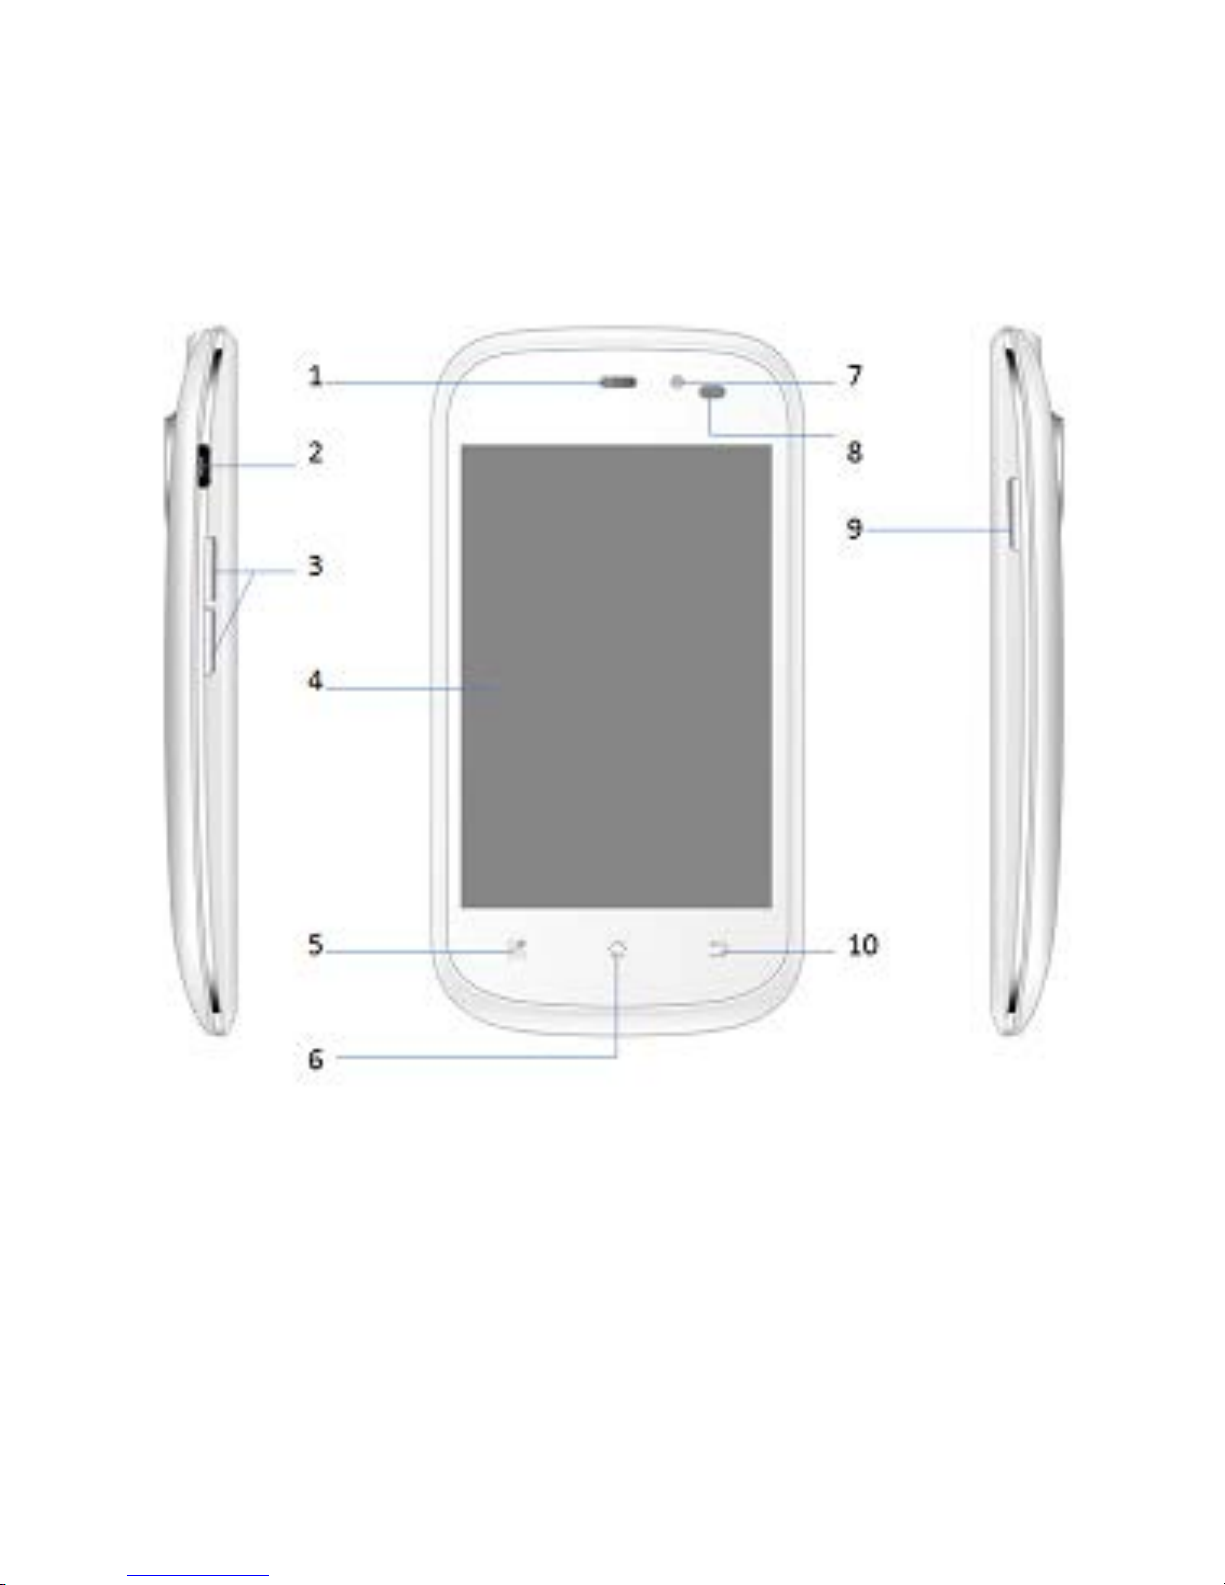
Use the control buttons on your phone to do the following:
POWER KEY: Press POWER key to lock the screen. To unlock the
screen, press power button and slide the lock icon.
Press and hold POWER key to view the phone options menu, from
which you can select to power off, restart, silent mode and airplane
mode.
VOLUME KEY: Press volume key up or down to adjust the sound
volume controls. Volume is controlled separately for the incoming call
ringer and audio/video files:
- On idle screen, the volume keys control the incoming call ring volume
- On a phone call, the volume keys control the call volume.
-On an audio or video file play the volume keys control the Media
volume.
During a n incoming c all if volume key is pressed up or down, t he p ho ne
enters Silent mode immediately, without sending a busy tone to the
caller.
BACK/ HOME/MENU KEY: Press HOME to return the idle screen.
Press MENU to open the list of actions you can perform o n the c urrent
screen.
Press BACK to go back to the previous screen, or to dismiss a dialog
box or menu.
Sno. Function Sno. Function
1 Receiver 6 Home Key
2 USB jack 7
Front VGA
Camera
3 Volume Keys 8 G-Sensor
4 Screen 9
Power ON/OFF
Key
5 Menu Key 10 Back Key
Page 6

6
1.2 Installing the SIM card, battery, and storage card
Ensure to always turn off the power before installing or replacing the SIM
card and battery.
To remove the back cover
1. Make sure your device is turned off.
2. Firmly hold the device with both hands and the front panel facing
down.
3. Push the back cover up wi th your thumbs until it disengages from t he
device and then remove.
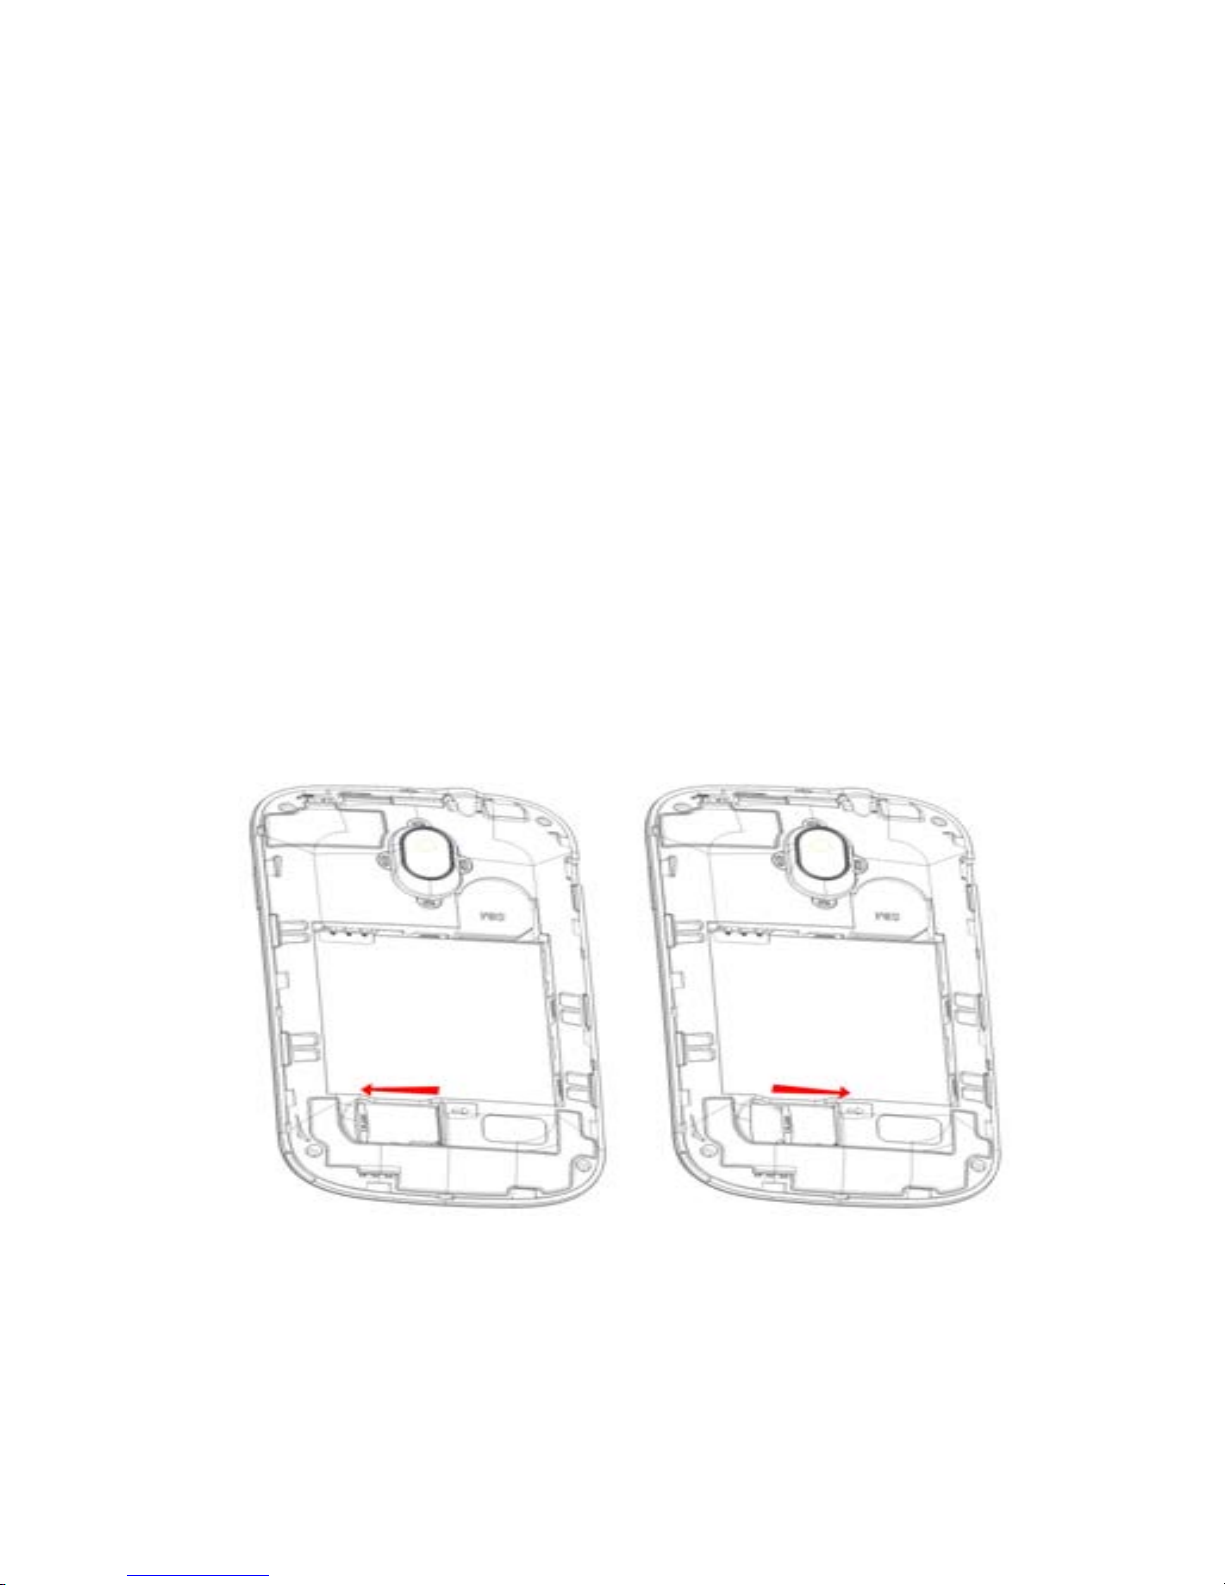
To install the SIM card
The SIM card contains your phone number, service details, and
phonebook/ message memory.
This phone can be support dual SIM cards.
1. Remove the battery.
2. Locate the SIM card slot, and then insert the SIM card with its gold
contacts facing down and its cut-off corner facing out of the card slot.
3. Slide the SIM card completely into the slot.
Page 7

7
To install the battery
Your device comes with a rechargeable Lithium-ion battery and is
designed to use only manufacturer-specified original battery.
1. Align the battery’s exposed copper contacts with the battery
connectors to the bottom part of the battery compartment.
2. Insert the contacts side of the battery first and then gently push the
battery into place.
3. Replace the back cover.
Page 8
8
To remove the battery
1. Make sure your device is turned off.
2. Remove the back cover.
3. The bottom of the phone has a notch. Lift the battery by the notch to
remove it.
To install a memory card
For an additional storage for images, videos, music, and files, you can
insert a memory card and install it into your device.
1. Make sure that your device is turned off, and then remove the back
cover.
2. Locate the memory card slot.
3. Insert the memory card into the slot wi th its gold contacts facing dow n
until it clicks into place.
1.3 Charging the Battery
The AC adapter and USB sy nc cable provi ded with your device m ust be
used to charge the device.
Connect the USB connector of the AC a dapter to the connector on the
Page 9
9
device, and plug in the AC adapter to an electrical outlet to start
charging the battery.
As the battery is being charged whil e the device i s on, a charging icon
appears in the title bar of the Home screen. After the battery has been
fully charged, a full battery icon appears in the title bar of the Home
screen.
1.4 Starting up the device
Power on/off
To power off your p hone, press & hold P OWER. On rel ease, the Phone
options menu opens. Select ‘Power off’ and confirm.
To power on again, press & hold POWER.
Screen sleep
After a period of inactivity, your screen will enter sleep mode (displ ay will
turn black). In sleep mode, your phone uses less battery. You can
control this behavior:
Set screen timeout period
1. On the Home screen, touch
and select Settings.
2. Select Display option.
3. Select Screen timeout. Select a time from the menu.
Prevent sleep while charging
1. On the Home screen, then touch
and select Settings.
2. Select Applications, and then select Development.
3. Select ‘Stay awake’ check box.
Lock screen & put phone to sleep
While not on a call, to lock your control buttons and screen from
accidental touch activation, press POWER.
You ca n increase the sec urity of your phone by setting a screen unlock
pattern. Once set, in order to unlock your scree n, you’ll have to draw t he
correct unlock pattern. You can set your screen unlock pattern as
follows:
1. On the Home screen, touch
and select Settings.
Page 10

10
2. Select Location & Security -> Screen unlock pattern.
3. Set or change your unlock pattern by selecting either Set unlock
pattern or Change unlock pattern, as applicable.
4. Follow the prompts to define your pattern.
Note: Yo u must slide your finger along the scree n to create the pattern,
not select individual dots. Connect at least four dots.
When you unlock your screen, if yo u want your pattern to be hidden as
you draw it, clear ‘Use visible pattern’ check box.
1.5 Status Icons
Connection status icons
Along the top of your phone screen is the status bar. On the left side,
icons will appear, notifying you of a new message, upcoming calendar
event, or something else you should notice. On the right side of the
status bar, you’ll see connection status icons.
New SMS or
MMS
Sign-in/sync error
GSM signal, no
signal
Song is playing
GPRS service
connected, data
flowing
WLAN service
connected
Edge service
connected, data
flowing
Wireless services
are off (Airplane
mode)
Call in progress
Silent mode
Page 11

11
Missed call
Battery is low
Speakerphone is
on
Battery is very low!
Connected the
PC
Battery is charging,
Connected the
earphone
Bluetooth is on
No SD card
Alarm is on
Read your notifications
When you see a notification in the status bar, touch the bar and slide
your finger down the screen to open the list o f notifi cations displayed in
the sliding window.
Ongoing notifications report activities such as call forwarding ON,
current call status, song playing.
Notifications report the arrival of new messages, calendar events, and
alarms. You can clear notifications list by selecting ‘Clear’ at the top of
the notifications window.
To open the message , reminder, or other notificati on, yo u can t o uch t he
items. To close the notifications window, slide your finger up the screen.
Page 12
12
On the home screen, touch the title bar and slide your finger down
the screen to open the list of notifications displayed in the sliding
window, you can touch the icon on the top of the screen (such as
WLAN, Bluetooth, Airplane mode, Brightness) to open or close the
selected function, sliding your finger left or right to select more
functions.
:Adjust the brightness
:Adjust the timeout
:Activate or deactivate Auto-rotates
:Activate or deactivate WLAN
:Activate or deactivate Bluetooth
:Activate or deactivate the airplane mode
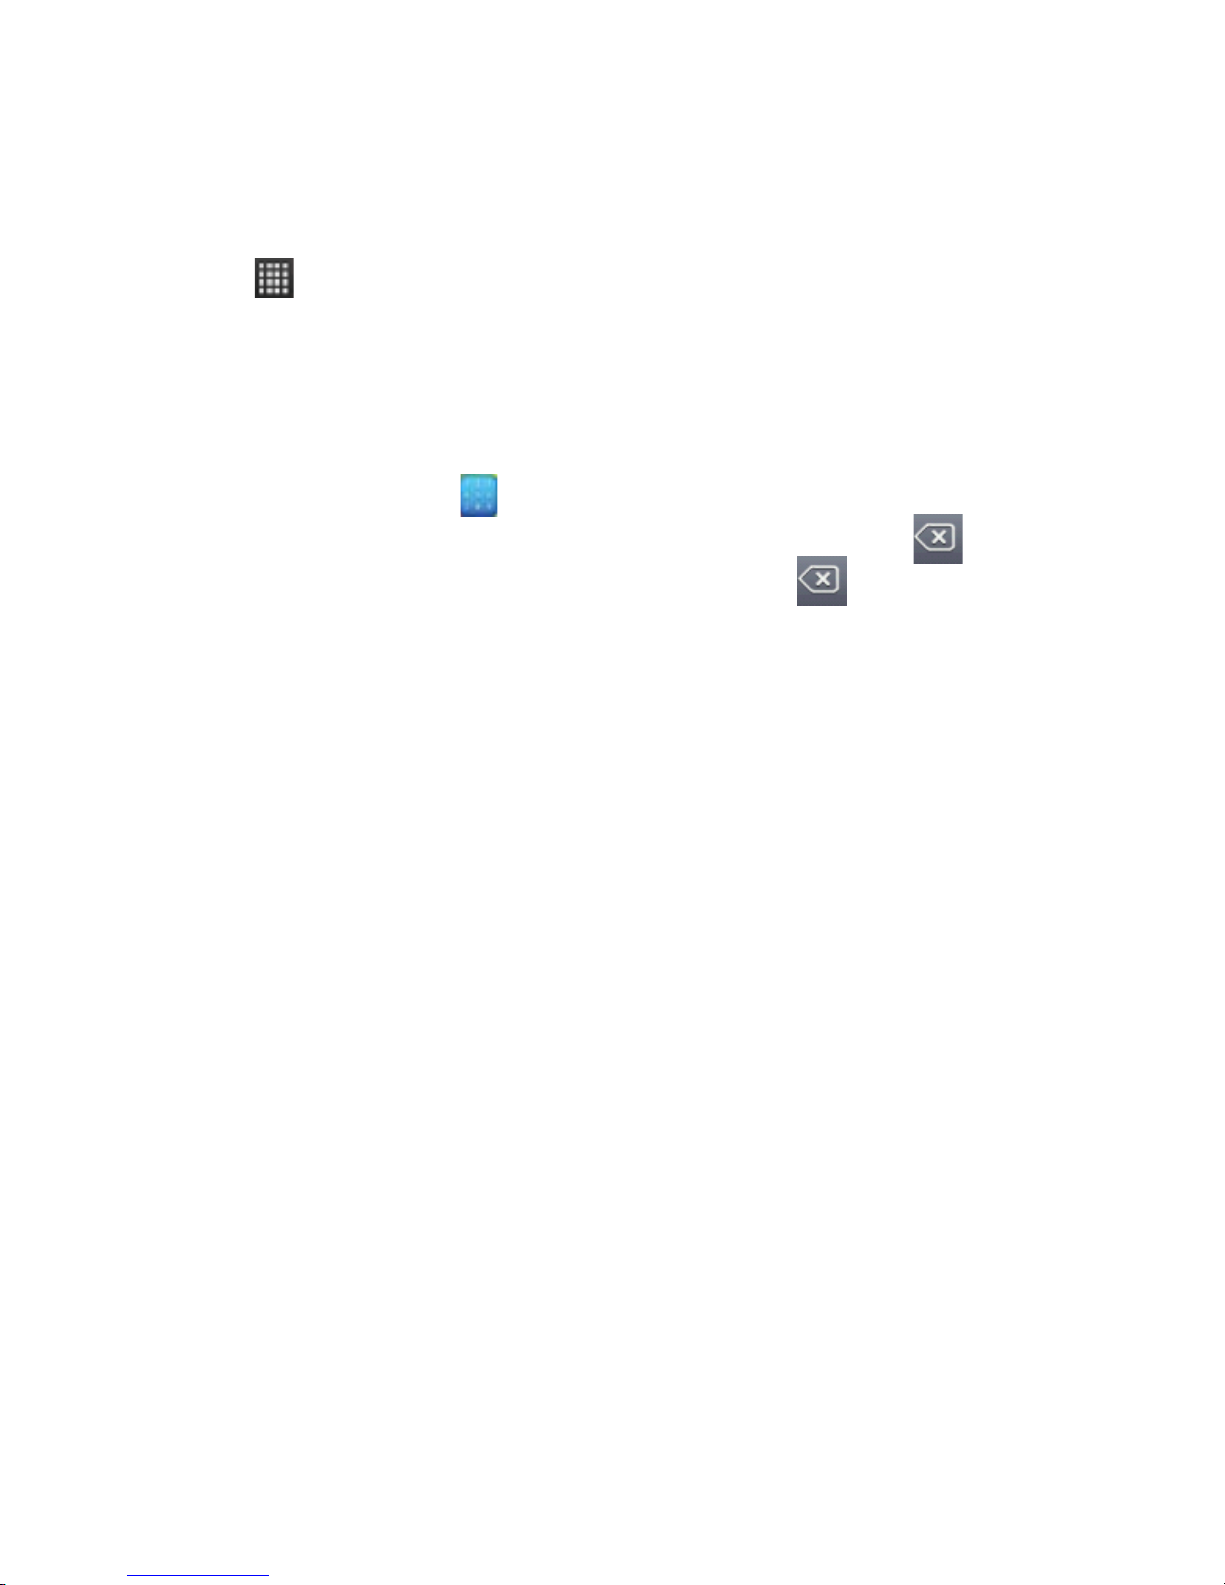
Home screen
The Home screen is your starting point for
using all the applications on your phone.
You can customize your Home screen to
display applications, shortcuts, and widgets
as you like.
1. Touch the application tab (
) with your
fingertip to reveal the application icons.
2. The Home screen actually extends beyond
the screen width. On Home screen, slide
your fingertip left and right along the screen
to reveal the full width of the Home screen.
This additional space gives you more room to customize Home with
Page 13

13
applications, shortcuts, and widgets.
3. Create Home screen shortcuts and widgets:
• From the Home screen, press MENU to sel ect ‘Add’, The Add to Home
screen menu opens.
• Select an Application shortcut, a Shortcut to some of your saved
information (such as a play list), a Widget (a clock or picture frame),
Folders or Wallpapers for your Home screen.
• The application, shortcut, folder, or widget appears on the screen. If
you selected Wallpaper, you’ll be asked to select a picture.
Tip: To cr eate an application shortcut quic kl y, touch the application tab to
reveal all the appl i cation icons, t hen to uch & hold an ap pl i cati on icon. Its
shortcut is added to the Home screen; close the application tab to see it.
4. To remove a s hortcut or widget from yo ur Home scr een, touc h & hold
the item to enter “move mode”. The application tab turns into a Trash
button
. Drag the item to the Trash button and release. You’ll know
when your item is in the Trash because the item and the tab will turn red.
5. Move objects on the Home screen
• To move an icon or other item on the Home screen, you must first
touch & hold it to enter move mode. The object will magnify when it’s
ready to be moved.
• Without lifting your finger (or you’ll drop out of move mode), drag the
object to the new position. To move an item to a section of the Home
screen not in view, move it to the edge of the screen and hold it there for
a moment. The screen view will shift; position the object and release.
2 Using phone features
2.1 Turning the phone function on and off
To enable or disable Airplane Mode
In many countries, you are required by law to turn off the phone while on
board an aircraft. Another way to turn off the phone function is to switch
Page 14
14
your device to Airplane Mode.
When you enable Ai rplane Mode, al l wireless radi os on your devi ce are
turned off, including the phone function, Bluetooth, and WLAN.
1. Touch
-> Settings -> Wireless & networks -> Airplane mode.
2. Touch ‘Airplane mode’ to enable or disable.
When you disabl e Airplane mode, the phone functi on is turned back on
and the previous state of Bluetooth and WLAN are restored.
2.2 Making a call
On Home screen, touch
icon to enter the dial screen.
Touch the on-screen dial pad to enter a number, touch
button to
delete numbers you’ve entered. Touch & hold
to delete all the
numbers in the field.
To dial a number, to uc h ‘ Call’ button (Gre en icon) to select SIM1 card or
SIM2 card to make a call. To end a call, touch ‘End’ button (Red icon).
1. Call log tab: Select an entry listed in the log to call the number.
2. Contacts tab: Contacts with phone numbers are listed. Select a
contact, and then select the phone number to dial the call.
3. Favorites tab: Favorite contacts with phone numbers are li sted. Select
a favorite, and then select the phone number to dial the call.
Calling voice mail
Number 1 is generally reserved for your voice mail. Tap and hold this
button on the P hone screen keypad to call voi ce mail and retrieve your
voice mail messages.
2.3 Answering and Ending a call
When you receive a phone call, the incoming voice call screen will
appear, allowing you to either answer or ignore the call.
1. To answer an incoming call, drag right to answer (Green icon) the
incoming call.
2. To reject a call, drag left to decline (Red icon) the incoming call.
2.4 In-call options
While on a cal l, reveal the in-call opti ons: Speaker, Mute, Hold, E nd and
Page 15

15
More.
Note that if Bluetooth services are on and you are connected to a
hands-free device, the more menu indicator will show Bluetooth on.
1. Speaker: To use the speaker, select ‘Speaker’ so it shows a green bar.
To turn it off, select it again so the bar is unfilled. The status bar will
display this icon when the speaker is on.
2. Mute: To mute your side of the co nversati on, select ‘Mute’ so i t shows
a green bar. To tur n it off, select i t agai n so the bar is unfill ed. The status
bar will display this icon when Mute is on.
3. Hol d: To put an active call on hold, select ‘Hold’ so it shows a green
bar. To resume the call, or take the call off hold, select it again so the bar
is unfilled. If you take a call while already on a call, the first call will be
placed on hold automaticall y. The status bar will display this icon when a
call is on hold.
4. Add call: If you need to di al the phone number whil e on a call, touch
‘Add call’.
5. Incoming call: During call in progress, if you are on a call when
another call comes in (“incoming call”), you have a few choices:
• Answer the incoming call and place the call in progress on hold. To
switch calls at any time, touch ‘Swap’ icon.
• If you don’t want to interrupt your call in progress, then touch ‘End’.
• If you have one call in progress and one caller on hold, to end both
calls, press MENU and touch ‘End all calls’.
6. While on a call, you can be co nference call ers.
Note: Whether the gro up call function can be used depends on w hether
the network operator supports and provides such function as well as
whether you have applied for such function. Please contact network
operator for details.
2.5 Using call history
1. The missed call i con
appears in the ti tl e bar when yo u mi ssed a
call.
Page 16
16
2. Use ‘Cal l log’ tab to check who the caller was, or view al l your dialed
numbers, and received calls. To open ‘Call log’ tab, touch ‘Call log’
button in the phone screen to enter the call history list.
3. Scroll to select the contact or number you want to dial, touch ‘Call’
button.
4. Tap and hold t he selected contact you want to cal l, and then you can
make to do the following options of call, edit number before call, send
text message, add to contacts or remove from call log phone on the
shortcut menu.
3 Setting on your device
Control phone-wide settings from the Home settings screen: touch
and select Settings.
3.1 Dual SIM settings
You can select to activate or deactivate the SIM card you want to open.
3.2 Wireless & networks
Airplane mode on/off: When airplane mode is selected, all wireless
connectivity is off. This icon
will display in the status bar when
airplane mode is selected.
WLAN on/off: Select this check box if you pref er to use WLAN for your
data connection.
WLAN settings: Open the WLAN settings screen; select it from the
network list. Provide your username or password if required.
Bluetooth on/off: Use this check box to turn Bluetooth services on or
off.
Bluetooth settings: With Bluetooth services on, you can open the
Bluetooth settings screen to:
• Rename your device.
• Select to be discoverable for up to 120 seconds, or not discoverable.
• Set how long device will be discoverable.
• Rescan for devices.
Page 17

17
VPN settings: Add or edit network Access Point Names (APNs) - Do
not change this setting unless advised to do so by your wireless
operator!
Mobile network:
• Select data roaming capability.
• Sel ect a wireless operator network - Scan for all avail able networks, or
select a network automatically.
3.3 Call settings
Not e that whe n you o pen ‘Cal l settings’ f or SIM1 or SIM2, your current
settings are fetched, which can take a few moments.
Fixed Dialing Numbers: This feature allows you to restrict outgoing
calls to a fixed set of numbers. To e nabl e thi s feat ure you must know the
SIM PIN2 code for your phone. You can get this number from your
wireless operator, assuming this feature is supported.
Voicemail service: Select to set a voicemail number that isn’t being
read from the SIM card.
Call forwarding: Select how you want busy, unanswered, and
unreachable calls to be handled. There is also an option to Always
forward.
Call barring settings: Restrict to a nswer or di al the call in any situation.
You need to appl y to the network operator for opening t he international
long-distance function and get network restricting code for barring
setups.
Additional settings: From this setting you can set your Caller ID
preference and turn on/off call waiting.
3.4 Basic phone settings
Sound
Select one user profile and enter the following options:
Vibrate: Select to have your phone vibrate for incoming calls.
Volume: Select to open the volume control, and then slide your finger
along the volume bar to set ringtone, an incoming call ring, in-call, alarm,
Page 18

18
media or notification volume.
Phone ring tone: Select to decide on a ring tone to use for incoming
calls. Note that you can overri de this setti ng for indivi dual contacts in the
Edit contact details screens.
Notification ring tone: Select a ring tone to use for a notifi cation (e.g.,
new message). N ote that yo u can override thi s setting for new Calendar
event notifications, text a nd multi media message notifi cations. Go to the
applications settings screens to select specific ring tones.
Audible touch tones: Select to have a tone sound when you use the
on-screen Dialer.
Audible selection: Select to have a sound play when you select an
item on the screen either using touch.
Screen lock sounds: Select to have a sound play when locking and
unlocking the screen.
Display
Brightness: Select to open the brightness control, and then slide your
finger along the brightness bar to set t he l evel. In sunlight, increase the
level.
Auto-rotate: Activate or deactivate the auto rotate.
Screen timeout: Select to decide how long your p hone m ust be inactive
before the screen turns off.
Location & Security
Use wireless networks: Sel ect a source for determining your location:
Wireless networks.
Set up screen unlock: Create a pattern you will be asked to draw
before your screen will unlock. You can select to make the pattern visible
or invisible as you draw it. Or you call set the PIN, password to lock your
phone.
Set up SIM card lock: Lock your SIM card for extra security. You can
also change your SIM card PIN from this screen. If you don’t know your
SIM PIN, you can obtain it from your wireless operator.
Page 19

19
Visible passwords: Select to have your password display as you type
it.
Applications
Unknown sources: Select this check box if you want the ability to
download appli cations from the Web. To ensure your perso nal data and
phone remain secure; it is recommended you not select this check box.
Manage applications: View all the applications stored on your phone
and how much space they occupy. Select a specific application to:
1. Clear your user data (if you have any associated with a particular
application).
2. Disassociate the application with any actions.
3. Uni ns ta ll- If you’ve dow nloaded a n appl ic ati on from the ot her so urces,
you will be able to uninstall it from this screen by selecting Uninstall.
Development: If you are an application developer, you may be
interested in these settings:
1. USB debugging: If you want be abl e to communicate wi th your phone
directly via USB, select ‘USB debugging’ check box.
2. Stay awake: To preve nt your phone from slee ping while charging (via
power adapter or USB), select ‘Stay awake’ check box.
Accounts & sync
Turn on/off synchronization for all services.
Privacy
You ca n select to reset your p hone to factory setti ngs. This will erase all
your data from the p hone and require you to si gn in and go through t he
setup screens to use any of the applications.
Storage
View and manage the data storage on your phone.
Monitor and manage the use of your memory card from this screen:
1. View how much space you are using on your memory card.
2. Select to use your memory card as USB mass storage when your
phone is connected to your computer (selected by default)
Page 20

20
3. Unmount/eject your memory card from your phone. Note that when
your phone is connected to your computer via USB, you cannot view
pictures or play any media stored on the card from your phone.
Internal storage: Reports how much internal storage is free.
Date & time
Set time, time zone, and date: Use Automatic unless you need to
override the network values.
Time format: Select from 12 or 24 hour formats.
Date format: Select from a variety of formats.
About phone
View your phone Status: This screen lists a variety of information,
including your phone number, the network you are currently using, the
type of network, signal strength, whether you are roaming or not, any
WLAN addresses you’re connected to, and more.
View the model number and version information for your phone.
4 ActiveSync
4.1 Data synchronization
Some applications on your phone (Calendar, and Contacts) give you
access to the same personal information that you can add, view, and
edit on your computer using Web applications. This means that when
you add, change, or delete your information in any of t hese applications
on the Web, the updated informatio n also appears o n your pho ne, and
vice versa. Also, if you lose your phone or if your phone is destroyed,
your personal information is not lost and will appear, as before, on a
replacement phone.
This mirroring of information happens through over-the-air data
synchronization, or data “syncing”. Data syncing occurs in the
background and shouldn’t ever get in your way. You’ll know your data is
being synchronized when you see this icon in the status bar:
Because sending large amounts of data back and forth over the air can
Page 21

21
take time and require considerable bandwidth, there are some settings
on the phone that allow you to control data sync.
Sync by application
To control synchronization for Calendar, and Contacts, you can do the
following:
1. On the Home screen, then touch
and select Settings.
2. Select Accounts & sync. When any of the applications are
synchronizing, you will see the “sync” icon
. You will al so see the last
time your data was synchronized.
3. By default, the personal information in Calendar and Contacts will
sync whenever you make a c hange or recei ve a new message. Yo u can
change this behavior:
Auto-sync: When selected, Auto-sync will sync Calendar and Contacts
automatically, as you make changes or receive new messages.
When OFF, information will not be synced automatically, although you
can force sync by using the individual appli cation check boxes described
below.
Calendar: Clear this check box to exclude Calendar from auto-sync.
Contacts: Clear this check box to exclude Contacts from auto-sync.
4. Sync problems:
If you see this icon
to the left of the sync check box, then there was
a temporary problem with the data synchronization. Check your data
connection and try again later.
4.2 Bluetooth
You can use Bluetooth to send and receive calls using a headset or
hands-free car kit.
Turn on Bluetooth services
1. On the Home screen, then touch
and select Settings.
2. Select W ireless & networks, and t hen select ‘Bluetooth’ check box to
turn on Bluetooth services.
3. When on, the Bluetooth icon appears in the status bar.
Page 22

22
Discoverability
By default, your phone is not “discoverable”. This means other Bluetoot h
devices will not see your phone in their scans for Bluetooth devices. If
you make your phone discoverable, it will be visible to other Bluetooth
devices for up to 120 seconds.
To make your phone discoverable:
1. Make sure you have turned Bluetooth on.
2. Select Settings > Wireless & networks> Bluetooth settings.
3. Select ‘Discoverable’ check box to make your phone visible to other
Bluetooth devices for 120 seconds (as default).
4. Select ‘Discoverable’ again during the 120 seconds to make your
phone undiscoverable.
Name your Bluetooth device
1. Make sure you have turned Bluetooth on.
2. Select Settings > Wireless & networks> Bluetooth settings > Device
name.
3. Type the name for your device in the dialog box, and then select ‘OK’.
4. Your new device name appears on the Bluetooth settings screen.
Pair & connect with Bluetooth devices
Before your phone can communicate with a Bluetooth headset or
hands-free car kit, the devices must “pair”, then “connect”:
1. Make sure you have turned Bluetooth on.
2. Select Settings > Wireless & networks> Bluetooth settings.
3. Your phone starts scanning for Bluetooth devices within range. As
they are found, the devices appear in the list of Bluetooth devices.
4. To pair with a device in the list, select it.
5. Type the device’s PIN, and then select ‘OK’.
6. Once paired, select the device name to connect. You can also touch &
hold the name to open the context menu, and then select Connect.
7. Pairing and connection status appear under the device name.
8. Once the other Bluetooth device shows “connected” status, you can
Page 23

23
start using it to make and receive phone calls.
9. To disconnect or unpair with a device, touch & hold the device to open
the context menu. Select Disconnect or Unpair, as appropriate. If you
select ‘Unpair’ when connected, you will be disconnected as well.
Notes: The phone supports only the headset and hands-free Bluetooth
profiles, so if you try to connect to a device that is not a headset or
hands-free car kit, then you will receive an “unable to connect” message.
If you pair with a second headset while connected to the first, the first
headset will remain connected. To switch connection to the second
headset you must manually select that headset again after pairing.
Rescan for Bluetooth devices
If you want to update the list of Bluetooth devices, select ‘Scan for
devices’.
5 Contacts
The contacts on your phone are synced with your account contacts
stored on the Web. To view the contacts on your phone, touch
.
Contacts belonging to a specific group (you can choose which group)
are listed in the Contacts tab. Only those contacts you star as “favorites”
are listed in the Favorites tab. Browse through your contacts by sliding
your fingertip up and down on the screen. Another way to find a contact
quickly is to use “Search” (touch MENU a nd select “Search”), the q uic k
search tab appears on the top of the screen, input the first letter of the
name you’re looking for, the matching contacts are appeared on the
screen.
From the Contacts tab, you can:
1. Take action on a contact: Touch & hold the contact’s name to open the
context menu. From the me nu you can select to vi ew the Co ntact details
screen, call the contact’s number, send a text message, add or remove
to favorites, edit the contact details, or delete the contact.
Page 24

24
2. Go to C ontact details: Select the co ntact’s name to open t he Contact
details screen, where all screen the information you’ve saved for this
contact is displayed.
Add a contact
1. Enter the contact list, press MENU and select ‘New contact’.
2. Select the account you want to store.
3. Add all the information you want to store for this contact in the
appropriate fi elds. You must add some i nformati on to save a co ntact. To
change a default label, select the label name to open the label menu.
Select a different label or create a custom label. To add more fields,
select + More info.
4. Create a contact in your phone memory; yo u can assign a C aller ID
icon to your contact by touching Call er ID icon. The Pictures appli cation
opens. Navigate to a picture and select it, size the cropper with your
fingertips. When finished, select ‘Save’. The picture is associated with
your contact. If you do not assign an icon, a defa ult android i con will be
assigned.
5. To save your contact, press BACK, or touch ‘Done’.
Assign favorites
Use Favorites as a way to displ ay only those contacts you contact most
frequently. To add a contact to Favorites:
1 From Contacts, touch & hold the contact you want to add to Favorites.
The context menu opens.
2. Select ‘Add to favorites’.
3. Now your contact will be listed in Favorites. Their details screen will
also display the colored star.
Edit contact details
You can always make changes to the information you’ve stored for a
contact:
1. From Contacts, touch & hold the contact whose information you want
to edit. The context menu opens.
Page 25

25
2. Select ‘Edit contact’. The Edit contact screen appears.
3. Make your edits, then press ‘Done’.
Communicate with a contact
From Contacts you can quickl y call or text a contact’s default number, as
displayed below their name on the screen. However, to view all the
information you’ve stored for a contact, and to initiate other types of
communication with that contact, open the Contact details screen. To
open a contact’s details screen, simply select their name from Contacts.
1. Call a contact: From the contact list, touch & hold the contact you
want to call. Select ‘Call contact’ to dial that contact’s primary number
(first in the list on their details screen).
2. To dial a different number for the contact, select the contact’s name,
and the n se le ct t he number on t heir details screen and then touc h ‘Call’
icon.
3. Send a te xt or m ulti media: To send a t e xt or m ulti medi a message to a
contact, you must have a message to a contact mobile number stored
for them in contact details. From the Contact details screen, select a
phone number and click ‘Message’ icon, A Compose screen opens for
your new message. Complete your message and select ‘Send’.
4. Se nd email to a contact: To s end a n email message to a co ntact, yo u
must have an email address stored for them in their contact details.
• Select the contact you want to email. Their Contact details screen
opens.
• In the Se nd email secti on, select the email address. If you are fetching
POP3 or IMAP email accounts to your phone, then select the account
you wish to use to send. A Compose screen opens for your new
message.
• Complete your message, select ‘Send’.
SIM contacts importer
If you have stored names and phone numbers on your SIM card, you
can add these to the Contacts stored on your phone by selecting this
Page 26

26
settings option. From the contact list, press MENU to select
‘More >Import/Export’.
6 Exchanging Messag es
6.1 SMS and MMS messaging
To open the SMS & MMS Messaging application, on the Home screen,
the n t ouc h
to enter the messaging list.
About text and multimedia messages
SMS messages are also know as “text” messages and can each be
around 160 characters. If yo u continue to type after t he limit is reached,
your message will be delivered as one, but count as more than one
message. These are called “concatenated” messages.
MMS messages are also known as “multimedia” or “picture” messages
and can contain text, picture, audio, and video files.
When you compose a message, the phone will automatically convert a
text message into a multi media message as soon as you add a subject
or an attachment, or if you address the message usi ng an emai l address
rather than a phone number.
View the message from the message list
Select a message thread in the list to open it for reading. When open,
the individual messages appear stacked on the screen, much like with
instant messaging conversations (or chats).
Note that messages you send are also listed in the Read view.
1. Reading multimedia messages
If you have selected to auto-retrieve your multimedia messages, then
both the message header and body will download.
If you are downloading only the headers, then you must first select the
Download button to retrieve the message body. If you are concerned
about the size of y o ur data dow nloads, yo u ca n c heck t he messa ge si ze
before you download.
Once the message has dow nloaded, sele ct the “play” b utton to vi ew t he
Page 27

27
message.
From a message read view, you can do the following:
1. To view details about a particular message, i n the Read view, touch &
hold the message to open the context menu. Select View message
details.
2. Reply to a message: Simpl y start typing your message in the text box
at the bottom of the screen to reply to a message. You can always press
MENU and select to add a subject or an attachment to convert it to a
multimedia message. Select ‘Send’ when ready.
3. Links in messages: If a message contains a link to a Web page, it will
be selectable. To view the Web page in the Browser, simply select it.
4. Delete messages: Your messages will be saved until you explicitly
delete them.
Delete one message in a thread - With the message thread open in
Read view, touch & hold the individual message you want to delete to
open the context menu. Delete all messages in a thread - With the
message thread open i n Read view, press MENU > Delete t hreads. You
can also delete an entire thread from the message list by pressing &
holding the thread to open the context menu, then select ‘Delete’.
Delete all message threads - From the message list, press MENU and
select Delete threads.
Compose text and multimedia messages
1. Press MENU and select ‘Compose’. The Compose screen opens.
2. Add recipi ents by typing a name, pho ne number, or email address i n
the ‘To’ field. Matching contacts will appear. Select the recipient or
continue typing. Add as many recipients as you wish. If you send the
message to an email address, the message will automatically convert
from a text to a multimedia message.
3. To add a subject, press MENU and select ‘Add s ubject’. If you add a
subject, the message will convert to a multimedia message.
4. To add an attachment, press MENU and select ‘Attach’. Adding an
Page 28

28
attachment will always convert the message to a multimedia message.
Select from audio or pi cture fil es. You can sel ect to take a new pi cture if
you want, or record an audio file. Any recordings you make will be stored
automatically in the Music application in a play list named “My
recordings”. To remove a n attachment, sel ect t he attachment’s ‘Remove’
button.
5. Type your message. As you type, you’ll be able to track how many
characters/messages you’re creating. Remember that text messages
have a limit around 160 characters. O nce you go over that limit, a new
message is actually created but automatically joined into one when
received.
6. Select ‘Send’ when ready. You can also save a draft.
7. As your message sends, progress disp lays in the title bar. If you see
this icon to the right of the message, it means your message is still being
delivered.
Save message as draft
While composi ng, press BACK, your message a utomatically saves as a
draft.
Text and multimedia message settings
To set text and multimedia message preferences, from t he message list,
press MENU and select ‘Settings’. You can set the following from this
screen:
1. Storage settings
Delete old message: Delete old message as limits are reached.
Text /multimedia message limit: Set Text /multimedia message per
conversation.
2. Text message settings
Delivery reports: To receive a report on the delivery status of your
message, select this check box.
Manage SIM card messages: Text messages can also be stored on your
SIM card. The exact SIM card number depends on your card, but it is
Page 29

29
usually around 25-50. To view messages on your SIM card, delete them,
and copy them to your phone memory, select this setting.
3. Multimedia message settings
Delivery reports: To receive a report on the delivery status of your
message, select this check box.
Read reports: To recei ve a report on whether eac h reci pient has read or
deleted the message without reading it, select this check box.
Auto-retrieve: To retrieve all your MMS messages automatically (the
header plus the message will download to your phone), select this check
box. If you clear this check box, then only the message headers wi ll be
retrieved and display in your message list. You can retrieve the full
message by selecti ng the Download butt on that displ ays in the header.
Once the message has dow nloaded, select the “play” b utton to expand
the message.
Roaming auto-retrieve: If you are concerned about data traffic and just
want the message headers to download while roaming, clear the
Roaming auto-retrieve check box. Otherwi se, you can select this check
box to have your messages download even while roaming.
4. Notification settings
You can receive a notification each time you receive a new message.
Select ‘Noti fications’ check box to receive a noti fication in the status bar
when a new message arrives. If you want your phone to ring when a
new message arrives, sel ect that check box as wel l. Sel ect Ring tone to
open the ring tone m enu and select a ri ng tone specific to new text and
multimedia message notifications. Note that when you check a ring tone,
it plays briefly.
If you want your phone to vibrate when you receive a new message,
select ‘Vibrate’ check box.
6.2 POP3 and IMAP email accounts
Add an email account
You can fetch messages from up to fi ve POP3 or IMAP accounts. Follow
Page 30

30
these steps:
1. On the Home screen, then touch
and sel ect Email application.
2. The Set up new account screen appears.
3. Type your account email address and password.
4. If you want, select the Send email from this account by default check
box. This setting only applies if you have more than one POP3 or IMAP
account set up.
5. Select ‘Next’.
If you have a popular email account, the application will set everything
up for you! Before you go to your Inbox, you can name the account (if
you don’t, your email address will be used). You are also asked to type
your name as you want it to display on outgoing messages. You must
complete this field before you can select ‘Next’ and go to your Inbox.
For less popular accounts, follow the prompts to type the email server,
protocol, and other account information yourself. After your account
settings have been verified, select ‘Next’ to go to your Inbox.
6. To add more accounts (up to five), from an Inbox or your Accounts
screen, press MENU and select ‘Add account’.
Use your POP3 and IMAP email account
Once you’ve set up an account, you can do the following:
1. Refresh Inbox: From the Inbox, press MENU and then select ‘Refresh’
to update your Inbox with any previously-unfetched email.
2. Read email : You ca n display or collapse the messages in your I nbox
by selecting Inbox. Unread messages display with a colored band.
(Each account you add will use a different color.)
3. Forward, Reply, Reply all: You can forward, reply, or reply all to an
email message from the Inbox. From the Inbox, touch & hold the
message to open its context menu. Select the action you want to take.
4. Compose new
From the Inbox, press MENU and select ‘Compose’.
Add recipients by typing a name or address in the ‘To’ field. Matching
Page 31

31
contacts will appear. Select the reci pient or co ntinue typing t he address.
Add as many as you wish.
Type a subject and message.
Select ‘Send’, ‘Save as draft’, or ‘Discard’. Pressi ng BACK wi ll also save
as draft unless you have not typed anything.
5. Delete message
From the Inbox, Expand the Inbox to display the messages.
Touch & hold the message you want to delete.
Select ‘Delete’. Your message is moved to the Trash.
6. Empty Trash: Once you’ve moved a m essage to the Trash, to empty
messages in the Trash you must delete each message individually.
Press MENU and select ‘Folders’ to enter the Trash.
Note that the message is only deleted from your phone, not from the
account server.
7. Remove an emai l account: Yo u can always remove a POP3 or IMAP
email account from your phone. Go to your Inbox, press MENU and
select ‘Accounts’. Your Accounts screen opens. Touch & hold the
account you want to remove to open the context menu. Select ‘Remove
account’. You will be asked to confirm before the account is removed.
Edit account settings
To open your Account settings screen, do the following:
1. From your account Inbox, press MENU and select ‘Account settings’.
2. The Acco unt setti ngs screen appears. You can do t he following from
this screen:
Account name: Select to c hange t he name of yo ur account as it appears
on your Accounts screen.
Your name: Select to change your name as it appears in outgoing email.
Email check frequency: Select this pop-up menu to set how frequently
your email account is checked for new messages. Note that whenever
you open a folder, email is refreshed, regardless of this setting.
Default account: If you have more than one POP3 or IMAP email
Page 32

32
account set up on your phone and want to use this account by default
when selecting Compose from the Accounts screen, select this check
box.
Email notifications: If you want an icon to appear in the status bar whe n
a new message arrives, select this check box.
Incoming server settings: Select Incoming settings if you need to edit the
username/ password, server, port, or option to delete email from server.
Outgoing server settings: Select Outgoing settings if you need to edit the
SMTP server, port, security type, option to require sign-in, or
username/password.
Add another POP3 or IMAP
To add another acco unt (you ca n add up t o fi v e), go to your I nbox, press
MENU and select ‘Accounts’. Your Accounts screen opens.
Press MENU and select ‘Add account’ another account.
7 Internet
7.1 Ways of Connecting to the Internet
Your device’s networking capabilities allow you to access the Internet or
your corporate network through WLAN, GPRS, or EDGE (if available).
You can also add and set up a VPN or proxy connection.
WLAN
WLAN provides wireless Internet access over distances of up to 100
meters (300 feet). To use WLAN on your device, you need access to a
wireless access point or “hotspot”.
Note: The avail ability and range of your devi ce’s WLAN signal depends
on t he n um b e r, i nf r ast ructur e , and o ther objec ts t hr oug h which the s igna l
passes.
7.2 Browser
To open the Browser, touch
and select Browser icon.
The Browser al ways opens to t he last W eb page you were vi ewing. The
Page 33

33
first time you enter the Browser after pow ering on, your home page will
display.
You can change your home page by pressing MENU and selecting
More > Settings > Set home page.
Zoom and navigation in Web pages
While viewing a Web page, you can press MENU and select More >
Settings > Default zoom to set the zoom controls.
Slide your fingertip in any direction to shift your page view.
The Browse screen
From the Browse screen you can do the following:
1. Go to a Web page: Make s ure the focus is not on a text bo x and then
start typing the URL.
2. Add a bookmark: Bookmark the Web page you are currently viewing:
• Press MENU and select ‘Bookmarks’.
• From the Bookmarks screen, select ‘Add’.
• Confirm the URL and name, and then select ‘OK’.
To view all your bookmarks, press MENU and select Bookmarks.
3. Refresh a Web page: To refresh the contents of the current page,
press MENU and select ‘Refresh’.
Open pages in separate windows
You ca n keep more t han one W eb page open by usi ng m ulti ple wi ndows
to display the pages. You can open up to eight windows.
Open a new window: From a Web page, press MENU and select
‘Windows’. The C urrent windows screen opens, s howing the Web page
you started from, plus a “new window”. Select ‘New window’. Your home
page opens in a new window. To return to one of the other windows,
press MENU and select ‘Windows’. Select the page you want to view.
Manage bookmarks
You can store as many bookmarks as you want on your phone.
Press MENU and select ‘Bookmarks’. The Bookmarks screen opens.
1. Bookmark any page: Select ‘Add bookmark’. Type a name and
Page 34

34
location (URL) in the dialog box. Select ‘OK’.
2. Send bookmarked page’s URL: Touch & hold the bookmark you want
to open. The context menu opens. Select ‘Share link’. An email
Compose screen opens with the URL as the message. Address your
message and finish composing and sel ect ‘Send’.
3. View bookmarked page: Touch & hold the bookmark you want to open.
The context menu opens. Select View page or Open in new window.
4. Edit bookmark: To uch & hold the bookmark yo u want to e open. The
context menu opens. Select ‘Edit bookmark’. The edit bookmark dialog
box opens. Type your change and select ‘OK’.
5. Delete a bookmark: Touch & hold the bookmark you want to open.
The context menu ope ns. Select ‘Delete bookmark’. You will be asked to
confirm.
Set your home page
You set your home page from the Settings screen:
1. Press MENU and select More > Settings. The Settings screen opens.
2. In the Page content section, select ‘Set home page’ to open the dialog
box.
3. Type the URL of the page you want to set as home, and then select
‘OK’.
Download Web files and applications
Before you download any files or applications using the Browser, note
the following:
1. All items downloaded form the Web are stored on your memory card,
so be sure you have a ca rd i nstall ed in your pho ne before yo u dow nl oad
from the Browser.
2. The Browse r will only allow you to dow nload items that are s upported
by an application installed on the phone.
Warni ng! A pplications downloaded from the Web can be from unknown
sources. You must explicitly “allow” downloading from the Home >
Settings > Applications > ‘Unknown sources’ check box.
Page 35

35
To protect your phone and personal data, only download applications
from sources you trust, such as Android Market.
View your downloads
To see which files or applications you’ve downloaded:
1. From the Browse screen, press MENU and select More > Downloads.
2. The Download history screen appears with the list of downloads. If
you have no downloads, nothing will be shown on this screen.
Browser settings
From the Browser screen, press MENU and select More > Settings.
1. Page content settings
Te xt si ze: Select to open the Text si ze menu. Default setting i s Normal,
but you can increase the size to Larger or Largest, or decrease to
Smaller or Smallest. Note that this text size setting only affects pages
you view through the Browser.
Block pop-up windows: Select this check box if you want pop-up
windows to be blocked.
Load images: Select this check box if you want images on Web pages to
load. For faster page loading, clear this check box.
Auto-fit pages: Select to size pages to the screen automatically.
Open in background: Sel ect if you want links to new pages to open in a
new window in the background.
Set home page: Your c urr e ntl y-set home page is s hown on the Settings
screen. To c hange your home, sel ect Set home page, type the URL for
your home page, then select OK.
2. Privacy settings
Select one of the privacy settings to clear the following:
Accept cookies: Select this check box if you want the Browser to save
cookies. Some Web sites might not work properly with cookies disabled.
Remember form data: Sel ect this check box if you want the Browser to
remember text you have typed i n forms, so that you ca n select the same
text later rather than retyping it.
Page 36

36
3. Security settings
Remember passwords: Select this check box to save usernames and
passwords to various Web sites.
Clear passwords: Select Clear passwords to clear all your saved
passwords.
Show security warnings: Sel ect this check box if you want a war ning to
be displayed when you are going to an insecure Web site.
8 Experiencing Multimedia
8.1 Camera & Picture
All the pictures you can capture or view on your phone are stored on
memory card, which must be installed in your phone. Before you can
use the Camera or view pi ctures in Pi ctures, make sure yo u have a card
installed.
Load pictures onto your memory card
Read the instructions below to add pictures to your Memory card.
1. Mount your memory card to your computer by doing one of the
following: Remove the memory card and insert it into a card reader
attached to your computer; or attach your phone to your comp uter using
a USB cable that came in the box.
2. On your computer, find the mounted USB drive and open it.
3. Create a folder at the top-level called “Gallery” or some other
descriptive name and open it.
4. Copy .jpg or other image fi l es into this fol der. To organize pict ures into
albums that will display in the Pictures application, create a folder and
copy pictures there for each album you want to display.
5. W hen finished, close the USB dri ve window and unmount or eject the
drive as req uired by yo ur computer's oper ating system . Yo u ca n also go
to Home > Settings > Storage, and clear the Use for USB storage check
box. Remove the USB cable from your phone and computer.
Take a picture
Page 37

37
Captured pictures are saved to the “DCIM” folder on your memory card.
Tip: Before you take a picture, wipe the sensor window (on the back
cover) to remove any small amounts of oil.
1. To o pen the Camera, on the Home screen, touch
and select the
Camera icon.
2. The Camera opens in capture mode. Frame your picture within the
screen and hold the phone steady. Touch Camera button to capture.
Continue to hold the camera steady for a second after you hear the
shutter sound.
3. Touch the picture and enter the Gall ery, you select to save, set as, or
share, your picture.
View your pictures
To view the pictures you’ve captured, as well as any you’ve stored on
your memory card, go to the Gallery application:
1. To open Pi ctures, on the Home scree n, touch
and select Gallery
icon.
2. Depe nding o n how ma ny pictures yo u’ve s tored, t hey may take a f ew
minutes to load.
3. If you’ve stored your pictures in folders on your Memory card, then the
folders will display as separate “albums”. The top left album always
contains all the pictures in all the albums.
4. The i ndividual pictures di splay in a grid in thumb nail format. Yo u can
select to display smaller or large thumbnails in Settings.
5. To open a picture in full-screen view, touch the picture. Once in
full-screen, select the arrows to scroll through the pictures within that
album. If the arrows disappear, touch the picture again to reveal the
arrows and zoom controls.
Picture options
You can do the following while in Pictures.
Note: In all the instructions below, you can touch & hold a picture to
open the context menu to access all actions, rather than open the
Page 38

38
picture in full-screen view.
1. View full-screen: Select a picture to open it in full-screen view.
2. Share a picture: In full-screen view, press MENU and select Share.
Select to share your picture via Messaging (MMS), Bluetooth, Email or
another application (if you have another application installed on your
phone that supports sharing).
3. Set as wallpaper: In full-screen view, press MENU and select Set as.
From the menu that opens select Wallpaper. Touch & hold an edge of
the cropper to reveal the si zing arrows, then drag the edge in or out to
size. Touch & drag the center of the cropper to move it within the picture.
When you’re happy with the cropped area, select ‘Save’.
4. Set as contact picture: In full-screen view, press MENU and select Set
as.
From the menu that opens, select Contact i con. Your contact li st opens.
Select the contact yo u want to associate wi th the picture. Touch & hold
an edge of the cropper to reveal t he sizing arrows, the n drag the edge i n
or out to size. Touch & drag t he center of the cropper to move it wi thin
the picture.
When you’re happy wi th the croppe d area , sel ect ‘Save’. The picture wi ll
now appear in the Contact details screen, as well as on any incoming
call notifications.
7. Crop picture: In full-screen view, press MENU and select More >
Crop.
Touch & hold an edge of the cropper to reveal the sizing arrows, then
drag the edge in or out to size. Touch & drag the center of the cropper to
move it within the picture. 3 When you are happy with the cropped area,
select ‘Save’. Select Discard to cancel the crop. The cropped picture is
saved to Pictures as a copy. Your original is not touched.
8. Rotate picture: In full-screen view, press MENU and select Rotate.
Select from Rotate left (counter-clockwise) or Rotate right (clockwise).
Your picture rotates and is saved automatically.
Page 39

39
9. Delete picture: In full-screen view, press MENU and select Delete.
The picture will be removed from the Memory card after you confirm.
10. View picture details: In full-screen view, press MENU and select
More > Details. The picture details window opens.
8.2 Music
To open your music Lib rary, on the Home screen, touch
and select
Music icon. Your music is organized into four categories: Artists, Albums,
Songs, and Playlists. Select a category to view the lists within each.
Once in a category, keep sel ecti ng until you reach the music you want to
play.
For example, if you select the Artists category, you will see a list of
artists in A-Z order. If you select an artist, t he list opens to di splay that
artist’s albums. Select an album, and the album’s song list displays.
Load music onto your Memory card
All the music you can listen to on your phone is stored o n memory card.
Read the instructions below to add music to your memory card.
1. Mount your memory card to your computer by doing one of the
following:
Remove the memory card and insert it into a card reader attached to
your computer; or, attach your phone to your computer using a USB
cable that came in the box.
2. On your computer, find the mounted USB drive and open it.
3. Al though your p hone will find all music fil es on your memory card, i t’s
advisable to keep the number of files or folders at the root level to a
minimum. So, if you wish, create a fol der at the top-level called “music”
(or whatever you want) to store your files.
4. Open this folder and copy music files into it. If you want, create folders
within “music” to organi ze your music further. If you wa nt to use certain
music files as phone, notification, or alarm ring tones.
Note: If you do not want a ringtone to appear in your music Library but
you do want it to be available as a ringtone, and then create the
Page 40

40
“ringtones”, “notifications”, or “alarms” folder outside your “music” folder.
5. W hen finished copying, close t he USB drive window and unmount or
eject the drive as required by your computer's operating system.
Remove the USB cable from your phone and computer.
Play back music
At any level in your Library, touch & hold a li sting (a song, artist, album,
or playlist) to open the context menu. Select Play to begin play and go to
the Playback screen. You can do the following using the Playback
screen:
1. Shuffle songs: Shuffle plays songs in random order. Touch to toggle
shuffle on and off. When the con is grey, shuffle is off.
2. Repeat mode: To uch to step through repeat modes: repea t all songs,
repeat current song, don’t repeat (grey icon).
3. Go to any point in song: Slide fingertip in progress bar to desired point
in a song.
4. Playback control: from left to right icons: Go to beginning song,
Pause/ resume play and Go to next of song.
If a song is playing while you are on the Library screen, you can switch
to the Playback screen quickly by selecting the lower song bar.
Playlists
You can create as many playlists as you wish. Note that the “Recently
added” playlist is a system playlist and cannot be deleted or renamed.
Also, if you make any voice recordings as part of a MMS message, t hey
will be stored automatically in a playlist called “My recordings”.
Create a playlist on your phone
1. From the Library, select a category. From the list that appears,
navigate to the artist, album, or song that you want on a playlist.
2. Touch & hold the artist, album, or song to open the context menu.
3. Select Add to playlist.
4. In the Add to playlist menu that opens, select New to create a new
playlist, or one of the existing playlists.
Page 41

41
5. The song(s) are added.
Manage your playlists
Go to the Library screen and select ‘Playlists’. All your playlists appear.
Touch & hold the playlist to open the context menu. You can do the
following from this screen: Play, Delete and Rename.
Create ringtones from songs
You can set any of your songs as a phone ringtone:
1. From the Library, navigate to a song you want to use as a phone
ringtone.
2. Touch & hold the song in the list to open the context menu.
3. Select Use as phone ringtone. The ringtone is set as your default
incoming call ringtone.
4. Now, when you go to Home > MENU > Settings > Audio profiles >
phone ringtone, your song will be listed as an option.
Delete music from memory card
All the music you play o n your phone is stored on the inserted memory
card. From your phone, you can delete music stored on the card:
1. From the Library screen, select the Artists, Albums, or Songs
category.
2. Go to the scree n that shows the artist, album, or so ng that you want
to delete.
3. Touch & hold the item to open the context menu.
4. Select ‘Delete’. You will be asked to confirm that you want to delete
the item from your memory card.
8.3 FM Radio
This device provides radio function.
Note: Withi n doors or s hielded enviro nment, the recei ving effect of ra dio
may be affected. Yo u can improve the effect in the following ways: Near
window, adjust the position of earphone cable or adopt manual
adjustment.
Page 42

42
8.4 Sound record
The phone can be as sound record.
9 Other applications
9.1 Alarm Clock
To open Alarm Clock, on the Home screen, then touch
and select
Clock icon. The Alarm clock offers as many alarms as you want.
Set an alarm
Two alarms are set up for you, ready to c ustomi ze. All alarms are turned
off by default. Select the check box to turn on the ala rm. If no day s hows
under the set time, the alarm will go off once when the set time is
reached.
To begin, select one of the default alarms to open Alarm settings.
Set the following options:
Alarm: Select the check box to turn alarm on (checked) or off (cleared).
This is the same check box that appears on the main Alarm Clock
screen.
Time: The time the alarm will go off is shown. To change this ti me, select
Time to open the time selector. Tap t he + or – buttons and the AM/PM
button to set the time you want, and then select Set.
Tip: Touch & hold the + or – buttons to move through the numbers
quickly.
Ring t one : T he cur r ent ri ng tone sel ection is shown. Select Ring tone to
pick another ring tone that will play when the alarm rings. (When you
select a ring tone, it plays briefly.)
Vibrate: Select this check box to have your phone vibrate when it goes
off.
Repeat: The current repeat selection is shown. To change the setting,
select Repeat a nd make a selecti on from the menu. To have yo ur alarm
will only go off once at the set time, don’t select any of the options. A
one-time alarm is shown on the Alarm Clock screen without any days
Page 43

43
under the set time.
Delete alarm: To delete the alarm, press MENU and select Delete alarm.
Once your alarm goes off, you will receive an alert with the options to
Snooze (for 10 minutes) or Dismiss.
Add more alarms
To add more than alarms, from the main Alarm Clock screen, press
MENU and select ‘Add alarm’.
Change date & time display
You ca n cha nge the format of t he ti me di sp l ayed i n your alarms from t he
global Settings screen:
1. On the Home screen, touch
> Settings. Scroll down and select
‘Date & time’. The Date & time settings screen appears.
2. Use the network-provided values by selecting ‘Automatic’ check box.
3. Select ‘Use 24 hour format’ check box if you wish to use that rather
than 12 hour format.
4. Select t ‘Sel ect date format’ option to open t he menu of various date
formats.
9.2 Calendar
Calendar views
You ca n view multipl e calendars on your phone, so eac h cal endar event
is coded with a color. You can view yo ur calendar in a variety of ways.
Press MENU to select from Month, Agenda, Week, or Day.
1. Month view
Days are shown in a month grid. Busy time slots are shown as vertical
bars in the corresponding part of the day.
View event details - Sel ect a day to view all the eve nts in that day. This
will take you to either the Agenda or Day vi ew, depending on which you
last visited. Select the event to view its details.
Edit an event - First select a day to g o to ei ther the Da y or Age nda vi ew.
From there, select the event to view i ts details. Assuming you have wri te
privileges on an eve nt, press MENU and sel ect ‘Edit event’ to open the
Page 44

44
event for editing. Navigate months - Slide your fingertip up/down,
through the days and past the beginning/end of the month to move to
the previous/next month.
Create new eve nt- Touch & hold a day to open the context menu. Select
‘New event’. You can also press MENU and select ‘New event’.
Jump to current day - Press MENU and select ‘Today’.
2. Agenda view
Events in the current month are show n verti cally i n a li st, one event after
the other. Days with no events are not displayed.
Repeating events - Marked with icon following the time or date.
View event details - Select the event to view its details.
Edit an event - First, sel ect the event to view its details. Assuming you
have write privil eges on a n event, press M ENU a nd sel ect ‘Edi t eve nt’ to
open the event for editing.
Navigate within the current month - Slide your fingertip up/down.
Jump to current agenda - Press MENU and select ‘Today’.
3. Week view
Days are shown vertically within the Week view. Time slots are defined
horizontally in rows. Events are shown as blocks.
Navigate within the current week -Slide your fingertip up/down.
Navigate to a past or future week - Slide your fingertip left/right.
Jump to current day - Press MENU and select ‘Today’. The current time
is highlighted.
4. Day view
Days are divided into hour time slots. Events are shown tiled and span
the time they last. All-day events are displayed at the top of the day list.
Navigate within the current day - Slide your fingertip up/down.
Navigate to a past or future day - Slide your fingertip left/right.
Jump to current day - Press MENU and select ‘Today’. The current time
is highlighted.
Create new event - Touch an empty time slot to open the new Event
Page 45

45
details screen.
Create an event
From any of the views, press MENU and select ‘New event’ to open the
new Event details screen.
• Type the information in the fields.
• Select date & time. You can type directly in the date fields if you don’t
want to step through using the + and – buttons.
• Name that appears in Day view.
• Description can be as long as you like.
• Select a calendar if you display more than one.
• Set a default reminder time.
Press MENU to select ‘Show extra options’ to set presence and privacy:
• Set online presence: available or busy.
• Select calendar privacy from Default (as defined when calendar was
created), Private, or Public.
When finished, select ‘Done’. Pressing BACK also saves the event.
The View event screen
From the View event screen, you can do the following:
View details: All the information you’ve entered about the event is
displayed on the View event screen.
Reset reminder: Select the Reminders pop-up menu to select a new
reminder time.
Add reminder: Press MENU a nd select ‘Add reminder ’ to create anot her
reminder for the event. This will not replace existing reminders. You can
have up to five reminders per event.
Delete remi nder: Either select the “-” to t he right of a reminder, or press
MENU and select ‘Delete event’ to remove the event from your calendar.
Edit event: Press MENU and select ‘Edit event’ to open the event for
editing.
Event reminders
If you have set at least one reminder for an event (you can set up to five),
Page 46

46
the upcoming event icon will appear in the left side of the status bar to
remind you. To view, dismiss, or snooze the reminder, do the following:
1. Touch the status bar and slide your finger down the screen to open
the notifications list. The upcoming event name is di splayed. If you have
only one reminder, the place is also displayed.
2. To read more details about the event, select the reminder. If you have
other reminders pe nding, they will be listed on this screen as well . You
can Snooze or Dismiss the reminder(s), or press BACK to keep the
reminder(s) pending in the notifications bar. The snooze time is five
minutes.
Edit an event
To edit an event, you must have the View event screen open and you
must have created, or have write privileges, for the event.
1. Navigate to the View event screen.
2. Press MENU and select ‘Edi t event’. If Edi t event isn’t an opti o n, t h e n
you cannot make any changes to that particular event.
Note: If your event repeats, you will be asked to choose which events
you want changed (o nly the current one you’re edi ting, all events in the
series, or the current event plus future events).
3. Once you have finished your edits, select ‘Done’.
4. To delete the event, from the View event screen, press MENU and
select ‘Delete event’.
Go to today
From any view, to jump to the screen that shows “today”, press MENU
and select ‘Today’. If you are in the Day or Week vi ew, the current time
will be highlighted.
9.3 Calculator
To open Cal culator, on the Home screen, then touch
and select t he
Calculator icon.
The Calculator offers two panels: basic and advanced. Swi tch back and
forth between panels by pressing MENU and selecting ‘Advanced panel’
Page 47

47
or ‘Basic panel’, as you wish.
Calculator panels
Two calculator’s panels are available: basic and advanced. Use the
Basic panel to enter numbers and perform basic addition, subtraction,
multiplication, and divi sion. Use the Advanced panel to insert advanced
operators or delimiters, such as sine, cosine, tangent, square root,
parentheses, etc.
Switch back and forth betwee n cal culator panels by pressi ng MENU a nd
selecting ‘Advanced panel’ or ‘Basic panel’, as you wish. As soon as you
select an advanced operator, the panel switches back to Basic, where
your operator appears.
To delete numbers, one at a time, touch CLEAR on the screen.
To clear your operation history, press MENU and select ‘Clear history’.
9.4 Download
To store the download files by the Browser.
9.5 SIM card
The functions provided by the network provider.
If the SIM card and network provider do not support the kinds of services,
the user will not be able to use this feature.
Troubleshooting
This section lists some problems that you might meet while using your
phone. If you feel t hat your p hone do not operate normall y, please reset
settings first, and then follow Troubleshooting Guide. If you are still
unable to solve problems, please contact the authorized service center
or the store from where you purchased the phone.
1. My Phone would not power on?
Page 48

48
Possible Reasons for
Malfunction
Solutions
1. Press [Power] key shorter.
Long press [Power] key over 3
seconds
2. Battery has run out.
Charge your battery for a few minutes
then try power on again.
3. The battery is installed
incorrectly.
Check if the battery is seated correctly
on the device.
4. Abnormally using leads
phone not to power on.
Please contact the local service
centre.
2. Audio quality seems poor?
Possible Reasons for
Malfunction
Solutions
1. The current signal strength is
unstable.
You may be i n the fast-moving state
train or car, etc.), according to the
signal strength, select a place with
good signal to make a cal l to ensure
call quality.
2. You might be in an area
where the signal strength is
low.
Please move to open areas.
3. My device would not make and/or receive calls?
Possible Reasons for
Malfunction
Solutions
1. You might be in an area
where the signal strength
is low.
Make sure you are i n the area with
good cell signal. To ensure it, see
the signal strength indicator on the
top right of your device screen
Page 49

49
2. You might have set your
Call Forwarding on your
phone.
According to your needs, please
cancel call forwarding.
3. Check if your device is
set on Airplane mode.
Please Undo it
4. SIM card might not be
inserted properly
Please check, and insert the SIM
card properly.
4. You can’t make a call?
Possible Reasons for
Malfunction
Solutions
1. Phone power off. Please power on your phone.
2. Phone is out of the
network service area.
Please make sure
the current
network is in good service.
3. Your SIM card is not
proper or out of service
fee.
Make sure your SIM c ard can work
properly.
4. Perhaps you set up call
barring.
According to your needs, please
cancel call barring.
5. The phone screen is
locked.
Please unlock t he screen according
to the prompts.
5. I cannot hear and/or be heard from the other side?
Possible Reasons for
Malfunction
Solutions
1. Call volume is low. Please raise the phone call volume.
2. Mute icon is pressed
during the call
Please deactivate the Mute
function.
3. The signal is poor or
unstable
Please move to an open area or a n
area with good signal strength.
6. The call alert doesn’t ring when a call coming in?
Page 50

50
Possible Reasons for
Malfunction
Solutions
1. Incoming call alert is set
as silent.
Please re-set t he incoming call alert
as a sound alert.
2. The ring volume i s set too
low.
Please increase the phone call
volume.
3. You have set up call
forwarding on your
phone.
Please cancel call forwarding.
7. Battery seems to drop really quickly.
Possible Reasons for
Malfunction
Solutions
1. Battery power runs out
fast.
Please make sure your battery be
charged in full before use
2. Battery is not good with
the phone connection.
Please install battery properly.
3. Perhaps the charger or
battery is damaged.
Please contact the nearest FLY
Authorized Care Centre
4. Some features such as
playing the media files,
using camera or
camcorder, running
applications in the
background, constantly
syncing email and using
Wi-Fi or Bluetooth, can
drain the battery quickly
tha n u sual.
Please keep these functions closed
when not required.
8. My device does not read a microSD card installed in my device?
Page 51

51
Possible Reasons for
Malfunction
Solutions
1. T-
Flash card is not
installed properly.
Turn off your device, pull out
microSD card, put it on again and
turn on your device.
2. T-Flash card is damaged. Please change T-Flash card.
3. Make sure microSD card
is
mounted on your
device
Go to Settings > SD card & device
storage and check if Unmount SD
card is highlighted or else tap Mount
SD card
9. Phone is out of memory?
Possible Reasons for
Malfunction
Solutions
1. MMS or SMS takes up
too much storage
space.
Please delete the unwanted SMS or
MMS to release space.
2. The browsing history
takes up too much
storage space.
Select "Browser - Settings - Privacy
Settings - to clear the cache to
release space.
3. Running too many
programs leads to
lack of space.
Enter “Settings –Applications-Manage
applications” or “Settings
–Applications-Running services”,
force stop some running
applications or services.
4. You have installed
many applications in
your pho ne .
Enter “Settings –Applications —
Manage applications”, choose and
touch the applications installed by
yourself, to uninstall them to release
space.
Note: The built-in applications can’t be
Page 52

52
uninstalled.
10. Touch screen is not responsive or responsive but not
as I intended
Possible Reasons for
Malfunction
Solutions
1. If the screen or finger
touching the screen is
wet, it can cause a failure.
Please make sure your finger is dry
while using the phone.
2. Protective film on touch
screen may make touch
screen less responsive.
Please remove any such protecti ve
screens.
3. Your device may become
slow, if you are running
many applications at the
same time.
Please close all applications, go
back to Home screen and try
again.
Read there simple guidelines before using the device.
ROAD SAFETY COMES FIRST
Obey all local laws, Always keep your hands free to operate the vehicl e
while driving. Your first consideration while driving should be road safety.
INTERFERENCE
All wireless devices may be susceptible to interference, which could
affect performance.
ENHANCEMENTS AND BATTERIES
Page 53

53
Use only approved enhancements and batteries. Do not connect
incompatible products.
SWITCH OFF NEAR BLASTING
Follow any restrictions. Do not use the device where blasting is in
progress.
CONNECTING TO OTHER DEVICES
When connecting to any other device, read its user guide for detailed
safety instructions. Do not connect incompatible products.
BACK-UP COPIES
Remember to make back-up copies of keep a written record of all
important information.
SWITCH OFF IN AIRCRAFT
Follow any restrictions. Wireless devices can cause interference in
aircraft.
SWITCH OFF IN HOSPITALS
Follow any restrictions. Switch the device off near medical equipment.
SWITCH OFF WHEN REFUELING
Page 54

54
Do not use the device at a refueling point. Do not use near fuel or
chemicals.
PRO TECT THE ENVIRONMENT
Do not dispose of batteries in a fire or as household trash. Obey any
local battery recycling laws or environment protection policy.
PRO TECT THE CHILDREN
Do not store any small parts of the device such as a memory card where
children may access them.
EMERGENCY CALLS
Ensure the phone function of the device is switched on and in service.
Enter the emergency number. Give your location. Do not end the call
without permission.
TECHNICAL SPECIFICATION
GSM NETWORK
900/1800 MHz
DISPLAY SIZE 9.53 cm
BATTERY CAPACITY
1200 mAh
CHARGER
SPECIFICATION
INPUT:AC
100-240V/50-60Hz
OUTPUT:DC
5V/500mA
SAR VALUE
0.909W/Kg
CAMERA RESOLUTIO N
3.0 MEGA PIXEL +
VGA
 Loading...