

Page 1
Installation:
Genuine
Replacement Par ts
C-100500-K Flush Cartridge
If the air inducer is doing its job of drawing
®
air into the FLUSHMATE
vessel at the
beginning of the refill cycle, then check the
cartridge assembly for any leaks.
Here’s how to do that:
1. Turn off the water and flush the toilet.
2. Hold the actuator down until the vessel is
completely drained.
3. Take a cup of water and pour it into the
cartridge housing area.
4. Turn on the water supply.
5. If you see a steady flow of bubbles
coming from the center of the cartridge
area, that means the cartridge has a leak
and should be replaced. If you don’t see
any bubbles and if you have a flush
handle-actuated system, you may have
to disconnect the rod itself in order to
remove the cartridge.
Remember: You must first turn the water
supply off, and flush the toilet.
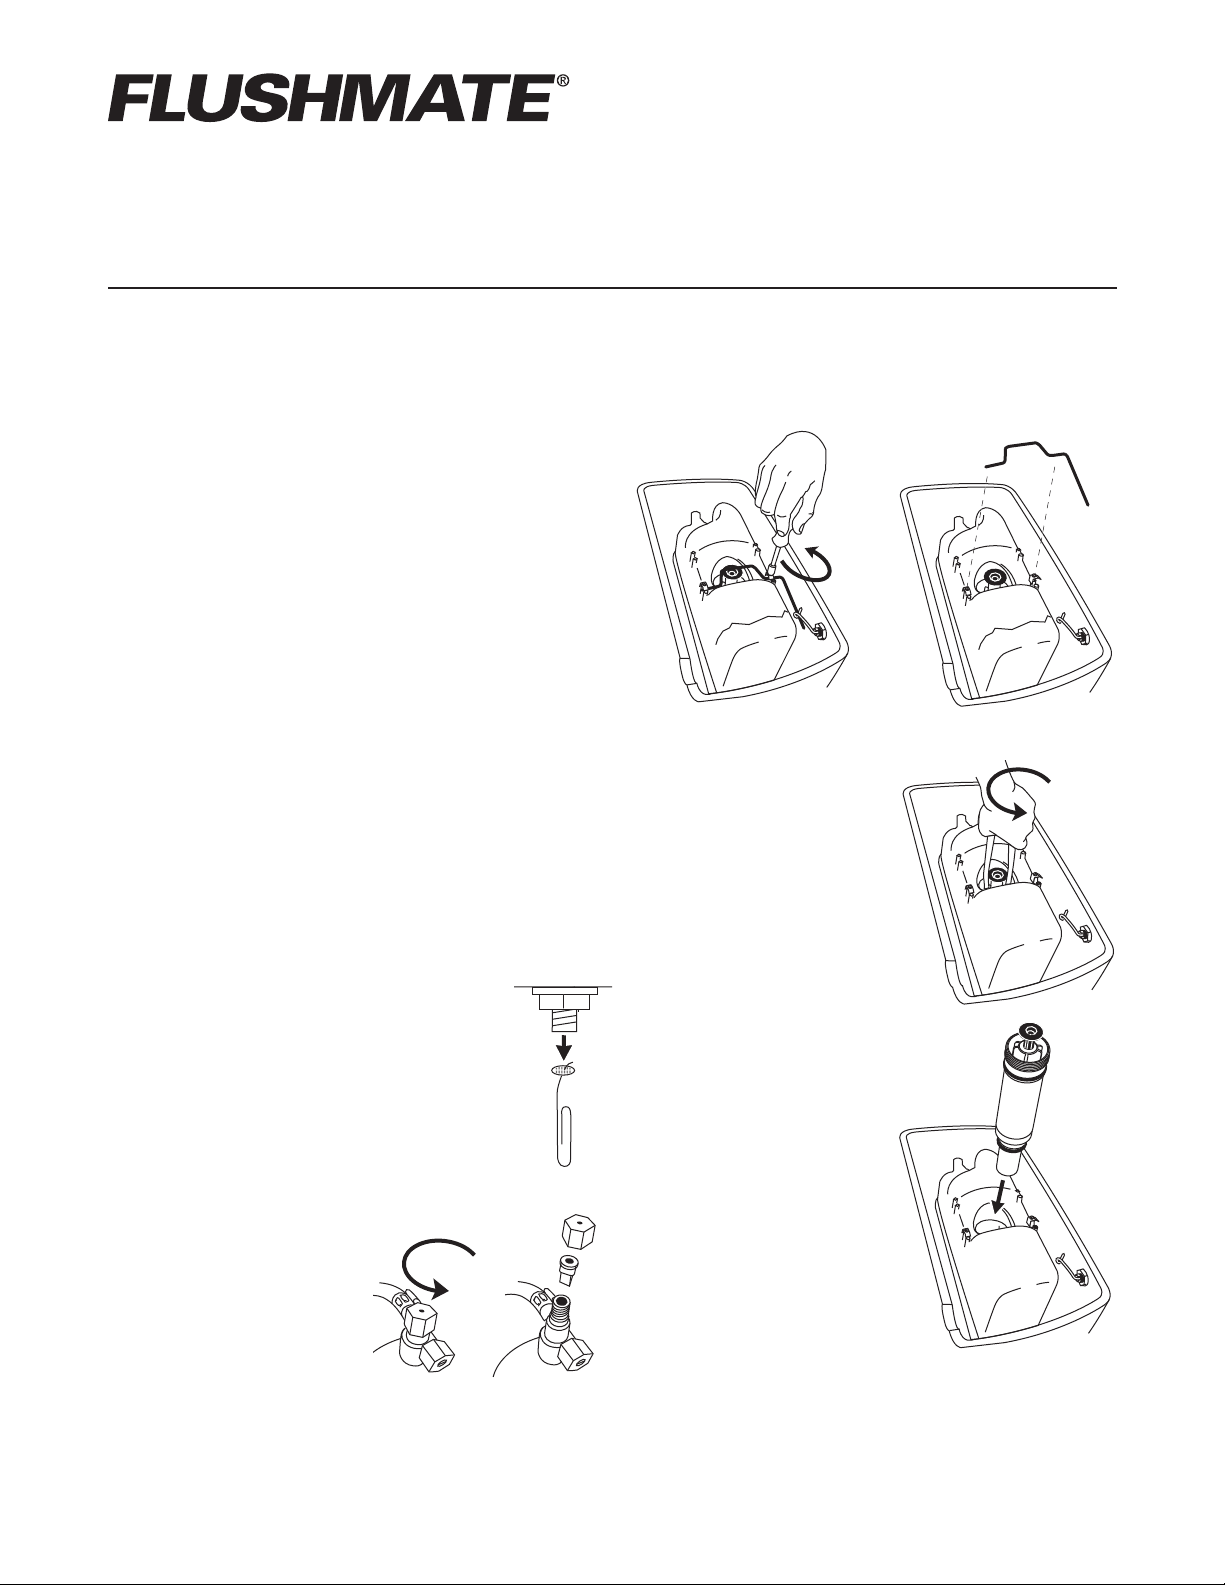
6. Remove inlet screen from lower
supply shank using a paper clip.
Install new inlet screen using
6
finger tip.
7. Unscrew the air inducer cap from
the upper supply. Pull the duck bill
valve out of the air inducer cap.
Install new duck bill
valve into upper
supply and reinstall
7
air inducer cap,
finger tight only.
8. Actuator rod removal is a simple
procedure using a screwdriver. You only
need to loosen one screw to remove the
rod.
8
9. Remove the
cartridge assembly
by inserting the
pliers handle like
you see here or
with our
FLUSHMATE 2-in-1
wrench. Remove the
cartridge assembly
by turning in a
counter-clockwise
direction.
10.Once the cartridge
assembly is
removed, examine
the exposed o-rings
on the cartridge.
Do you see any
signs of wear or
damage? If a defect
is observed, replace
the cartridge.
9
10
Visit FLUSHMATE’s How to videos at www.howto.flushmate.com
30075 Research Drive, New Hudson, MI 48165
Phone: 248-446-5300, Fax: 248-446-2190, www.flushmate.com
FLU9062.1 0113
Continued on other side.
Visit FLUSHMATE’s How to videos
at www.howto.flushmate.com
Page 2
Installation:
Genuine
Replacement Par ts
C-100500-K Flush Cartridge
11.Before you reinstall or replace the
cartridge, first turn the water supply back
on and allow the water to flow for about
30 seconds. If there is any debris that has
been trapped inside the FLUSHMATE unit,
this should clear it away. Look inside the
FLUSHMATE unit to make sure there is no
debris inside the sealed surface. Debris or
defects in the sealed surface can cause
the unit to continue to run on.
12.Then, reinstall the cartridge by turning
the cartridge assembly counter-clockwise
while pushing down and applying
pressure to avoid cross-threading. Stop
when you hear an audible click, caused
by the threads engaging.
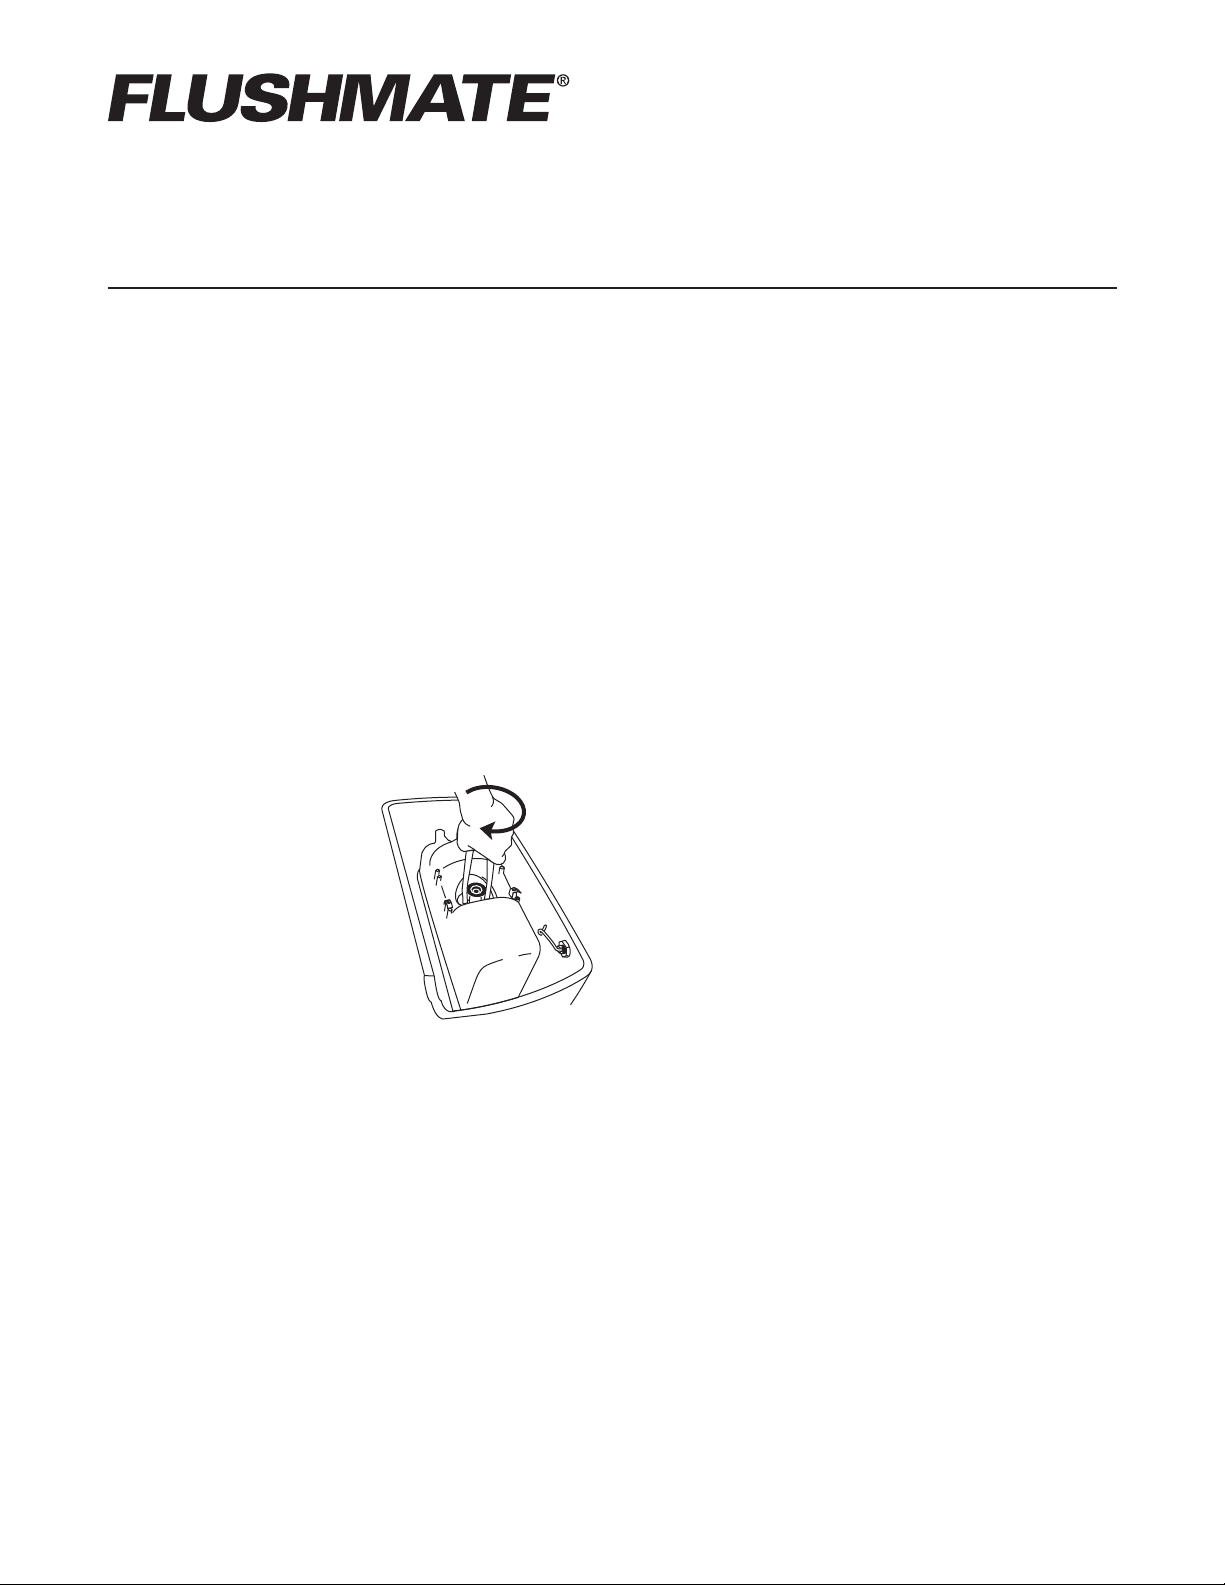
13.Next, turn clockwise
to install the
13
cartridge back into
position until a
thread or two of the
FLUSHMATE unit
are showing above
the cartridge.
14.Then, turn the water back on and keep
slowly turning the cartridge in a clockwise
direction until the water stops running into
the toilet bowl. Once the water stops, no
additional adjustments to the cartridge
installation should be required.
15.Install the flush rod if it was removed and
make sure there is no interference in the
proper adjustments to actuator is made.
The actuator may also need to be
adjusted if you have a push button model.
In either case, the proper clearance
between the flush rod or push button to
the actuator is important to ensure proper
flushing actuation.
16.There may be rare situations where this
service action does not stop the water
from running. This may be a sign that you
need to replace the cartridge assembly
itself.
Visit FLUSHMATE’s How to videos at www.howto.flushmate.com
30075 Research Drive, New Hudson, MI 48165
Phone: 248-446-5300, Fax: 248-446-2190, www.flushmate.com
FLU9062.1 0113
Visit FLUSHMATE’s How to videos
at www.howto.flushmate.com
 Loading...