

User Manual
Mini Humidity & Temperature Meter
Please read this user manual thoroughly before using
the unit and keep it for your future reference
1. Safety
Read the following safety information carefully before attempting to operate the meter.
Use the meter only as specified in this manual; otherwise, the warranty may be invalidated.
Environment conditions:
Altitude up to 2000 meters
RH≤90%(Non-Condensation)
Operating Temperature: -20~60℃
Maintenance
Repairs or servicing should only be performed by ATP Instrumentation Ltd.
Cleaning: Wipe the unit with a dry soft cloth. Do not use abrasives or solvents on this instrument.
Safety Symbol
Comply with EMC
2. Introduction
The Humidity & Temperature Meter has a high accuracy Humidity & Temperature sensor, providing high
accuracy, fast response and stable readings.
3. Application
This meter is ideal for measurement of temperature and humidity in environmental applications, and is ideally
suited for taking measurements in an air stream.
4. Specifications
Humidity
Measuring
Range
Accuracy Resolution
0%~100%RH
20%~40%RH : ±3.0%
0.1%RH
40%~60%RH: ±2.5%
60%~80%RH: ±3.0%
0%~20%RH
80%~100%RH: ±3.5%
Temperature
-30℃~70℃
-22℉~158℉
-30℃~-10℃(-22℉~14℉):
±1.0℃(±1.8℉)
0.1℃
-10℃~70℃(14℉~158℉):
±0.5℃(±0.9℉)
Response Time
1 second
Sampling Rate
2 times per second
Working Temp.
-30℃to 60℃
Power Resource
9V battery
Dimension(L*W*H)
165 x 55 x 38mm
Weight
88g
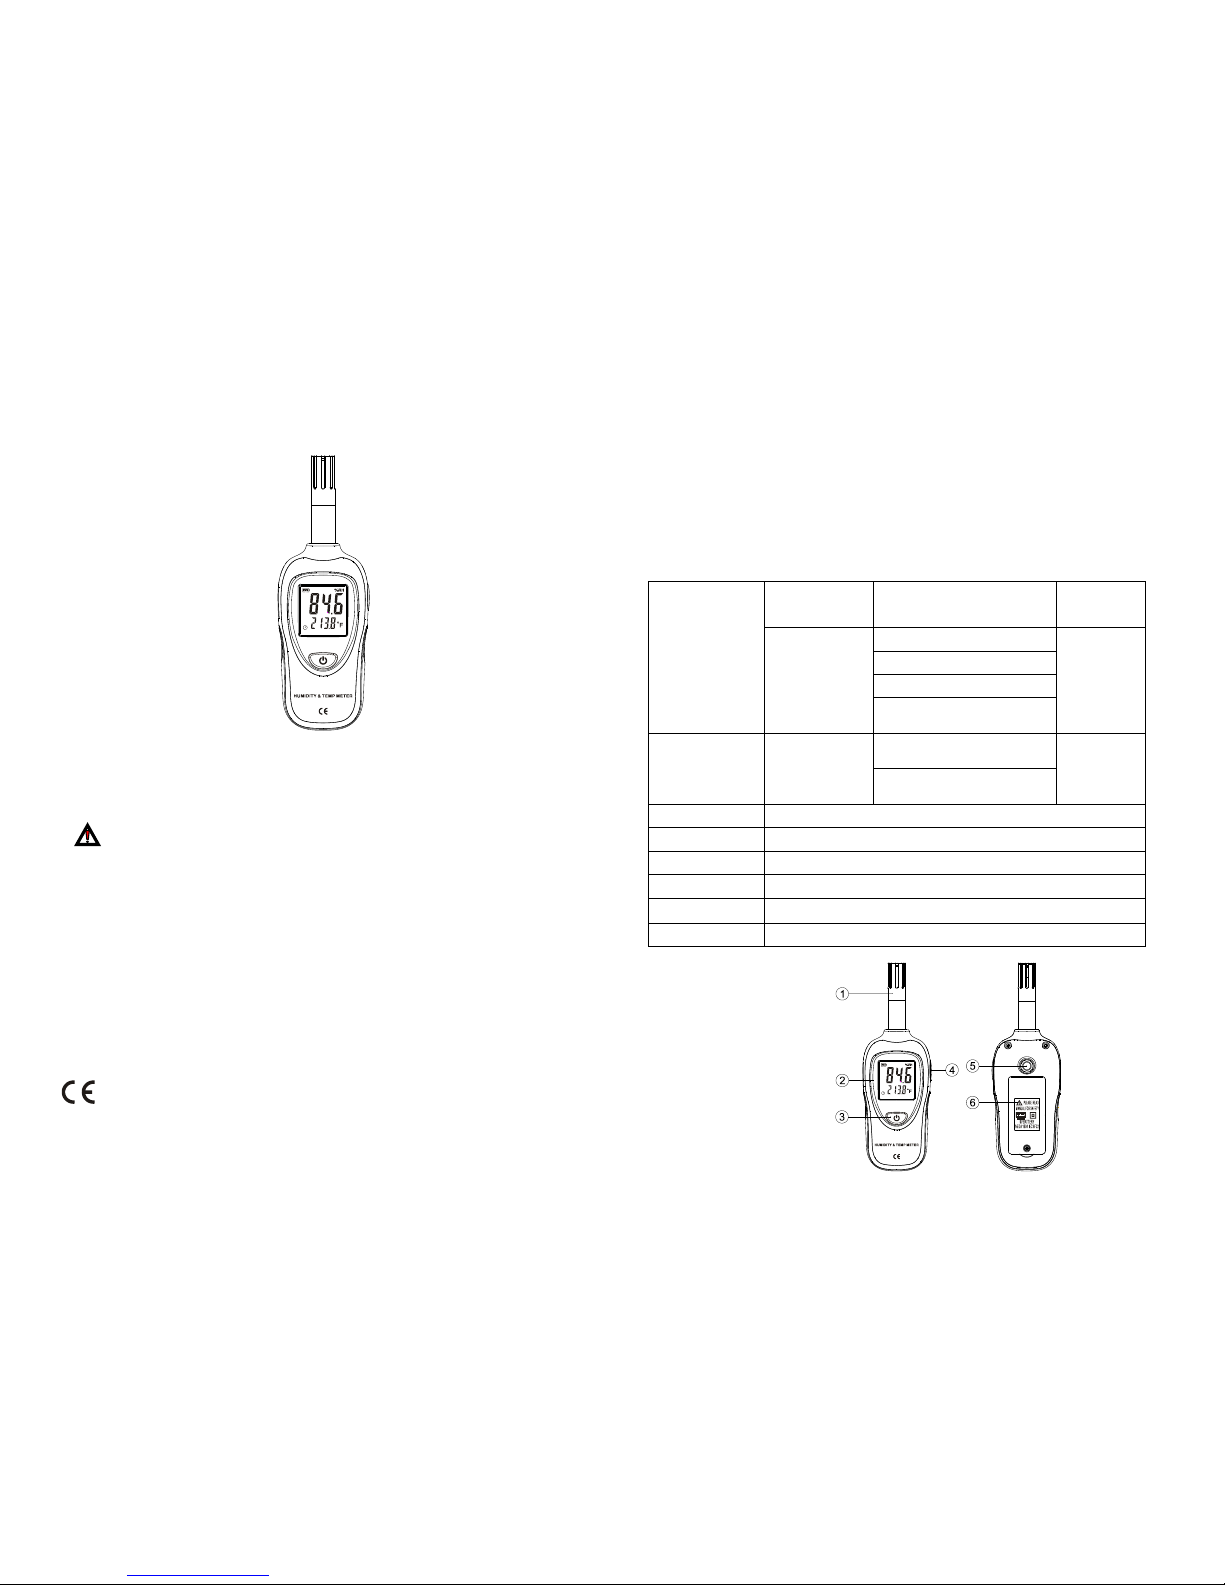
5. Meter Description
1. Temperature & Humidity sensor
2. LCD display
3. Power ON/OFF button
4. MAX/MIN button
5. Tripod nut
6. Battery cover
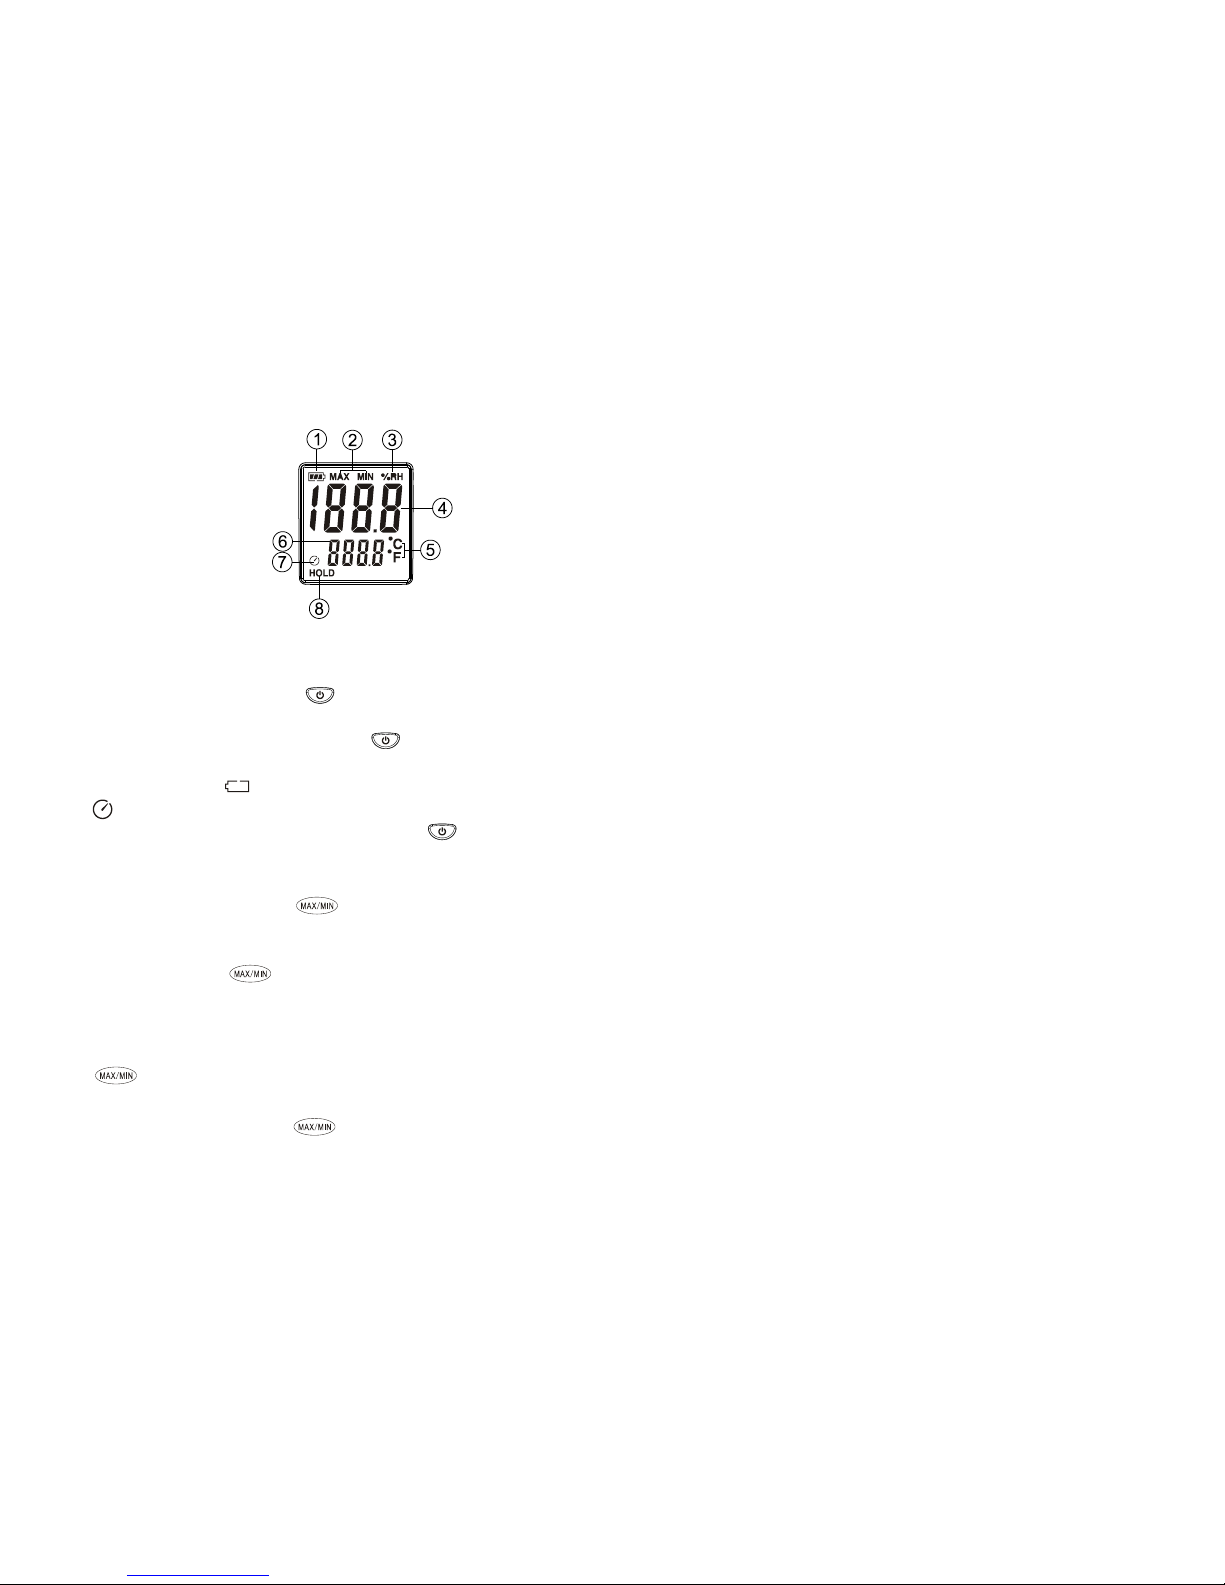
6. LCD Display Description
1. Low battery indication
2. MAX/MIN icon
3. Humidity icon
4. Humidity reading
5. ℃/℉ temperature icon
6. Temperature reading
7. Auto power off icon
8. Hold icon
7. Operation Instruction
(1) Open battery cover and install a 9-volt battery in the battery compartment.
(2) Power ON:Turn the meter on by pressing " " button for 1 second until the LCD is lit, then release
the button.
(3) Power OFF:Turn the meter off by pressing and holding " " button for approx. 3 seconds until the
LCD is switched off, then release the button.
(4) When the low battery icon " " appears, replace the meter's battery.
(5) Auto power off icon, the meter will automatically turn off after approx. 15 minutes of inactivity.
(6) LCD Backlight: After turning the meter on, momentarily press the " " button, the backlight will
come on; it will automatically turn off after approx. 30 seconds of inactivity.
(7) Hold & MAX/MIN Function
HOLD: After turning the meter on, press " " button. The "HOLD" icon will appear on the LCD,
which indicates the data is frozen. To release the held reading, press the button again.
MAX/MIN: Press and hold " " button for at least 3 seconds until "MAX" icon appears on the
LCD to view the MAX reading since power on; press the button again, the "MIN" icon appears on the
LCD to view the MIN reading since power on. To exit the MAX/MIN mode, press and hold the button
" " for 3 seconds.
(8) ℃/℉ temperature units
In the OFF mode, press and hold the " " button, then power the meter on, after the LCD
displays, release the button, the temperature units ℃/℉ will alternate.
(9) Calibration
The recommended calibration period is one year.
8. Notes
① This meter has already been calibrated before delivery.
② Repairs or servicing should only be performed by ATP Instrumentation Ltd.
③ Remove the battery when the meter is to be stored for long periods of time to avoid battery leakage.
9. Accessories
① User manual
② 9V battery
 Loading...