

Fluidity FT Aviator Quick Start Manual
Quick Start Guide
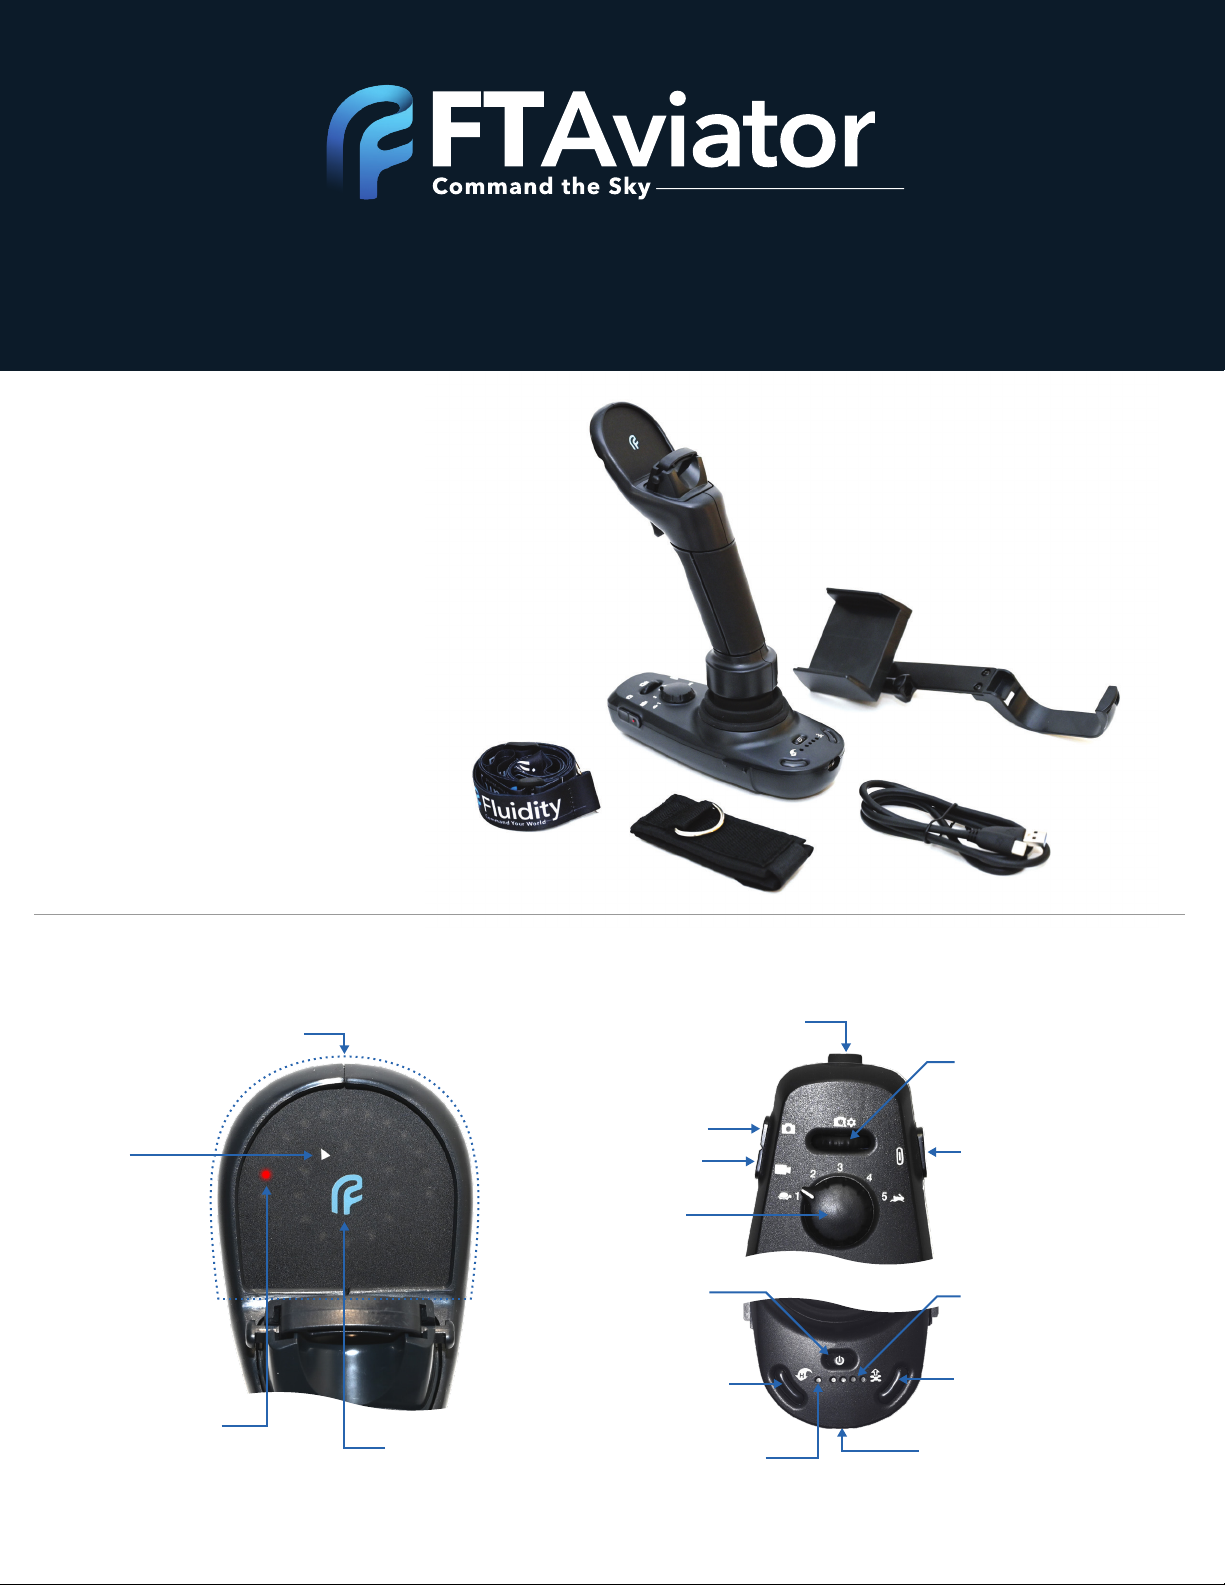
What’s in the Box?
• Quick Start Guide
• FT Aviator
• Smartphone Holder
• USB-C Cable
• Radio Strap
• Fluidity Lanyard
Product Features
Situational Awareness
Display
Drone
Relative Yaw
Drone Relative
Position
Connectivity
Status Light
Shutter Release
Video Record
Flight Control
Sensitivity Dial
Return to Home
www.fluidity.tech
Camera Tilt
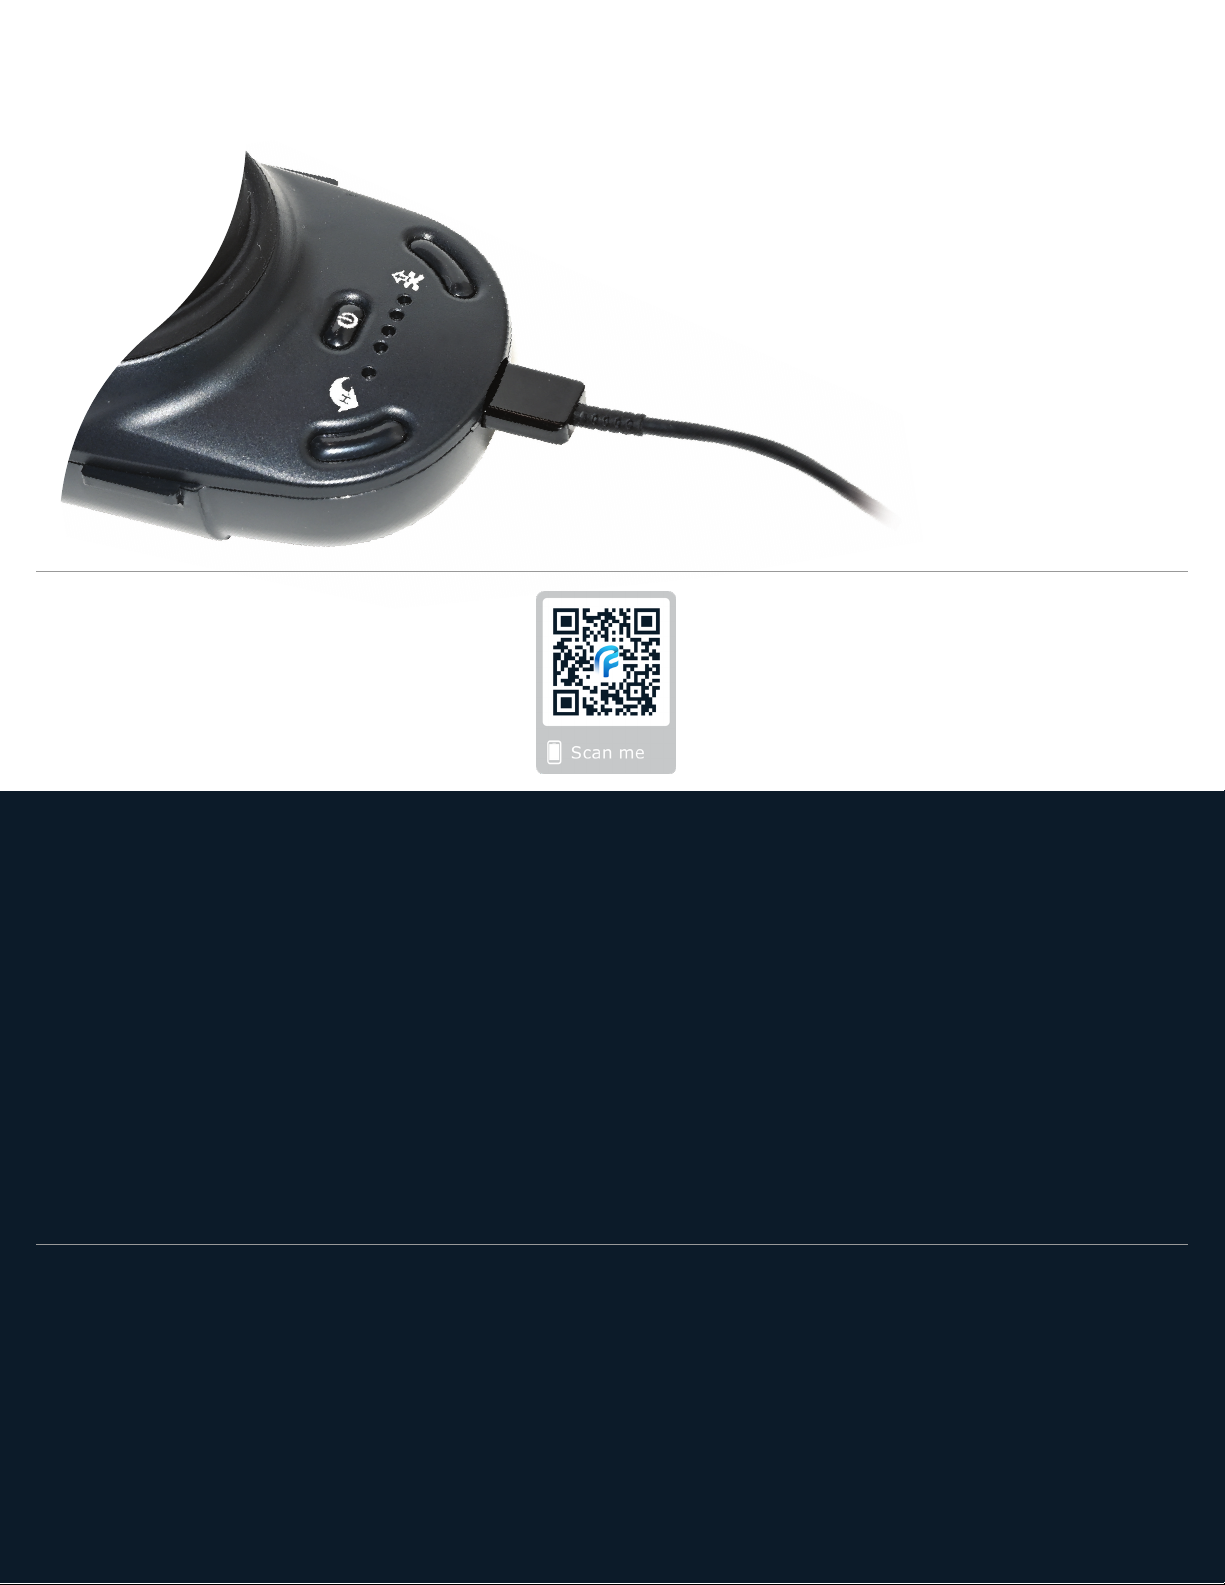
Power
Bluetooth
Connectivity Status
Camera Controls Rotary
(Scroll/Click)
Programmable – Multi
Function Button
Battery Indicator
Take Off (Launch)
Charging Port
1. Charge the FT Aviator
2. Download the App
• Connect FT Aviator to AC adapter with the
included USB-C cable to the charging port
• Charge until 4 LEDs illuminate, indicative
of a full charge
www.fluidity.tech/download-app
3. Set-up the FT Aviator
• Attach the FT Aviator smartphone holder to the base
• Insert the smartphone into the FT Aviator phone holder; adjust angle
• Connect the Fluidity lanyard to the DJI remote - for Mavic, attach the radio strap to
the Mavic remote, for Phantom and larger, attach lanyard directly to the DJI remote
• Connect the DJI remote to your smartphone via USB cable
– For Android, use the included USB-C cable
– For iOS, an iPhone USB cable is needed (not included)
4. Prepare the Drone
• Power up drone and its remote; place the drone in a clear spot
• Push the power button on the FT Aviator, then press and hold again until the LEDs
illuminate on the situational awareness display
For more detailed set-up information, please see www.fluidity.tech/quick-start
 Loading...