

Flowtron Outdoor Products LE-900F User Manual
SHREDS LEAVES, GRASS CLIPPINGS, PINE NEEDLES . . .
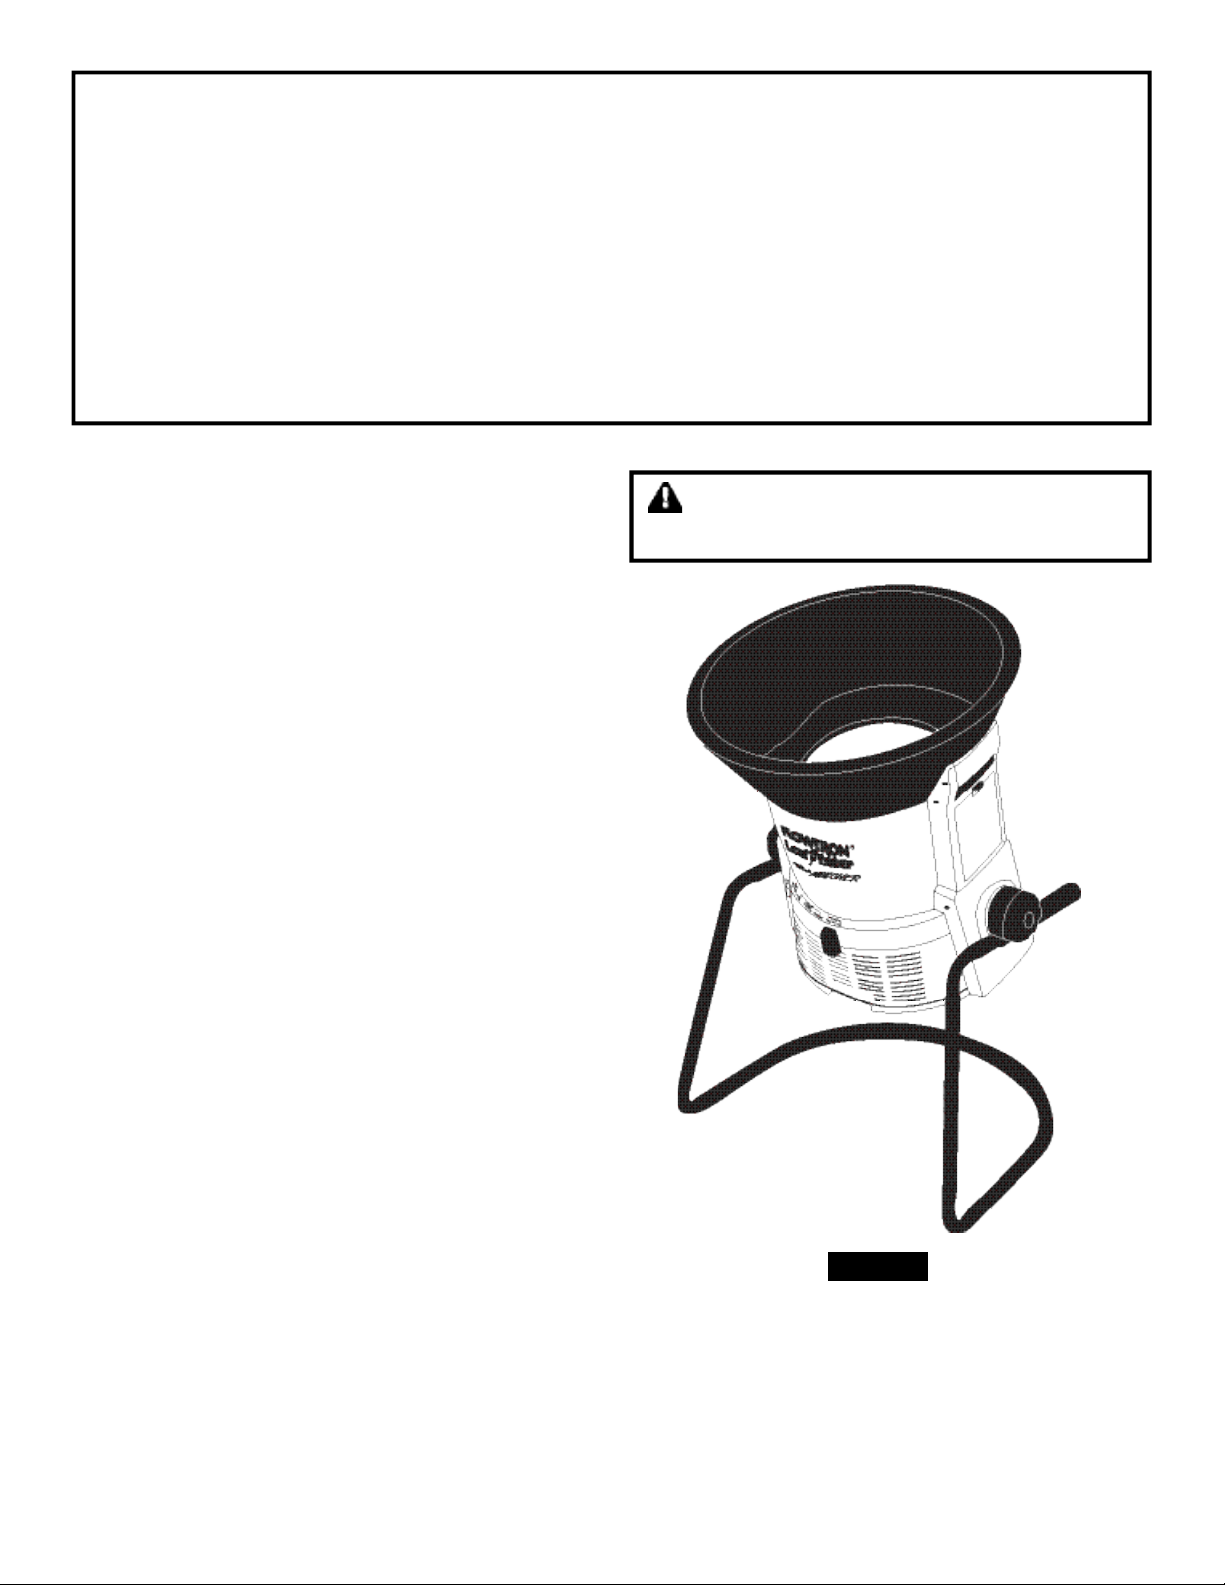
OWNER’S
MANUAL
Model
LE-900F
• Assembly
• Operation
• Maintenance
• Repair Parts
WA R N I N G
C a r e f u l ly read and fo l l o w
s a fety rules, precautions and
operating instructions.
Failure to do so can result in
serious personal injury.
Always Wear Eye Protection During Operation
the Ultimate MULCHER
page 2
Model # _____________________________________________
Serial # _____________________________________________
The model and serial number will be found on the decal attached to
the underside of the motor duct housing.
You should record both model and serial numbers and keep in a
safe place for future reference.
Instructions given with this symbol
are for personal safe t y. Be sure to fo ll o w them.
ONE Year Limited Warranty on FLOWTRON LEAF-EATER THE ULTIMATE MULCHER — LE-900F
FLOWTRON, division of Armatron warrants your Flowtron Leaf-Eater to be free from defects in materials or workmanship under normal use and
service for one year from date of the original purchase. All parts which are defective will be repaired or replaced free of charge. Any implied warranties, including the implied warranty of merchantability are also limited in duration for one year from the original purchase date. Some states do
not allow limitations on how long an implied warranty lasts, so the above limitations may not apply to you.
The provisions of this warranty shall not apply to any Flowtron Leaf-Eater which has been subject to misuse, neglect or accident, nor which is used
for a purpose for which it is not designed, or which shall have been repaired or altered in any way so as to adversely affect its performance and
reliability. Service by unauthorized parties voids your warranty. Warranty covers only the original purchaser. Commercial and/or professional use is
excluded from warranty coverage.
Flowtron neither assumes nor authorizes any person to assume for it any other liability in connection with its products. No responsi bility is
assumed for any consequential damages that may result from the use of a Flowtron product, not for damages due to accident, abuse, lack of
responsible care, the affixing of any unauthorized attachments, loss of parts or subjecting this unit to any but the specified voltage. Some states do
not allow the exclusion or limitation of the incidental or consequential damages, so the above limitation or exclusion may not apply to you.
This warranty gives you specific legal rights, and you may also have other rights which vary from state to state.
FLOWTRON Outdoor Products, 15 Highland Ave, Malden,MA 02148 •
an ARMATRON Co.
TABLE OF CONTENTS
PAGE
Warranty . . . . . . . . . . . . . . . . . . . . . . . . . . . . . . . . . . . . 2
Know Your Flowtron Ultimate Leaf-Eater . . . . . . . . . . . 3
Assembly . . . . . . . . . . . . . . . . . . . . . . . . . . . . . . . . . . 4,5
1. Assemble Funnel . . . . . . . . . . . . . . . . . . . . . . . 4
2. Attach Funnel to Housing . . . . . . . . . . . . . . . . . 4
3. Assemble Legs . . . . . . . . . . . . . . . . . . . . . . . . . 5
4. Attach Spacer and Handle Grips to Legs . . . . . 5
5. Assemble Housing to Legs . . . . . . . . . . . . . . . . 5
Safety Rules and Precautions . . . . . . . . . . . . . . . . . . . 6
Electrical Requirements . . . . . . . . . . . . . . . . . . . . . . . . 7
Motor Information . . . . . . . . . . . . . . . . . . . . . . . . . . . . . 7
Safe Operating Instructions . . . . . . . . . . . . . . . . . . . . . 8
1. Moving Your Unit. . . . . . . . . . . . . . . . . . . . . . . . 8
2. Loading Your Unit . . . . . . . . . . . . . . . . . . . . . . . 8
3. Mulching Control Lever. . . . . . . . . . . . . . . . . . . 8
Maintenance . . . . . . . . . . . . . . . . . . . . . . . . . . . . . . . . . 9
1. Cleaning Your Unit . . . . . . . . . . . . . . . . . . . . . . 9
2. Replacement of Cutting Line . . . . . . . . . . . . . . 9
3. Replacement of Spinner . . . . . . . . . . . . . . . . . . 9
4. Cleaning Air Filter . . . . . . . . . . . . . . . . . . . . . . . 9
5. Storage . . . . . . . . . . . . . . . . . . . . . . . . . . . . . . . 8
Trouble Shooting . . . . . . . . . . . . . . . . . . . . . . . . . . . . . 9
Exploded View. . . . . . . . . . . . . . . . . . . . . . . . . . . . . . . 10
Parts List . . . . . . . . . . . . . . . . . . . . . . . . . . . . . . . . . . . 11
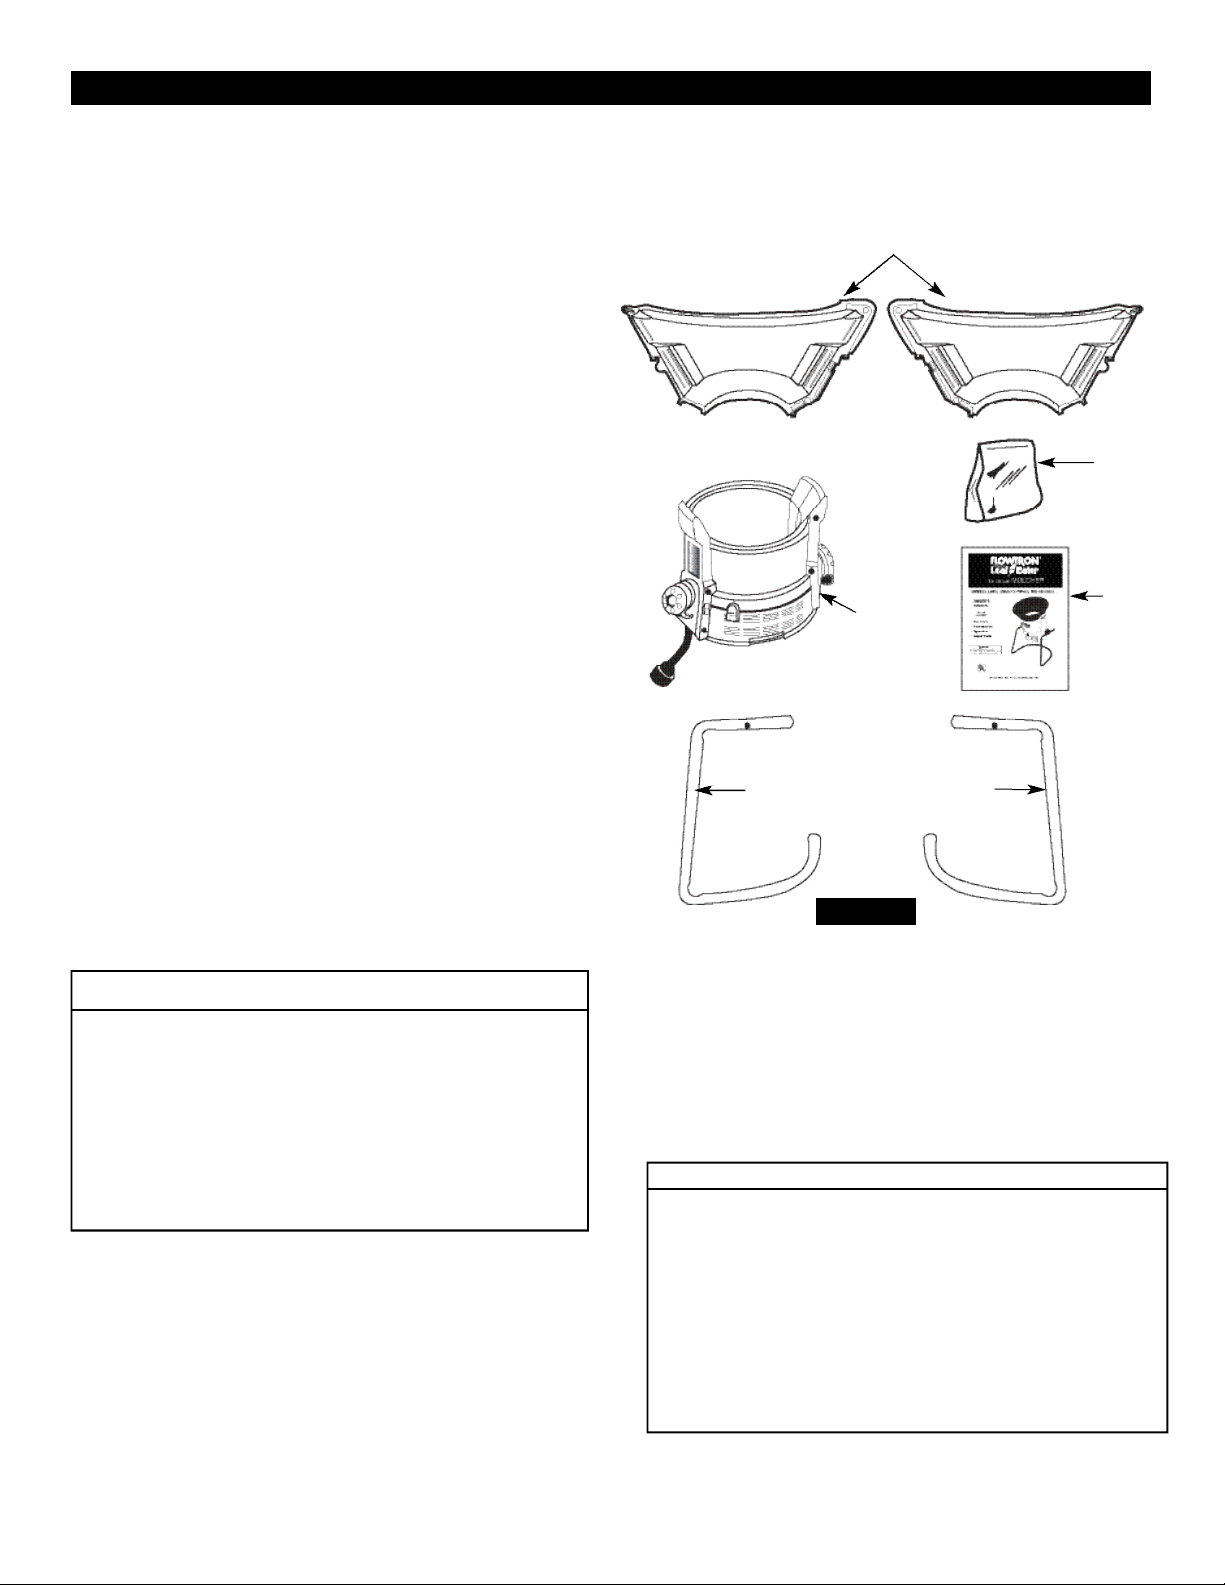
FIGURE 1
FRONT
page 3
A. Special Features Include:
• Coarse to fine leaf reduction with special positions for
pine needles and grass clippings.
• Unique leg design – functions upright or straddles trash
barrel.
• Tilt feature makes loading easy; body of unit flips 180°
for simple, compact storage.
• Bungee cord surrounding bottom of unit firmly holds
leaf bag in position.
• Storage compartment with hinged door holds cutting
lines, gloves, safety glasses, etc.
• Foam cushion handle grips ensure comfort and ease of
carrying.
• Powerful universal electric motor.
• Runs on ordinary 120 volt, 15 amp household current.
B. Unpacking Instructions
Your unit has been carefully packed at the factory to
prevent damage during shipment and storage.
Carefully unpack the carton as follows:
1. Check parts against list shown
2. Examine for damage
Your Flowtron Ultimate Leaf-Eater is a quality built product that is designed to
p r ovide you with a unit that is aff o r dable and will perf o rm with a minimum of care
and maintenance.
KEY #. DESCRIPTION QTY.
1 FUNNEL HALF 2
2 HOUSING 1
3 LEG LEFT 1
4 LEG RIGHT 1
5 HARDWARE PACKAGE 1
6 OWNER’S MANUAL 1
FIGURE 2
N O T E : The Right Hand, (R.H.), and Left Hand, (L.H.),
sides of your FLOWTRON Ultimate Leaf-Eater are determined when standing at the rear of the machine. See
Figure 1.
KNOW YOUR FLOWTRON ULTIMATE LEAF-EATER
2
3
5
6
1
4
Carton Contents
Hardware Bag Contents
Qty. Description
1 Leg Clamp, Upper
1 Leg Clamp, Lower
2 #8 Pan Head Phillips Screw 1/2" long
2 Spacer
2 #10 Pan Head Phillips Screw 3/4" long
4 #8 Pan Head Phillips Screw 5/8: long
2 Handle Grips
4 #8-32 Hex Nut
36 Cutting Lines
4 #8 Pan Head Phillips Screw 1/2” long
page 4
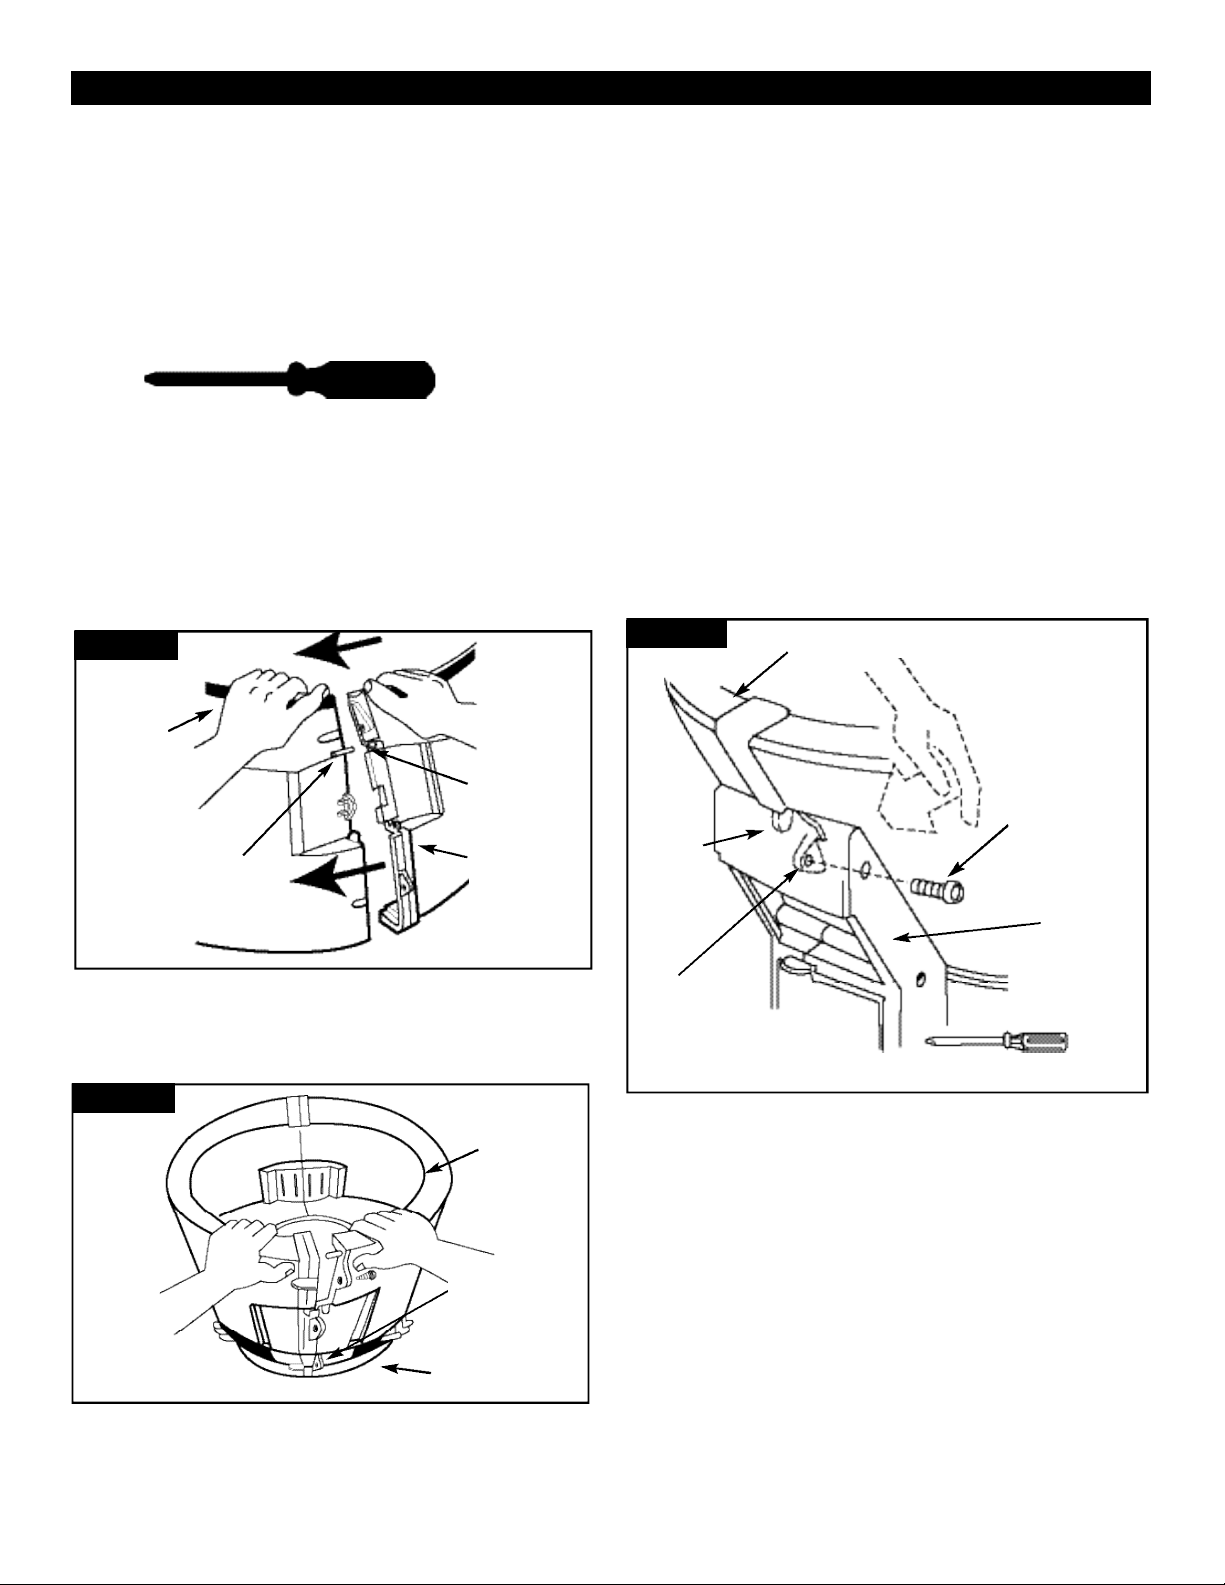
1. Assemble Funnel
Place funnel halves on flat surface with narrow opening
facing up. Align both halves and press locating pin
nearest narrow opening of funnel half into locating hole
on adjacent funnel half. See figure 3. Using two (2) #8 x
1/2” screws, fasten both halves together. See Figure 4.
N O T E : Flange on funnel half overlaps outer surface of
adjacent funnel half as shown in figure 3.
Rotate Funnel 180º and press locating pin nearest
large opening of funnel half into locating hole on adjacent funnel half. See figure 3. Using two (2) #8 x 1/2”
screws, fasten both halves together. See Figure 4
2. Attach Funnel to Housing
Place narrow opening of funnel on upper end of housing and position funnel so that flat areas of funnel are
located at the right and left housing towers. Align boss
on funnel with hole at top center of housing tower as
shown in figure 5. Repeat for opposite side. With bosses aligned, press funnel firmly down onto housing.
Apply pressure all around edge of funnel until funnel is
seated evenly around the housing. Fasten funnel to
right side of housing by inserting a #10 x 3/4" long pan
head phillips screw into large screw hole opening at
top front edge of housing tower, and tighten using a
phillips screwdriver. CAUTION: Do not over tighten
screw. See figure 5. Repeat for left side.
NOTE: While inserting screw into screw hole opening,
keep funnel tab in place by pressing down on inside
surface of funnel opposite tab so that screw passes
through hole in funnel tab.
ASSEMBLY
PREPARATION
Your Owner’s Manual has been developed to help you
assemble the unit and to understand its safe operation. It
is important that you read your manual completely to
become familiar with the unit before you begin assembly.
1. Tools you will need
#2 phillips head screwdriver
FIGURE 3
Narrow End
of Funnel
Locating Pin
Hole
FLANGE
Locating Pin
FIGURE 4
Wide
Opening
Narrow Opening
#8 x 1/2” screw
(two places)
FIGURE 5
Push
Housing
Tower
Funnel Tab
Funnel
Funnel
Boss
Screw
#10 x 3/4" Long
 Loading...