

Page 1
INSTALLATION INSTRUCTIONS
WiFi Module
WiFi Module Set up
1. Loosen screws on the WiFi module cover.
2. Remove the WiFi module cover.
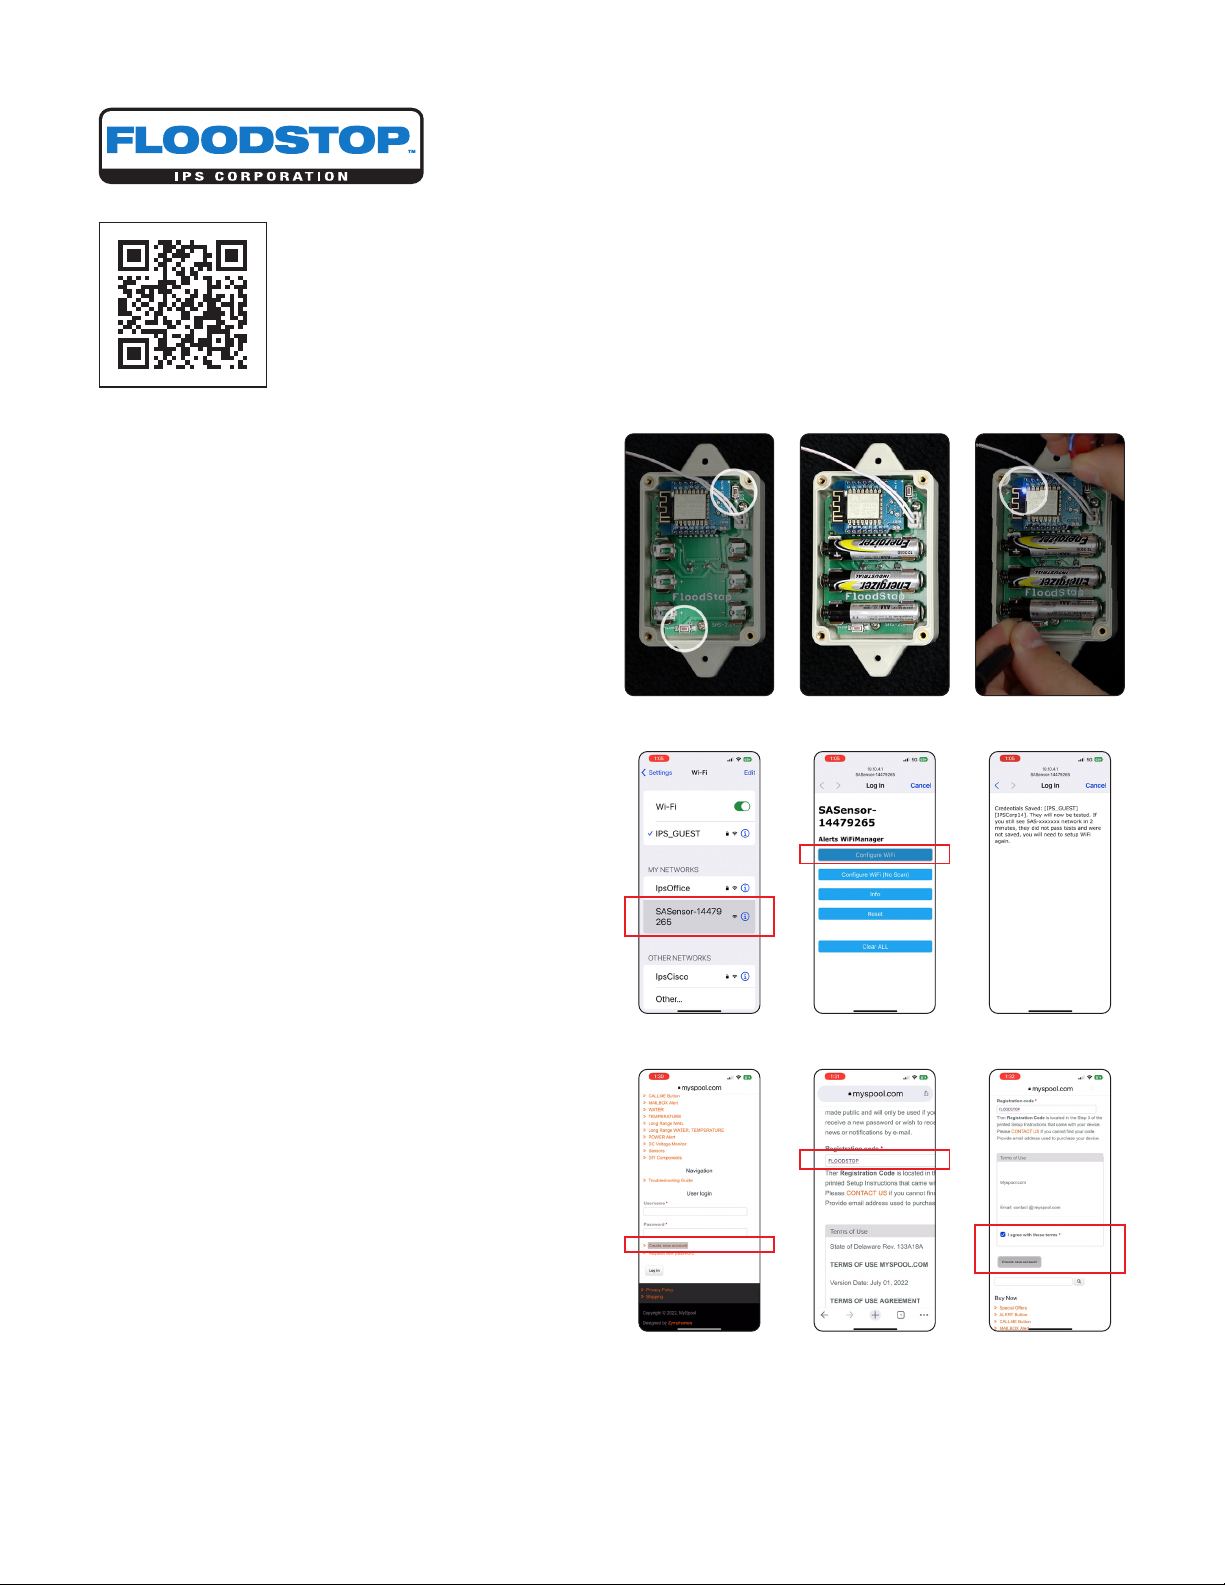
3. Note location of the red TEST and CLEAR buttons. See Image 01.
4. Insert three (3) AAA batteries. See Image 02.
5. Press and hold the red TEST and red CLEAR buttons until the solid
blue light comes on and remains lit. See Image 03.
6. The WiFi module is now ready for pairing.
7. If you do not get a steady blue light, remove and check the
batteries then repeat steps 4 and 5 again.
Pairing the WiFi Module
8. Open the WiFi settings on your mobile device.
9. From your list of networks, select SASensor-xxxxxxxx. Note: The
last eight digits are a unique ID specic to each WiFi module.
See Image 04.
10. Once connected, the WiFi Manager will launch. Select Congure
WiFi. See Image 05.
11. Select the WiFi network your Floodstop device(s) will be using.
12. Enter the network’s WiFi Password.
13. Your credentials are saved and the screen will change. Testing
begins, which could take up to 2 minutes. See Image 06.
14. When the screen changes again to the WiFi setup, your WiFi
module is then connected to the WiFi network. You are now ready
to create and set up your account notications. Note: If your
screen changes back to the WiFi network login page, you will need
to repeat steps.
Account Set-up
15. Using your device, open a browser and go to myspool.com.
16. Under user login at the bottom of the page, click “Create new
account”. See Image 07.
17. On the next page, create a username and add your e-mail address.
18. Enter the registration code “FLOODSTOP”. This is also printed on the
guide included with the WiFi module. See Image 08.
19. Read the Terms of Use and select “I agree with these terms”.
20. Click the “Create new account” button. See Image 09.
Verify Account Set-up
21. Once your account has been created, you will receive an e-mail
from MySpool.com.
22. Open the e-mail and click the link to login to your myspool.com
account and set your password.
Image 01 Image 02 Image 03
Image 04 Image 05 Image 06
Image 07 Image 08 Image 09
For video step-by-step
instructions scan the QR code.
Continued on page 2
Page 2
Install_FS_WiFi Model_20052
INSTALLATION INSTRUCTIONS
WiFi Module
Congure Your WiFi Module for Notications
23. From your account at myspool.com, select "MY DEVICES" from
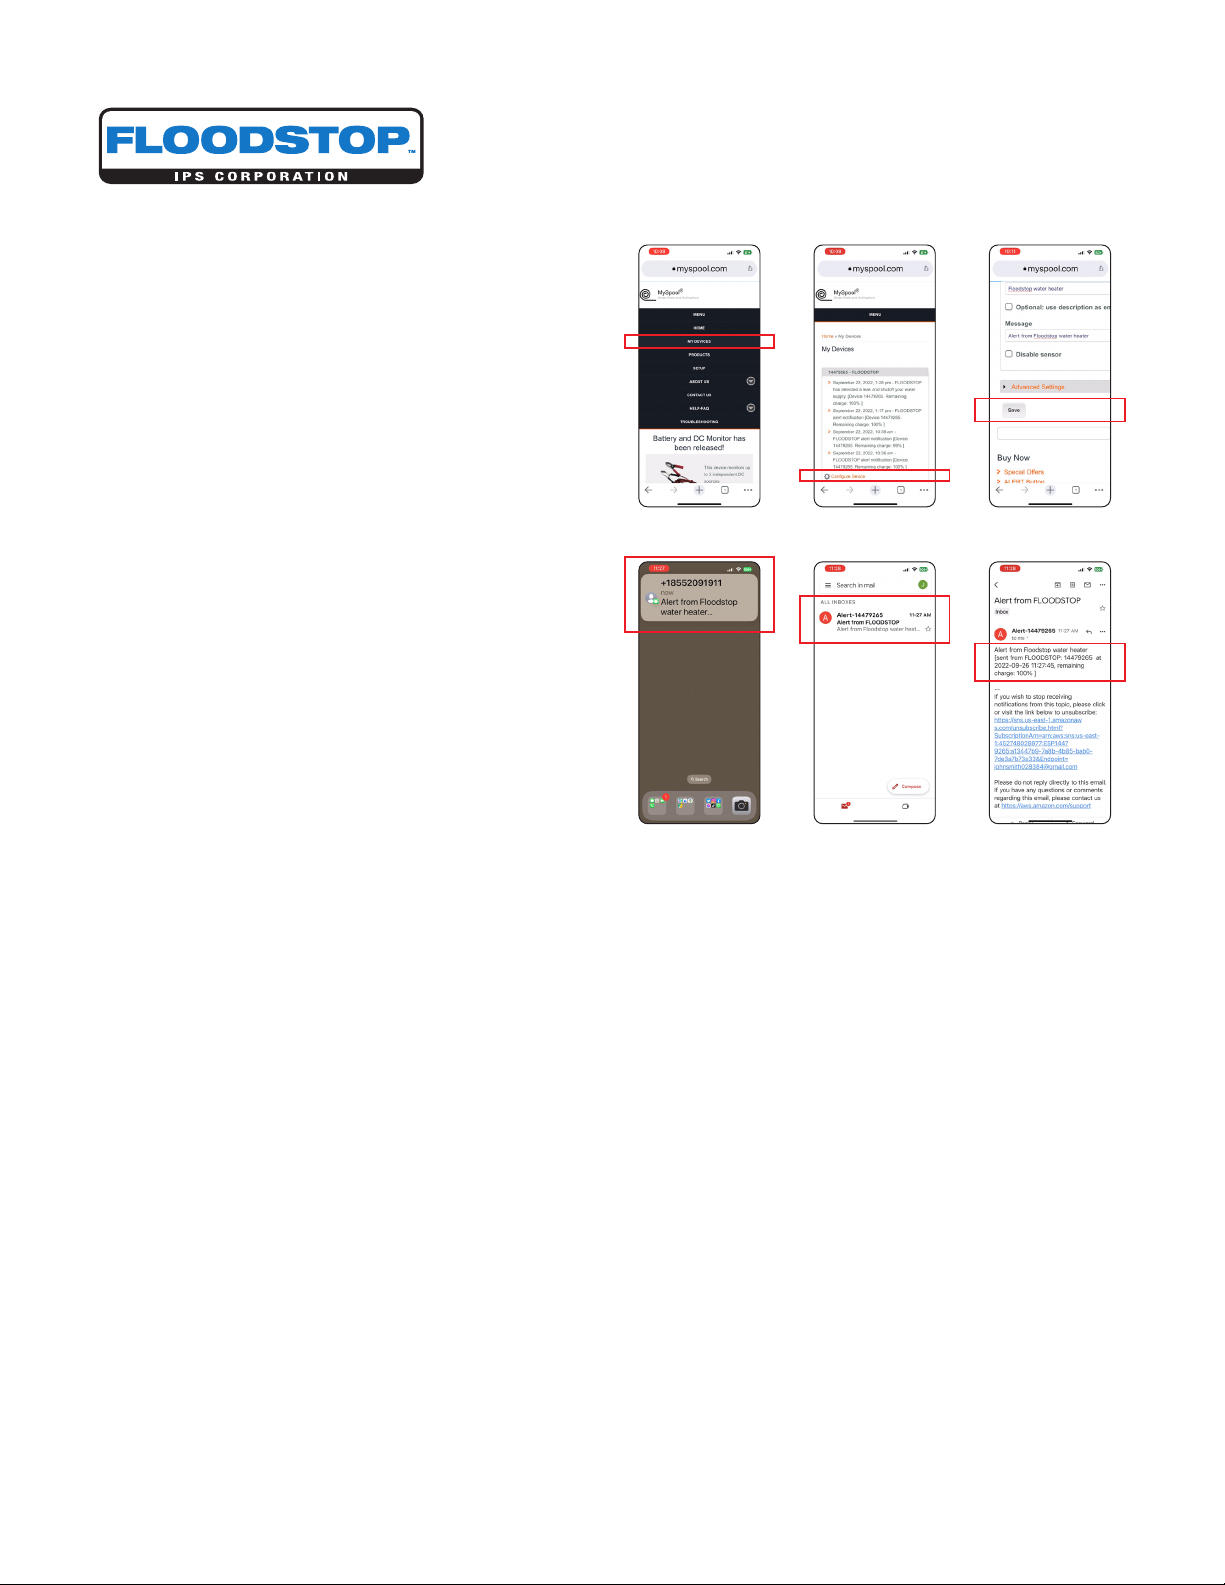
the menu. See Image 10.
24. Click Congure Device. See Image 11.
25. Enter an e-mail address and phone number where you would like
to receive notications.
26. If applicable, select the time zone and active times when you
would like to receive SMS notications.
27. Give the WiFi Module a description and alert message.
28. Click "SAVE". See Image 12.
Floodstop Notications
29. When a leak is detected, the WiFi module will send a notication to
the device that is set up in the myspool.com account. See Images
13 and 14.
30. Notications will show the date, time, and battery life
(if applicable) for when the leak was detected. See Image 15.
Image 10 Image 11 Image 12
Image 13 Image 14 Image 15
 Loading...