

Floeter AirBoy Nano3 Operating Instructions Manual
nano3 - OPERATING INSTRUCTIONS

OPERATING INSTRUCTIONS
1
Contents
Contents 1
Safety guidelines 2
Air cushion types 3
Machine overview 4
Technical data 4
Buttons introduction 5
Accessories 5
Operating device 6
Operating setting details 9
Parameter setting guidance 10
Maintenance Notes 11
Consumables and abrasion accessories declaration 15
Failure Code 16
Options and expandability 19
Support and Service 20
Document version 27.11.2018

OPERATING INSTRUCTIONS
2
Safety guidelines
Please read the safety guidelines and operating instructions closely before using the
machine.
- Turn off the machine and disconnect power before opening the machine or performing
any repair or maintenance work on the machine.
- Switch off the machine if it will not be used for an extended period of time.
- Do not insert any objects into the machine when it is connected to power.
- To prevent the risk of electric shock, ensure that the machine does not come into contact
with liquids.
- Do not operate the machine without the covers for the machine components.
- Keep hair and loose clothing away from the film feed mechanism.
- Place the machine only on surfaces that are adequately large, stable, flat, and horizontal.
This machine is designed for safe operation in compliance with the use, instructions, and
guidelines specified in these operating instruction.
All persons who use this machine must be familiar with the content of
these operating instructions and must carefully follow the safety
guidelines.
FLOETER shall not be responsible for damage resulting from improper use of the machine
or non-observance of the safety guidelines.

OPERATING INSTRUCTIONS
3
Air cushion types
Our standard version – Polyethylene 20 µm or Bio (home-compostable)
Type 7.1 AirWave air cushion filler 100 x 210 mm
Ideal for filling small voids and for use as an intermediate layer
Type 8.3 AirWave wrapper 420mm 4 chambers
4 chambers for use as an intermediate layer, wrapping, and
envelope

OPERATING INSTRUCTIONS
4
Machine overview
1. AC power cable
2. Power switch
3. Control panel
4. Feeding roller
5. Tension column A
6. Tension column B
7. Roll film tension
8. Air nozzle
9. Protecting cover A
10. Protecting cover B
11. Puller A
12. Sealing wheel B
13. Conveyor wheels C/D
14. High temperature belt
15. Knife/Blade
Technical data
Power supply: AC100-240V 1.6A 50/60Hz
Power consumption: 60 W
Production speed: 4 m / min
Weight: 2,5 kg
Dimensions (l / w / h): 430 / 190 / 195 mm
OPERATING INSTRUCTIONS
5
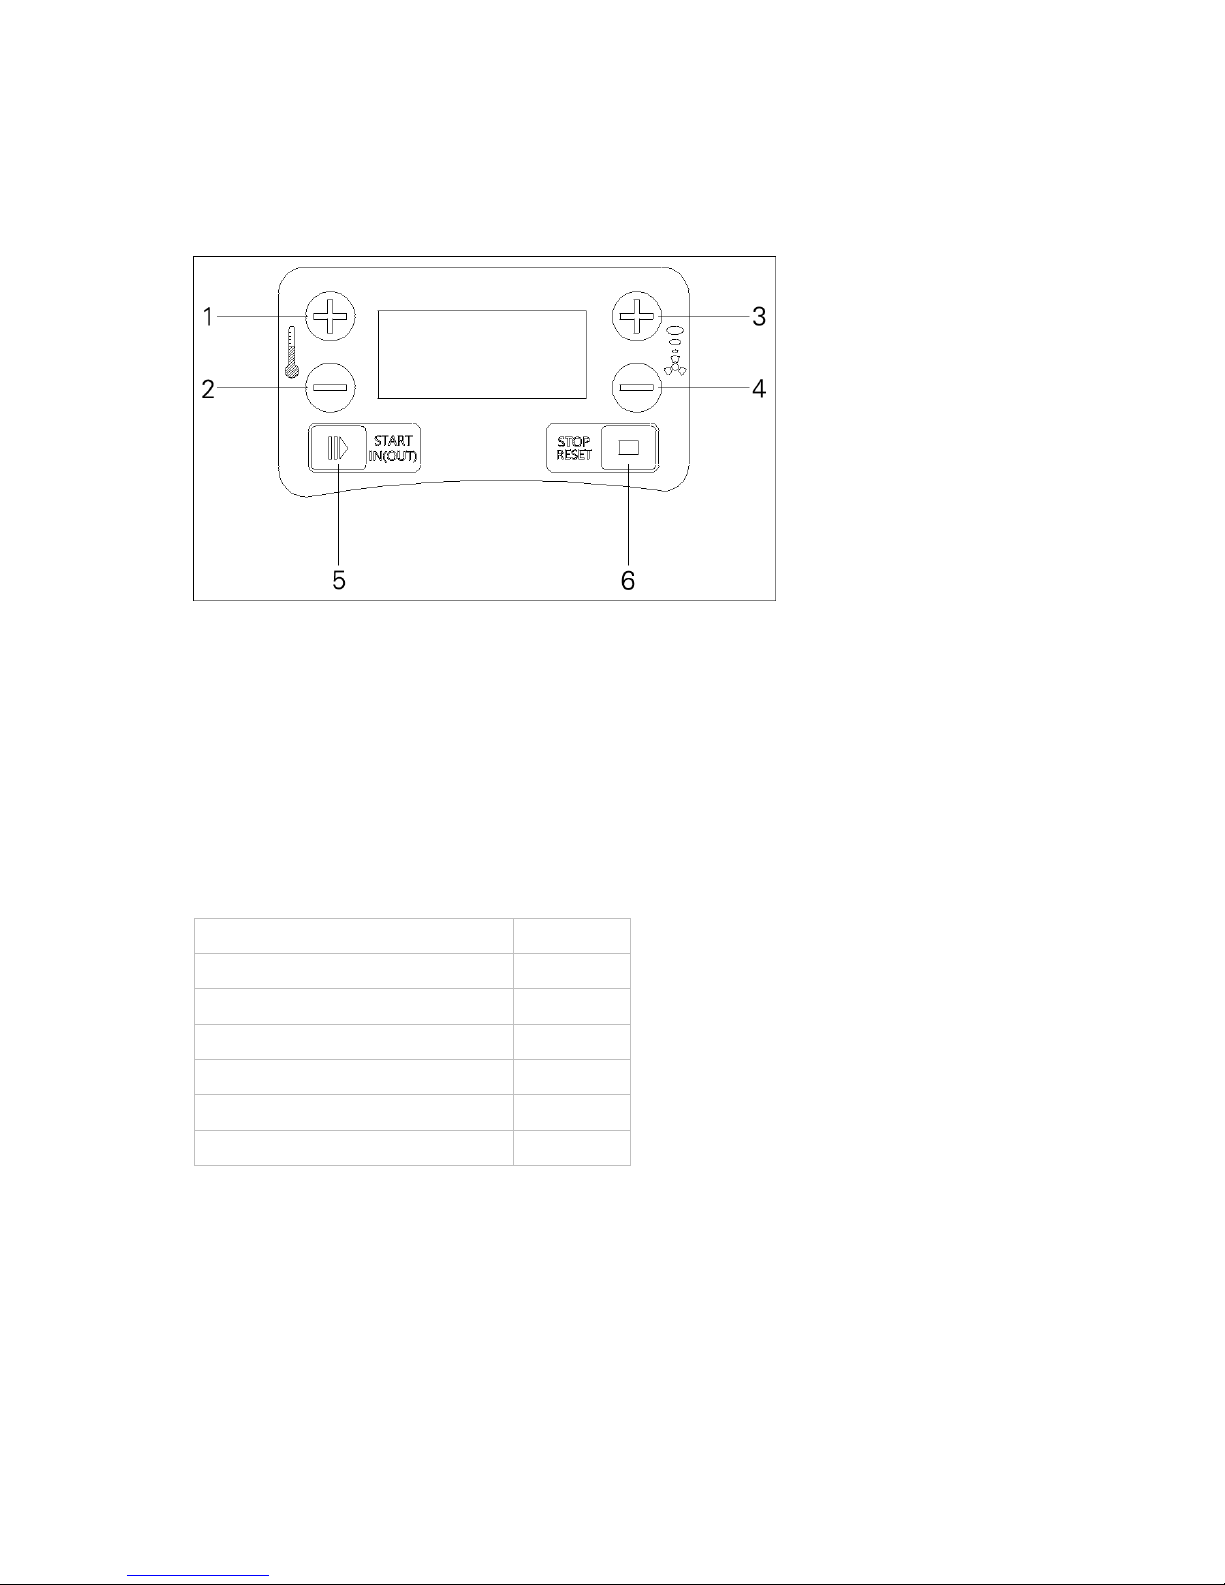
Buttons introduction
1. Temperature "+" 01~30 level
2. Temperature "-" 30~01 level
3. Air Volume "+" 01~40 level
4. Air Volume "-" 01~40 level
5. Start / Enter Film (press long time)
6. Pause / Adjust time (press long time)
Accessories
Name
Quantity
nano3 Machine
1
AC power plug
1
User manual
1
Knives / Blades
2
Spare belts
2
Pins
4
OPERATING INSTRUCTIONS
6
Operating device
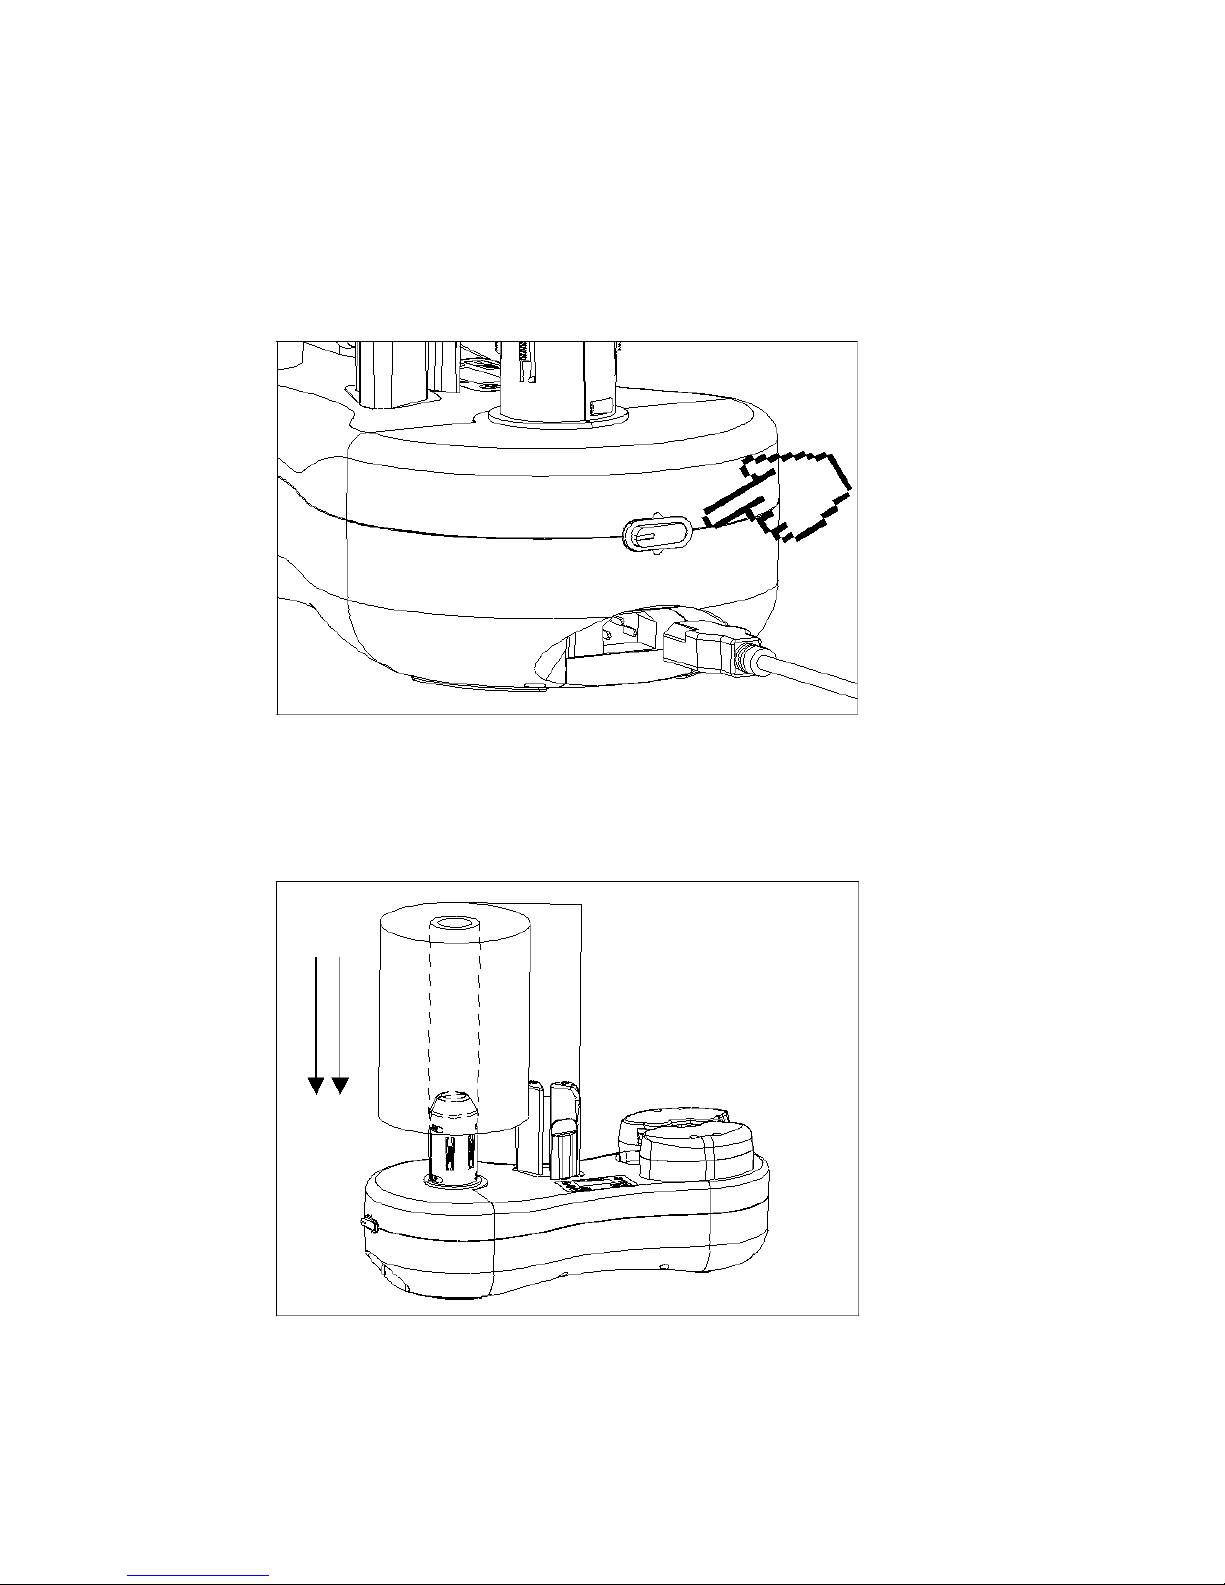
1. Turn on the power switch
Connect the power cable and turn on the power switch
2. Load in the air cushion film
Load the film roll into the feeding roller and pass the film through with the air
channel side down, pull film in from the right side of tension column A,
then pull out from the middle of guide tension column B and roll film tension.
 Loading...