

Flitework Extra 300LPX Instructions Manual
- 1 -
...live to fly!
Instruction manual

- 2 -
· Wingspan 2600 mm
· Length 2400 mm
· Wing area without 112 dm²
elevator
· Take off weight 10.300 g
with 12s5000 and
Flitework TB-5000
· Electric power system TB-5000
· Gas engine DLE 110
Technical data:

- 3 -
Congratulations for purchasing the Flitework Extra 300LPX. We say thanks for your trust and we wish you a
lot of happy flights with your new Extra 300 LPX.
ATTENTION PLEASE!
Remote controlled model planes are not a toy! For assembling, flying and servicing such models, you need a
high grade of technical comprehension and liability.
Careless assembling and operation may cause personal and material damage.
Because the Flitework GmbH has no influence on assembly, RC installation, operation and servicing of the
flight device, any liability is rejected under explicit advice to these dangers.
Usefull tools and adhesives:
· Hobbyknife
· Philips screw driver
· Drill bit set
· Wrench set
· Allen wrench set
· CA glue
· 10-min Epoxy glue
· PU glue
· Locking agent (b lue)
· Double sided adhesive tape
Recommended accessories:
1 x Motor set T-Boost 5000 Order No.: 0800-TB5000S
1 x Spinner 115mm
4 x Aileron servos with 100 N set force Order No.: 007-4020M
2 x Elevator servo with 100 N set force Order No.: 007-4020M
2 x Lipo-battery 6s 5000mAh 25C Order No.: 018-5006
1 x 5-6 channel receiver
Before assembling, please check the completeness and the accuracy of the model kit. Partially built models
are excluded from the right of replacement.
For the purposes of quality improvement we reserve ourselves changes of the technical implementation
without any announcement.
The current instruction manual should be support for the assembling of the model. The shown pictures and
hints are without any commitment. Legal effects cannot be deducted from this manual.
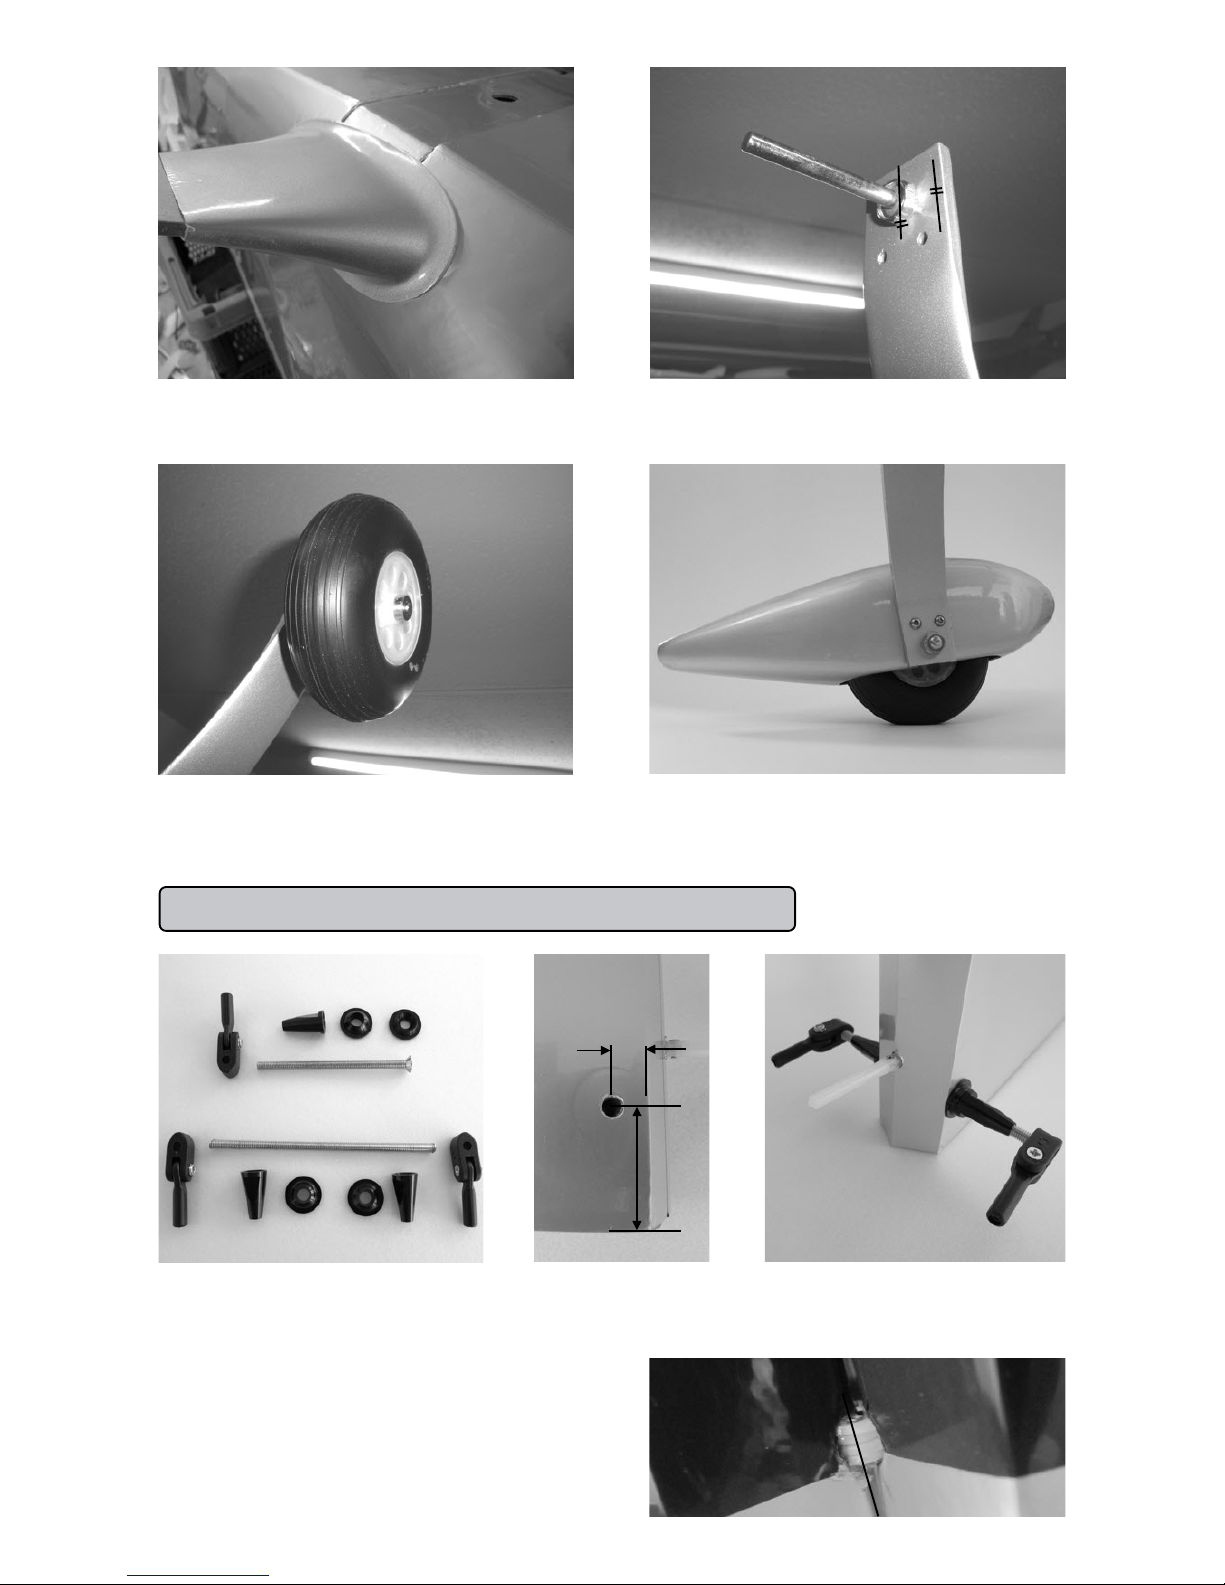
Screw the aluminium gear bow into the slot in the fuselage, using M5 screws. Afterward mount the gear cover
with the central M5 screw. Adapt the Fairings to the fuselage and use doublesided adhesive tape to fix the
fairings against the body.
Instead of the tape you can use 2 mm wood screws.
Assembling the main gear:
- 4 -
To fit the fairings with adhesive tape against the
body is normally enough.
Screw the wheel hub into the gear bow and take
care, that the edges of the hex head are parallel to
the edges of the bow.
Place the wheel with the adjusting rings on the
shaft, that it is in the middle of the wheel pants.
Screw the wheel pants with M3 screws to the gear
bow. Look for a parallel alignment of the pants!
Installing the rudder:
The lever parts of Extra 300 LPX consists of high
quality aluminium-, steel- and plastic parts. The
lever system is adjustable stepless. Very important is, to make the 5 mm hole for the M5 bolt in
correct position and right angular, using a box
column drill. The lever system is able to be adapted stepless to any servo angel. The installation of
the lever system can be made before or after
glueing the hinges into the rudder. The lever
system can be mounted or dismounted any time.
During glueing the hinges, look for the correct
adjustment of the axis.
Axis direction !!
8mm
28mm
 Loading...