

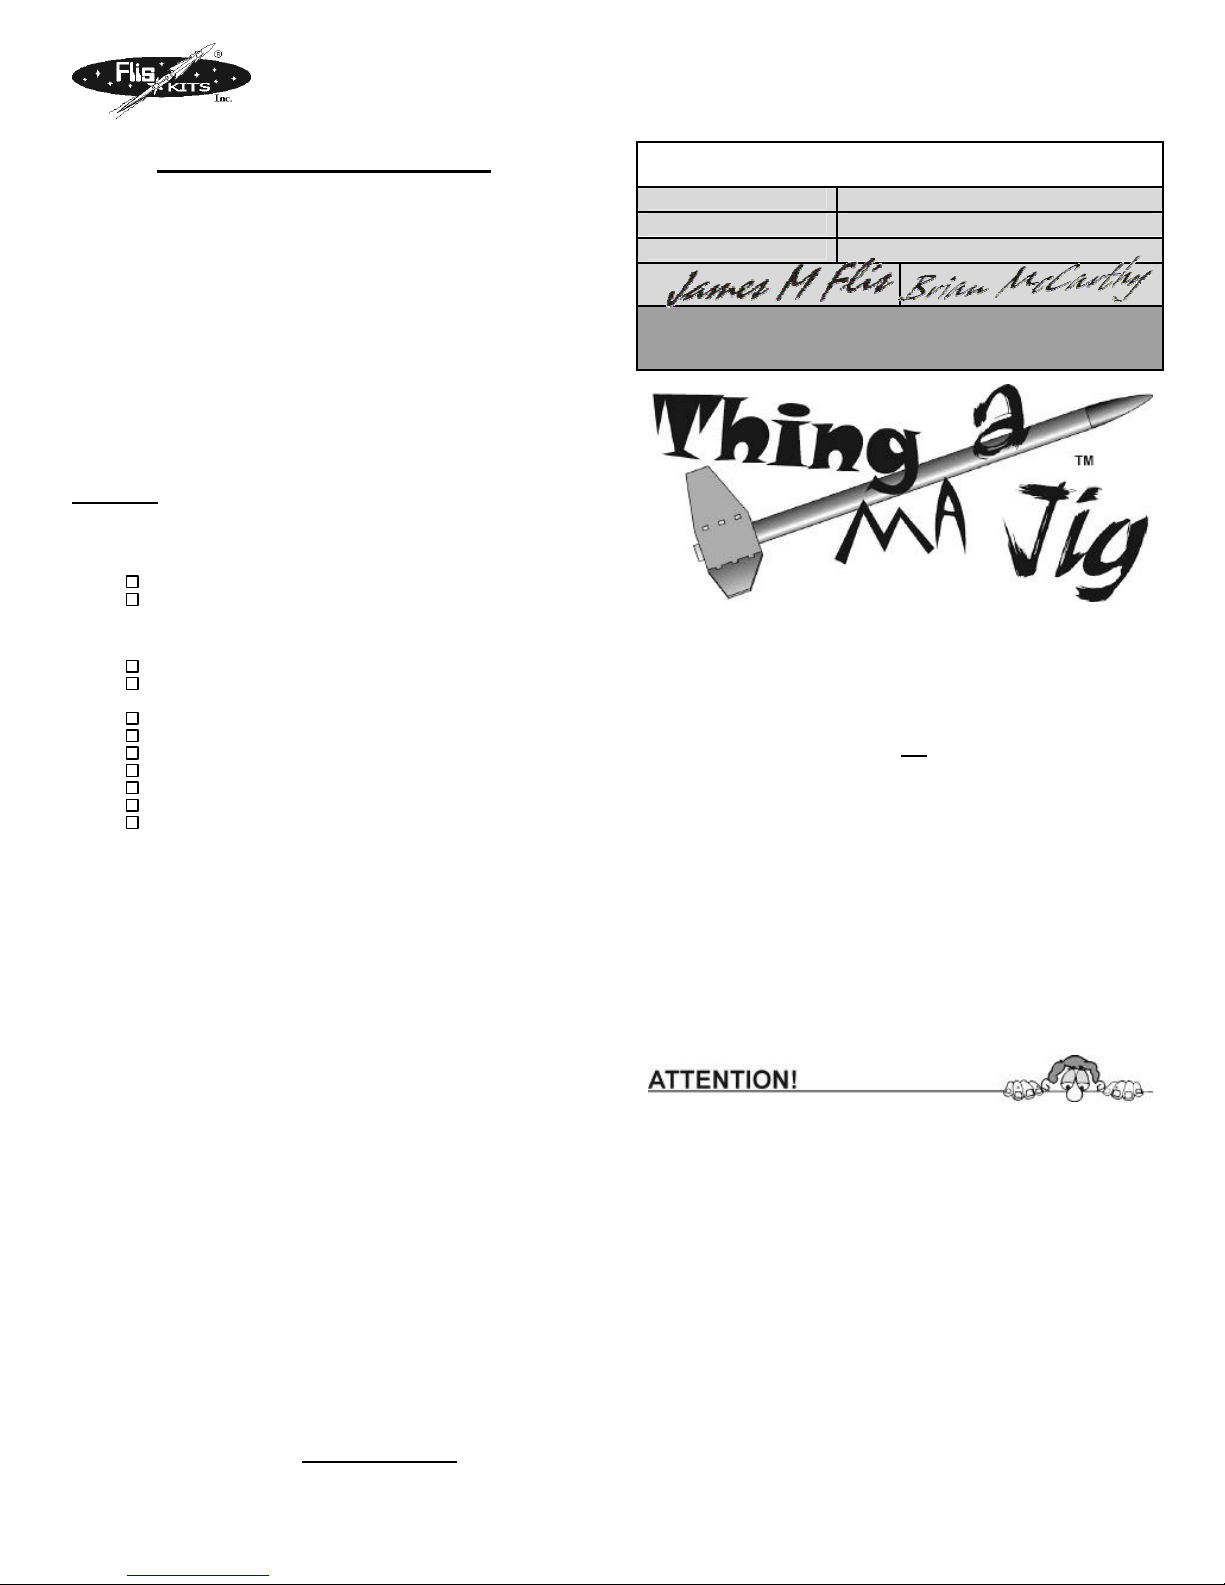
FlisKits Thing-a-ma-Jig Assembly Instructions Manual
Thing-a-ma-Jig Finishing
To “Finish” a model means to apply paint and other decorations to
complete the look of your model. Meaning to “apply a finish”. That is what
we will discuss in this section.
Applying a finish (painting) to your model can be a simple or a complex
process depending on the look that you want, your skill level and how much
time you wish to spend on this part of your model build activity. Once
assembled, you can spend as little as 20 minutes to as much as 10 days
applying the finish to a model the size of the Thing-a-ma-Jig.
This section will talk about the simpler approach to finishing your model.
These lessons will provide you with the experience you will need as you
advance and move on to the more complex finishing methods.
Read each step carefully. Don’t be shy about asking an adult for help in
understanding how to perform a step. This will go a long way to helping
you learn the tricks of creating a beautiful model!
Finishing:
Since the Thing-a-ma-Jig is made from paper, cardboard and wood, you will
need paints and supplies designed for these materials. A good beginning
list of finishing materials could look like this:
Your imagination (ALWAYS first on my list!)
Sand paper (200, 400 and 600 grit) (The grit number on sand
paper tells you how many grains of sand there are along every
inch. So 600 grit paper has 600 tiny grains of sand for every
inch. The higher the number the finer the sandpaper.)
Wood Glue (the yellow glue)
Water based art paints (Spray paints and acrylics will be used
when you have gained some additional experience).
Magic Markers (These can be used WITH or INSTEAD of paint)
Stickers (These can really help dress up your model!)
Paint brushes.
Old clothes (do NOT ruin your good clothes!)
A cup of water (for cleaning your brushes)
Thick layers of newspapers (to protect your table)
Soap, water, and paper towels for clean up.
1. To begin, carefully and lightly sand your fins. The balsawood fins may
have little fibers (hairs) that get pulled up from the wood. Sanding
them lightly will reduce these. You may also wish to sand off the tips
of the fin tabs that stick through the fins on the Fin Unit. Sand these
until they are even with the surface of the fin.
2. Check the glue filets you applied in Step 27. When glue dries it can
shrink, leaving holes in glue filets. If this has happened, apply another
thin fillet to try to cover these holes.
3. If you wish, you can choose to “seal” all of the balsa wood parts of
your model. There are many methods that can be used. Ask your
hobby dealer or hardware store for suitable wood sealers and how to
apply them. This helps to provide a very smooth finish to your fins
before painting them, but is not required.
4. Select the colors you want to use. Starting with the lightest color first,
paint your rocket any way you would like. It is usually easier to paint
your entire model one light color (yellow, for example) and then when
it is dry, add other darker colors (like blue or red) on top of the yellow.
5. Be sure to clean your brush completely as you change colors.
6. Remember that wide brushes are good for large areas (body tubes
and the flat parts of the fins). Narrow (thin) brushes are better for
smaller areas (the edges of the fins, launch lug, etc) and details (small
lettering, windows, etc)
7. Be sure to clean up all of your tools and your work space when done.
Be sure that all paint containers are closed as well as the glue bottle.
Take your time and enjoy the painting part of your model. The most perfect
looking model is one that expresses YOUR imagination and YOUR skills.
Your first rocket may or may not look “pretty” to you. However you will
appreciate how each new rocket looks a little bit better than the one before
as you gain skill and experience. If you want to explore more complex
finishing methods, check out the enclosed Hints-n-Tips sheet.
We hope you enjoy your Thing-a-ma-Jig!
Keep watch for more exciting rocket kits from FlisKits on
our web site http://fliskits.com/
? 2006,FlisKits, Inc., All rights reserved - Kevlar® is a registered trademark of Dupont
Engineering Directive
From:
Vehicle(s):
Effective Date:
Chief Ordinance Engineer
Effective immediately, the attached procedures will be used in
the assembly and deployment of Launch Vehicle SP015,
known as “Thing-a-ma-Jig”.
Assembly Instructions
A note to kids and
grown ups who want to be kids again!
OK, now we are going to have FUN! The Thing-a-ma-Jig has
a “Thing” on top and a “Jig” on the bottom with a bunch of
parts in between that you could call “a-ma”…but we won’t.?
Building and flying a model rocket is FUN but it takes careful
work for it to fly properly. When you are building your Thing-a-
ma-Jig, be sure to:
READ each step through carefully as you come to it.
LOOK at each diagram then follow the directions from top to
bottom as you build.
STOP and ask for help when you aren’t sure what to do. It is
much better to ask a question than to make a mistake that
could be avoided.
When you see this little guy looking over the figure it means
that the step needs extra attention from you and maybe even
help from and adult. That might be because you are using a
tool like a hobby knife which could be a safety hazard if not
handled properly. It also could mean it’s very important to do
that step right the first time.
So, instead of reading the back of a cereal box while eating
breakfast, read these instructions and get yourself ready to
have gobs of fun building -and then flying- your Thing-a-ma-
Jig.
Be sure to read the front packaging card, which has lots of
interesting stuff about your rocket on it. And don’t miss the
Model Rocket Safety Code and information about the
National Association of Rocketry (NAR) on the back of the
enclosed warranty card.
Office of Chief Engineer
SP015
31-March-2006
Chief Deployment Engineer
Flying Model Rocket
Recommended Motors:
A8-3. B4-2, B6-4, C6-5
Thing-a-ma-Jig Instruction Sheet: INS-SP015
Note to Parents, Teachers, and Leaders
The Thing-a-ma-Jig is a model rocket kit that is designed with
youngsters in mind.
?? As far as model rockets go, Thing-a-ma-Jig
assembly is easy!
?? Instructions for this kit may look long, but that is
because steps are broken down and carefully
explained in kid-friendly terms.
?? There are some steps (using cutting tools, knot tying,
critical assembly steps) that may require adult
assistance, depending on the age and experience of
the child. These are highlighted in the instructions
with an adult looking over the step.
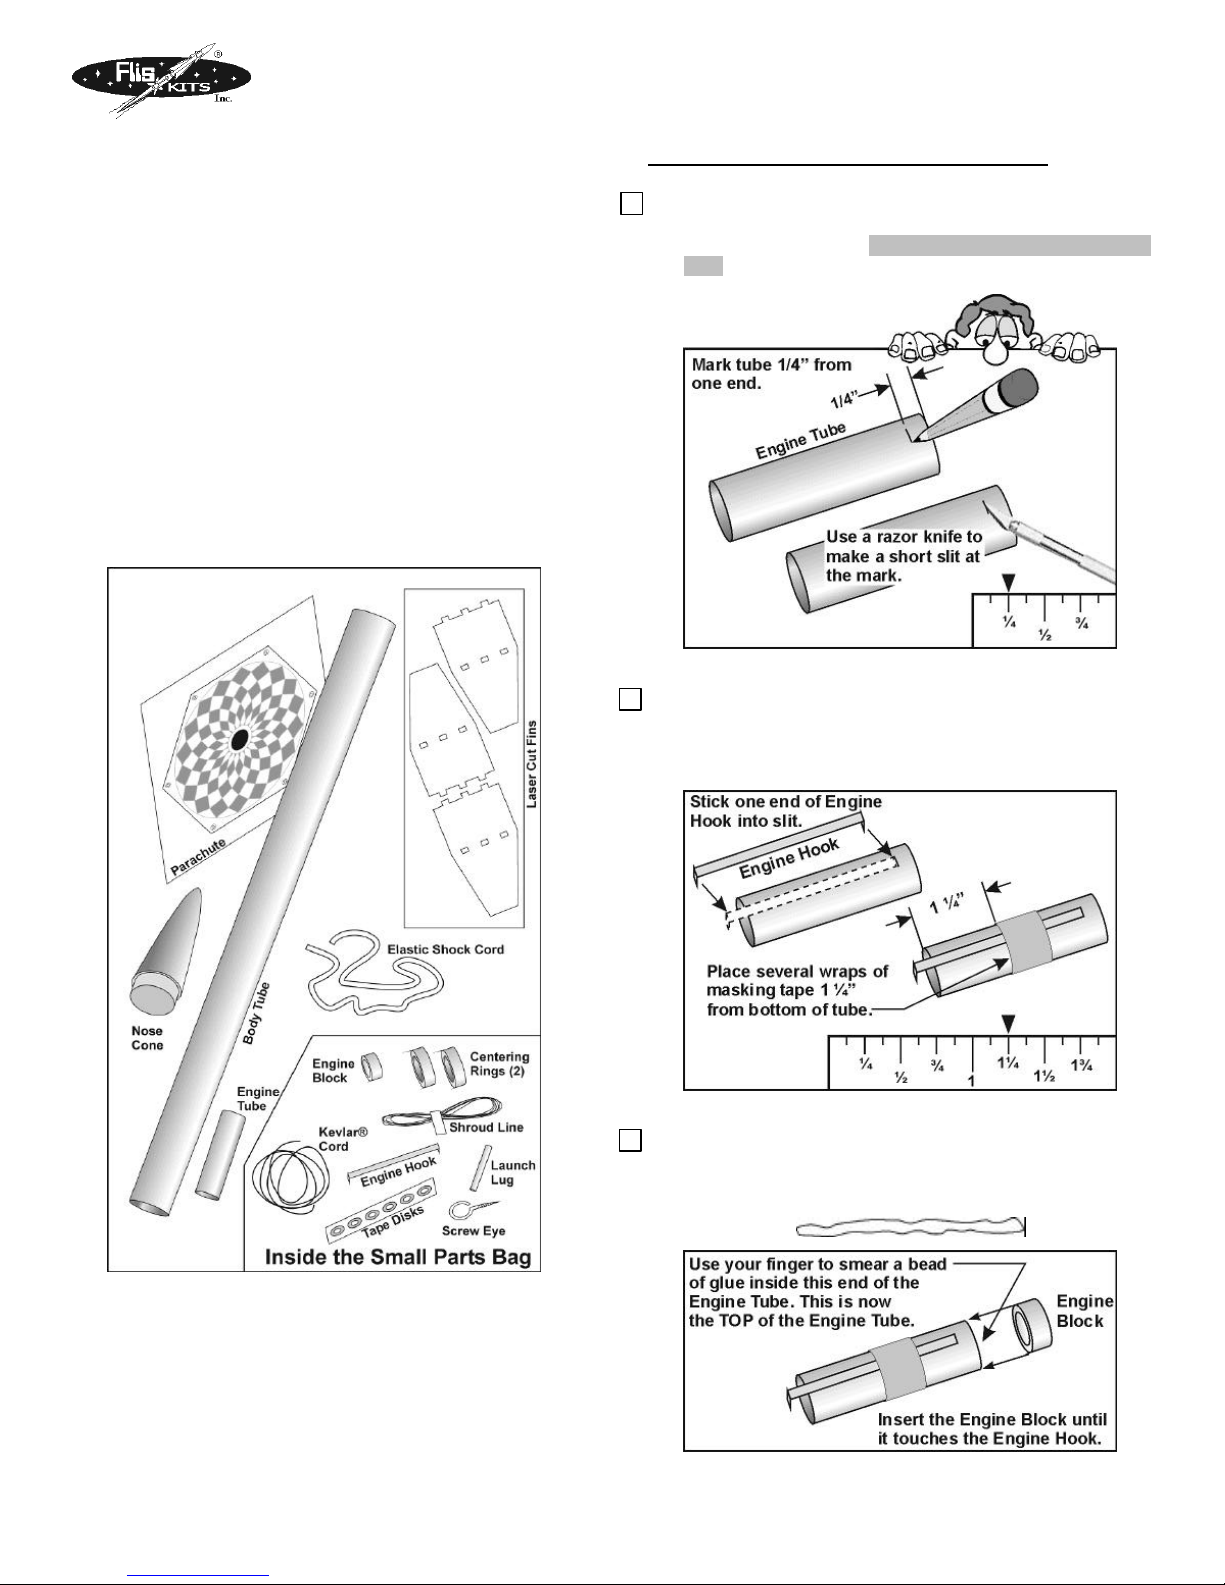
Thing-a-ma-Jig Kit Contents:
The figure below shows a picture of each of the parts in your
Thing-a-ma-Jig kit. Take a minute to find these parts and
become familiar with their names.
Steps 1-7 Engine Mount Construction
1. Make a mark on the Engine Tube ¼” from one end, as
shown in Figure 1. Using a razor knife, cut a short slit in
the tube, at this mark. ADULTS may wish to help with this
step. (Thing-a-ma-FACT: The Engine Tube is used to hold the
model rocket motor in place during flight)
Figure 1
2. Locate the Engine Hook and insert one end of it into the
slit you made as shown in Figure 2. (Thing-a-ma-FACT: The
Engine Hook is used to help hold the rocket motor inside the
engine tube)
Required for assembly and finishing
To properly assemble the Thing-a-ma-Jig you will need the
following tools and supplies: White glue (Elmer’s School Glue
is not recommended as it is too thin) (NOTE: Do NOT use Hot
Glue!), pencil, ruler, scissors, masking tape, hobby knife, and a
hole punch.
For finishing see the section on finishing (on the first page).
? 2006,FlisKits, Inc., All rights reserved - Kevlar® is a registered trademark of Dupont
Figure 2
3. Figure 3 shows you how to glue in the Engine Block.
(Thing-a-ma-FACT: The Engine Block blocks the motor to keep
it from shooting up into the rocket during flight. A Bead of Glue is
a wide line of glue, kind of like the drawing below.)
Figure 3
Thing-a-ma-Jig Instruction Sheet: INS-SP015

4. Review Figure 4 to glue on one of the two Centering
Rings. (Thing-a-ma-FACT: The Centering Rings are used to
hold the engine tube in the center of the body tube.)
Figure 4
5. Referring to Figure 5, carefully cut out a 1/8” section from
the other Centering Ring. Scissors can be used.
ADULTS may wish to help with this step.
7. Find the piece of yellow Kevlar® Cord (string). Securely
tie this to the top of the Engine Mount as shown in
Figure 7.
(Thing-a-ma-FACT: Kevlar® Cord is a very strong thread that is
used here to provide a strong connection between the bottom of
the rocket and the nose cone. Kevlar® thread is SO strong that it
is also used to make bullet proof vests!)
Figure 7
Steps 8-12 Fin Assembly
8. Figure 8 shows you many important details about the
3 fins that are provided with your model rocket kit. These
fins were cut with a computer controlled laser beam for an
exact fit! Carefully remove the 3 fins from the sheet of
balsawood and place a small mark at the leading edge of
each fin. (Thing-a-ma-FACT: Fins are used to control the
model’s flight by keeping it pointed straight during flight.)
Figure 5
6. Figure 6 shows how this modified ring is glued to the
engine tube.
Figure 6
? 2006,FlisKits, Inc., All rights reserved - Kevlar® is a registered trademark of Dupont
Figure 8
Thing-a-ma-Jig Instruction Sheet: INS-SP015
 Loading...