

FlisKits Midnight Express Assembly Instructions Manual
Engineering Direc ti v e
From:
From:
Vehicle(s):
Vehicle(s):
Vehicle(s):Vehicle(s):
Effective Da te:
Effective Da te:
Effective Da te:Effective Da te:
Chief Ordinance Engineer
From:From:
Office of Chief Engineer
FRE01
26-March-2002
Chief Deployment Engineer
Effective immediately, the attached procedures will be used in
the assembly and deployment of Launch Vehicle FRE01,
known as “Midnight Express”.
Recommended Motors: A6-4, A8-3, B6-4, C6-5
Flying Model Rocket
Assembly Instructions
The Midnight Express model rocket kit is a FREE download kit available from FlisKits, Inc.
These instructions, and available pattern sheets are copyright 2003, FlisKits, Inc. and can not
be reproduced in any way, by any means, electronic or otherwise without the expressed
written permission of FlisKits, Inc.
The Midnight Express will provide you with hours of building and
flying fun while showing that very non-conventional materials can be
used to build a very conventional looking model rocket. Other than the
recovery device (Shock Cord and Streamer), there are NO standard
model rocket materials used in this kit. The entire model (body tube,
fins, launch lug and nose cone) is made entirely from a single sheet of
card stock!
The Midnight Express will show you techniques that you can apply to
other models, both kits and scratch built models. You will learn how to
fabricate tubes, cones and fins, each with surprising strength, from
very simple and readily available materials.
One set of patterns comes pre-printed with the Midnight Express
artwork. A second pattern sheet is available that has just the outline of
all of the parts needed for this model. You are encouraged to use your
imagination and decorate this model in any way you choose! You may
wish to color/decorate this other kit before assembly, as you may find it
easier to do so while the parts are flat (something you can’t do with
conventional model rocketry materials!) You can use paints, markers,
pencils and even crayons to get just the look you want for your paper
model rocket!
To construct your Midnight Express, you will need the following:
Pencil, razor knife, white glue, 1/8” dowel (for shaping launch lug),
short length of BT-5 body tube or other narrow tube, 3-4 expended
engine casings (for shaping the body tube), patience and your
imagination! You will also need the following components to add to
these patterns, to complete this FREE kit:
o 12” – 18” Shock Cord material
o 12” Cotton Button Thread
o Masking Tape or tape disk
o 18” Crepe Paper Streamer
o Clay Weight or other nose weight material
Please read these instructions through, to become familiar with each
step, before beginning construction. You must go to http://fliskits.com/
and go to the Products section to obtain the pattern sheets for the
Midnight Express (Under Sport rockets)
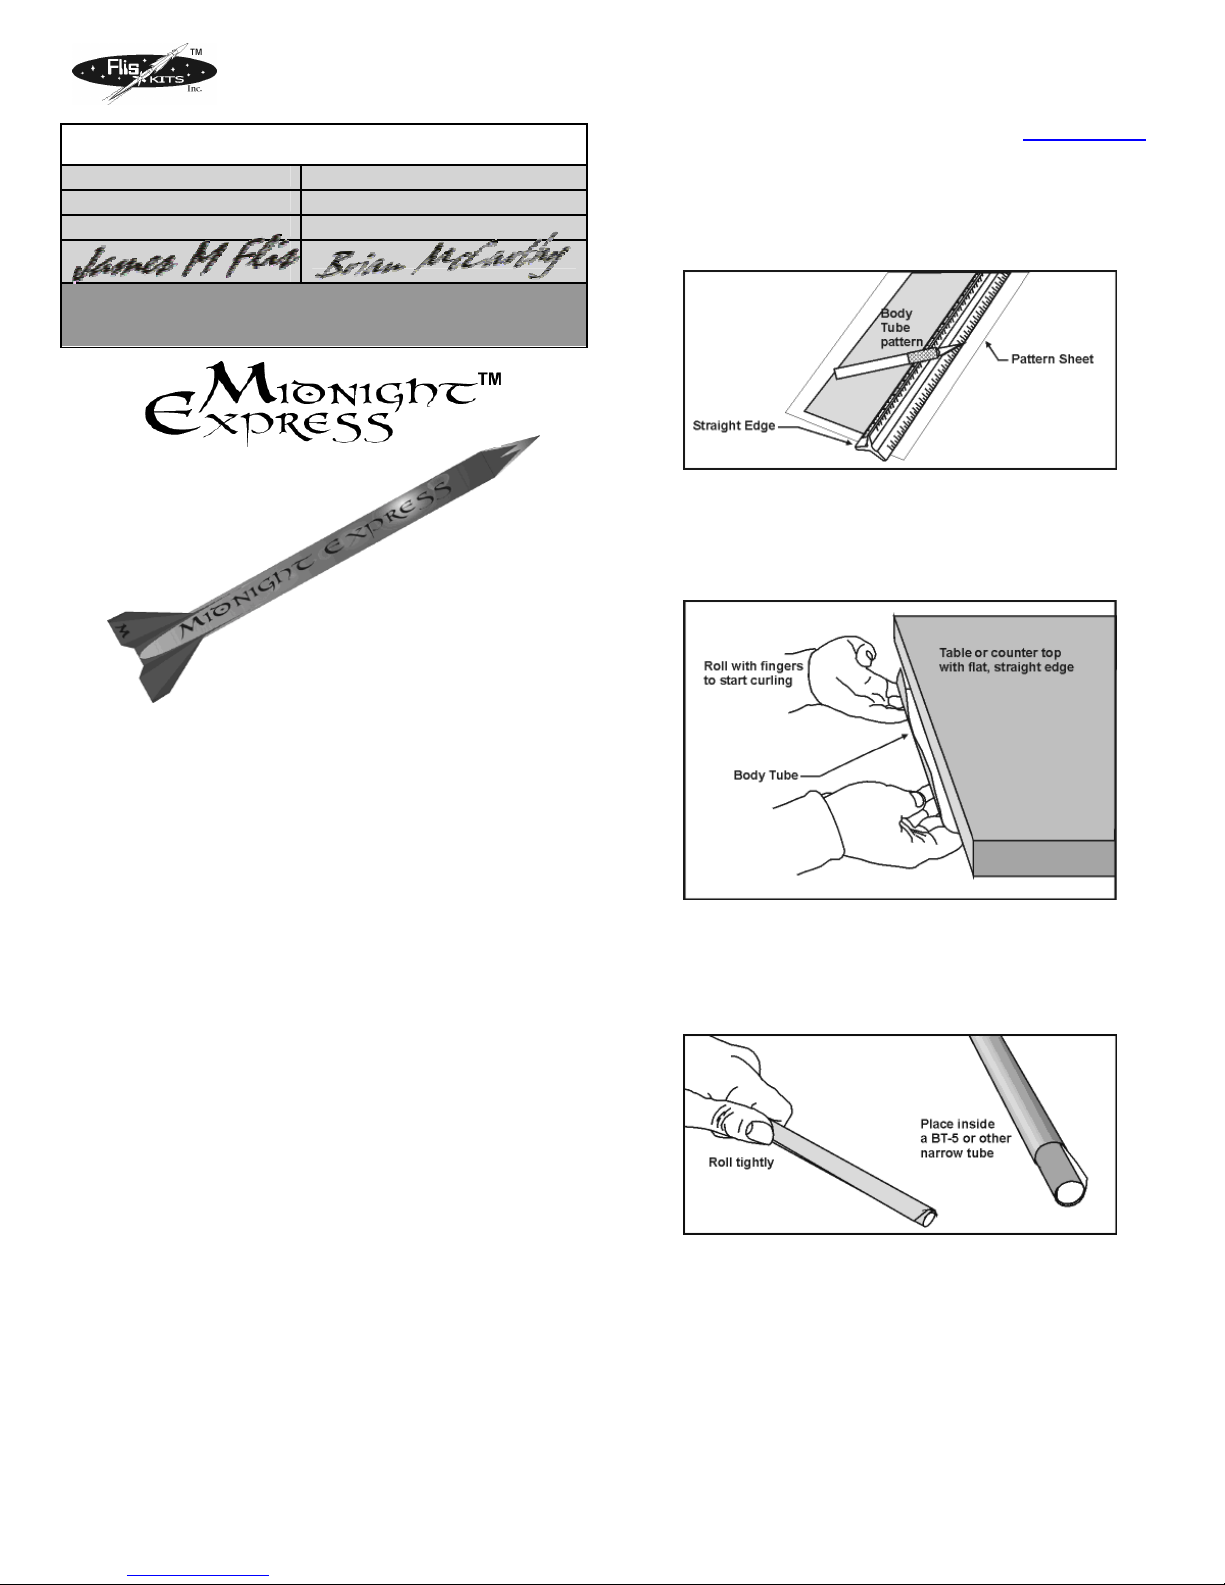
1. Referring to Figure 1, use a straight edge and razor knife to cut
out the Body Tube from the provided pattern.
Figure 1
2. Resting the pattern on your fingers, print side down, press and roll
the body tube, with the unprinted side against a table edge, as
shown in Figure 2. This will cause the paper to begin to curl in
the direction needed for assembly.
Figure 2
3. Tightly roll the Body Tube until it is narrow enough to fit INSIDE a
narrow tube (like a BT-5 body tube). Place this inside the narrow
tube, as shown in Figure 3, and set aside. This will help it to
retain its shape as you go on to the next few steps.
Figure 3
4. Using your razor knife cut out the Nose Cone. (NOTE: Take your
time while working the Nose Cone into shape for gluing. A
second Nose Cone is provided should the first one not come out
right) Referring to Figure 4, set the curl in the nose cone, with the
edge of a table, as you did for the Body Tube. After the curl has
begun, continue rolling the Nose Cone between your fingers,
bringing the edges together, until the Nose Cone can hold its
shape.
2003, FlisKits, Inc., All rights reserved
Midnight Express Instruction Sheet: FK-INS-FRE01
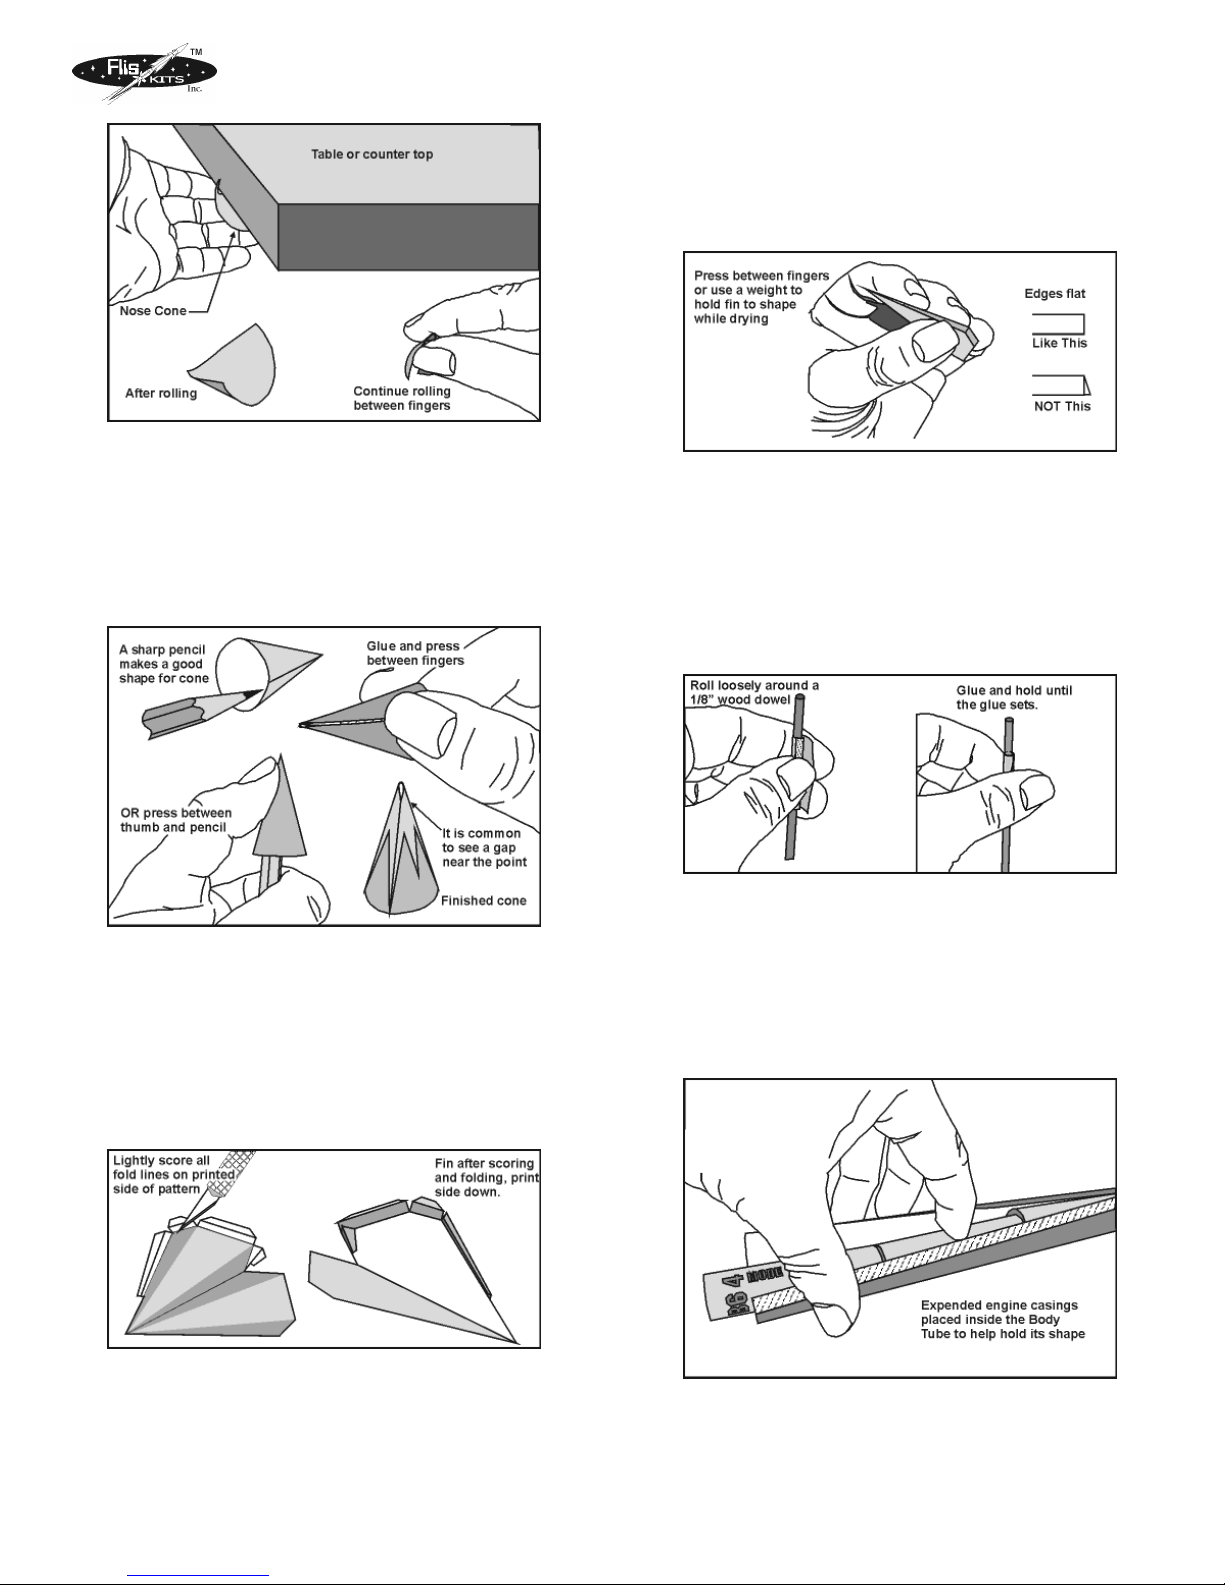
7. Apply a bead of glue on all 4 tabs (gray areas) and form the fin,
compressing it between your fingers to hold its shape as the glue
sets, as shown in Figur e 7. NOTE: Make sure that the edges of
the fin are flat and flush, as shown on the right of Figure 7.
Repeat for the remaining two fins.
Figure 4
5. NOTE: Practice this step WITHOUT glue first. Apply a glue film
to the glue tab and form the Nose Cone by bringing the other
edge over the glue tab as shown in Figure 5. Hold the Nose
Cone to the proper shape between your fingers or, place the point
of a sharp pencil into the Nose Cone and hole with your thumb
(as shown on the left side of Figure 5). Hold until the glue is set.
The finished cone is shown in Figure 5, bottom-right. NOTE: It is
normal to see a small gap or hole at the top of the Nose Cone.
Figure 5
6. Using a straight edge and razor knife, cut out a Fin from the
provided pattern sheet. LIGHTLY score each of the fold lines,
from the printed size, using your knife and straight edge as shown
in Figure 6, on the right. You should have 9 score lines (2 for
each tab and one long one along the center of the Fin. NOTE: Do
NOT cut all the way through the material. Just enough to enable
easy folding along these lines. After scoring, gently fold at each
score line as show on the right of Figure 6. Repeat for the
remaining two fins.
Figure 7
8. Cut out the Launch Lug and begin curling it as you did with the
Body Tube and Nose Cone. After curling, roll the Launch Lug
tightly upon itself to help it retain its shape. Referring to Figure 8,
apply a bead of glue along the glue tab and roll the launch lug
over a 1/8” length wood dowel. Press and hold until the glue has
set. Remove the wood dowel as soon as possible to prevent it
from being glued inside the Launch Lug. NOTE: The Launch Lug
will be larger in diameter than the dowel. Make sure that, as you
wrap the lug around the dowel, that you do so very loosely.
Figure 8
9. Getting back to the Body Tube, remove the Body Tube from the
tube you placed it in from Step 3. You will notice that the Body
Tube will retain its shape. Referring to Figure 9, insert engine
casings into the Body Tube (4 casings will fill the entire Body
Tube and will result in the best construction). Run a bead of glue
along the full length of the glue tab and smooth it out to cover the
whole glue tab. NOTE: Be very careful NOT to get any glue on
the engine casings!
Figure 6
2003, FlisKits, Inc., All rights reserved
Figure 9
10. Carefully line up the edge of the Body Tube along the glue tab
and press into place, on a smooth flat surface. Referring to
Figure 10, roll the Body Tube on the flat surface until the seam is
on the underside, held in place with your fingers and the engine
Midnight Express Instruction Sheet: FK-INS-FRE01
 Loading...