


TruWITNESS Wearer's Quick Guide
What's in the Box
1. TruWITNESS Sensory
2. TruWITNESS Power/Communications/Storage Pack (PCS)
3. Mounting Hardware
4. 'L' and 'T' Cables (L - normal use, T - using a USB charging source.)
5. Wearer's Quick Guide (this document)
1. TruWITNESS SENSORY
The Wearable Sensory includes:
·
Hi-Res Camera
·
User controls
·
User and Ambient Microphones
·
Speaker
·
Gyroscope, Accelerometer
·
Optional attachment hardware, giving flexible wearer options.
Sensory Controls
ALARM
FLIR Logo Button
(Long Press)
EVENT
FLIR Logo Button
(Short Press)
Privacy On/OFF
Top/Bottom
together
2. TruWITNESS PCS
(Power/Communications/Storage Unit)
The Power/Communications/Storage Unit shows:
·
Status Display (OLED)
The PCS display shows the User the unit's key status indicators
- Battery level, Communications status,
On-board Recording status
·
Battery Condition
- when below 20% the user will also get a 'low battery' message
·
Communications Status
- shows 3G/4G status
·
(Reserved for future use)
·
Recording status
- The PCS records continuously (even when in Live mode),
except when the user sets it to 'Privacy'
·
Text Message
- The default message shows the User Name.
Other Status messages listed overleaf.
3. Mounting Hardware
Safety Glasses
Vest/Epaulette
Collar/Cap
1/4" - 20 Fixed
4. 'L' and 'T' Cables
Attaching Sensory to Mount
The mounts use a universal mounting clip, making
the process the same for all types.
Detaching Sensory from Mount
1. Plug the cable into the Sensory.
2. Slide the sensory into the mount with
the bottom toward the release clip (1)
3. Push until there is a click
1. Pull the release clip out, away from the
sensory (1)
2. Push the sensory from the bottom in
the direction of the lens
Note: When mounted, the cable cannot be detached from the sensory unless removed from the mount
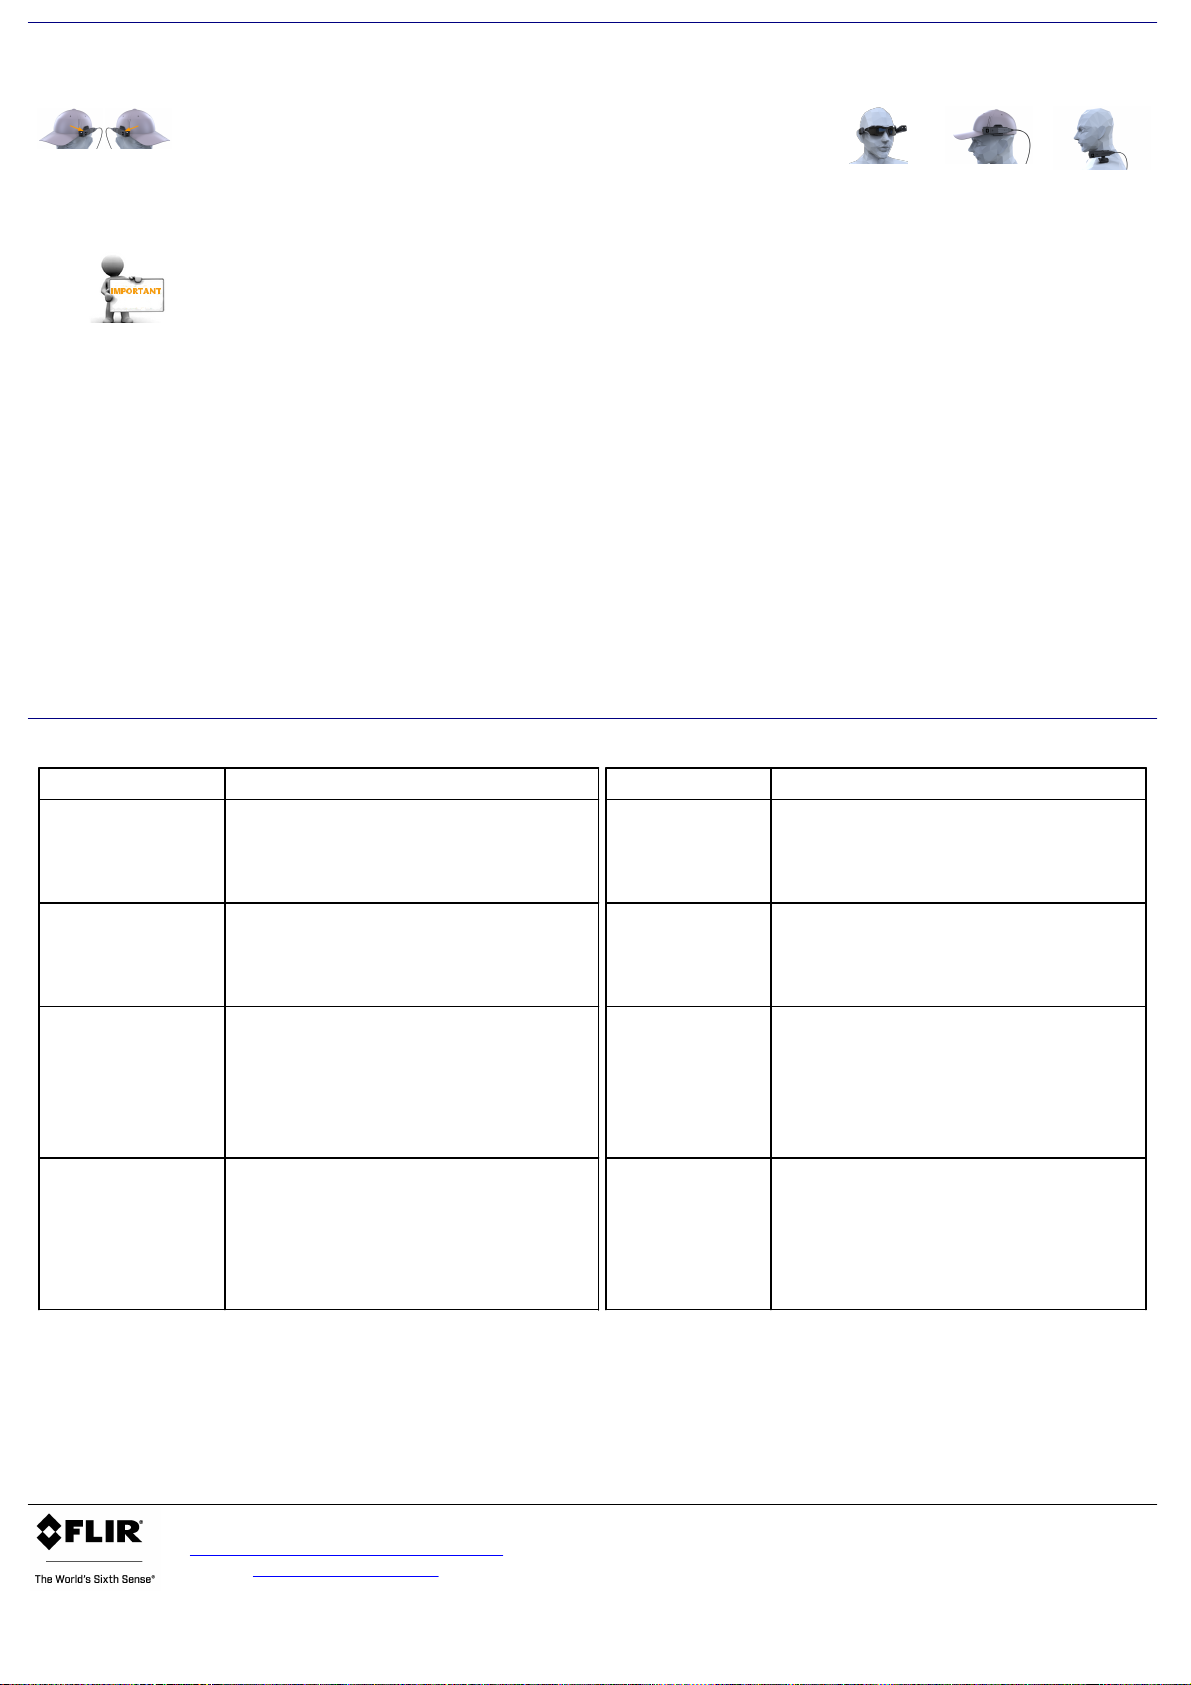
Wearing your Sensory
Glasses
Cap
Shoulder
*Left or Right? The Sensory knows which way is 'up' .
All mounting hardware can be rotated, and therefore can be used on
either the left or right side of the body / head / glasses
- Always mount the Sensory with the Alarm button facing outwards.
Using your SENSORY and PCS
Note: Sensories are assigned to specific users at an Assignment Station, so that all recordings are always
directly associated with that user.
You should always use the specific Sensory that is currently assigned to you.
1. Get a charged PCS from a Charging Hub.
2. Connect the Sensory to the PCS.
Always clamp (or release) the cable from the PCS by pressing the Cable Release buttons.
- The 'L' cable is normally used to attach to the PCS when wearing the Sensory.
- The 'T' cable is for when a Sensory is used as a fixed-mount device, or when external power is needed
(via the large USB connector).
3. The Sensory and PCS will go through a startup cycle as soon as they are connected.
Wait for the version number and your User Name to appear on the PCS screen - this indicates that the unit is assigned
to you, is ready to use, and on-board recording has commenced.
4. If you get a message 'Return PCS to Hub' on startup, do not use that PCS - it needs to be fully recharged and its
recordings uploaded. Return it and request a different PCS.
5. While using the unit, you can trigger Alarms, put the unit in Privacy mode, and adjust the unit Audio.
The sensory controls are shown overleaf.
Text Messages
Message
Meaning
Message
Meaning
Alarm
Alarm End
Long press on Alarm button starts an
Alarm. Repeat to end Alarm.
- Alarm raised in Control Center.
- Control Center starts recording.
Privacy HH:mm
Privacy mode reminder
(Shows every 5 mins while in Privacy
Mode)
Shows time Privacy Mode was started
Event
Event End
Short press on Alarm button starts an
Event. Repeat to end Event.
- Event created without Alarm
- Control Center starts recording
HQ Request
Control Center has requested Live Video
while User in Privacy Mode
Neighbor Event
User is in range of an Alarm from another
User. Buzzer will sound.
Live Stream may be started
Live On
Live Off
HQ initiates Live Streaming:
Message shows for 10 secs,
"Live" LED on Sensory switches on.
When Live streaming ends,
"Off" message shows for 10 secs.
"Live" LED on Sensory switches off.
Privacy Mode
Video is Public
Privacy mode
(To enter Privacy Mode, press both
Volume Up & Down buttons while in
normal mode)
(Repeat to end Privacy Mode)
Low Power
Battery is <20% Recording will continue but Live viewing via
Cloud connection suspended
If charging commences using 'T' cable,
message still remains until unit is charged
back to 25%
Notes:
1. The PCS handles storage and communications, but when the video from the Sensory is shown live or played back later
on the VMS, it remains associated with the assigned User.
2. Users can even use a replacement PCS's during a shift - for example, if their first PCS is low on battery.
The VMS system will correctly identify and splice the recordings from multiple PCSs.
3. Where activated by the system, each user will get an email for each Alarm or Event containing the related recordings,
so that they can be reviewed.
pr oduct.enter pr is e.s uppor t@flir .com
w w w .flir .com /secur ity
TW_Wearer_QG V01a
FLIR System s, Inc.
Tel: +1 888.388-3577
6769 Hollis ter Ave.
Goleta, CA 93117
 Loading...