

Page 1

QUICK START GUIDE
Third Generation
For Android and iOS
Page 2
FLIR ONE PRO QUICK START GUIDE
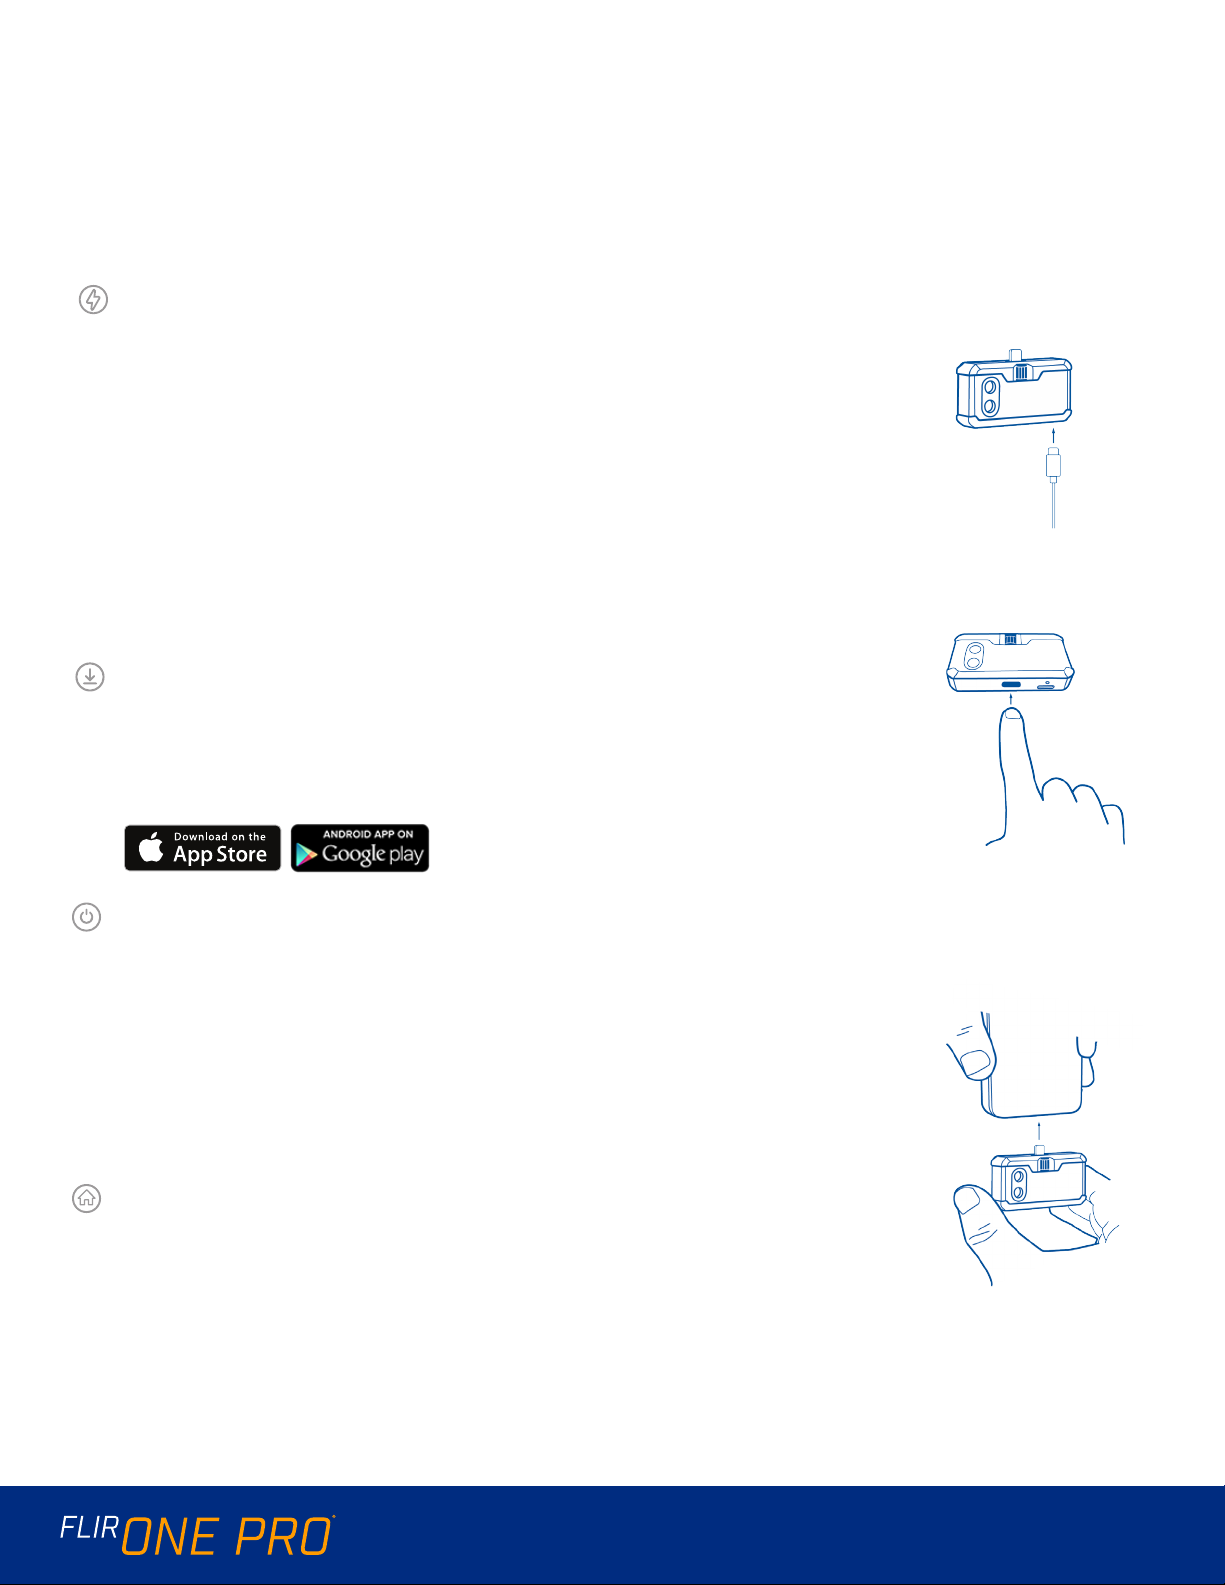
STEP 1
Charge the FLIR ONE Pro with the included USB-C power cable
connected to a 1A power source. The Charge Indicator LED next to
the USB-C connection blinks on and o while the FLIR ONE Pro is
charging and stays on continuously when it is fully charged. It will
take about an hour to completely charge your FLIR ONE Pro. Ensure
the FLIR ONE Pro is fully charged before using it the rst time.
Note: The power cable for the iPhone (with a Lightning connector) will not
work to charge the FLIR ONE Pro iOS model.
STEP 2
Download and install the FLIR ONE app, which is available on the Apple
App Store and Google Play Store. When you start the FLIR ONE app,
the rst-time User Guide will help you get started with the FLIR ONE.
STEP 3
Press the power button on the bottom of the FLIR ONE to turn it
on. The indicator light will turn orange. It will ash green when the
device is ready. If needed, adjust the blue dial of the OneFit™ and
extend the connector to the appropriate length to t through your
smartphone’s protective case. Connect the FLIR ONE to your smart
phone and start the FLIR ONE app. You will be asked to create a user
account with your email address and a password.
STEP 4
Check out the app’s Home screen to access your gallery, get the
latest Tips & Tricks for using your FLIR ONE, share your photos and
videos with the FLIR ONE community, and stay up to date with all
the latest news and promotions from FLIR.
QUICK START GUIDE 2
Page 3

STEP 5
Explore all the Camera features on the FLIR ONE Pro.
COLOR PALETTES
• Tap on the Features icon in the bottom right of the screen
• Choose between 9 dierent color palettes
SPOT METERS AND REGIONS OF INTEREST (ROI)
• Tap on the Spot Meter icon in the top left corner to get a list of
spot meters and ROIs. Add the number you want and click the
icon again. Up to three spot meters, three square ROIs, and three
circular ROIs can be displayed at one time.
• Tap and hold the Spot Meter to move it around the screen. Pinch
to adjust the size of the ROIs, or tap and hold them to move them
around the screen.
SPOT METERS AND ROIs
TIMER
• Set a timer for 3 or 5 seconds
CHANGE CAMERA MODES
• Select Video, Photo or Time Lapse
MSX® PARALLAX
• The image that displays in the app is a combination of a thermal
image and a visible-light image through a unique process called
FLIR MSX. The FLIR ONE Pro thermal camera can produce an
image even in total darkness. When visible light is available, the
FLIR ONE Pro visible-light camera is used to enhance the detail of
the FLIR ONE Pro thermal camera.
• When looking at an image up close, or far away, you can adjust the
MSX alignment for the object to align the thermal and visible-light
images. Tap on the features button on the bottom right corner, tap
MSX Distance, and adjust as needed.
MSX DISTANCE SLIDER
ALIGNED
WARNING
The FLIR ONE and FLIR ONE Pro
are not waterproof. Use caution
if the FLIR ONE or FLIR ONE
Pro are used to observe very hot
objects like fire or molten metal.
QUICK START GUIDE 3
 Loading...