

Page 1
TM
QUICK START GUIDE
THIS QUICK S TART GUIDE WI LL HELP SHOW Y OU HOW EA SY IT IS TO GE T
YOUR PLUG-A ND-PLAY FLIR VUE CONNECT ED, RUNNING, AND MOUNTED.
YOUR FL IR VUE COME S WITH THE F OLLOWING CO MPONENT S:
• FLIR Vue thermal camera
STEP ONE
WHAT’S IN THE BOX?
• Bench Cable – for connecting your FLIR Vue to the FLIR Camera Controller
GUI and an external video monitor
LENS BARREL
LENS
STEP T WO
A QUICK TOUR
M2X0. 4-6 THREA DED MOUNTIN G HOLES 2X ON
THE CAMERA’S LEFT SIDE, RIGHT SIDE, AND
BOT TOM (MOUNTI NG SCREWS NO T INCLUDED)
MINI-USB CONNECTOR
CAMERA BODY ¼-20 T HREADE D
MOUNTING HOLE
STEP THREE
CONNECTING AND POWERING THE FLIR VUE
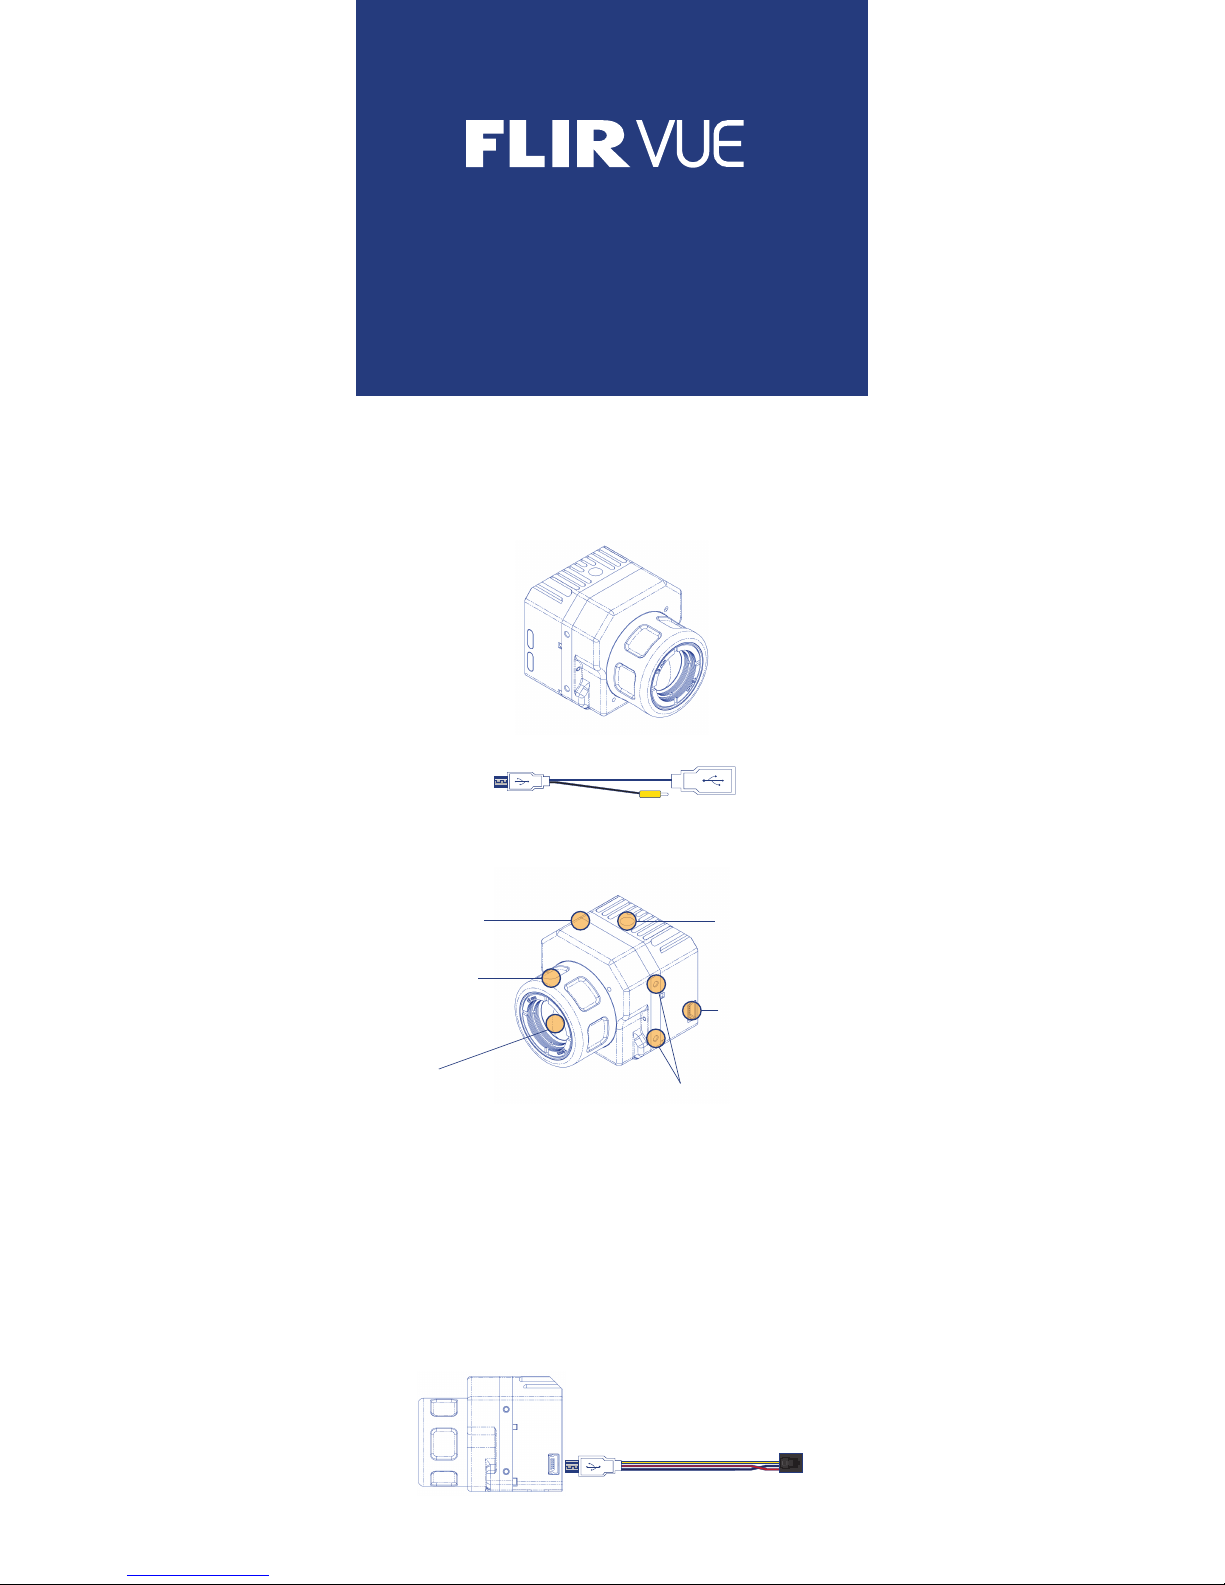
FLIR Vue is com patible with common cables that are used t o provide power
to – and get video from – a GoPr o 3 or 4’s 10-pin mini-USB cable. A couple
of examples are shown belo w.
A number of ven dors sell cables that are comp atible with ImmersionRC
video tran smitter s, which is conv enient because this brand of t ransmitt er
supplies the 5 VDC Power the FLIR Vue needs. Connect t he ImmersionRC
video tran smitter per the manufac turer’s ins tructions.
IMMERSIONRC
CONNECTOR:
RED – 5V DC POWER IN
BLACK – GROUND
YELL OW – VIDEO OU T
WHIT E – NOT USED
(Step 3 con tinues on oth er side.)
Page 2
STEP FIVE
CARE AND FEEDING OF FLIR VUE
FLIR Vue is a durable, easy to us e camera tha t should give you y ears of reliable
perfor mance. There are just a couple of things to be aw are of:
• As mentioned before, only power FLIR Vue with a regulated 5 VDC power
source. Using more than 6VDC will damage the camera and void your
warranty.
• Do not touch the lens w ith your skin. I f the lens gets dir ty, clean it of f with
warm, soapy water and a sof t cotton cloth. Do no t clean with ammoniabased solutions as they will degr ade the special co ating on the lens.
A NOTE ON P OWERING FLIR V UE:
• Only power FLIR Vue with a regulated 5 VDC power source! Using more
than 6VDC w ill damage the camera and void your warr anty.
• The 5VDC output from ImmersionRC video transmitters has been
tested with FLIR Vue and found to provide a well-filtered and regulated
5VDC power source.
• If you’re using another power source, make sure to use an appropriate
BEC that outputs 5VDC.
Anothe r example of a co mpatible ca ble would prov ide discret e connect ors for
power and v ideo as show n below.
Simply plug y our chosen ca ble into the mini- USB port on t he FLIR Vue, an d
connect t he other end t o your suitabl e video trans mitter or O SD.
DISCRETE POWER/VIDEO
CONNECTOR
5VDC PO WER IN
POWER GR OUND
VIDEO SIGNAL
VIDEO GROUND
FLI R . C O M / VUE
FLIR SYSTEMS, INC.
436-0001-10
STEP FOUR
MOUNTING FLIR VUE
FLIR VU E HAS A NUMBE R OF MOUNTIN G OPTION S.
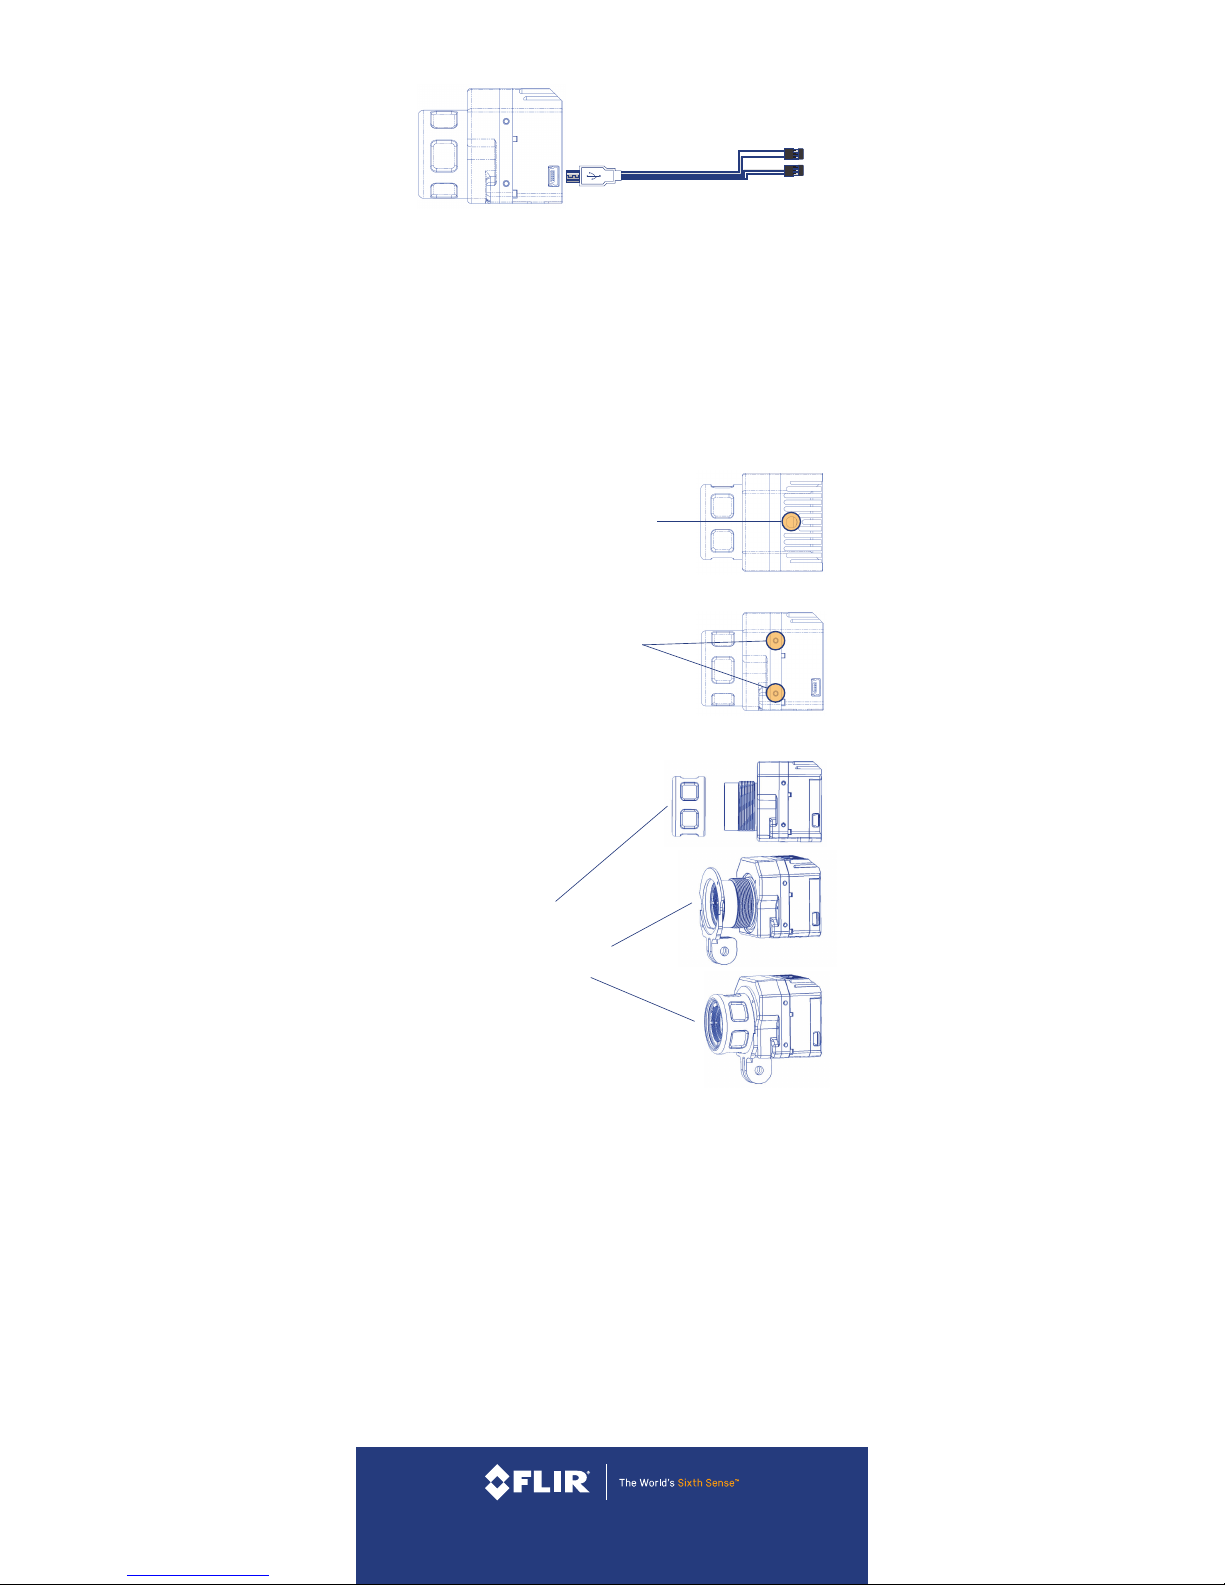
SNOUT MOUNT
The included Snout Mount lets you
use standard action camera mounts .
Installat ion of the Snout Mount is
very easy:
• Unscrew the Lens Barrel
• Slide the Snout Mount over the
lens and line up the alignment pins
• Screw the Lens Barrel back on
If your mounting scheme requires it, you c an mount FLIR Vue upside down
and invert the image in the Camera Controller GUI, which can be downloaded
free at w ww.flir.com/oem/gui. Please refer to the GUI’s manual for details;
it can be dow nloaded at w ww.flir.com/oem/gui-user-guide.
¼-20 INSERT
Screw a st andard tripo d ¼-20 bolt into the
threaded insert loca ted on the top surface of
the camera.
SIDE OR BOTTOM MOUNTING HOLES
FLIR Vue has t wo threaded mounting hole s on
each side, as w ell as on the camera’s bottom .
These thr eaded holes ac cept M2x 0. 4-6 screws
(not included).
STEP THRE E (Continued)
MORE DE TAILED INFOR MATION ON AVAILAB LE CAMERA S ETTINGS T HAT CAN BE CONF IGURED
WITH O UR FREE CAME RA CONTRO LLER GUI ARE AVAIL ABLE IN THE P RODUCT LIT ERATURE
SECT ION OF WWW.F LIR.COM/F LIRVUE IN TH E FLIR CAMER A CONTROL LER GUI USER’ S GUIDE.
 Loading...