

Page 1
Quick Install Guide
Quasar Gen II
CM-6206-H1-I
6MP Mini-Hemispheric IP Camera
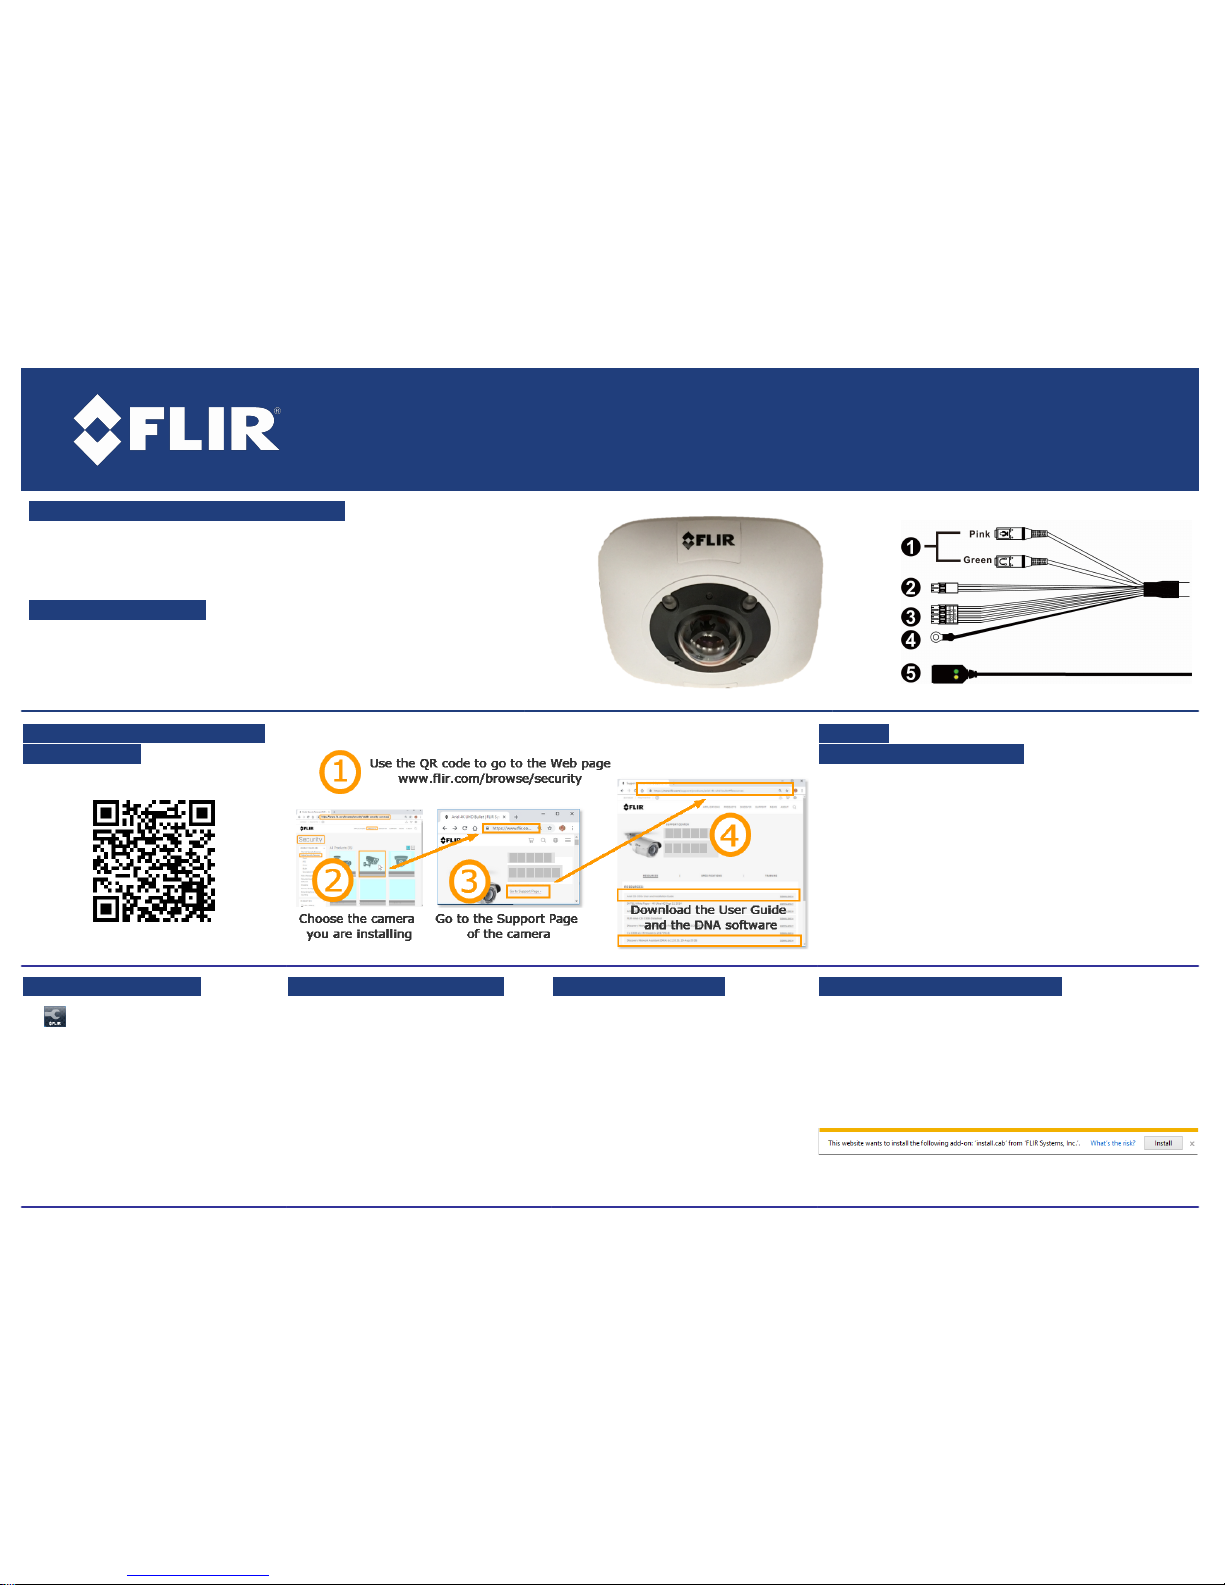
A. Insert and Configure microSD Card
If required, a microSDXC card (not supplied) must be inserted in the card slot
inside the camera housing in order to store snapshots or recordings triggered
by events locally. (Min 4GB, up to 128GB, Class 10).
B. Mount the Camera
1. Verify that the operating temperature range is between -10°C ~ 50°C
(14° ~ 122°F), 0-90% relative humidity (non-condensing).
2. Be sure to have the required accessories and tools available.
3. Refer to the User and Installation Guide for mounting instructions.
C. Download Documentation
and Software
D. Setup
D1. Connect the Camera
1. Attach the Audio cables to an external device.
2. If not using PoE, attach the power wires to an optional
12VDC power supply.
3. Attach the four Alarm wires to an external device.
4. Attach the Ground lug to a ground source.
5. Attach the RJ45 connector to the network switch for a
10/100/1000 Mbps Ethernet connection and PoE
connection. Verify that there are a solid green LED and
flashing yellow LED on the camera’s RJ45 connector
.
D2. Discover the Unit
1. Download and run the DNA Utility
from the FLIR website as shown.
2. Attach the unit to the same LAN
segment as the computer that is
managing the unit.
DNA discovers the unit and displays it
as a new line in the Discover List,
showing its current IP address.
D3. Set IP & Video Format
1. Select the unit from the Discover List.
2. Static IP address (as on a Latitude
System): Follow the DNA instructions
to set the desired IP address.
DHCP Addressing: (Do NOT use on
Latitude)
Select the DHCP option in DNA.
3. Video:Select the device in the
Discover list, right-click to open the
context menu and click Change
Video Format, Click Update.
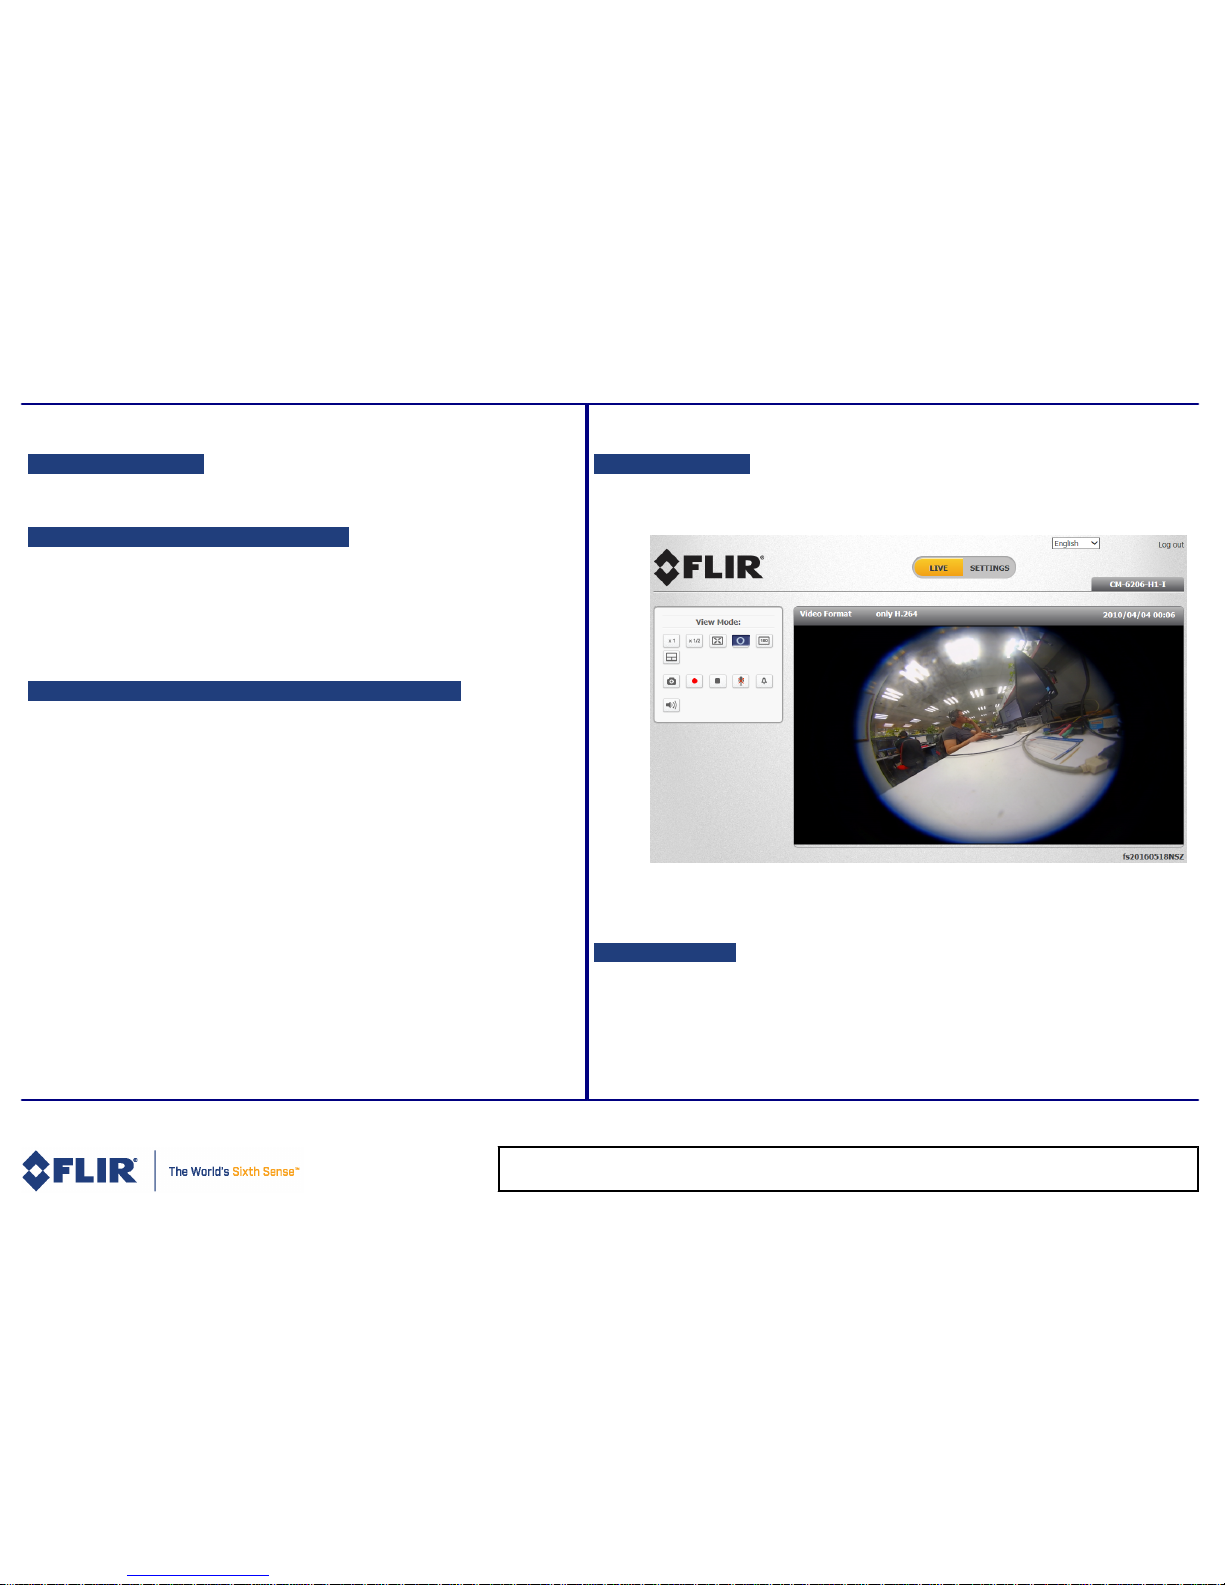
D4. Log into the Unit
Enter the unit's IP address into Internet
Explorer 11 and higher (32-bit) with the
ActiveX plug-in, on PCs running 64-bit
Win XP/7/8/8.1.
Note: IE must run with Compatibility
Mode set.
Log in by double-clicking the unit in
DNA’s Discover List
D5. Load and Enable ActiveX
1. If requested, enter the Username and password (casesensitive)
Default "admin", "admin",
The unit’s web interface opens.
2. If the Quasar player (ActiveX) was not previously loaded,
the following message will be displayed:
.
3. Click Install message to install the player.
Page 2
E. Configure the Unit
E1. Configure the SD Card (if installed)
1. When the camera is connected, use the web interface to verify the card status in the
System > Edge Recording > SD Card screen.
(When no card is installed, the status 'SD card n/a' is shown.)
2. Format the card.
3. Configure the camera to store snapshots and recordings from the System > Events
Setup screens.
E2. Configure Zoom, Dewarping, and Video Settings
1. From the Settings > Camera > Misc. screen, select the Digital Zoom .
Click SET.
2. From the Settings > Camera > Fisheye Setting screen, select Software Dewarping or
Camera Dewarping.
Click Save.
3. From the Installation drop-down menu, select Ceiling Mount or Wall Mount.
Click Save.
4. From the Settings > Streaming > Video Format screen, select Software Dewarping or
Camera Dewarping.
Click Save.
5. Configure the camera’s streaming settings according to your requirem ents.
Click Save.
F. Open Live View
Select the Live tab.
G. Attach to VMS
Follow your VMS system instructions to connect the camera.
CM-6206_QIG_V2a
FLIR Systems, Inc.
Tel: +1-800-254-0632
6769 Hollister Ave.
product.enterprise.support@flir.com
Goleta, CA 93117
www.flir.com/security
 Loading...