

Quick Install Guide
ioi HD
CF-5212/CF-5222
Analytic Fixed IP Cameras
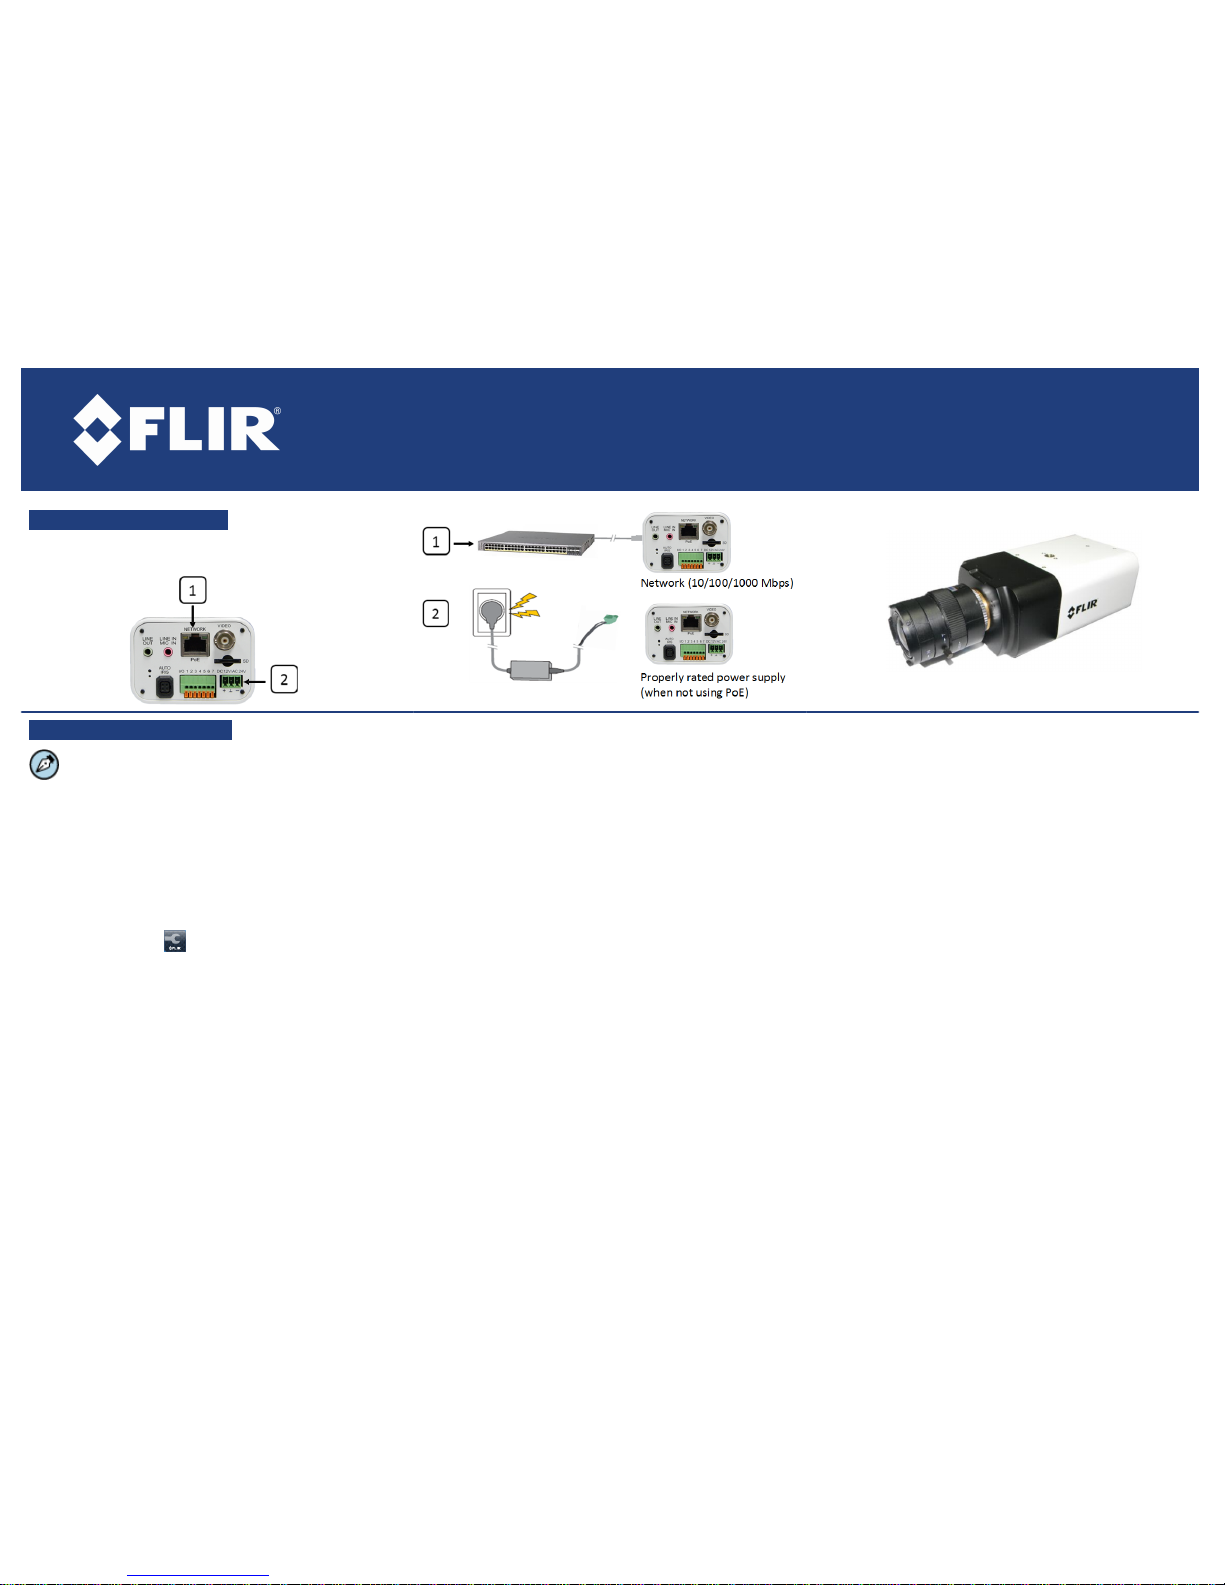
A. Connect the Camera
B. Discover the Camera
The unit's GUI is supported by IE 9 and higher (32-bit)
with the ActiveX plug-in on PCs running 64-bit Windows XP,
7, 8, 8.1, or 10.
B.1. Configuring the encoder on your workstation for
the first time
1. Install the CD in the product package or download FLIR’s
Dis covery Network Assistant (DNA) utility from the Support
> FLIR Firmware & Software Downloads page at http://
www.flir.com/security.
2. Click the D NA icon and run DNA v. 2.1.x.x or above to log
into the unit.
3. Attach the unit to the sam e LAN segment as the computer
that is managing the unit. DNA automatically discovers the
unit on the network and displays the device’s current IP
address in the Discover List.
4. Select the unit from the Discover List.
5. From the context menu, or from the Properties > Device
Properties screen, select the unit, select PAL or NTSC,
click Change Video Format.
6. Click Update.
B.2.a Managing the encoder with Horizon, Meridian or
on a DHCP-enabled network
If the encoder is managed by Horizon configured as a
DHCP server, or is on a network with a DHCP server, the
encoder automatically receives an IP address.
1. Open DNA. The unit is automatically discovered on the
network. See s ection B.1 for instructions how to install
DNA.
2. Verify that the unit is displayed in the Discover List. The unit
status should b e displayed as Online and Authenticated.
B.2.b Managing the encoder with Latitude or on a
network with static IP configuration
If the encoder is managed by Latitude or is on a network
without a DHCP server, you must manually enter its IP
address in DNA.
1. Open DNA. The unit is automatically discovered. See
section B.1.
2. If you use non-default credentials :
a. Use DNA to select the unit(s).
b. Right-click or click the Login button.
c. Enter the encoder's Us er Name ("admin") and
Password ("admin").
d. Click Login.
3. In the DNA Assign IP screen, uncheck Use DHCP, and
enter the unit’s IP, Mask and Gateway IP addresses . If the
encoder is not authenticated, you m ust first authenticate it.
4. Click Update.
B.3. Log into the Unit
1. Click the unit in DNA’s Dis cover Lis t. The Login window
opens.
2. Enter the default User Name ("admin") and Password
("admin"), which are case-sensitive. Then click OK.
3. Click Login in DNA. The unit’s web interface opens.
4. Click the mes sage to install the ActiveX plug-in.
5. Follow the on-screen instructions to install the plug-in.
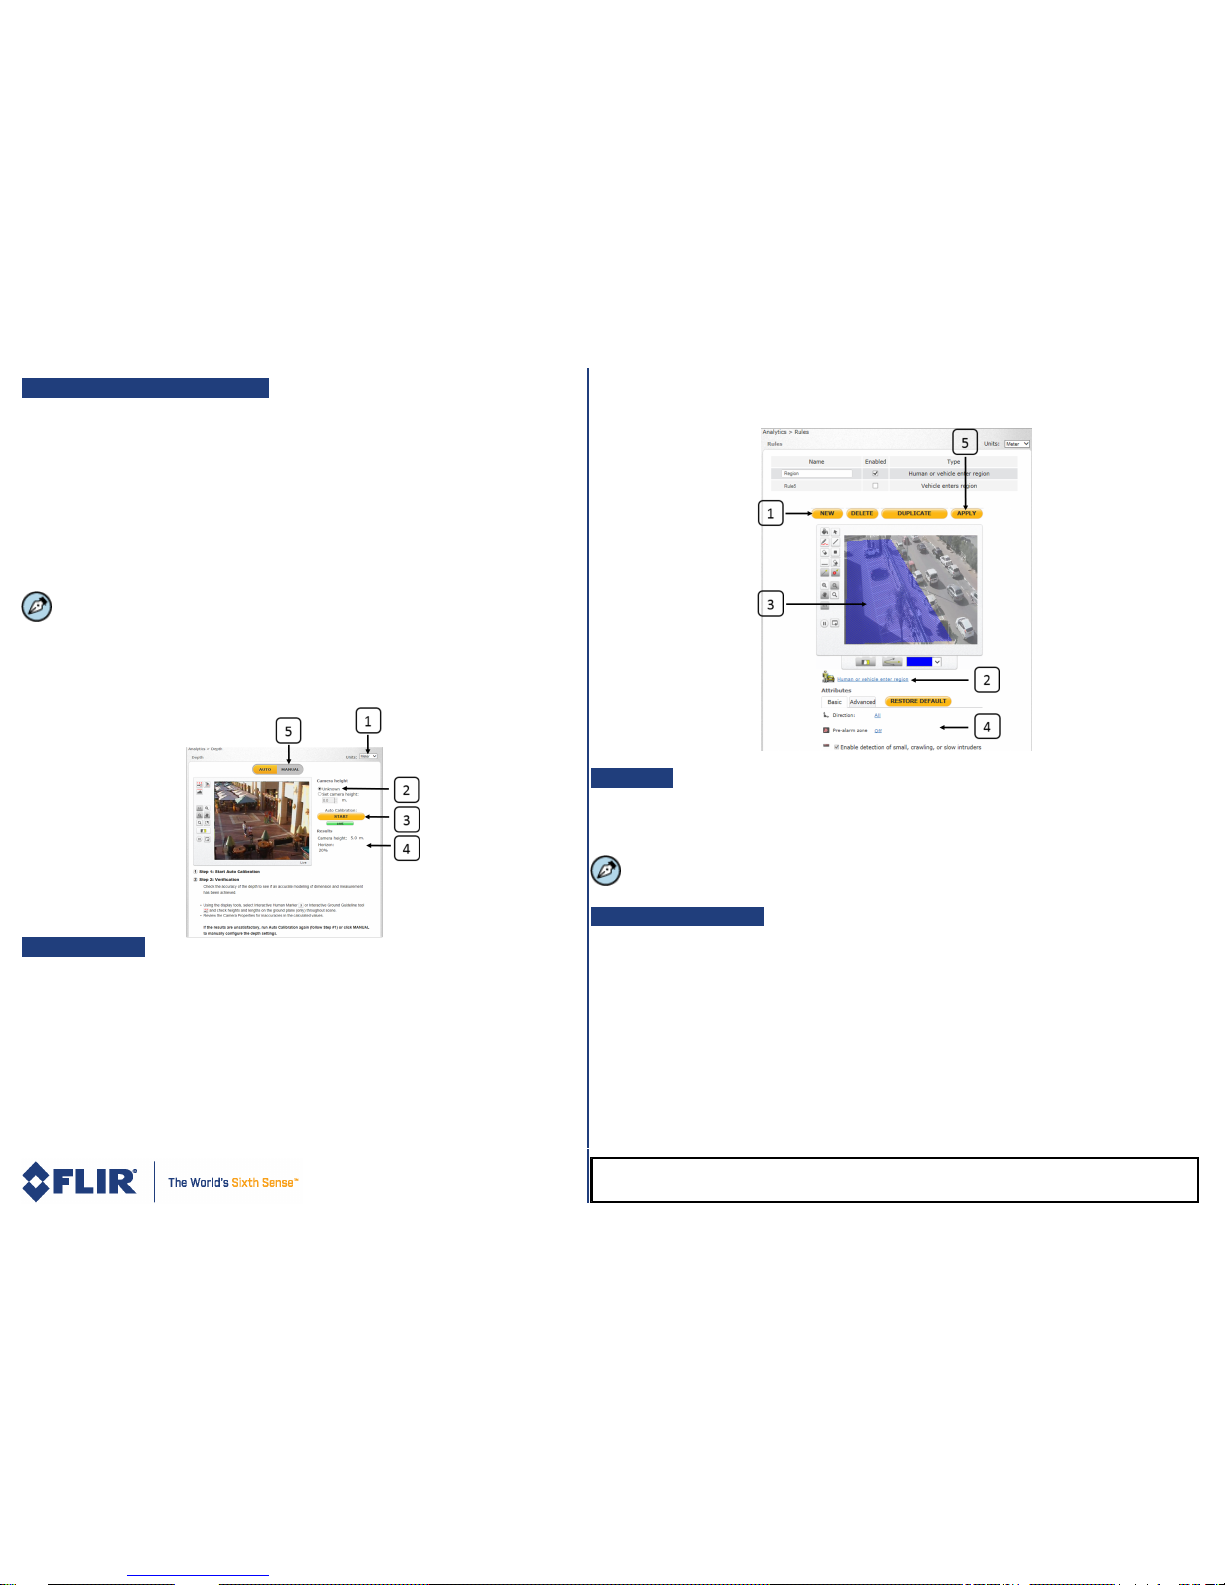
C. Auto-Calibrate the Camera
From the navigation bar, select the Settings > Analytics > Depth tab. The web interface
opens on the Depth > AUTO screen. Verify that the camera is installed at a height of at
least four meters (13 feet) and that the horizon is less than 30% of the Field of View.
1. From the Units drop-down list, select Feet or Meter.
2. Se lect Set cam era height and enter the estimated cam era height.
3. C lick START. The camera automatically calibrates the depth. Be sure that a person is
walking along the Y (Vertical) axis of the FoV while Auto Calibration is in process.
4. Verify that the horizon, camera height, and hum an marker settings are correct.
5. C lick MANUAL and finish configuri ng depth s ettings.
· While Auto Calibration is in progress, you can go to steps D (Select Rule) and E (Detect).
· The Auto Calibration finis hes when the progress bar reaches 100%. If you stop the
procedure before it finishes, the analytic proces s will reset.
· If you change from Auto to Manual mode, you must wait until the analytic process resets in
order to us e Manual mode.
D. Select R ule
From the navigation bar, select Analytic > Rule s to activate rules, modify settings,
delete, or add a new rule. A rule for detecting humans or vehicles entering the scene
(blue masked area) is defined by default. To create a new rule:
1. C lick NEW.
2. Select the rule type by clicking the link.
3. Draw on the video scene where you want the detection to take place.
4. Define the attributes for detection from the Basic and Advanced tabs.
5. When finis hed, cli ck APPLY to save the settings.
E. Detect
1. Select the Live tab.
2. Click ARM. The camera is ready for use.
3. Click the red recording icon to start recording.
Analytic perform ance is optimized only after the auto depth calibration proces s is completed.
F. Attach to Latitude
1. In Latitude, click Physical View on the sidebar.
2. On the Navigation Tree, click the system name.
3. From the Discovery tab, do the following:
a. Under Cameras and Encoders, sel ect IOim age Latitude 7) or FLIR (Latitude 8).
b. Click Start. The camera details are displayed in the Discovery table.
c. If the cam era was not dis covered, click Discover Unit Manually.
d. Enter the camera’s IP address and select IOimage (Latitude 7) or FLIR and Auto Detect
(Latitude 8).
e. Click OK.
4. In the Discovery table, right-click the cam era.
5. Click Attach.
6. Click the Archiver name to attach.
7. Click Save.
IOI HD_CF-52x2_QIG_3May17_v1
FLIR Systems, Inc. 6769 Hollister Ave. Goleta, CA 93117
Tel: +1 888.388-3577 product.enterprise.support@flir.com www.flir.com/security
 Loading...